When you click on links to various merchants on this site and make a purchase, this can result in this site earning a commission. Affiliate programs and affiliations include, but are not limited to, the eBay Partner Network.
Lol, Porsche is strange, they do it both ways. The file they use as you can see has slightly rounded off edges at the wheel arches to prevent from lifting. Then at the door jambs given I've seen it both ways as well. They must use two different files as the ones that aren't wrapped over look like they were plotter cut.
I would say either way is fine on the door seams, but the front and rear rockers should be short trimmed for longevity. 99% of kits you purchase online will be singular and include a few extra inches of material on either end so you have room for placement, as well as options when it comes to wrapping edges. Also being that it is all one piece it is much easier for alignment.
Yes.. easy peasy, I did it while parked outside my hotel in Austria... took about two hours, but I was interrupted by a street procession where I had to stand at attention (out of respect) while my stuff was drying out.. I was freaking out but it all turned out ok. Could have taken less time but I was enjoying the process and drinking beer with some German motorcyclists in the meantime.
Here are the basics.
-clean the car
-make friends with German motorcyclists who will cheer you on while sipping beer and making funny jokes about you. "Look at funny sticker man!"
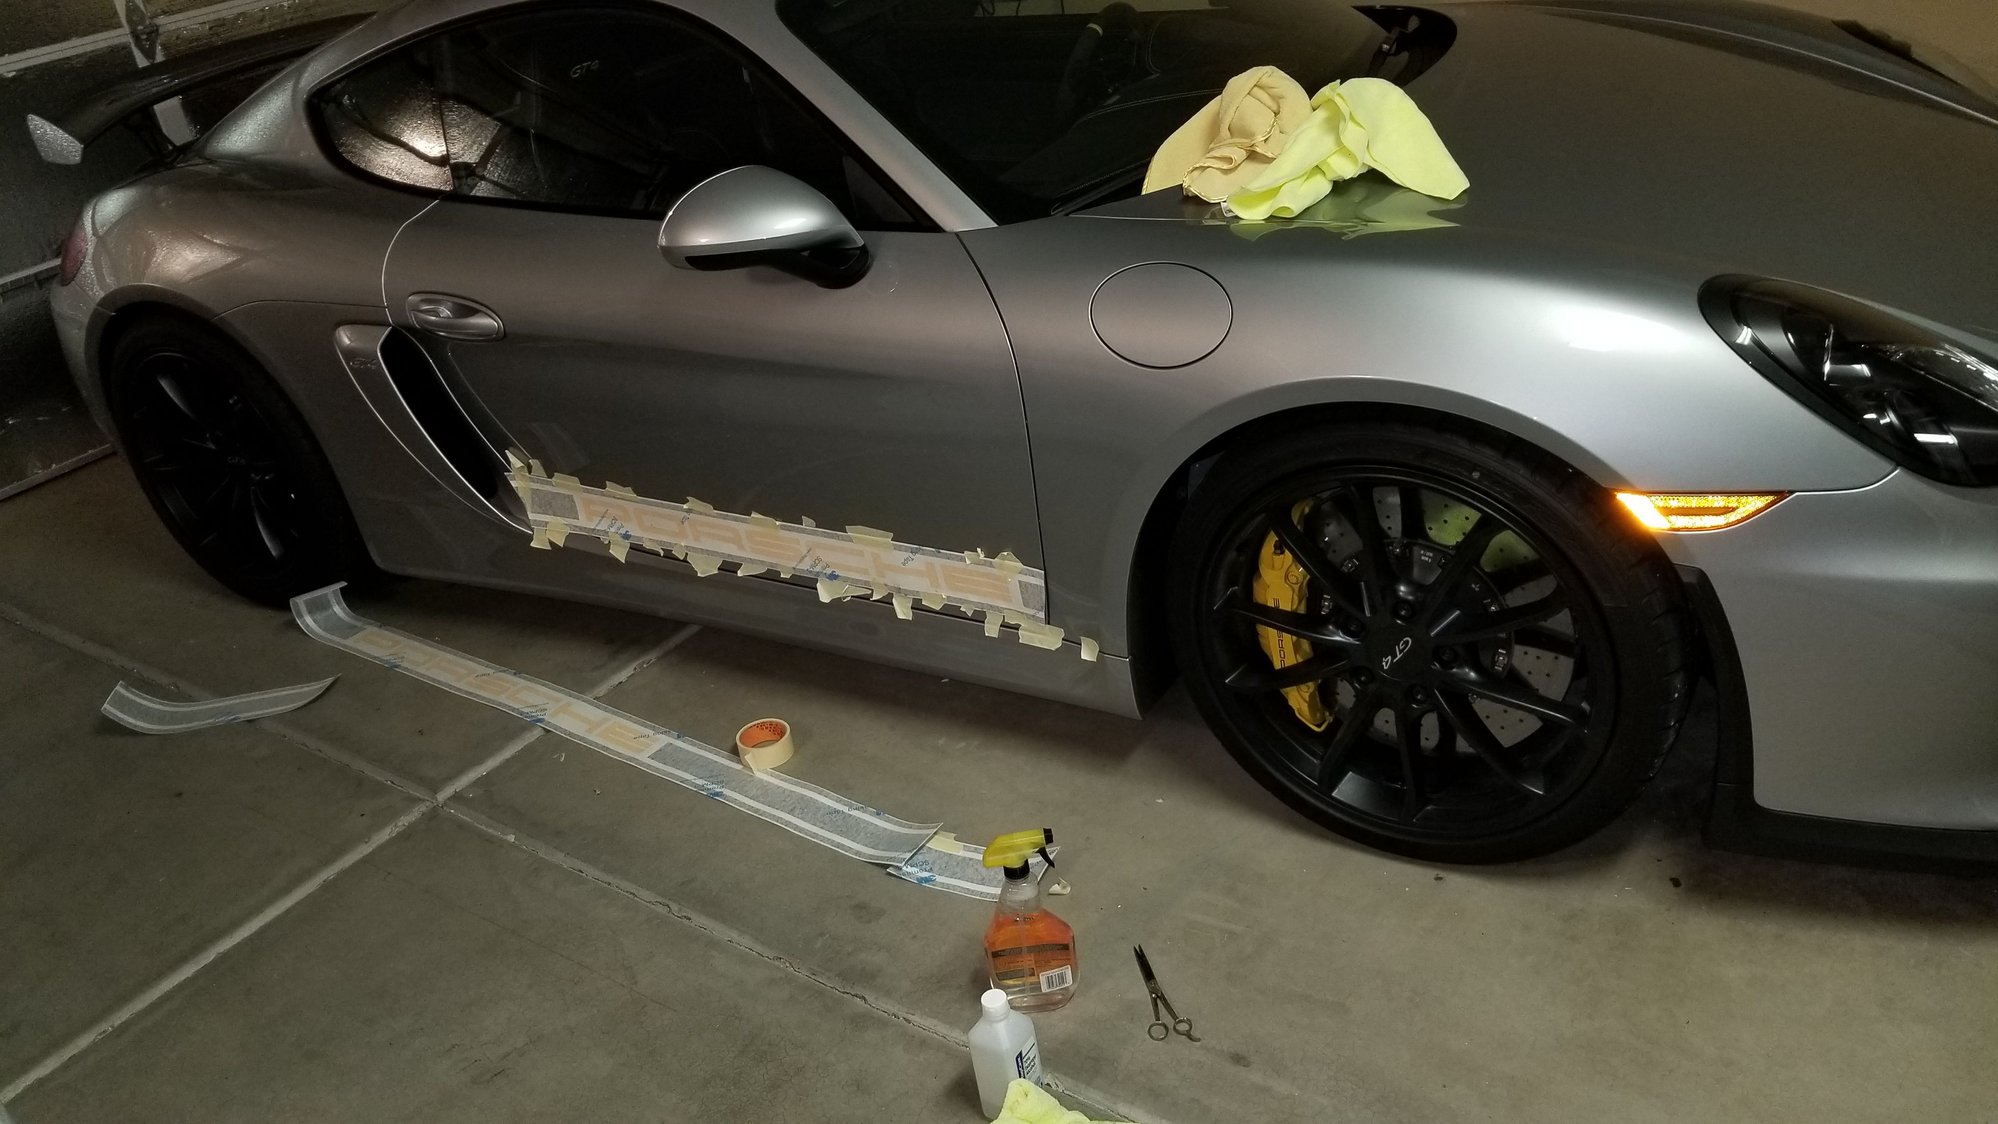
-measure desired height of sticker , use 911R pic from google for reference.
-use painters tape to affix the sticker on. Measure height with tape along a few sections.
-half way across the car.. fix the sticker with more tape, then let other half fall to the ground.
-peel backing off other half and wet the back of the sticker with water sprayer.
-gently apply it on car and squeegee out any bubbles.
-let Austrian procession pass while standing at attention and surreptitiously keep spraying the back of the sticker while pretending to be solemnly paying attention.
Let procession pass, smile at any cute Austrian girls, then get back to work.
-tape over the finished section to hold it in place by using the painters tape vertically and then work on the other half.
-Squeegie other side also so the back is a little wet. Apply into place using previous tape markings.
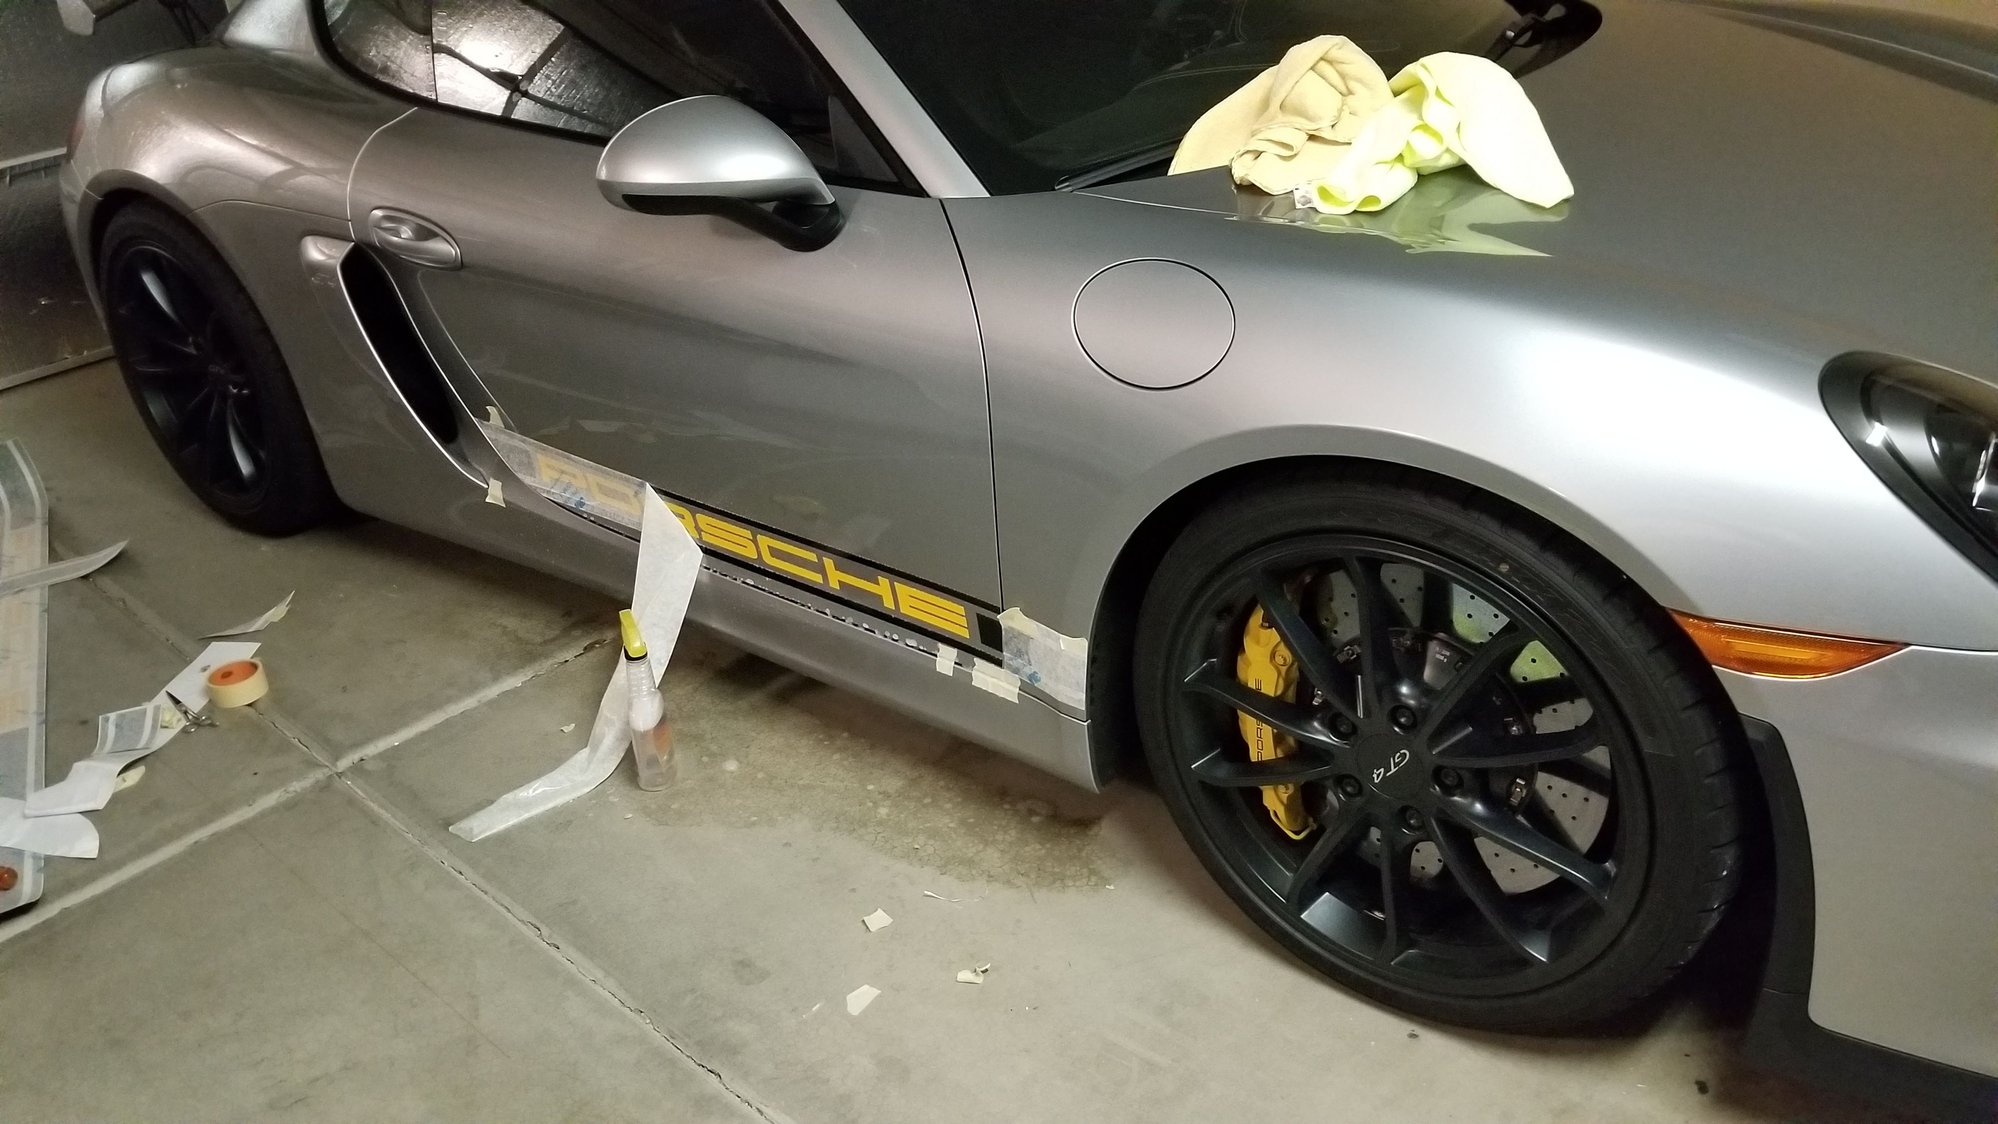
-cut with razor blade where door gaps are, bend sticker over where you want it to end, and cut the sticker to size where you folded it.
-use a 911R photo from google again for easy reference.
-let sticker dry for an hour at least before removing the protective paper on the front.
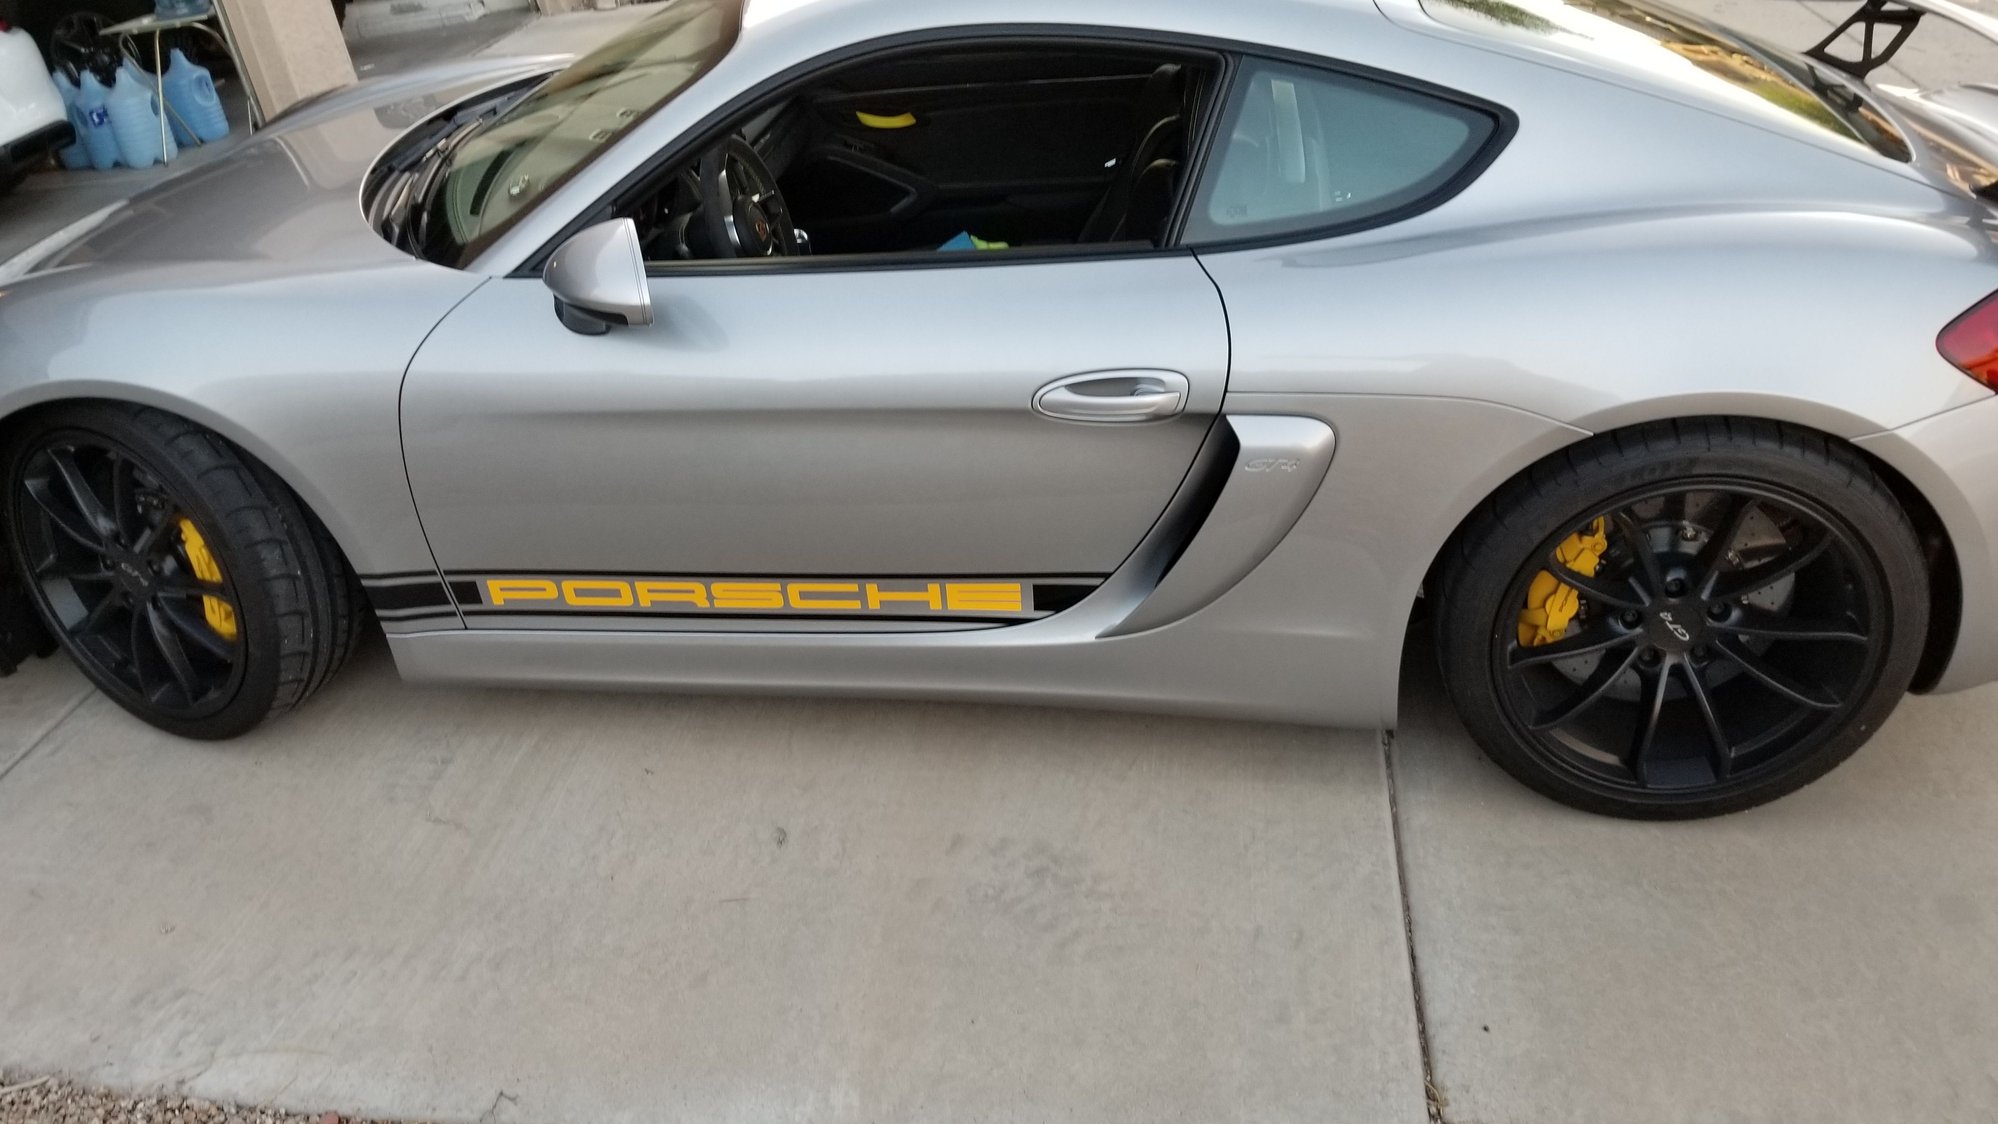
-voila.. you're a badass! Pat yourself on the back, drink the beer YA!
-take lots of pics of your handiwork and find any reason possible to post these pictures.
- Add evil grin emoji
-consider adding a light-up UBER sticker to your windshield just to confuse the locals.
Do they come trimmed at the tip right 911R or am I supposed to cut it myself?
Trim yourself. Fold on itself where you want to cut, don't cut on paint obviously, then slice like a ninja, cut like a razor blade... word to your motha'.
My five sets arrived, still costs less than a single install and I can practice on the GT4 prior to the Touring arriving and have room fro error. I used a LOT of tape, the biggest tip is to use a bottom tape line as your guide line for final mounting.
Oh yeah, Renndecal come from Canada so shipping was a bit longer than anticipated but their yellow goes so well with PCCBs
I see that you extended the decal all the way into the wheel arch. NS media pointed out that it may detach slowly at the edge and collect dirt underneath the decal. Did you find that the case?
I see that you extended the decal all the way into the wheel arch. NS media pointed out that it may detach slowly at the edge and collect dirt underneath the decal. Did you find that the case?
Thank you, yes at first it did not want to adhere around a corner but it held eventually, perhaps have to trim it up in a day or so ut great advice, much appreciated.
These are so cheap and easy to install, I bought 5 different sets so if this one gets tattered I've already planned a replacement!
Thank you, yes at first it did not want to adhere around a corner but it held eventually, perhaps have to trim it up in a day or so ut great advice, much appreciated.
These are so cheap and easy to install, I bought 5 different sets so if this one gets tattered I've already planned a replacement!
Lol that's perfect. If you have 5 sets just install whichever way you say most visually appealing!
Thank you, yes at first it did not want to adhere around a corner but it held eventually, perhaps have to trim it up in a day or so ut great advice, much appreciated.
These are so cheap and easy to install, I bought 5 different sets so if this one gets tattered I've already planned a replacement!
I might as well take your route.
First of all, I don't want to make a mistake cutting that edge and damaging paint job
Secondly, not confident that I will make a perfect rounded edge.
If it starts peeling off, I might just tape on masking tape or painter's tape inside the wheel arch.
First of all, I don't want to make a mistake cutting that edge and damaging paint job
Secondly, not confident that I will make a perfect rounded edge.
If it starts peeling off, I might just tape on masking tape or painter's tape inside the wheel arch.
Don't cut on paint.. fold sticker over where you want it to bend, make a crease in other words, then cut the crease, THEN, peel the backing and attach. Easy and precise result
Don't cut on paint.. fold sticker over where you want it to bend, make a crease in other words, then cut the crease, THEN, peel the backing and attach. Easy and precise result
The decal should come with a layer on top of the actual sticker for you to write on. See Perimeter photo where SCHE" is unmasked.
You can use a pen/pencil to outline on this top layer where you want to cut. Then use a scissor or knife to cut along the outline.


 06-07-2018, 02:24 PM