When you click on links to various merchants on this site and make a purchase, this can result in this site earning a commission. Affiliate programs and affiliations include, but are not limited to, the eBay Partner Network.
Safety: Always be aware of the dangers when working on your car. When lifting your car, always do so on a level ground and use mechanical locks to ensure the car does not collapse in case of pneumatic failure. I always like to wear mechanics gloves when removing/replacing pieces from my car and nitrile gloves when dealing with fluids. Use safety glasses when using power tools or when under the car to protect from debris.
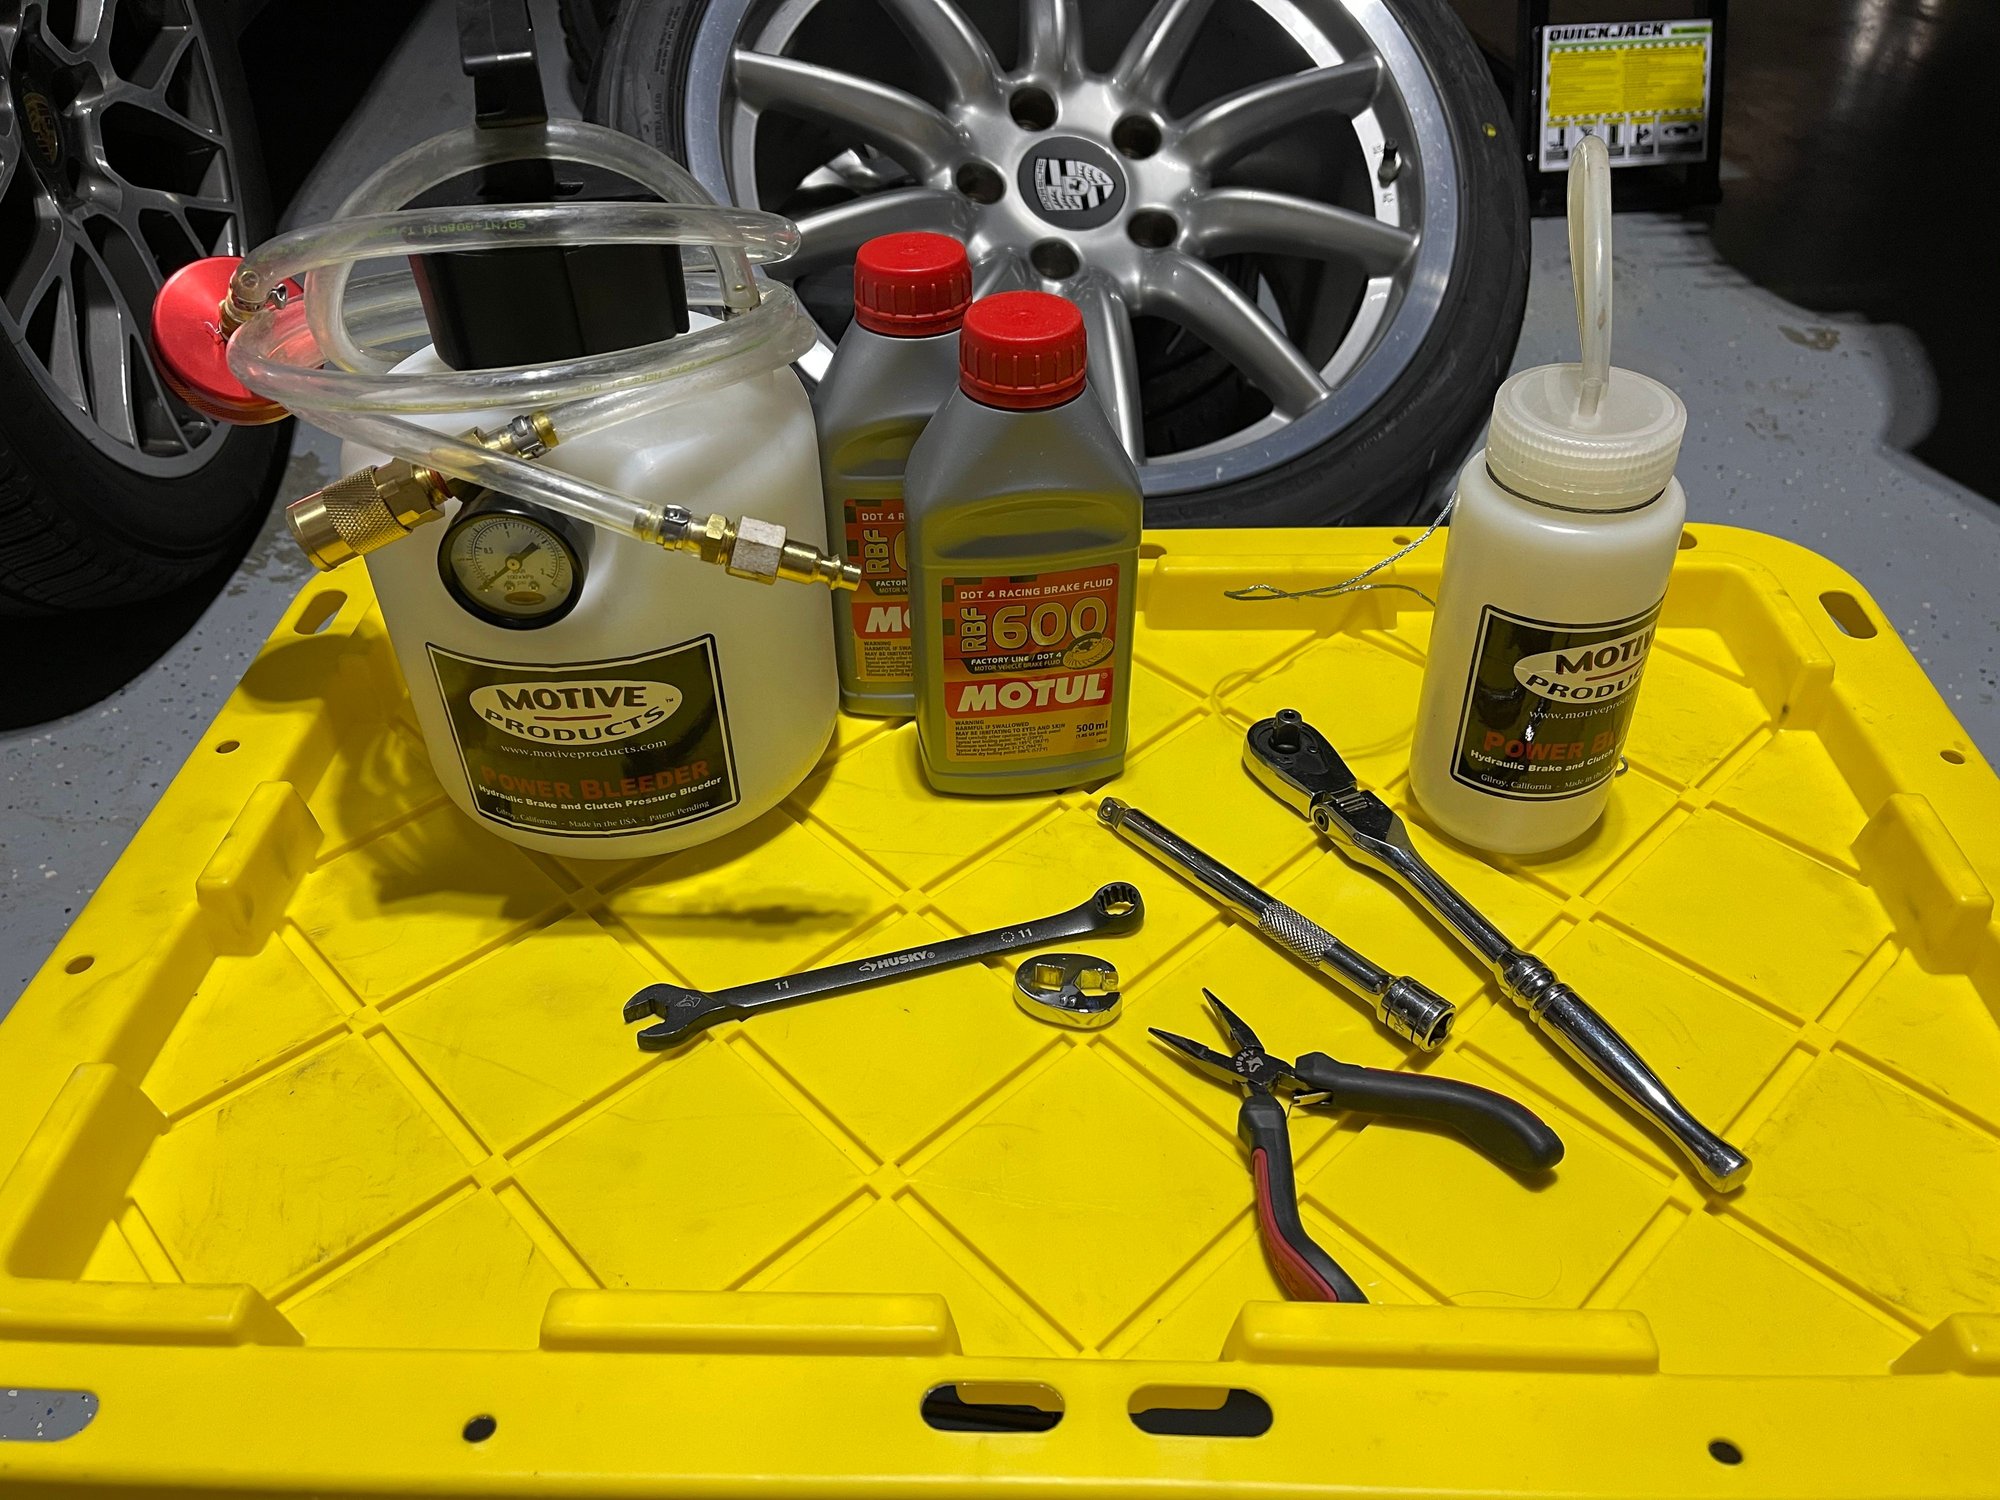
Tools Needed:
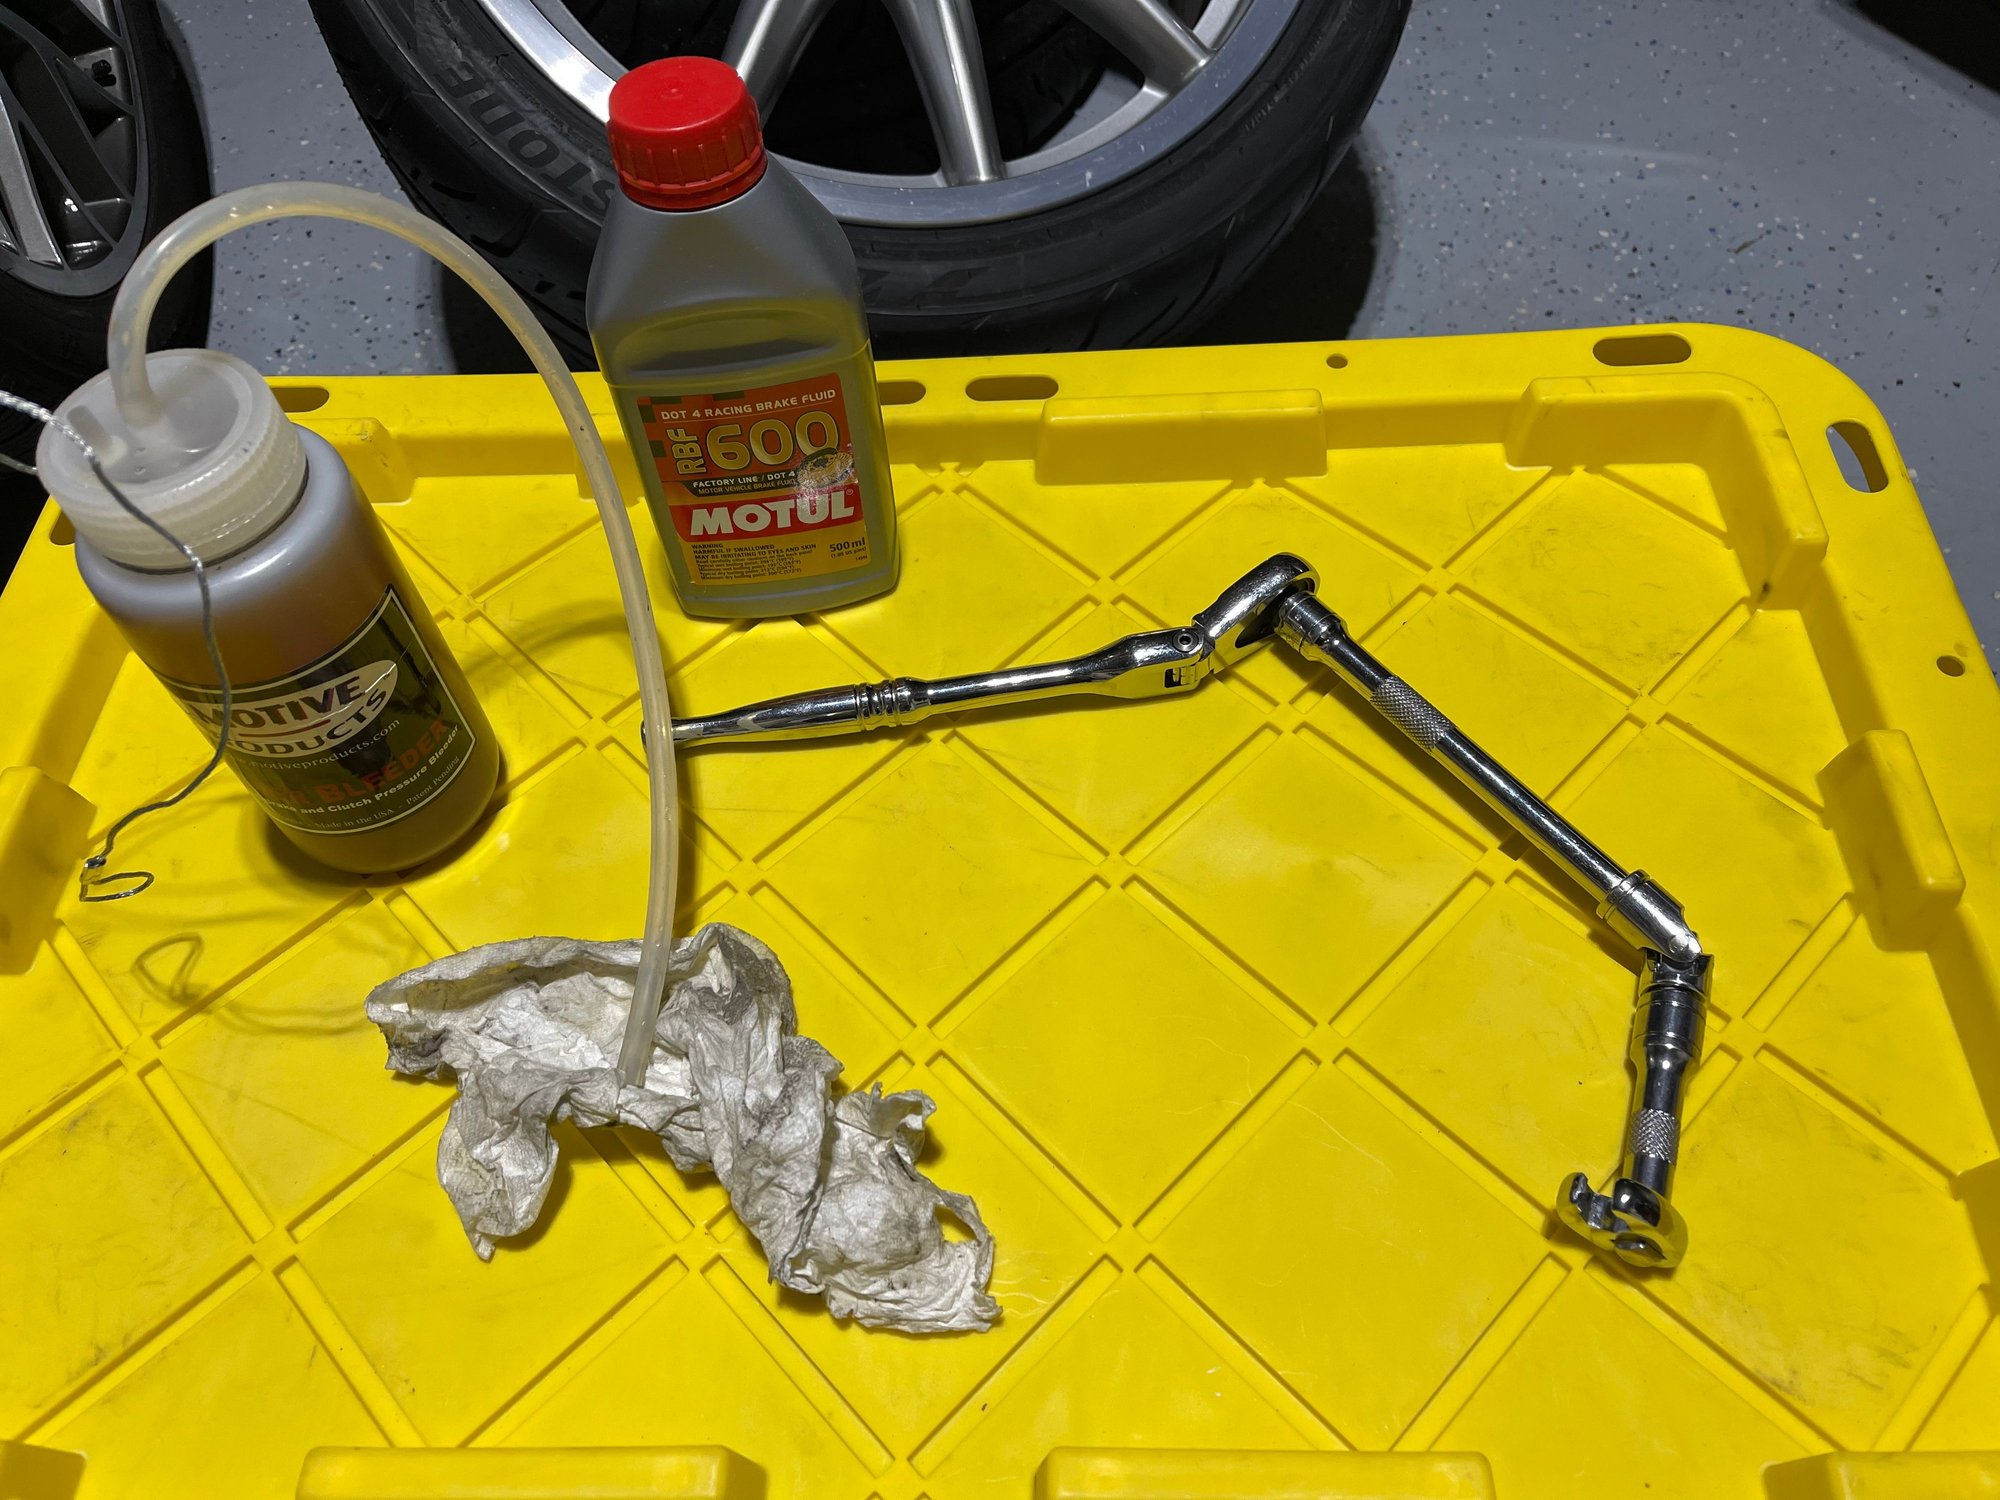
11mm Wrench
11mm Crowfoot
10mm Hex socket
3/8" Socket Wrench
3" & 6" extension and U-Joint
Brake Fluid - always have extra
I usually flush 500mL however I flush often.
If you're only doing this once a year, I'd use 1L+ depending how dark your fluid is.
Pressure Bleeder or partner
I use a Motive Bleeder (dry).
Catch Bottle with hose
Needle Nose Pliers
Oil pan
Towels/rags/newspaper/cardboard
Lights
Nice to have tools:
Quick Disconnects on pressure bleeder hose
This makes pressurizing and filling much faster. I used M-style or Industrial because it's common and cheap.
Mechanic's Creeper or shop chair
Blocks to raise catch bottle
Water bottle or spray bottle with water
10 Steps for Bleeding Clutch and Brakes:
Lift your car on an even surface.
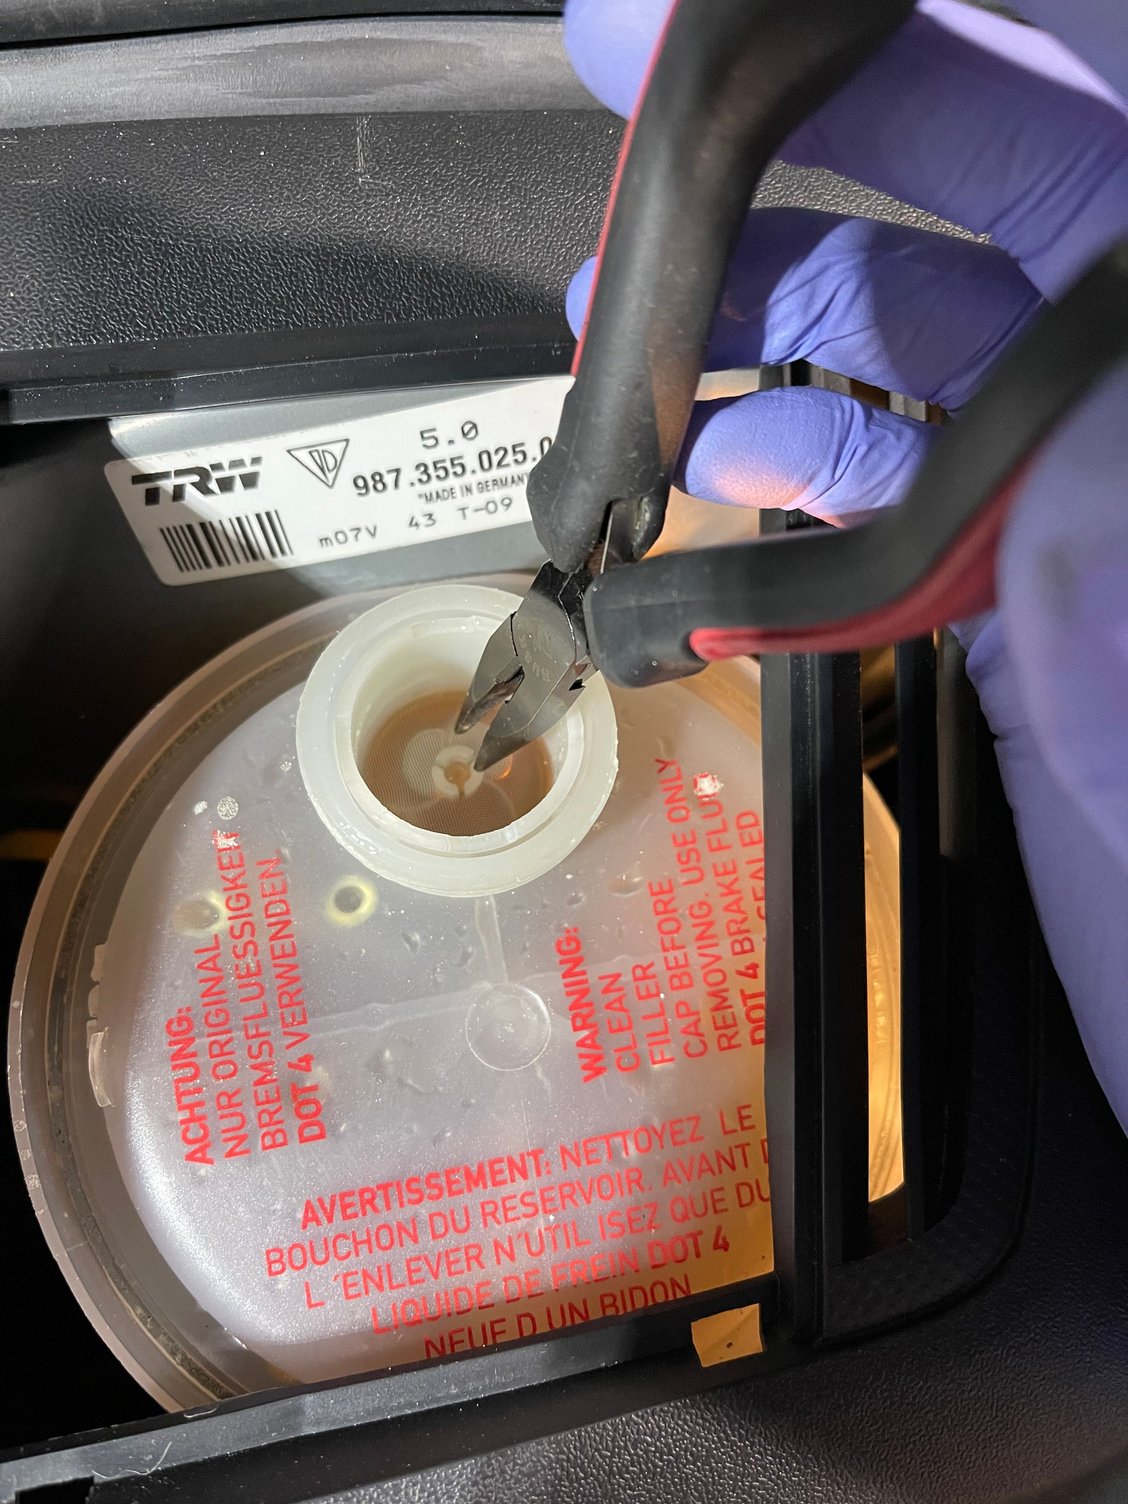
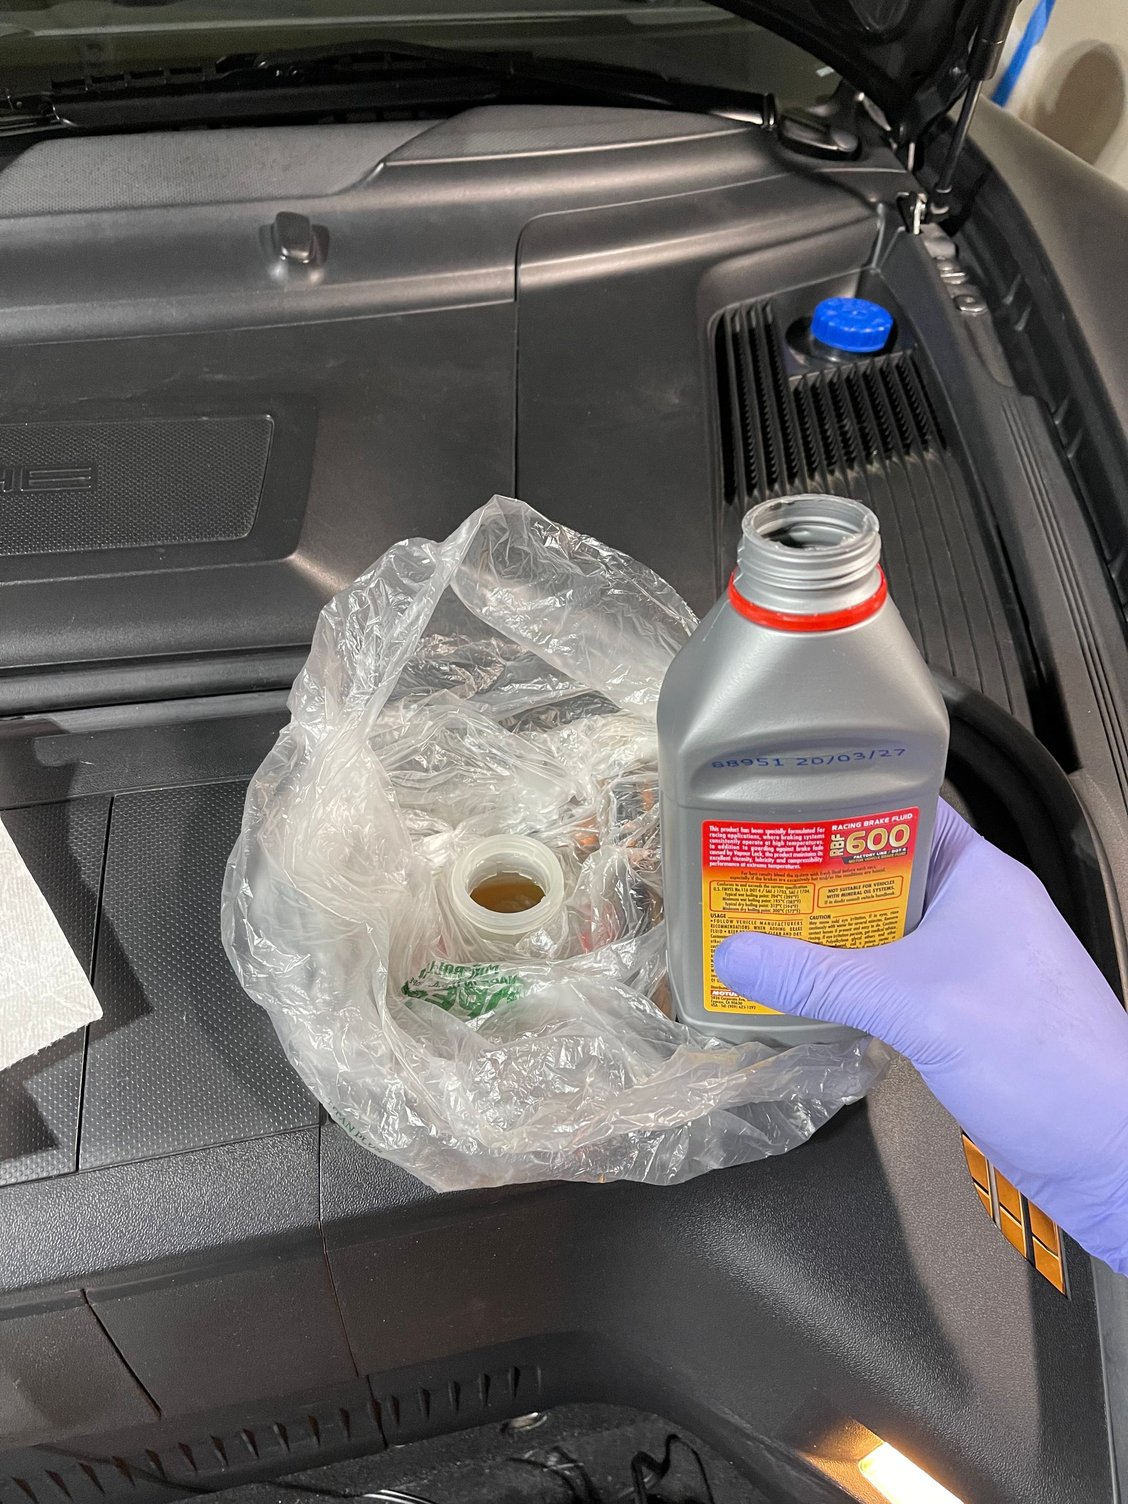
Remove all 4 wheels and set them aside. Open Frunk, remove, plastic door, master cylinder cap, and plastic filter (with needle nose pliers).
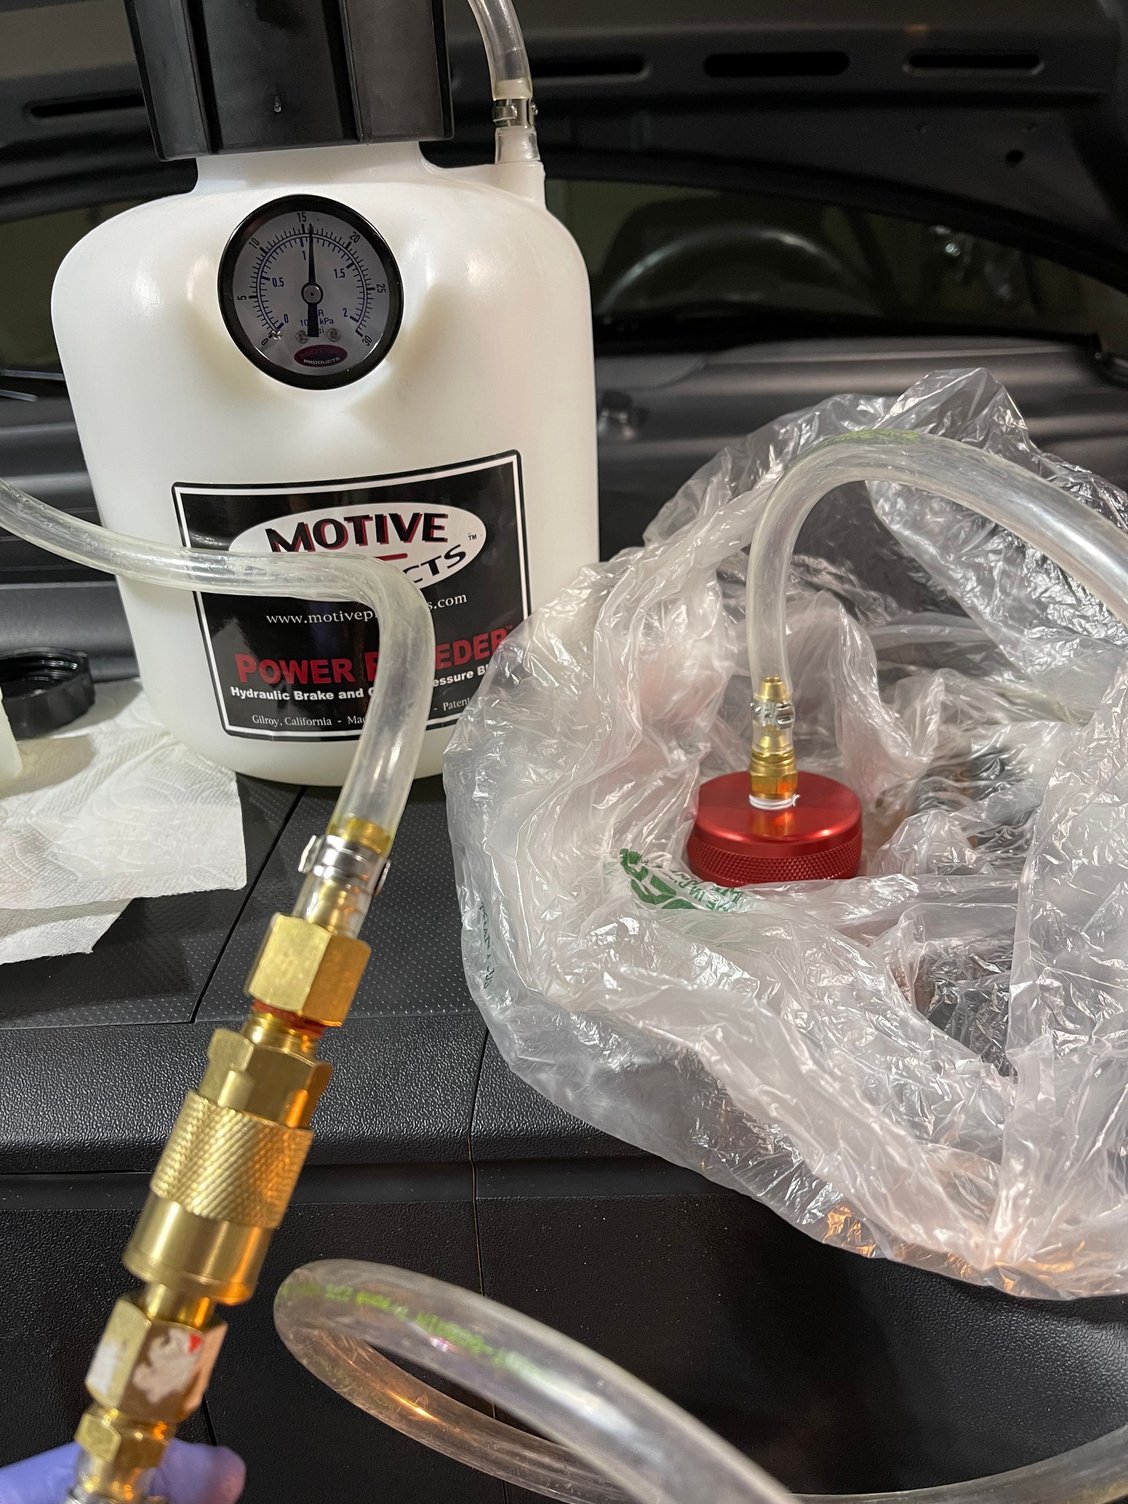
Optional: Take a plastic bag, rip a hole in it, and surround the MC if you think you might spill brake fluid while filling.
Brake fluid is corrosive to your car's paint so don't let it touch your car and sit. It is water based and should be thoroughly rinsed with clean water if you splash, spill, or touch your car with fluid on your hands.
Fill up the MC with new brake fluid, attach the pressure bleeder, pump to 1.2-1.3 bar (17-18 psi). Do not over pressurize or you'll blow seals.
Dry method: Requires refilling of the MC between brakes. NEVER let fluid level too low or you'll spend more time and fluid trying to remove air bubbles out of your brake system.
Cons: Constantly double checking fluid level and could introduce air into the brake system.
Wet method: Fill up the pressure bleeder with brake fluid and never worry about air entering your brake system.
Cons: It takes longer to clean up and you potentially toss away more fluid.
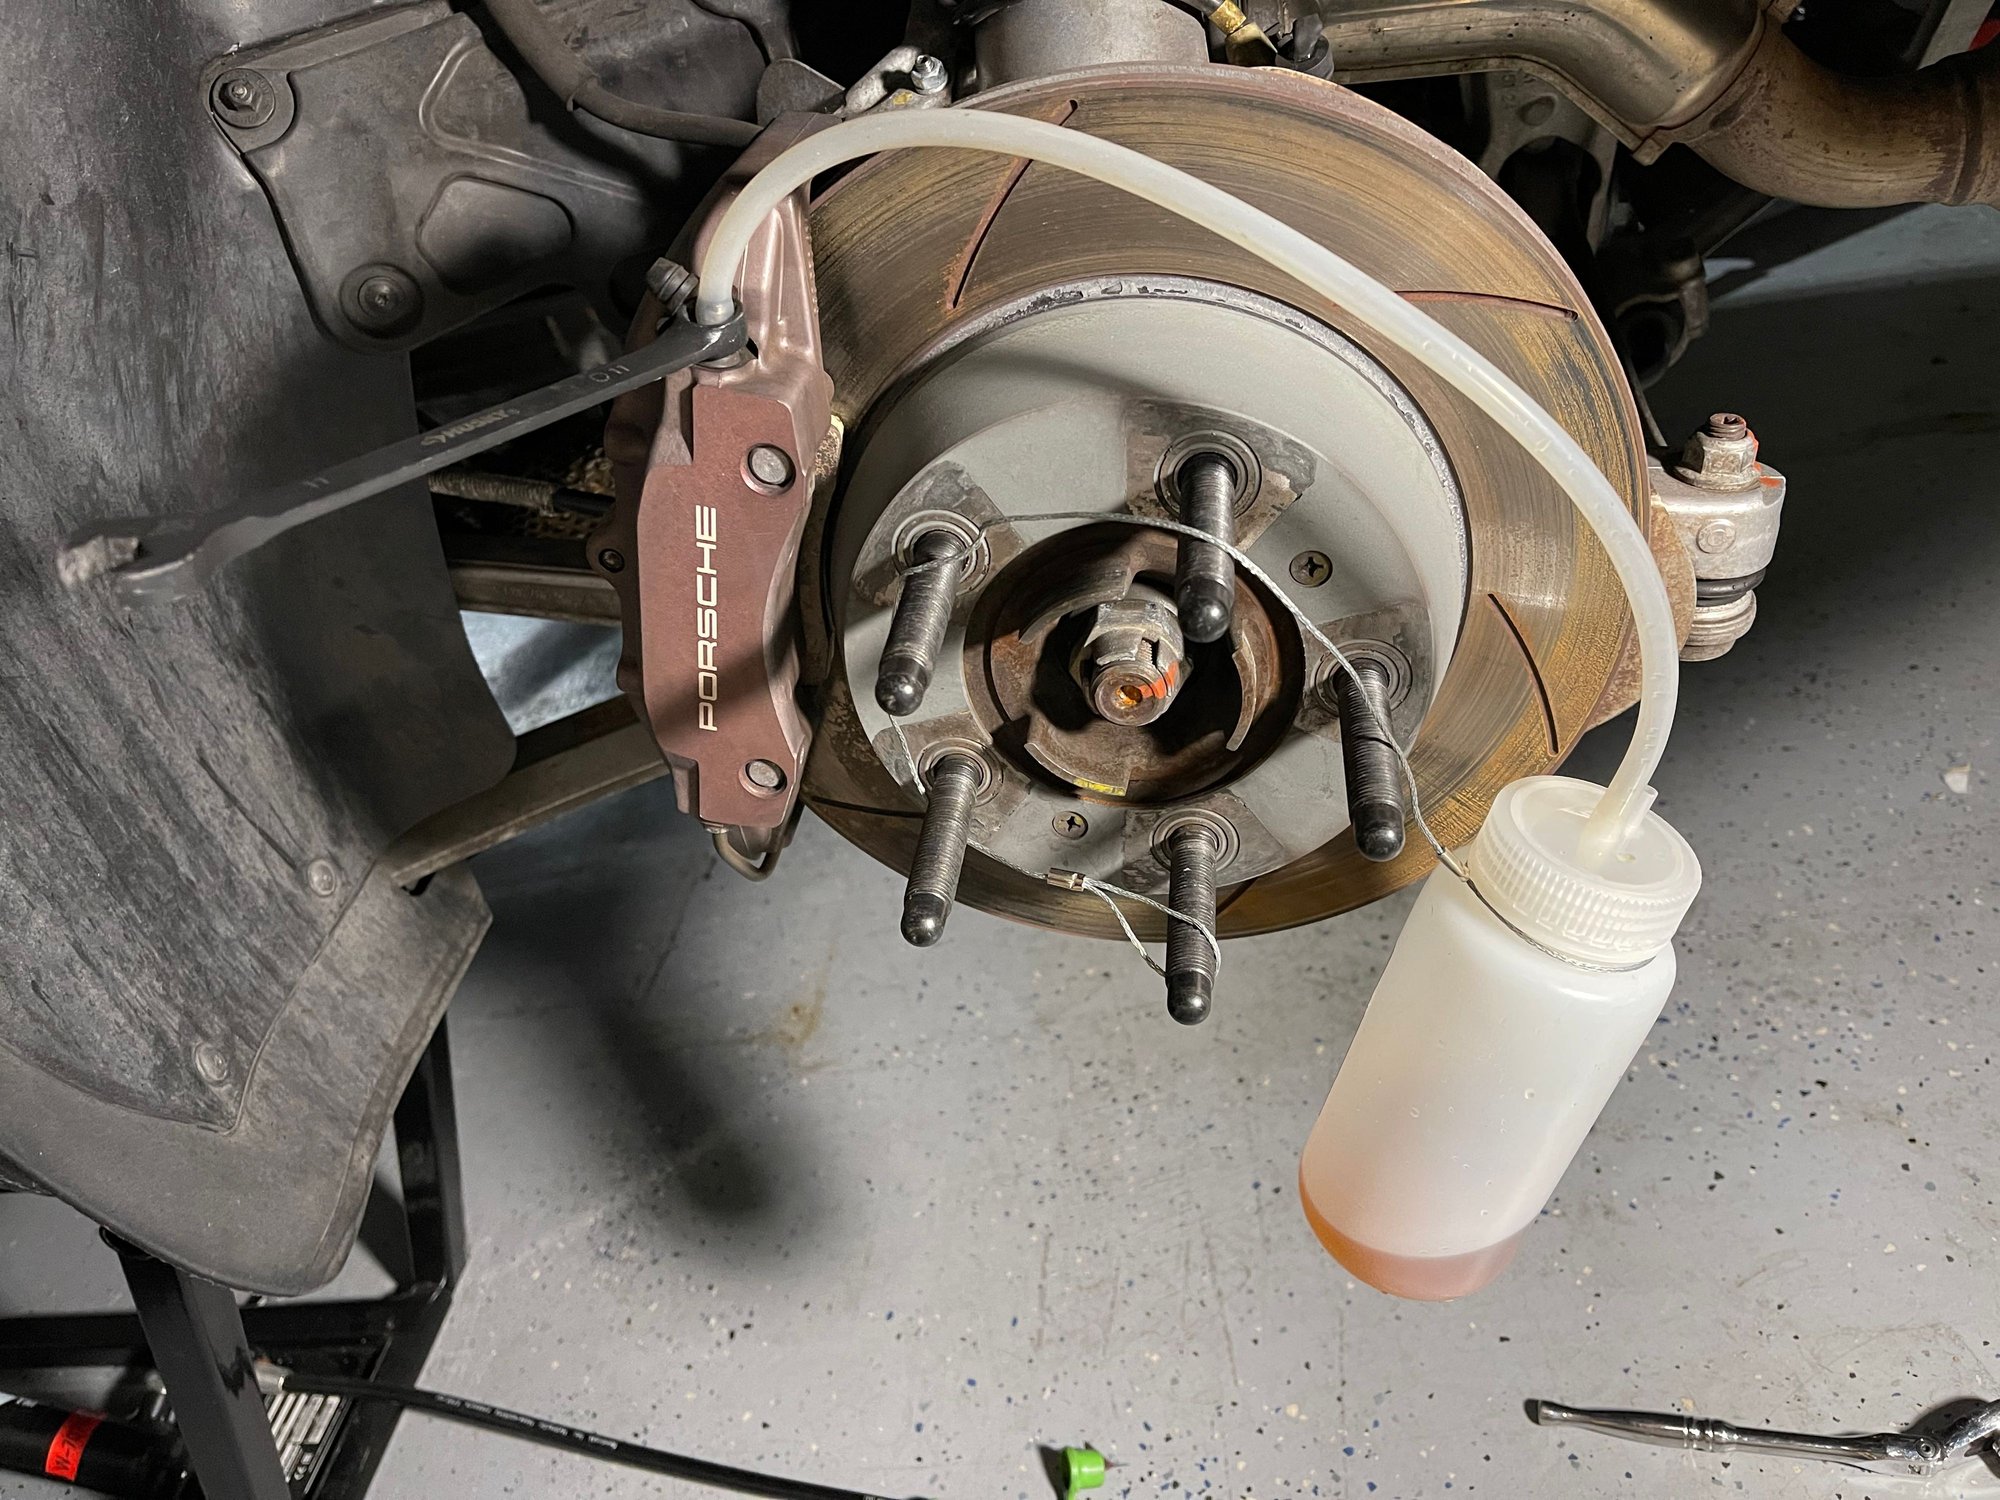
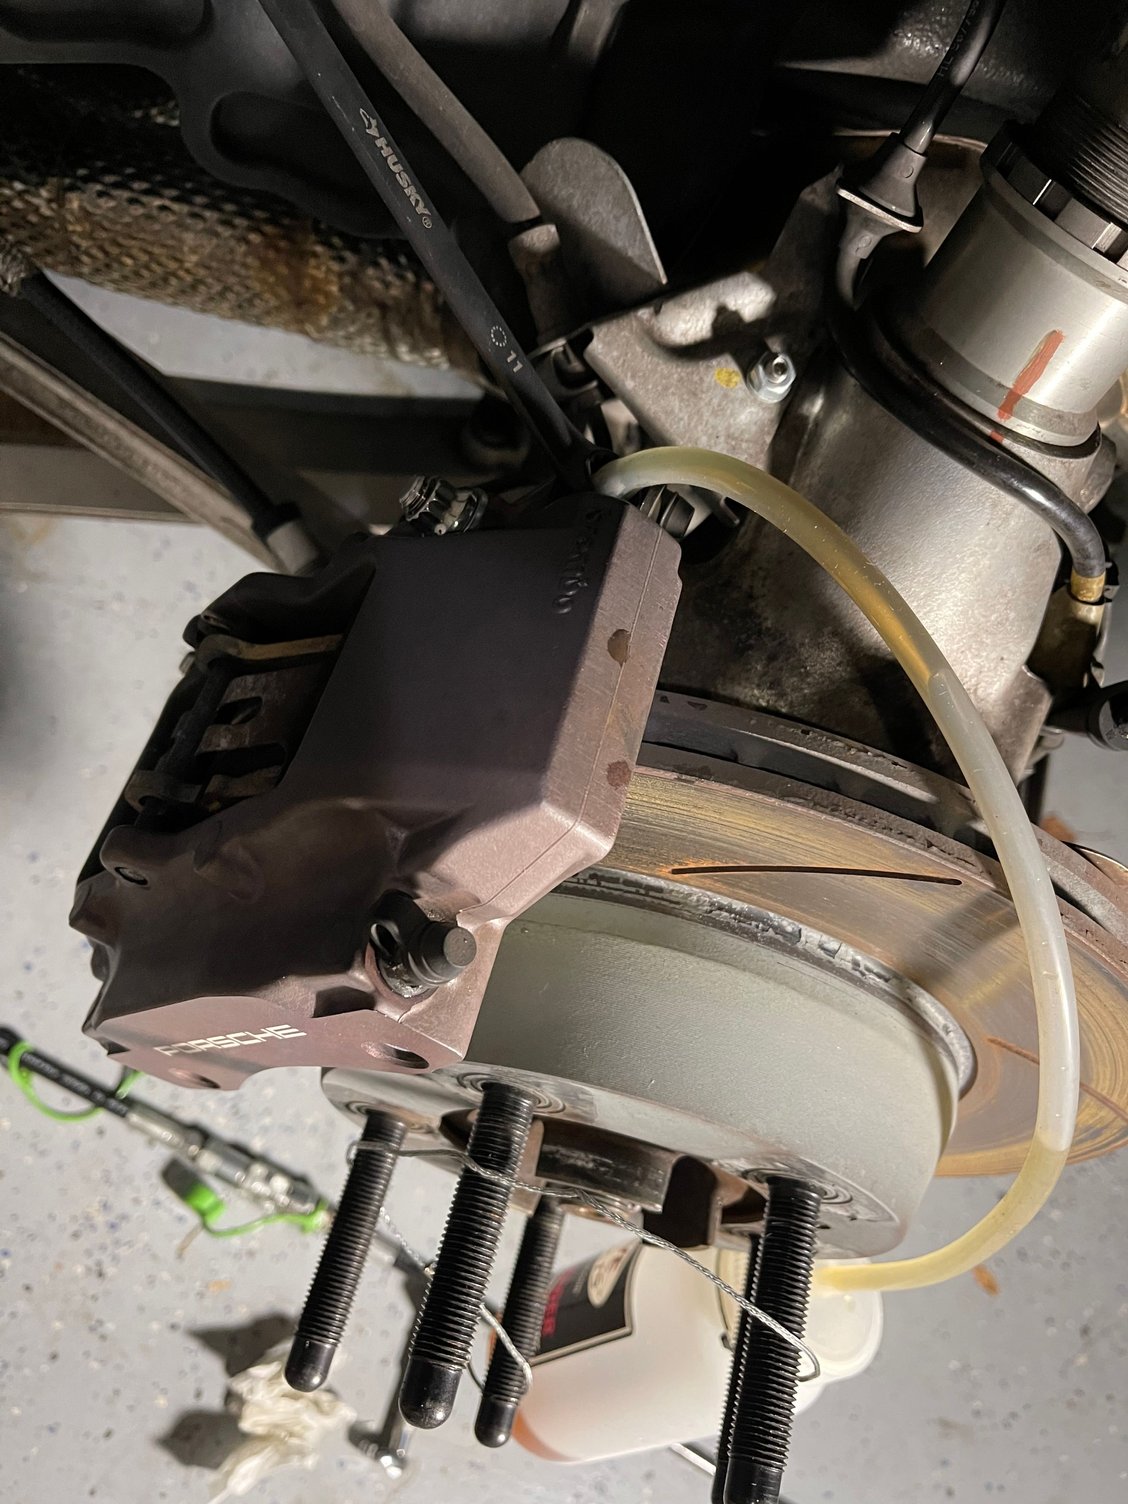
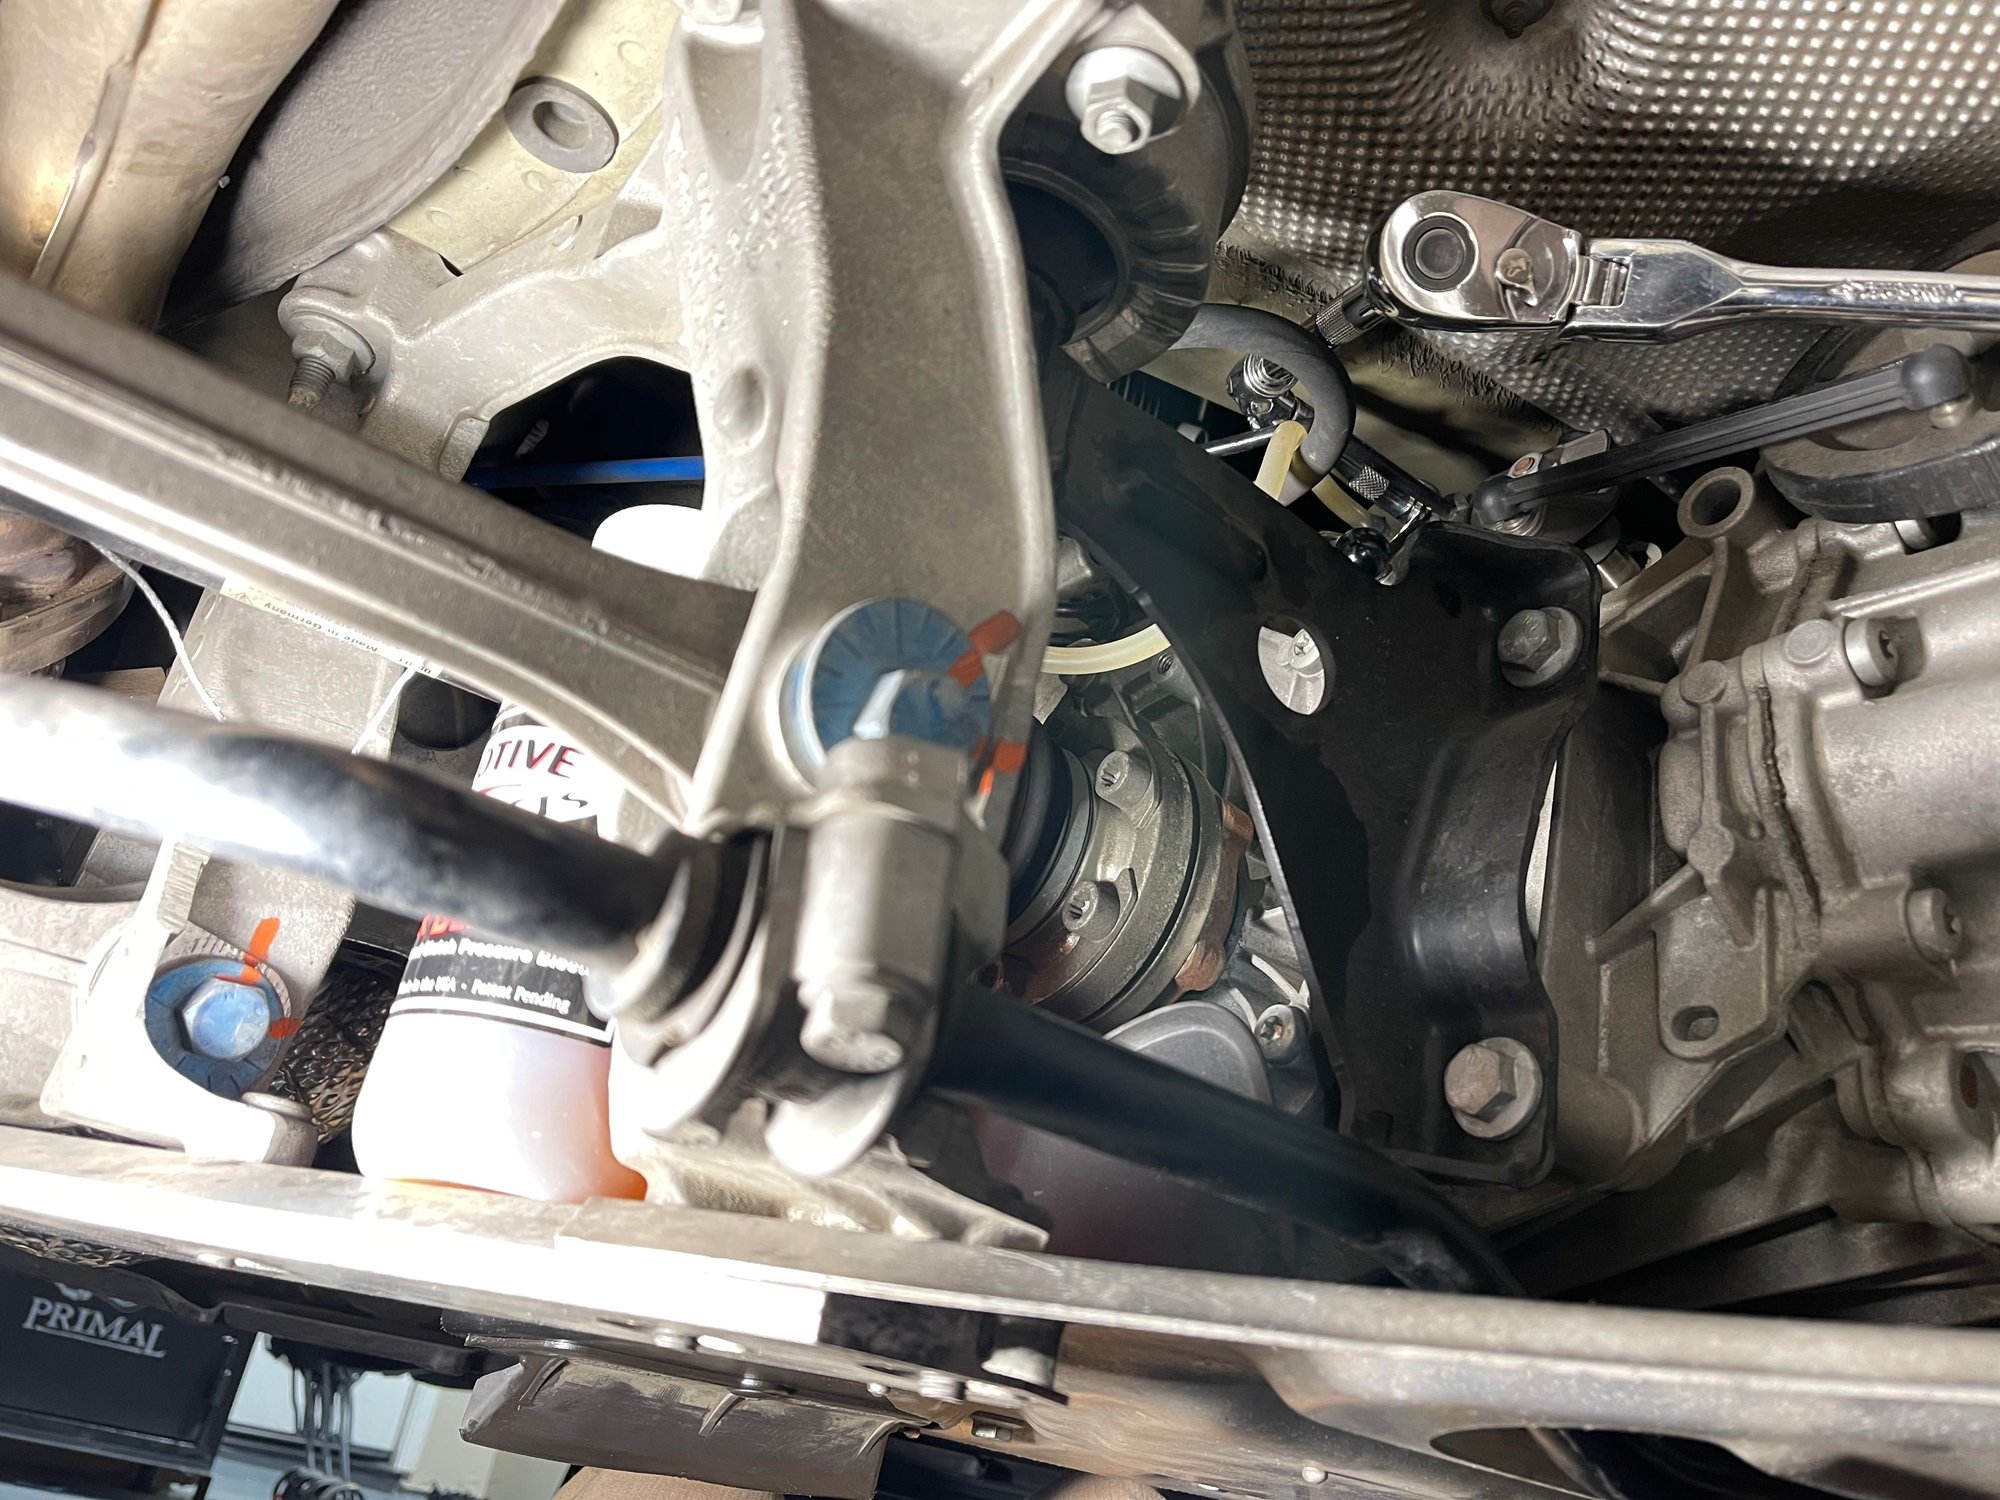
Starting with the passenger rear caliper, remove both bleed valve covers, place your 11mm wrench on the outer bleed valve, then attach the hose from the catch bottle.
Open bleed valve until you see brake fluid flowing, wait 5-10 seconds, then close. Double check pressure on pressure bleeder, fluid level in master cylinder, and repeat until you have fresh (clear) fluid coming from the bleed valve without bubbles.
Pro tip: Add pneumatic fittings on your pressure bleeder so you can quickly refill the MC while maintaining pressure in the pressure bleeder.
Repeat on inside valve.
Double check pressure on pressure bleeder, fluid level in master cylinder and top off fluid if needed.
Repeat steps 4-6 on driver rear, passenger front, and then driver front.
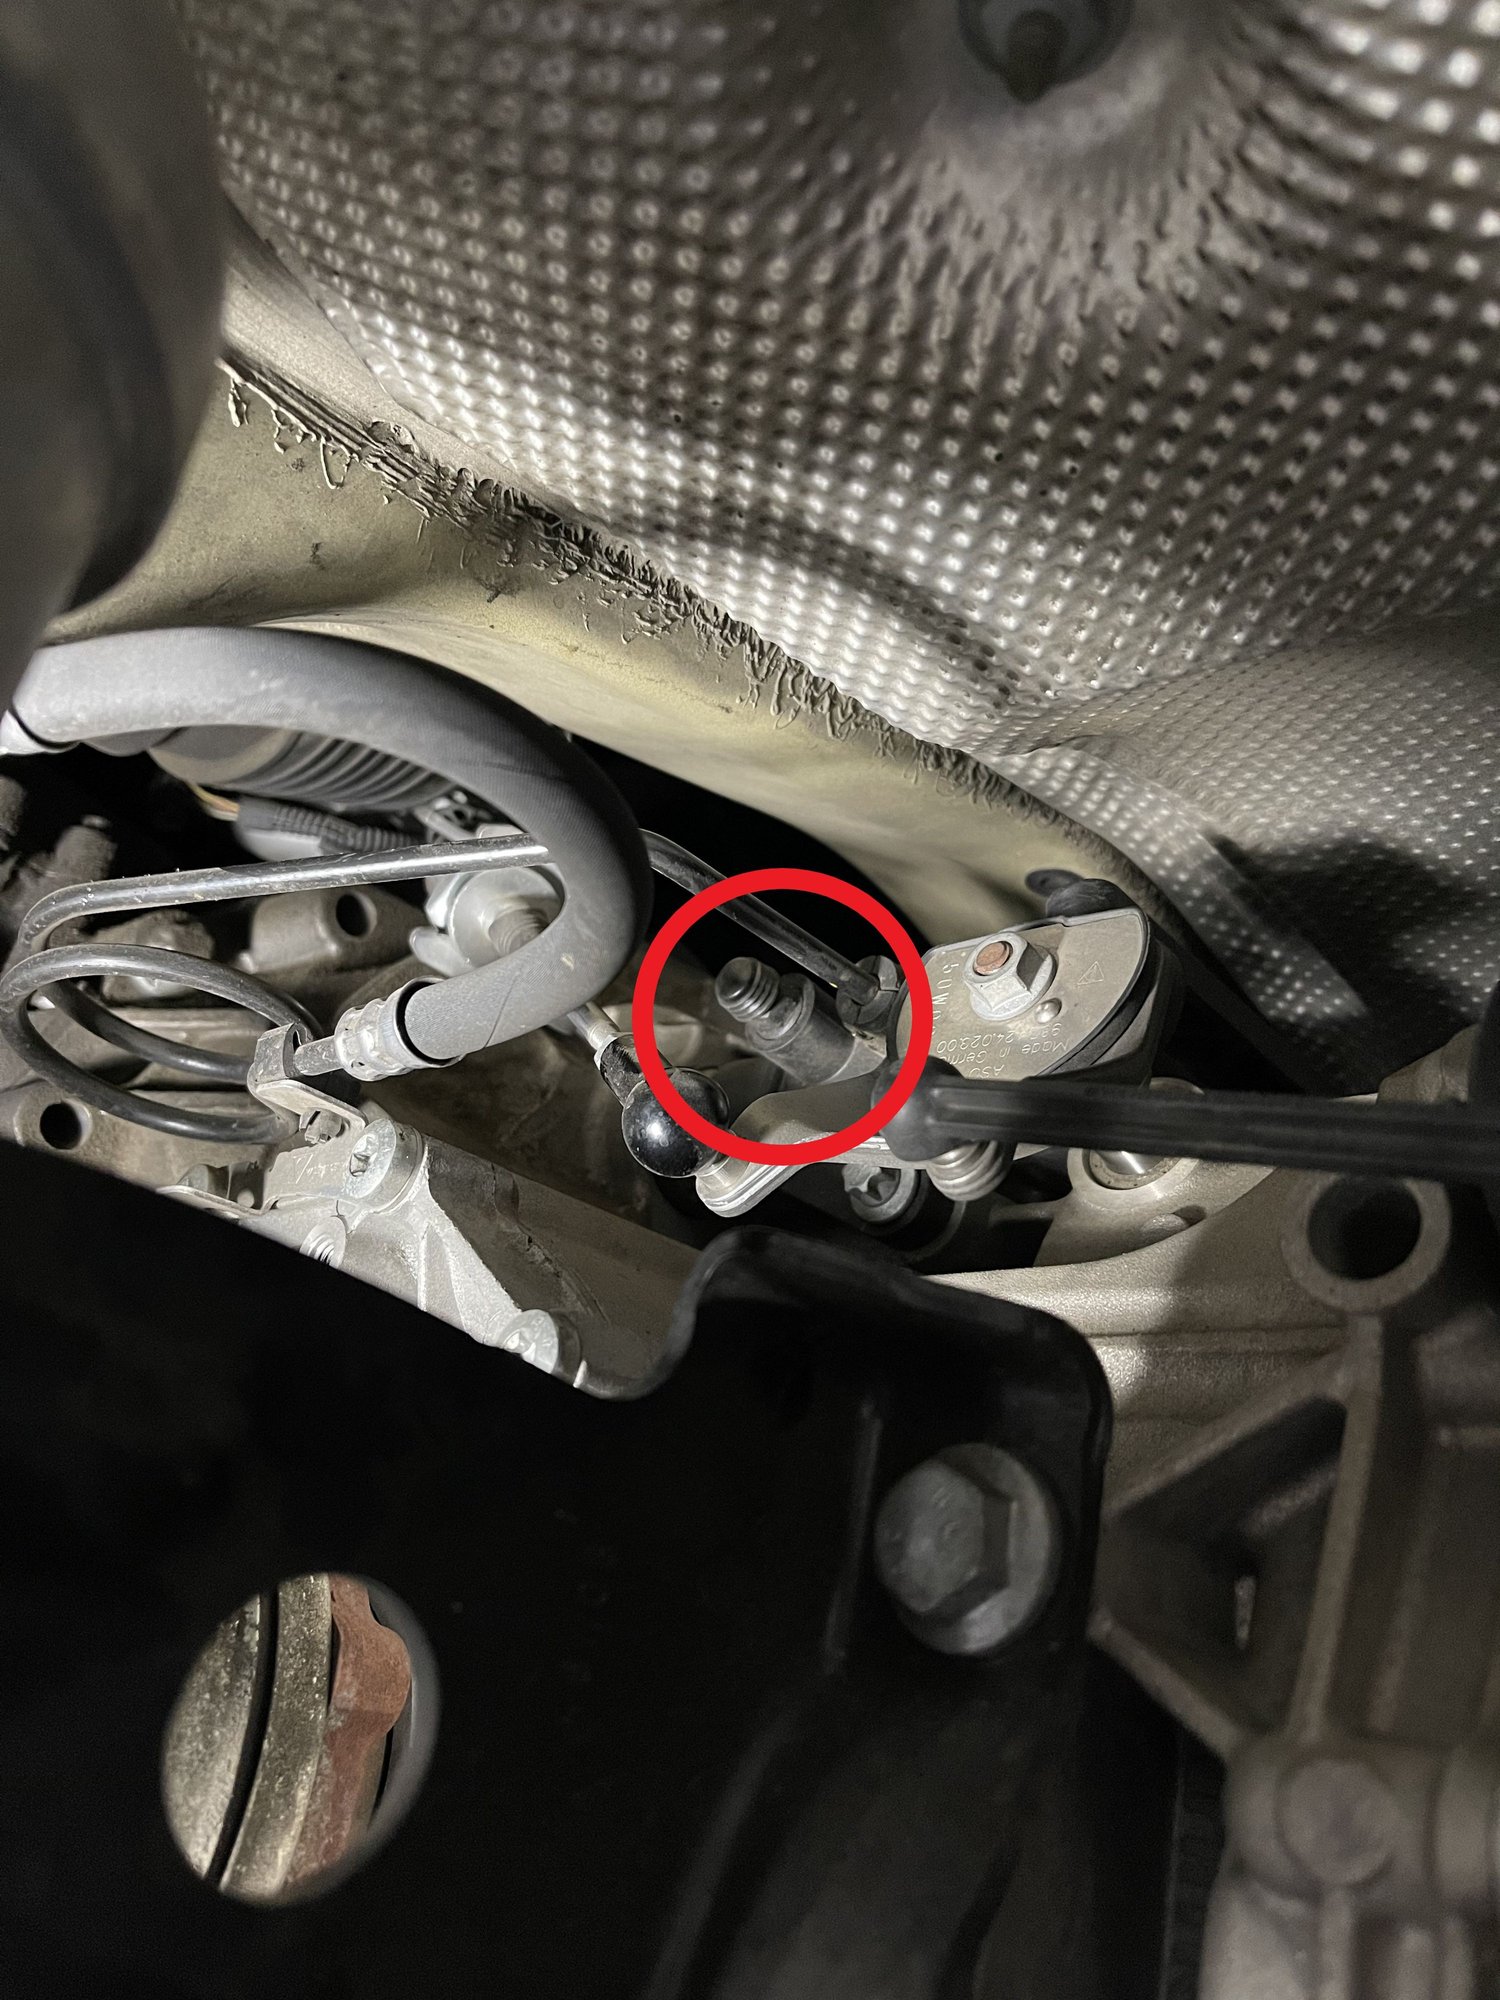
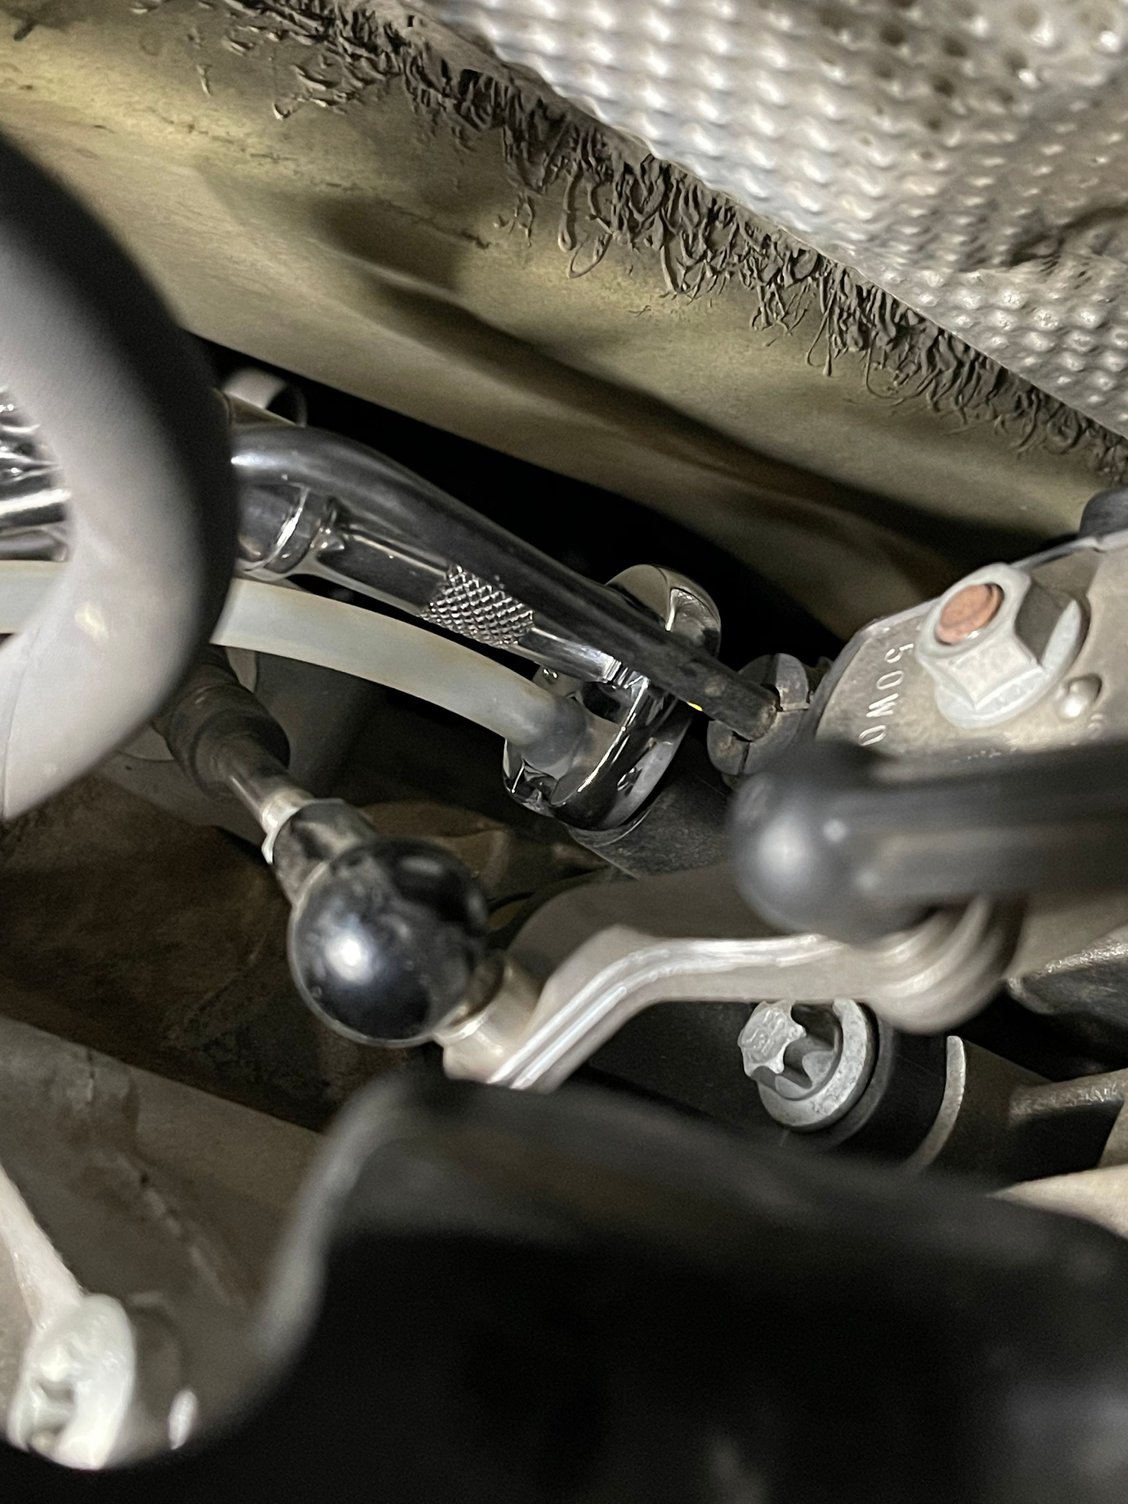
Clutch: Double check pressure and fluid level, locate the clutch bleed valve, remove cover, attach catch bottle, slip on crowfoot socket with 3" extension and U-joint, add 6" extension and socket wrench.
I don't know if order matters on this one, but I did my clutch first then brakes next. Ideally you start furthest from MC then move closer so it would be passenger rear, driver rear, clutch, passenger front, then driver front.
Repeat step 5.
Some people like to actuate the clutch pedal while doing this, but I don't think it's necessary as the system is pressurized. These are the steps how...
Replace all the bleeder valve covers, fill your MC to max, replace your wheels (torque on ground), and clean up.
All the tools minus 3" extension and U-joint Use needle nose pliers to gently remove filter by the middle grooves. Pro Tip: The quick disconnect maintains pressure when disconnected. This means less pumping when you refill fluid using the dry method. This is the outer bleed valve. My bottle comes with a metal wire where I can hang on my studs. Use a stool or blocks if you don't have that. This is the inner bleed valve. Dirty brake fluid. Notice the color is a dark reddish/brown. The ratchet and extensions is what I used for the bleeding the clutch. This is the clutch bleed valve cover, looking forward from behind the driver rear wheel. Catch bottle hose first, crowfoot around hose, then slide onto bleed valve. I place the catch bottle on the cross bar. Bag is optional... I only added it for pictures this time.
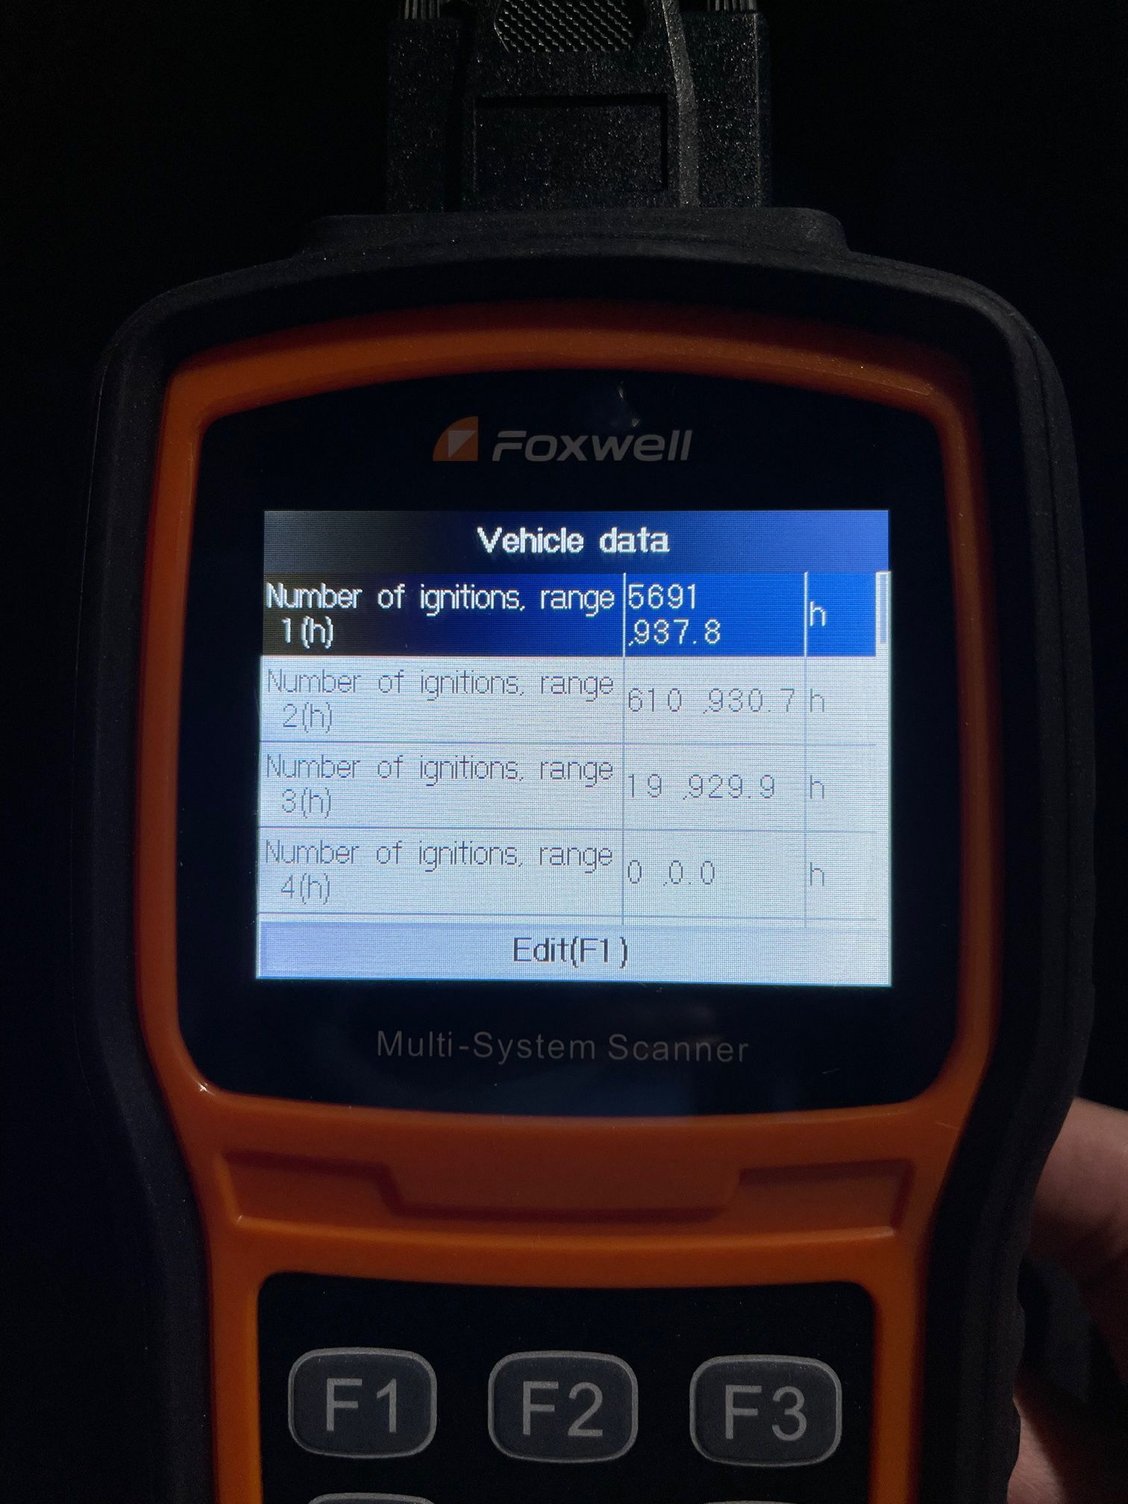
Although multiple tools work for this application, I bought the Foxwell NT530. It's easy to use for looking at information and to program almost everything in your car from seat belts, spoiler, BOSE system, service reminders, etc.
9 Steps for your DME Report
Insert your car key and turn it to the on position (no need to start engine).
Porsche
(1) Car type comes with your purchase however you can purchase additional car types.
SmartVIN (or Manual Selection then choose your car)
I use a Durametric. It works well as it is designed specifically to work with the Porsche model;
Main difference being that the interface on a Durametric is displayed on a laptop or connected pc screen. Foxwell has it's own dedicated screen built into the unit which is nice.
Durametric however can also be used by tuners to add a flash/tune to the vehicle.
Last edited by Fresh.Sizzle; 02-01-2021 at 09:55 AM.
Although multiple tools work for this application, I bought the Foxwell NT530. It's easy to use for looking at information and to program almost everything in your car from seat belts, spoiler, BOSE system, service reminders, etc.
The NT530 will program lots of things on a 987, but it won't on a 981. The programming ability seems to be linked to the software for each model. It worked great on my 987.2. It had no real programming ability for my 958.1 Cayenne (2011). It's worth really looking at the spreadsheet they have on their website about the capabilities of the device for each model. Some have programming, some don't. For the price - used with a 987 it can't be beat... much better than the enthusiast version of the Durametric, and the iCarScan X431 (I own both of those also.) And it's certainly more cost-effective than the Durametric - that in the "Enthusiast" model (around $400) is only good for 3 VIN#. And it appears for the other Porsche models where it doesn't support programming - it has diagnostics and activation features equal to the Durametric.
I have put in a request to Foxwell asking when programming will be supported for the Cayenne 958 (it does marvelous programming for the earlier 955/957 models). If I hear back I'll update this posting.
Last edited by deilenberger; 02-01-2021 at 05:00 PM.
I use a Durametric. It works well as it is designed specifically to work with the Porsche model;
Main difference being that the interface on a Durametric is displayed on a laptop or connected pc screen. Foxwell has it's own dedicated screen built into the unit which is nice.
Durametric however can also be used by tuners to add a flash/tune to the vehicle.
Which Durametric has that capability and with what tuners? I've seen no mention of that ability with the Enthusiast version (which I own..)
Unfortunately, only the Durametric Pro can write to the car. Like you, I have the Enthusiast version so I don't know which things the Pro can write to. Hopefully others can chime in.
Thank you for posting these DIYs! I just picked up a 981 GT4 with 7k miles and plan to do all of these maint items this week. This thread is much appreciated!
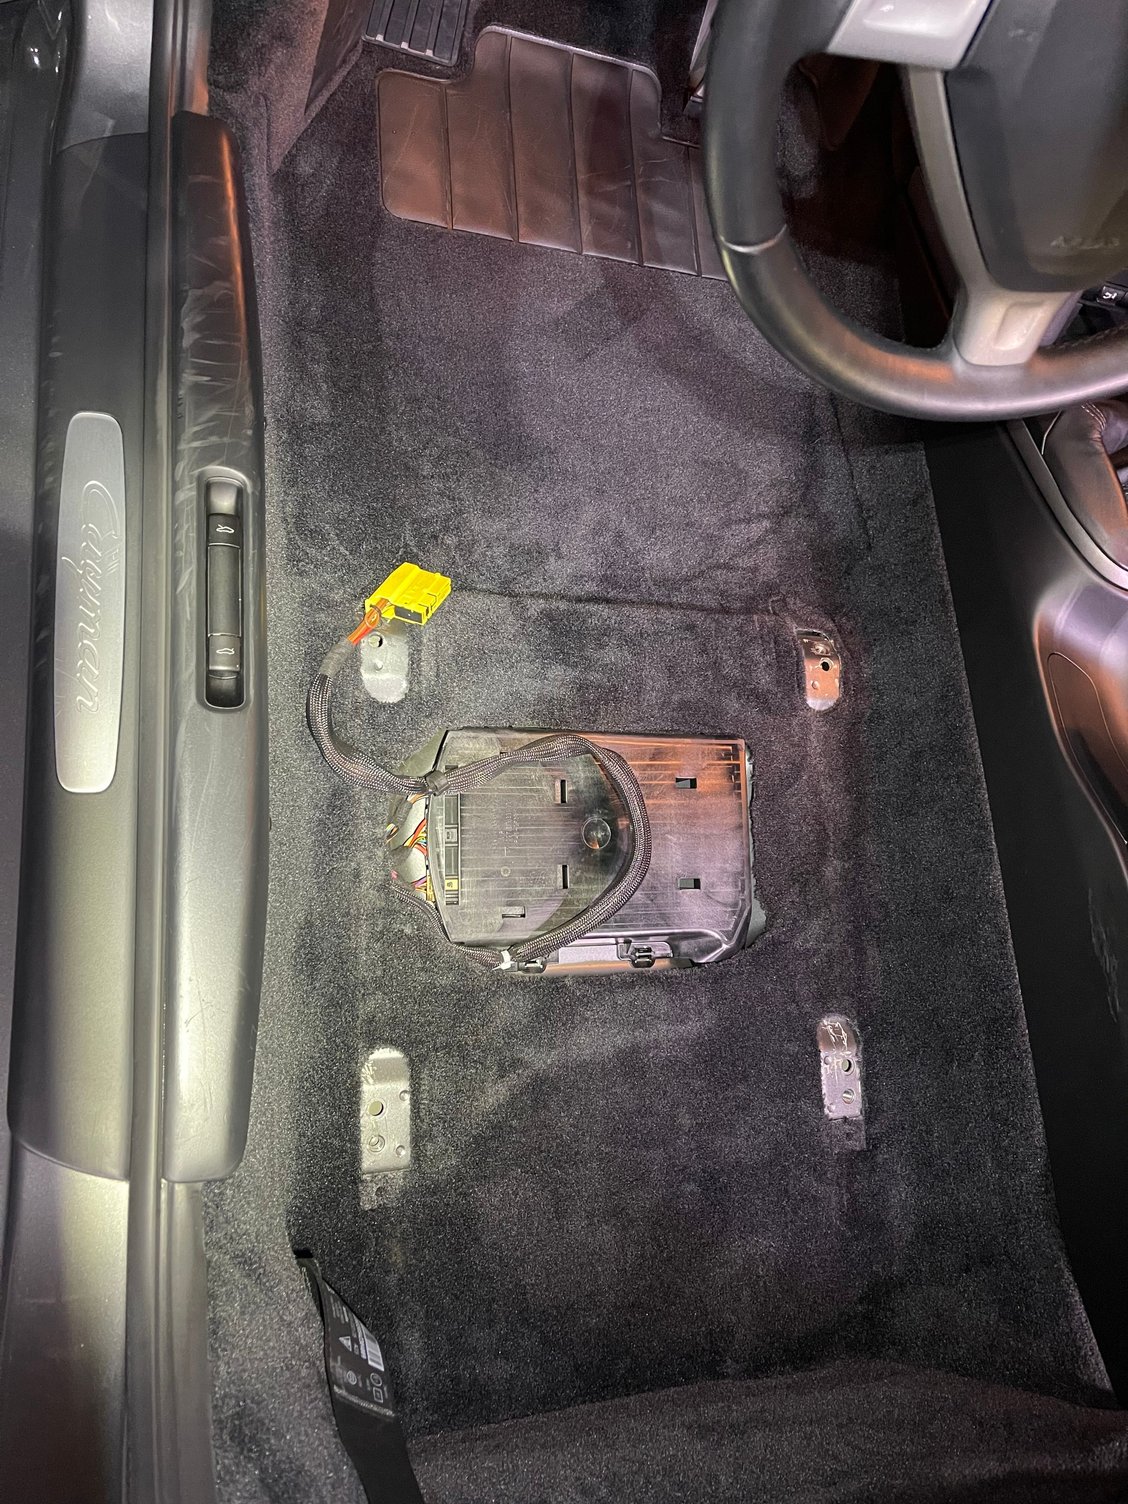
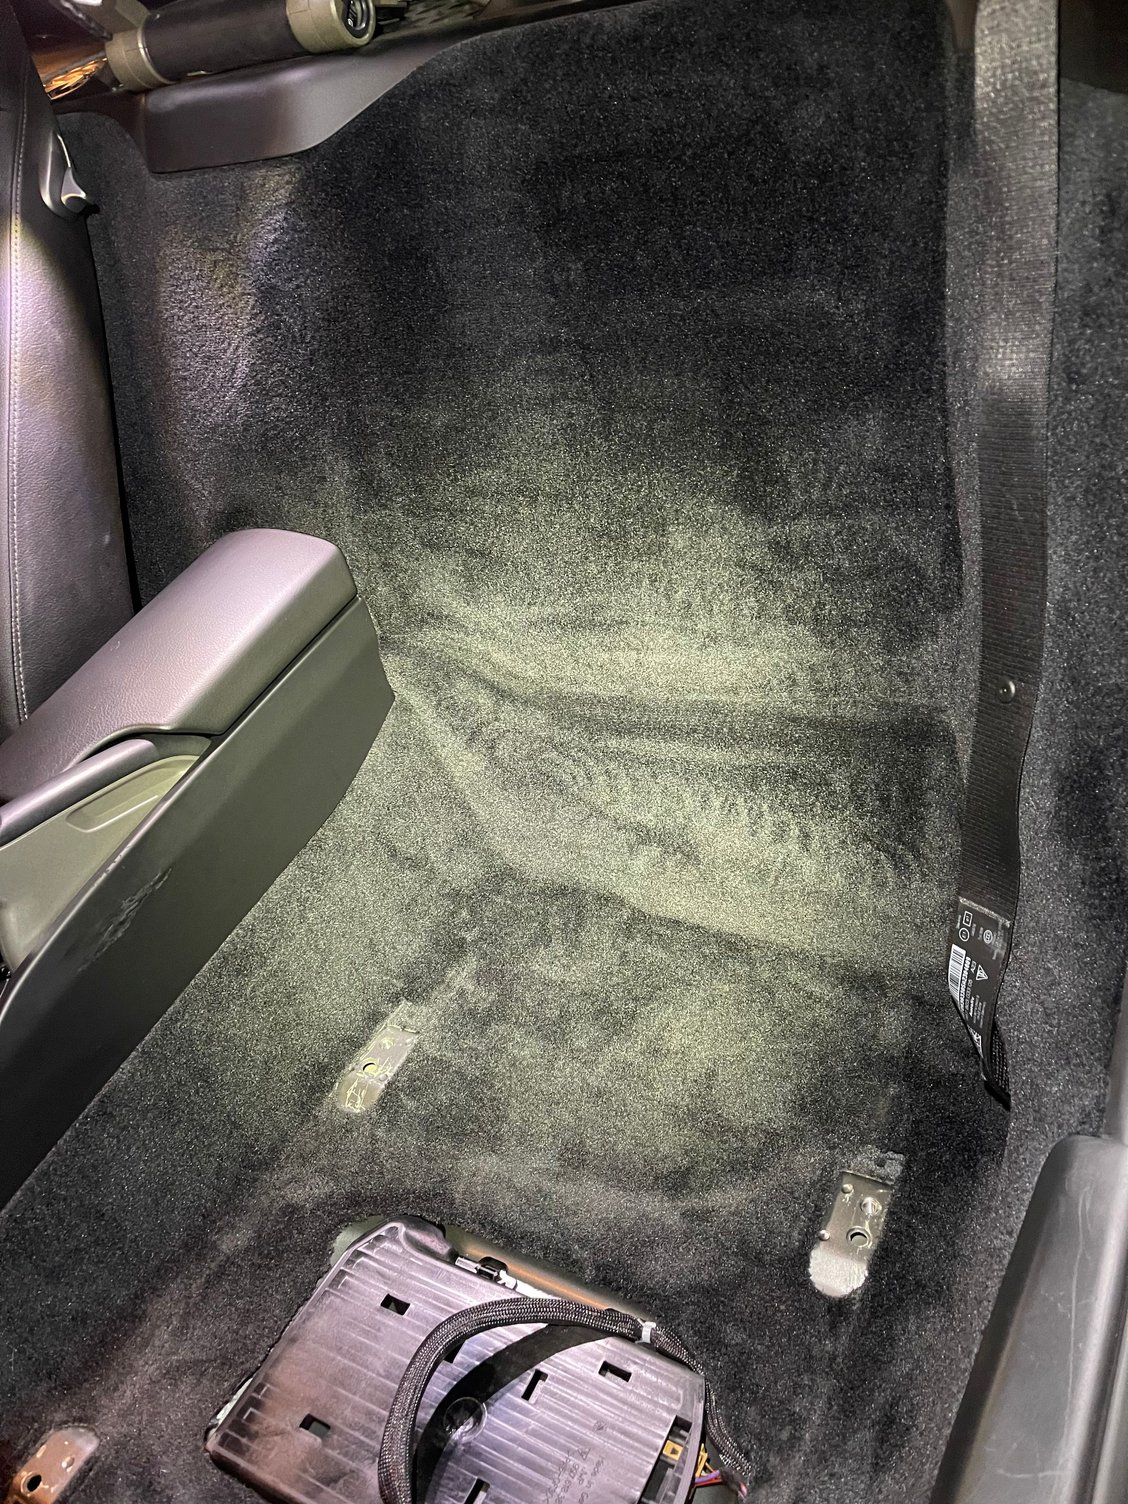
I reverted my seat back to OEM and wanted to share a few tidbits that might help someone looking to do this.
OEM seat without rail = 42 lbs
Sparco QRT EVO seat with side mounts no rail = 18.8 lbs.
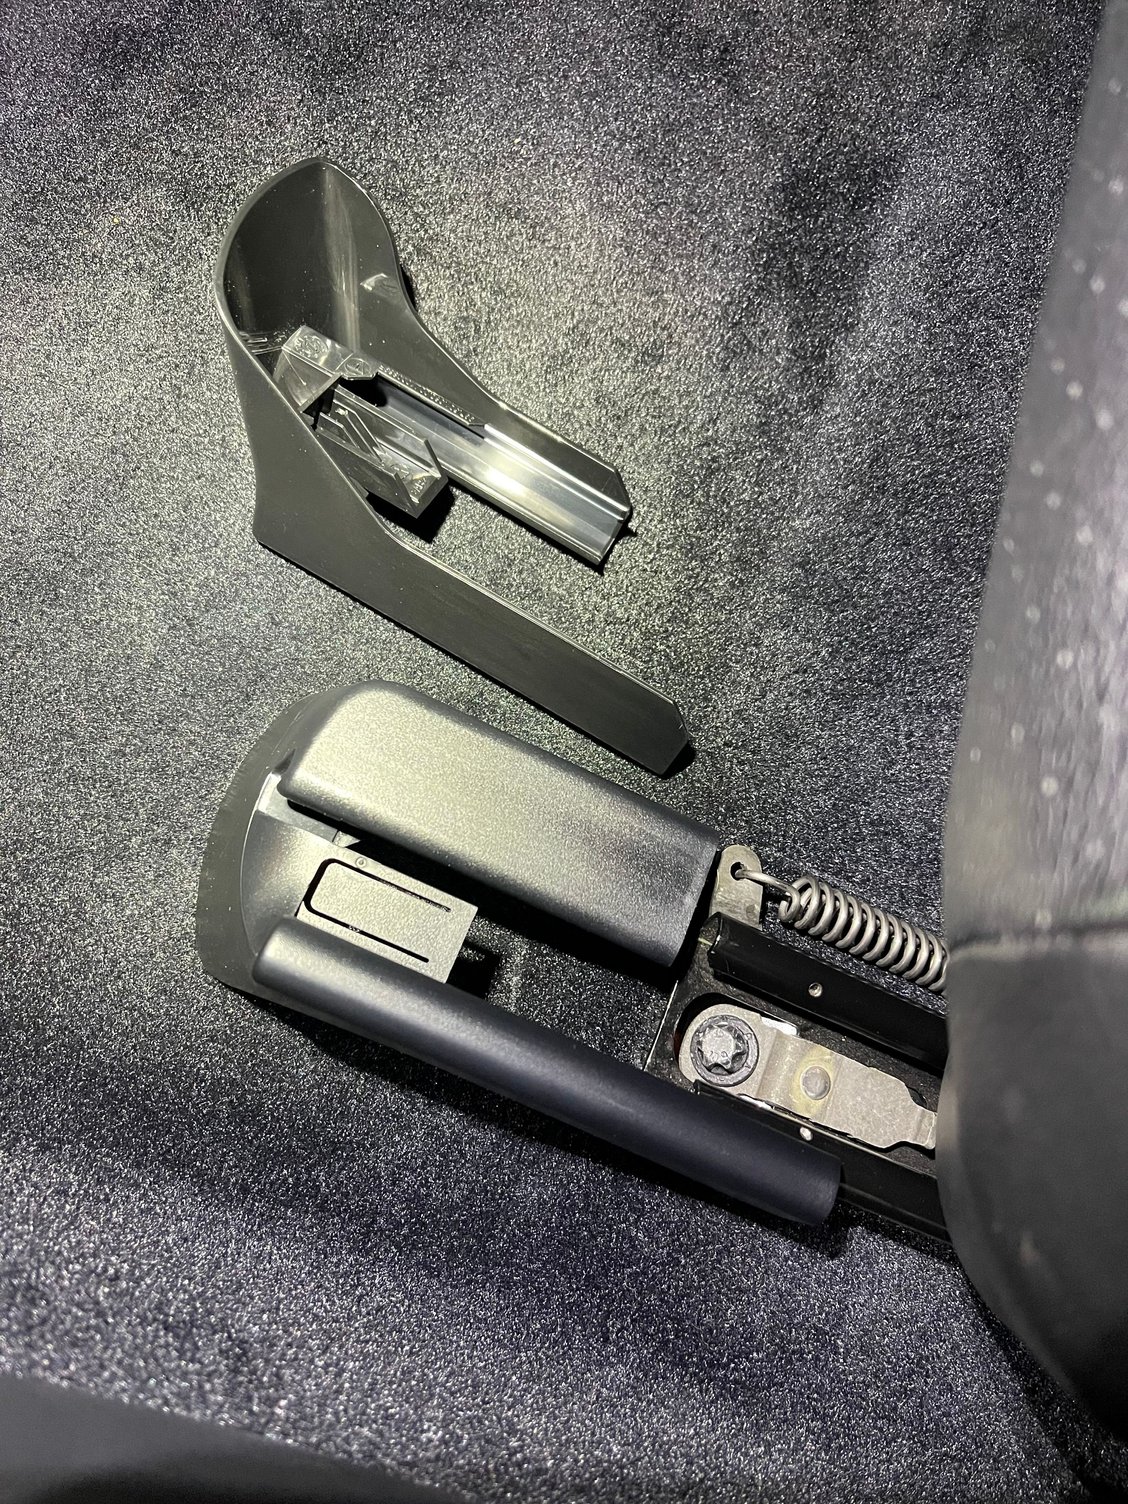
Remove the plastic covering to access the E-Torx bolts that hold the seat by lifting the tab and pulling it out. Here�s a photo of one right side up and another upside down. The tab locks onto the E-Torx bolt. There are 2 up front and 2 behind. Slide your seat forward and back to access the bolts.
Layer a blanket or towel on the door sill so you don�t accidentally scratch it. This sucker is heavy and oddly shaped.
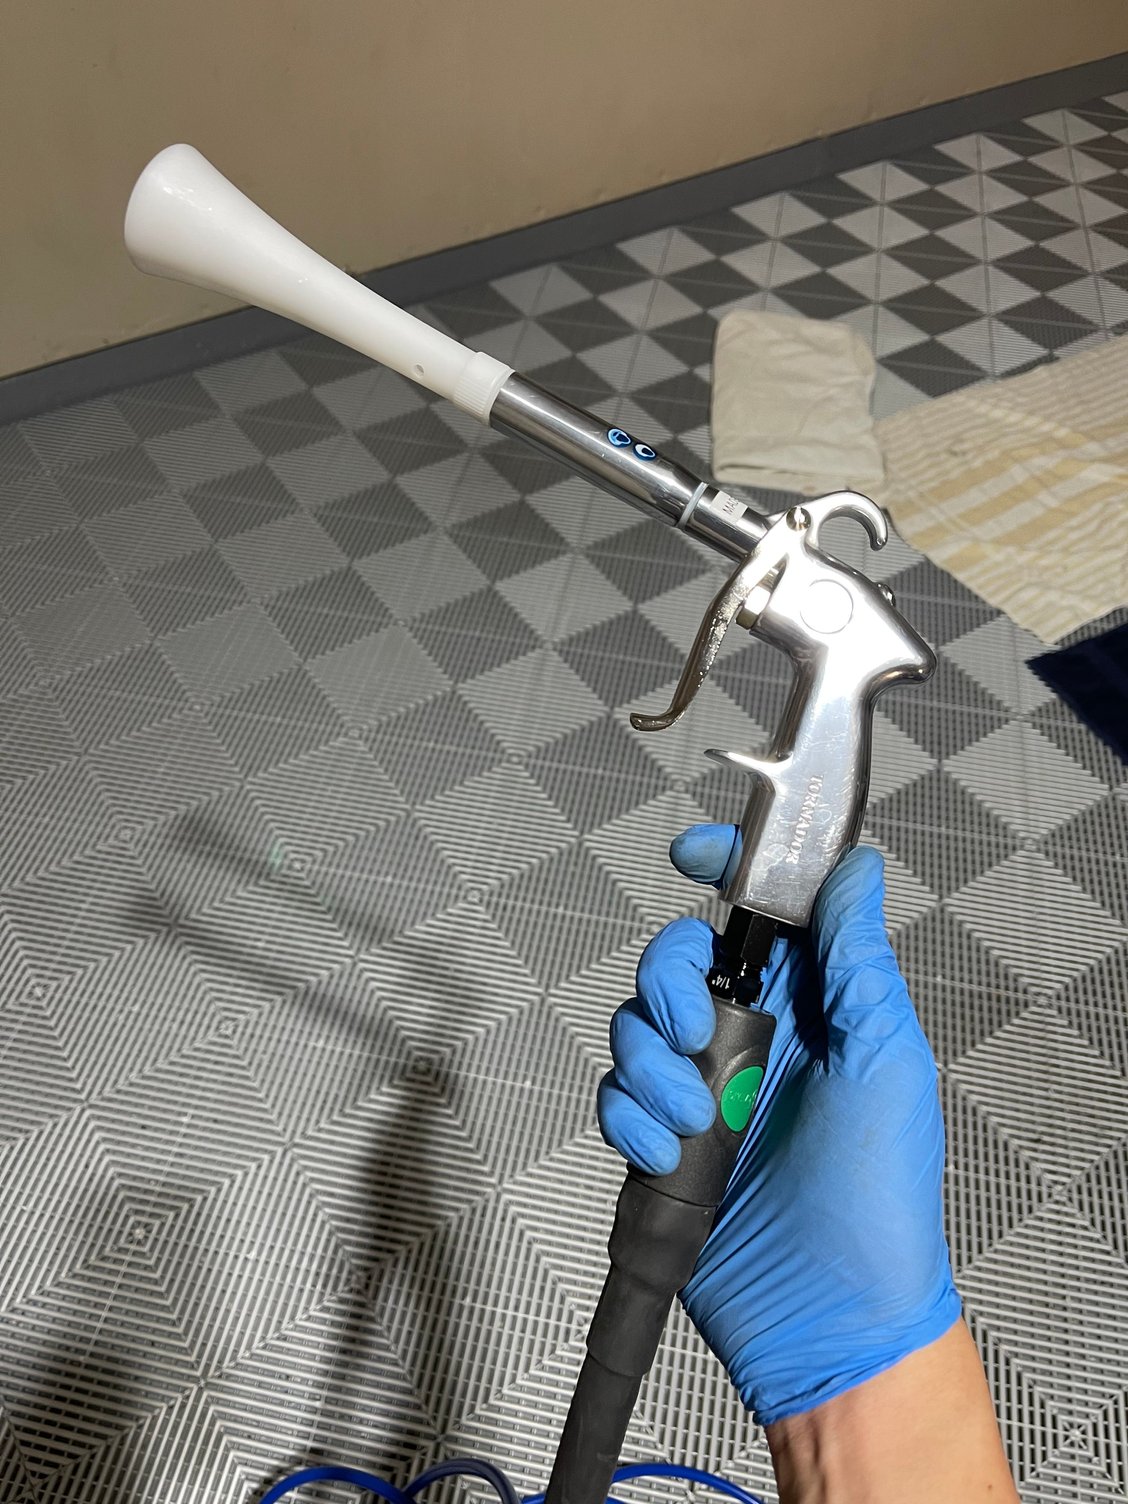
After removing, detail that interior. You can vacuum all you want but nothing will remove fine dust particles like an air compressor. I use the Tornador. These photos are before I vacuum it making the hairs go 1 direction.
Use a T30 and 10mm socket to remove the OEM rail slider if you plan on using it for your new seat. Remove the belt receptacle if you plan on reusing it too.
Reinstall everything and you�re good to go!
You can program the airbag on the Foxwell NT530 or PIWIS (other devices too?) My local dealership would not do that for me.
I was going to do the clutch & brake fluid change myself, but then noticed in my '100 projects for Boxster' book that for cars with PSM, one needs to use the 'Porsche System Tester 2 (PST2)'. Thought I would add that here. Does anyone have the experience that the PST2 is not needed? And I'm not sure if all 987 models have PSM as standard (I have a base model and it has PSM).
I was going to do the clutch & brake fluid change myself, but then noticed in my '100 projects for Boxster' book that for cars with PSM, one needs to use the 'Porsche System Tester 2 (PST2)'. Thought I would add that here. Does anyone have the experience that the PST2 is not needed? And I'm not sure if all 987 models have PSM as standard (I have a base model and it has PSM).
That's a great question and I believe I've seen it on other threads. The general consensus was that the PST2 wasn't really needed. IIRC it is intended to flush the ABS by actuating it to cycle new fluid through the system. Personally, I flush the brakes and clutch without touching the ABS.
Incredible thread. Hope you keep this one going. Tons of useful DIY info in here.
Unfortunately I sold my 987.2... However I upgraded to a GT4! If you have questions or would like to bounce ideas back and forth, feel free to PM me or post on this thread. I may have pictures from past projects that could help or even do them on my new car.


 01-06-2021, 03:54 PM