When you click on links to various merchants on this site and make a purchase, this can result in this site earning a commission. Affiliate programs and affiliations include, but are not limited to, the eBay Partner Network.
Thanks, and feel free to ask any questions about Japan and touring accordingly - happy to help...
A few threads over on clocks and dash pods, a comment prompted me to finally rethink my dash clock and instruments color mismatch.
Though the Sport Chrono stopwatch was silver, not white like the rest of the instruments, I had always intended to one day fit a matching white VDO clock face, but could not source a 52mm VDO with the front setting buttons - instead of the remote switch type, which of course would require more wires and somewhere to mount the setting switch.
The VDO series ('Cockpit', not 'Viewline' I think), with the through-the-glass buttons is easy and discrete, allowing the otherwise 100% plug-and-play of the pigtail I made.
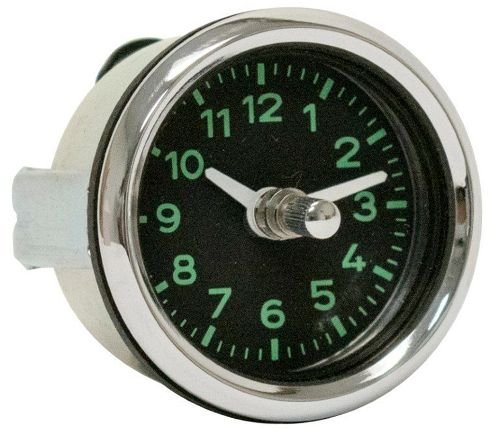
In looking for options, I came across new old stock 356 dash clocks:
Still black-face though, but I did like the green 356-style font and color.
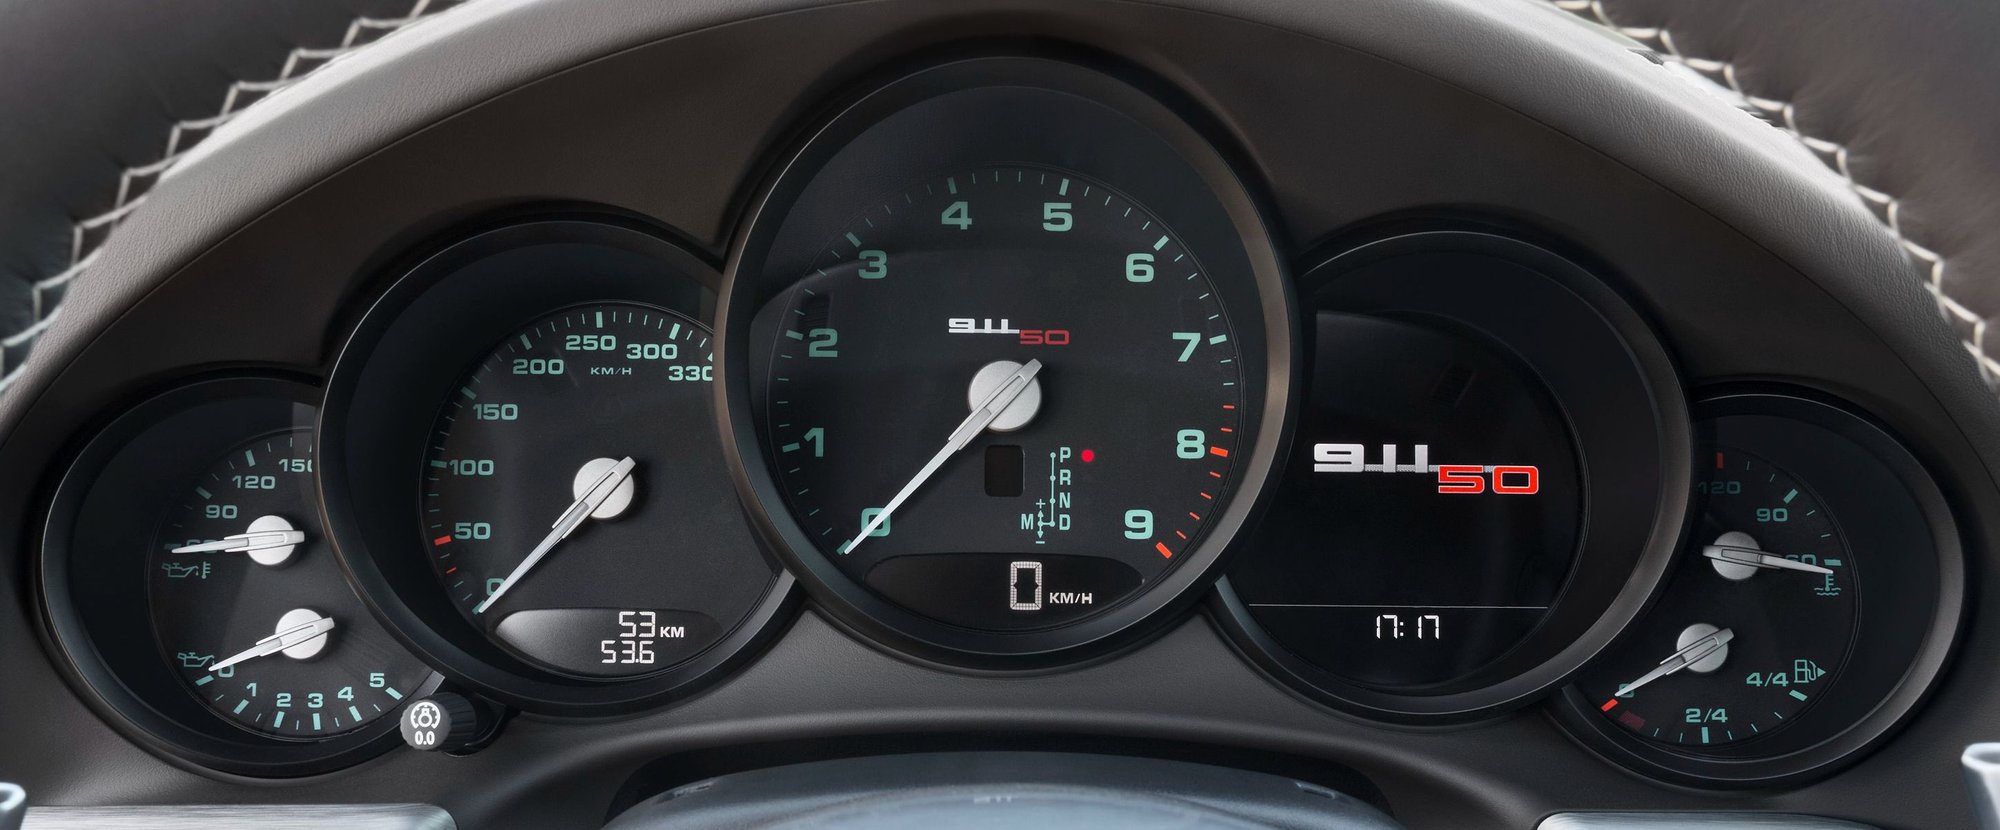
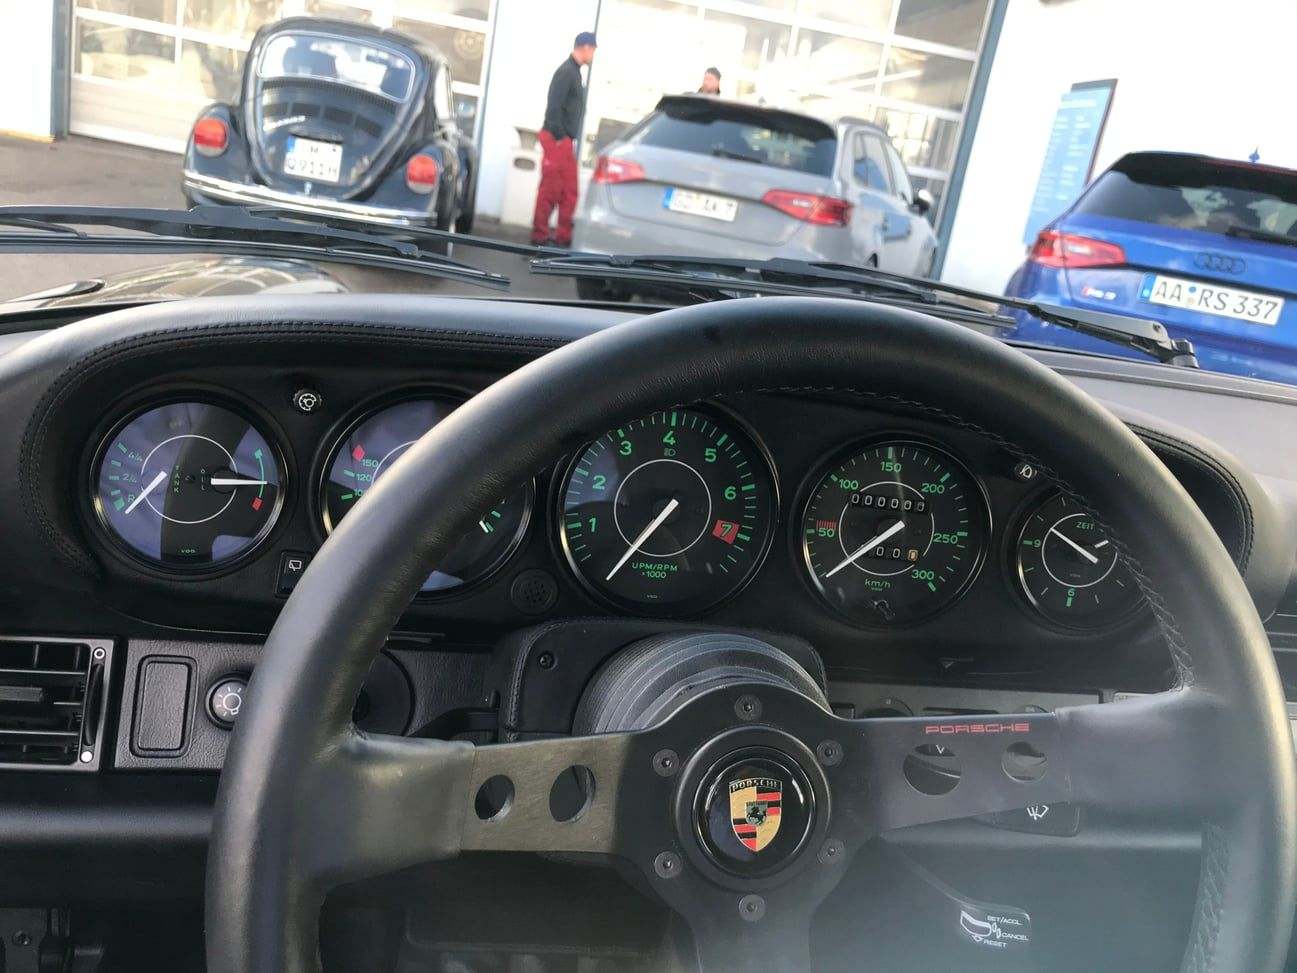
It reminded me of the 50 Jahr 911 dash:
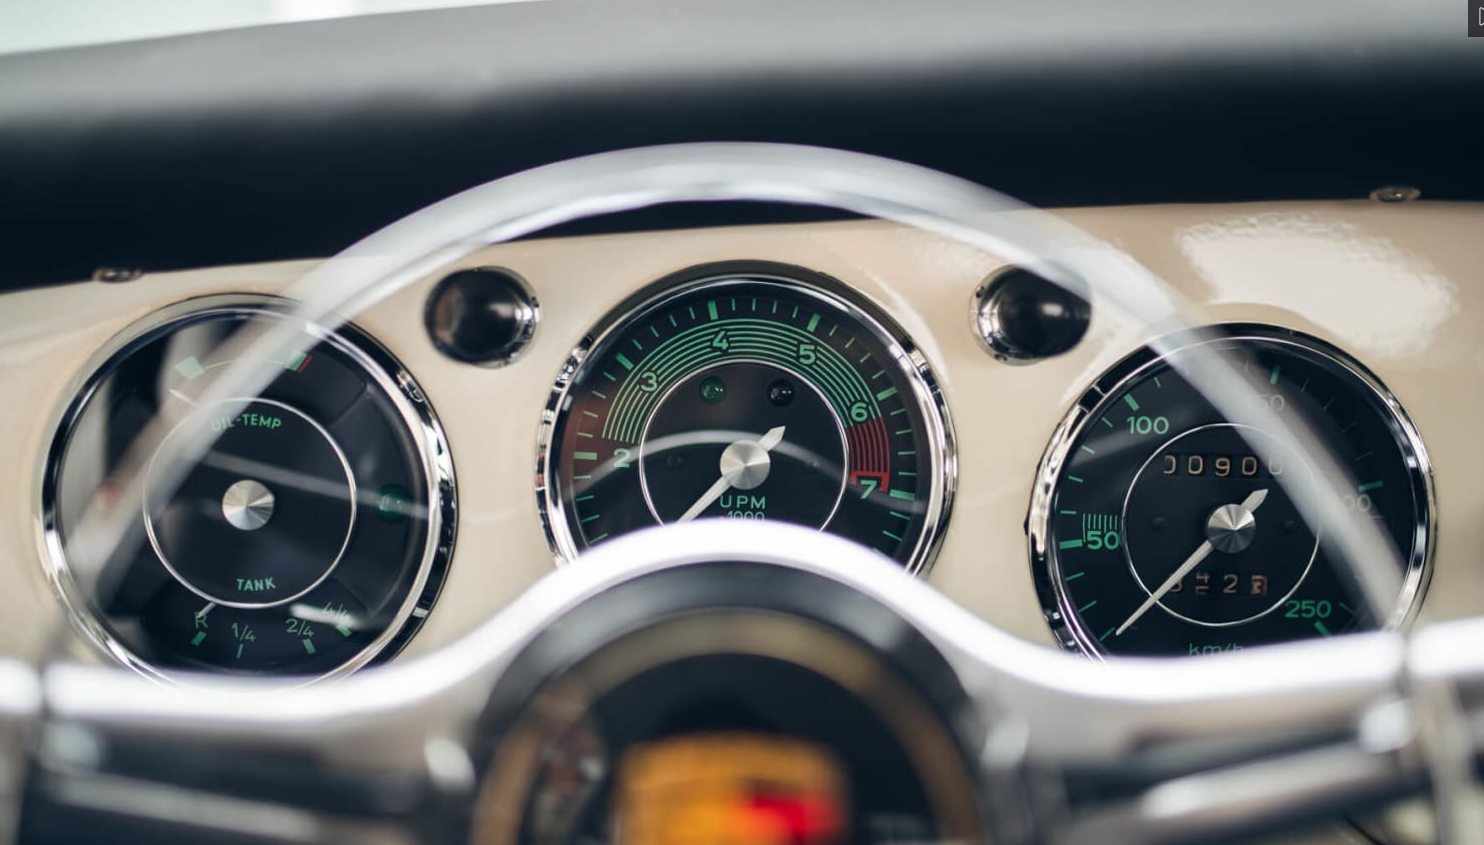
My Elfenbeinwei� 356 of course had black faced instruments, with the classic early Porsche green highlights, and the speedometer and tachometer green and red zones:
So, rather than change the black clock to match the white S instrument pack, I figured changing the white instrument faces to match the black clock, and pick up the retro cues off my 356 might be a viable option.
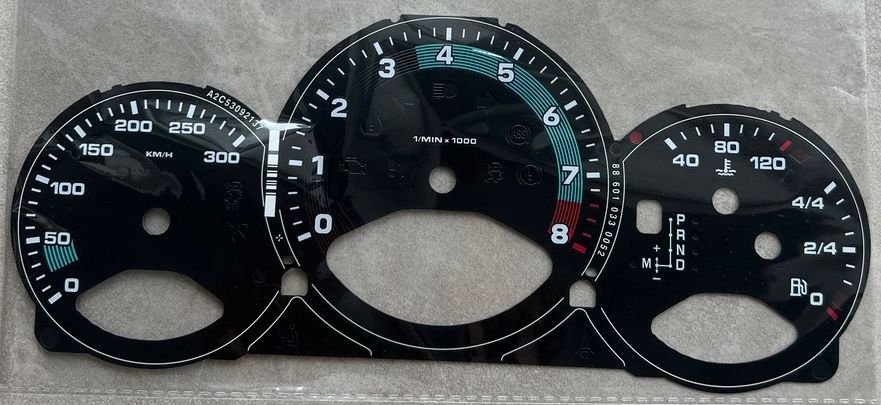
Thus, I just ordered this instrument cluster face from Gauge Faces.com:
I chose the more serious 356 / 911 font, over the playful Boxster / Cayman font too.
A few other outlets are also making a variety of retro, colored, and GT and S versions for most models these days, and it was a 964 set that prompted me to go searching for this option for the Cayman.
Hopefully the quality matches the OEM and the installation isn't as complicated as it first seems, as the black and white theme matches my tastes nicely...
That is going to look fantastic, thank you, I am so copying this for my Cayman R.
That is going to look fantastic, thank you, I am so copying this for my Cayman R.
Go for it!
A moderately easy reversible mod too...
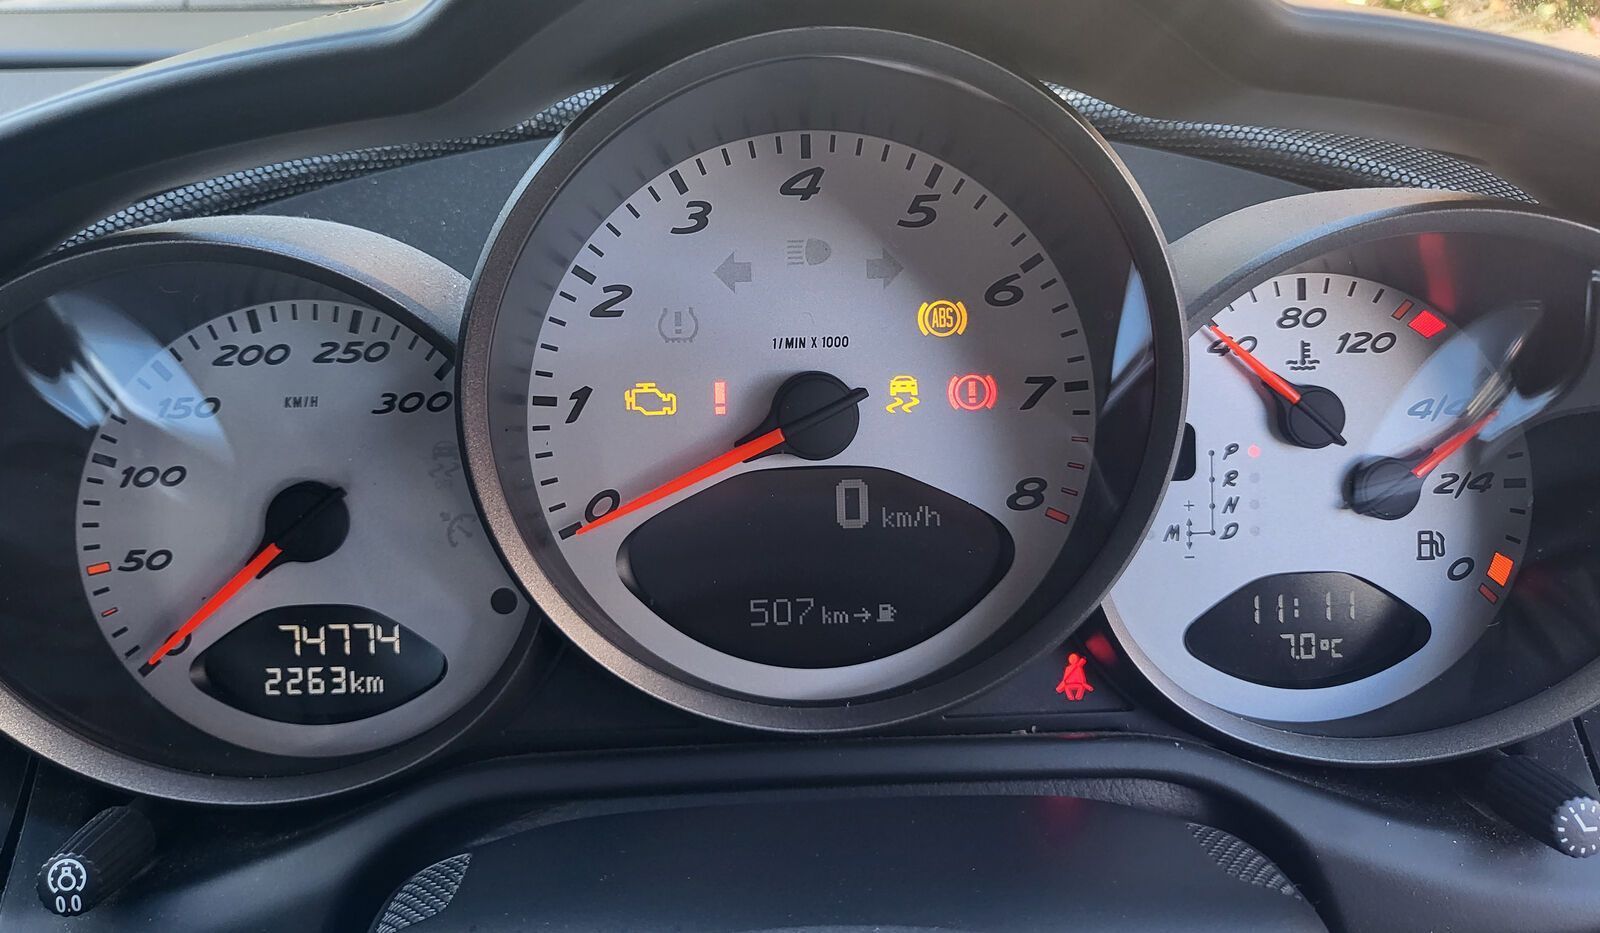
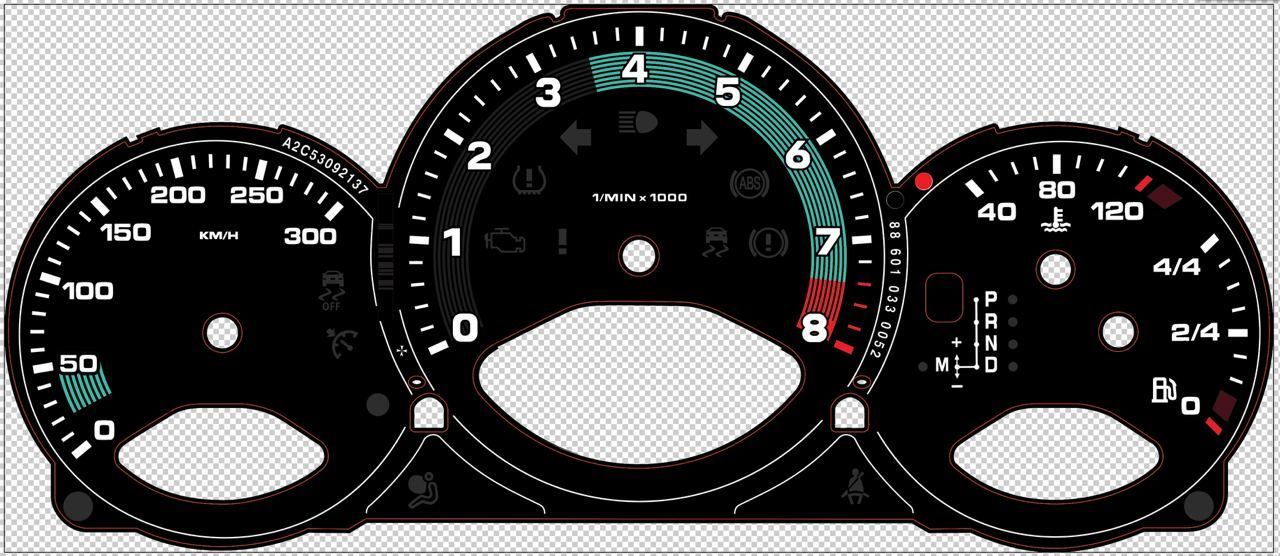
Depending where you are, some icons in the cluster vary - as well as with the km vs. furlongs, and C vs. F temp range, the ABS and BRAKE warning light icons also are different - essentially rest-of-world differs from US market cars I think...
I went through a number of revisions before Gaugefaces.com matched my Japan market icons and similar.
This is a screen cap of their final, to perhaps compare:
After shipping, I also noticed the 50 Jahr also has that little arrow icon, pointing to the filler side.
Not something 100% necessary I guess, but with our CX-5 on the left (and with the standard arrow icon too) it might have been worth the ask?
I realize too, out this weekend later in the day, the black face should also avoid the unfortunate loss of legibility that sometime happens when the lights are on, and the setting sun is behind you, white-on-white not very good for contrast I guess.
Though, it wasn't until I looked at the photograph, I realized the digits are ringed in black perhaps to avoid this concern (a little):
Good luck if you go ahead with it, and post pics!
I also bought the supposed necessary tool for removing the gauge face ferrules from the rear, which I will see if strictly necessary as some just swing on them from the front:
It would also be good to see how your R cluster is removed, vs. S too...
Go for it!
A moderately easy reversible mod too...
Depending where you are, some icons in the cluster vary - as well as with the km vs. furlongs, and C vs. F temp range, the ABS and BRAKE warning light icons also are different - essentially rest-of-world differs from US market cars I think...
I went through a number of revisions before Gaugefaces.com matched my Japan market icons and similar.
This is a screen cap of their final, to perhaps compare:
After shipping, I also noticed the 50 Jahr also has that little arrow icon, pointing to the filler side.
Not something 100% necessary I guess, but with our CX-5 on the left (and with the standard arrow icon too) it might have been worth the ask?
I realize too, out this weekend later in the day, the black face should also avoid the unfortunate loss of legibility that sometime happens when the lights are on, and the setting sun is behind you, white-on-white not very good for contrast I guess.
Though, it wasn't until I looked at the photograph, I realized the digits are ringed in black perhaps to avoid this concern (a little):
Good luck if you go ahead with it, and post pics!
I also bought the supposed necessary tool for removing the gauge face ferrules from the rear, which I will see if strictly necessary as some just swing on them from the front:
It would also be good to see how your R cluster is removed, vs. S too...
I won't do it myself, dont trust my skills. There is a company that will do it for a fair price. I had them do gauges in another Porsche a few years ago.
I contacted your company and am waiting to hear back on the turnaround time. I think I'd do the gauges you chose but not have the green markings below the numbers, just keep it looking like the old 911's VDO gauges.
Makes sense!
I too was contemplating taking to a local shop who just completed a friend's 964 similarly - the trim ring holding the glass on air-cooled 911 gauges is a real mess if not done correctly.
I may yet do so, if I get into trouble...
Depending on the market, year, and model, the red / green warning lines on the SWB 911s varies too.
Here's a sample, and my 356 and a friend's 912/6 similarly equipped:
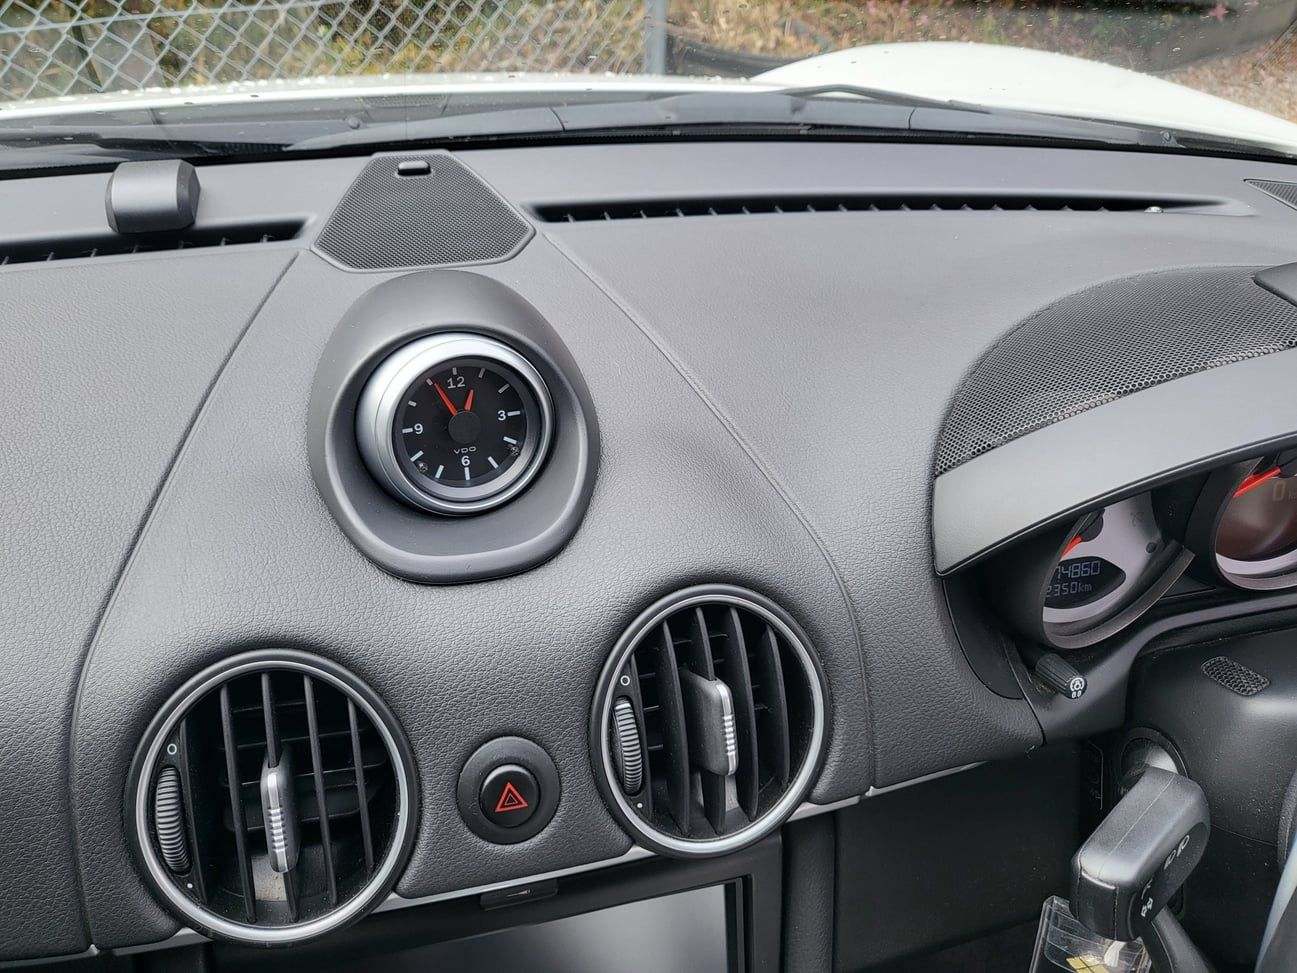
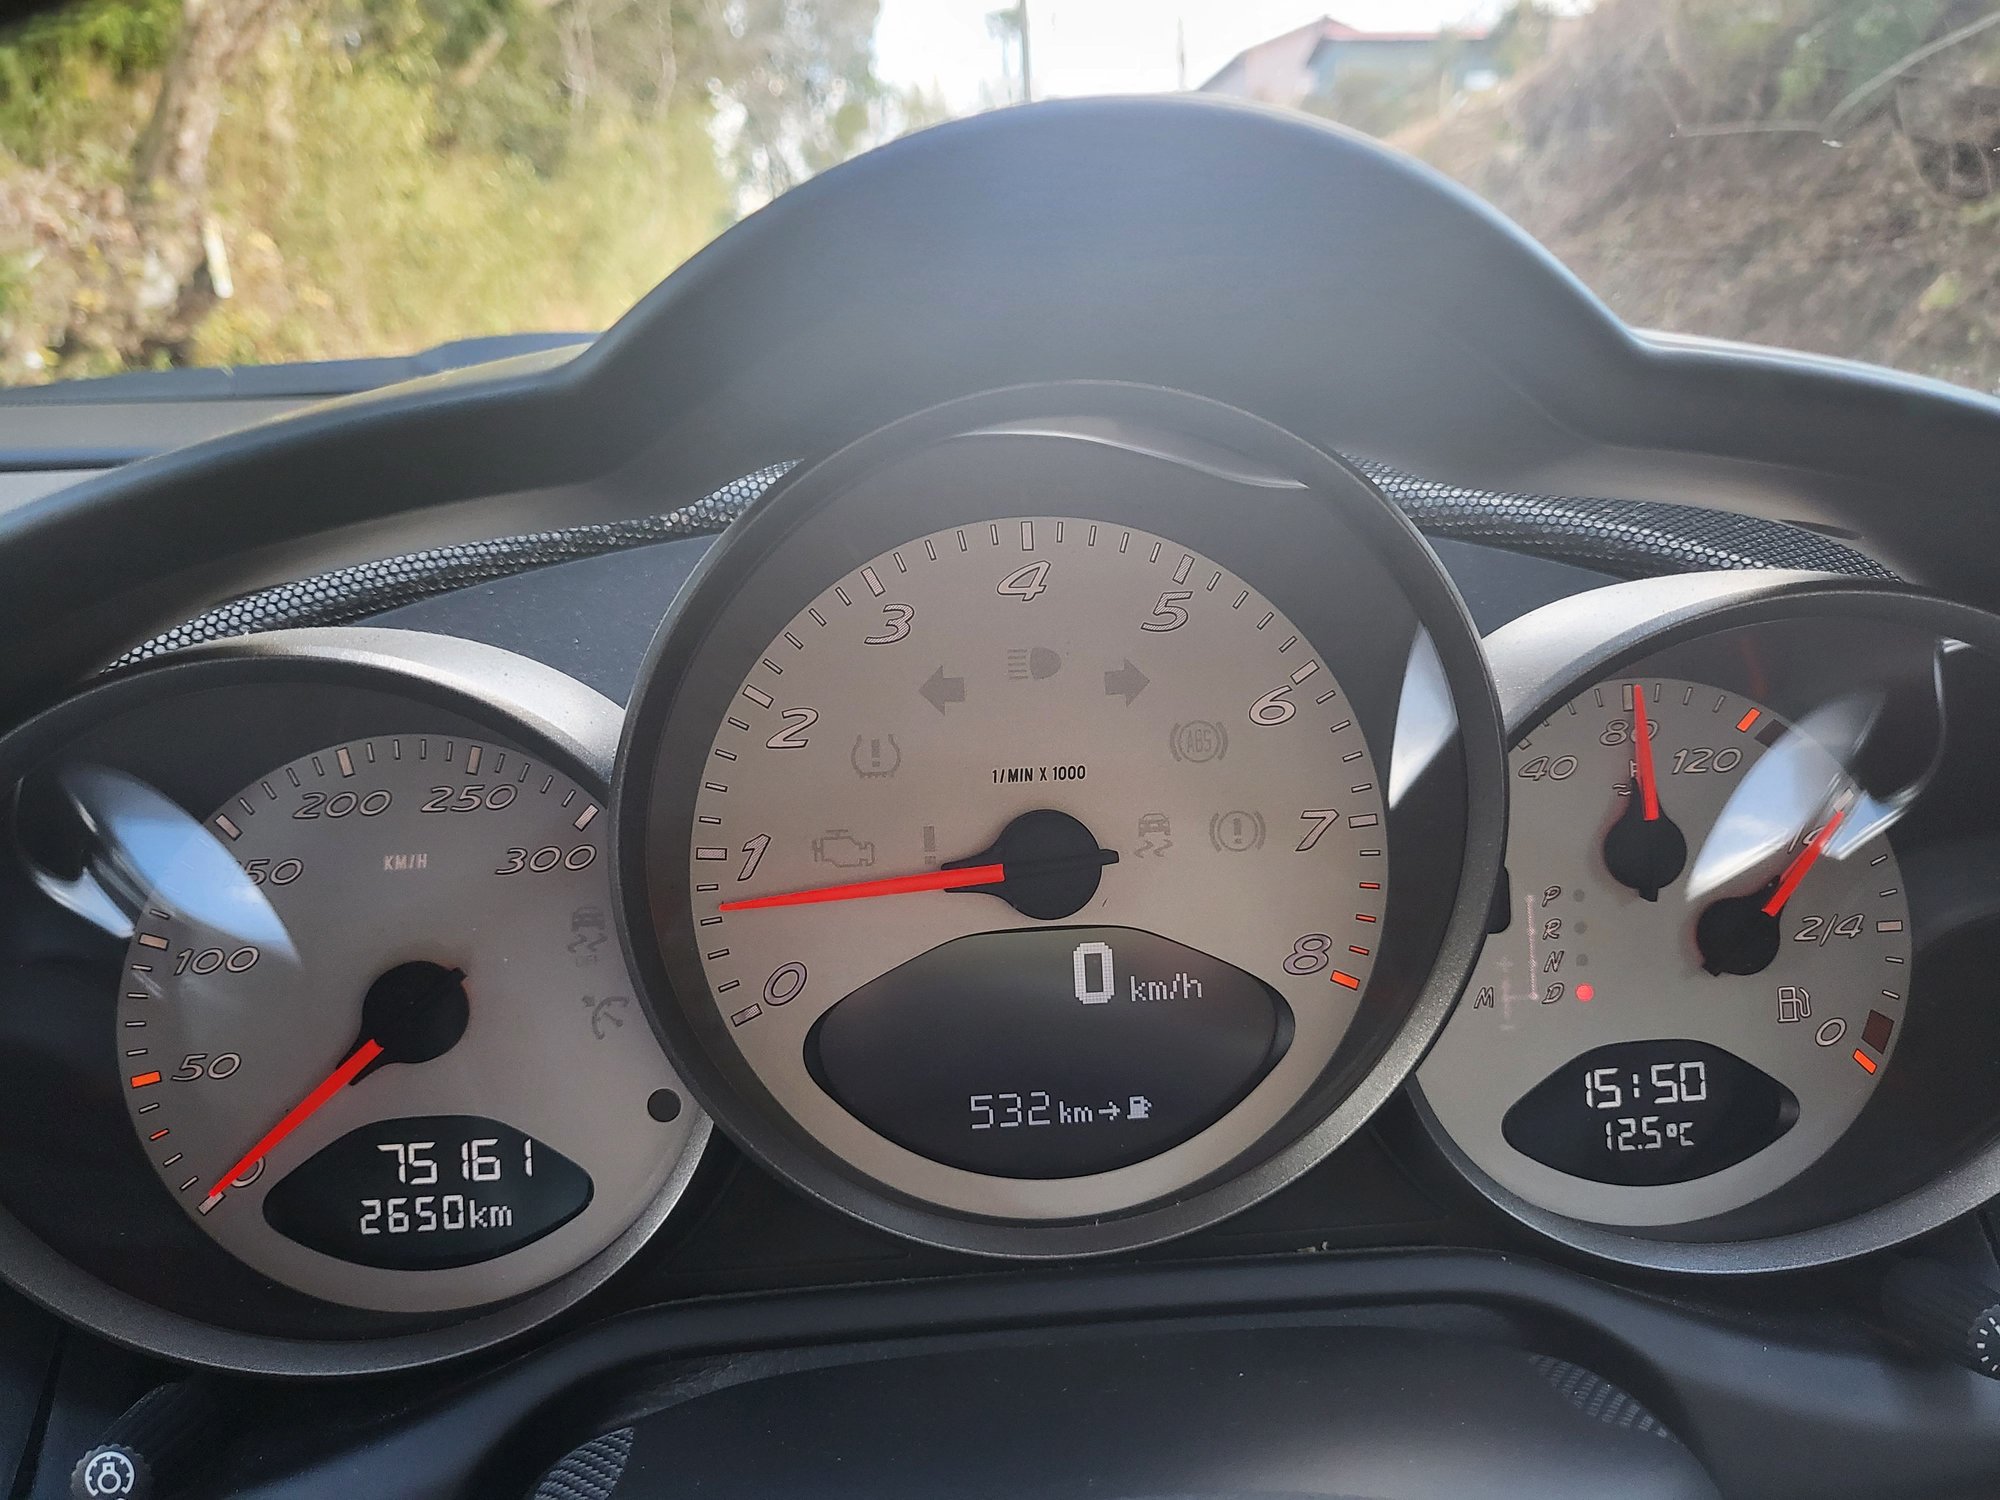
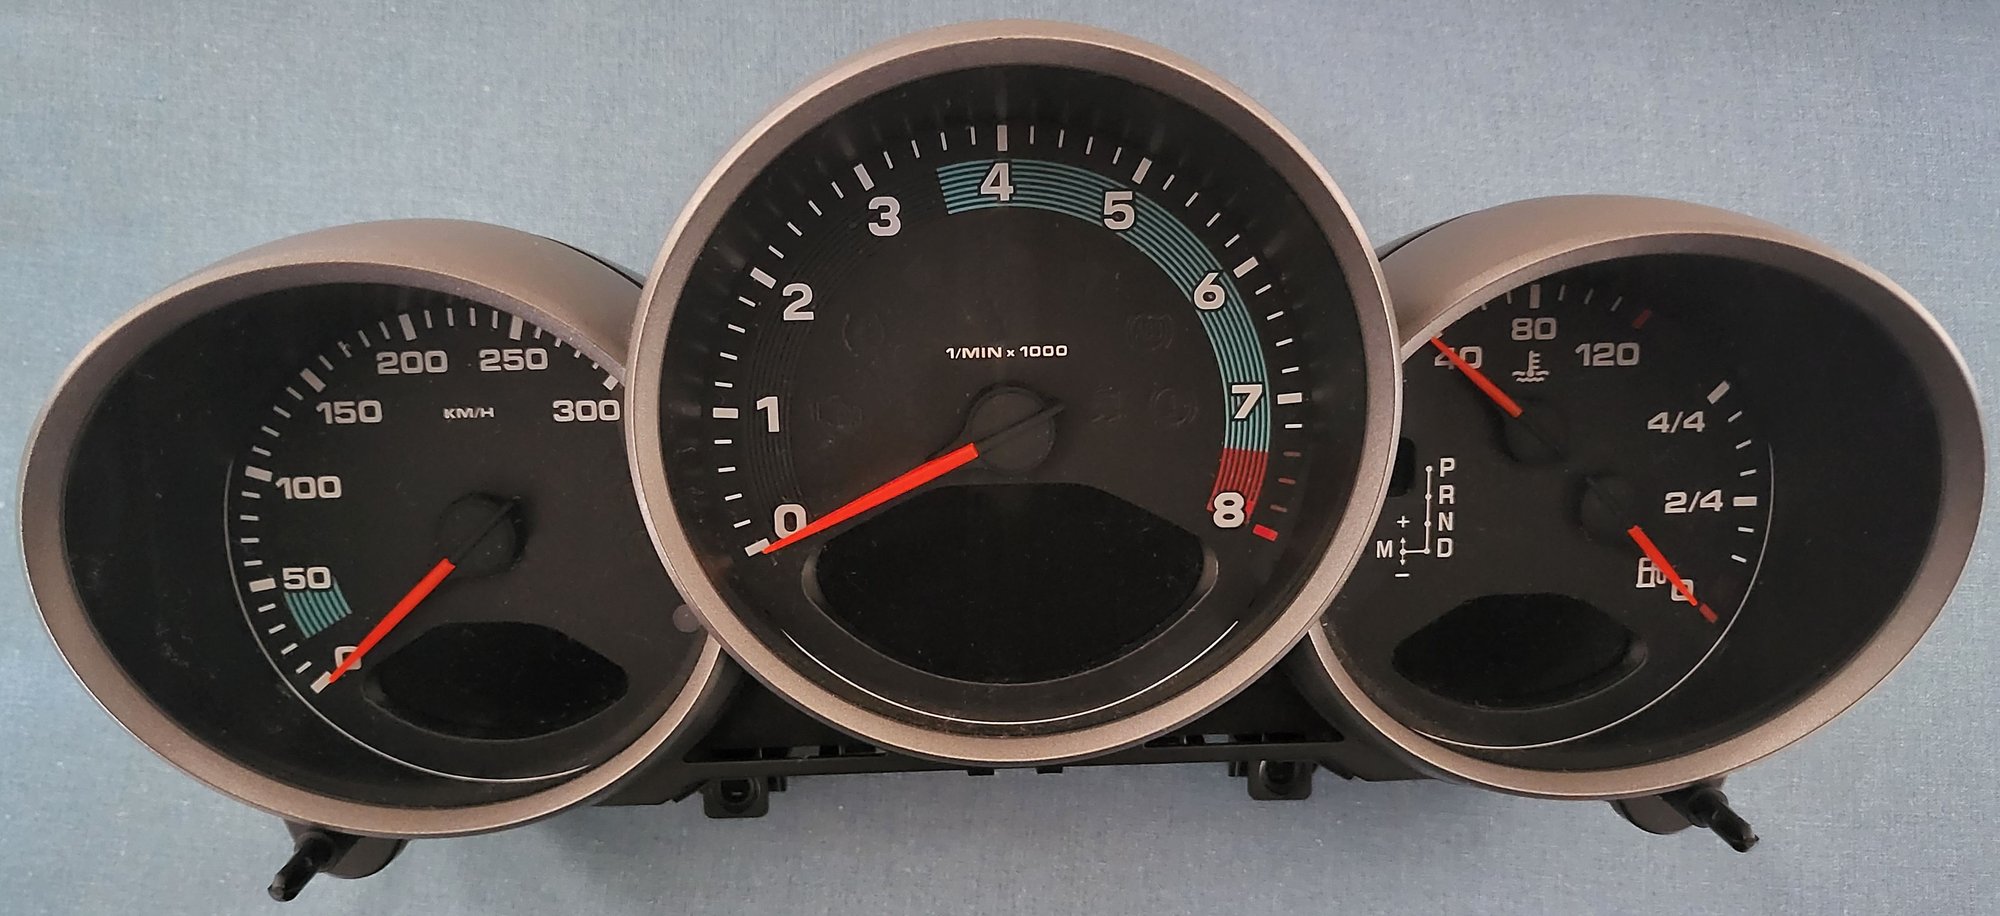
Before.
Mismatched replacement clock and main instrument cluster face color.
Never really bothered me, but I was always on the look for a possible solution.
Replacing the clock was obviously the easiest, but I could not find the same version with the white face and through-the-lens buttons.
That is, until after I had found and ordered a black gauge face overlay from gaugefaces.com
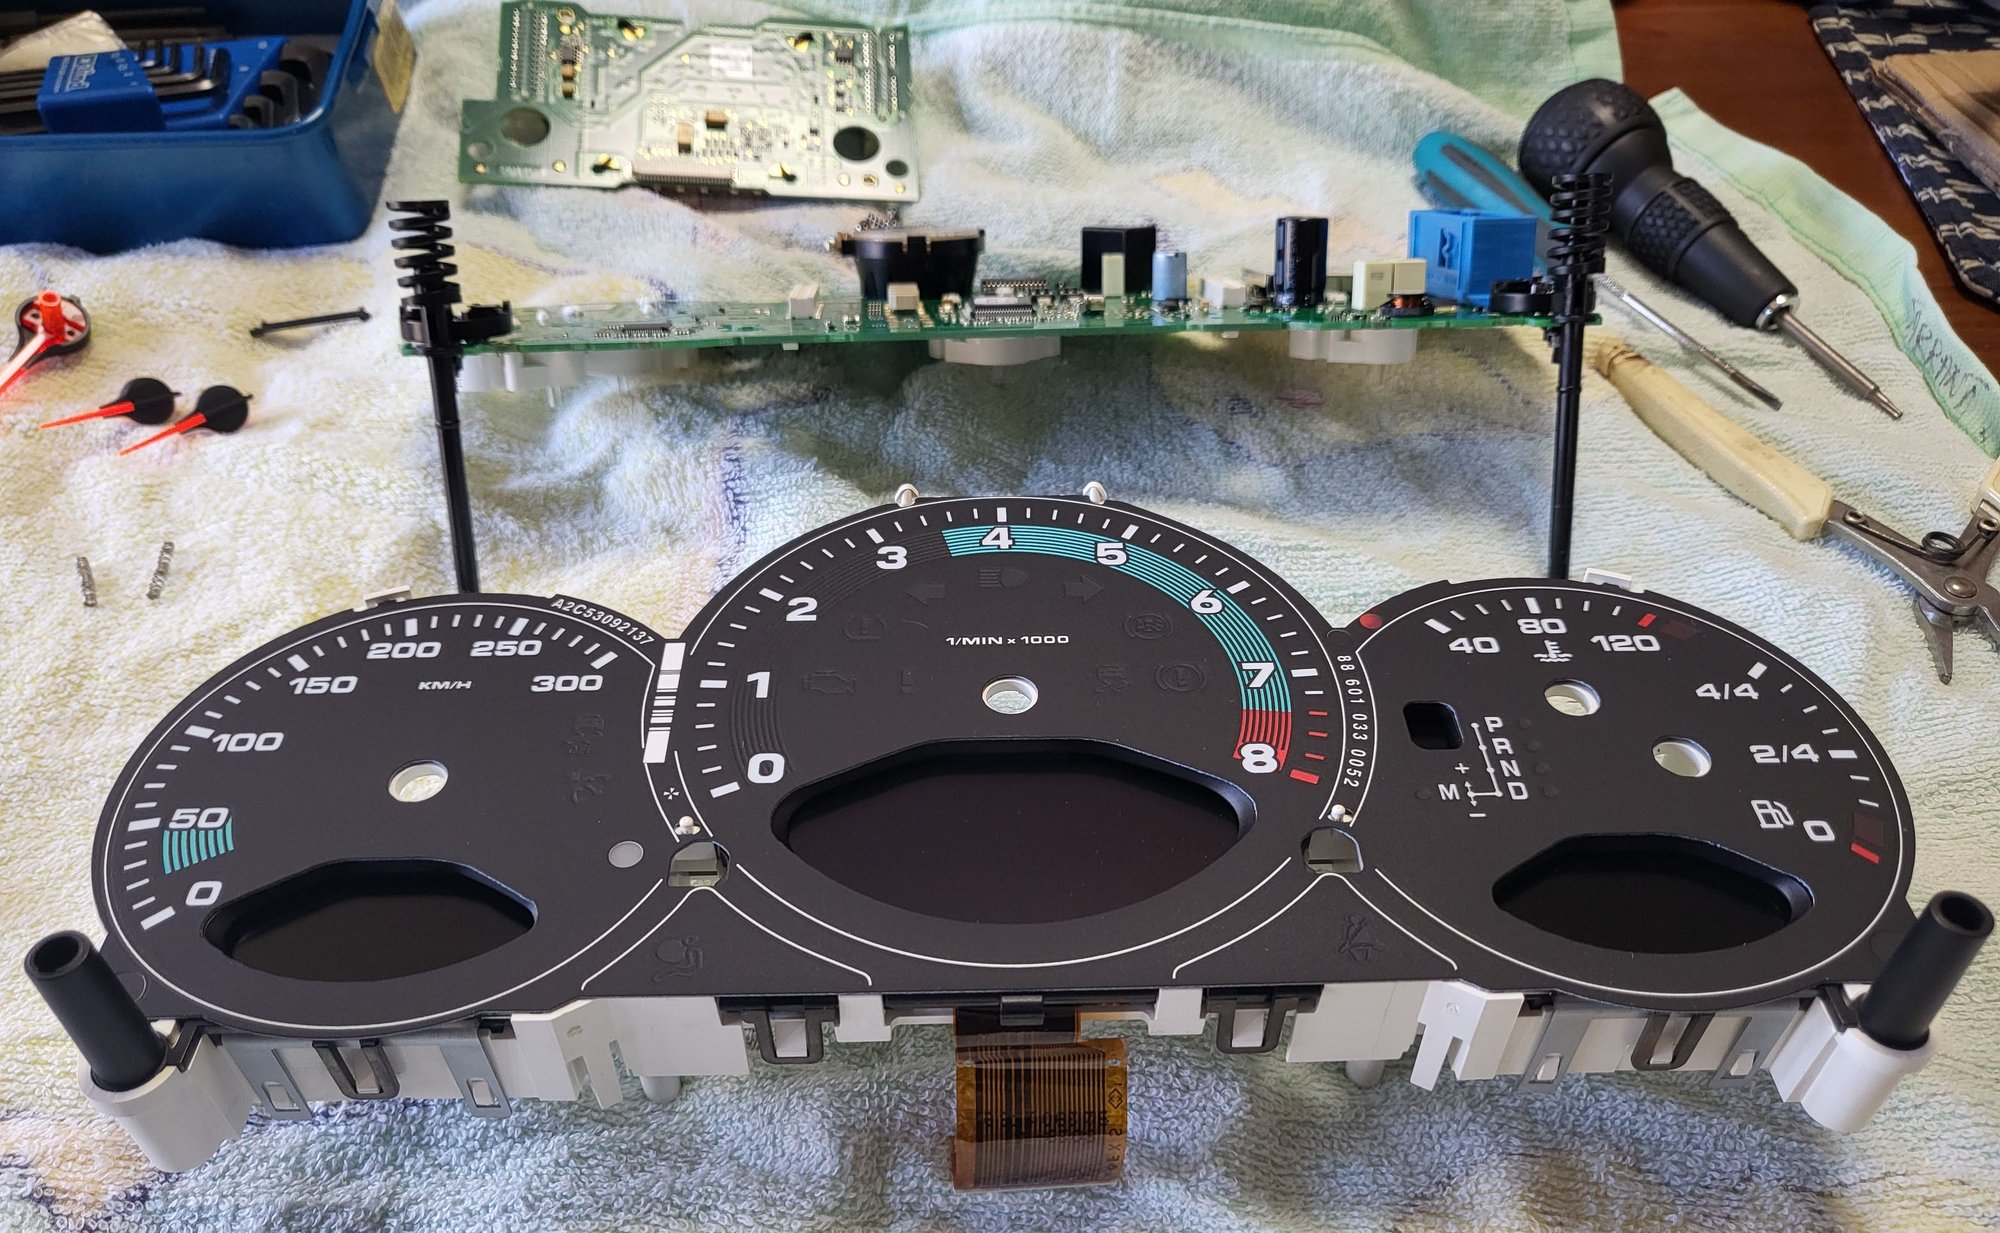
After.
Gaugefaces.com offer a user defined set of options, so obviously I needed the ROW km/h and degrees C.
The 356-style highlight lines as an option were an added bonus to me.
There are a number of videos and instructions on the internet on how to remove the instrument cluster, but only one suggests to remove the steering column top cap to start.
Lowering the steering wheel, and pulling to its rear-most position, with the top cap of the steering column removed definitely gave me the most space and leverage for what might have been the most difficult step - removing the lower dash in-fill trim, below the instrument cluster.
Even with use of soft trim removal tools, the only effective way to remove seems to be to pull straight back with maximum traction and force.
My fingers ended up being cut and bruised but it did come away eventually - over an hour of wiggles and pulls.
See below for possible kludge to assist though.
With the trim moved to the side, you can then see the x2 T20 machine screws that secure the lower edge of the cluster.
I also removed the trip computer and clock adjust ***** here too - they pull straight off easily.
You can also see the pivot point on the steering column to pull the wheel up and away from driver in a heavy crash.
With a trim removal tool, and again lots of wiggling, the two remaining clips - closer to the upper edge of the front side of the cluster, can be worked through.
It was after this effort I realized a long thin cable tie, or possibly a length of pallet strap could be wiggled down behind the cluster (as there looks like sufficient slot space).
Instead of pulling on the less assembly of the cluster, pulling on the cable tie or pallet strap wrapped around the front facing side of the cluster, might be easier, and less stressful to both technician and cluster.
Perhaps too, the same technique can be used on the first piece of dash trim to be removed as well?
You can see the location of the two horizontal slots, that hold the cluster in place, and the possibility of how to wiggle a strong flat ribbon for pulling the cluster rearward might work.
Cluster on the bench (kitchen table).
Online vids show how to remove lens assembly, mentioning the outside lower edge clips, but not that the upper edge clips are embedded inside the assembly and I can only see the best way to remove was to tilt slightly upward as pulling away.
The gauges have no stop or detent for their zero position.
To avoid imparting any rotary movement, so thin card and a small trim removal tool worked perfectly.
There's plenty of vid about on how to separate the PCBs, remove gauge face overlay and replace.
All relatively easy to follow.
I will comment though, removing the black plastic ferrules around the needle shafts should be done properly with a removal tool from the rear, and do not try and pull them forward from the front - they will certainly break and become unusable.
Night illumination is effective, and although I prefer things as simple as possible I like the little bit of extra for the gauges.
Problems; yes one!
Unfortunately, the gauge face from gaugefaces.com is a multilayered build, and the otherwise clear substrate for the warning lights and the ambient light sensor was built with an unnecessarily dark tint.
This makes the cluster think it is dark out, and it autodims the LCDs accordingly, so in daylight they are quite hard to see.
It also makes the warning lights harder to discern.
You can trick the sensor by shining a bright light through the ambient light sensor hole (that dot on the bottom right of the speedometer), and I used this and replacing with the OEM overlay to verify I hadn't broken anything, and the issue was with the new gauge face overlay instead.
Comparing the transparency of the OEM and the replacement side-by-side also confirmed.
I've written to gaugefaces.com and they replied a replacement would be sent, and unfortunately have not heard from them since... it's only been two weeks, so perhaps they are busy with other orders of similar.
If a replacement is shipped, I will try the strap removal technique on the cluster and the lower dash trim as well...
Excellent work! Cluster removals are always a pain but worth it as you look at it every. single. time!
Indeed!
Gaugefaces.com have just advised too, they shipped a replacement 10 days ago, and with the tracking number, soon to arrive it seems.
Looks like good customer service there to me, just perhaps bad spam filtering somewhere.
Originally Posted by The Duke
2x on the exceptional work! Congrats and thanks for the step by step.
More to add on the strap / cable tie to remove cluster process for new gauge face then too...
Random visitors to a local michi-no-eki (roadside station) and the overflow parking lot.
It was a cold winter day, and the Targa was topless - which sounds nasty, but it is a really pleasant experience especially in the countryside. Heater on, windows up, you get to feel every change in temperature as you drive up and down the hills, into valleys, and beside rivers. With an ever changing series of things to smell, trees, cut grass, restaurants, forests, wood fires, it all comes alive.
Loved it!
I suspect the 300ZX driver's Sunny was in the shop, and I spoke briefly with the GTV driver, as there's something I really like about the Daruma series I will try and contact him again for a magazine feature in a more suitable location...
Lazy, sunny, Sunday, and with gaugefaces.com nicely shipping a remade gauge face overlay (with an untinted ambient light sensor window), I updated:
After being removed a number of times previously, the trim and cluster all came away easily, and no special tricks needed.
Though, I did investigate if some pallet strap could be fed behind the cluster to assist pulling off, and it looks possible.
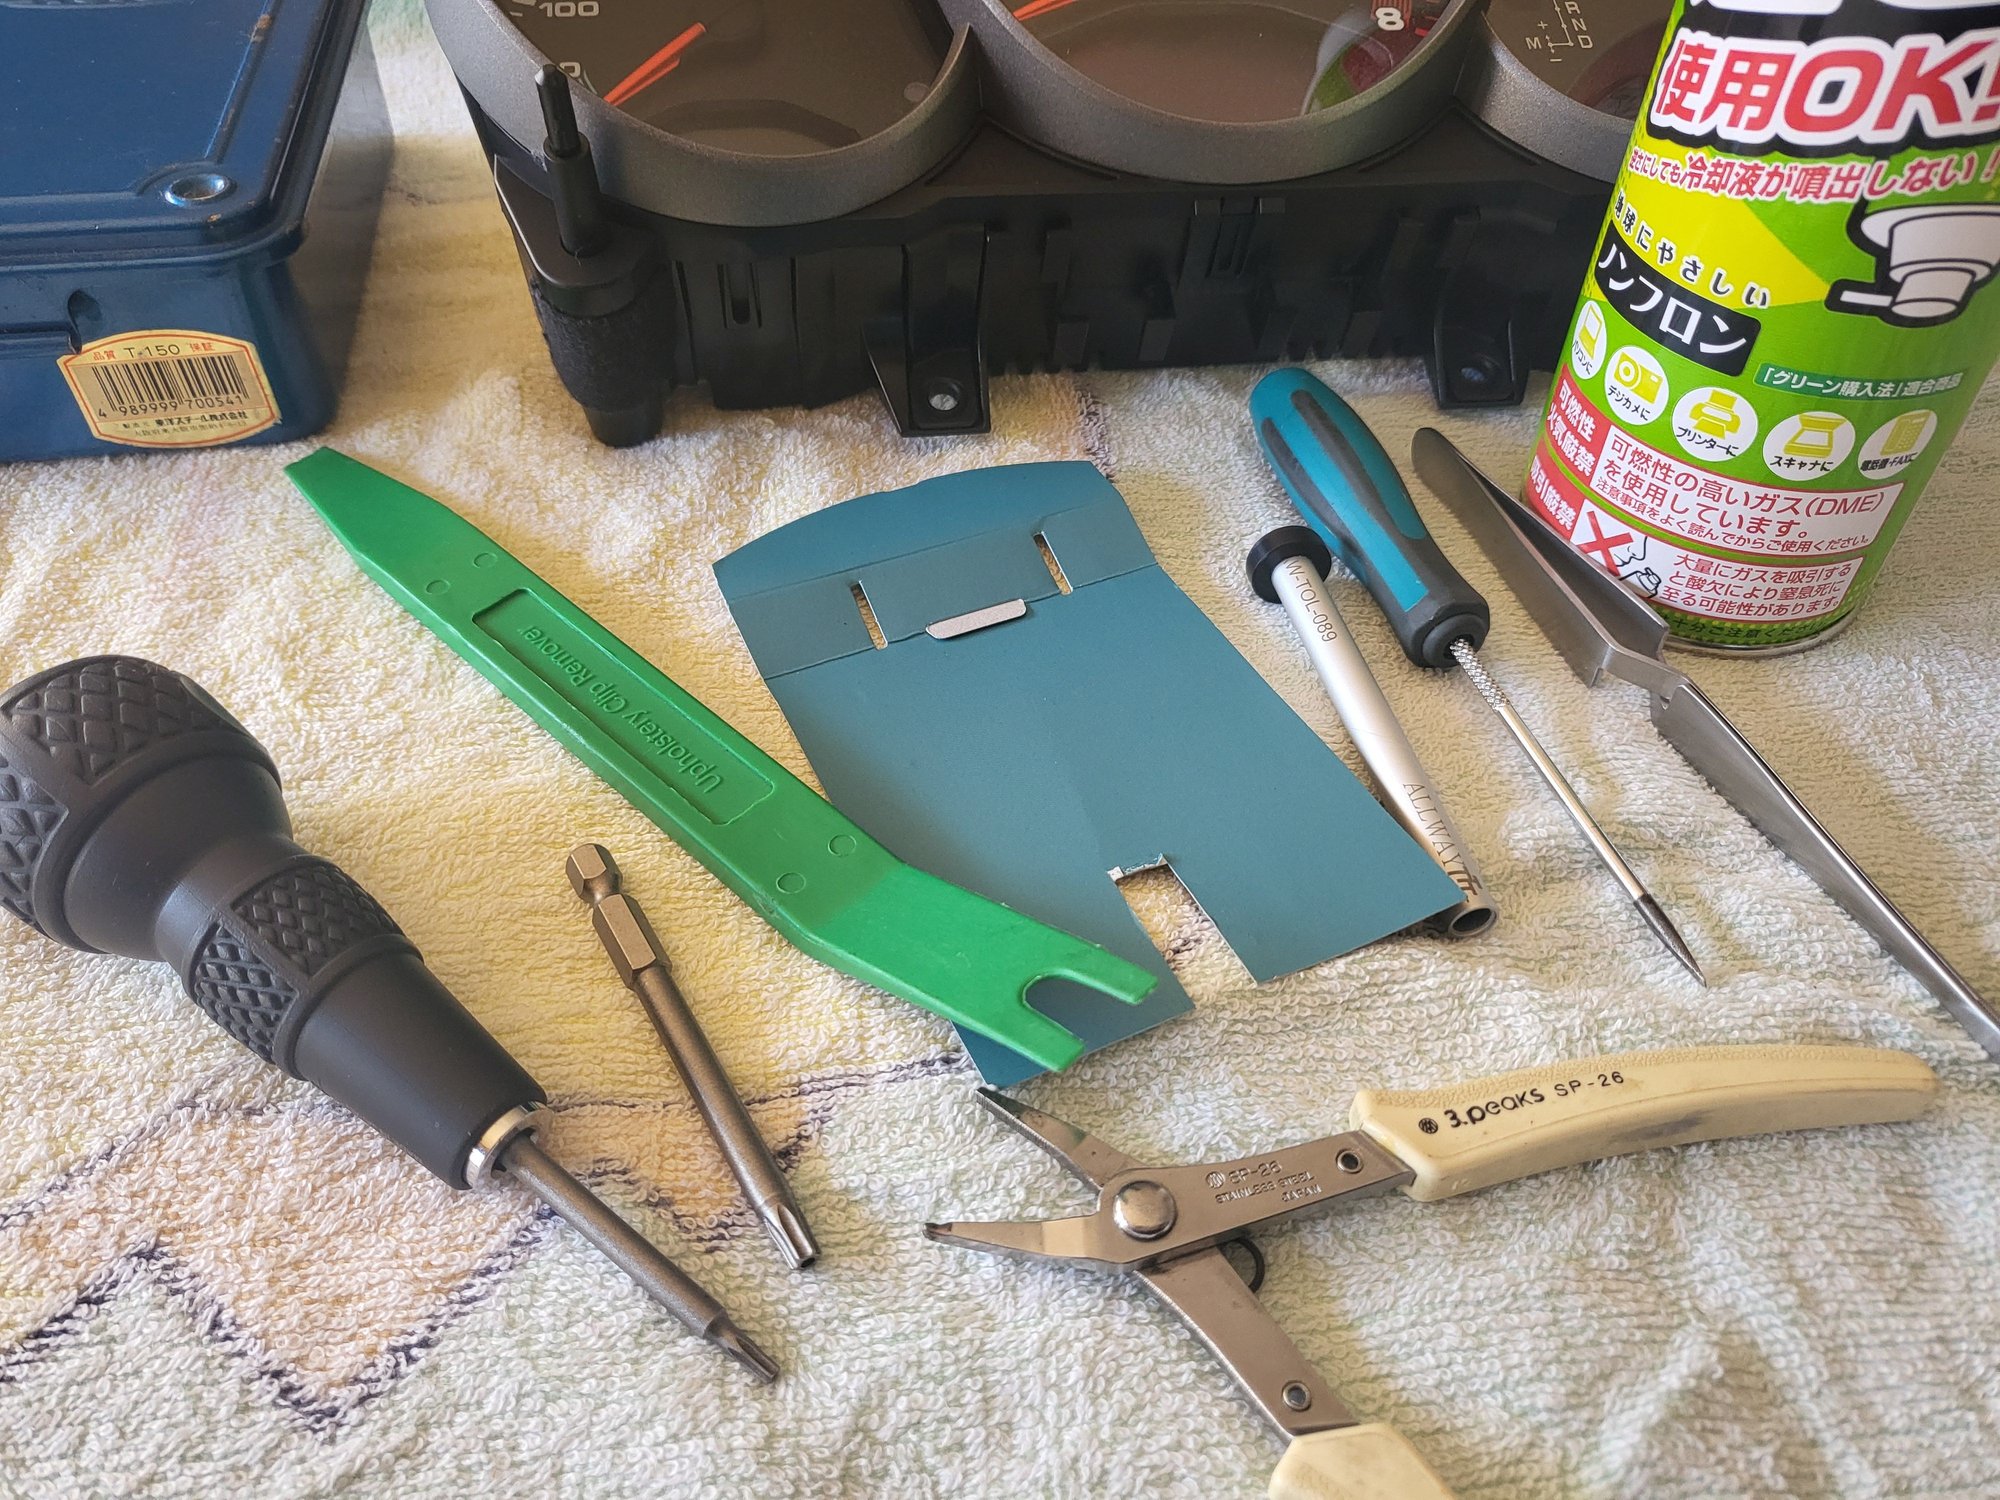
Tools needed include T-10 for steering column cover and instrument cluster separation, T-20 for instrument cluster to dash screws, small U-shaped trim removal tool and cut card for needle removal, needle shaft ferrule removal tool, small minus driver and flat nosed pliers for circuit board spring tab manipulation. Perhaps most importantly, some latex gloves and air-duster to keep both face and glass inside and out clean and lint free.
New overlay applied, and you can see the now transparent ambient light sensor window on the speedmeter at four o'clock.
The sharpness of the printing and overall feel of the work from gaugefaces.com is excellent.
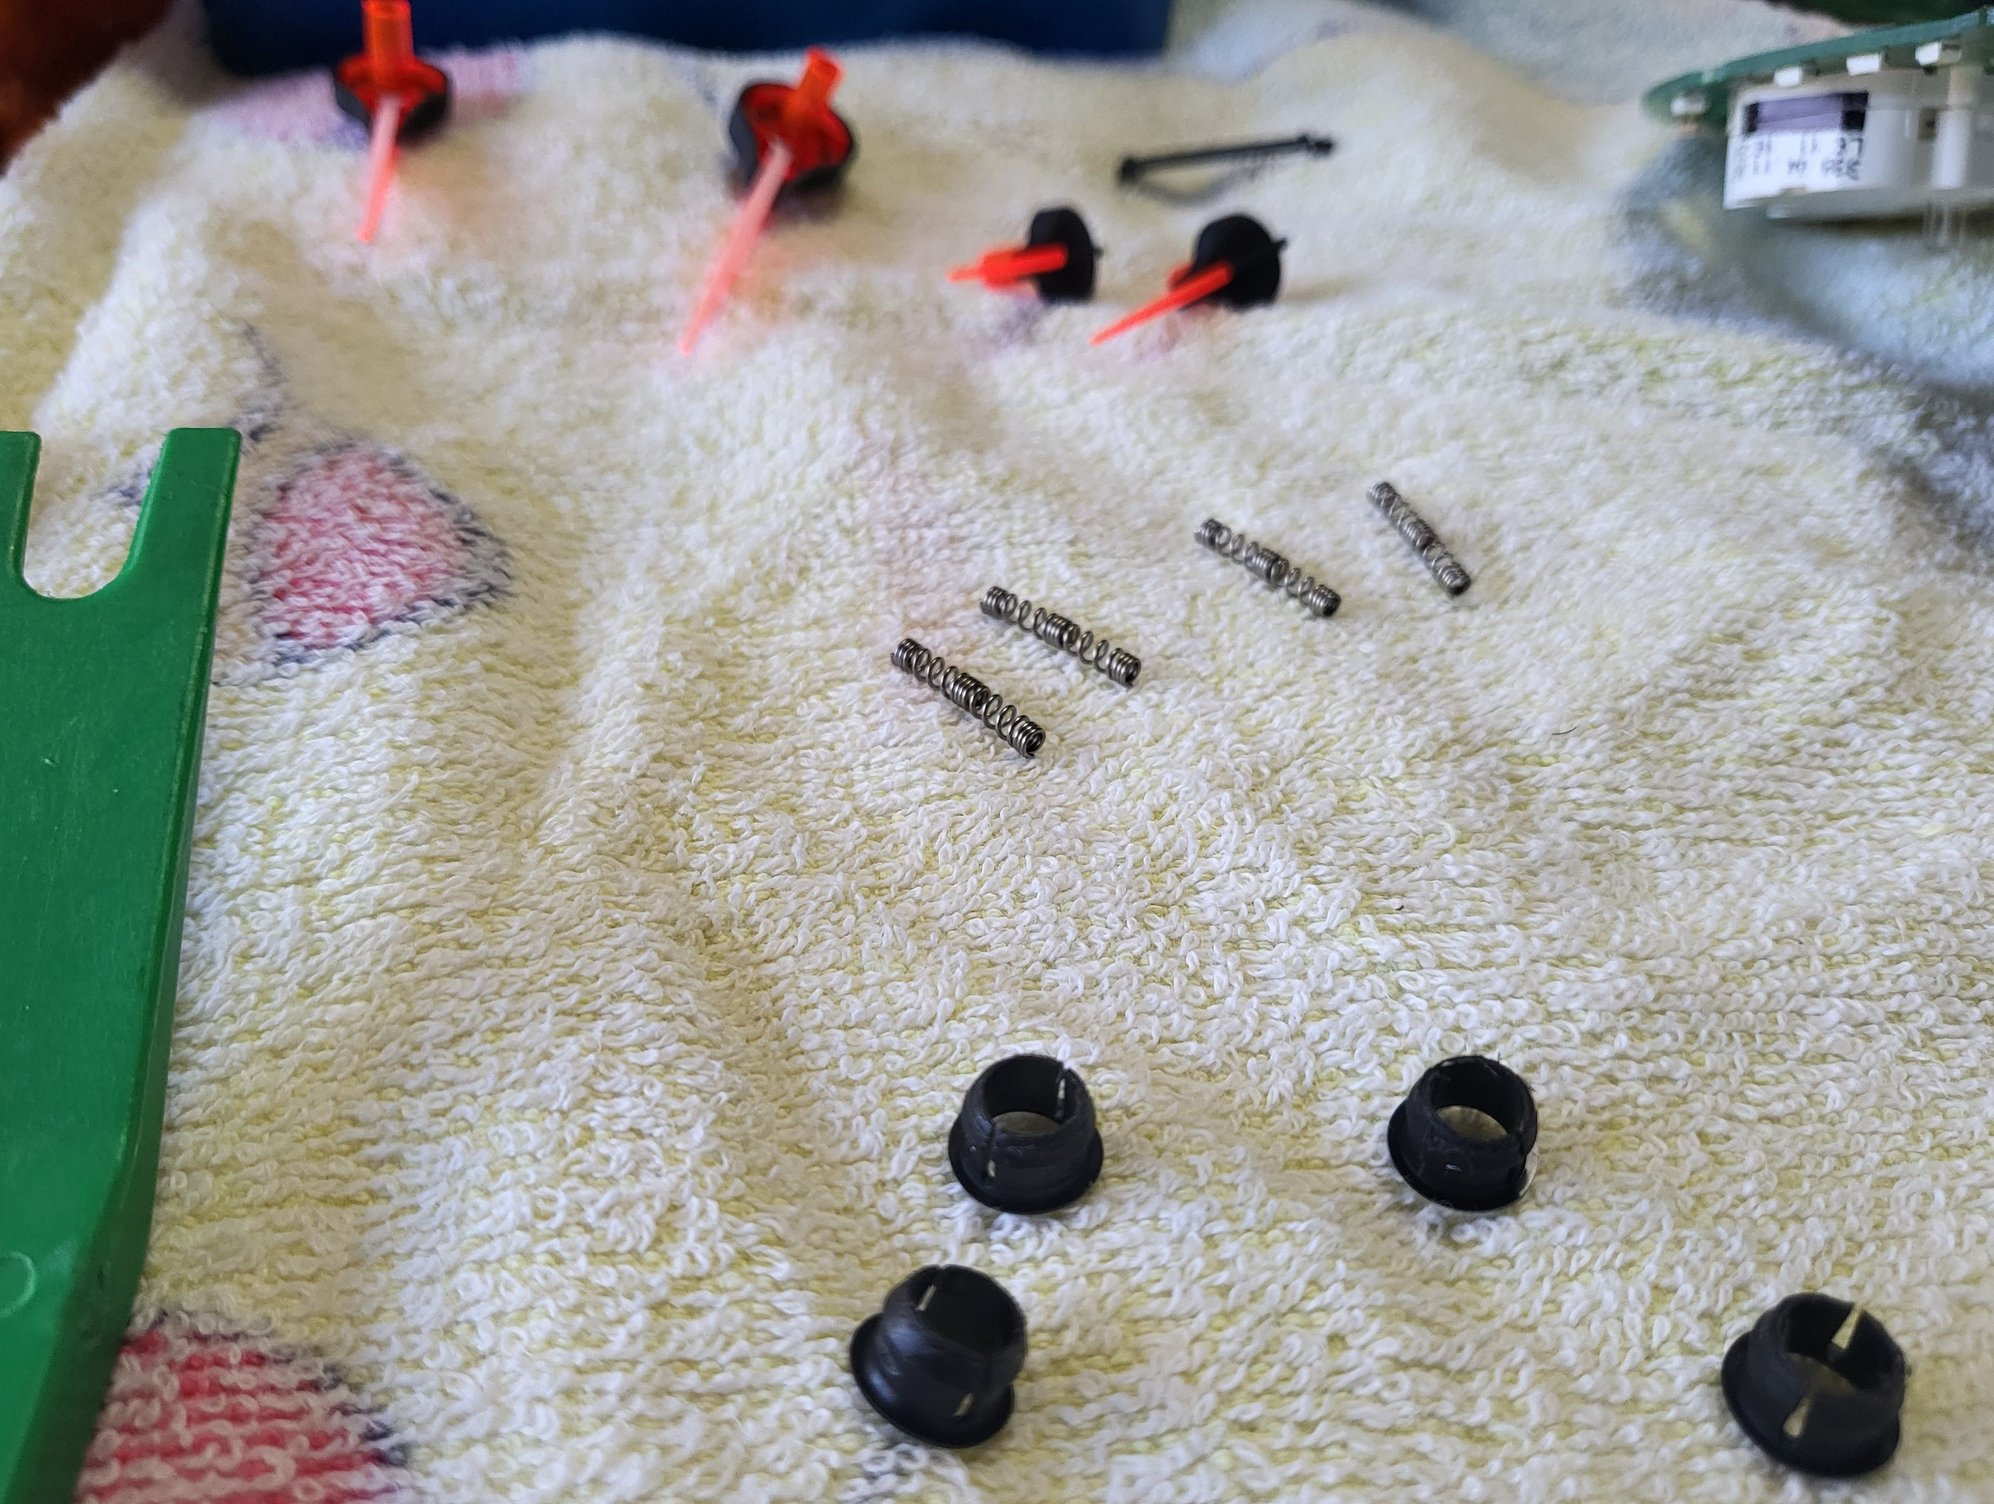
Some of the fiddly bits; needles, kept in order, to be reapplied at the zero position, black needle shaft ferrules that require the special tool to remove to avoid their mangling, and this is recommended as these ones have now been removed three or four times intact, and the four, easy-to-forget, circuit connection springs.
I note too, in reinstalling the needles, with power off their resting position is at the lower edge of their zero markers, and with ignition on, their resting position is at the upper edge of their zero markers.
Ready to go back in the car, and proper in-car pics to follow...
Tokyo Wan Aqualine tunnel for the trip back home from the Tokyo apartment.
With the 997 Research autolights module, the ten or more tunnels on the run are non-eventful (no more dicing with trucks, shifting, or lane changing as turning on and off lights).
The gaugefaces.com overlay looks great lit up too.
Clear run out over Aqualine bridge.
We counted maybe 200 cruisers coming down off the touge.
Ambient light sensor window, confirmed properly operational in direct sunlight, switching LCDs to maximum brightness with no probs.
Textures, colors, and illumination are all nice on the new overlay.
The warning lights are still a bit softer, but you can certainly see them OK.
Love the Datsun 1200s (probably called A110s in Japan)! The yellow one is particularly cool with the wheel flares. I used to own a 1200 that was nearly the same yellow as the one pictured. It got me through high school, won a lot of autocrosses (and a few championships), and I built it into my first race car. I won a bunch of races and championships with it doing that as well. Not very fast, but it was a lot of fun to drive because it was so light; 1560 lbs minimum race weight - about half of what our Caymans weigh!
Love the Datsun 1200s (probably called A110s in Japan)! The yellow one is particularly cool with the wheel flares. I used to own a 1200 that was nearly the same yellow as the one pictured. It got me through high school, won a lot of autocrosses (and a few championships), and I built it into my first race car. I won a bunch of races and championships with it doing that as well. Not very fast, but it was a lot of fun to drive because it was so light; 1560 lbs minimum race weight - about half of what our Caymans weigh!
We call them Sunny, mostly anyway.
I think the chassis code is B110, as an A110 is a French Cayman?
You're right about their competition history too, as they were and still are, heavily raced due perhaps to the somewhat sleek shape, homologated disk brakes, and a 'bigger' 1200cc engine?
I thought I had a tonne of Sunny coupe pics, but could only find these...

 02-11-2024, 09:31 AM