When you click on links to various merchants on this site and make a purchase, this can result in this site earning a commission. Affiliate programs and affiliations include, but are not limited to, the eBay Partner Network.
Cayman S 987.2 Camshaft Position Sensor (Hall Sender) Installation
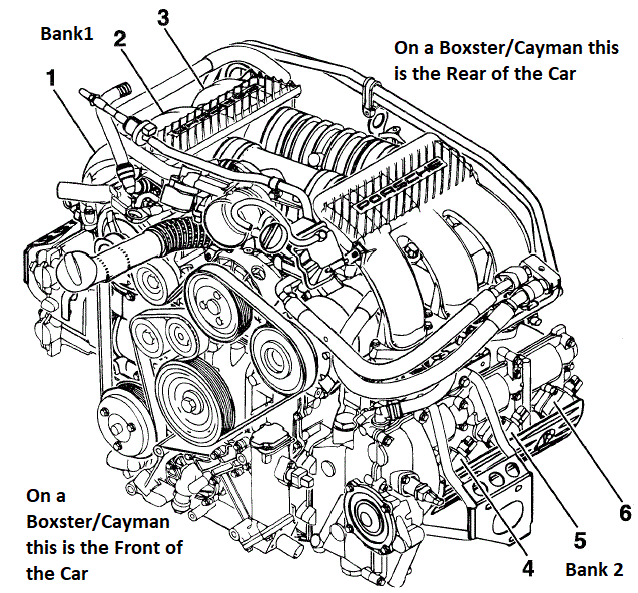
This is my first post to Rennlist so I hope it is helpful. After struggling to find any information on replacing the 987.2 Cayman S Camshaft Position Sensors (aka Hall Senders), to help me correct the 2 codes indicating I had Bank1 Camshaft Position Sensor issues (P000A and P0016), I decided to post my experience to help others who may be in the same situation as I was. I looked in all the suggested places for other Porsche models however on a 997.2 Cayman S these sensors are NOT found behind the seats behind the carpet/firewall and NOT found under the airbox. They are found near the spark plug ignition coils by removing the rear wheels and shields.
This took me about 45 min to an hour per side (bank) taking my time and figuring things out as I went after jacking up the car to start the process.
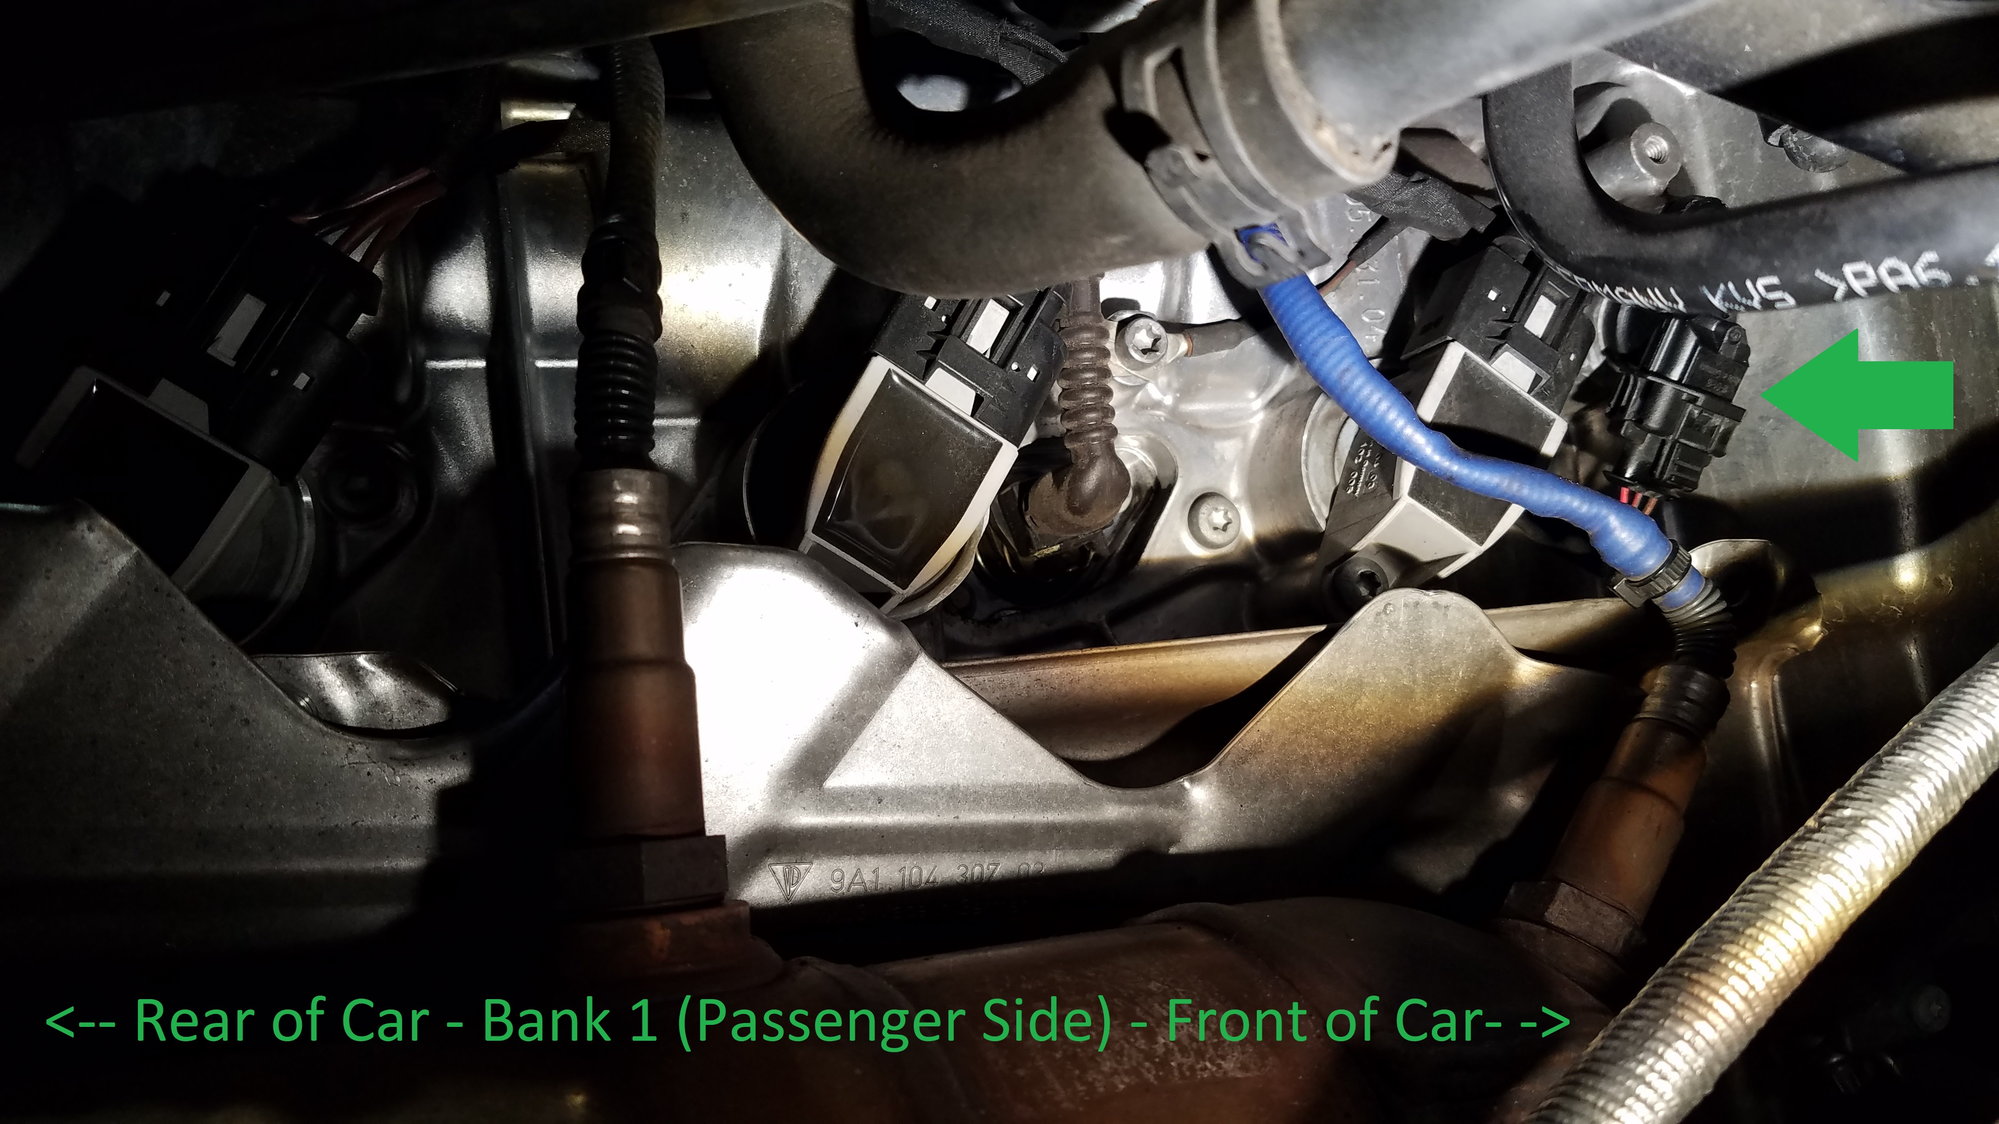
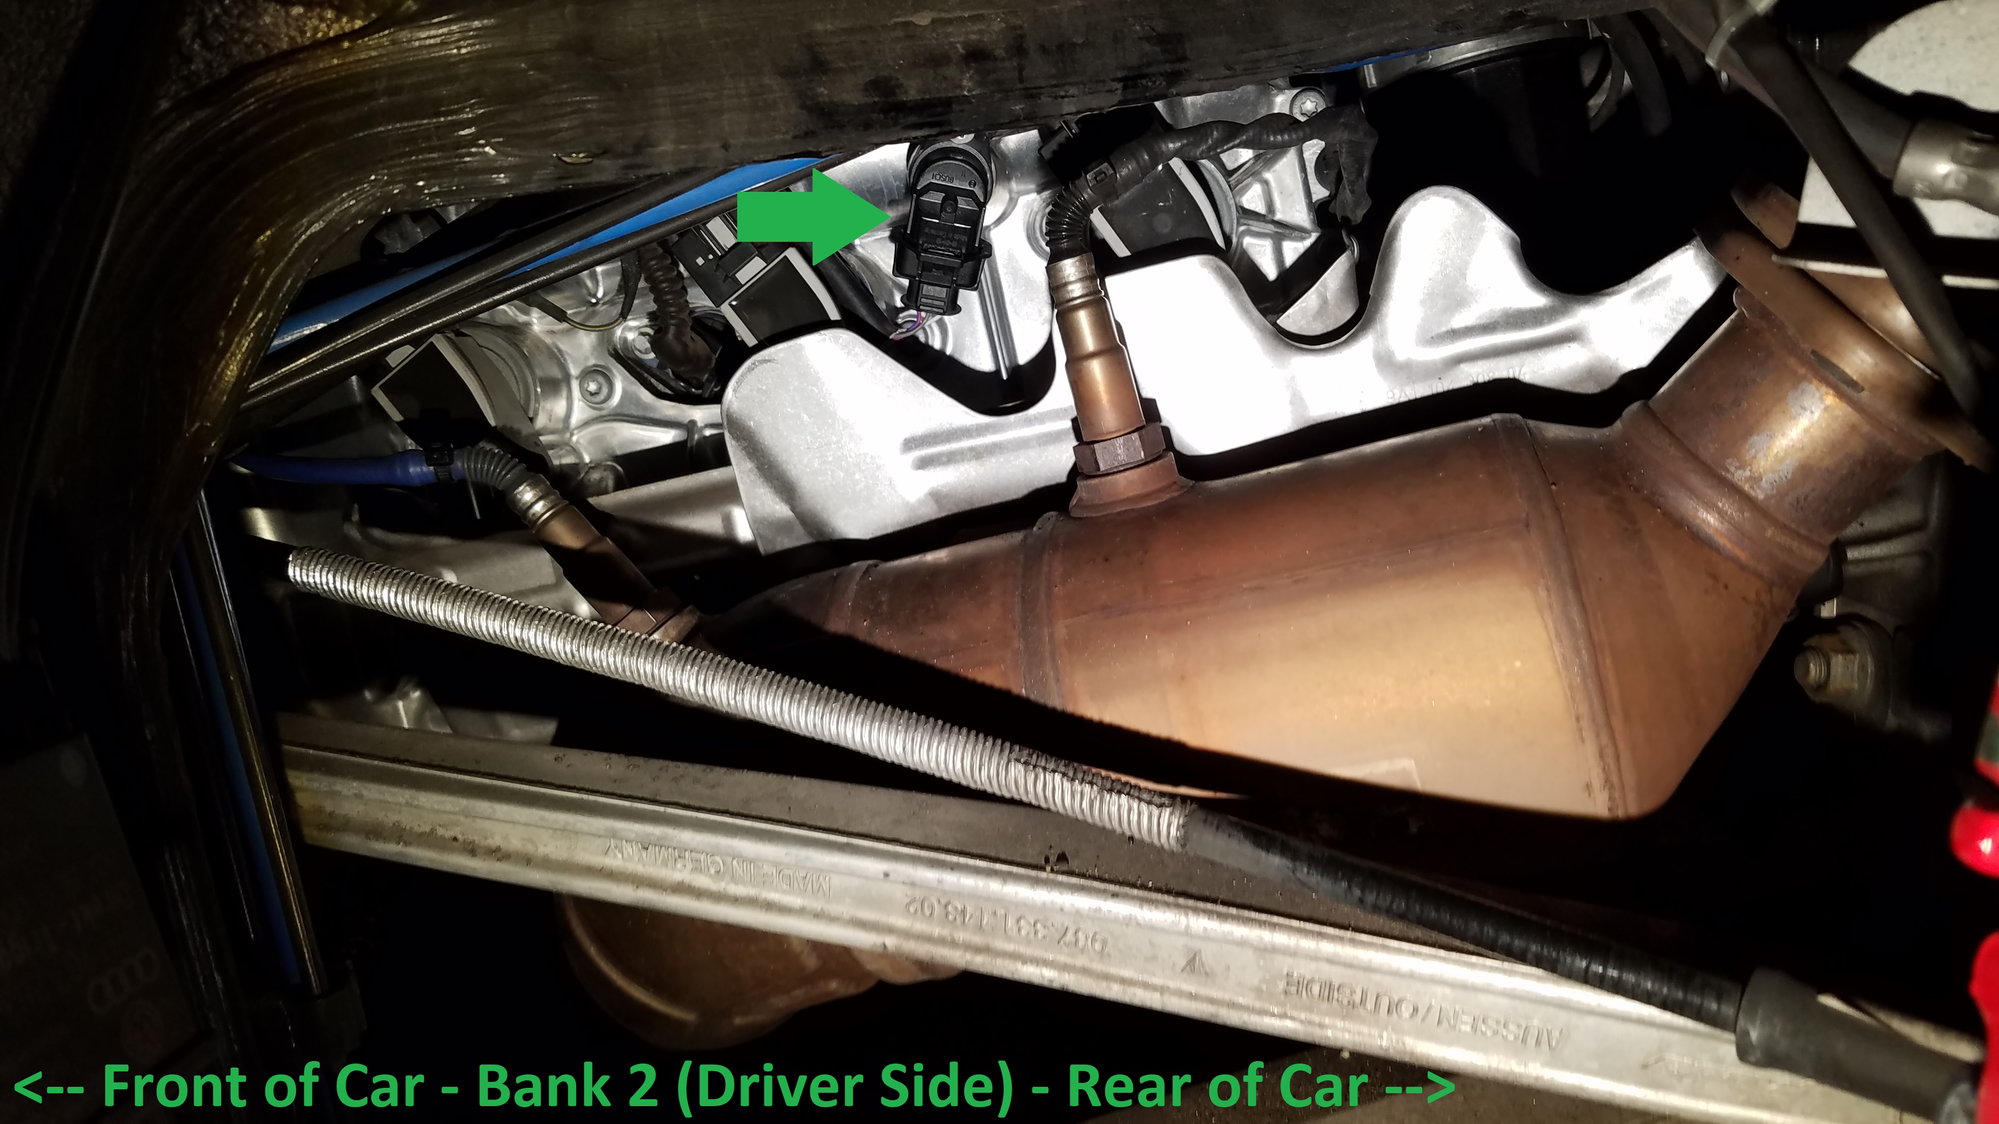
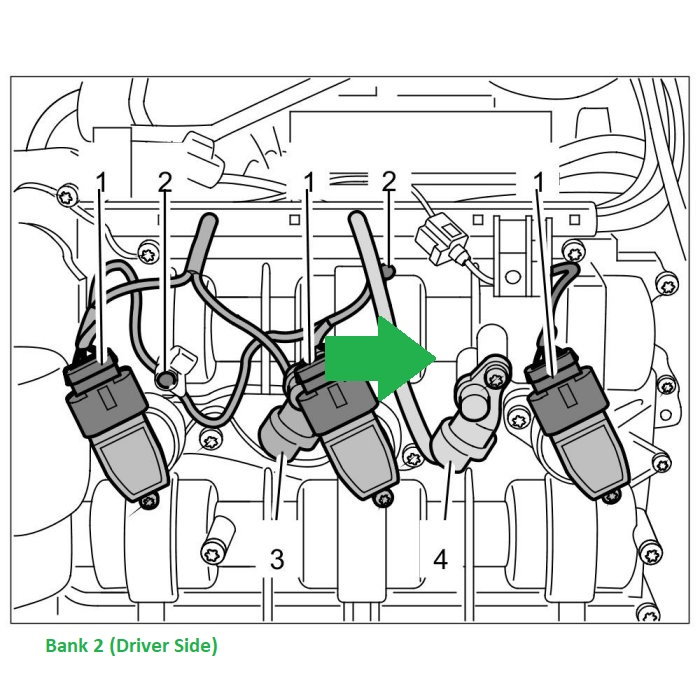
Bank 1 (Passenger Side) � a little more difficult as the Camshaft Position Sensor is to the right of Cylinder 1 (toward the front of the car) and a little tough to get the tools in there � see pic Bank 2 (Drivers Side) � a little easier as the Camshaft Position Sensor is in-between Cylinder 5 and 6 slightly more toward the rear of the car with easier access for tools � see pic
Steps per side (per bank):
Remove wheel lugs and wheels - 19mm socket
Remove wheel well dust shields - 10mm socket (3 nuts) and Internal Torx T25 (3 screws)
Remove upper heat shield and slide out of the way (This doesn�t need to be fully removed just slid out of the way) � External Torx E10 (2 screws)
Remove the Camshaft Position Sensor and o-ring (make sure you remove this as it can get stuck in the hole � you should be able to pull out with your fingers, don�t use any sharp tools as it may scratch the surface and the new o-ring may leak) � you may see some oil leak just wipe with a clean rag - Internal Torx T30
Unplug the Camshaft Position Sensor (you will need a tool such as a small screwdriver to pull back the tab � pressing on it will only work after you release the tab with a screwdriver) � This step can be done before step 4 or after depending on what seems easier for you.
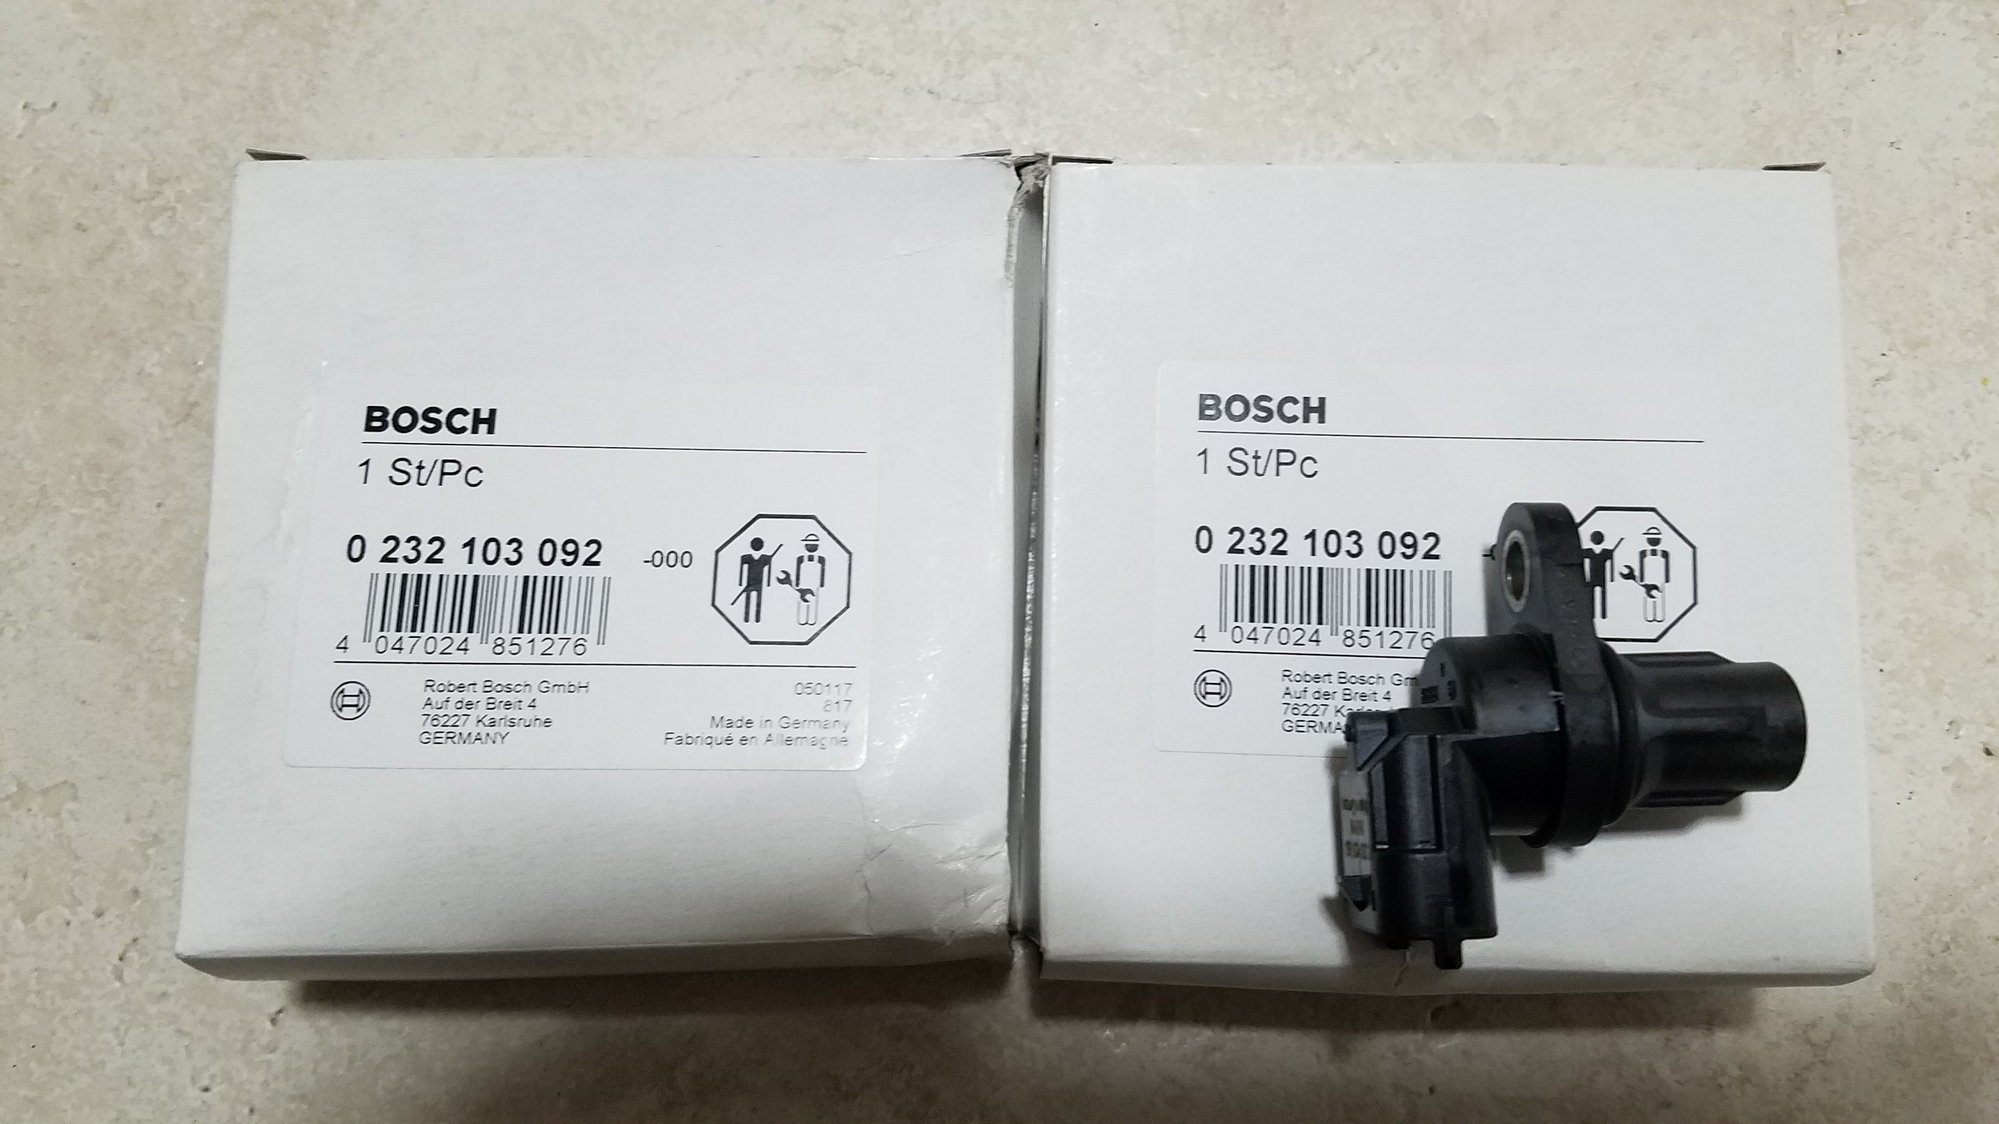
Replace the new Cam Shaft Position Sensor with the o-ring around it - put a little oil on your finger and apply it to the o-ring before installing for easier install and so it will seat easier � push in the Camshaft Position Sensor and ensure it �pops or clicks� into place. It you can move it easily or it falls out on it�s own it is not fully installed � it took me a good bit of effort to push it in, hear the click and then it was very tough to move or rotate it. It should stay in by itself without the screw install.
Install the Camshaft Position Screw - Internal Torx T30 - 10Nm (7.5ftlb)
Plugin the Camshaft Position Sensor Harness (make sure it clicks)
If you have any questions on this installation and/or have any suggestions/corrections please reply as this is for anyone else who will need to compete this install in the future.
Thanks for the reply and info. I got both 0016 and 0018 so I am assuming it is more likely the crank angle sensor. I bought one but can't figure out how to install it. I can see it from below but the only way I can see to get to it is to remove the oil filter. Will all the oil draIn if iI do that? If so, I'll have to drain the oil into a new pan and put it back in. Too new and expensive to waste.
Hi Cayman Madness -- to do the Variocam (VVT) solenoid, did you have to drop the motor, or was it do-able in the car? And did you DIY the solenoid, or farm the work out?
My car kicked up P0018 and P0000C recently (keeping me from passing emissions *ugh*) and I'm debating about a DIY solution vs "just give it to the pros"
all three sensors related to variocam can be replaced with engine in. They are all easy DIY if you're somewhat mechanically inclined. Only held in with two bolts. Hardest part is finding them! Once you do swap banks and see if your code moves to other bank. If so you've found your faulty sensor. Good luck!
all three sensors related to variocam can be replaced with engine in. They are all easy DIY if you're somewhat mechanically inclined. Only held in with two bolts. Hardest part is finding them! Once you do swap banks and see if your code moves to other bank. If so you've found your faulty sensor. Good luck!
The hall sensor and solenoid are the two mentioned above; is there another sensor related to the variocam?
Does anyone experience "failed" on a Durametric for VarioCam Plus "readiness" status? Codes P0010 and P0016 were present but reset and have not come back - however, failed readiness still exists.
I recently got P0010 on my car, I cleared the code but have not been able to get the car out and drive it. Some research pointed me to something as simple as needing an oil change due to incorrect oil being used.
The hall sensor and solenoid are the two mentioned above; is there another sensor related to the variocam?
Does anyone experience "failed" on a Durametric for VarioCam Plus "readiness" status? Codes P0010 and P0016 were present but reset and have not come back - however, failed readiness still exists.
There is a 3rd sensor in the VarioCam triad on these cars: In addition to the Hall Sensor and the VVS Soleniod, and the VarioCam actuator.


 03-13-2019, 05:00 PM