When you click on links to various merchants on this site and make a purchase, this can result in this site earning a commission. Affiliate programs and affiliations include, but are not limited to, the eBay Partner Network.
After wasting far too much time sanding / polishing and refinishing my 981 Cayman S headlamps on a regular basis, I recently decided to replace the lenses. The lenses were full of micro-cracks from UV damage from daily driving in FL.
I had one last try with SprayMax 2K Clearcoat, highly recommended by several folks online; however this immediately crazed my headlamps, despite very careful preparation and use of the correct adhesion promoter and primers� so it was time.
I purchased some new lenses from Amazon, however when I received them they were poorly molded and had black painted edges; unlike those from the factory which have a dark metallic gray skirt. So I took a chance on another set from eBay (seller: �us-motorsportltd�) for $115, and was really impressed!
This project is all about CONFIDENCE, and for anyone with reasonable skills I cannot see why you would not succeed. I received the lenses from FedEx at 3 pm, and by 7 pm both headlamps were back on the car, and looking amazing!
The only tools needed are a Dremel-type rotary grinder which in my case I bought for $45 from Aldi; a small cutting disc, a couple of screwdrivers, and a nice sharp craft knife.
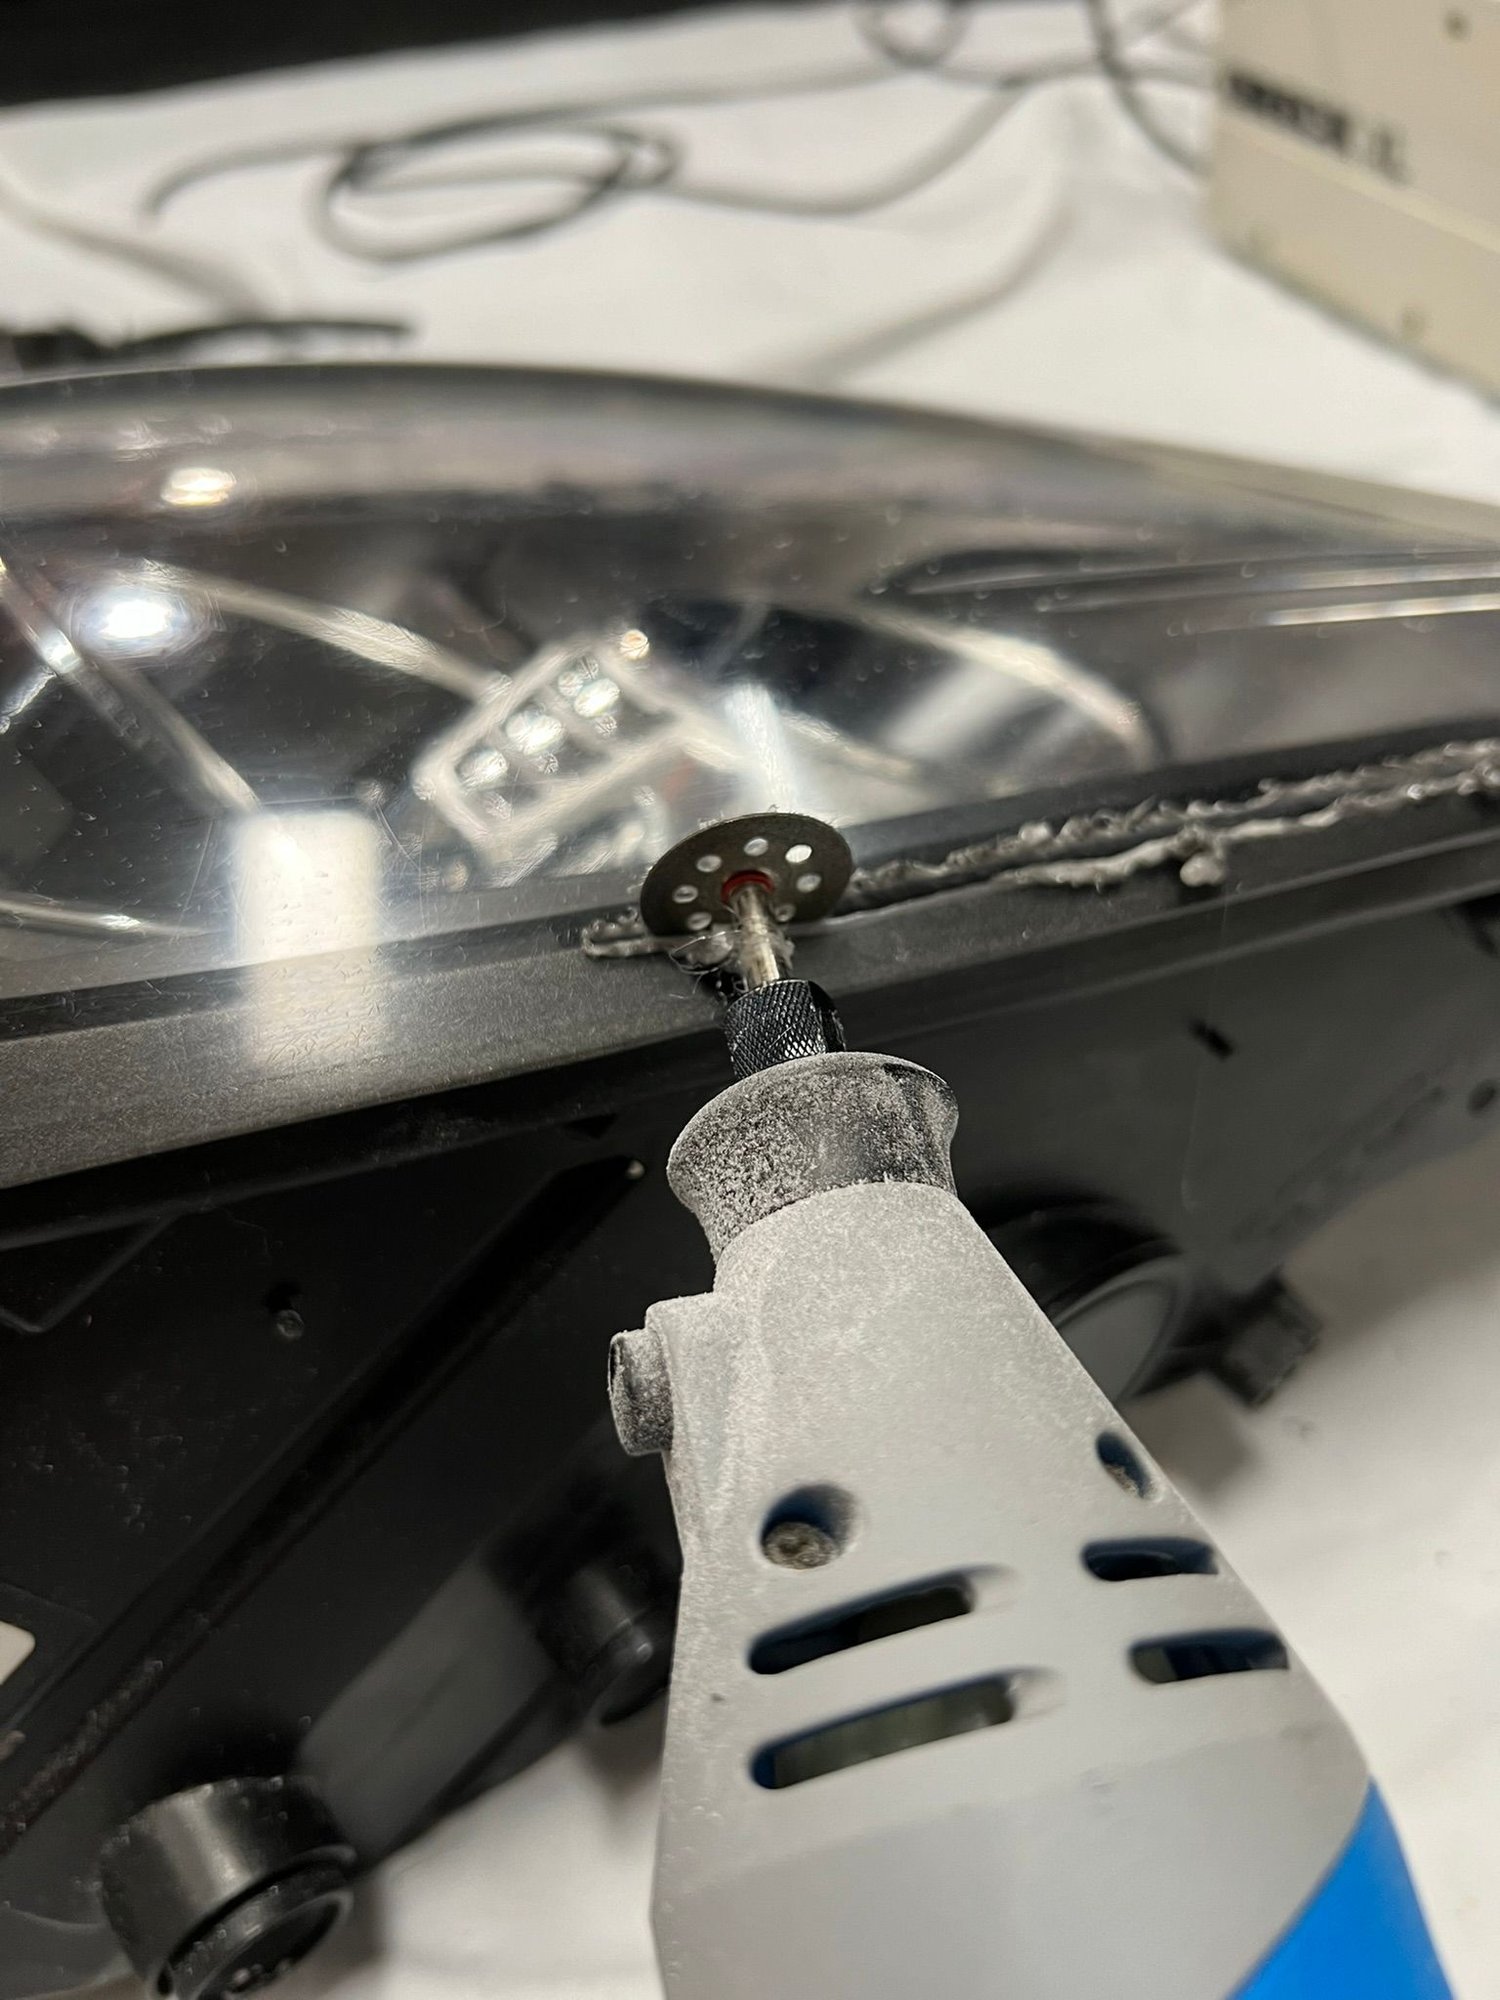
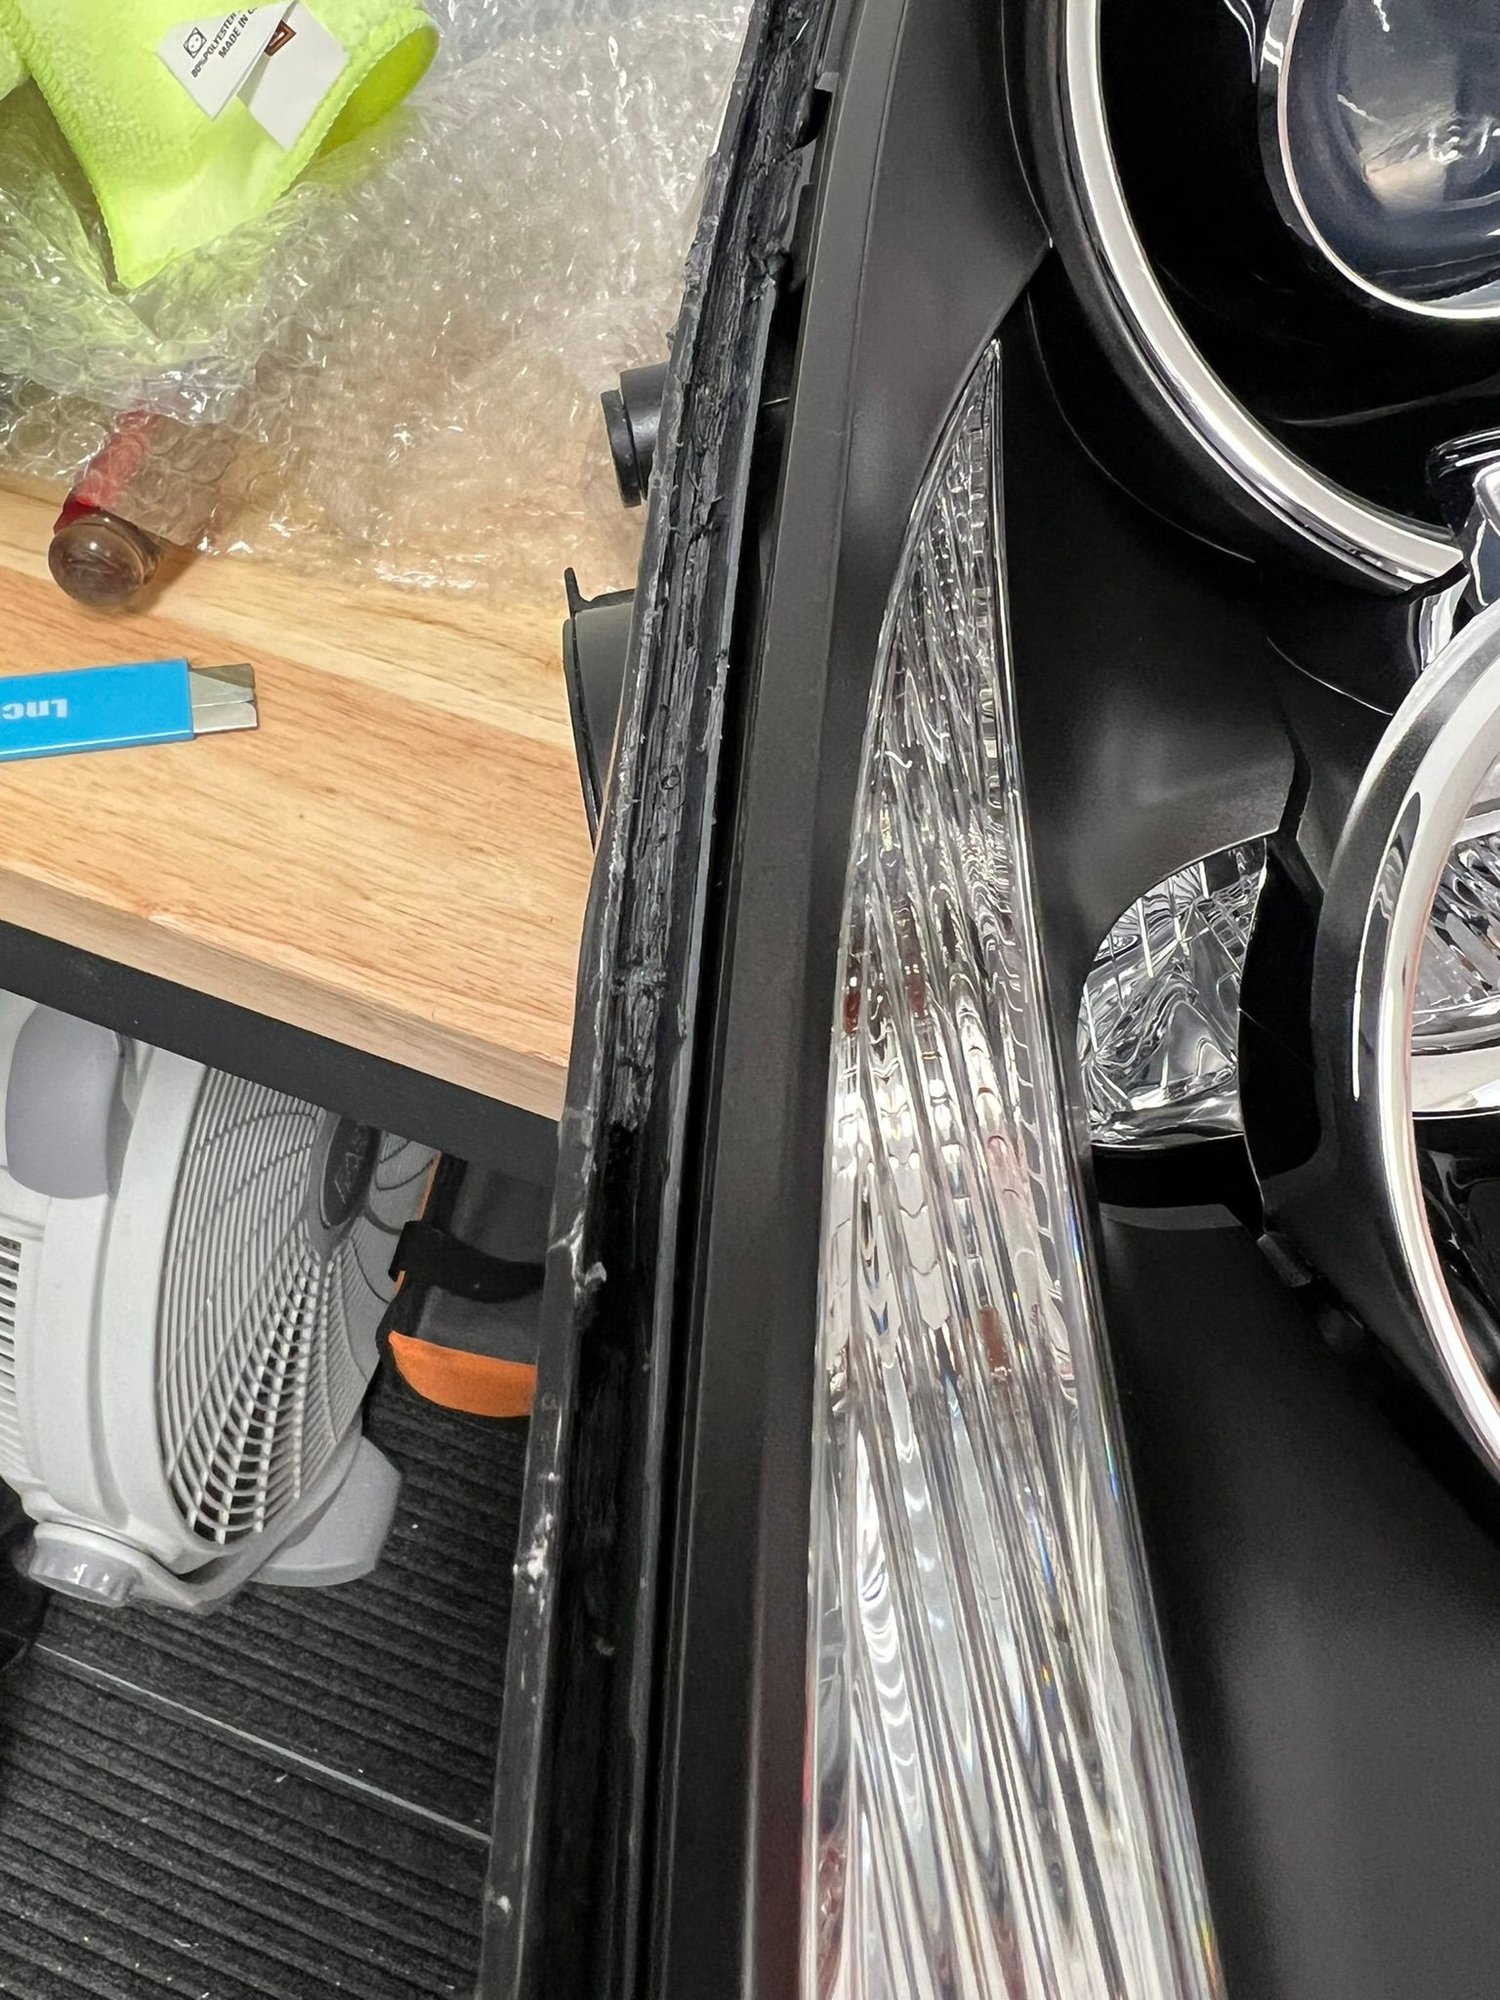
After taking the headlamps out and removing the rubber surround you can get straight to work! The lens cover is held into the housing by a vertical rim all around; it�s a �T� cross section� the top of the �T� being the lens itself, and the vertical being the rim that is glued (with silicone) into a channel in the housing. What you are going to be doing is cutting off the plastic inside and outside this rim, and then pulling the rim piece out of the housing after slicing the glue.
Here you can see I am cutting off the outside skirt of the lens with the Dremel.. Note the black line which is the rim.
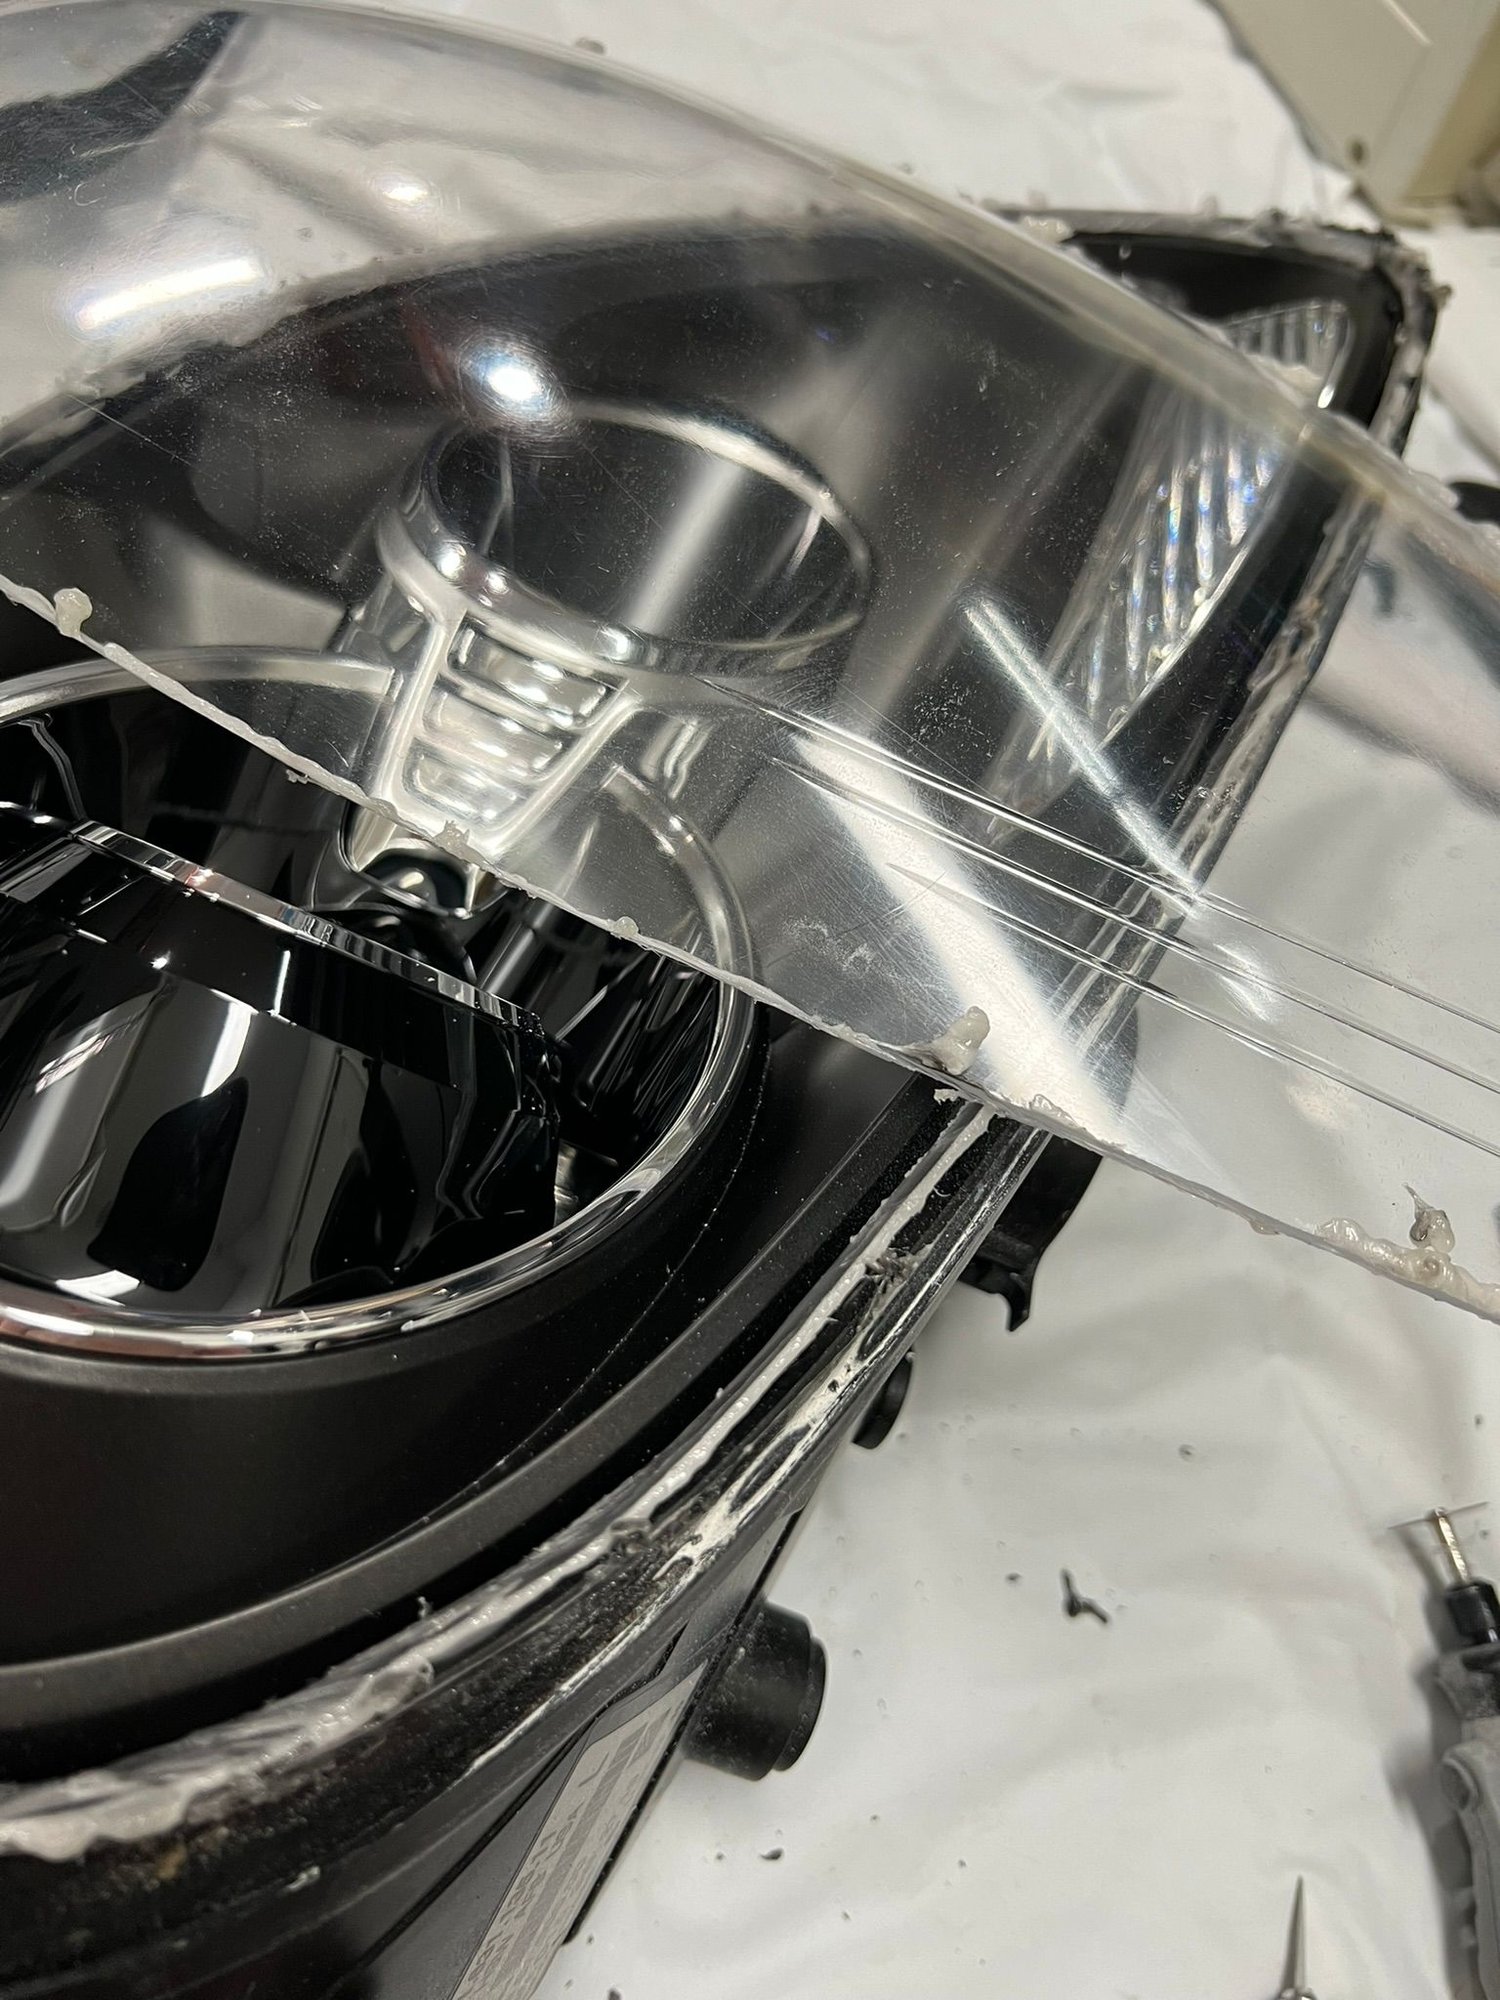
After cutting off the outer skirt I then repeated by cutting the main lens out on the other side of the back line;
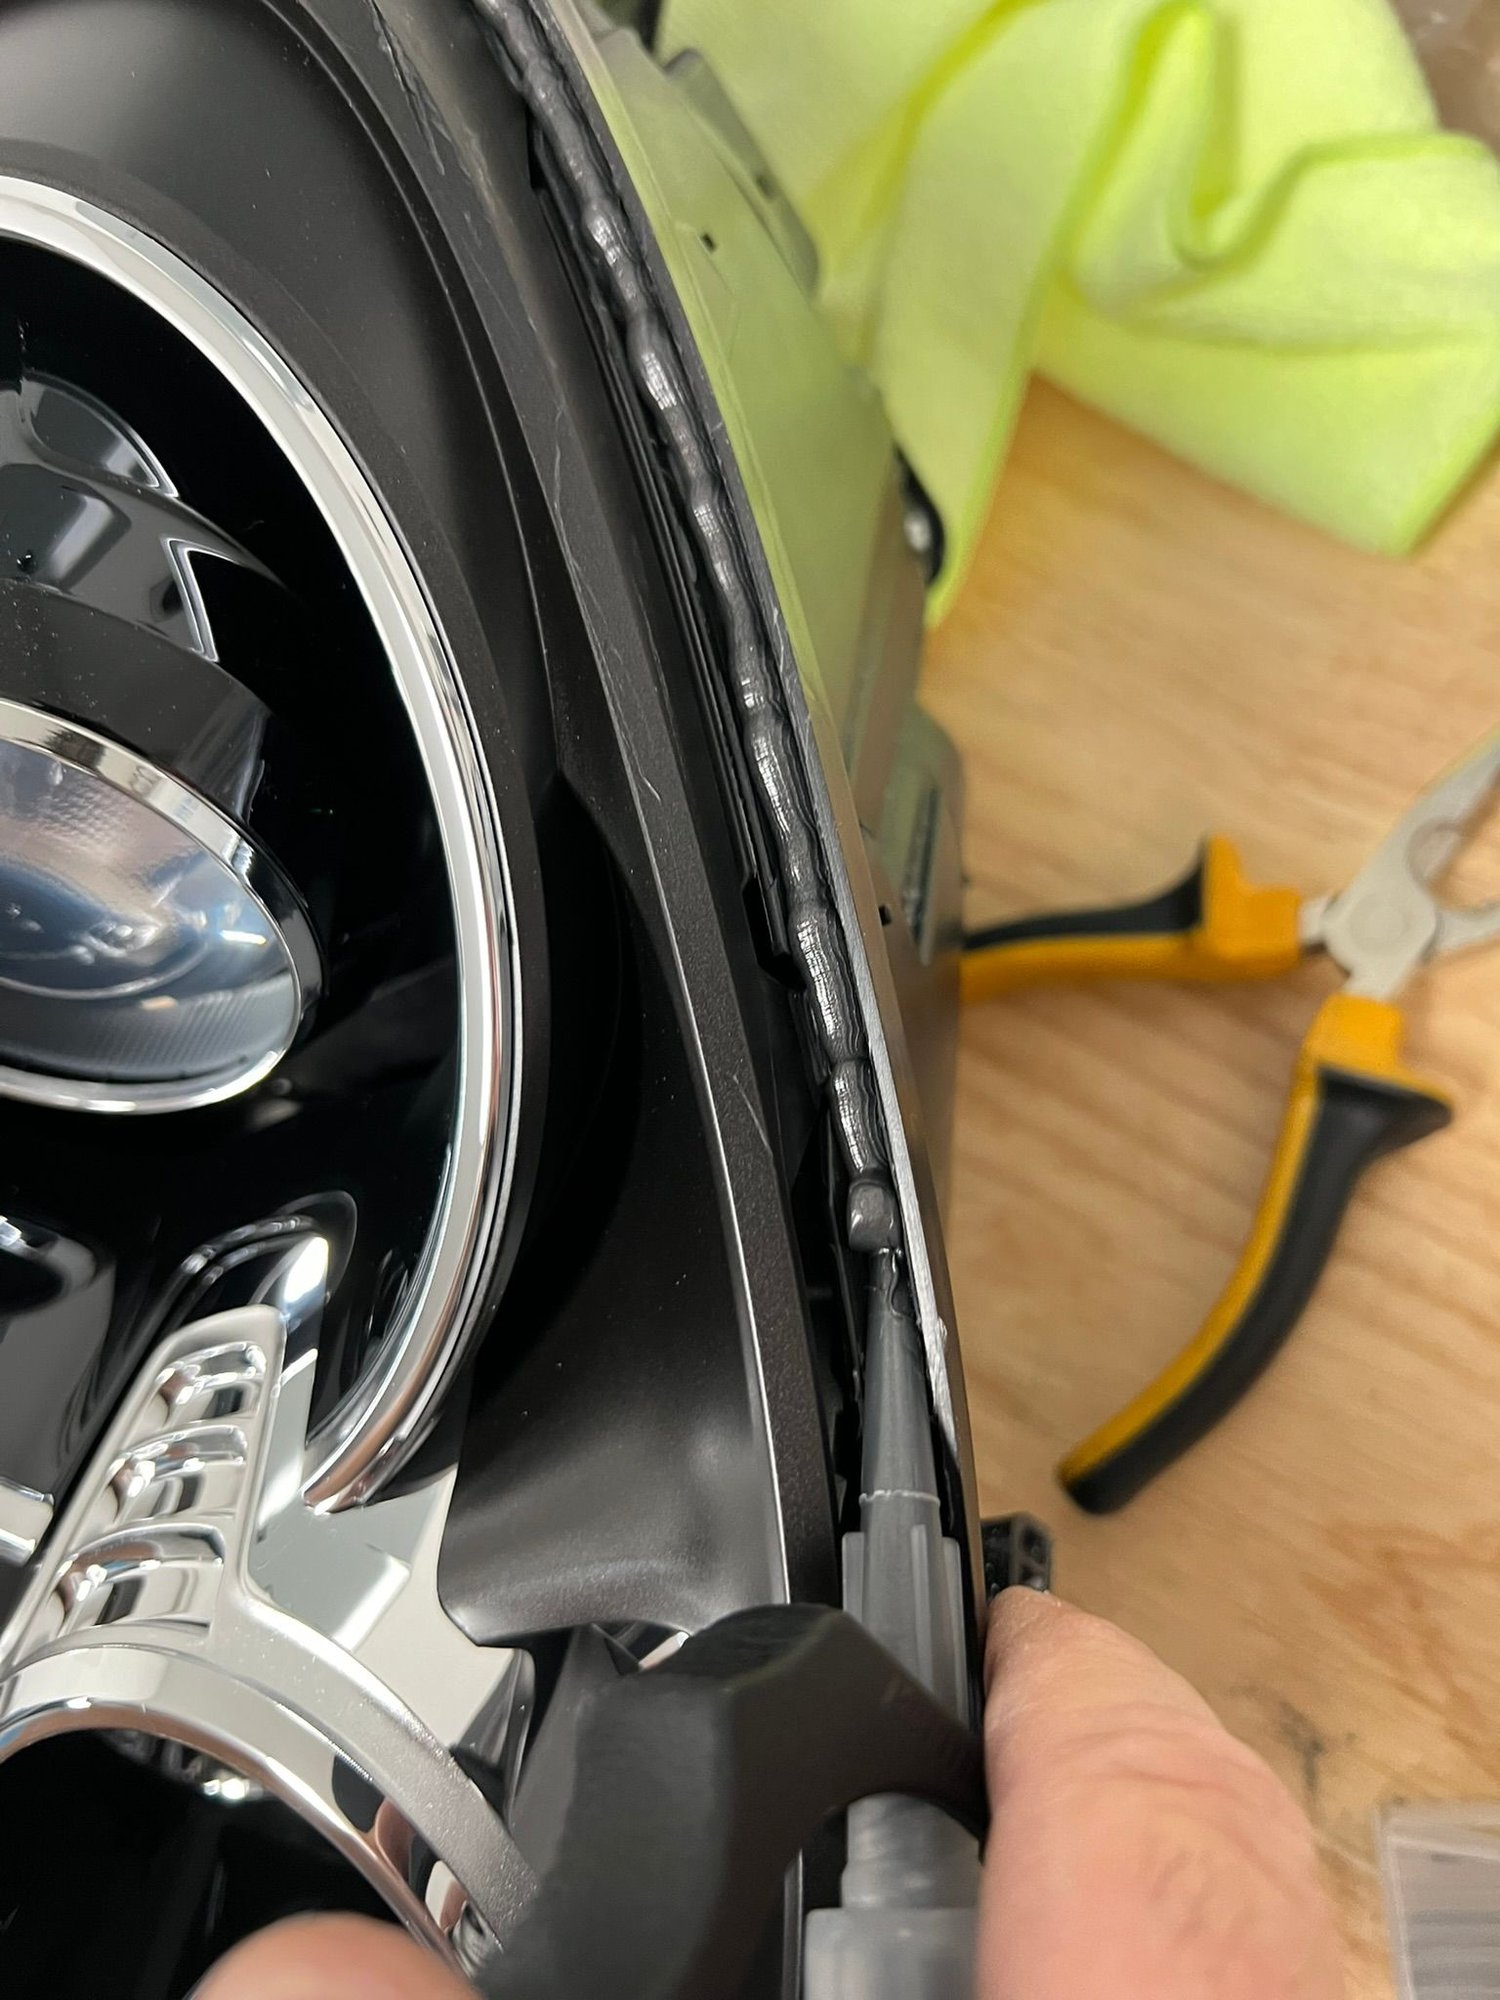
Now what is left is the rim, sitting in a channel in the housing. Next, run a sharp knife several times through the silicone around both sides of the channel:
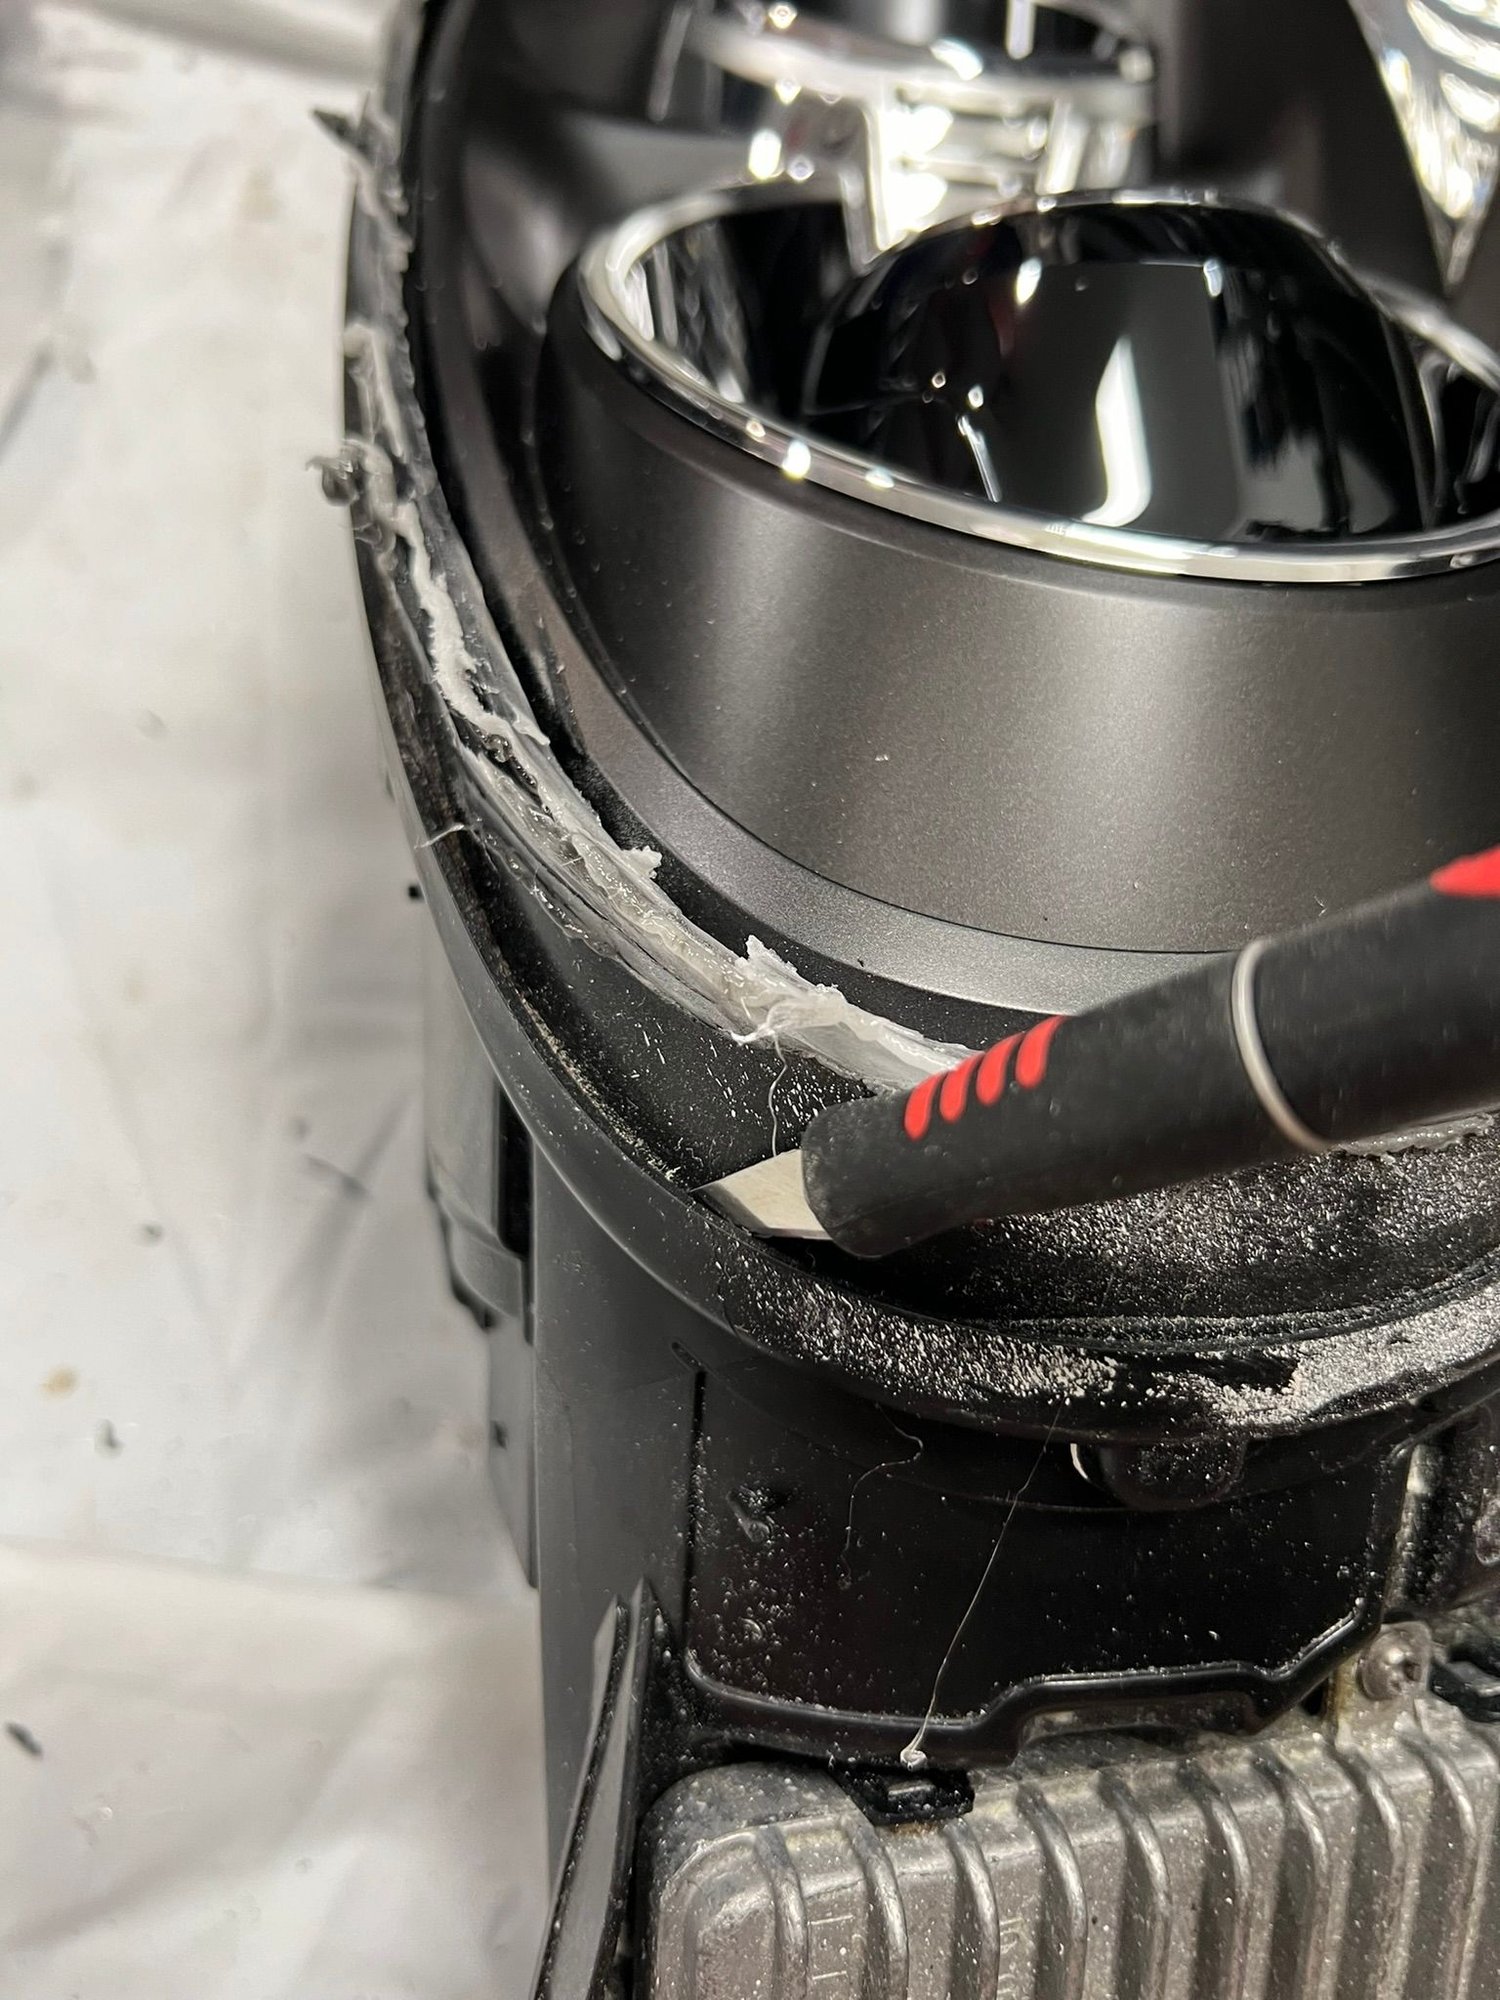
And you can then start to carefully leverage the rim out of the housing. I found it easier to make a cut through the rim and then start pulling with pliers:
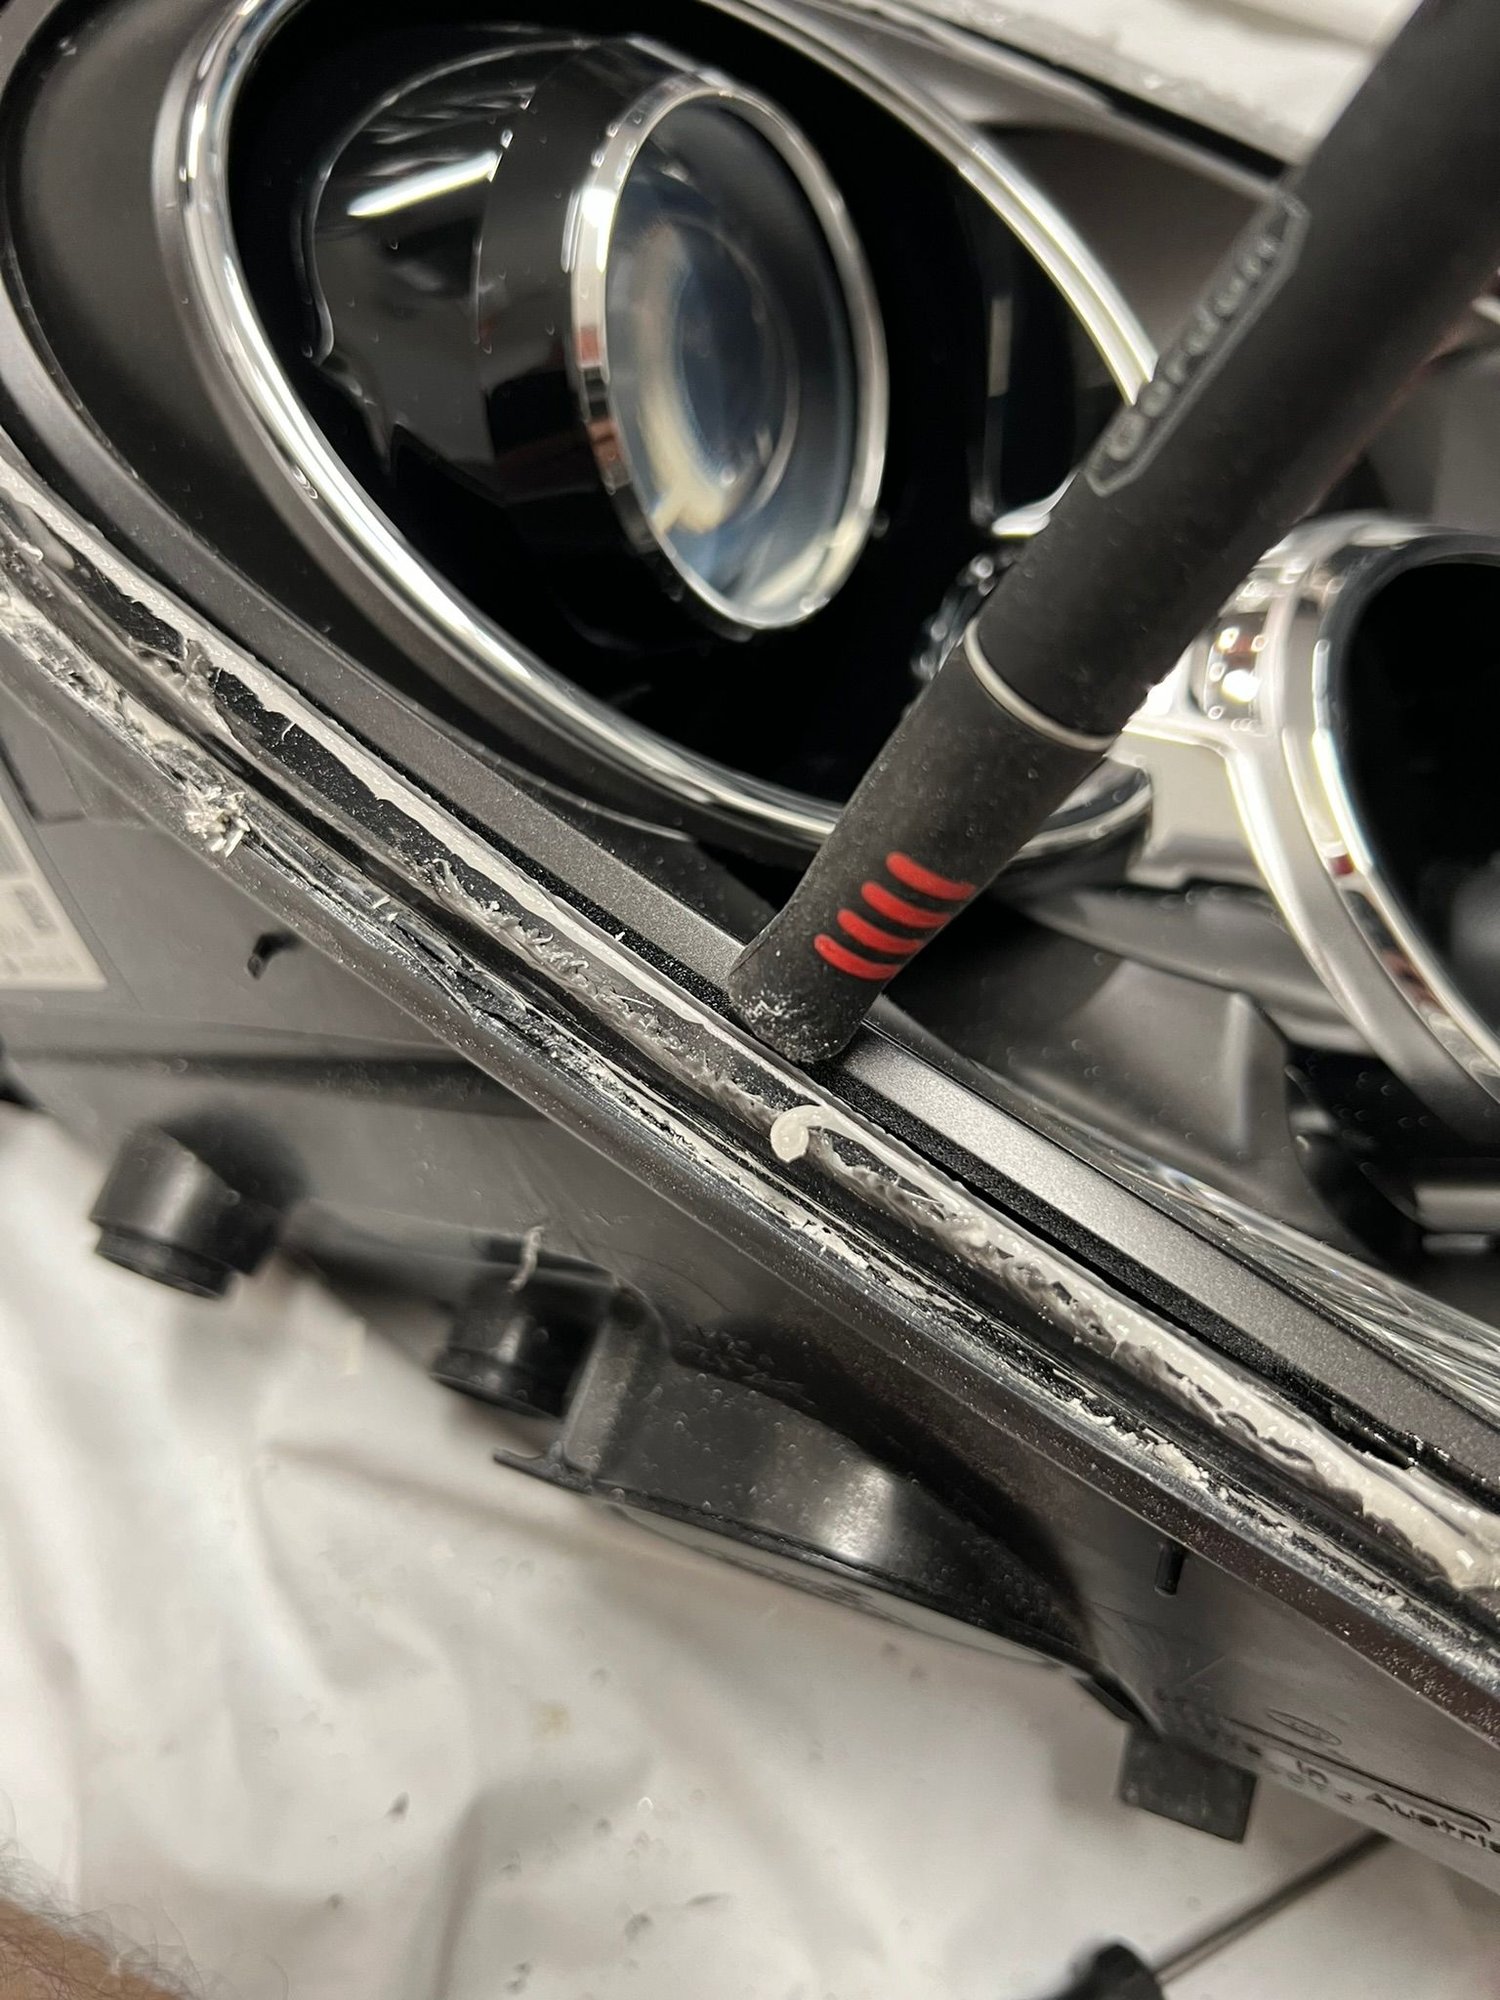
With a little effort you will be able to pull the entre rim out, which leaves you to pick away with a blade and screwdriver to clean up the channel:
Finally, test-fit the new lens; and after cleaning / blowing / vacuuming very carefully you can fill the channel with new black silicone:
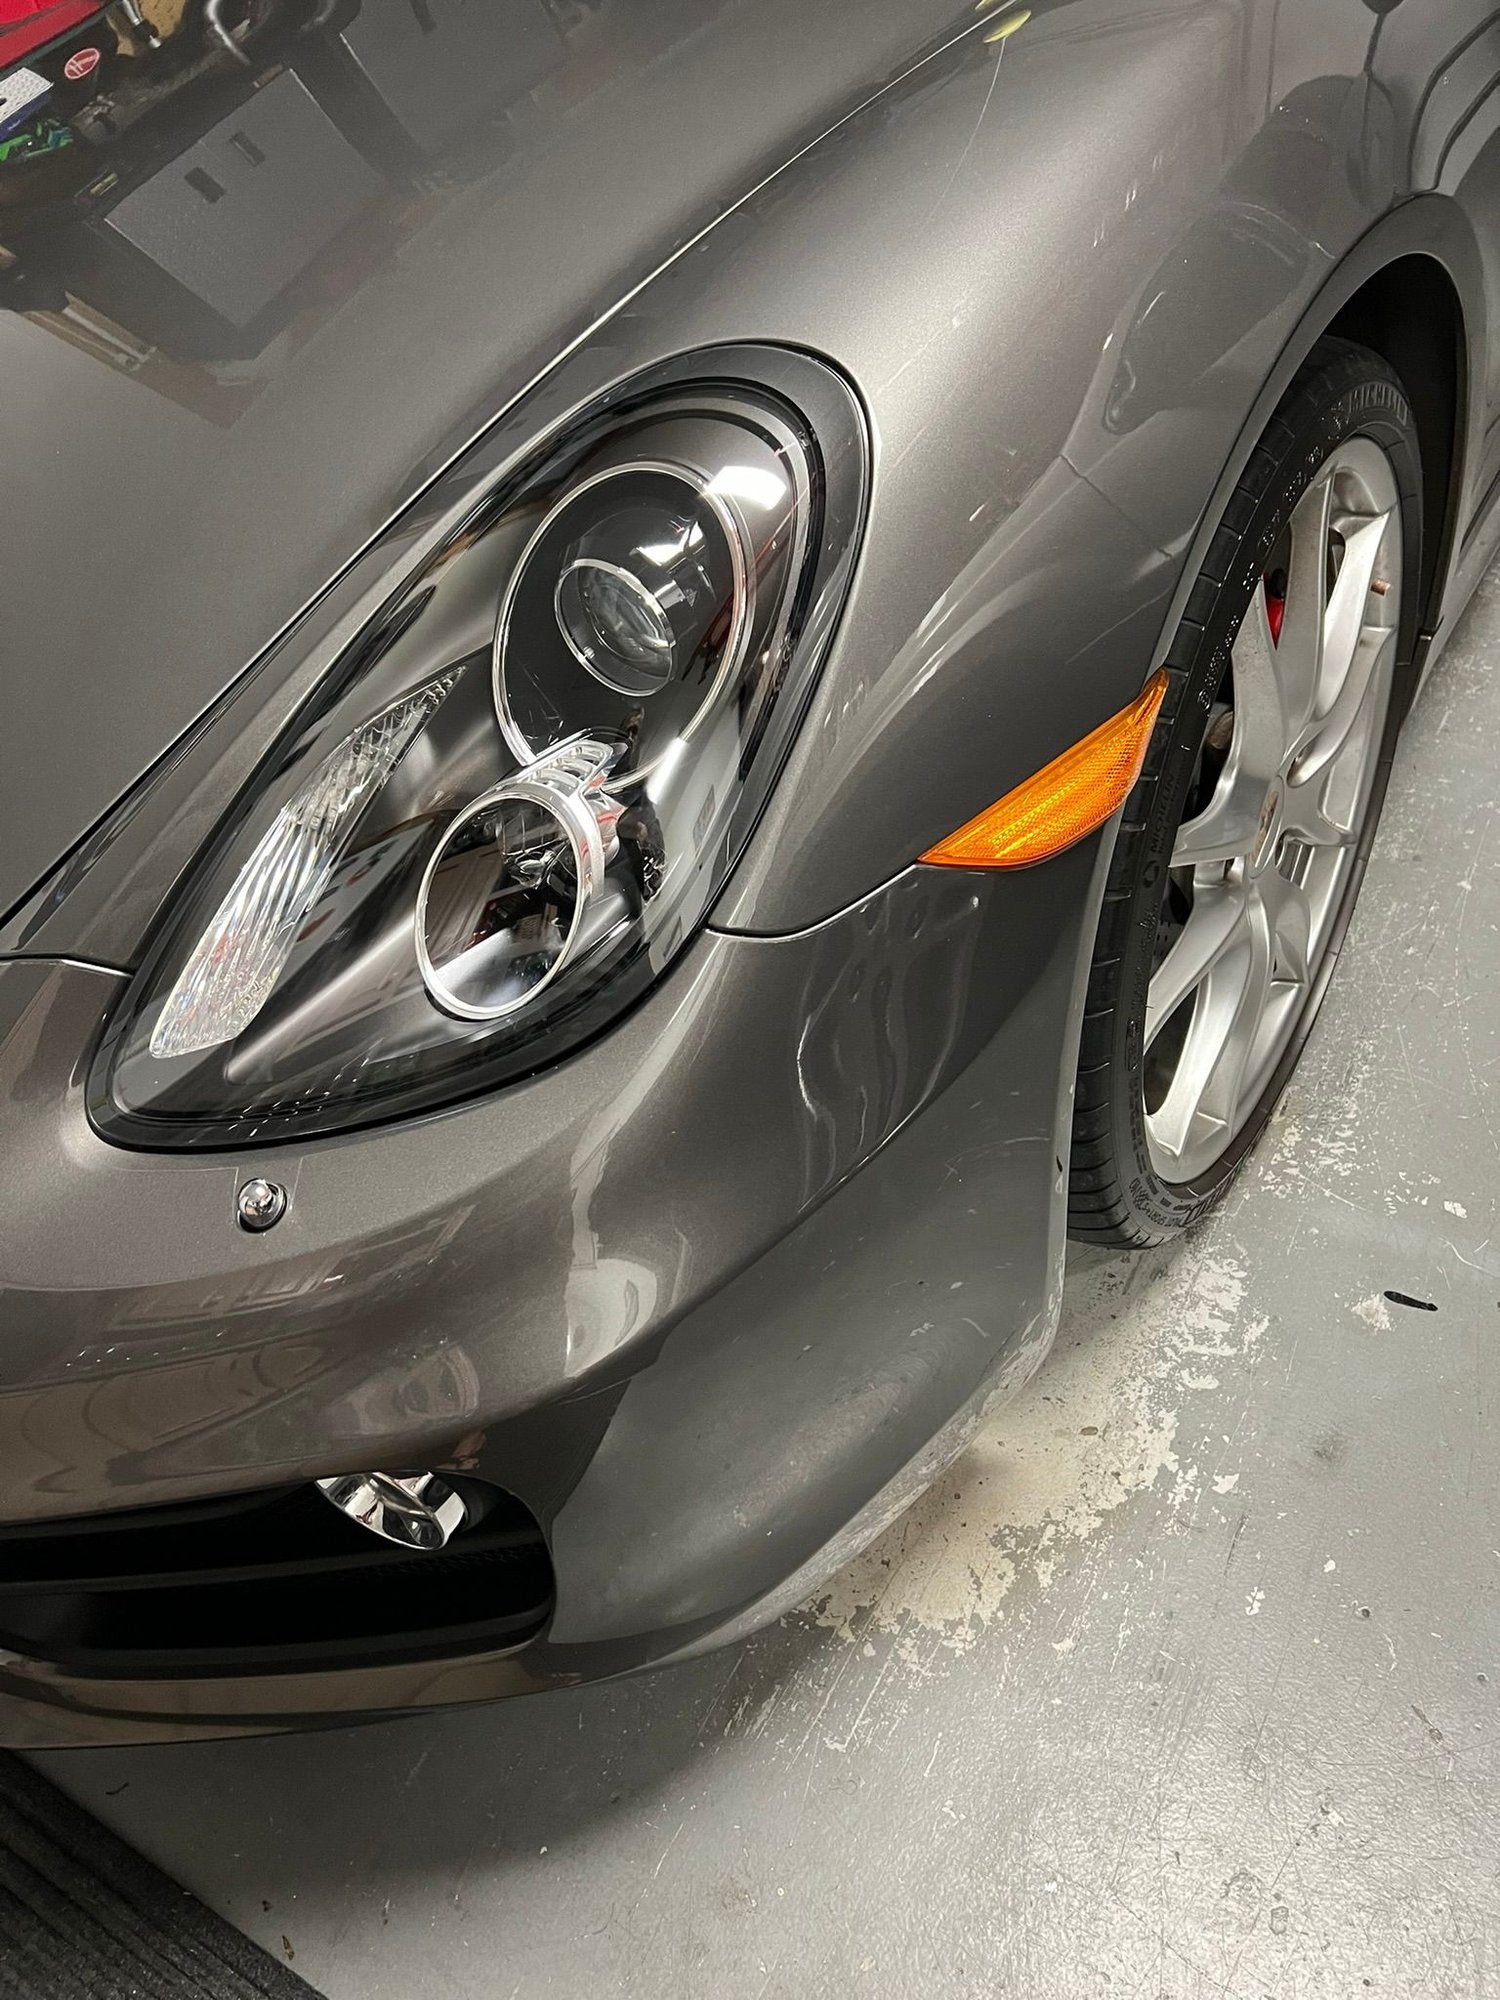
And that�s pretty much it. Place the lens in position and push into the adhesive, allow to set and then reinstall on the car and SMILE at the result:
Wow!!
Feel free to ask if you have any questions, and GOOD LUCK!!
Last edited by Rob's-981S; 01-01-2024 at 10:42 AM.
It's been awhile since I've visited the forum and when I saw your thread, I clicked on it immediately, and had the replacement lenses ordered 2 minutes later. Cheers for putting this together!!
How easily did the old silicon come out? When I painted the lenses on a set off my Toyota, I put the headlights in the oven to soften the old adhesive and the lense pulled apart. Would that make this any easier? Or do you think the old stuff came out easily enough that it's not worth the time
Unfortunately, heat did nothing to help separate or loosen the silicon/RTV.
I tried this on my first attempt just to see if it made it any easier and it was just a waste of time.
As mentioned above, the only way to break the bond is cutting/scrapping on each side of the channel.
Unfortunately, heat did nothing to help separate or loosen the silicon/RTV.
I tried this on my first attempt just to see if it made it any easier and it was just a waste of time.
As mentioned above, the only way to break the bond is cutting/scrapping on each side of the channel.
Firstly, the Silicone / RTV adhesive....
Unlike some vehicle brands which use tar-like adhesive that softens with heat, our 981 headlights are bonded with silicone which would need such a high temperature to loosen that it would also melt the ABS plastic housings themselves. But honestly with a nice sharp craft blade and a screwdriver it is really not that bad to get out.
Secondly, the aftermarket lenses...
There seem to be several manufacturers of these items, but unfortunately it is difficult to know which you're buying and what the quality will be like.
The first set of lenses I purchased were disappointing, with a poorly painted black edge and slightly cloudy lenses however I was able to return them (to Amazon). The second set look to be a great match for OEM, but only time will tell. For me they are perfect, but if you want guaranteed perfection, then buy new OEM (at about $1,500 each). But, I am extremely happy with my $115 investment from eBay, plus the $20 I spent on black RTV from the auto store!!
I also searched AliExpress (where all of these are probably sourced), and note a wide range of pricing and quite different claims regarding what materials they used. I believe the originals are UV-coated Polycarbonate, so I looked for vendors claiming that.
Don't hesitate to reach out if you have any questions!!
I gotta tell you, your way of doing it is spot on. I just did my headlights on my 991.1 and IT WAS EASIER than others had made it out to be. No baking in the oven etc.
For my first headlight it took about 1.5 hours and second was about and hour.
Just watch out for the chrome plating on the plastic, it likes to come off really easy. Others had mentioned it, but luckily the chrome that came off was going to be removed anyways to darken the housing.
Thanks for the tips.
Did you remove the chrome and black them out? If so, how'd you go about it?
Again, I've removed the chrome on other car's headlights and it's painstaking process. Sanding, priming, painting, etc. Turns out great but a lot of work. Wondering what your process was
Did you remove the chrome and black them out? If so, how'd you go about it?
Again, I've removed the chrome on other car's headlights and it's painstaking process. Sanding, priming, painting, etc. Turns out great but a lot of work. Wondering what your process was
All you have to do is take some glass cleaner and a microfiber towel and spray a little on the cloth and start wiping/scrubbing the area you want black...and it comes off like a scratchers lottery tickets...no joke.
I used a RYOBI oscillating saw to cut the lense off first similar to you and then got the remaining pieces with a razor knife and pliers to take the big chunks out. The silicone came out with the headlight pieces still in the channel.
Interesting thing, I found the lens seller, and they state 2014-2016 981. So I contacted them, asking why not 2013, since it is also a 981. After some back and forth, they stated it is only for 2014-2016. Maybe because they are only looking at Cayman build dates.

 12-31-2023, 11:52 PM