When you click on links to various merchants on this site and make a purchase, this can result in this site earning a commission. Affiliate programs and affiliations include, but are not limited to, the eBay Partner Network.
Posting this for the use/benefit of fellow enthusiasts. Backstory: when I purchased my 968 in Dec. 2018, there were a number of issues that the PPI did not mention. One of those was strange (red) lighting for the instrument cluster. The prior owner had installed red LED's for the main lighting areas, and I did not like the look at all. In addition, the cluster surround had turned to that familiar, and weird brownish color with the whitish speckles all over it. There was also some sun fading of the redlines and needles, so I wanted to have North Hollywood Speedometer fix that. They advised me that they would not do anything about the speckles and brownish part of the cluster surround, but would gladly repair/repaint the needles and redlines.
So, knowing that I wouldn't be satisfied with a job half-done, I decided to take the plunge and attempt a restore of the gauge surround. The first (and scariest) portion was to separate the clear face from the remainder of the surround. I don't have any pictures of this part, but I can provide a reasonable description of the process. I used a sharp 5/8" wood chisel to separate the face, with light taps from a small hammer, while holding the surround in my lap. For anyone attempting this, before starting, look at the entire circumference of the surround and note the condition of the mating surfaces. In many, if not most, cases the adhesive originally used will have started to separate due to age/heat cycles, etc. This is a good place to start the work from. l overlapped the chisel area by 25-50% from each prior pass so that I didn't put too much stress on the plastic. I repeated this all the way around, and it took me probably 30 minutes or so to complete. I did crack the plastic a small amount in one area, but it was just at the very edge on one area on top, and was not in any way visible.
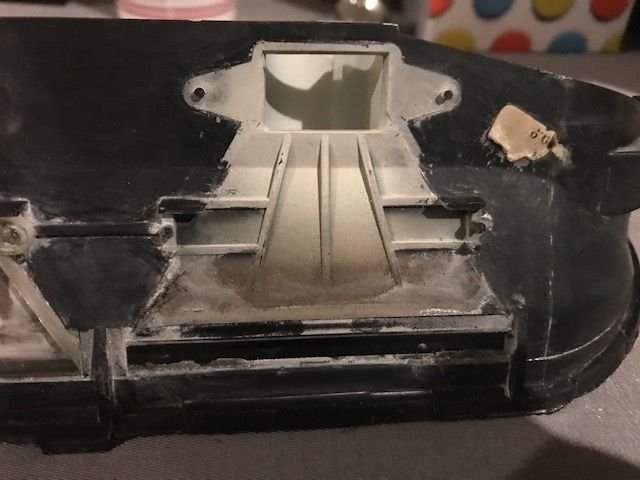
Once I had the two pieces separated, I put the clear plastic aside, wrapped in microfiber towels so that it would be safe. What I was left with was picture 1. In this shot, I believe I had already started the sanding process. To remove the brownish tint and speckles, I wet sanded all of the visible surfaces with 400 grit paper. During this process, I hadn't really thought ahead too much, and some of the sanding slurry ended up getting into the light tunnels. So, that led to the next step, which was to disassemble each of the tunnels. In the second picture, you can see that I had already removed the factory silver paint from the back side of the tunnel. Each tunnel has two pieces, the clear portion that transfers the light from the bulb, and a black base cover. Each is held to the surround by two plastic pegs that I believe were likely essentially melted in place by the factory to hold them together. I used an appropriate size drill bit and slowly drilled away the melted portion. This leaves enough peg legs in place to refit the units after. See picture 3 for what remains after removing the two tunnel pieces (x3 for whole cluster, of course).
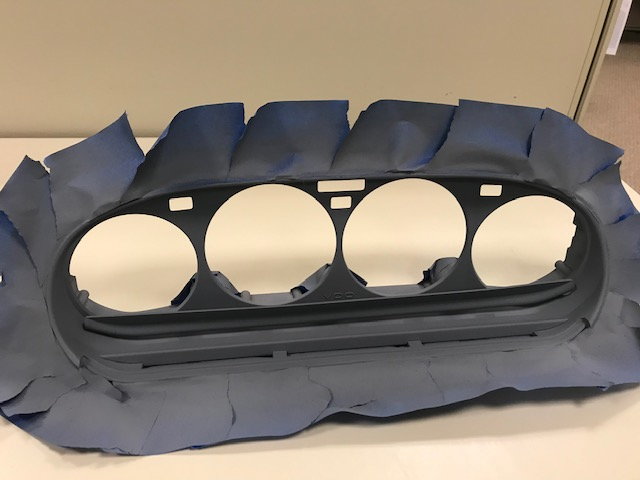
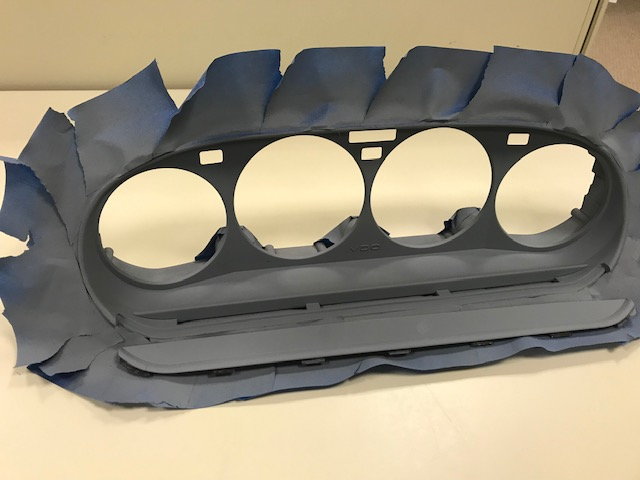
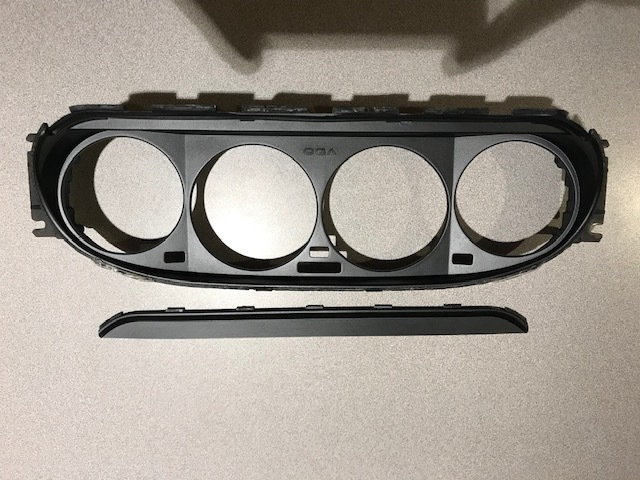
Once all of these were removed, I turned my attention back to the visible face. After completing the wet sanding with 400 grit to remove the brown and speckles, I followed up with 1000 grit to smooth the surface. I then masked the circumference and sprayed with a couple of coats of primer. Almost forgot - where the light exits the tunnels there is a front guard piece that also has to be removed, be very careful when cutting around the tab edges. Once the primer was dry, wet sanded with 400 grit again to smooth the surface, then I painted with flat black paint in 2-3 light coats. Just be sure that you have full coverage. These are shown in pictures 4-6.
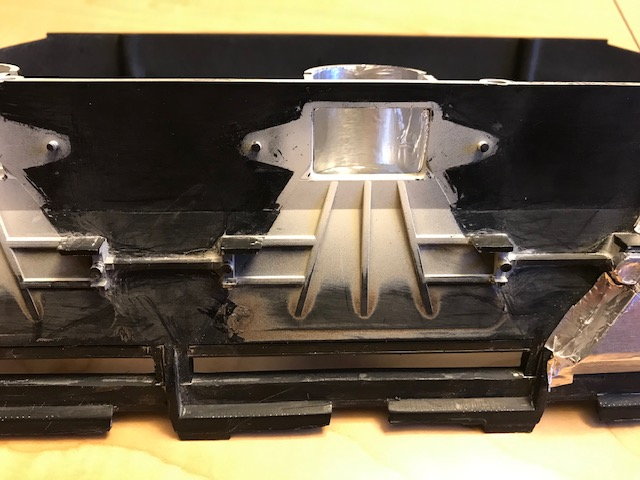
Once that was complete, I turned my attention back to the light tunnels. There have been several threads on using aluminum tape to get better light output, and I readily acknowledge their efforts and contributions, as I used that for my 944. I thought there might be a way to improve upon that process. As you can see from some of the pictures, Porsche painted a portion of the housing that is under the light tunnel elements silver also. I didn't think this looked all that reflective, so if aluminum tape works for the clear portion of the tunnels, why not use this on the under portion as well?
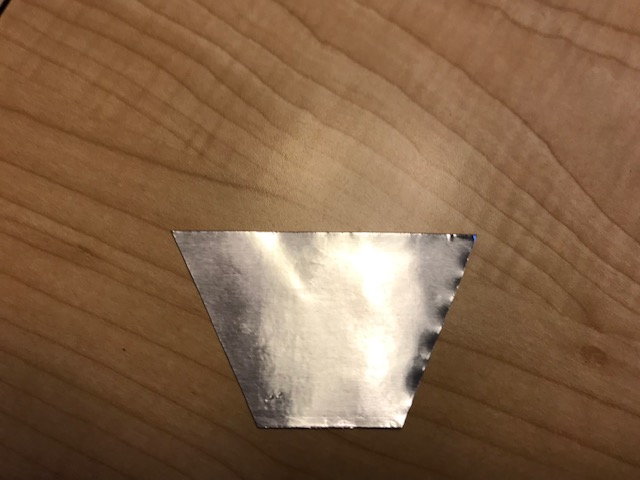
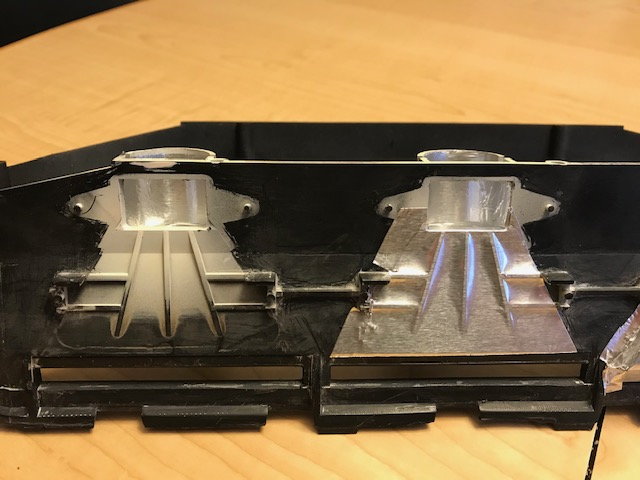
I cut some of the aluminum tape using the clear tunnel as a template. See picture 7 for what that looked like. I then put each of those sections down on each of the bottom of the housing. See picture 8 for this. In addition, the bulbs reside in the semi-circular portions of the housing, and those are painted from the factory with white paint. Another area for improvement? Since the aluminum tape should be more reflective than flat white paint, let's get some tape in there as well. This was somewhat challenging, as fitting in the semi-circle and the long strip without getting wrinkles in the tape took a while, and a couple of cuts when I made them too small.
After all of these were complete, I reassembled the clear portion of the tunnel on the pegs and covered them with the aluminum tape, then added the black portions at the rear of the tunnels. No pictures of this, but I used some clear epoxy to seal the pegs and tunnels together. I let that cure for a day, then I used a small bead of clear epoxy around the circumference of the housing and attached the plastic front to the housing. I don't recall exactly how I clamped the two pieces together, but I think I used small strong rubber bands so that the two pieces would stay mated.
While the plastic front was off, I used Meguiar's Clear Plastic Cleaner on a microfiber towel to remove any swirls on the plastic (both sides), then followed up with Meguiar's Clear Plastic Polish.
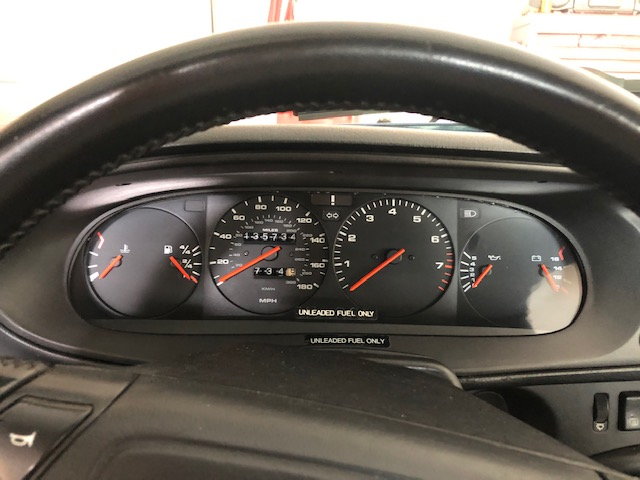
The remaining process was to reassemble the gauges back onto the housing, then install the completed cluster back into the car. Last picture is what it looks like in place today.
If anyone has any questions, let me know. Hope you find this helpful. Cluster front with plastic removed Light tunnel with factory silver paint removed prior to drilling attachment points surround after drilling and removing two light tunnel portions Front of surround after masking and primer Second view showing the panel that helps direct light towards instruments Surround after flat black paint template of aluminum tape for underside of light tunnels bulb housing shown with aluminum tape in place of factory white paint full under side of light tunnel. Installed complete cluster.
That looks great. Congratulations. Thank you very much for sharing this with us.
No problem. Nice to be able to give back to the community. Can't even begin to say how much information I have received for both the 944 and the 968 from others. These cars are always a work in progress.
Good question, not sure. There is an up arrow in the right gauge, so maybe the arrow lights up along with the brake pad or antilock text as well?
Here are two photos of my TIP instrument cluster, after changing from miles to km/h cluster and upgrade to LED. The down arrow on the left should indicate that the parking brake has been pulled.
Thanks for all this info. I am seeing lights in these cluster photos that I have not seen before. I will take a closer look when I next start up in the dark. Especially those up arrows are new to me.
When I recently opened up my instrumentation cluster the lights bulbs for the ! and the head lamps on bright were completely missing. I replaced them and they are now working.After replacing my parking brake swiich just day or so ago, I know also notice the Parking Brake is On warning light.
Are all the warning lights supposed to come on on start up? If so I may have more bulbs to replace.
Thanks
I just connected with DSMblue, and we found out this is my old 968 that was recovered from an idiot in Arlington TX. It went to WI to a buyer without a lot of knowledge of the 968. His uncle came and looked at the car, and then it left for WI, and about a year later, a large group of docs I found went up there. Glad to see the car is in good hands, and being sorted.
I think I'm the one that put the red inst cluster lights in. I didn't refurbish the glareshield, or paint the bezel or the light tunnels. All the other lights were working when I sold it.
It's sad that the hitch is missing. That was one of the best features I had for the car, and I used it to tow a small trailer pretty often.

 02-29-2020, 07:06 PM