When you click on links to various merchants on this site and make a purchase, this can result in this site earning a commission. Affiliate programs and affiliations include, but are not limited to, the eBay Partner Network.
You are welcome. My pads are at 60k miles and almost 25 years old so I'd bet you are still in good shape. I can't believe I'm the 7th owner of this car yet the first one to open it up and do this job. It's surprising it didn't blow a pad and then a chain. I sure wish my flywheel lock would arrive so I could finish the teardown! I ordered Zinc Sulfate and Zinc anodes tonight because I plan to replate my fasteners etc. It's a good thing this isn't my daily driver. I'll take as long as I need to so that it's right when I'm finished. I managed to drain the coolant and get the radiator out today. It's winter in Missouri so I do a little bit at a time (unheated garage).
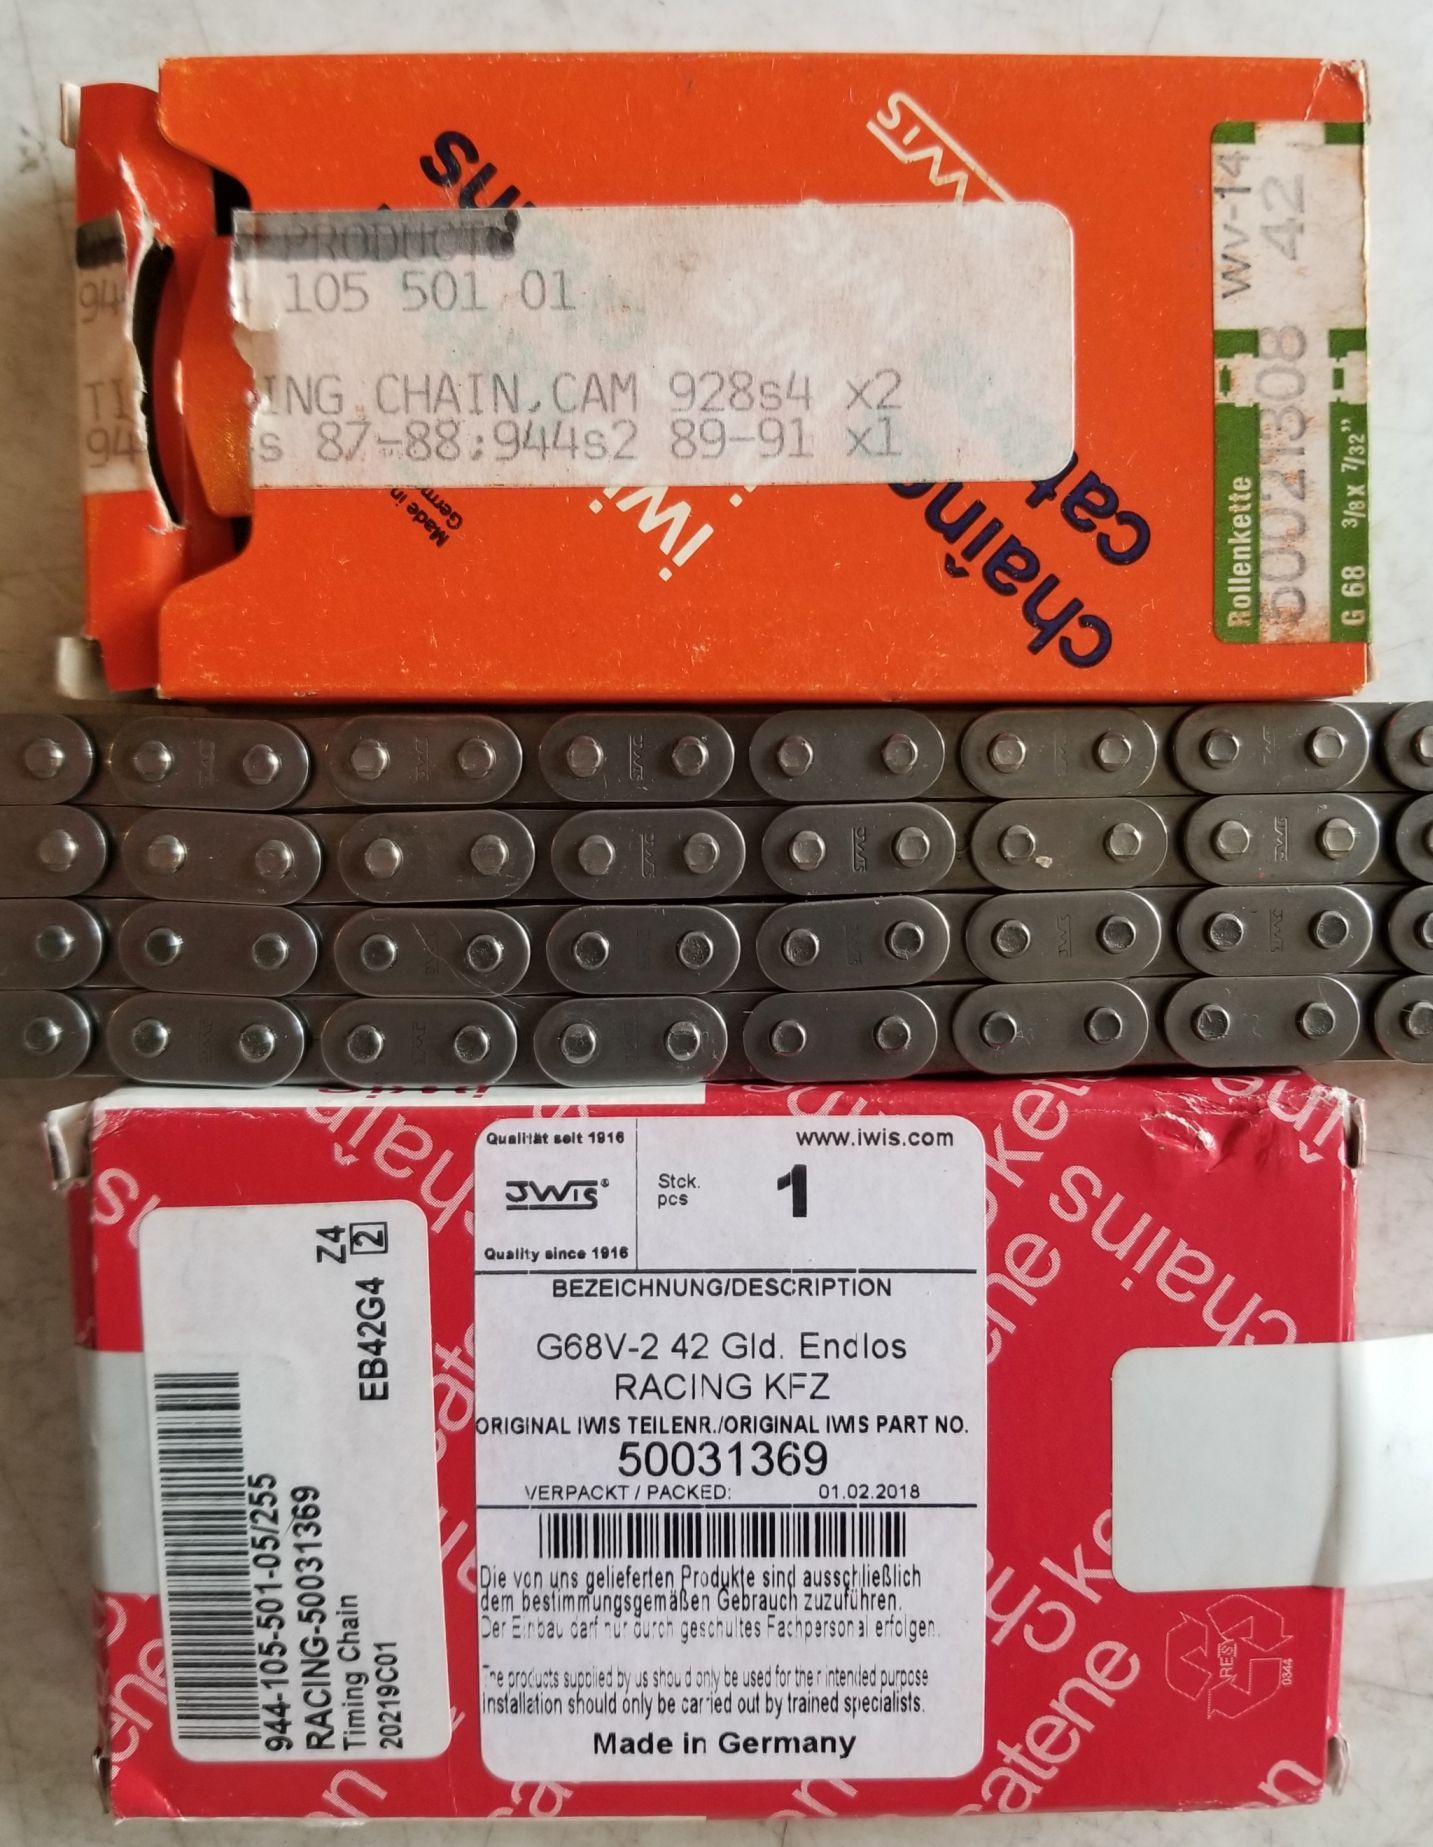
I saw on other threads that no one could see any difference between regular IWIS chains and the "racing" chains, including any appreciable weight difference. I bought one of each just so that I can take both to work and do a Rockwell hardness test on them to see if the difference lies in the metallurgy/heat treatment. I will make a small block out of tool steel to fit snugly between links to negate deflection. We have an X-ray Emission Spectroscope I could use to do a metallurgical analysis as well, but that may be going overboard. It's an old machine but gives excellent results. It uses a Palm Pilot for the software!
Great thread and thanks for the informative pics.. I have just been going through the same things on my 968 as well as getting the head refreshed and doing a complete front end reseal. I very much enjoyed the work and tidying up everything as I went along. I do have a nice heated garage to work in though, which makes the job much more enjoyable.
I would be very interested in your findings on comparing cam chains, as well as other observations from an engineers point of view..
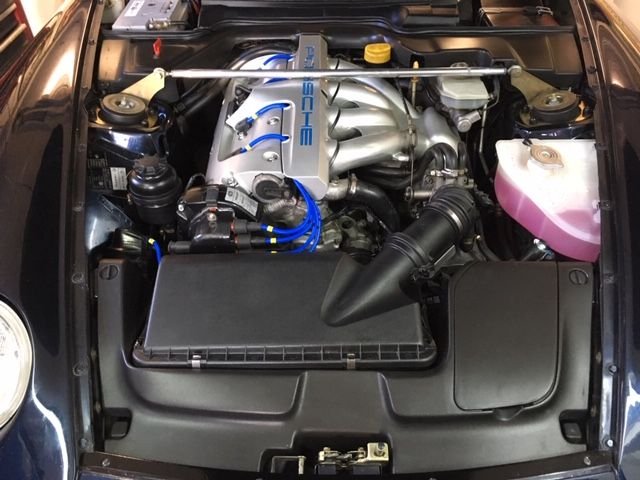
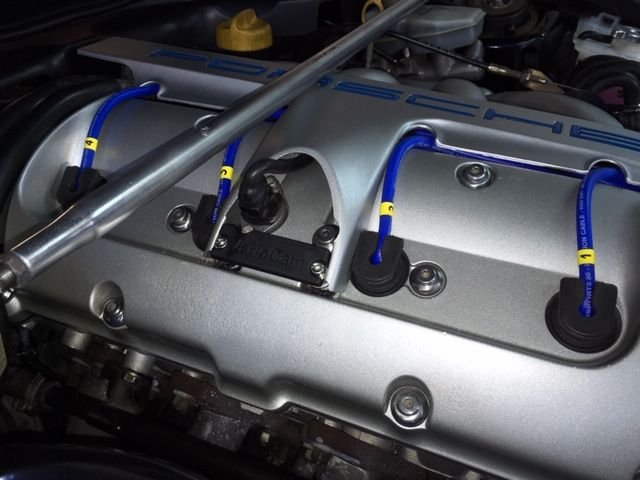
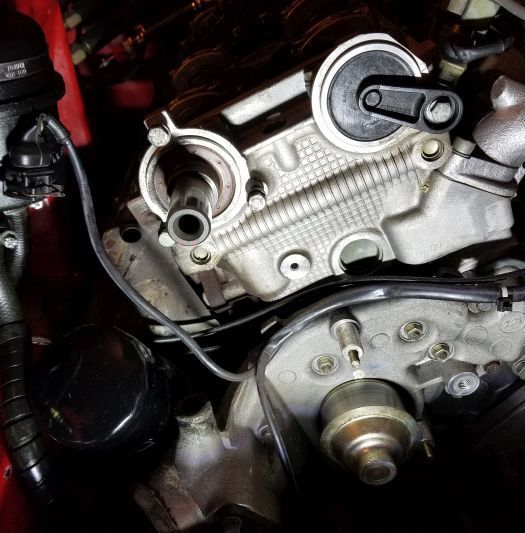
Here is a couple of pics of my finished engine.. It feels so satisfying when you are done and know your engine is in perfect running order..
That is a beautiful engine bay. I'm going to reblast my valve cover tomorrow morning and will be painting my letters as you have done. It looks great like that.
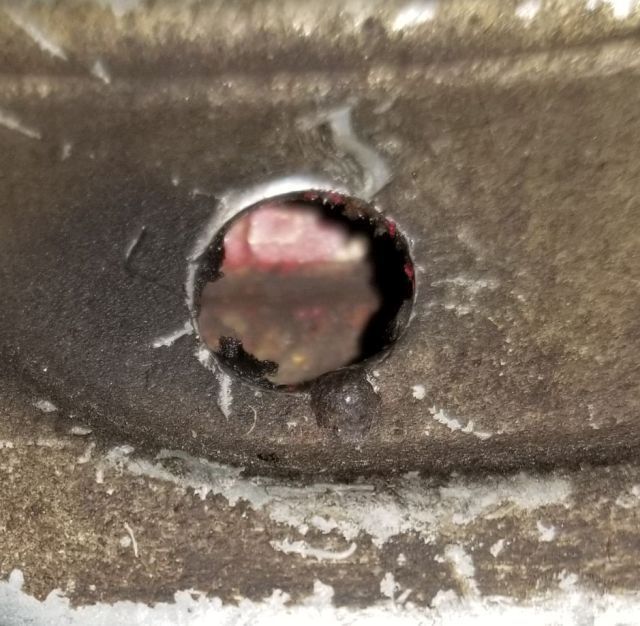
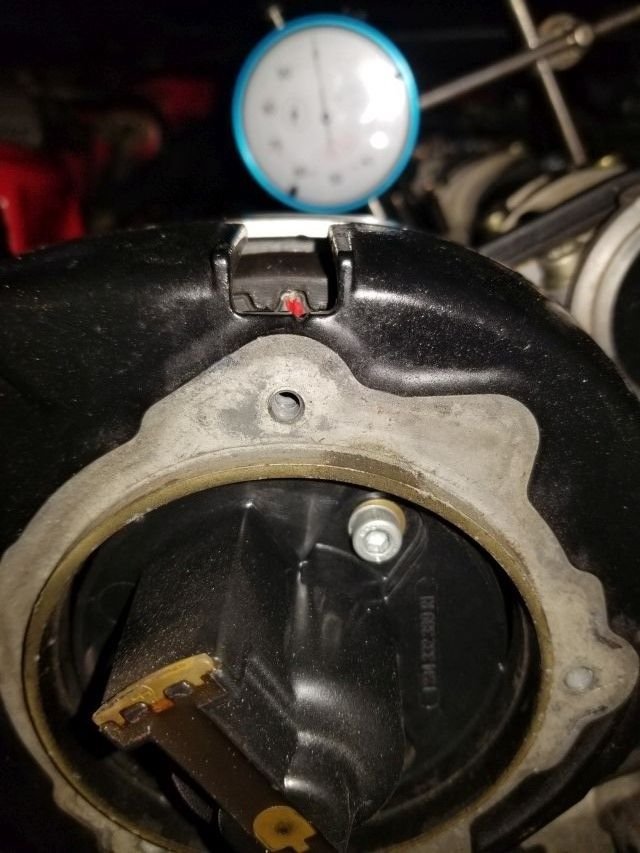
With my cam mark dead on target I went underneath to confirm my flywheel mark. It's pretty vague sighting a dirty old mark through that small hole:
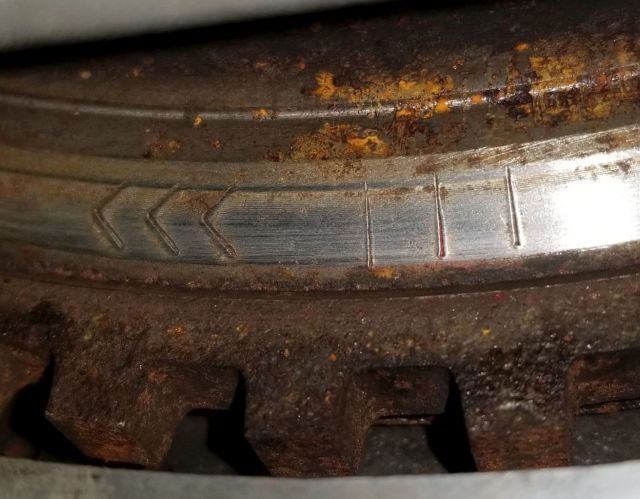
So I took the cover off to clean it and have a better look at things. I have searched for an image showing the arrows and marks and couldn't find one, so here it is:
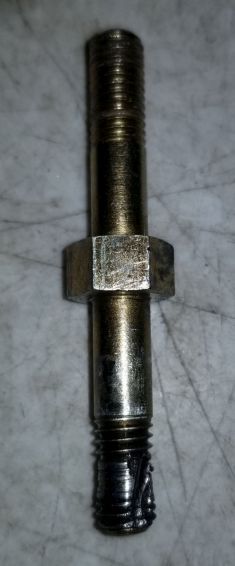
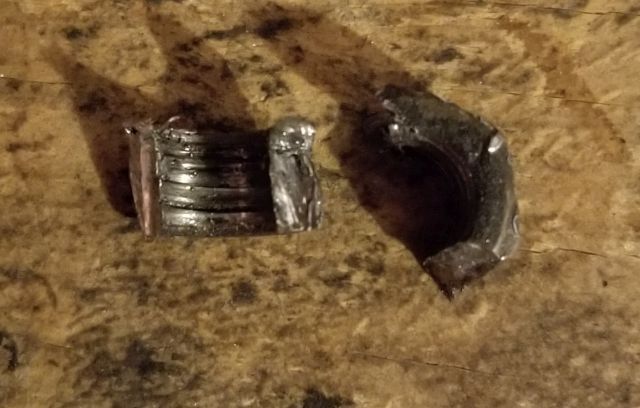
This morning I hit a little snag. Somebody in the past stripped the front pivot nut on the power steering pump. There was nothing for it but to cut the nut in half. Time to order a new stud. I can never figure out why anyone would tighten a pivot so tight.
Dremel and a carbide burr were the answer.
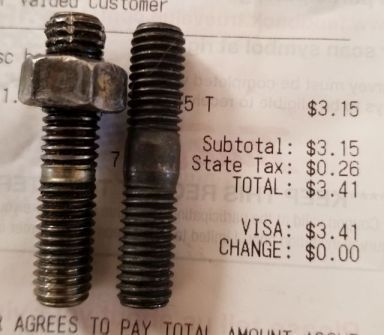
The M8-1.25 x 40mm stud attaching the adjuster link to the bracket was stripped at the nut also. I turned the stud out with vise-grips and will head to the hardware store to find a new one. This time it gets a Nyloc and won't be tightened like the last person did it.
Here's the new one (Grade 8.8) from True Value hardware store:
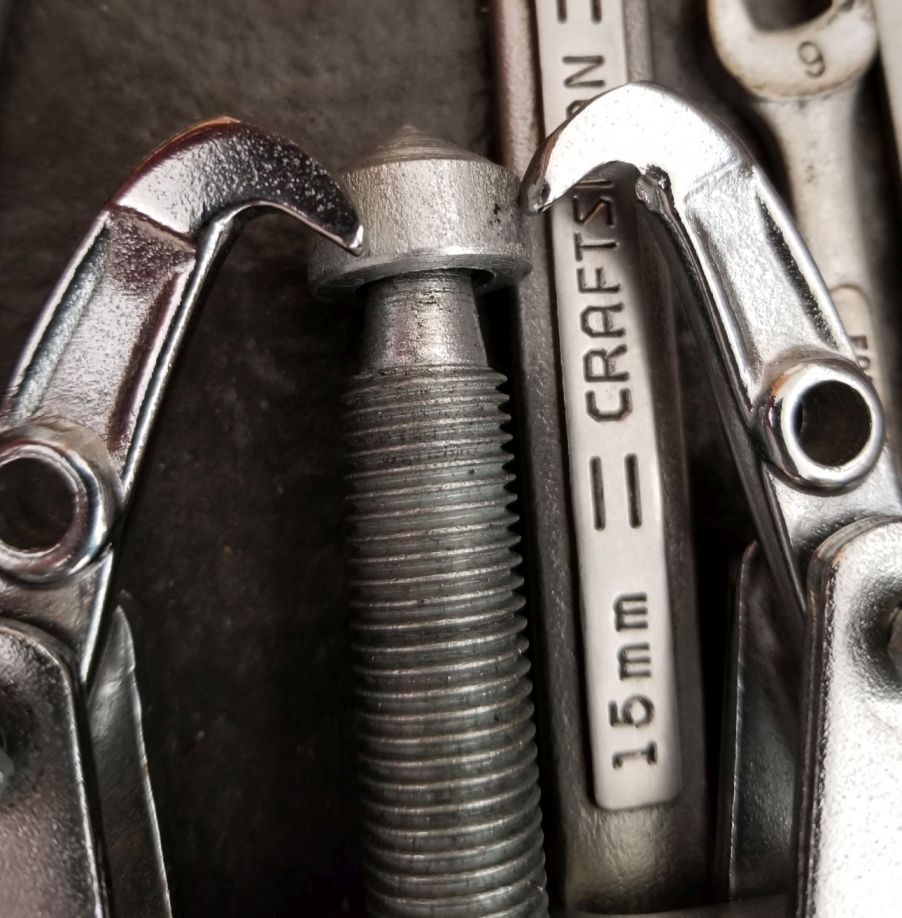
I could have probably saved a little money if I knew the ins and outs of all the different parts sources, but that's why they call it a learning curve. I bought from multiple sources, not only for cost reasons, but to spread my business and get a feel for each supplier. I didn't add the cost of tools that could be used on other cars into my Excel sheet. Until now, I had everything I needed to work on any of my cars but they were Toyotas, Mazdas, Triumphs, or BMW. I'd never needed triple-square for ANYTHING. I do now!
[screenshot of excel sheet deleted]
That's a great list of parts/sources - any chance you can post that excel file (beyond the screenshots you've already done above) directly to the forum for others to use when buying parts for a similar job?
That's a great list of parts/sources - any chance you can post that excel file (beyond the screenshots you've already done above) directly to the forum for others to use when buying parts for a similar job?
Yes. I'll do it now as soon as I figure out how. Odds and ends hardware may be added as I go along but most of it should be there now. There's a sheet called "Extra Parts" that you can disregard. They are duplicate parts of what came in kits when I decided to go further than I originally thought I would.
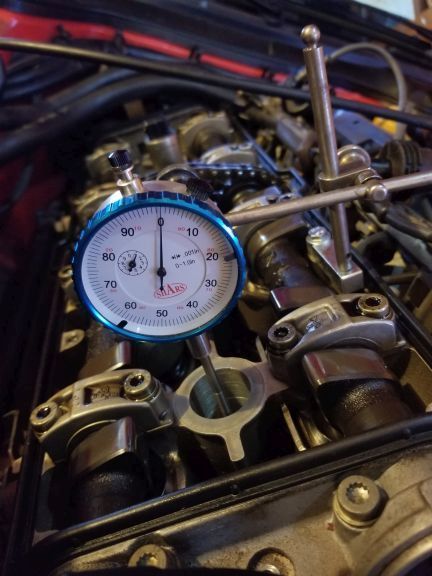
I made a little more progress today. I finished my mounts for my Starrett indicator posts, put my variocam tool together and tested it, reinstalled the plate covering the flywheel after marking the center line with white paint, indicated to top dead center and locked the flywheel. I noticed that the lock kicks the flywheel mark a little bit out of position but it will be fine. I know where it is and took lots of pictures.
After removing the rotors I used 5 x 20mm screws to preserve the timing position rather than 5 x 15mm as shown in another thread. 15mm are too short.
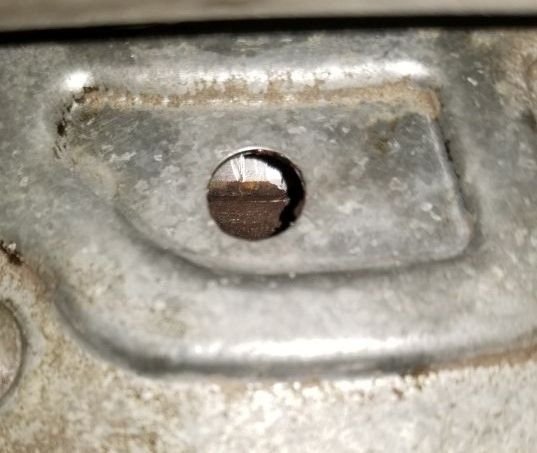
The center mark with white paint is just visible in the right side of the inspection hole with the lock in place.
I broke the crank bolt and both balance shaft bolts loose and will break the cam gear loose when I get back at it tomorrow. Before removing the cams, I tested the the variocam operation. It looks normal as far as I can tell. Let me know if you see anything of concern please. This is my first time doing any of this on a Porsche though I've worked on a lot of other cars.
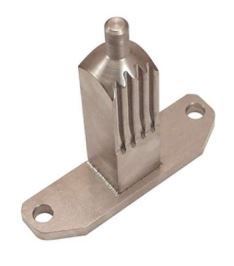
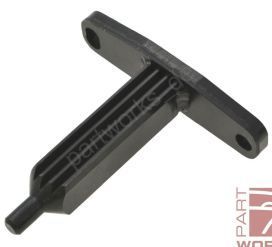
I've discovered why the flywheel mark is kicked out of position a little bit with the flywheel lock in place. Some are made with a tooth running through the center line like seen here: http://www.baumtools.com/shop/Porsch...k#.XgXkN47PyJA or the one Paragon sells. The one I bought from Germany for $46.44 shipped has a groove rather than a tooth running through the center line. That would explain the difference. The one I bought matches the one sold at Pelican. So it appears to me that the better tool may be the one sold at Paragon or Baum Tools. YMMV.
Thanks for the compliments fellas. I learned a lot from the folks in this forum and in return I hope to leave something useful. Hopefully, this documenting process will help me as well to be methodical and not miss something along the way. Please speak freely if you see me making a bonehead/noob mistake.
Here's a side-by-side shot of the two chains. The racing chain is about 5 grams heavier though the width on the outside links is about .005" narrower. The width of the racing chain appears more consistent as well. Note the different colors of the link pins, most likely indicative of a different alloy and/or different heat treat process. Also note that the swaging appears to be different on the two chains' pins. I was going to hardness check both of them but will be ready to go back together tomorrow most likely, so I will skip that since I don't work until Monday.
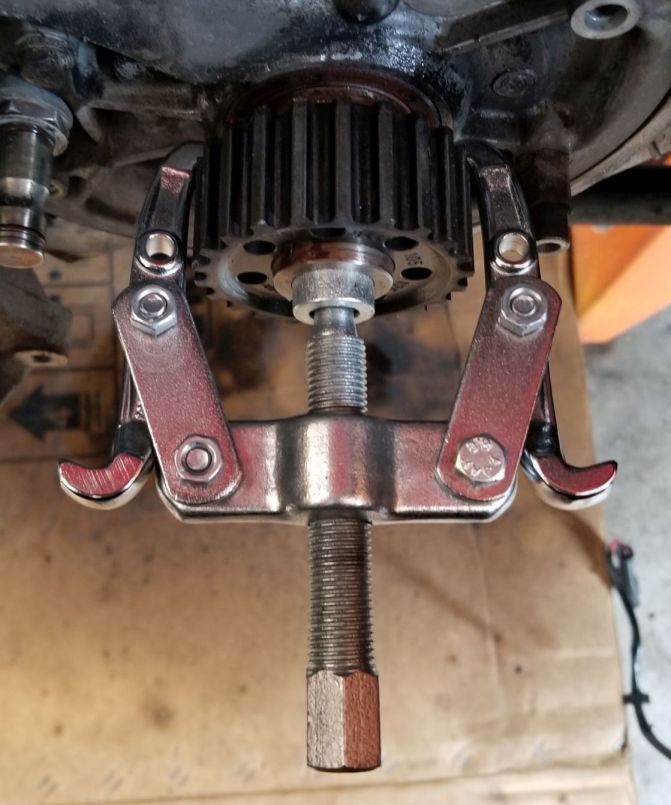
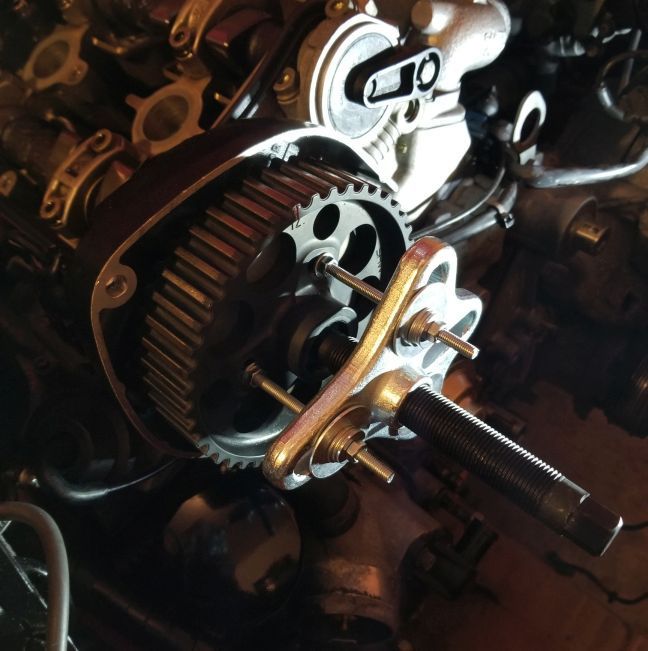
Modified Harbor Freight 2-Jaw Puller - I ground the ends of the pawls to fit behind the gear:
Time for a few hours break, then I will remove the cam gear wheel next.
On another note, while I was out getting more tools for this job (harmonic balancer puller for the cam gear), I got the rest of my supplies to zinc plate my valve cover screws and power steering adjuster rod. Karo syrup and Muriatic acid was all I had left to buy. I have to take the zinc plate I bought to work Monday and shear it into strips.
While I'm here I'm replacing the heater control valve and hoses on either side of it. The diaphragm is completely shot so I'm figuring that was a source of a vacuum leak, especially when the heat is on. I tested it by depressing the piston and covering the pipe with my finger. Upon release of the piston it returns at almost full speed. I sincerely hope this is the last of the parts I need! Valve, both hoses and four clamps ordered for $38 shipped from 944Online.
Tomorrow's jobs are replace water pump and then cam chain and pads to begin with. We'll see how it goes from there.
 12-21-2019, 10:17 PM