When you click on links to various merchants on this site and make a purchase, this can result in this site earning a commission. Affiliate programs and affiliations include, but are not limited to, the eBay Partner Network.
My door handle gaskets appear to be deteriorating rapidly.
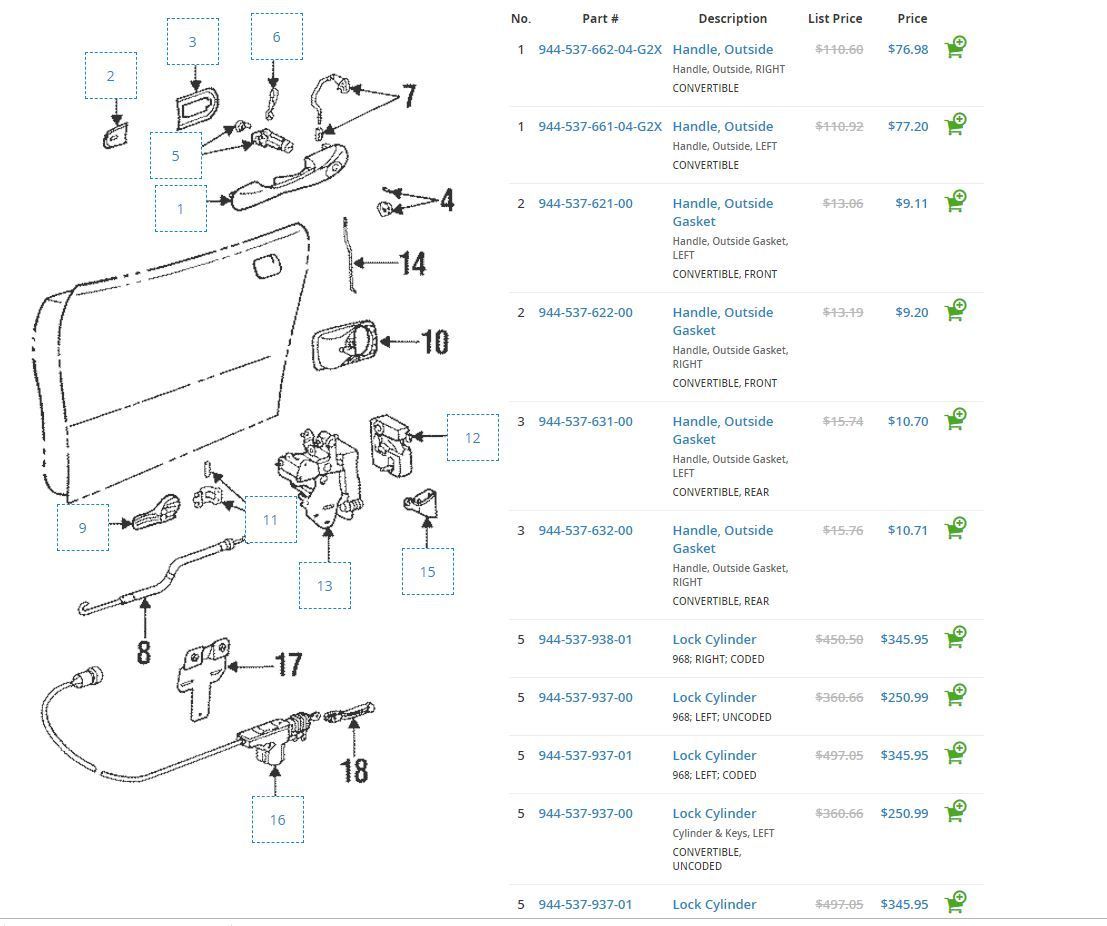
Looking at parts, I'm wondering if there might be a difference between the convertible and coupe versions?
Here's the pics for the convertible... Parts #2 and 3, with a part number.
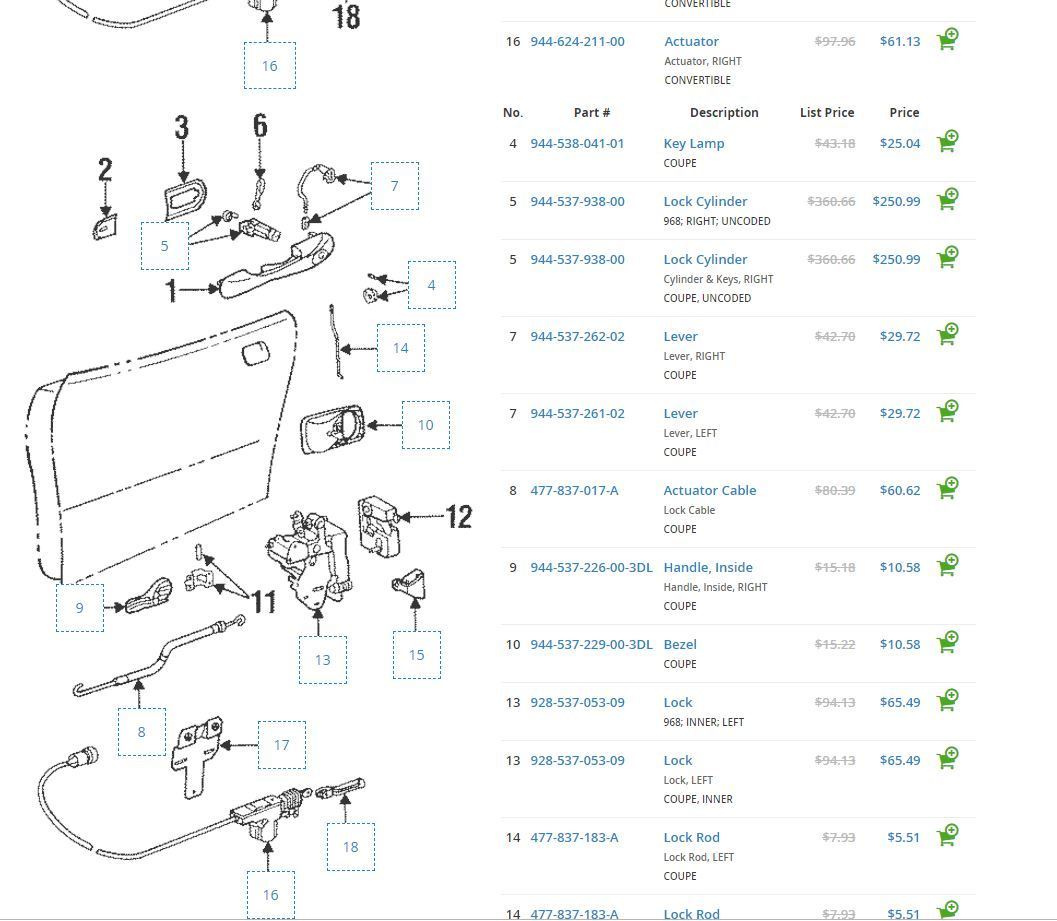
And now, the Coupe. No part numbers available, and they don't appear in the parts list.
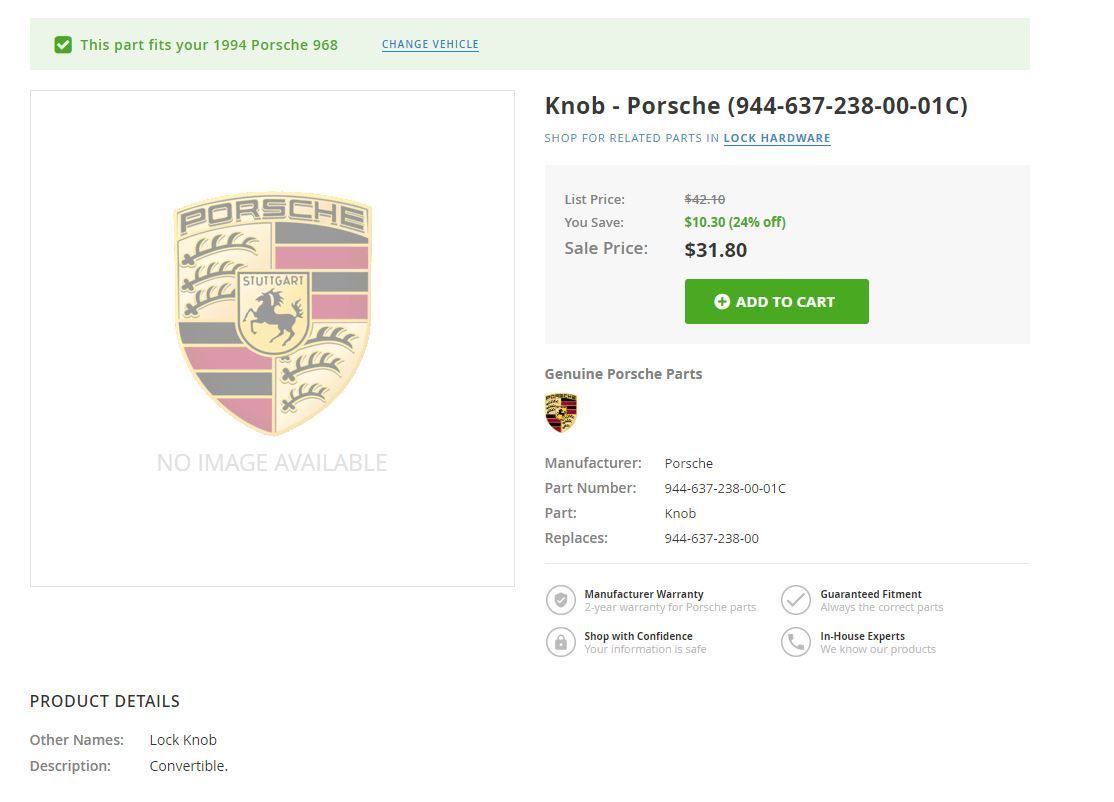
Lastly, the housing for the LED lighted door lock **** on the passenger side is broken.
It should be this part number... but only specifies convertible.
Here's the Pelican pic... I'm puzzled by it though, and can't figure out how it would actuate. Any pictures of this mechanism out there?
I don�t believe there is any difference between the coupe and cab door handle or gaskets.
The lighted **** that you�ve included a picture of works like this;
The **** screws apart into two components, a top �sheath� and a base �post�. (Picture taking the cap off of a pen, the cap being the sheath, and the pen the post). The post screws onto the metal lever that goes down into the door. This is the lever that locks and unlocks the door.
The LED, trailing its two wires, fits into a recessed trough or groove on the �post� such that the LED ends up at the top of the post.
You then slide the �sheath� down over the LED/post/wires and reattach it onto the post at the bottom. Again, like putting the cap back on a pen.
The other end of that lighted **** assembly is simply an electrical connector. Why it�s several inches long, I don�t know.
It just plugs into another feeder connector that is running along the top of the door. You attach the connector to the top of the door by pushing the plastic tang into a small hole on the top of the door. It just holds the connector and wires safely in place.
And that�s it.
The ***** are notoriously fragile.
IMO, they are not meant to be the primary method to lock and unlock the door. As the lock mechanism wears and dirt builds up in the mechanism it becomes harder and harder to pull the lock up or push it down. The door lock solenoid also has to move when you push down or pull up that **** increasing the force needed.
Instead using the lock button on the console and turning the key in the lock itself are the methods that should be used to lock and unlock without risking damage to these *****.
I just repaired the ***** on both of my doors. I had to replace one with a new unit (as in your photo).
I was able to superglue the slightly cracked **** sheath to the post on the second door, and so far it�s holding.
The gaskets are the same. Make sure you look up the installation process. Many just cut the rear gasket on the bottom in order to install. There are many pins in the handle to keep the gasket in place.

 04-17-2019, 10:00 PM