When you click on links to various merchants on this site and make a purchase, this can result in this site earning a commission. Affiliate programs and affiliations include, but are not limited to, the eBay Partner Network.
I'm a fan of AMMO NYC on Youtube.
Larry uses hot water as heated by a drip coffee maker. It seems to be hot enough to release the glue but not so hot as to damage the paint.
He has a recent video up where he removes aftermarket film from the nose of a 996.
Jump to 10:49
I have done this to 5 very similar 911s and on all of them I removed the OEM stoneguards using steam from steamcleaner from bottom going up. Absolutely no issue in paint removal.
Followed with 3M General adhesive cleaner 08987 or 03618 to clean up the area
I then had a professional PPF guy reinstall much larger PPF all the way up the hips.
On one of the cars, I noticed discoloration in the area under the OEM stoneguards vs. the unprotected area. Modern PPFs are significantly clearer than the OEM stoneguards.
By the time the 996 came out the films changed considerably. They have continually improved them and the new films are much nicer. Although even the new films yellow over time.
i find many people use solvents or other chemicals which dry the old films out. I have had some cars where one side came off in one piece the other 1000 tiny pieces.
Many thanks for the great advice....since they are both no longer a contiguous pieces, literally look like a plastic flagstone path it’s likely going to be a labor of love😂 I’ll keep you posted.
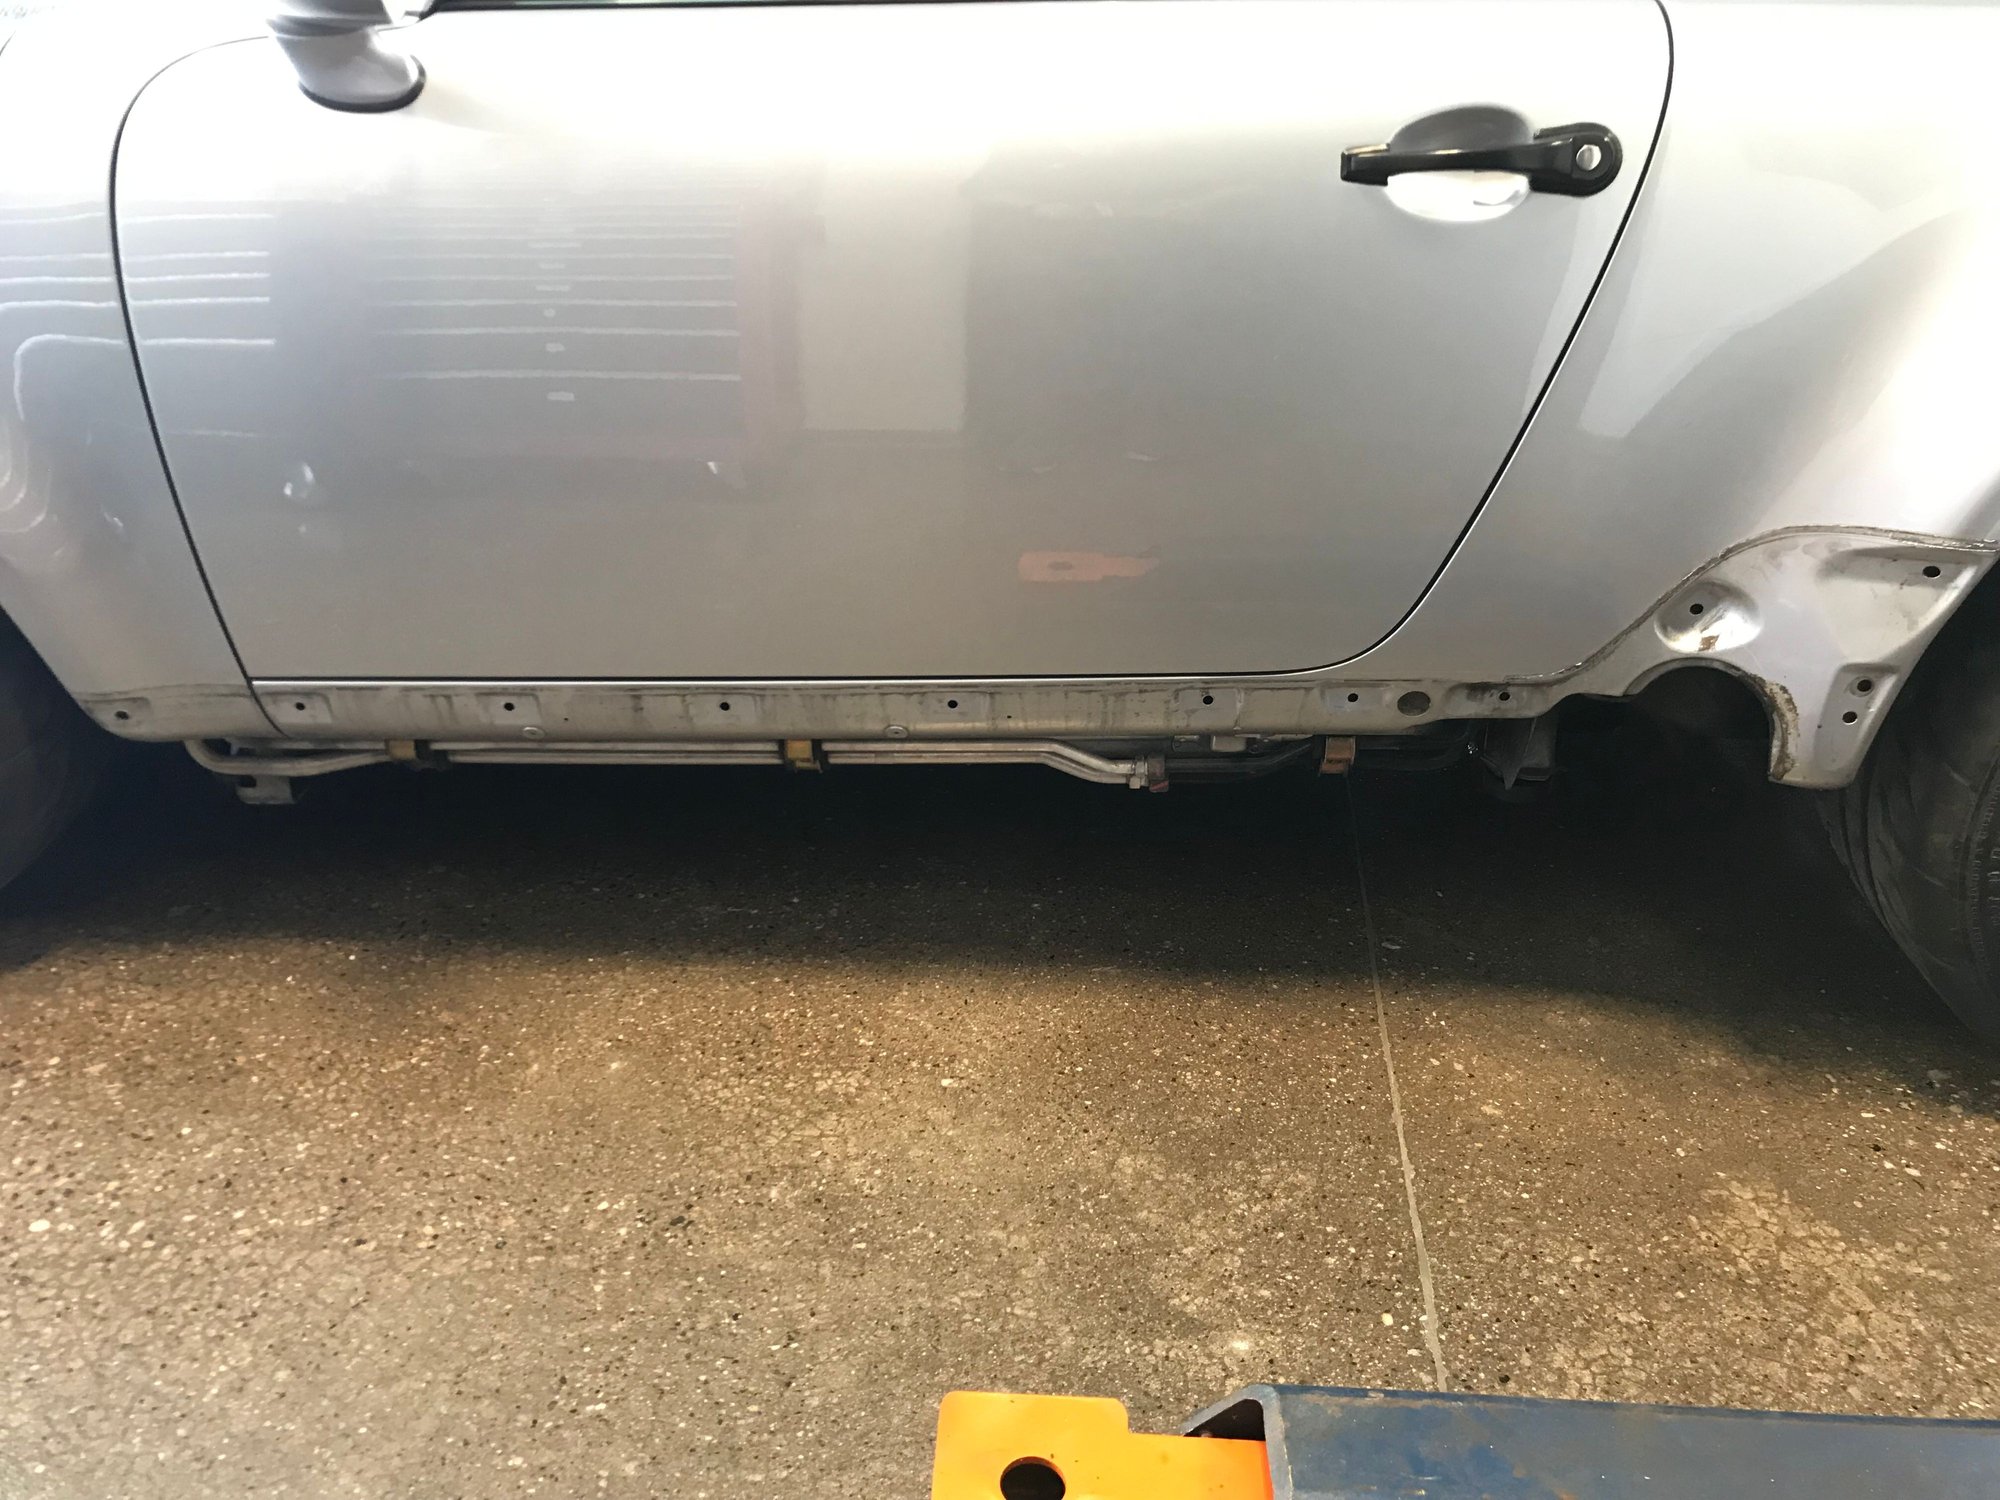
To remove the rocker panel, first remove the piece by the rear wheel. A couple of screws on the bottom of the panel and two plastic nuts inside the fender well. To remove the main rocker panel, remove the fasteners on the bottom. There are snapon fasteners on the top of the panel. Just start on one end and pop them out.
NOTE: the clips get very brittle with age. you should have new clips on hand to replace. be careful pulling panels off as the plastic “male” pieces on the backs get as brittle as the clips themselves.
As ^he^ said, it is very very easy. The parts list is up in the thread. Order the parts and have something that will not damage the paint to pry the rockers.
Here is a picture to help you see where the "holes" are:
I went ahead and completely cleaned and PPF'd the rockers and shark fin while they were off.
start with the screw heads on the underside and in the back (behind the wheel well). there is black plastic screws to fix the rockers.
then you can carefully pull the parts from the lower away from the car. start with the rear part. once it is removed, the rest is easy.
to fix the new gaskest is the most time consuming part. i did it split to two days. first day i mounted all parts back but did not screw on. second day the gaskets held in place better. so it was easy to do some corrections.
The 6 pins/clips/grommets under the door were very very stuck on my car, but only broke one taking it off. I'm thinking when I put it back together, to apply some grease to those pins so it's a lot easier next time!
You want them to be difficult to remove. If not they will pop out on you which you don't want. I keep a lot of these parts on hand just in case. I usually replace the grommet that inserts into the tub each time. I find they lose their grip when you remove them a few times.
If you don't have a set I highly recommend something like this for removing parts on our cars.

 12-02-2021, 10:31 AM