When you click on links to various merchants on this site and make a purchase, this can result in this site earning a commission. Affiliate programs and affiliations include, but are not limited to, the eBay Partner Network.
Another DIY.
Changing the front diff seal normally involves a very difficult and involved process of dropping the subframe, removing the steering rack and diff from the car and the very diffcult access to the top 2 bolts on the diff/tube.
As an alternative, if you have the engine out it is quite easy to do the seal by removing the torque tube/prop. This leaves the diff in the car, and because you can angle the tube down it makes the top bolts easier (but still tricky).
Make sure you order the small rubber washer as well as a new seal, the washer goes in the end of the propshaft.
Start by supporting the diff, pull off the gear **** from inside the car (just pull up it can be difficult) , remove the diff mount so it doesnt tear and to give you more room above for the top bolts. Angle to torque tube down and support at the rear.
Undo the front of the clamp on the splined collar that attaches the prop to the diff input shaft, and remove the bolt.
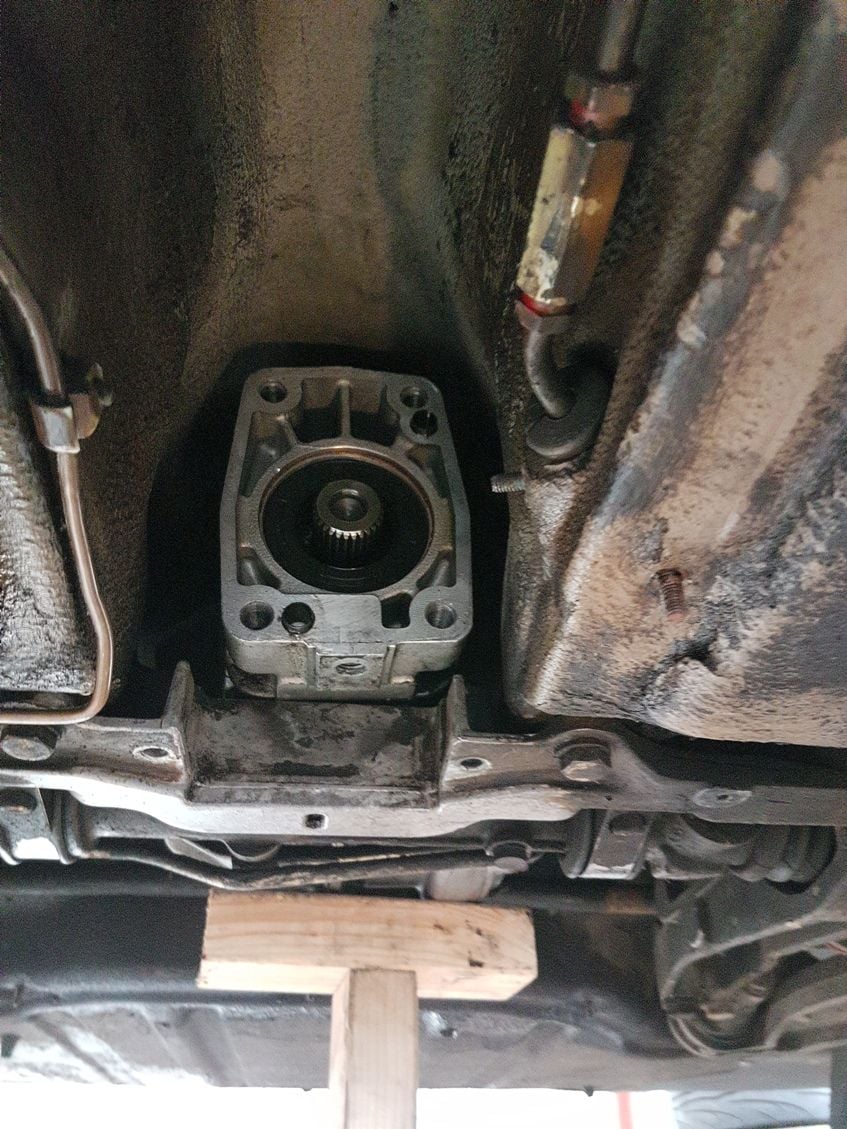
Undo the 4 main bolts that attach the diff to the torque tube, 2x top ones need a socket extension with a flexible joint, (a good tip is to wrap the flexible joint in electrical tape to limit the flex). pull the tube and change the rubber washer in the end of the shaft. It is quite heavy!!
Then remove and replace the input seal (make a note of how far in it is relative to the diff casing), re-install the tube and bolt up, bolt up the prop splined collar, then angle it back up into place whilst re-fitting the gearknob from above. Re-attach the rubber cover under the gear lever area below.
I replaced the front diff mount with new as well, makes a big difference to the tightness of the car.
Last edited by tdiquattro; 06-04-2017 at 09:33 AM.
I am noting this thread for later reference, thanks for the tips.... Will be checking front of torque tube for evidence of any leaking. If no leaks, will pass for now. The slope can get very slippery, I'm not looking for trouble, trouble will have to find me
Thank you tdiquattro! I too have a leaky front diff and planned the typical emasculation of my C4. Since I will drop my engine soon, this is a great alternative. Bookmarked indeed!
Another DIY. Changing the front diff seal normally involves a very difficult and involved process of dropping the subframe, removing the steering rack and diffcult access to the top 2 bolts on the diff. As an alternative, if you have the engine out it is quite easy to do the seal by removing the torque tube/prop. This leaves the diff in the car, and because you can angle the tube down it makes the top bolts easier (but still tricky). Make sure you order the small rubber washer as well as a new seal, the washer goes in the end of the propshaft. Start by supporting the diff, pull off the gear **** from inside the car just pull up it can be difficult, remove the diff mount so it doesnt tear and to give you more room above for the top bolts. Angle to tube down. Undo the 4 main bolts that attach the diff to the tube, top ones need a socket extension with a flexible joint, tip is to wrap the flexible joint in electrical tape to limit the flex. pull the tube and change the rubber washer in the end. It is quite heavy! Then remove and replace the seal, re-install the tube and bolt up, angle it back up into place whilst re-fitting the gearknob. Re-attach the rubber cover under the gear lever area below. I replaced the front diff mount as well, makes a big difference to the tightness of the car.
964.375.053.01 front diff mount x1 100usd (got this from design 911, cheaper than OPC)
964.421.245.01 driveshaft front rubber washer x1 10usd (goes in the end of the driveshaft)
999.703.233.40 torque tube dust plugs x2 2usd (cover the round holes in the torque tube)
999.651.190.40 c4 lines clips gbox x4 4usd (little clips that hold the C4 hard lines on the gbox)
999.113.352.40 front diff input seal 42x72x10 x1 15usd
I actually ended up using a commercial double lip seal for the input shaft as it looked better than the OPC one, no leaks so far 1500 miles
964.375.053.01 front diff mount x1 100usd (got this from design 911, cheaper than OPC) 964.421.245.01 driveshaft front rubber washer x1 10usd (goes in the end of the driveshaft) 999.703.233.40 torque tube dust plugs x2 2usd (cover the round holes in the torque tube) 999.651.190.40 c4 lines clips gbox x4 4usd (little clips that hold the C4 hard lines on the gbox) 999.113.352.40 front diff input seal 42x72x10 x1 15usd I actually ended up using a commercial double lip seal for the input shaft as it looked better than the OPC one, no leaks so far 1500 miles
Thanks, I would have surely missed something otherwise. All parts ordered from Design 911. Not that expensive and you never know that front diff mount might be degraded after 27 years.
Hey Ricardo! , I finally fitted the nose bearing seal you sent me!! No leakes at all so very pleased, thanks once again for helping me source it and get it to the uk
Folkes; if you didn't know alreay Ricardo is a top bloke! (and his superb capture of all his 964 DIY was a massive inspiration for me as well as many others).
Very cool, I am still in the middle of my world's slowest engine rebuild but should be starting back up in a few weeks. Glad you could help me learn about a the diff seal I didn't even know existed. One thing I've learned on my second 964 engine our repair is replace every possible seal you can.
The workshop manual specifies glycerine for the washer and Olista Longtime 3EP for the seal. Where did you source the latter or is there a more modern replacement?
I have been using castrol RRG or a quality Polyurea grease or Nikleslip, depending on where it goes.
For the input seal I just used a bit of polyurea on the lip, but as far as I can tell it is a wet seal anyway with the way the old one was leaking! So cant quite see the logic of the workshop manual.
I expect there will be a few views on this, but I have not had any issues for years using these. Nickleslip is great as a better alternative to copper based for studs, exhaust etc, although expensive.
Thanks, Red rubber grease is certainly easier to get hold of than Olista. Meanwhile, almost every special part is on back order at Design 911 so I have time to source whatever grease I go with.

 05-07-2017, 05:20 PM