When you click on links to various merchants on this site and make a purchase, this can result in this site earning a commission. Affiliate programs and affiliations include, but are not limited to, the eBay Partner Network.
Thank you for the pics. Interesting. It seems perhaps the most difficult part is to get the knee shield off so as to get behind the switch. What did you have to remove to get that out of the way? Thanks.
Thank you for the pics. Interesting. It seems perhaps the most difficult part is to get the knee shield off so as to get behind the switch. What did you have to remove to get that out of the way? Thanks.
You can access it without removing the knee pad. It is a PITA but all you need to remove is the VDO box I pictured. Once that is out of the way it is just getting in there to remove the switch which is held on by two screws. It is just awkward to do and I have some nice scrapes from doing it. I will try to take better pictures when I do my track car next week. Although this has the entire lower dash removed and the rennline dash face.
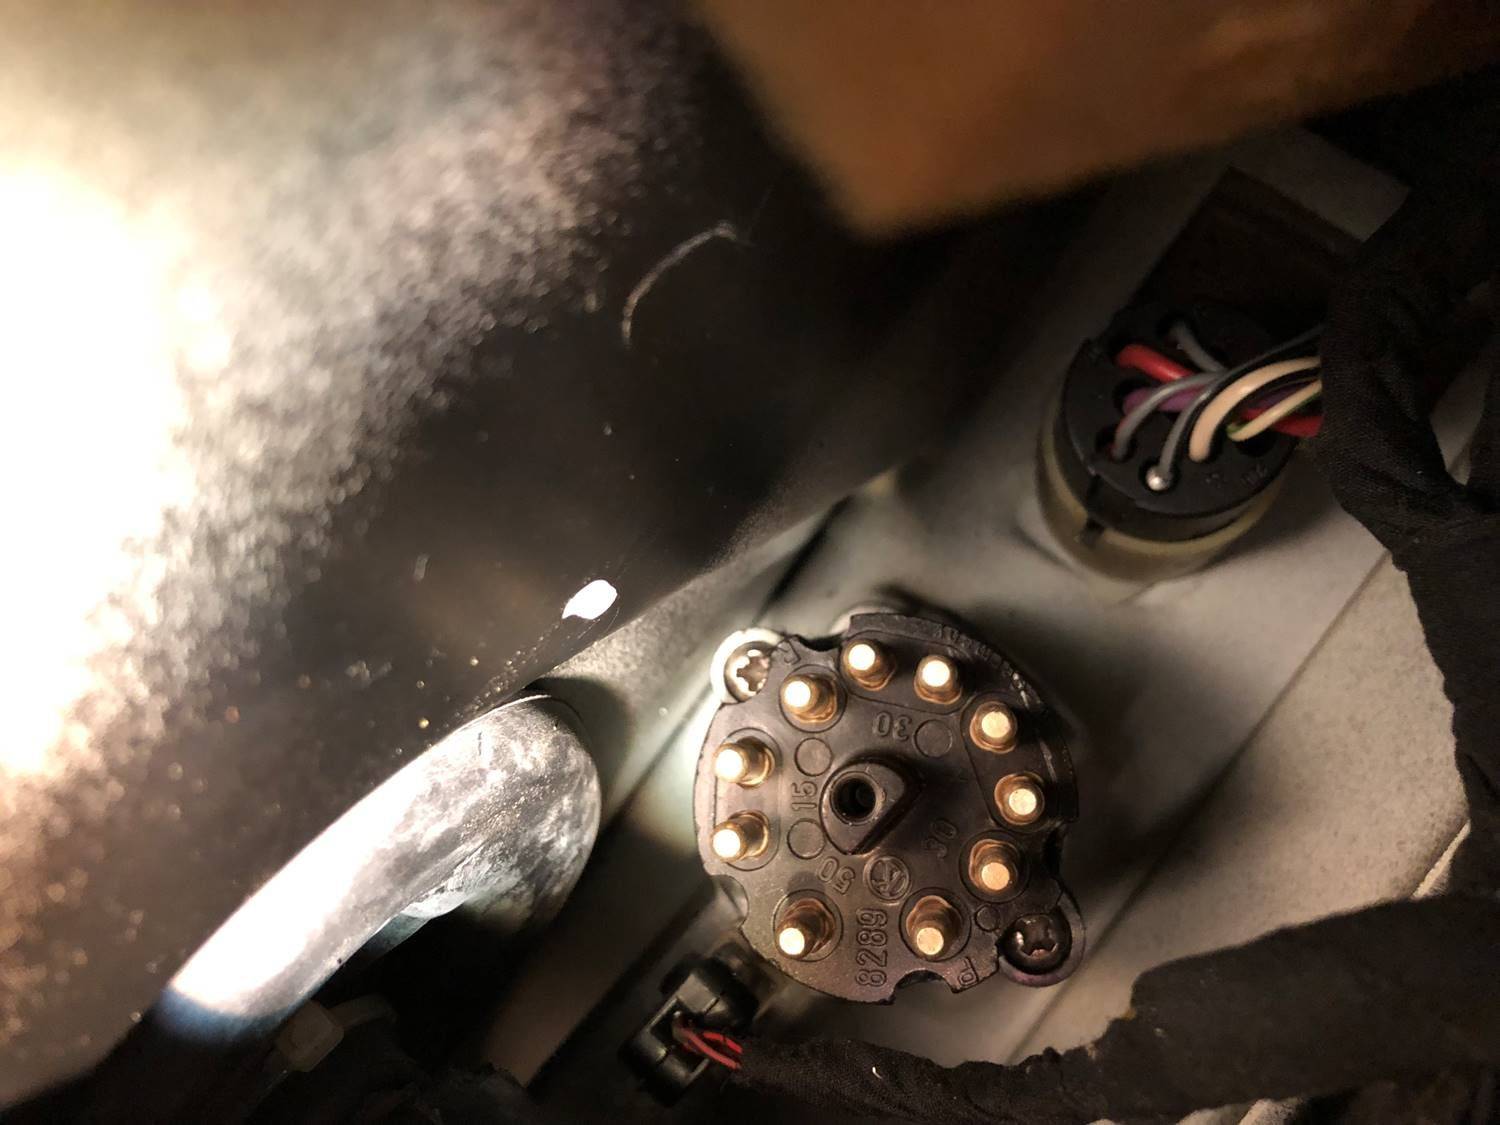
The picture of the two screws is where the VDO box mounts if you look closely at the lower right part of the picture you can see the switch hiding behind the harness.
So I tackled the same issue with my car today. The gremlins were indicating that the ignition switch was the source of my electrical problems when I attempted to start my car. Wiper blades wouldn't work, window switch would stop working, and AC blower motor would stop. If I jiggled the key those components would start working which was by luck I figured that out. The final straw was when after a nice run around town and parked it the next day the car wouldn't start at all. Checked all the obvious items such as battery cables, fuses, and DME. Nothing worked. So I ordered a new ignition switch from Porsche and picked it up in two days. So thanks to Cobalt's post I choose his method to deal with this.
Originally Posted by cobalt
Well I haven't had to work under a dash in a long time. I forgot how much I hate working upside down like that!!!!!!!!
Removed the seat pulled the VDO box and the plug the at the end of the ignition switch. Installed the new switch used a screwdriver to give it a try and bam it started without any hesitation. Clearly the switch was the culprit. Now removing the old switch and replacing it with the new one was a job by itself. I would have taken pictures but it was hard enough for me to fit under there as it was.
I guess it is better than the G series cars that you could easily pull the plug and install a switch ala Charlie Sheen and No Mans Land.
I too realized what PITA it was. But here is a couple things I did differently than what Cobalt described later in his post.
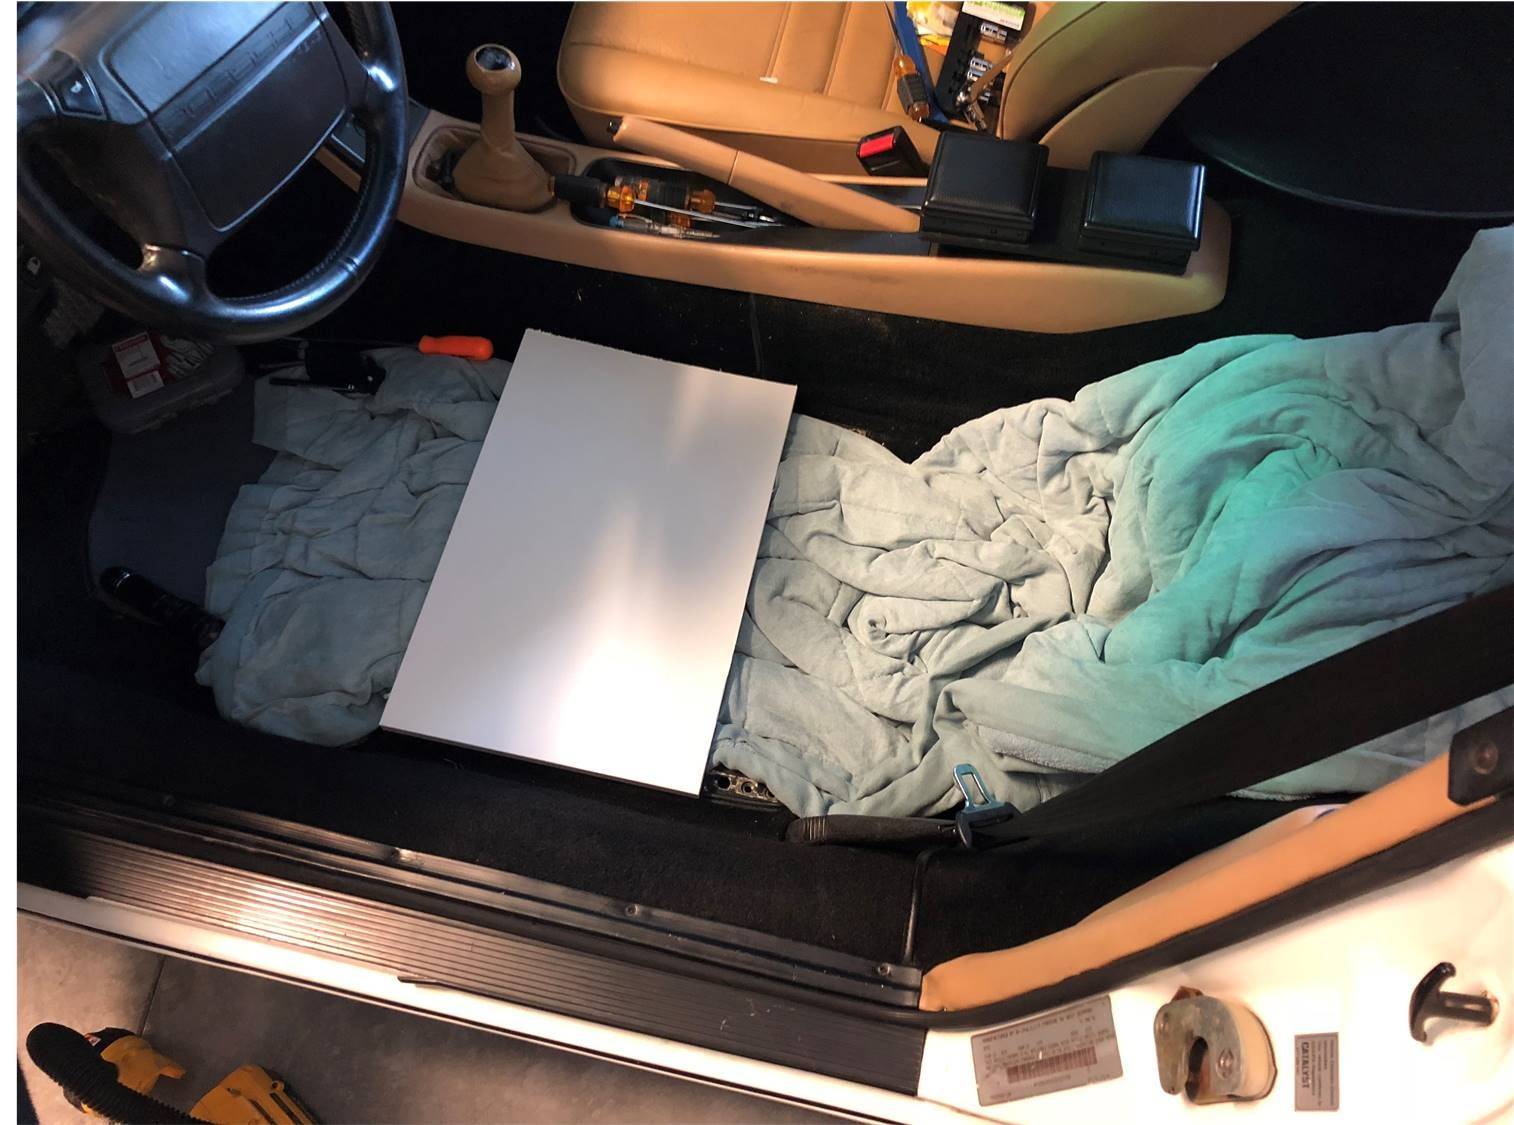
After removing the seat with the two harness connections I decided not to remove any more components, but instead, built a wood platform to rest on the raised body portion where the seat rails are mounted to 18" x 15" x 1/2" thick should work. Measure yours to be specific and make sure it supports your weight without flexing. Then place padding all along the bottom to protect the wires and boxes.
Here are the components you need to protect from damage.
Here's what it looks like with your new back support.
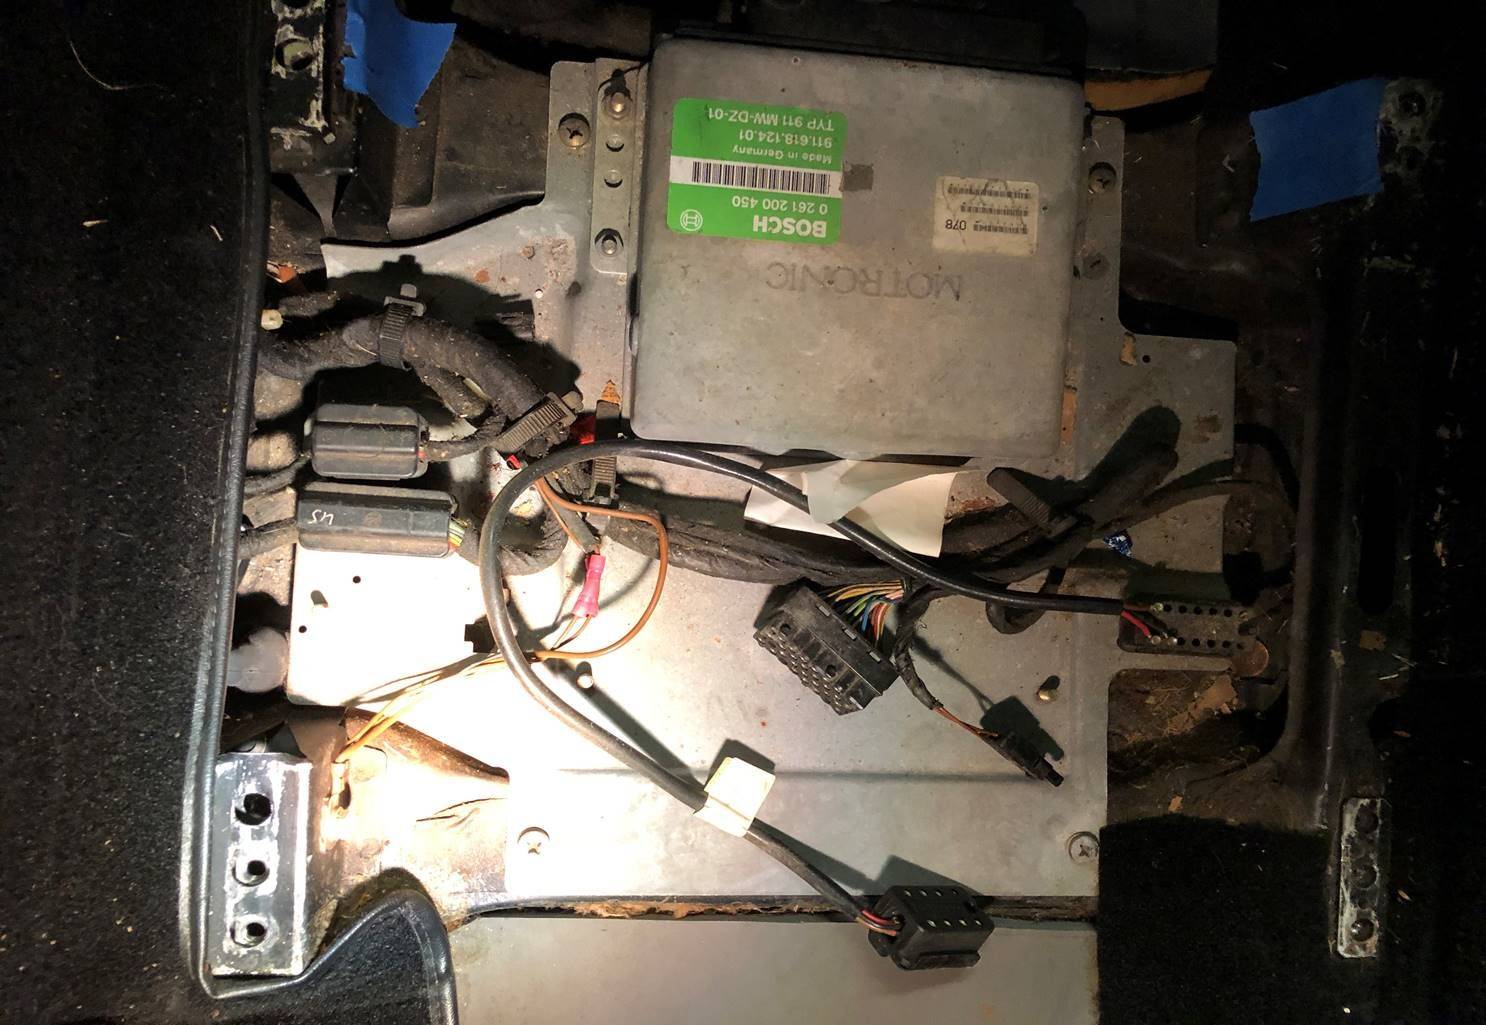
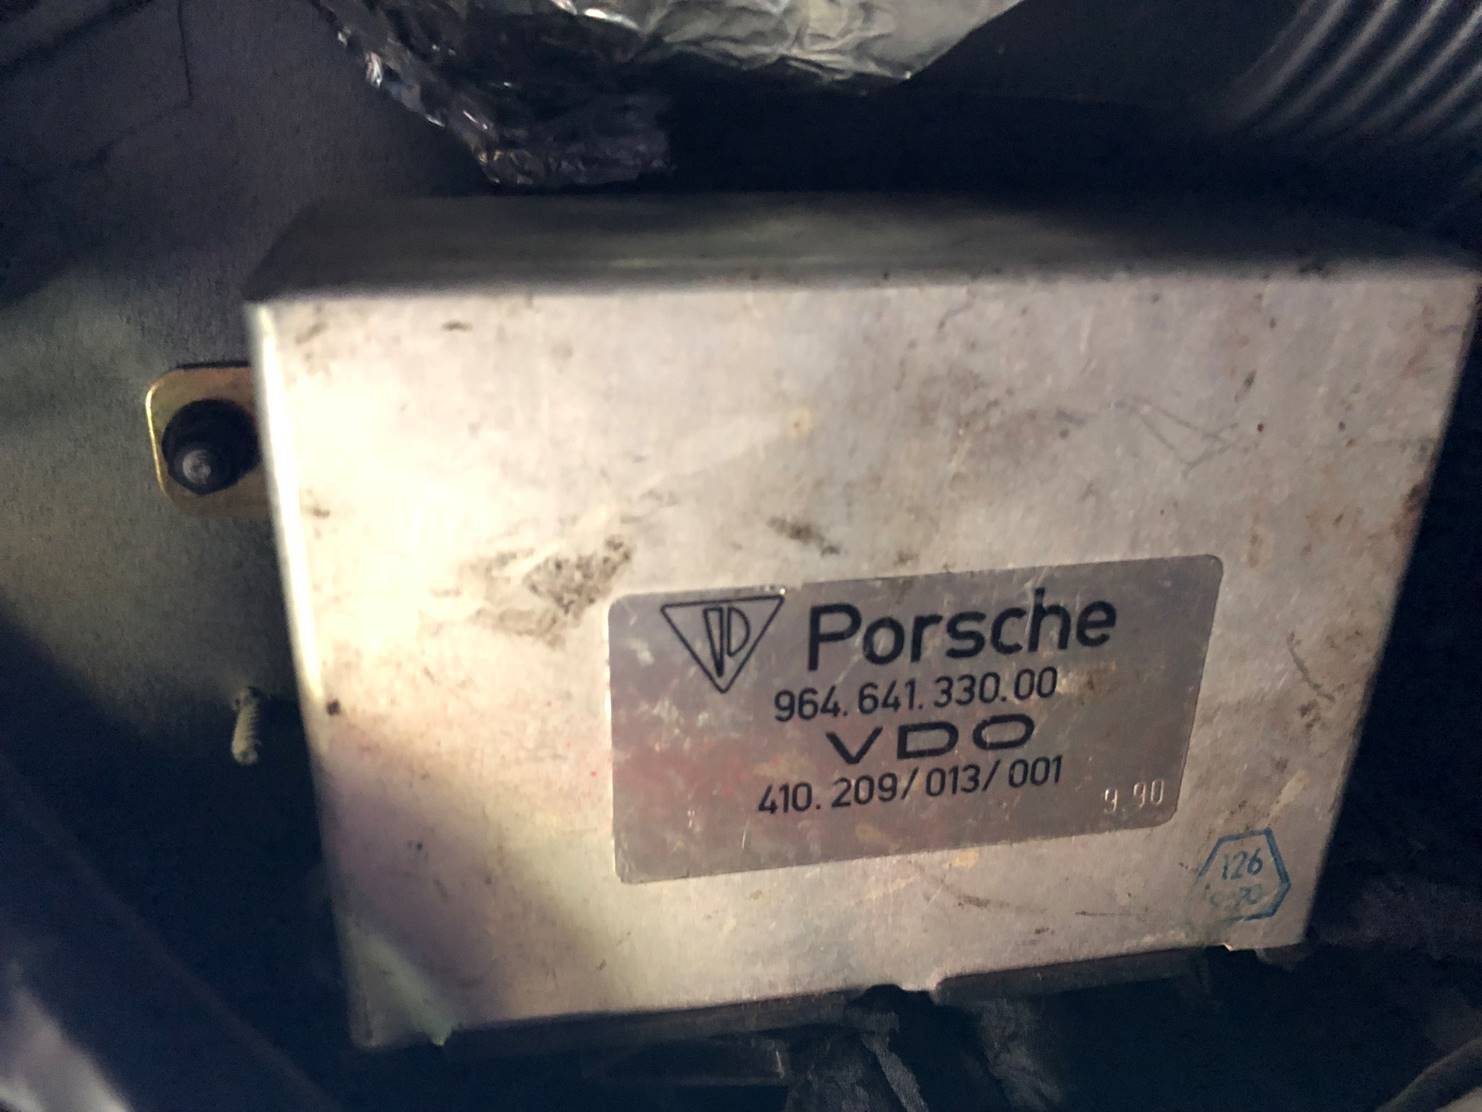
The next steps follow exactly what Cobalt suggest and remove the VDO box which has two screws holding in place.
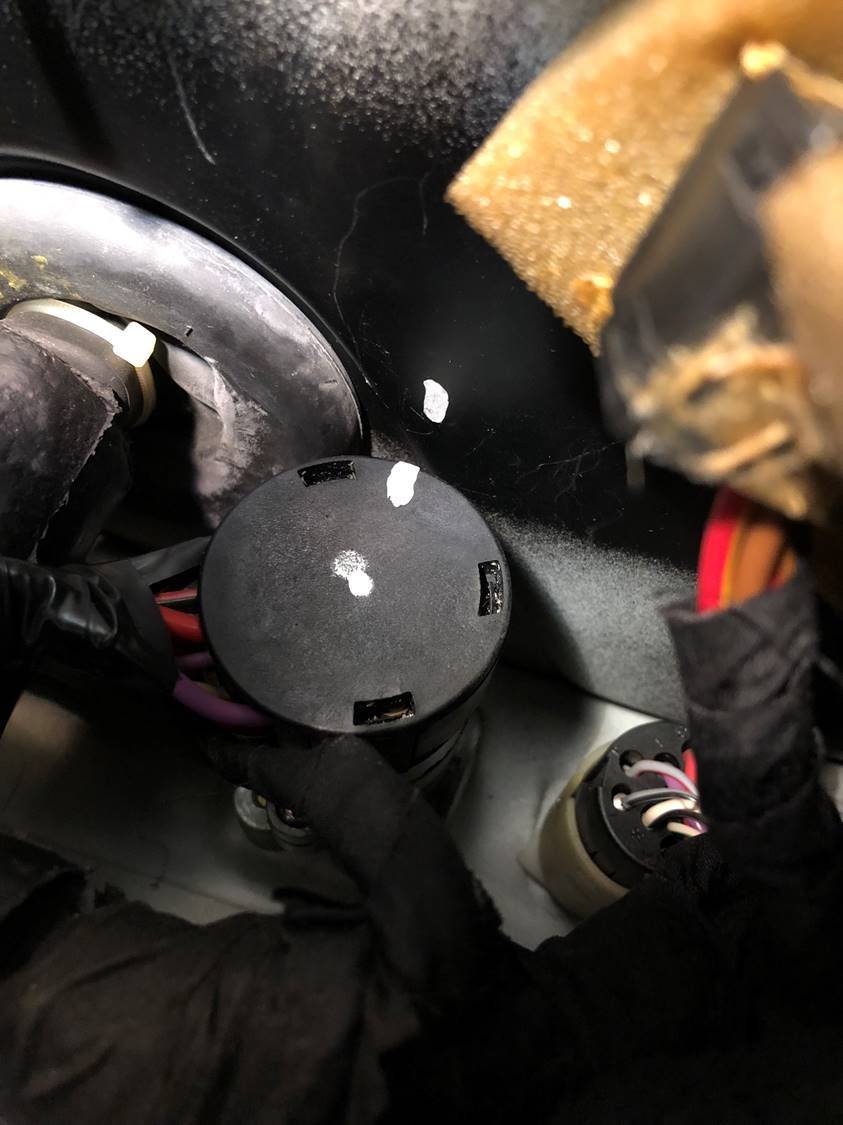
VDO Before removal, Ignition Switch Harness is directly behind it.
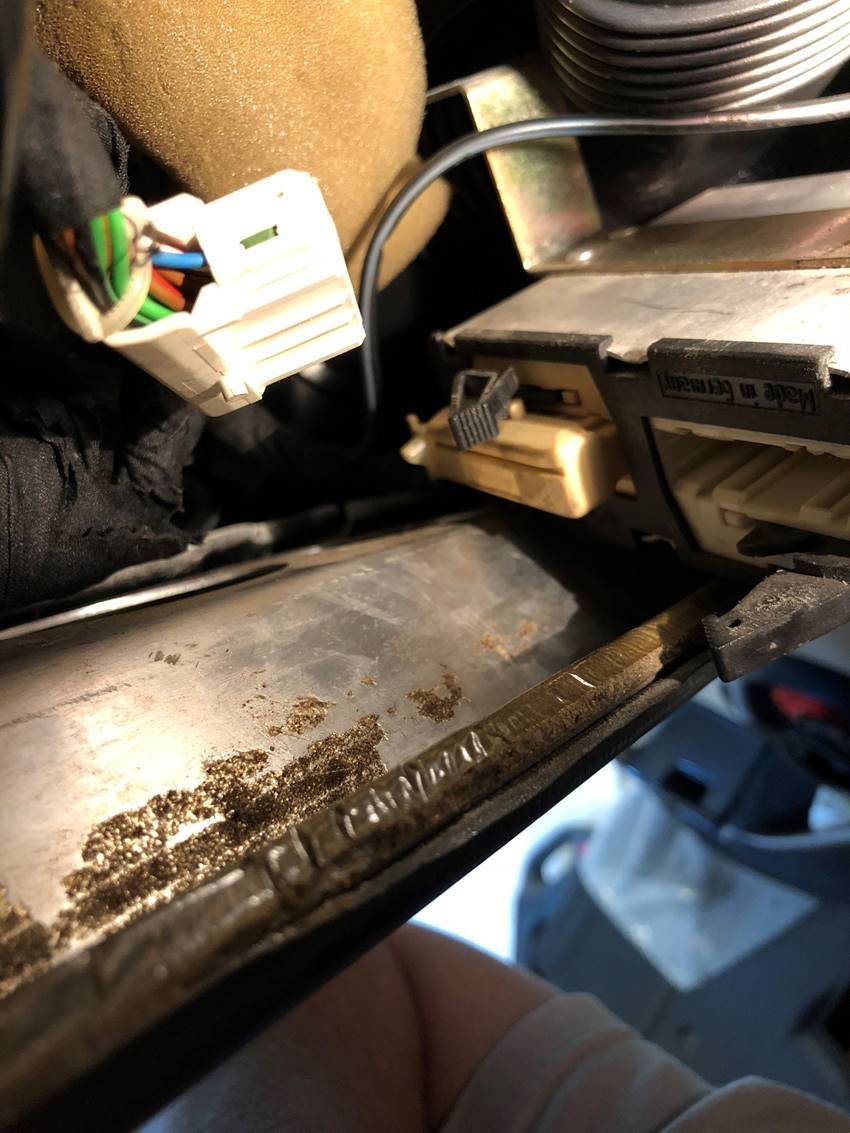
VDO has two connectors and you need to be careful removing, each has a lever to assist with separation, then set connector harness aside.
Next step you will see the black connector harness to the ignition switch. Two screws are present one on top and one on the bottom. The top screw is tricky to get to depending on how big your hands are. Warning your only getting one hand in that tight space. You will need a small cross tip screwdriver to remove and if you have one that is magnetized all the better. If not have a magnet handy cause if you drop a screw you're going to have to go fishing for it. The kneeboard of the dash has gaping holes to catch it. Also, do yourself a favor and mark the orientation of the wire harness before you remove it.
Wire harness marked with white-out to make easy for reconnection.
Here you can see the two screws that are a pain to get out and worse to get back in. But I have a secret that made it easier.
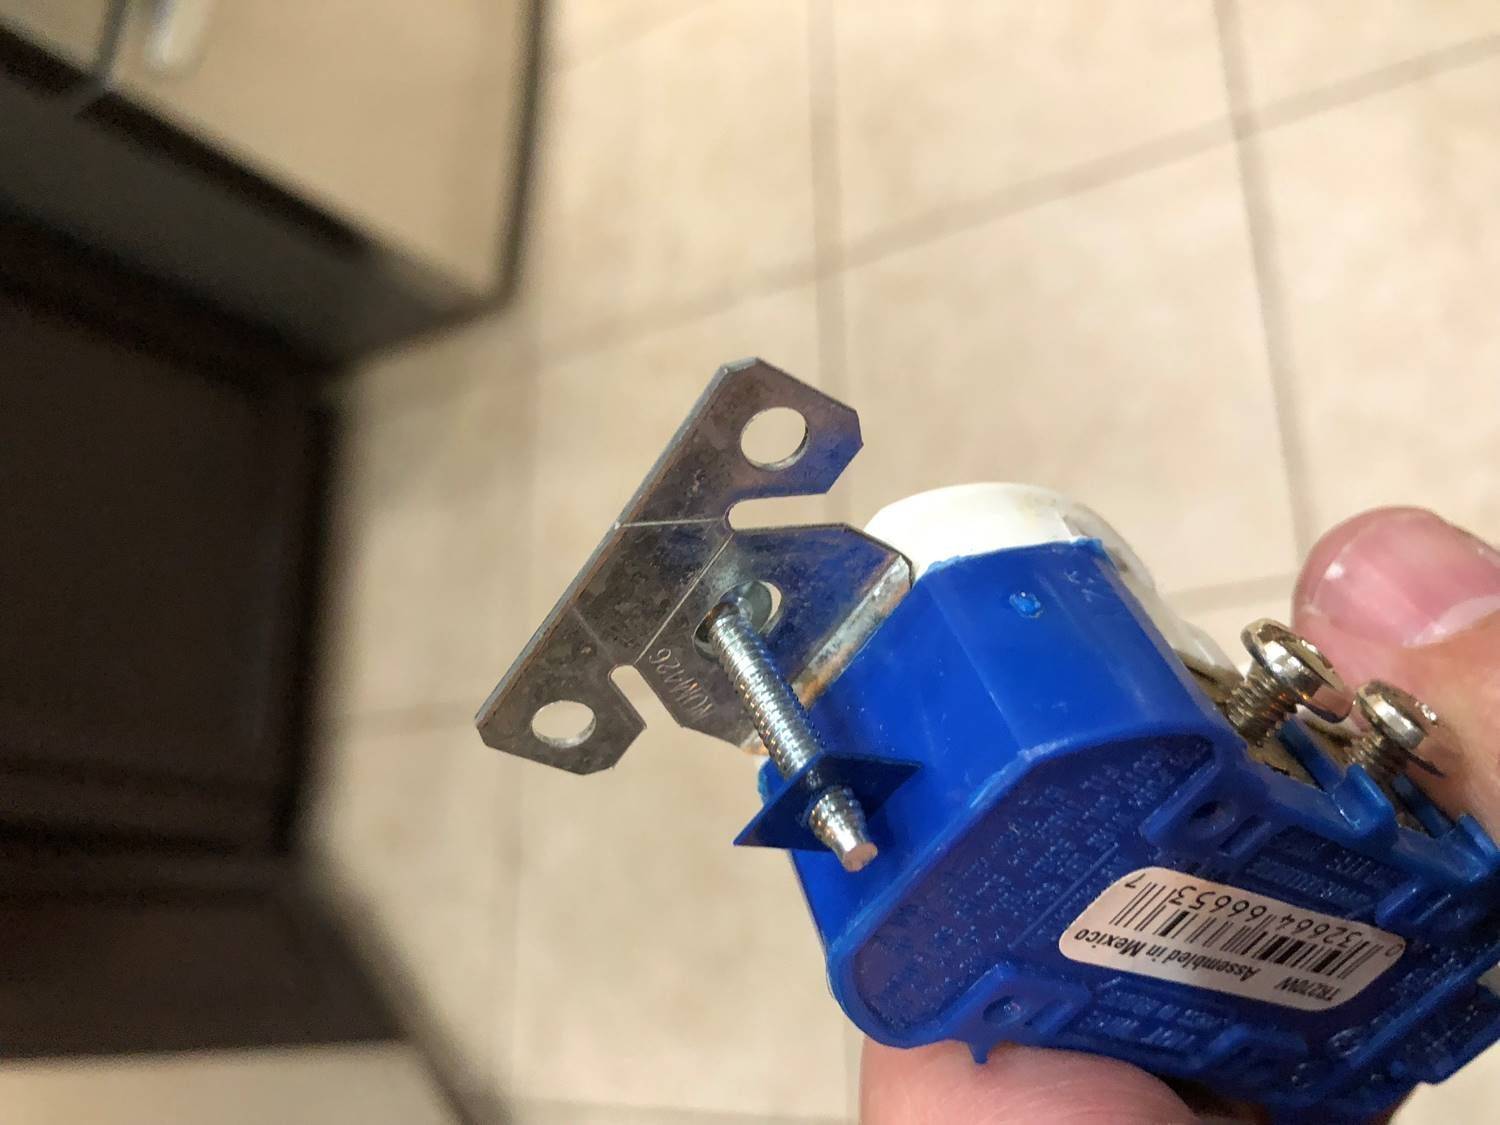
So after dropping my screws like two times in the pit of the dash and having to try and fish them back out. I remembered a trick that might work better so I didn't have to try and manipulate the screws and screwdriver with one hand. Which is why they kept falling. I found a new electrical outlet that had those stupid plastic backings for the screws to be held in place and decided to try using them on this project. Just locate some and trim them down into a circle and pre-screw them to fit your screws that are a little wider. Put it all together then you can install without messing with the dang screws. Easy as can be.
Electrical outlet before removing plastic square for my project.
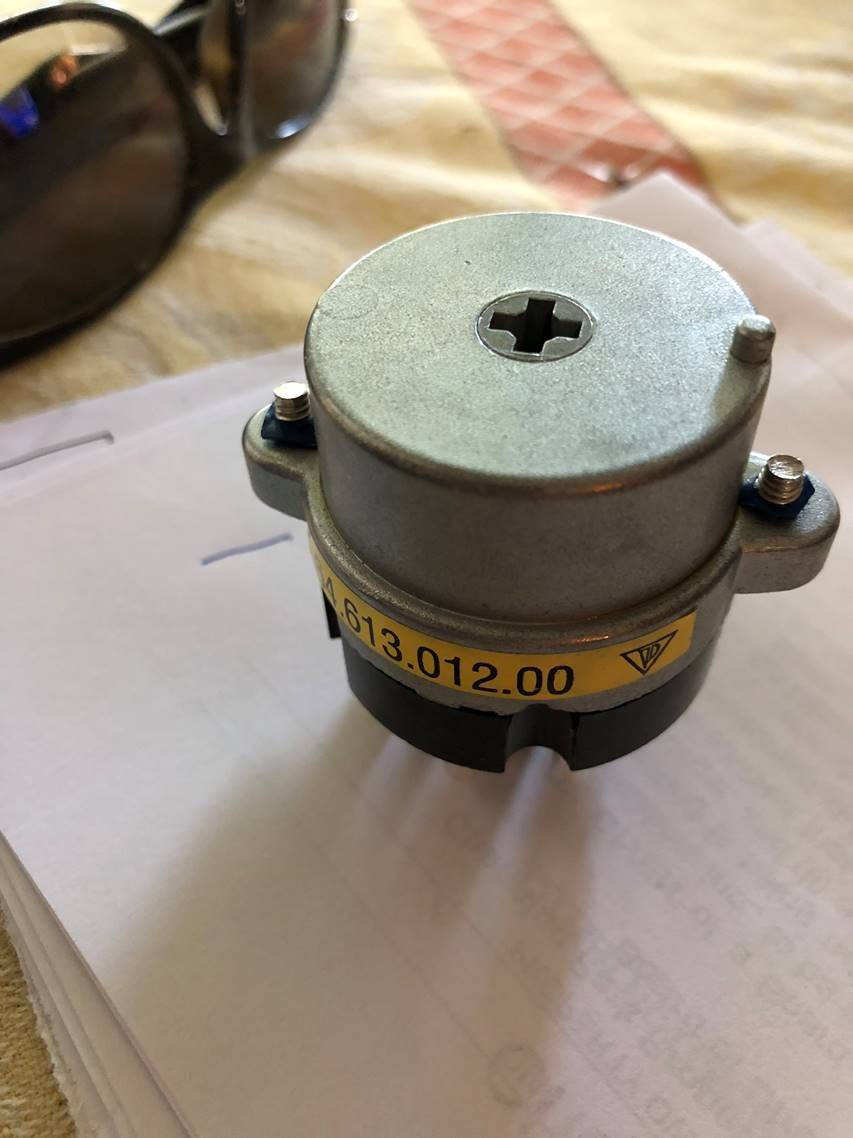
The ignition switch is now set up with screws firmly in place ready for install.
Put everything back together just like you took it apart and you should be good without further hassle. After the car was back together she fired up with no issue. The only existing problem this didn't resolve that I believe is actually unrelated is my #1 fuse 25 amp to interior blower motor keeps popping after replacing it three times. So more gremlins to figure out. The bad part is the mechanic just had my AC running again nice and cold before all this happened. So now I'm going to let him take a look at this issue.
Anyway, I know this was long but hopefully it helps you with your ignition issues. Thanks again Cobalt for your write-up I had no desire to tear out the lower dash to do this install. Your method works great.
ordering a wwe 96461301200 from rockauto made by standard motor products. Any experience with this aftermarket vs the oem porsche? saves about $40-50...
my problems?
1.spring inside the switch doesn't fully spring back and needs to be manually moved so lights, wipers, windows and hvac operate
2. christmas tree and annoying loud beeper comes on and no other causes from my inspection - fresh coils, rotors, caps, ignition wires, plugs and leads... i did find an arcing from not putting one of the leads on correctly and at night it took five seconds to find
Honestly for the work involved I don't see the value in taking a chance on an unknown item. It might work but do you really want to do the job twice if it doesn't last?
@mainja - what a great tip to steal two plastic tabs off the electrical switch to reinstall. i also recommend using a small thin phillips screwdriver to re install. removal requires a short phillips no2 to remove..
Did the swap and 'broke' off the original thinking that someone had been in there and replaced. couldn't find or feel the top phillips screwdriver (approx 12 o'clock). Anyway, thought it was stuck so I used a hose puller and broke it off (I know a bit rough) then saw the phillips, removed and replaced.
meanwhile pulled the VDO unit and took to my electroncis expert and found some cold solders.
symptom - car lights up like a christmas tree - similar to when the ignition is switched to position 2 and all warning lights light up...
will replace and report back. this repair costing 6 cans of strongbow...
Did this yesterday with thanks to these threads. I left the driver's seat in, though. I had to cut down a screwdriver to get the top screw out. I didn't bother with marking anything as there's no other way for it all to go together. For reassembly I used masking tape over the top screw head as it was punch-throughable but still tacky enough to keep it in place.
The old switch looked and felt 'sloppy', which makes me suspect a quick twatting on the pinched bits would sort it out for another few years. I'm resisting the temptation to do it and keep it as a 'poor spare', though...


 05-03-2017 | 10:24 AM


 Very clever, I had a lot fun when I replaced mine. If there is a next time I will try your trick.