When you click on links to various merchants on this site and make a purchase, this can result in this site earning a commission. Affiliate programs and affiliations include, but are not limited to, the eBay Partner Network.
Well last night was fun, a little cramped. Removed the cabriolet top. Three allen bolts at the back of the cab, 3 allen bolt on either side just behind the door pillar, remove main bolts from access panels and pin. Volia, easy peasy.
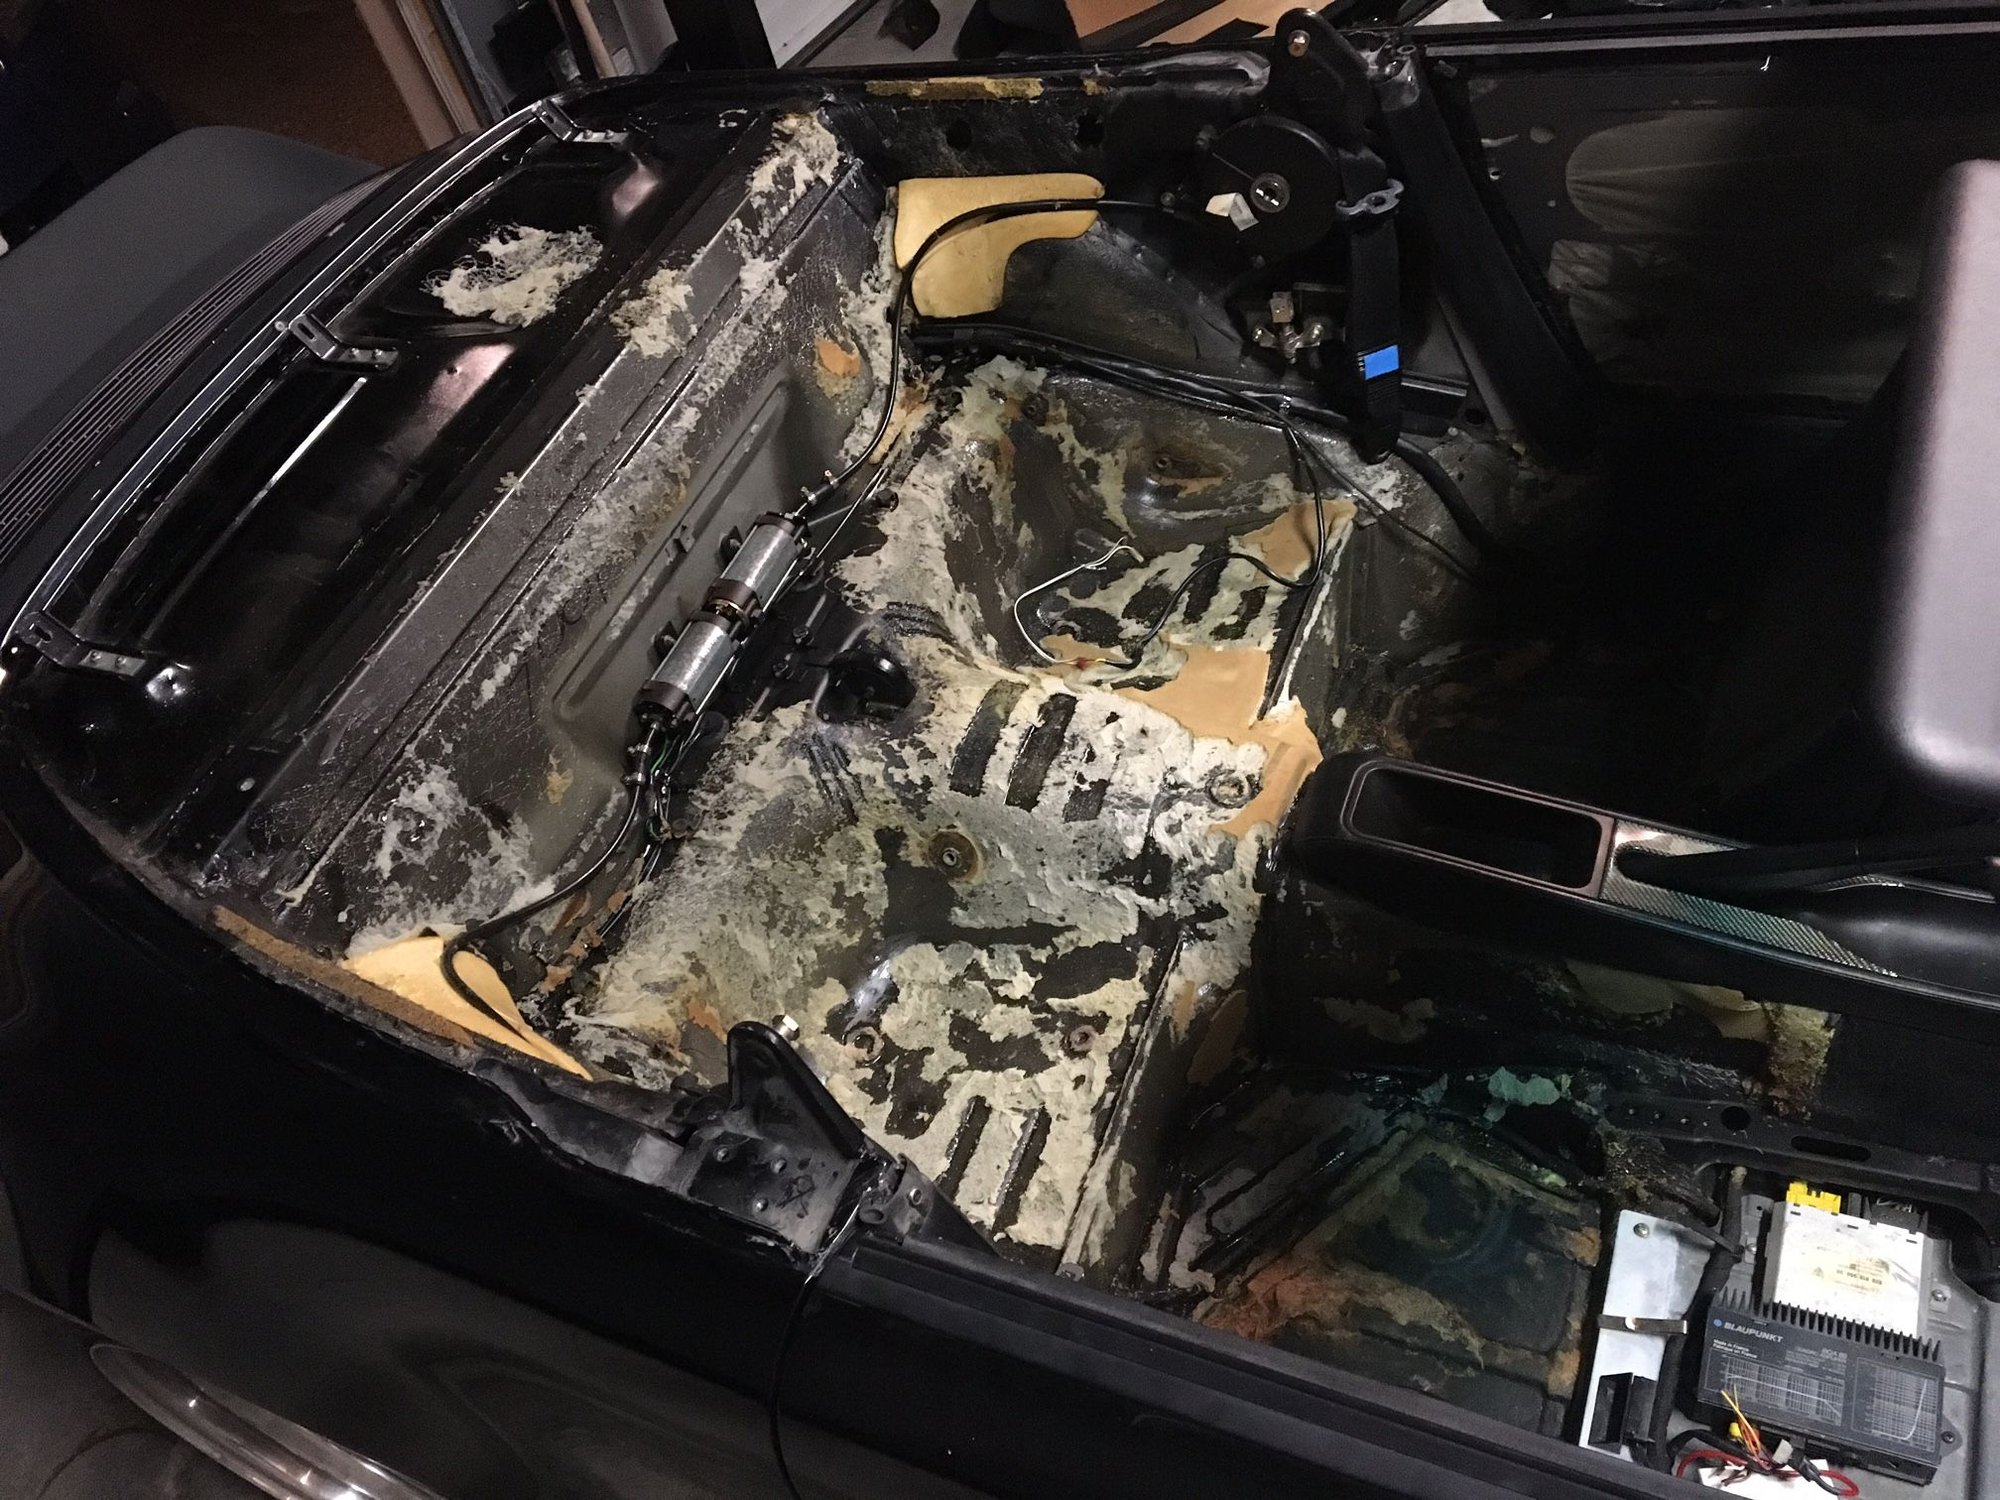
Everything was dry as a bone....phew. not a spot of rust under the cab either.
Also started to tear all the carpet and foam, oh my. What a process this is going to be. So much easier with no roof. All you coupe guys....my neck would be twisted like a pretzel.
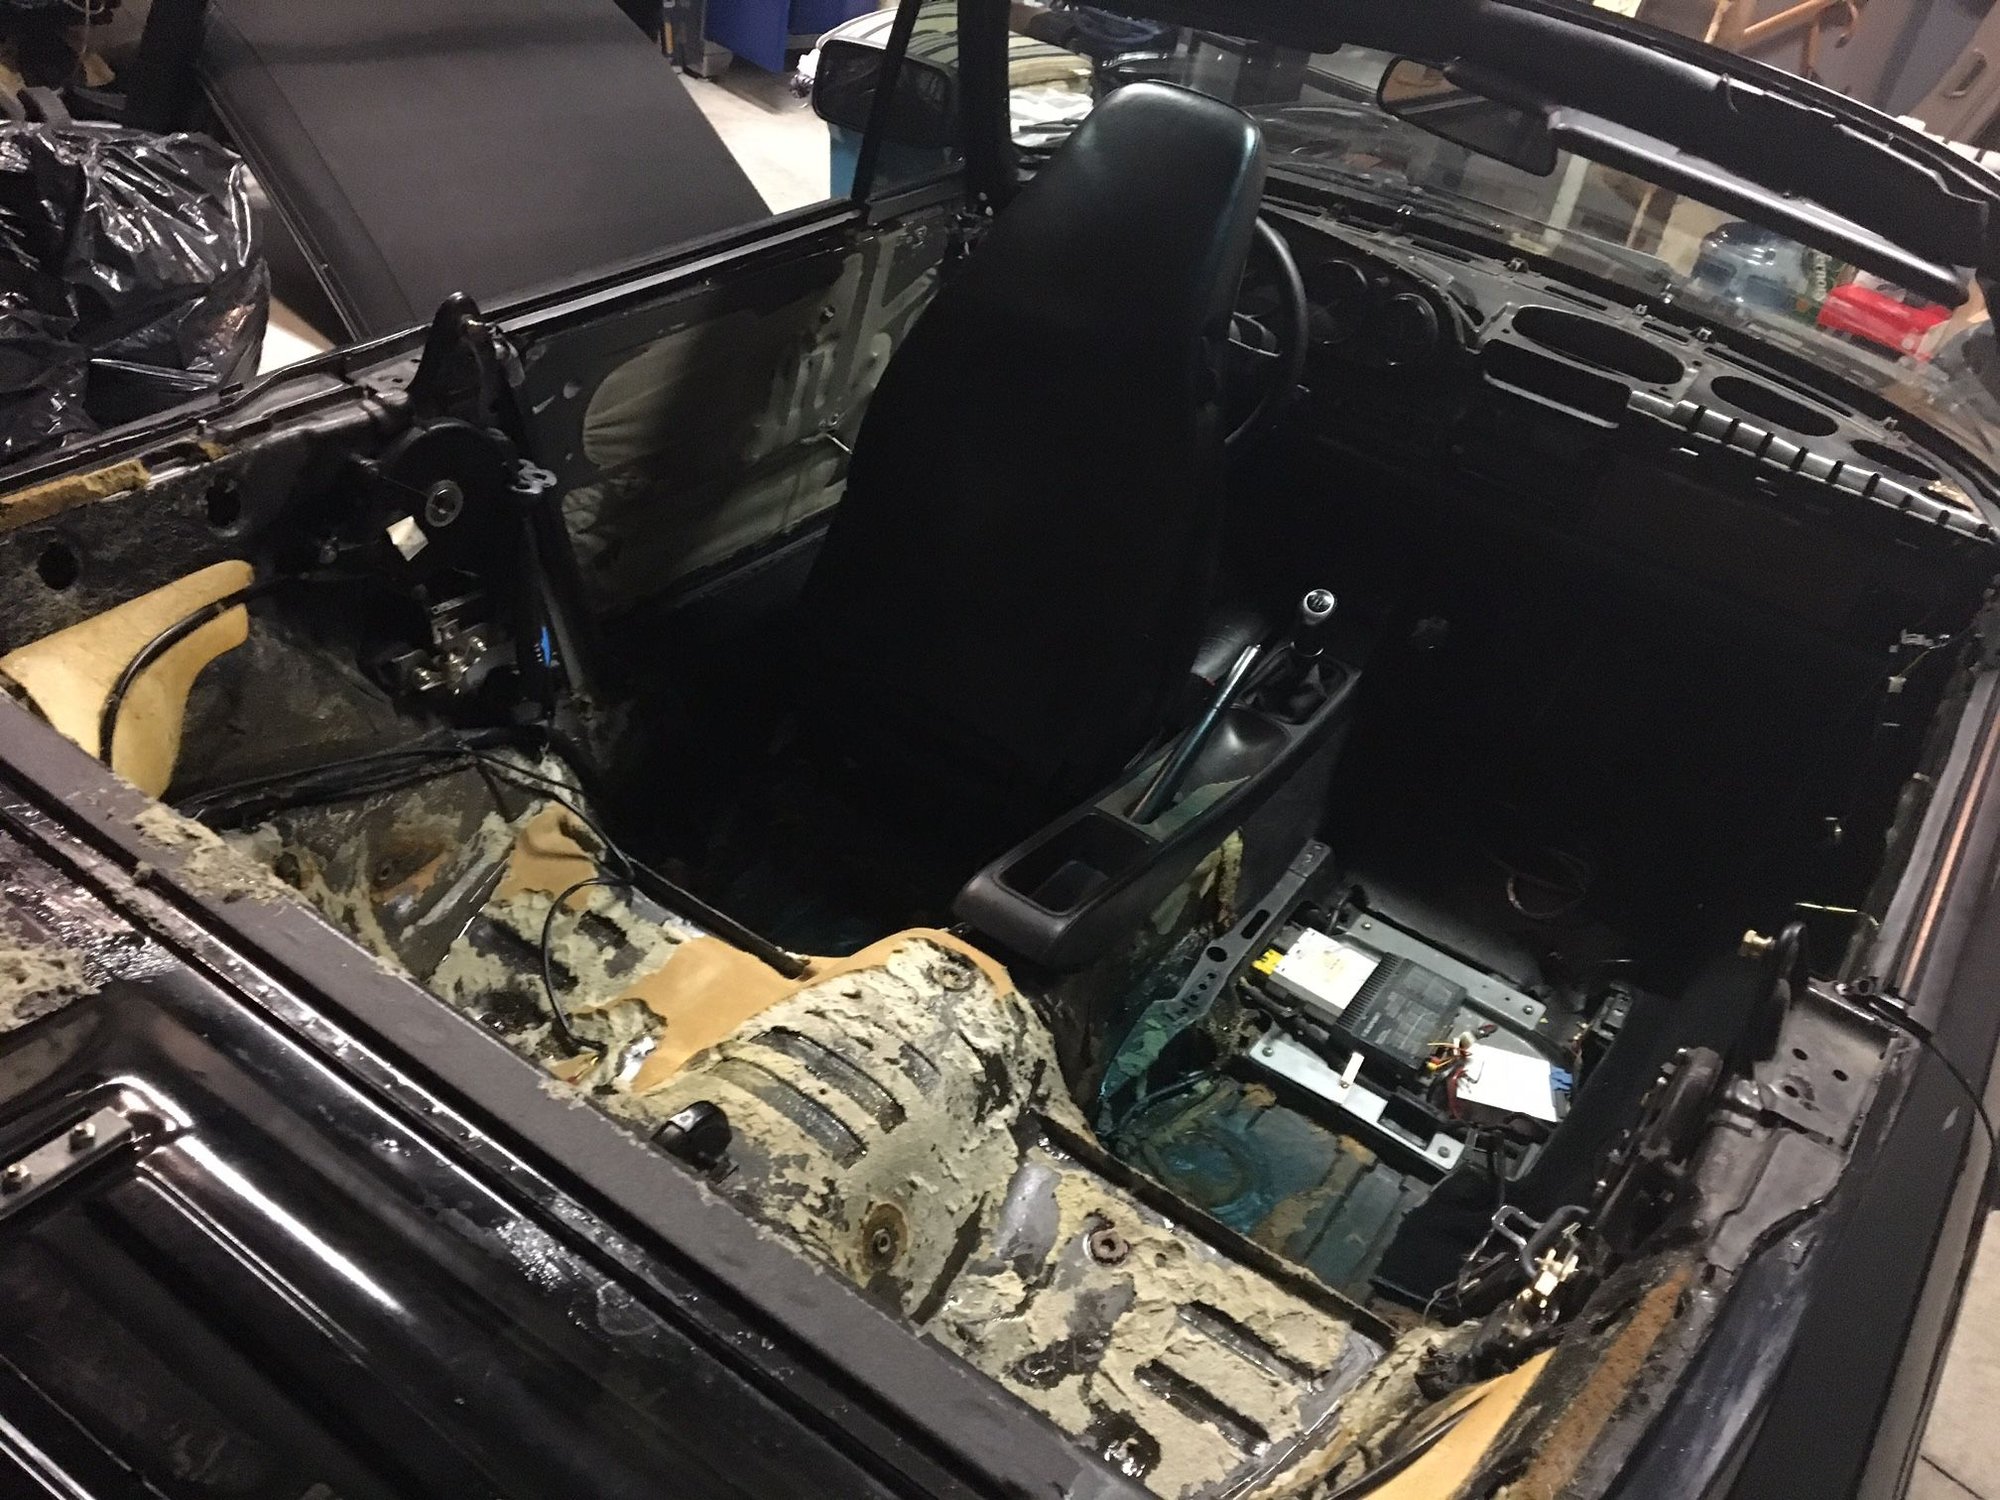
Tonight is the center console, lower dash and driver seat removal. This weekend I will be getting high on fumes....lol
So sick brother. Had a few talk with turbokraft as well even though I'm also in Canada...
Im in the middle of a rebuild on my 964. When it's all done looking forward to putting up a thread similar to yours!
Dan
Chris is really an awesome person. He gives so much to the community with nothing in return. Always has time for everyone. There is a huge chance that he will come to Canada next August for the final stage of my build.
Start a new thread and show us where you began and your journey with the build.... I really enjoy every ones build, weather its changing it up to personalize it to your own tastes or bringing it back to original.
Wow, excellent work! Really nice.
Welcome to the liquid club!
Where did you put the radiator for the chargecooler?
Do you have a clear picture of the chargecooler itself? I'd be interested to see how large it is as I am looking at upgrading mine and I like the way you have it positioned.
Wow, excellent work! Really nice.
Welcome to the liquid club!
Where did you put the radiator for the chargecooler?
Do you have a clear picture of the chargecooler itself? I'd be interested to see how large it is as I am looking at upgrading mine and I like the way you have it positioned.
So much fun to see that engine in a convertible!
The twin heat exchangers are up front, in front of the A/C condenser and oil cooler. I would need to take the bumper off to too them. I will try and take a pic once they have the car disassembled in the next few weeks.
I don't have any clear pictures of the chargecooler from the backside ( I will ask Chris to see if he has one). This is the best pic I have below. I was told there is roughly 8 litres of 50/50 in the system.
So car was off to paint this Tuesday. Fully stripped interior and no cab roof.... I drove down the hwy401 in my snowmobile suit, winter gloves, winter boots and Motorcycle helmet. The looks I was getting...ahahahhahaha The only perfect dry clear day in the forecast...had no choice, 33 degree Fahrenheit. brrrrrrrrrrrr
Managed to make a list of all the parts I need including seals and new tail lights.
I am going to start my dash and door top trim repair in the next few weeks. Going to fix the humps and have it wrapped in leather. Stay tuned...hope this works.
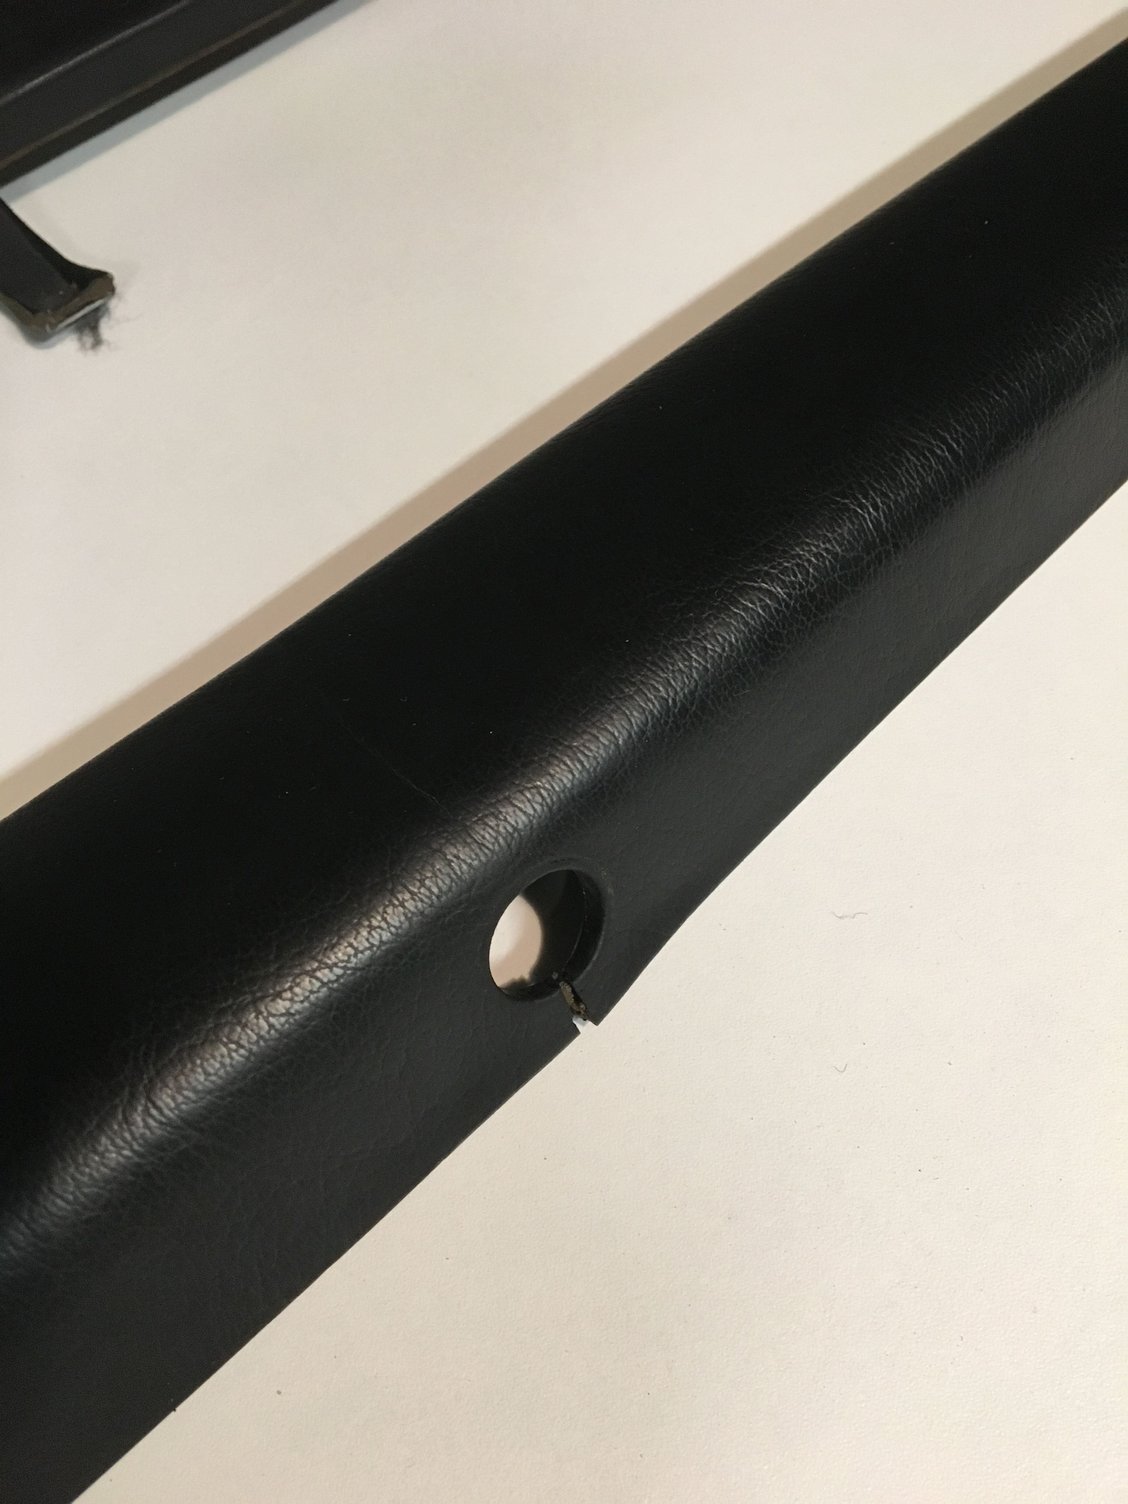
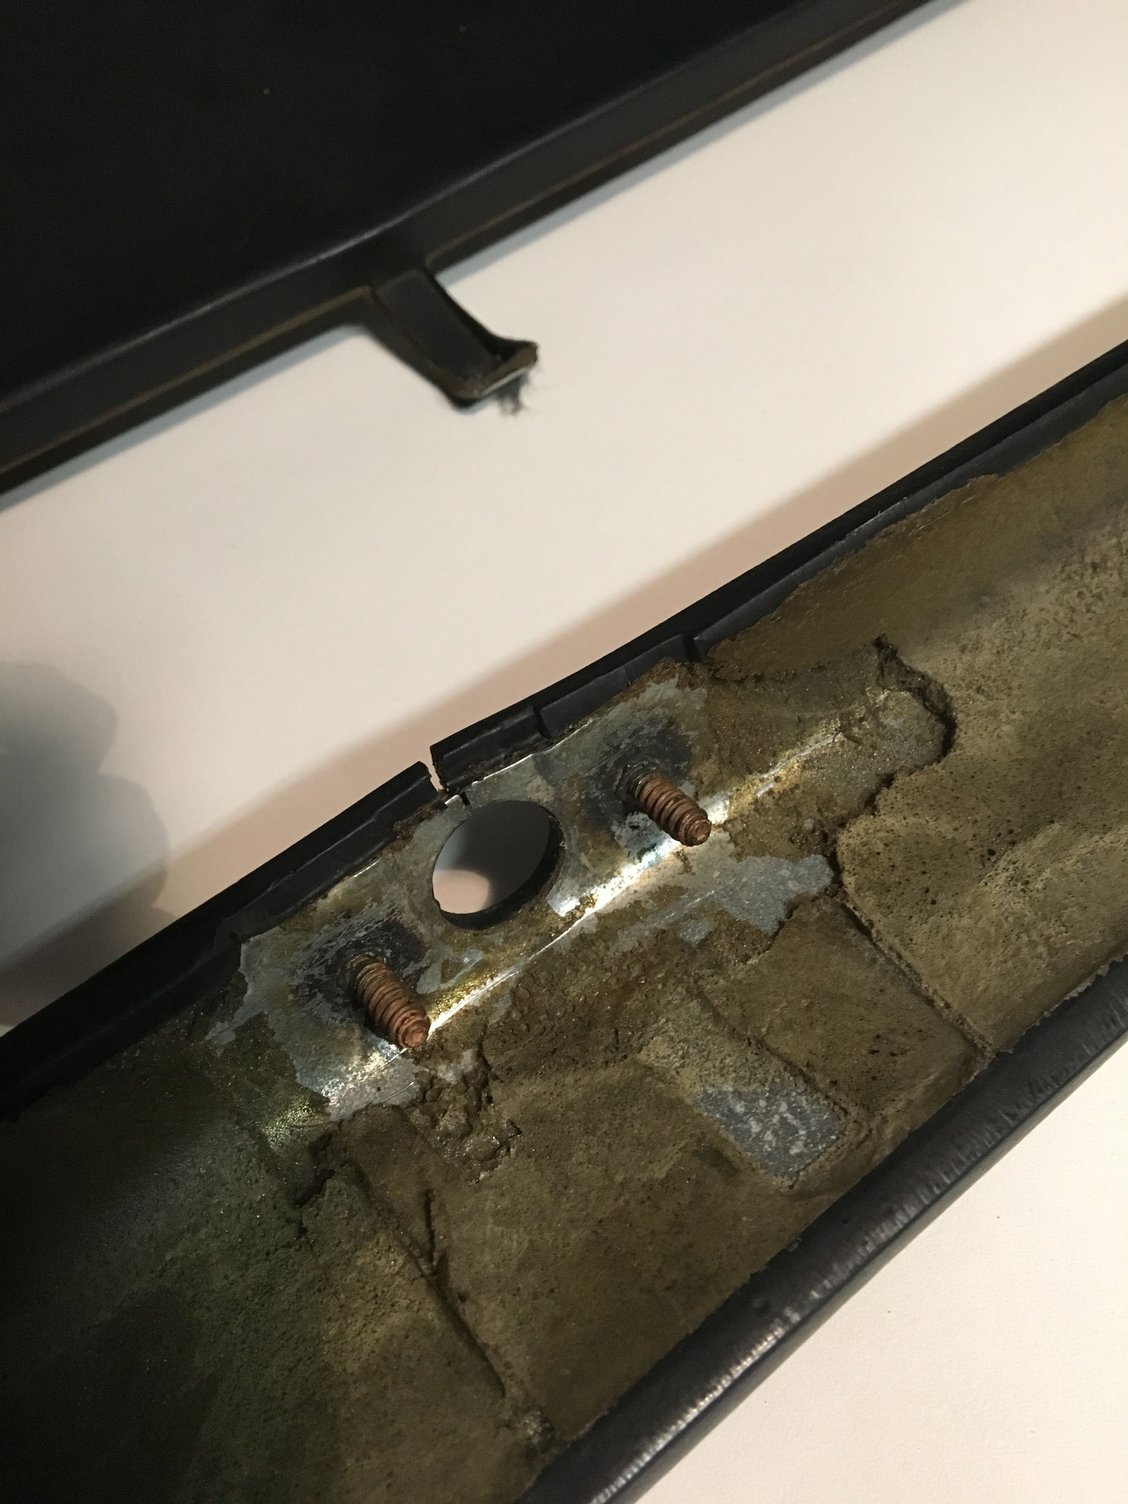
Progress update, while the car was in for paint. I decided to take the task of refurbishing my dash and drivers door trim. We have all had this happen to us before. We have a few options, purchase new, was well over $2k of fix it with a kit from Polyvance for $120.00 then retrim with leather.
What I was dealing with, humps, indents and broken tab and creased door trim.
The guys at Smart Automotive in Milton took care of the colour change. Very happy with the final outcome.
The only rust on the car was at the base of the passengers window. Under a dime size. It was nice to find out it was only surface from a rock chip.
Oh man, what a difference, for everyone ordering rear lights. Please note the centre sections comes with all the gaskets. Don't make the mistake I did and order all new gaskets for it.... PS, the side light gaskets look like crap from Porsche, they are going back, white and chalky rubbers, seriously Porsche???? Running without them now.
I was able to spend 2 days getting more familiar with the car and helping with reassembly. Just wanted to be part of the process....... Was able to get the small little items knocked off quite easily.
Getting ready for cut and polish, the paint is glass smooth.
Thank goodness for a perfect day outside. The enclosed trailer was not available.....
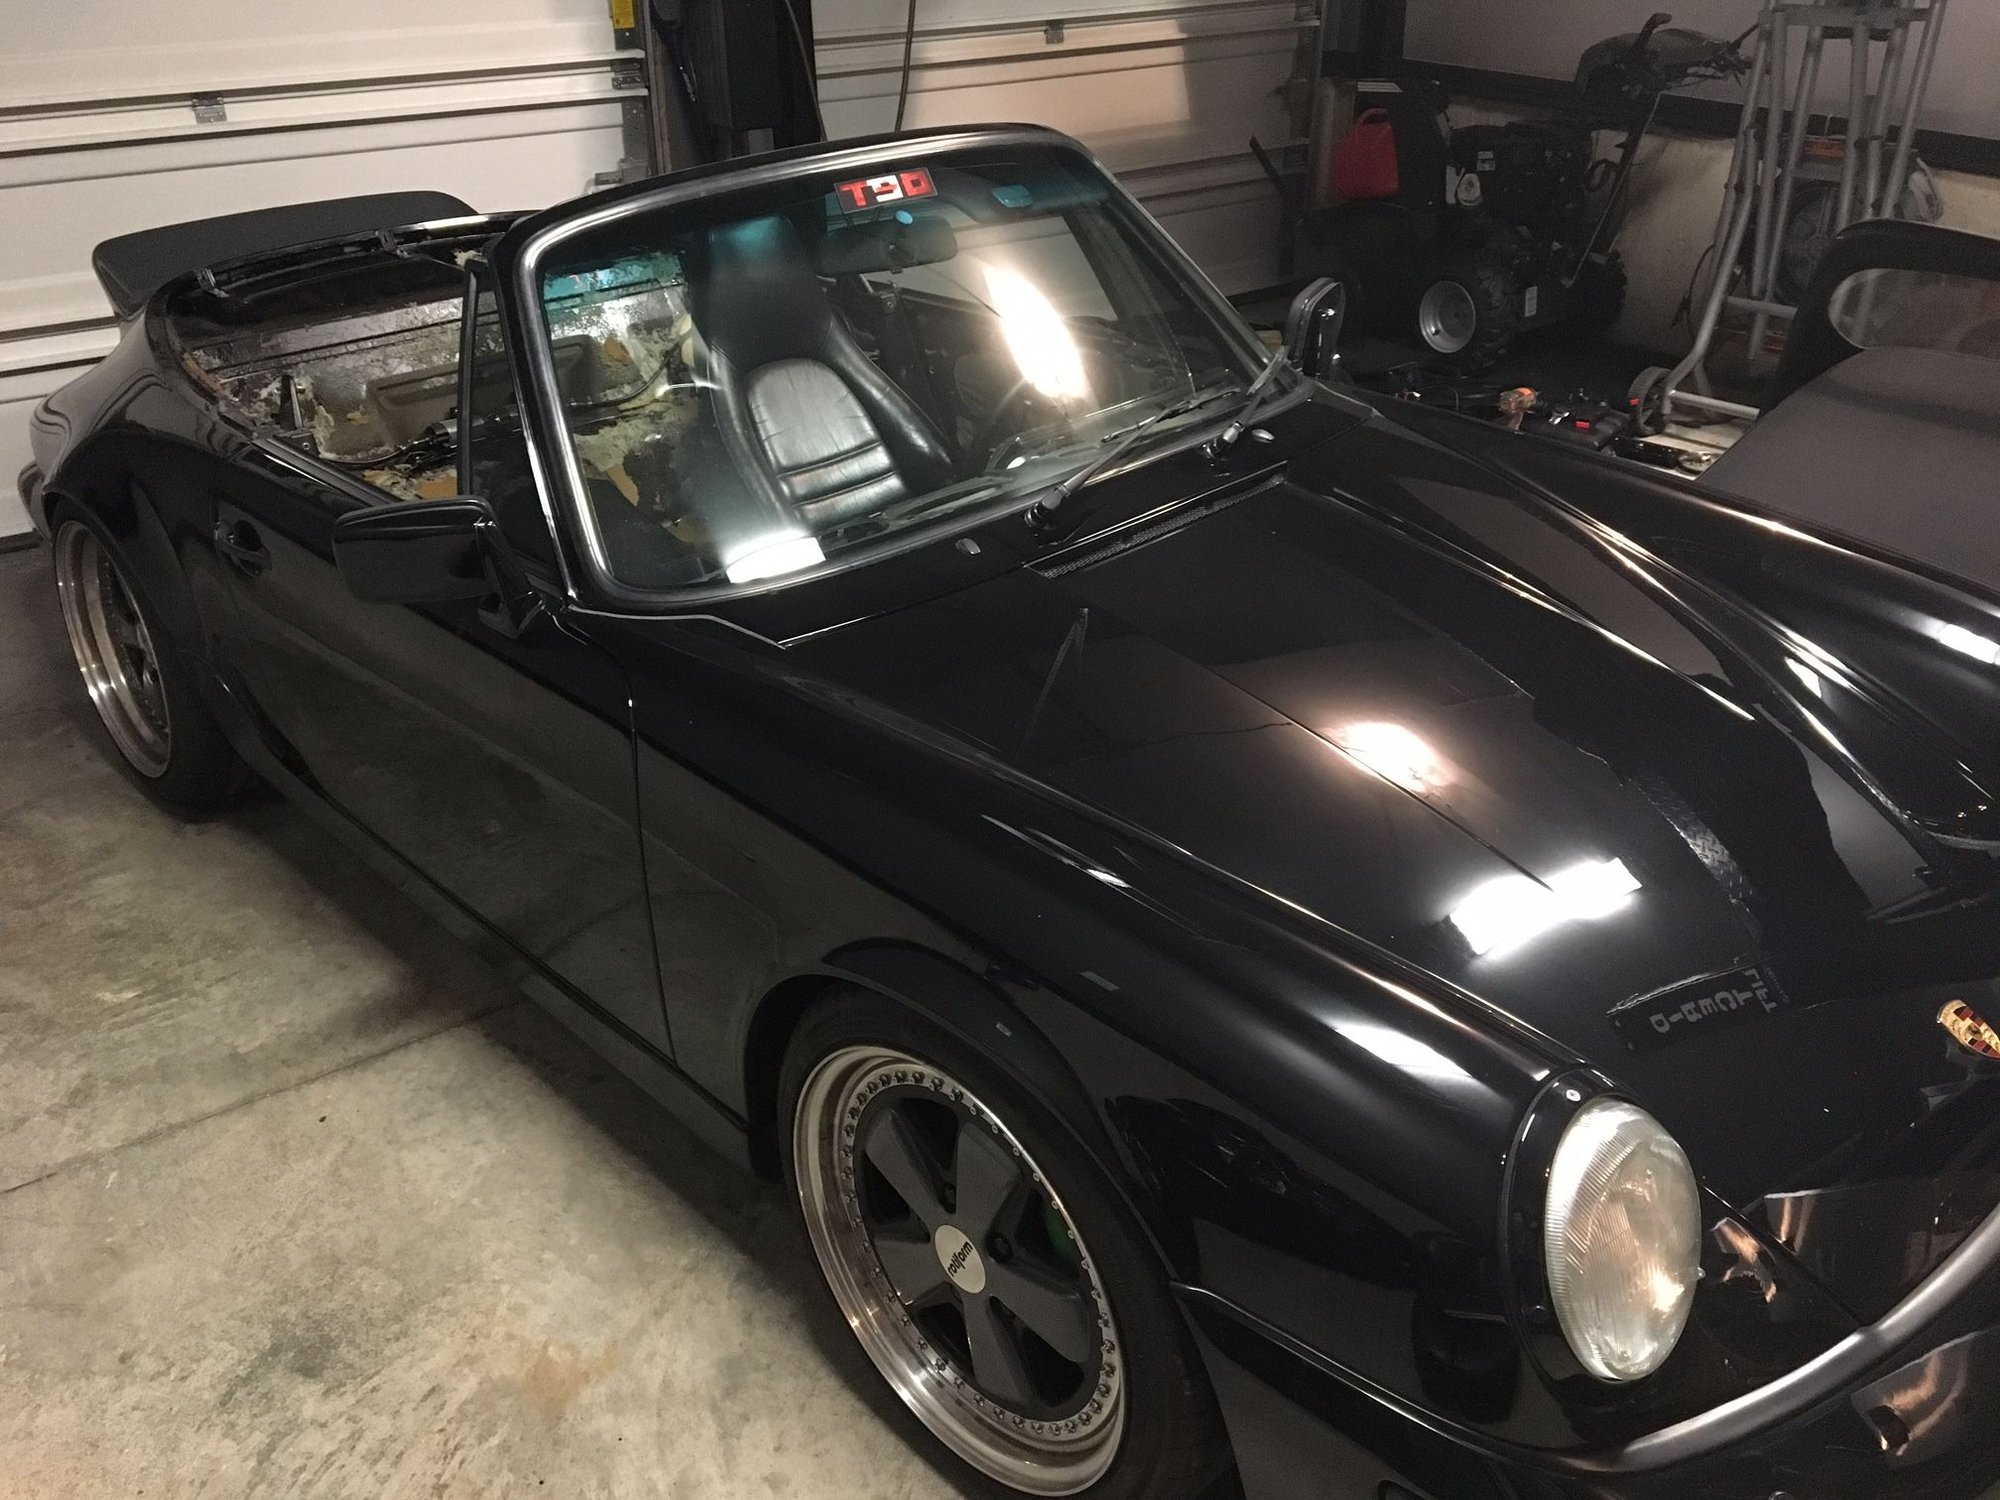
Back home in my garage, going to tackle the sound deadening and appbiz carpet kit over the next few weeks, stay tuned for more fun.

 11-17-2016, 04:47 PM