When you click on links to various merchants on this site and make a purchase, this can result in this site earning a commission. Affiliate programs and affiliations include, but are not limited to, the eBay Partner Network.
H4 headlights...Here is ALL that is involved in the upgrade
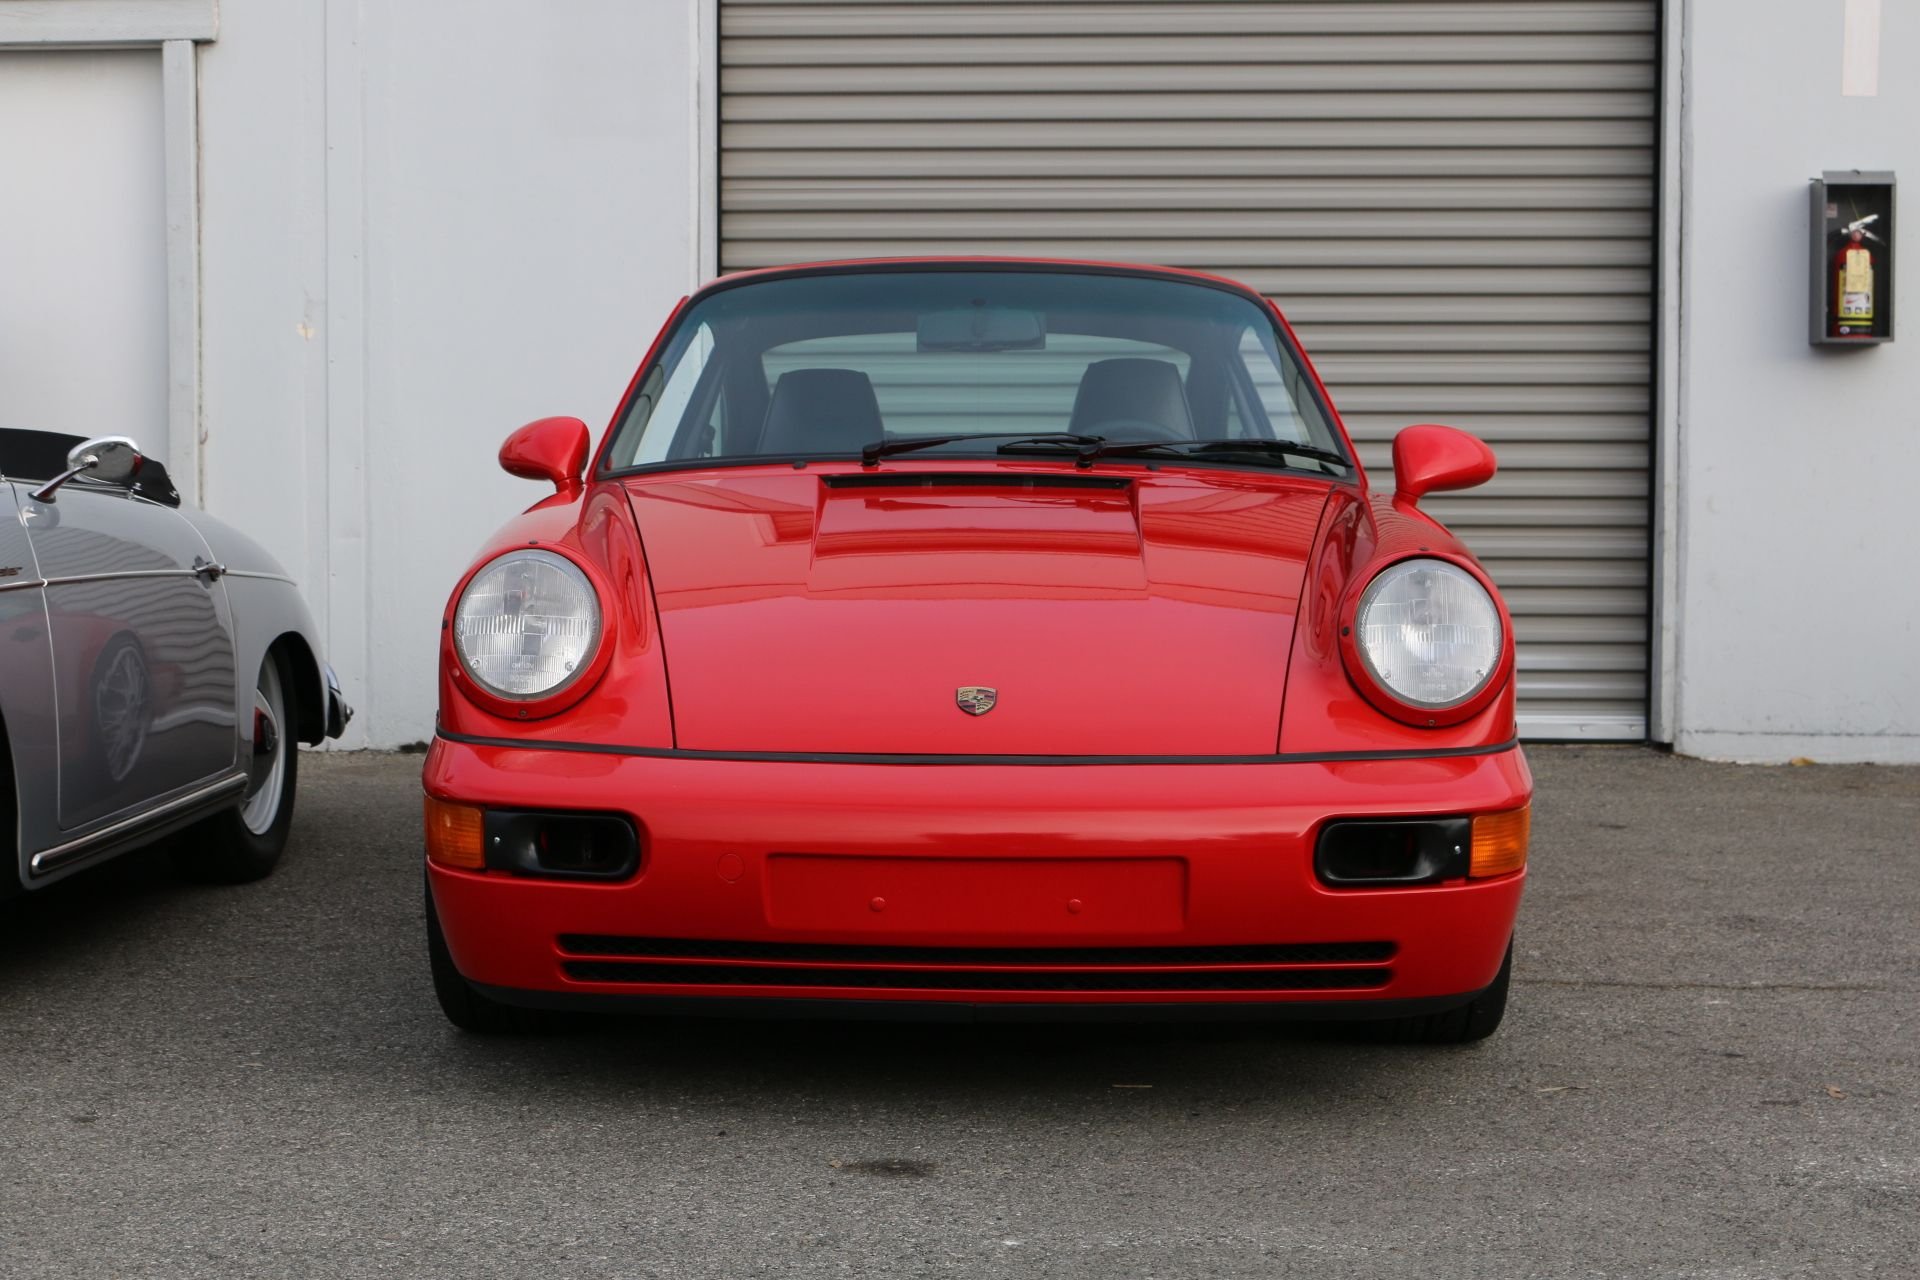
I think we can all agree the stock US spec H5 lighting is not good.
Before I installed H4s on my 964 I did a search of what was needed to complete the job, however, I couldn’t find one post that included everything. I was confused and needed help. Maybe my searching was off somehow, but eventually I was able to figure things out with the help of some members on here. So I’m just going to put this post out there. It may be repetitive of another post I was unable to search for, but hopefully it is of use to some of you guys who are interested in upgrading from US spec H5s to H4s.
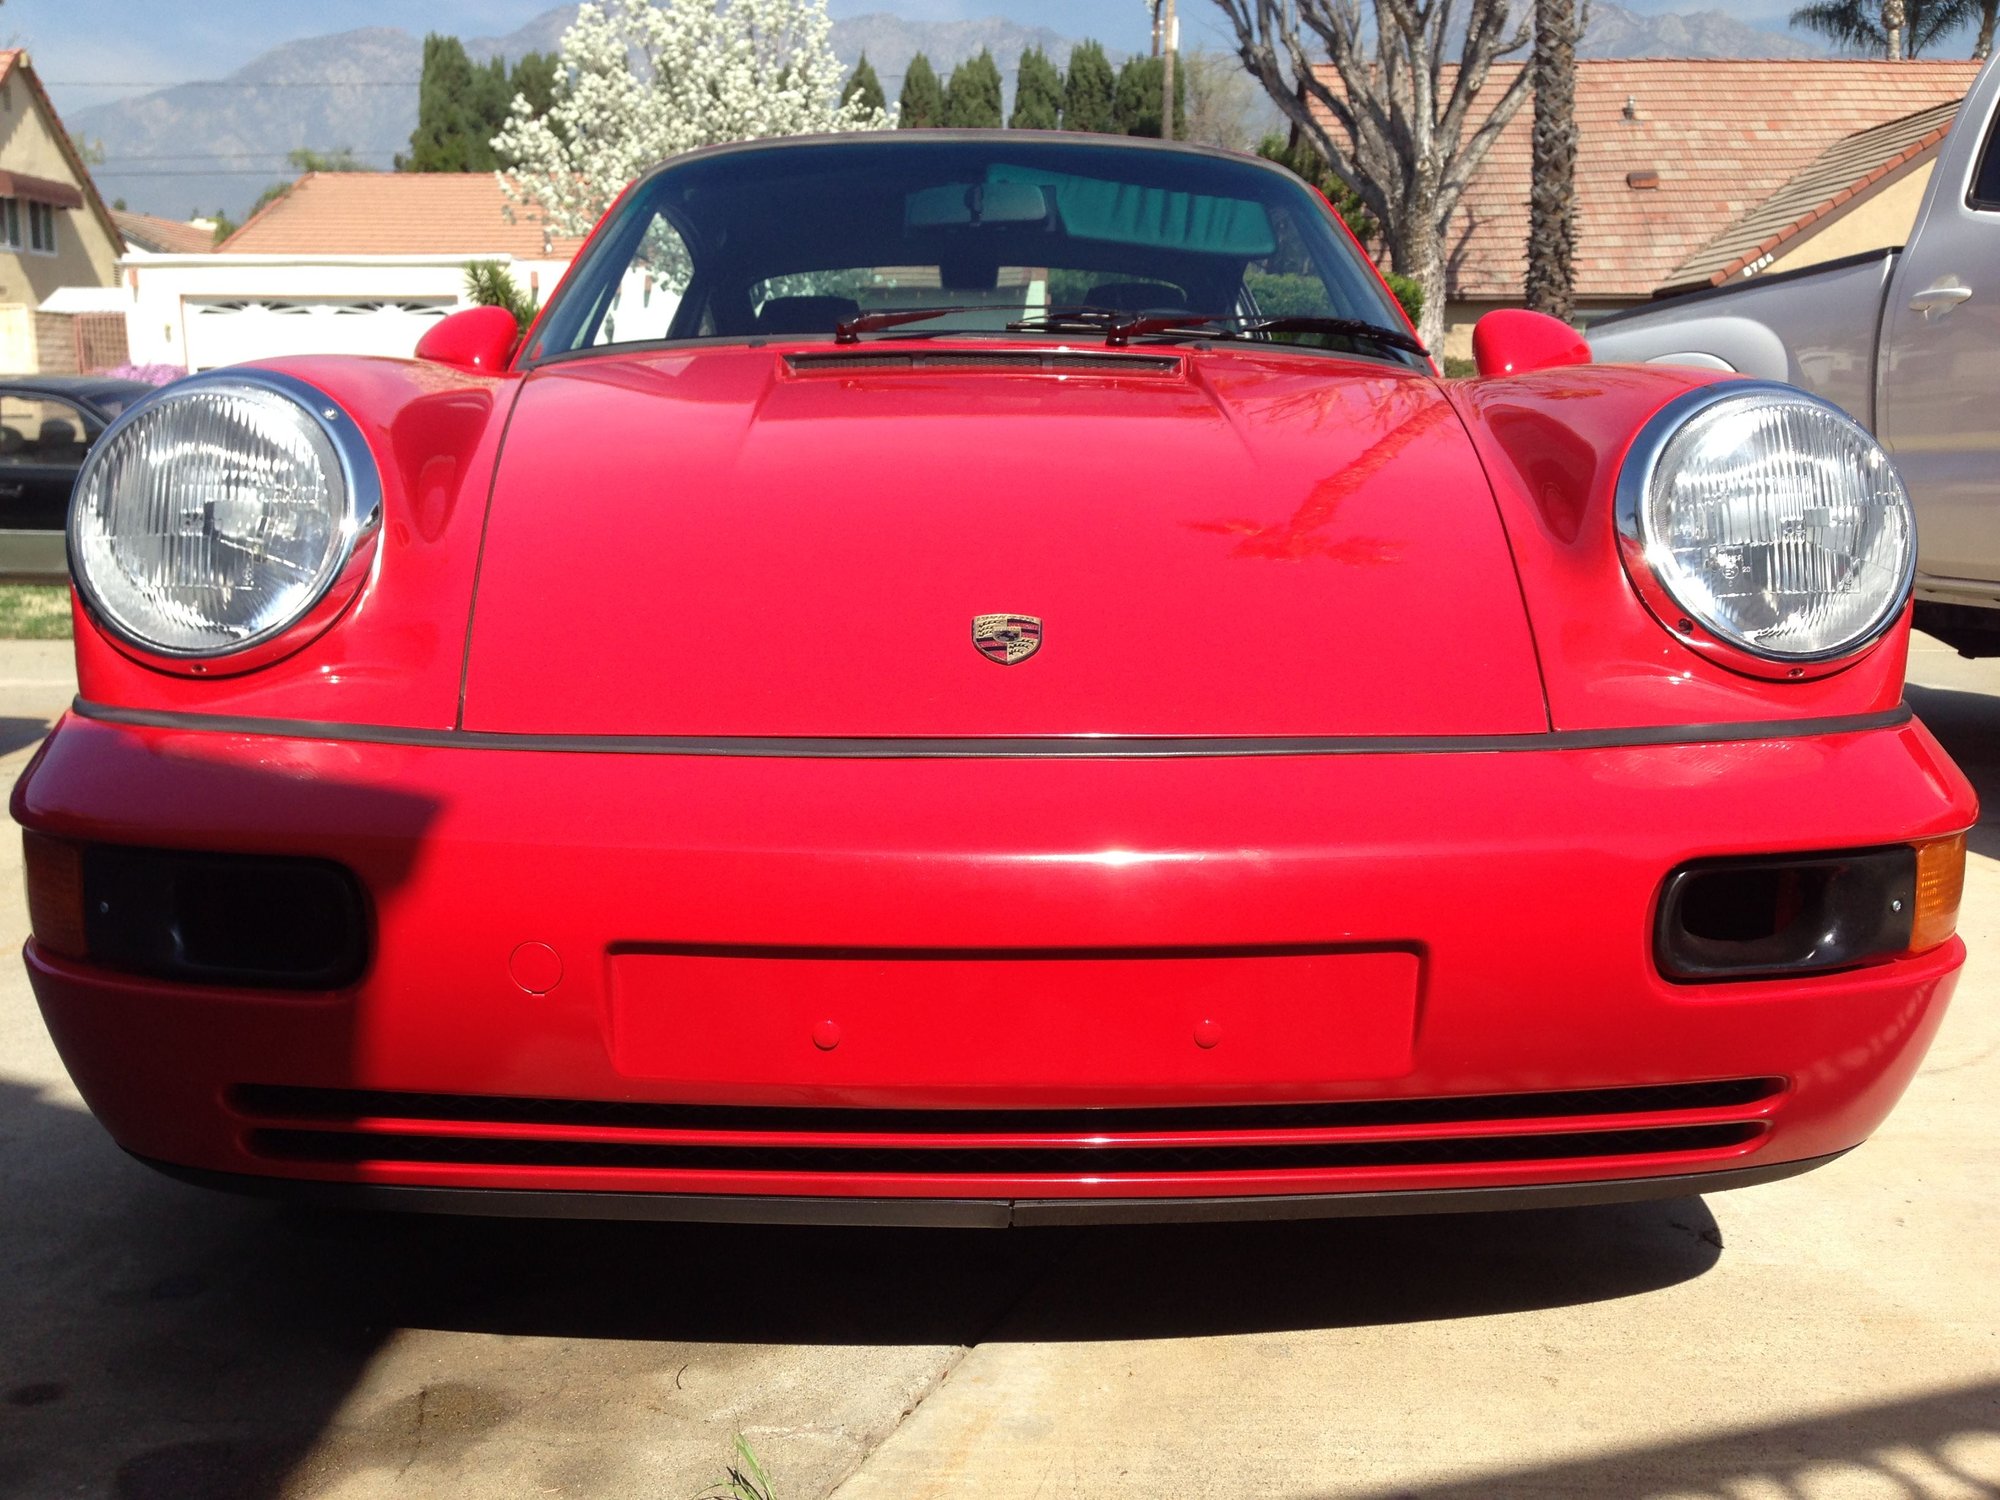
So here’s a before pic of my car with H5s.
First thing to clarify, H4s will say fits UP TO 1986 ONLY. This is NOT TRUE! They fit 87-89 G50 cars as well as all 964.
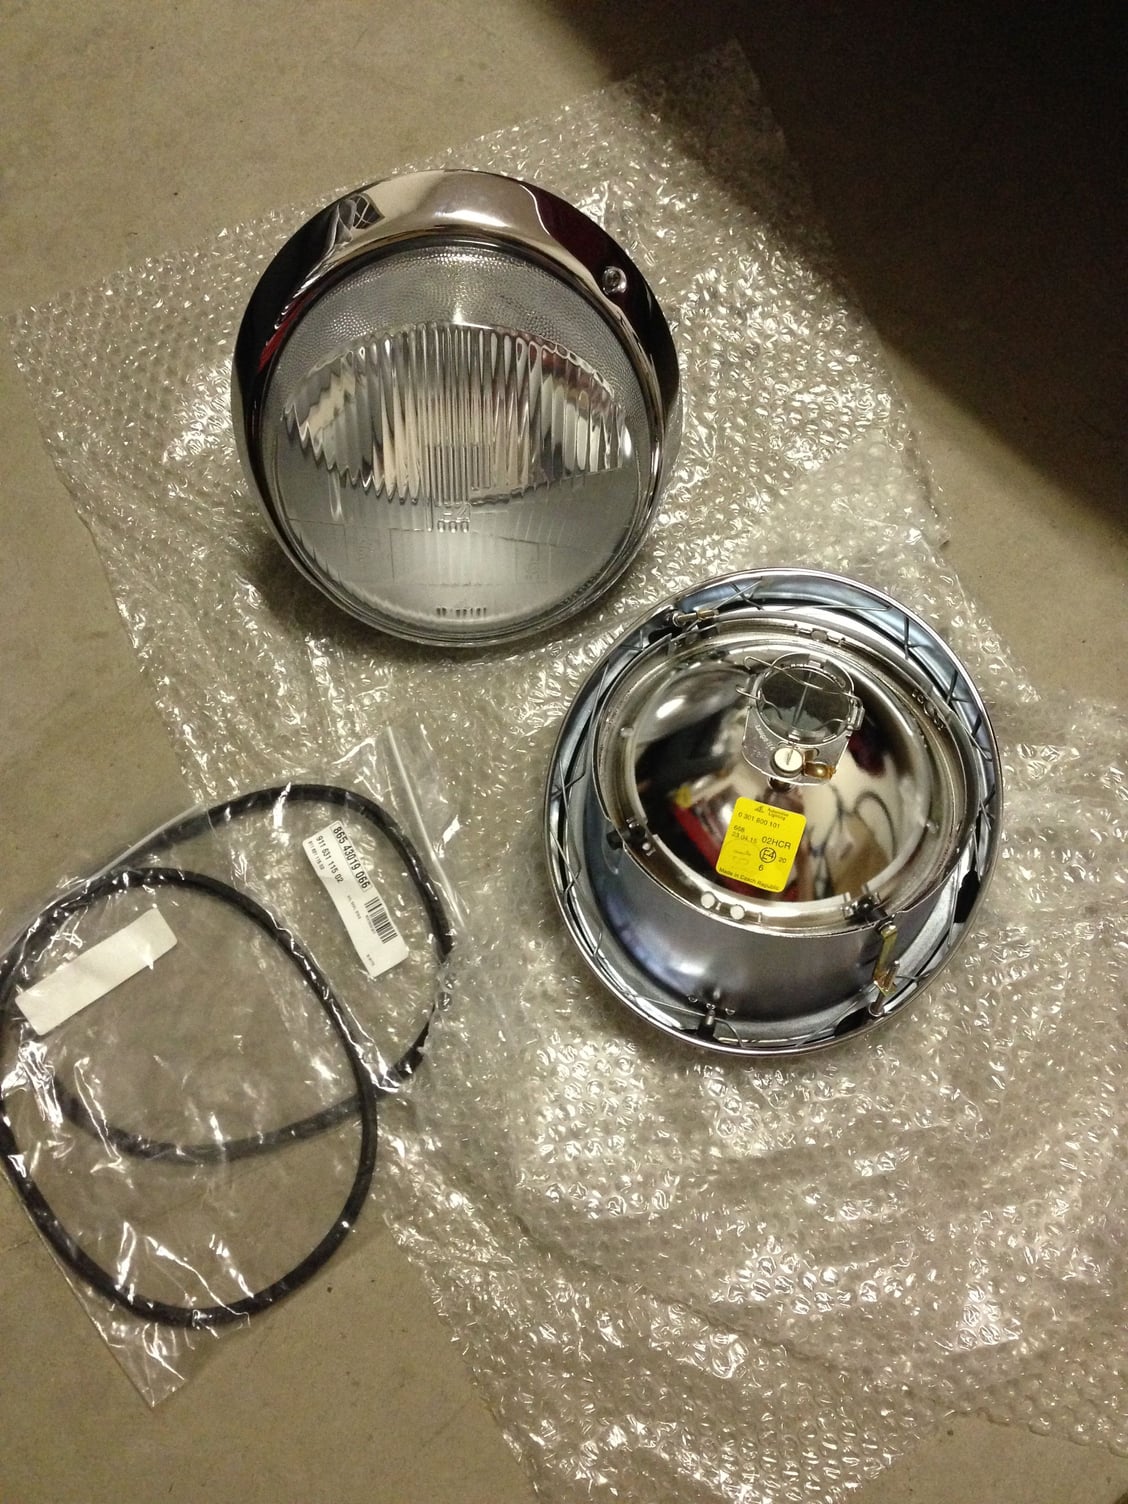
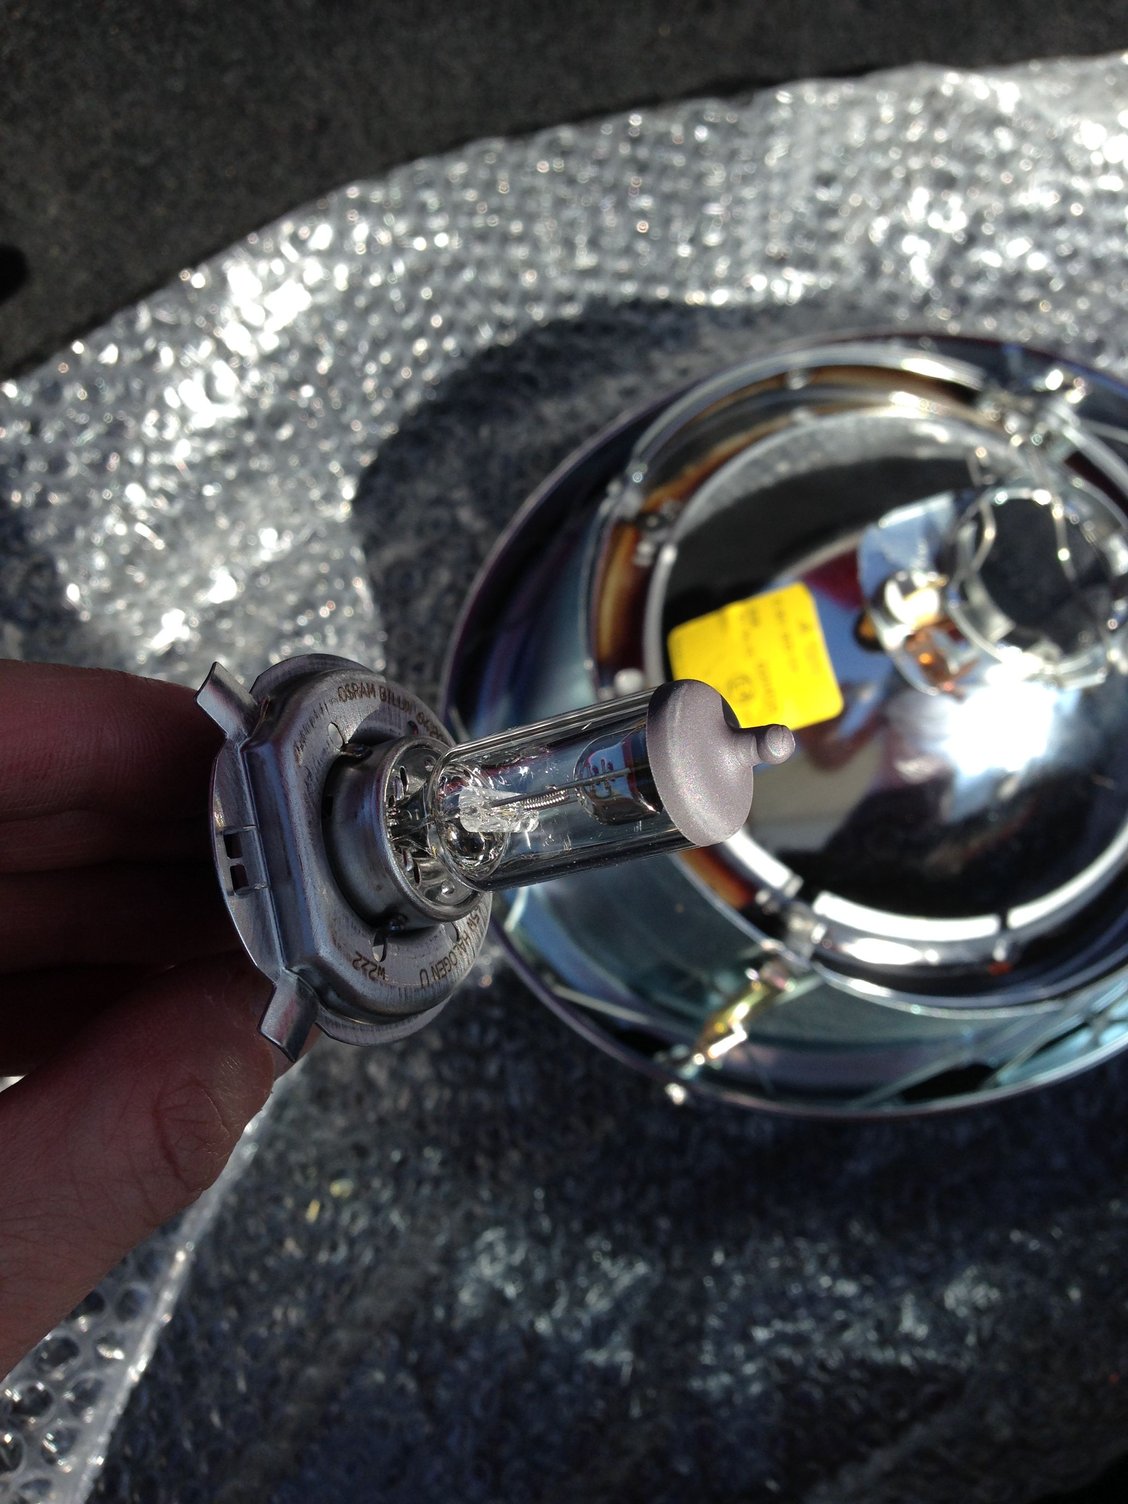
The H4s…There are 2 brands of H4s. Bosch and Magneti Marelli (a division of Hella I believe. Someone correct me). Bosch units say Bosch on the lens. The other has AL markings on the lens. To my understanding they are the exact same dimensions and features wise and only differ from each other in the markings on the glass. Nevertheless the Bosch units (if you can find them) are very expensive which is why I purchased the other brand of H4s. I also decided to replace both headlight seals. Pretty cheap.
There are 2 versions of H4s. Ones with chrome rings and ones with black rings. As the chrome are significantly cheaper than the black ringed units, you can see that's why I ended up with chrome.
To put H4s on a car made for H5s all that is needed are H5 to H4 plug adapter harnesses. These are the Hi-Temp silicone ones from Pelican. Part #: PEL-H5H4-CPL. You will need TWO of these obviously.
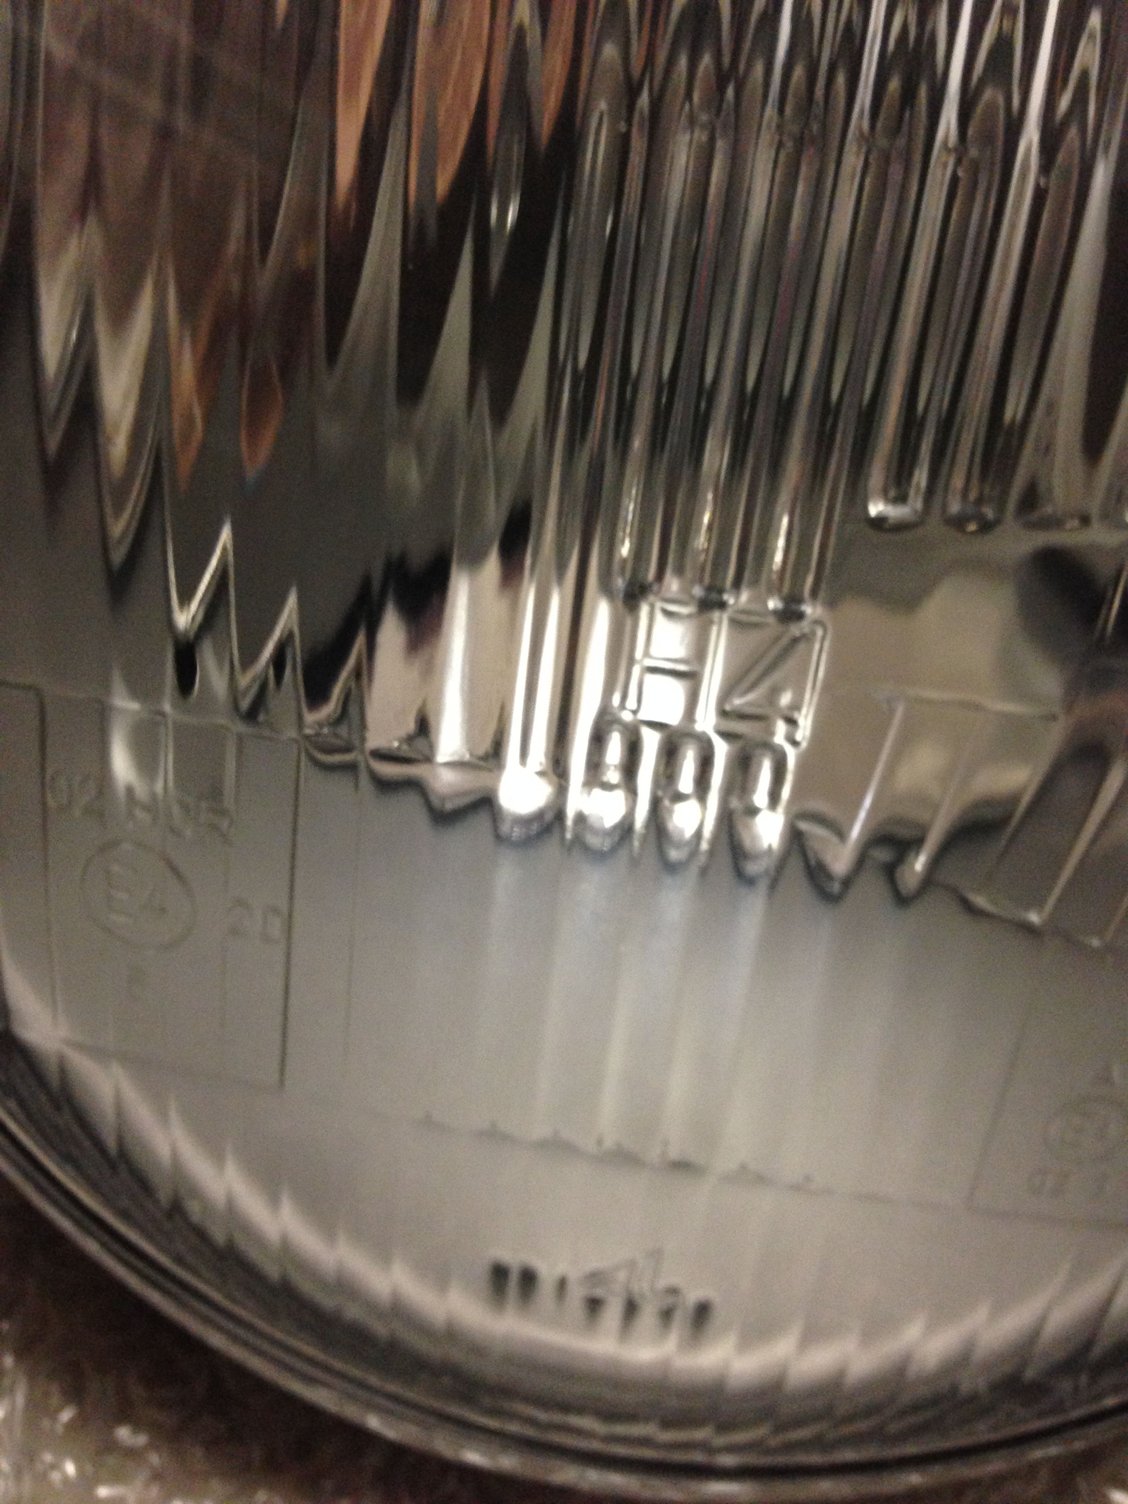
The standard H4 bulbs are 55/60watt, but the bulbs I chose to use are the 65/70watt H4 bulbs made by OSRAM. They are much brighter than the standard 55/60 and are the highest you would want to use unless you add relays to your car…something I did not want to do. So 65/70watt it was.
They were NOT properly aimed yet in this pic
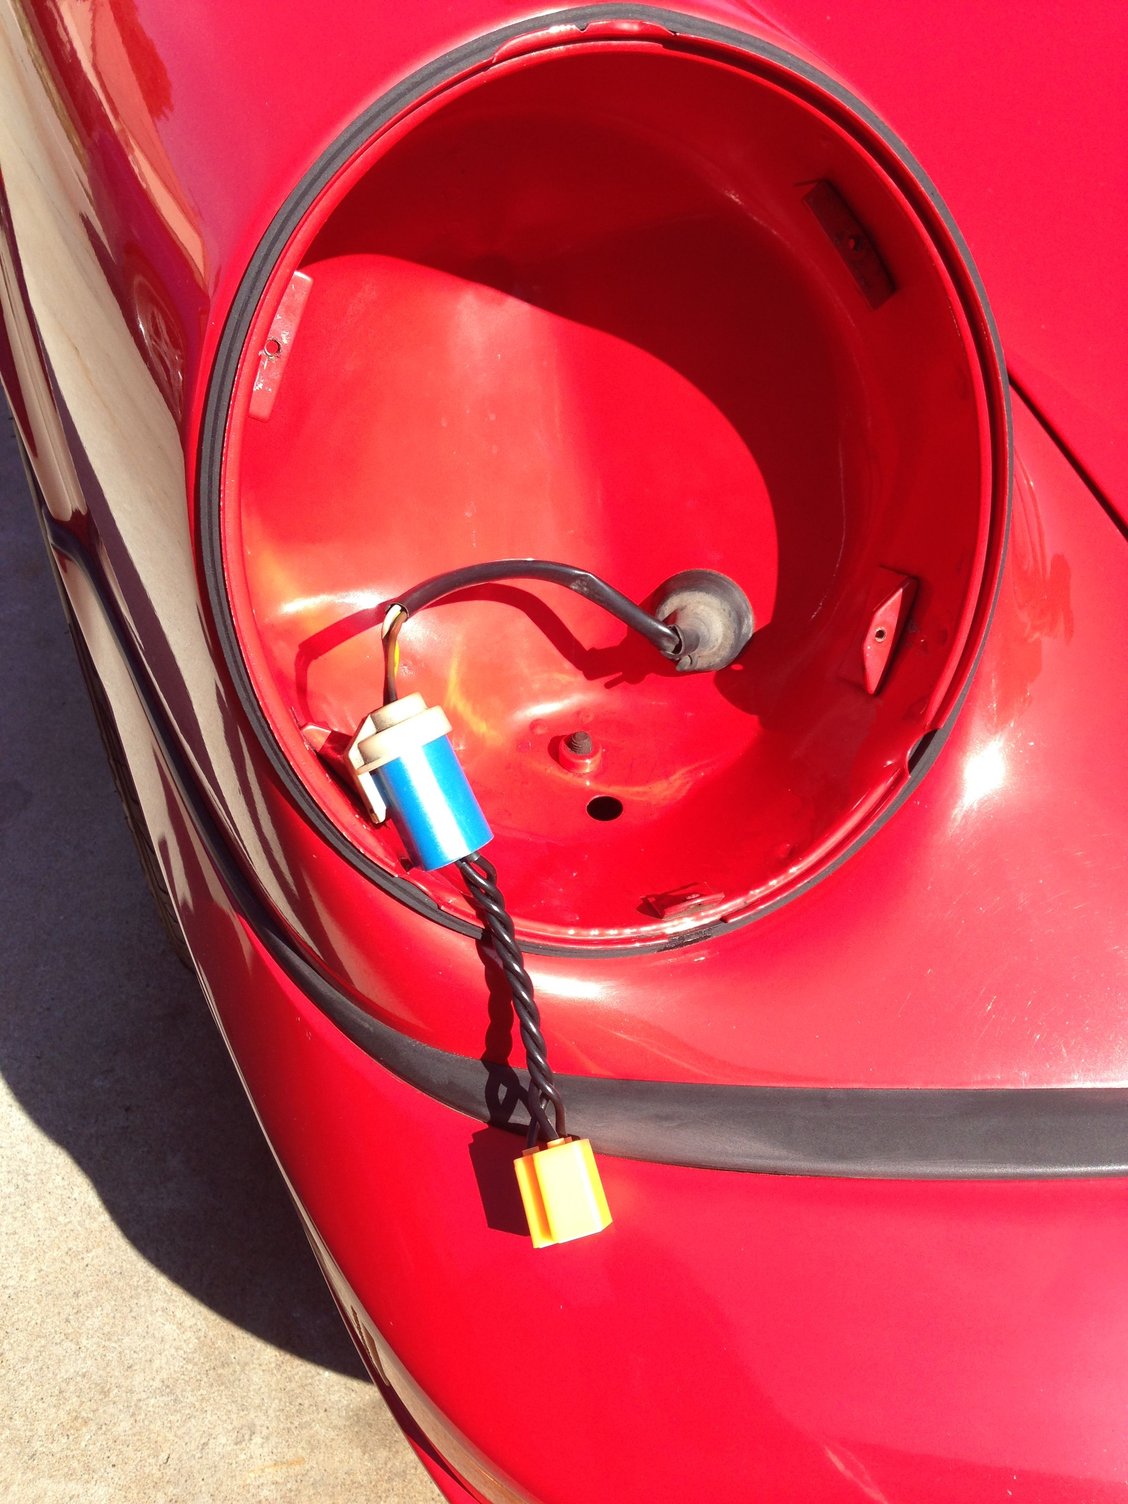
H5s mount with 4 screws. You will see what I’m talking about when you remove yours. H4s mount with only ONE screw at the base of the light ring. The top lip of the H4 headlight unit clips or hangs onto the ring of the fender light housing and then the entire headlight is secured using only ONE screw at the base. Fortunately the screw threads into an existing mounting point that the H5 unit used to secure itself.
Chrome was nice and shiny, but no place on a 964 lol
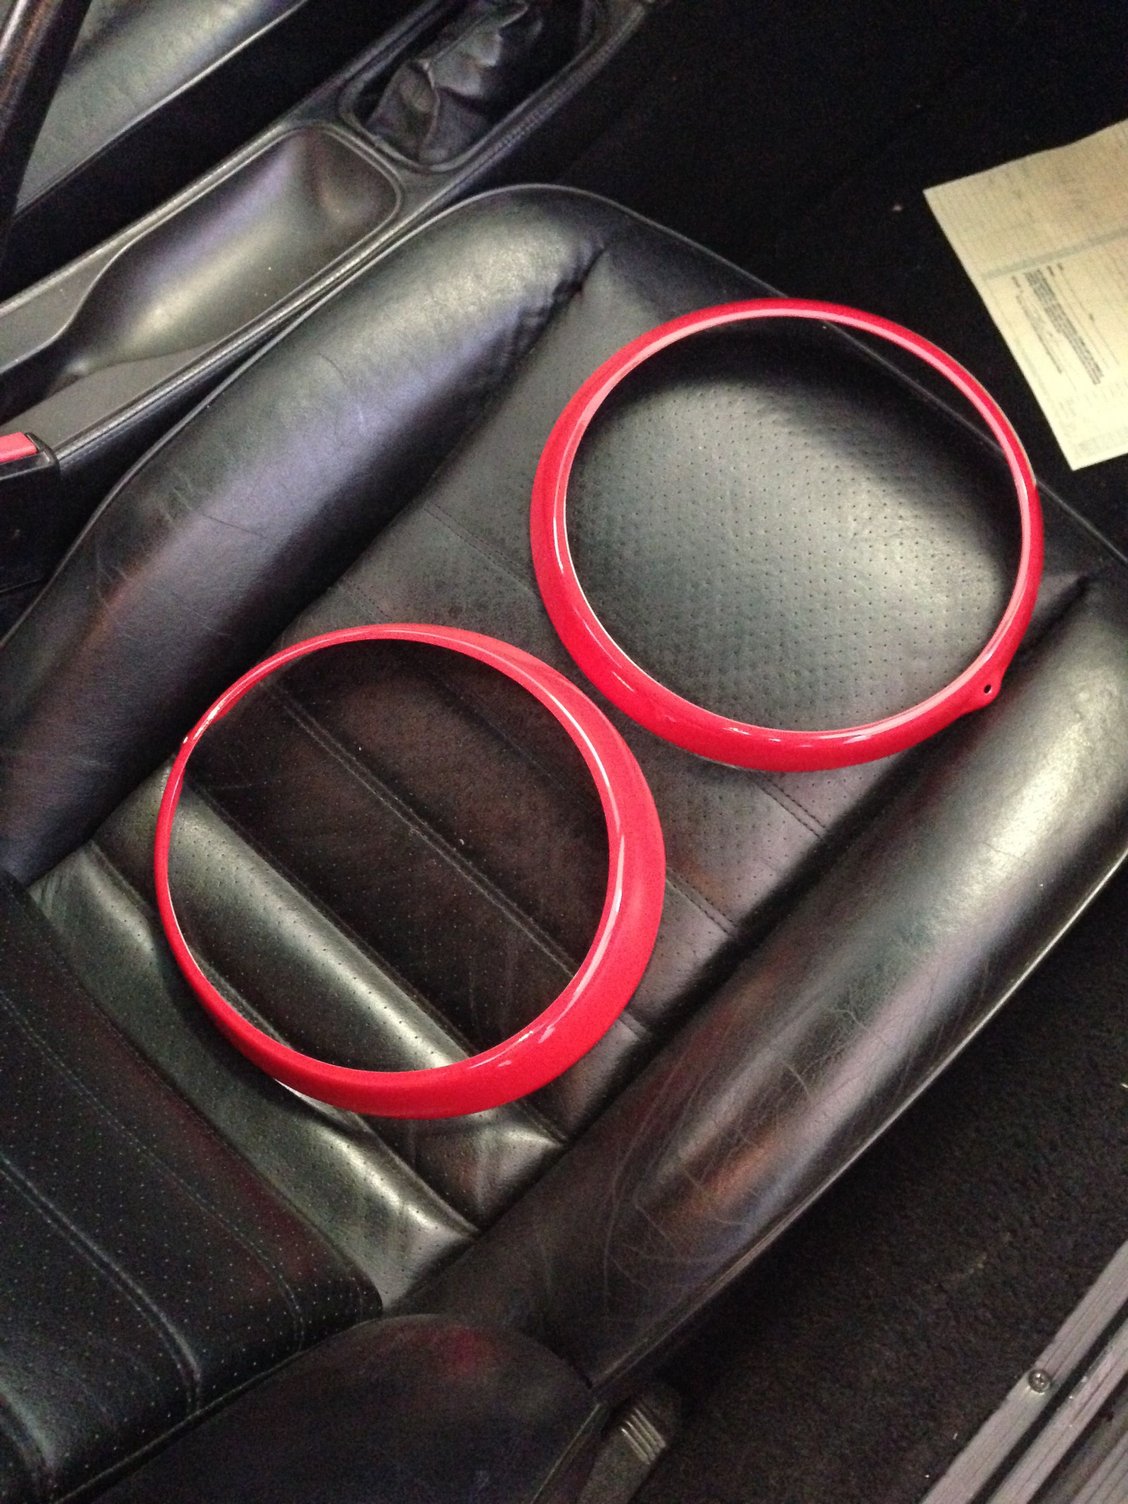
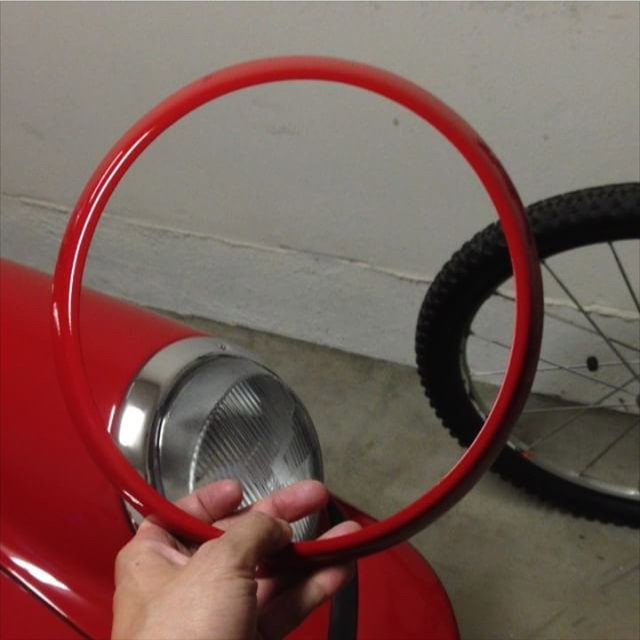
So now comes the part that was new to me. I couldn’t figure this out at the time but now it all makes sense which is why I am sharing for anyone who is confused. I always thought that you had to paint the existing rings on the H4 units if you wanted them body colored. Either you’d have to sand down the black or chrome rings and have them sprayed body color. However, I noticed that on some cars, I didn’t see the adjustment screws exposed which led me to realize that there are trim rings that OVERLAY the existing rings on the H4s.
The rings come UNPAINTED but primered. I had mine professionally painted in guards red. Part number for these trim rings from Pelican: Part # 911-631-141-00-M260 …you will need TWO obviously. About $50 each. The rings will either say for H1 or H4 headlights. Same thing.
As you can see, once you mount the trim rings over the existing ring, it covers it completely. So if you are planning to go this route, it doesn’t really matter if you buy the chrome or black ring units initially.
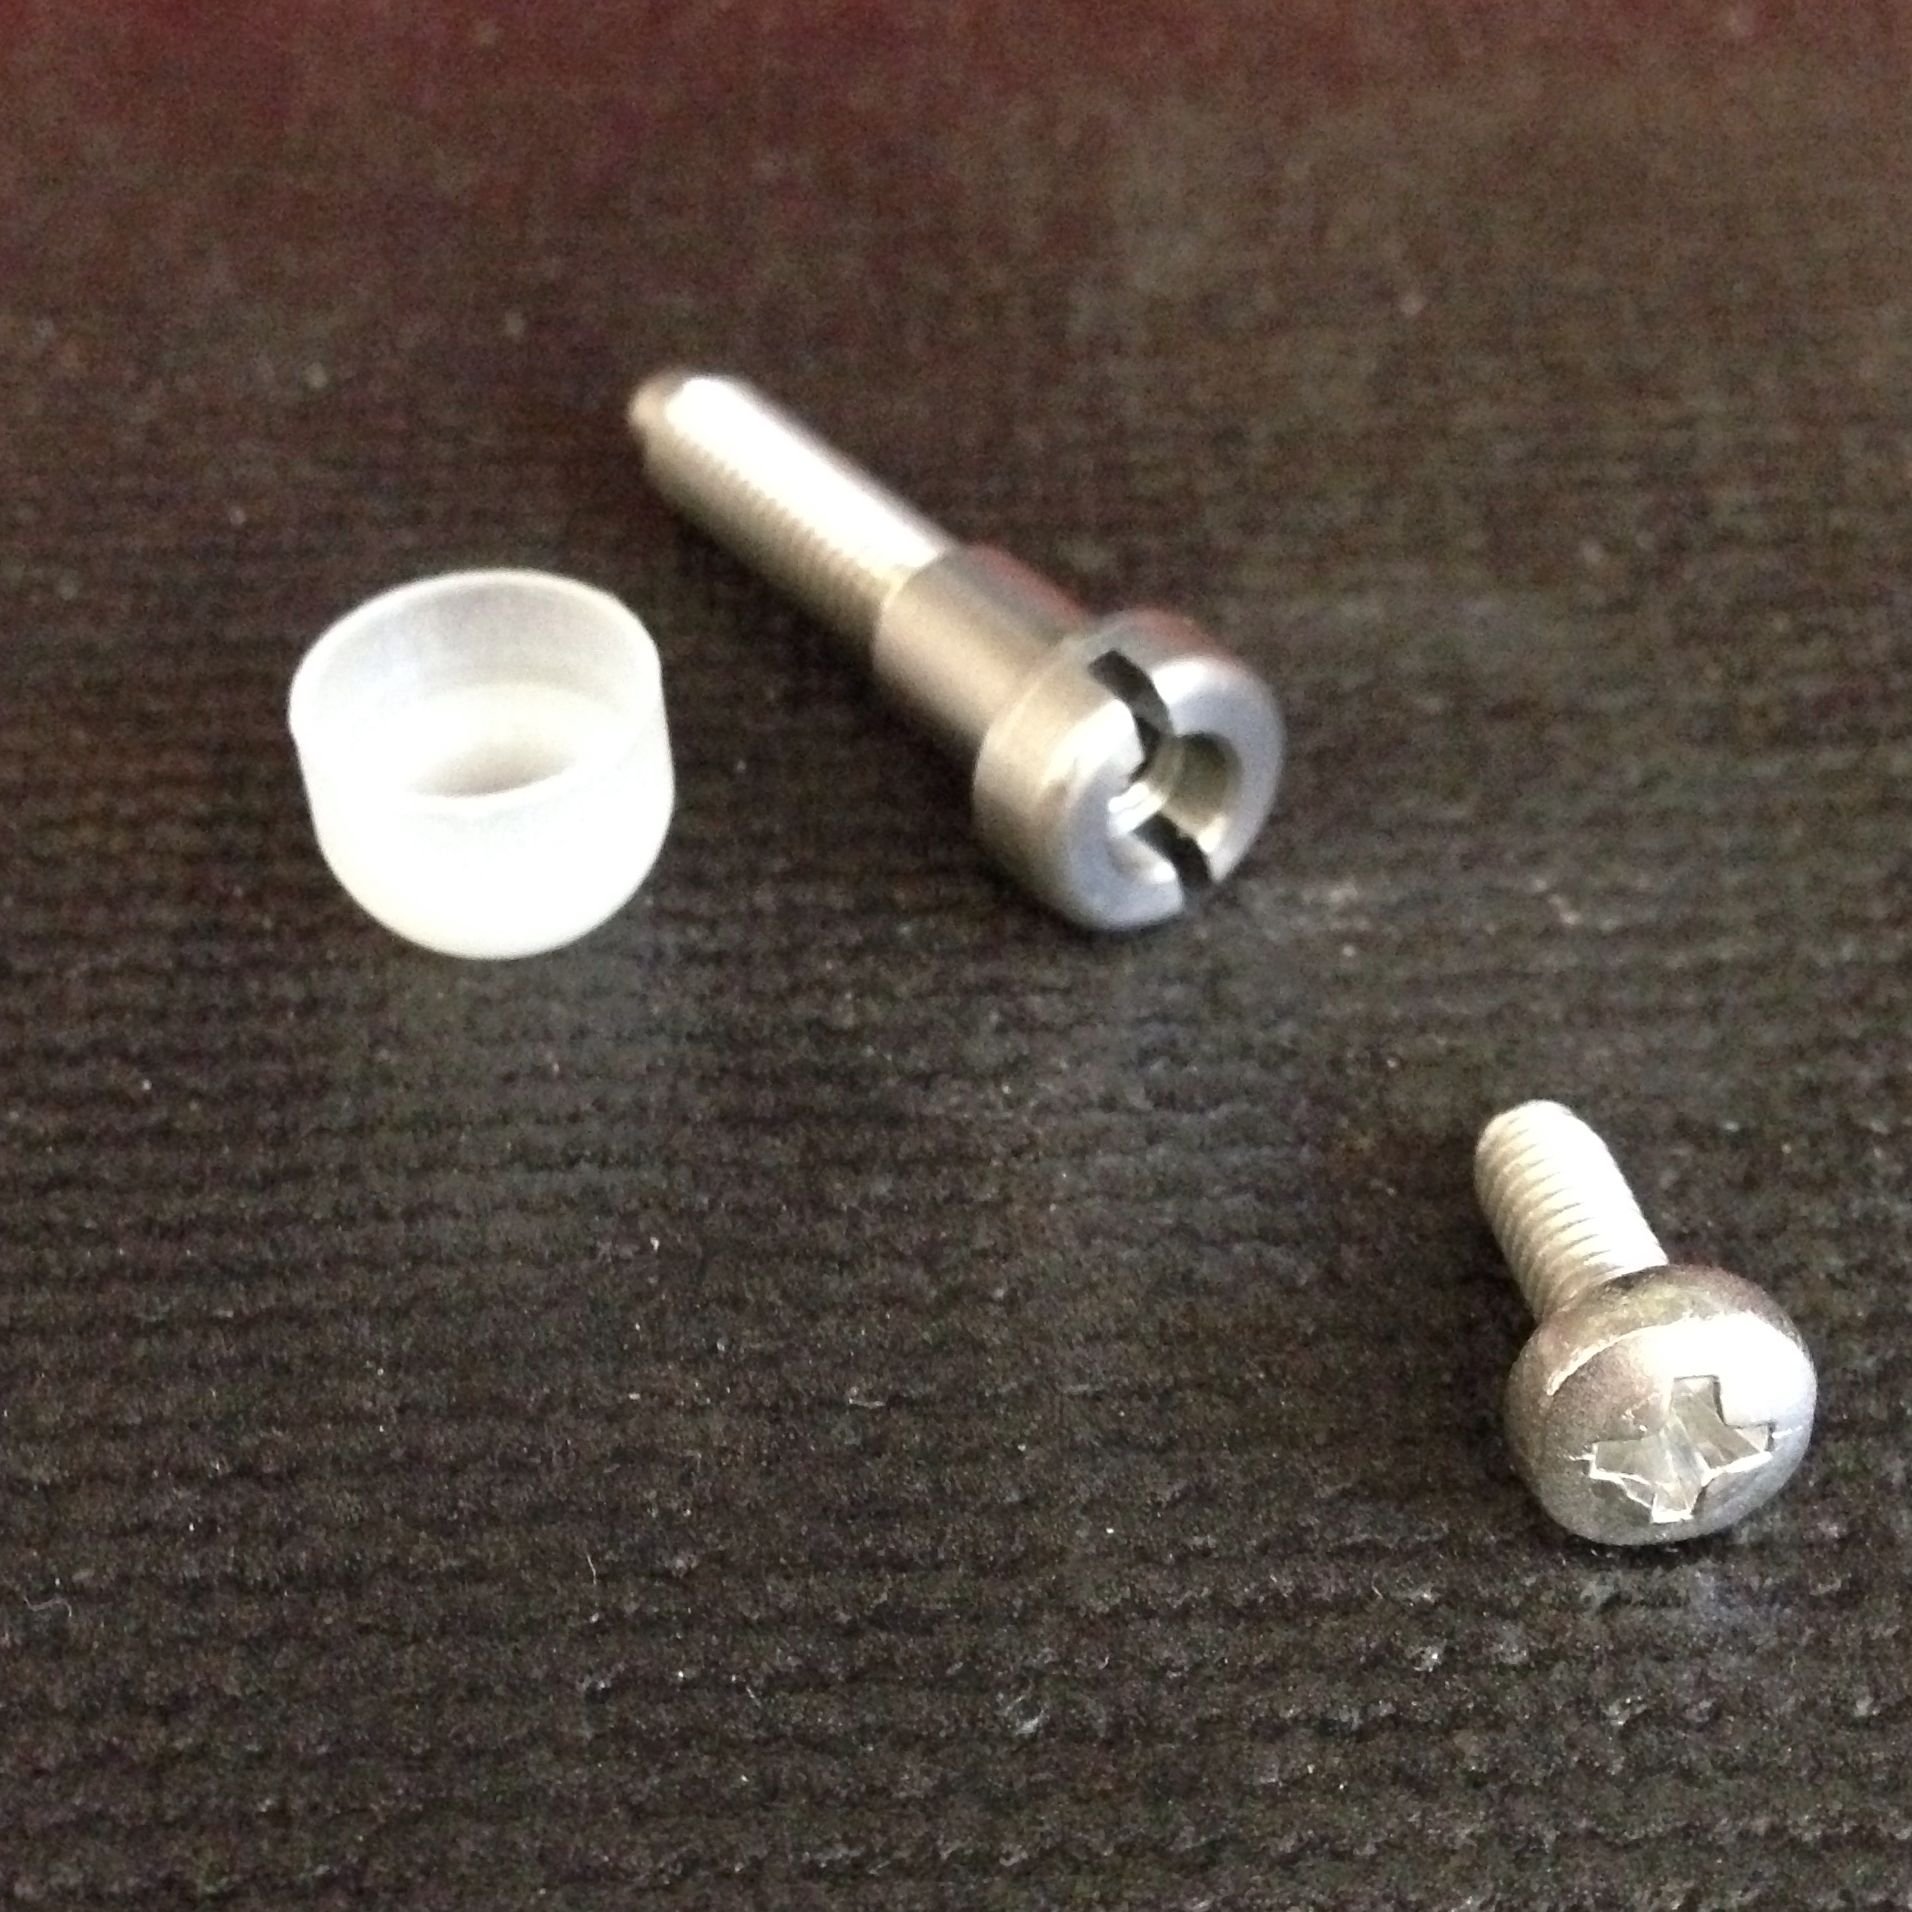
Then comes the interesting part. Mounting the outer ring was confusing because the screw that the H4 units come with appears not to be long enough. The Screw at the base of the trim ring shares the same mounting hole as the headlight unit. After some help from rennlist members, I was able to figure out that I need a specific mounting screw for the trim ring. More money to spend! I couldn’t quite understand how it all worked but I trusted that once I see it in person, it will all make sense. What you need: Head lamp screw: 911-631-033-00 & Trim ring screw : 911-631-132-00
And once you see them in person, it all makes sense. It’s a screw within a screw. The inner screw goes in and holds the headlight in place. But the screw also has threads that allow for another screw to hold the trim ring on. You CANNOT use the existing screw that came with the H4 headlights as those are only intended for mounting the “bare” lights without the body-colored trim ring.
I hope this info can help clear some confusion for those of you curious about doing this upgrade.
The black/chrome housings with projectors look pretty clean, similar to the Singer design but with the quad LED's it looks very awkward in a 964. Now if this was a 1999 Civic and you're in high school, then it fits the car styling
I think they would match the gold chains around your neck in the vette convertible ...
Originally Posted by Brian Kotyk
The black/chrome housings with projectors look pretty clean, similar to the Singer design but with the quad LED's it looks very awkward in a 964. Now if this was a 1999 Civic and you're in high school, then it fits the car styling
nice.
however, you are missing out, by not putting in the relays. probably missing around 20% of the potential brightness.
the addition of higher wattage bulbs, without the relays, will result in the the hi/lo beam switch burning out, even sooner. my new switch was around 500 bucks. : (
you can built your own relay set-up for approximately 15 bucks. you can easily make it plug and play. no compromising of originality.
I think FormulaRX already has new relays set aside for this. Can't wait to see this post updated with new pics.
i emailed Daniel Stern and he said relays not necessary. He said this knowing i was adding things to my cart. I have no knowledge , just passing on what he said

 03-28-2016, 02:35 AM