


Well...could be worse.
Thread Starter
Three Wheelin'
Joined: May 2012
Posts: 1,349
Likes: 4
From: NYC
On the anxiety filled journey that is removing ones old as hell heat exchangers, there were some emotional moments.
Fortunately, soaking with PB blaster for a two days freed up a lot of the stuff, but not everything. One of those allen/barrel nuts started slipping on me, the VERY LAST ONE I needed to get loose. Everything else came off with some a little force and some of those scary creaks when something has been sitting for a long time. So I let this one barrel nut soak for another day, hit it with heat the next day, trying to be careful and not set the oil on the valve covers on fire.
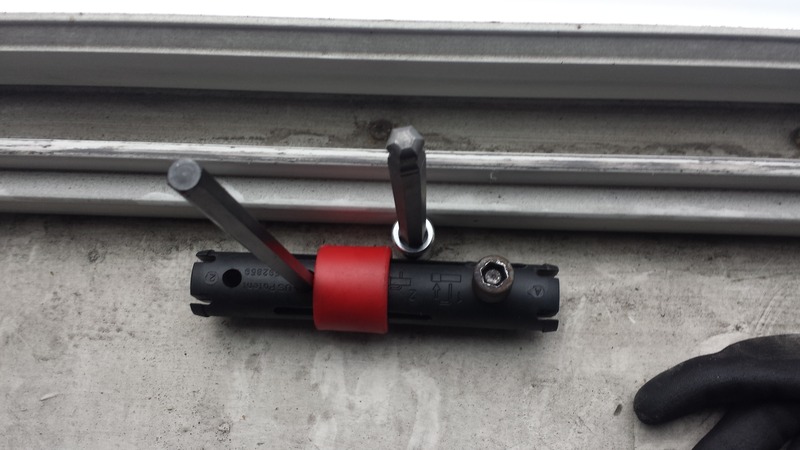
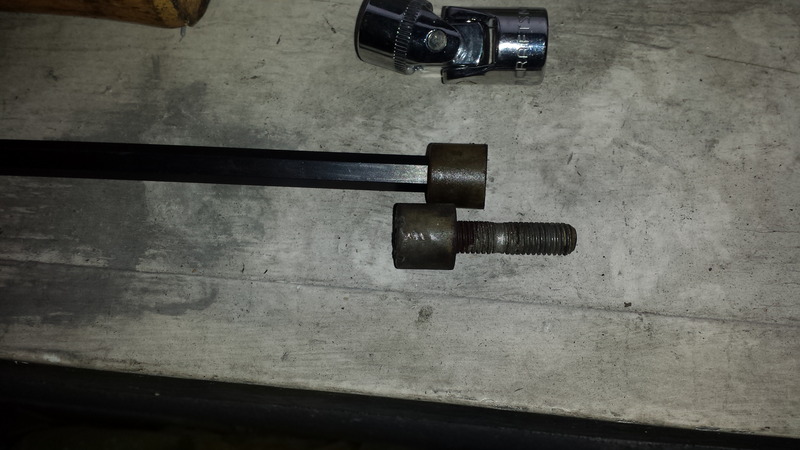
But, it even starts rounding a bit more. Out of desperation and frustration I think about hammering on a 9mm allen and trying that, but halfway in I think of another set of tool in my fathers tool bag. They are these long allen wrenches with a t-bar like attachment, with all my strength it starts creaking loose bit by bit. BUT THE WHOLE STUD comes out with it. I prayed to all aircooled gods that it didn't snap, although it seems to be permanently seized to the nut.
The associating problem could be that the sockets I bought arent squared off but rounded at the top, with max grab being around the middle of the head, but only quarter of the ball fit in.
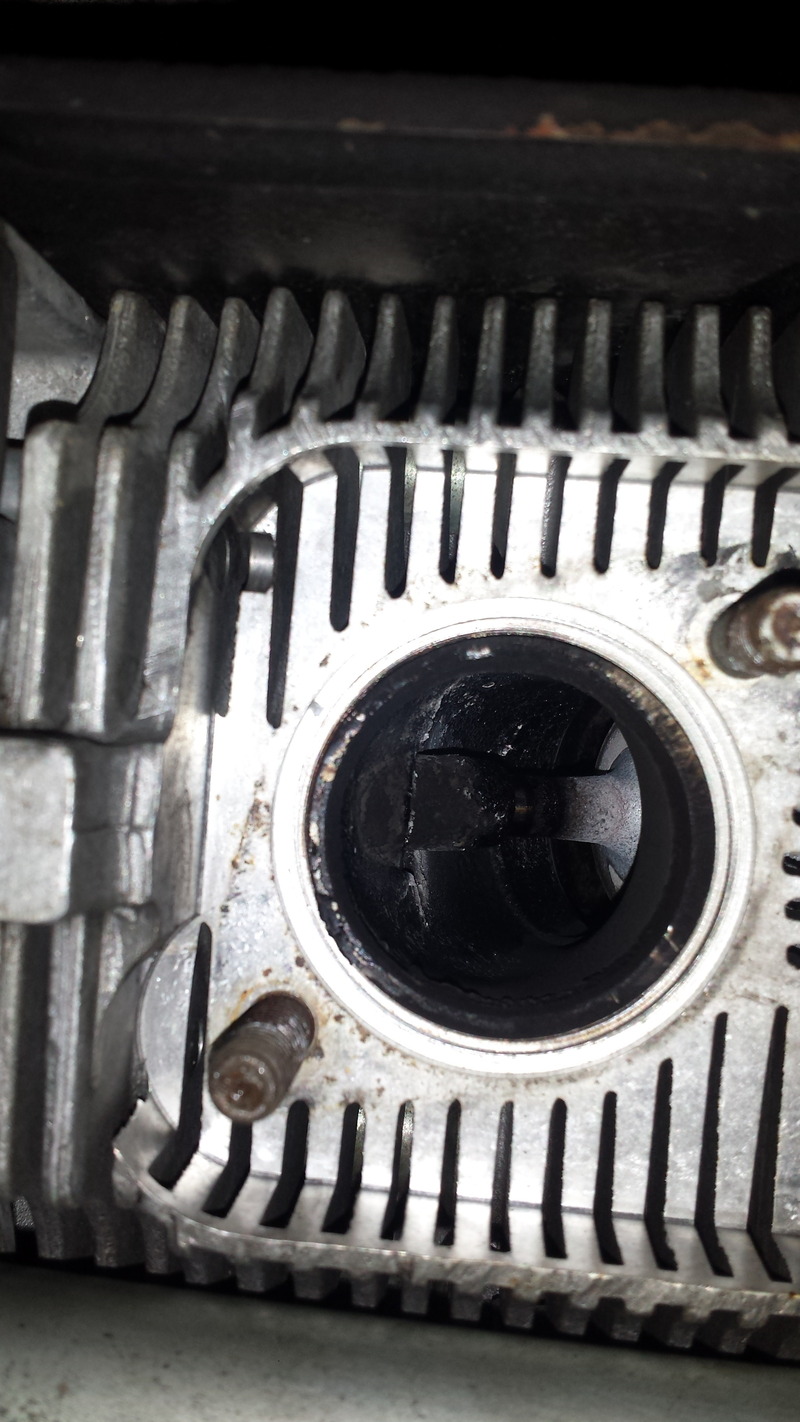
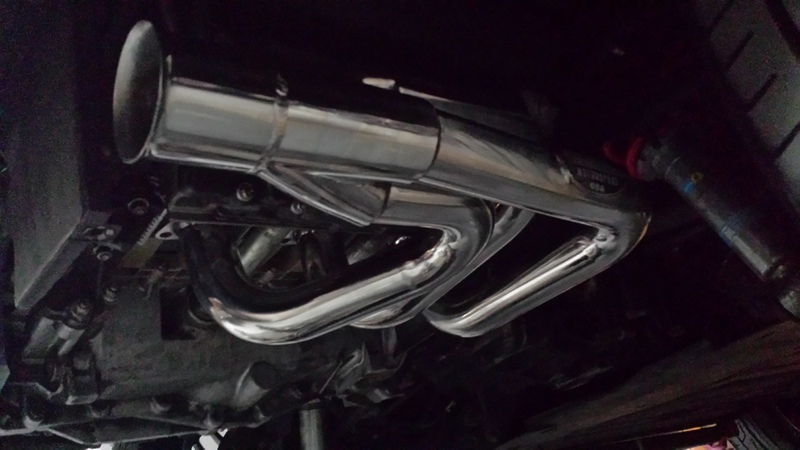
Moral of story...double check your tools, even when you think you have the right thing. Have a stud on order now, but got the other side fitted with the shiny goodness.
PS; I still can't split the two heat exchangers from each other for easier storage, after soaking and everything, it just seems to want to round the head of the bolt.
Some pics to go with the lackluster story.
20151218_110525_zpslkwqlsfn.jpg
20151218_112142_zpsj6k7wdj9.jpg
20151218_115812_zps2uqskiwf.jpg
Fortunately, soaking with PB blaster for a two days freed up a lot of the stuff, but not everything. One of those allen/barrel nuts started slipping on me, the VERY LAST ONE I needed to get loose. Everything else came off with some a little force and some of those scary creaks when something has been sitting for a long time. So I let this one barrel nut soak for another day, hit it with heat the next day, trying to be careful and not set the oil on the valve covers on fire.
But, it even starts rounding a bit more. Out of desperation and frustration I think about hammering on a 9mm allen and trying that, but halfway in I think of another set of tool in my fathers tool bag. They are these long allen wrenches with a t-bar like attachment, with all my strength it starts creaking loose bit by bit. BUT THE WHOLE STUD comes out with it. I prayed to all aircooled gods that it didn't snap, although it seems to be permanently seized to the nut.
The associating problem could be that the sockets I bought arent squared off but rounded at the top, with max grab being around the middle of the head, but only quarter of the ball fit in.
Moral of story...double check your tools, even when you think you have the right thing. Have a stud on order now, but got the other side fitted with the shiny goodness.
PS; I still can't split the two heat exchangers from each other for easier storage, after soaking and everything, it just seems to want to round the head of the bolt.
Some pics to go with the lackluster story.
20151218_110525_zpslkwqlsfn.jpg
20151218_112142_zpsj6k7wdj9.jpg
20151218_115812_zps2uqskiwf.jpg
Drifting
Joined: Dec 2014
Posts: 2,128
Likes: 7
From: Michigan
Glad you got them all out! I have yet to tackle this project, to many other things at the moment. Only way I'm taking them off is if I get new headers. I think mine where remove by the PO to put on a new oil line.

Nordschleife Master
Joined: Jul 2007
Posts: 5,613
Likes: 52
From: DFW, TX
I'm amazed you had trouble with only 1 fastener given that you were using those wiggly head bits. I would not approach that job with that tool. I guess the penetrating oil prep work really worked.
Burning Brakes

Joined: Mar 2004
Posts: 767
Likes: 16
From: Texas
EDIT: Looks like it's Sir Tools P243
Thanks
Last edited by Super90; Dec 19, 2015 at 02:07 PM.
Trending Topics
Rennlist Member
Joined: Oct 2003
Posts: 24,138
Likes: 3,242
From: New Jersey
Nothing more frustrating and even worse when it is the last of them to be a PITA.
A lesson I learned a long time ago especially when something has not been disassembled for a long time. I always give them a solid shot with a 2.5 pound or heavier hammer to make sure they are well seated before ever applying pressure. Similar to the seat bolt issue. Once it slips and gauls the nut you're done. Never liked the design myself that is why I keep two sets of those in stock. A lot of people swap them out with 12mm nuts. You can get a 12mm socket through there but not 13.
Glad you were able to get it off. You're not to far away if you run into trouble I have about every tool imaginable I am happy to help if I can.
Rennlist Stories
The Best Porsche Posts for Porsche Enthusiasts

Every Era of 911 Owner Explained in One Sentence
Verdad Gallardo
Thinking of Buying a Porsche? Do These 10 Things First
Joe Kucinski
Pixar Pals Turned Into 1-of-1 Porsches!
Michael S. Palmer
Theon Goes Full Carbon Fiber With Stunning New Build
Verdad Gallardo
Genius Porsche-Themed Gifts That'll Make Any Dad or Grad Smile
Joe Kucinski
10 Used Porsches Are Selling for Way Too Cheap
Joe Kucinski
Tuner Is Converting Porsche 911s Into Shooting Brakes
Verdad Gallardo
This Coachbuilt Creation Is A Modern Take on the Legendary Porsche 917
Verdad Gallardo
Is This Convertible Cayenne A Steal, Or A Returnless Investment?
Verdad Gallardo
Thread Starter
Three Wheelin'
Joined: May 2012
Posts: 1,349
Likes: 4
From: NYC
When the new stud comes, whats the best way to thread it in, the two nut method with some of the heavy duty/red loctite?
The whole thing is taking much more time than I anticipated, but its one of those things which I have some anxiety approaching. Kept thinking, "14 of these exhaust manifold studs, which one will snap first".
Porsche engineers def. did an interesting design with these heat exchangers, its one tough cookie. I'm just glad this car was not run in the winter, otherwise I think things would have gone differently. But I would not approach this as a minimal job, I'd say time, lots of penetrating oil, a torch, and gentle small movements on the wrench.
I really believe the penetrating oil did a number, because some of those nuts and studs have seen better days. I'm not going to put the barrel bolts back on, think I'l just do the regular nut. What sometimes bugs me is that despite my all the tools in the garage, most my fathers, I still have to end up getting stuff for almost every other project on this car. From the sockets to the swivel head.
I also had one of those round off, I hammered in the socket and it gently gave. But its interesting advice.
Thanks Cobalt, I also did use the hammer on this cautiously, although the hammer helped me out the most on the steering rack bolts.
I couldn't believe it too, was so happy everything was coming loose so easily and then bam, slap in the face.
20151218_131937_zps0svvrrzj.jpg
Nothing more frustrating and even worse when it is the last of them to be a PITA.
A lesson I learned a long time ago especially when something has not been disassembled for a long time. I always give them a solid shot with a 2.5 pound or heavier hammer to make sure they are well seated before ever applying pressure. Similar to the seat bolt issue. Once it slips and gauls the nut you're done. Never liked the design myself that is why I keep two sets of those in stock. A lot of people swap them out with 12mm nuts. You can get a 12mm socket through there but not 13.
Glad you were able to get it off. You're not to far away if you run into trouble I have about every tool imaginable I am happy to help if I can.
A lesson I learned a long time ago especially when something has not been disassembled for a long time. I always give them a solid shot with a 2.5 pound or heavier hammer to make sure they are well seated before ever applying pressure. Similar to the seat bolt issue. Once it slips and gauls the nut you're done. Never liked the design myself that is why I keep two sets of those in stock. A lot of people swap them out with 12mm nuts. You can get a 12mm socket through there but not 13.
Glad you were able to get it off. You're not to far away if you run into trouble I have about every tool imaginable I am happy to help if I can.
20151218_131937_zps0svvrrzj.jpg