When you click on links to various merchants on this site and make a purchase, this can result in this site earning a commission. Affiliate programs and affiliations include, but are not limited to, the eBay Partner Network.
Clearly not your first rodeo... You seem to have a source for every service and part you need. Seem to know how to turn a wrench too... Been doing all this stuff a while, I presume.
Hey, you mentioned clutch pack replacement, were you referring to clutch pack in torque transfer box where the planetary gear resides? Do you have intentions to ever source a planetary gear to replace your repaired version?
John, Clearly not your first rodeo... You seam to have a source for every service and part you need. Seem to know how to turn a wrench too... Been doing all this stuff a while, I presume. Hey, you mentioned clutch pack replacement, were you referring to clutch pack in torque transfer box where the planetary gear resides? Do you have intentions to ever source a planetary gear to replace your repaired version? In pic of flywheel sensor, what was fused?
Finding parts and services is an iterative process. When I find someone with a similar approach to cars I ask them who they use and it goes from there.
As for wrenching I have a limited amount of experience. If it wasn't for forums, online parts stores and cheaper tools then I would have no hope. I work at my own (slow) pace and it just seems to work out.
There was a thought of replacing the planetary gear, but the weld is in such good condition after hard driving that I left well enough alone. It's evidently up to the Job. I read somewhere that the weld is stronger than the surrounding metal so I'm good with the status quo.
The crank ref sensor plug is sort of fused in the female socket. When I have the engine back in my garage I will work out what to do. I have a later version sensor in my parts box. It just needs a bit of work to connect to the loom.
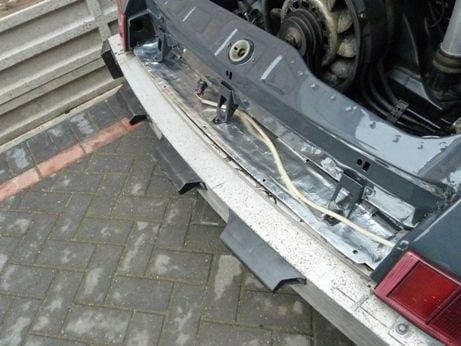
if you want to fit/remove the plastic bumper after the ally part then just use self tapping screws down from the top through into the ally part. You have to make small access holes in the ally heat shield above.
I found this better for lining everything up and being able to remove the plastic for paint etc.
Also you might want to use rivnuts instead of the spire clips as the paint will not be damaged and then rust back.
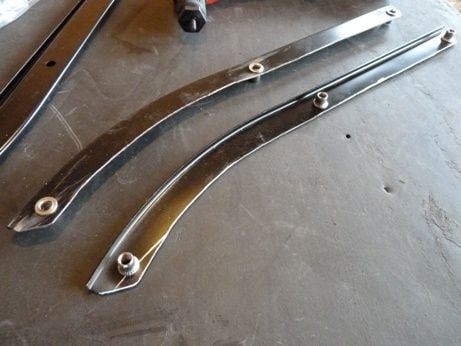
you can make "female" brackets for the rear wing bumper fixings using a cut down set of new plates from OPc, they are not expensive. then bolts through..
if you want to fit/remove the plastic bumper after the ally part then just use self tapping screws down from the top through into the ally part. You have to make small access holes in the ally heat shield above.
I found this better for lining everything up and being able to remove the plastic for paint etc.
Also you might want to use rivnuts instead of the spire clips as the paint will not be damaged and then rust back.
you can make "female" brackets for the rear wing bumper fixings using a cut down set of new plates from OPc, they are not expensive. then bolts through..
Thanks for the suggestions. I like the idea of lining things up. Not sure how often I will have the bumper off after this, but you never know.
The engine and gearbox refit is the priority now so I made a hard decision. I waited as long as I could but the CNC shop couldn't meet the timeline for the billet covers so I've reinstalled the original valve covers with some flange sealant to help. Powder coating the lower ones is a bit pointless for show on a 964 as it's all hidden by heat shield but it should help with corrosion protection. Four stainless fasteners to be sourced to finish the heat shield fastening. Otherwise this engine and box are ready to reunite with the body.
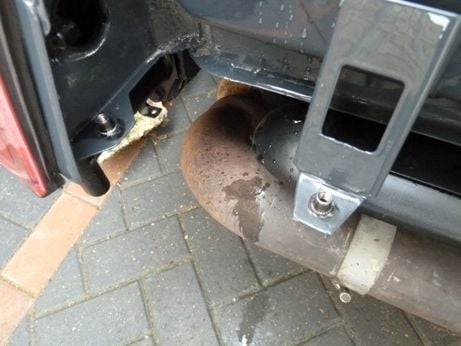
As a side note. The thing I will definitely do next time is a full engine oil drain before dropping the engine. That pipe on the side of the engine has leaked oil through every bag I have used over the last 4 months.
An interesting evening in the garage. Biggest 'own goal' bar the 'tissue' incident of 2013.
In early 2013, I bought an odd ball lot of 964 stuff for $40. Pressure switch (dud), a hydraulic 'bomb' (fitted early on as the original failed), primary muffler, and a cat.
For some reason, probably because it was in great condition, I asked my mechanic to fit the cat to the car. I assumed all along that the car had one (this was before I started wrenching on the car).
My attempts to gut that cat since the refurb started were very frustrating (it's the worst job you can imagine - don't do it) so I decided to rummage under the house and get out the original one for the weekend start. This is what I saw.
For 2 1/2 years I have run a power sapping Cat while the original Porsche Cat Bypass sat in storage under the house. I should have known better as this is a Singapore car running open loop.
I'm learning to test fit parts to make sure nothing needs to be ordered as it smooths the process e.g. I need 5 new fasteners for the cat bypass etc. I also bought an o2 sensor insert as I need that for the wide band sensor I'll fit to tune the AFR on the Specialist Components ECU.


 12-04-2015, 11:51 PM