When you click on links to various merchants on this site and make a purchase, this can result in this site earning a commission. Affiliate programs and affiliations include, but are not limited to, the eBay Partner Network.
Just a light touch in the garage tonight. Power steering pump was removed, so were the alternator fan straps. I also took off the valve covers on the left hand cylinders (1, 2 & 3). Spark plugs look good. Cams and tappets look good from what I can see. Head studs are all intact
Your updates are always relevant to my interests, John. I've been reading up on doing an engine drop on mine (for valve adjustment and oil leak elimination), and your posts are excellent for a do-it-yourselfer.
Your updates are always relevant to my interests, John. I've been reading up on doing an engine drop on mine (for valve adjustment and oil leak elimination), and your posts are excellent for a do-it-yourselfer.
Happy to help Chris.
BTW: Engine out is the way to go for a first timer. Everything is so easy to get to and fix. Obviously a mechanic couldn't justify the time expense of dropping the engine, so has to do it the harder way, but my time is free so I do it the way I want.
I turned the engine over tonight. The target was the heat exchanger bolts. PB blaster and a Mapp torch managed to shift seven of the eight bolts. The last bolt needs a different tool which should arrive soon, as should the long Allen key required to loosen the nuts that are accessed through the holes in the heat exchanger.
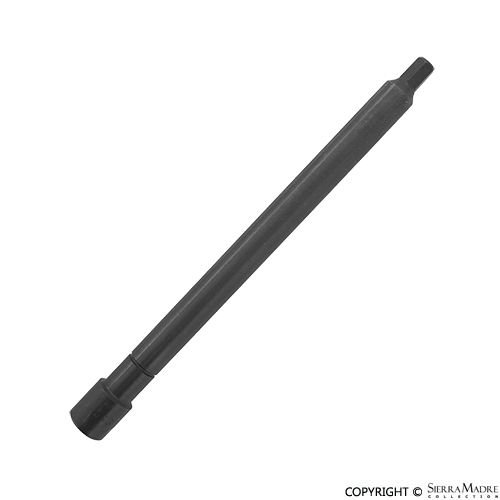
This Facom hex tool made short work of the Allen key nuts accessed through the heat exchanger holes. The last nut, up by the flywheel end needed a box wrench. All sorted. I took a few studs out but they are easy to replace. The heat exchanger was relatively easy to remove. Quite heavy.
How did you get the HE studs out exactly? Do new studs get any loctite, such as, loctite Blue?
You plan to keep cam tower and heads together and move aside? No work on those pieces, correct?
How did you get the HE studs out exactly? Do new studs get any loctite, such as, loctite Blue? You plan to keep cam tower and heads together and move aside? No work on those pieces, correct?
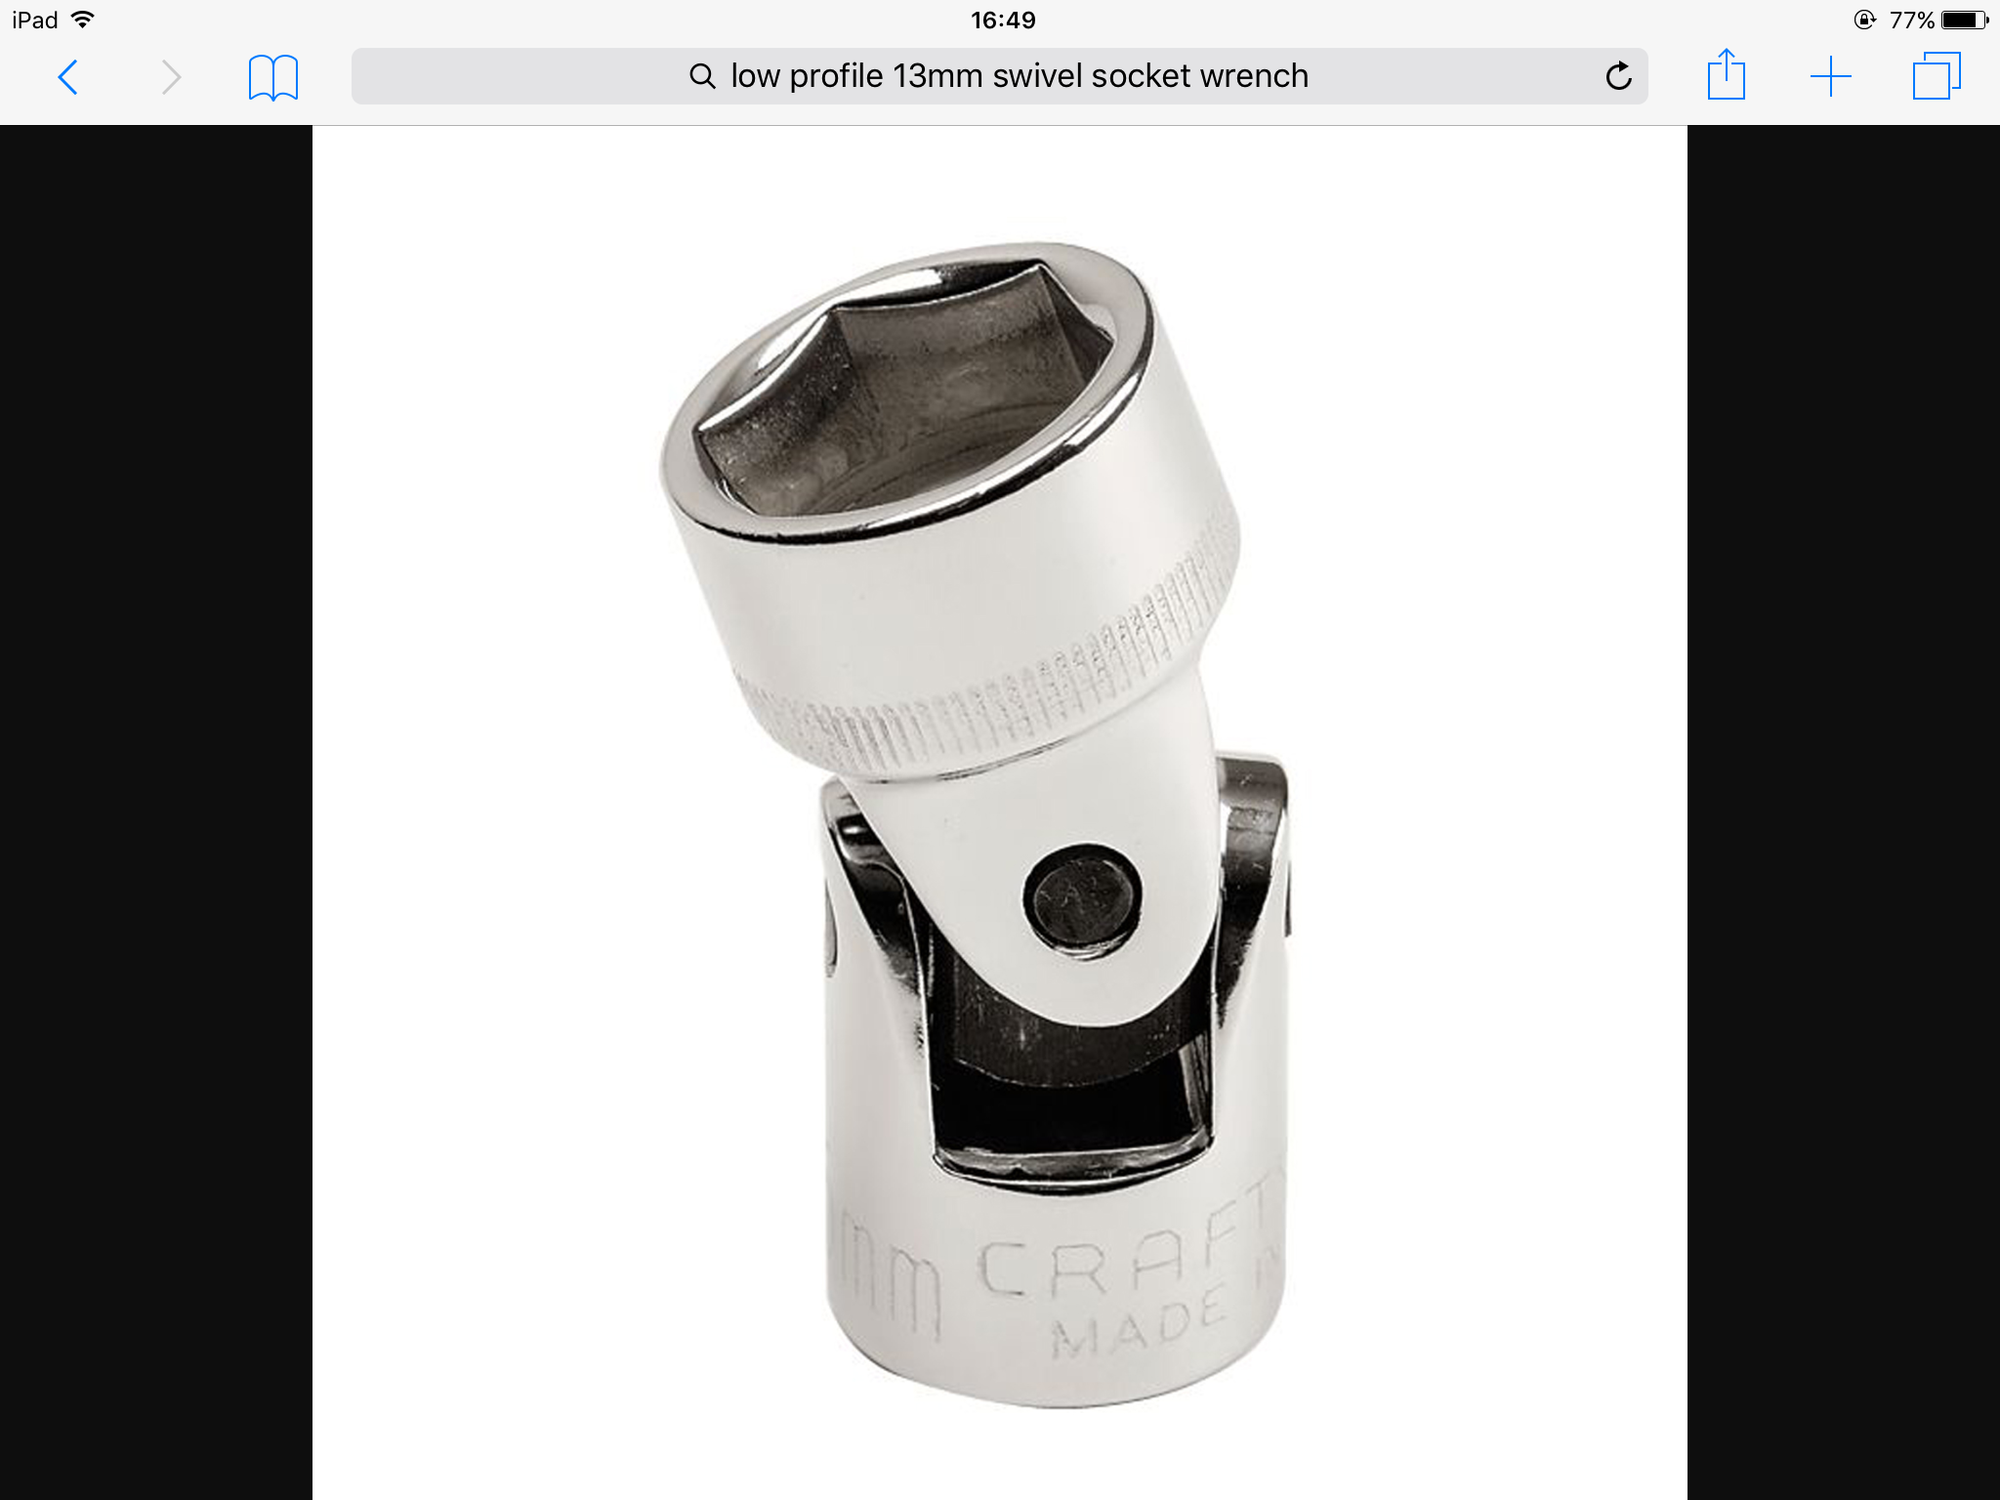
I first sprayed all of the nuts with PB blaster. Then I used a MAAP torch to heat them up. Maybe 30 seconds on each. Next I used a 13mm socket on a 1/4" drive with a universal joint. That sorted 7 of the nuts. The last nut was sorted with the above pictured box wrench. Looking at the task I think that wrench could have been used from the start. Lastly I used the above Facom Hex wrench for the Allen head nuts accessed through the holes in the heat exchangers. I am beginning to dislike Allen heads as if the tool rounds out the head you are in for a world of pain. For that reason I now buy the best quality I can and this wrench has a hard sharp end. It can also be used on the driveshaft bolts.
Some of the nuts had a stronger hold than the stud/engine bond and the whole stud came out. I will buy new ones for those and 12 all new nuts. I won't use loctite as the heat would likely make it ineffective and I can't find evidence they would back out. Of all the jobs to date these nuts have given me the most angst. Making them even harder to get out seems counterproductive.
As for the nuts, they are different to others on the engine. They seem harder and give a 'crack' when they loosen. Once cracked they are east to get off.
Yes, I intend to keep the cam tower and heads as intact as possible. I'm after the nose bearing area and will only do what's required to sort that.
John I love how the title of this thread is "light refurb"
I've often wondered about the "light" irony myself. It wasn't the intention to go this deep but it should pay off over the next twenty or more years of ownership.
I wish I had the space in my garage to pull an engine and put on the stand to work on it like that !! Too many kids bicycles, etc. for now. That time will come...
Did you use a Mapp/Oxygen torch, or just a Mapp gas torch? I tried just the Mapp gas and it wouldn't get very hot. When I used a little Mapp/Oxygen torch, that made a huge difference, as it gets MUCH hotter. I would put the torch to the HE fasteners, focus it to get things cherry red, and then, they would come right loose. Fortunately I only had four of them that needed so much persuasion with the "hot wrench". The other eight came loose with just a liberal soaking in PB Blaster and Kroil.
Also, I had a lot of different wrenches, including the one you noted, but seems like a flex socket worked the best, for me...
And a similar allen wrench, available from Pelican, Sierra Madre, etc. for those barrel nuts...
Having a car from dry country with no other corrosion makes a big difference.
I replaced the studs that came out with the fasteners, and the ones that remained, I chased the threads. All new fasteners and a thin coat of anti-seize.
Nice work John !! I wish I had the space in my garage to pull an engine and put on the stand to work on it like that !! Too many kids bicycles, etc. for now. That time will come... Did you use a Mapp/Oxygen torch, or just a Mapp gas torch? I tried just the Mapp gas and it wouldn't get very hot. When I used Mapp/Oxygen, that made a huge difference. I would put the torch to the HE fasteners, focus it to get things cherry red, and then, they would come right loose. Fortunately I only had four of them that needed so much persuasion with the "hot wrench". The other eight came loose with just a liberal soaking in PB Blaster and Kroil. Having a car from dry country with no other corrosion makes a big difference. I replaced the studs that came out with the fasteners, and the ones that remained, I chased the threads. All new fasteners and a thin coat of anti-seize. Next time around should be much easier. : )
Just Mapp, thankfully as the cost of purchasing the Mapp/oxy combination torch seemed a step too far given the limited use I would get from it. Thanks for reminding me to put thread chasing on my to do list. I have the anti-sieze and the stud/nut order was made last night. I too have a benign climate. I'd hate to try this on a car from an area that salts its roads.
As for space, there's never enough. I tested the boundaries by placing a tail in the gym and my wife repelled the invasion. Next job is to clear space for the engine pieces. That will take a day as nothing can go outside the garage and I still want to drive my Silver car so nothing can go behind it. Boxes full of interior parts, recovered seats with nowhere to go. This is how stuff gets damaged. First world problem.
Now you know .... With the heads off, putting in shiny new (single piece) oil return tubes will be calling your name.... Then on all the cast iron mount pieces of HE maybe some 2000 degree rustoleum primer/paint ... the very very steep slope or, you may make RL History for switching ONE O-Ring
I picked up this from Sears anticipating the HE job ...
That tool is definitely a good idea. With so many nuts/bolts on these cars being 13mm you will get good use out of it.
To be honest, I'm not a fan of overdoing engine aesthetics unless you want to put a mirror on the floor in your garage and never drive it. I will fix broken items and replace worn fastenings but otherwise the focus is on the leak.

 03-21-2017, 06:50 AM


 or, you may make RL History for switching ONE O-Ring