

How To Replace FPR Fuel Pressure Regulator 1991 C2 964
 05-25-2014, 09:23 PM
#1
Rennlist Member
Thread Starter
I recently replaced the FPR on my 1991 C2. I am posting step by step photos of the 6 hour adventure.
The symptoms were:
Momentary random power loss
Hard to start cold
Very hard to start hot
Erratic idle - occasional stall
Small muffled backfire when first accelerating
Overall horrible performance
The FPR was leaking through the vacuum/pressure diaphragm causing raw fuel to empty into the intake manifolds. Pulling the vacuum line from the FPR revealed the leak - fuel drained out of the tube when the fuel pump runs.
Replacing the FPR cured ALL of the symptoms and the car is running better than I can ever remember. Flawless!
----------------------------------------------------
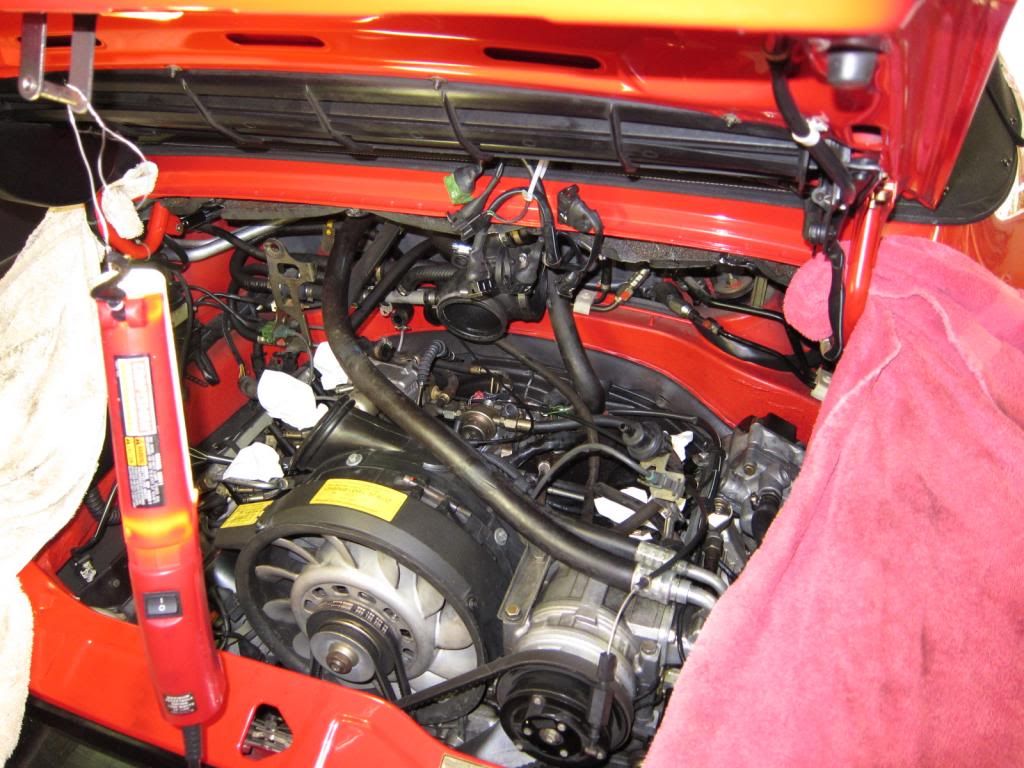
This is what we're after:

First step - remove the electric fan duct.

Next step, remove all connectors and the vacuum line on the throttle body (it's coming out):

Next, Remove the fan by removing the 2 bolts (10mm) and the electrical connector:

This is what it looks like out - notice the piece that rests in the support grommet on the bracket (see next image):

That's where the fan rests:

Remove these two bolts (10mm):

Loosen all three upper clamps on the right intake manifold:

Remove air filter box and AFM housing:

Loosen two large clamps that attach right intake to throttle body and remove the right intake:

Close up of fuel puddling in the intake manifold - Not good!

Loosen all 6 clamps on the left intake - notice the hidden little bugger:

Remove left intake:


Loosen two clamps and remove ISV:
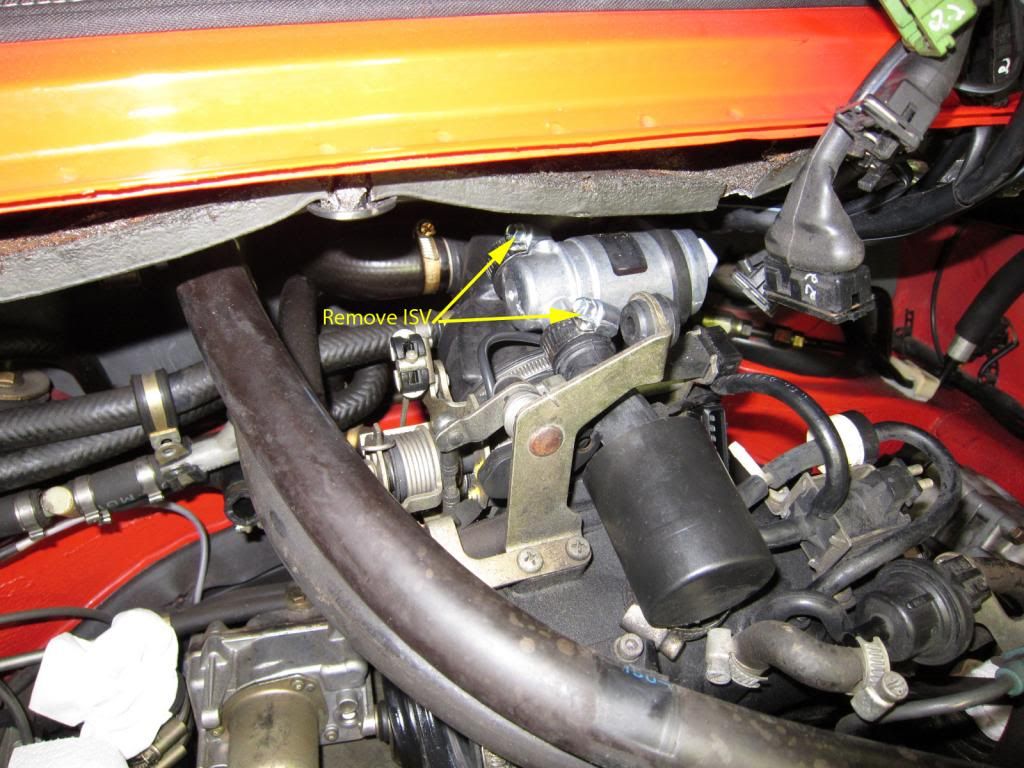
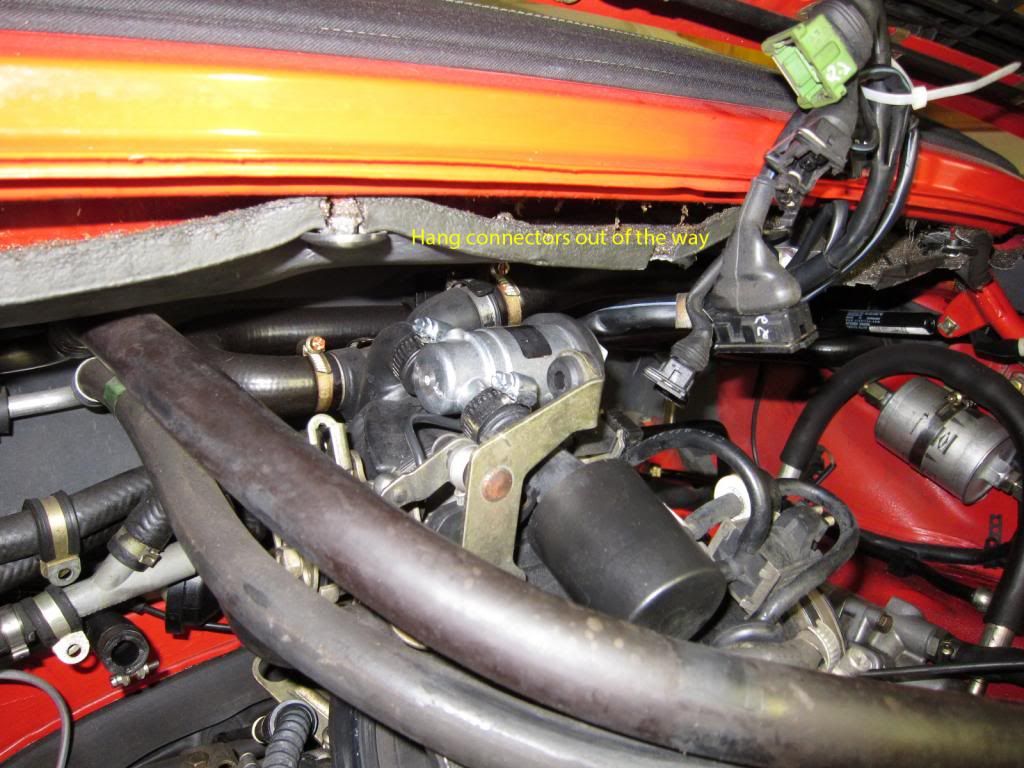
Zip-tie the connectors out of the way. You'll need a 24mm box wrench to remove the large nut on the FPR bracket after you remove the fuel line (19mm) - No photo, you'll need to do it by feel:
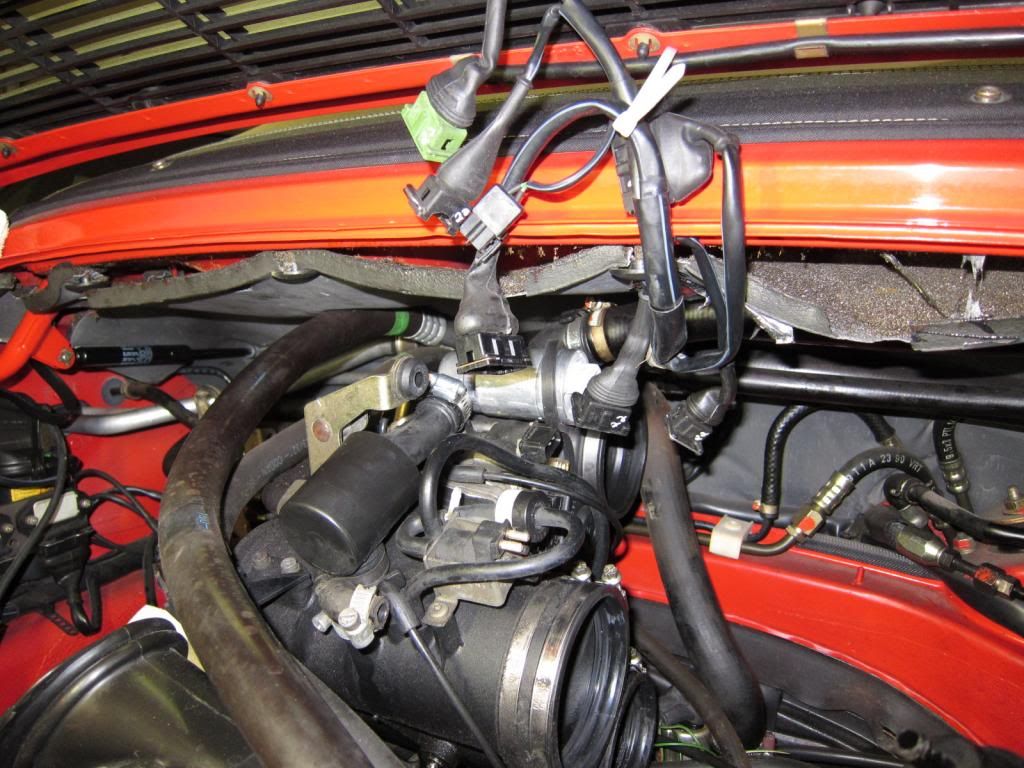
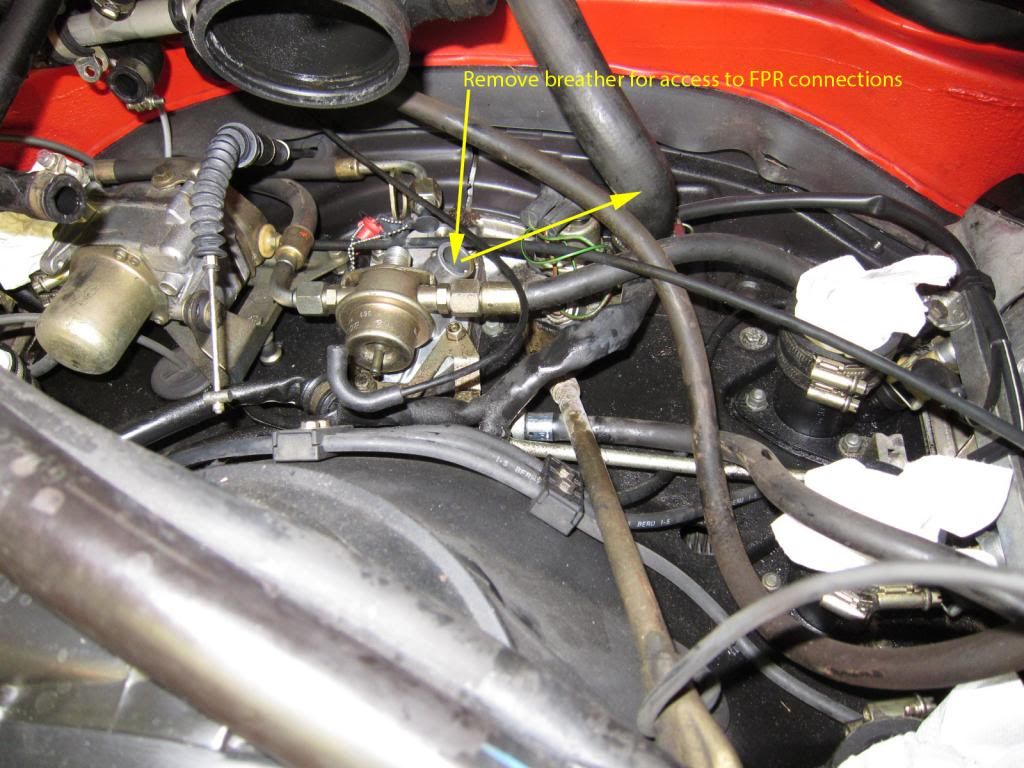
Throttle body is removed and the FPR is exposed. Remove the breather hose for better access to the FPR fittings:
So this is where we are:
After removing the fuel return, it will leak fuel everywhere, so plug it as shown:
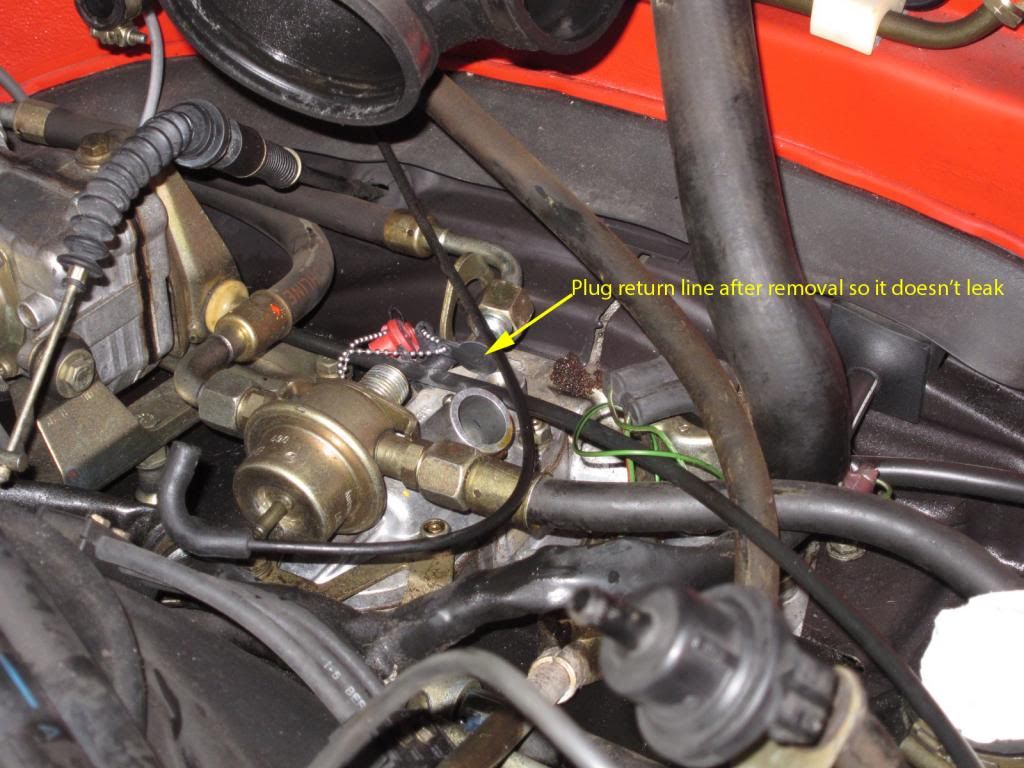
Close up:

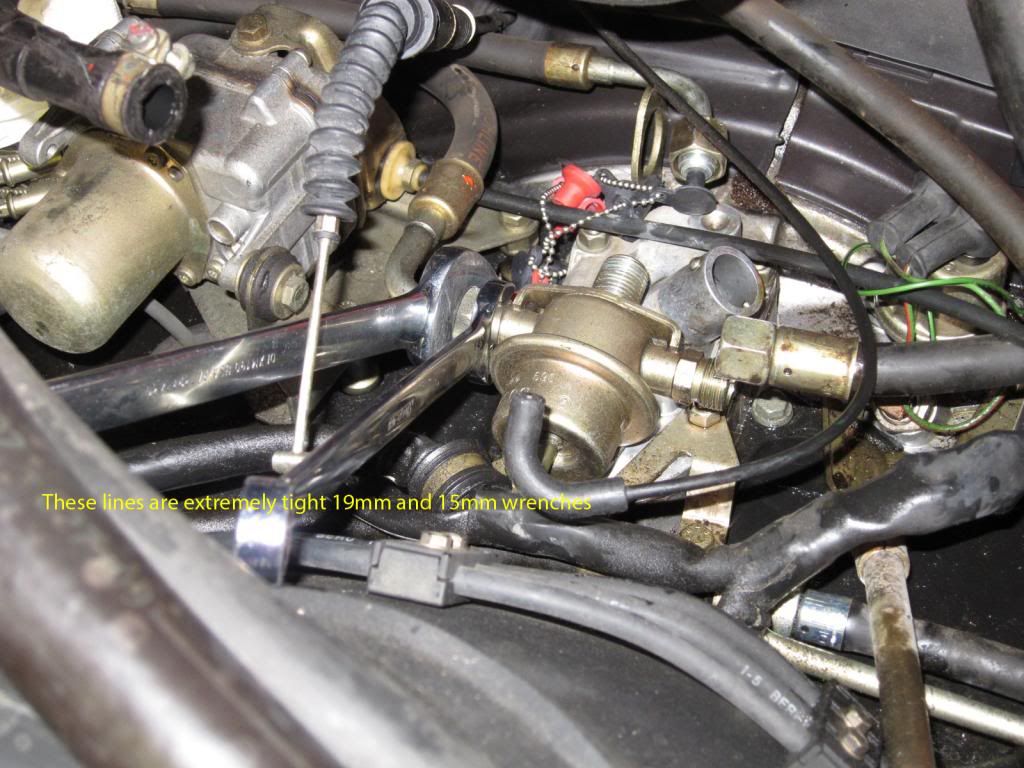
Make sure you use high quality wrenches so you don't round the nuts!
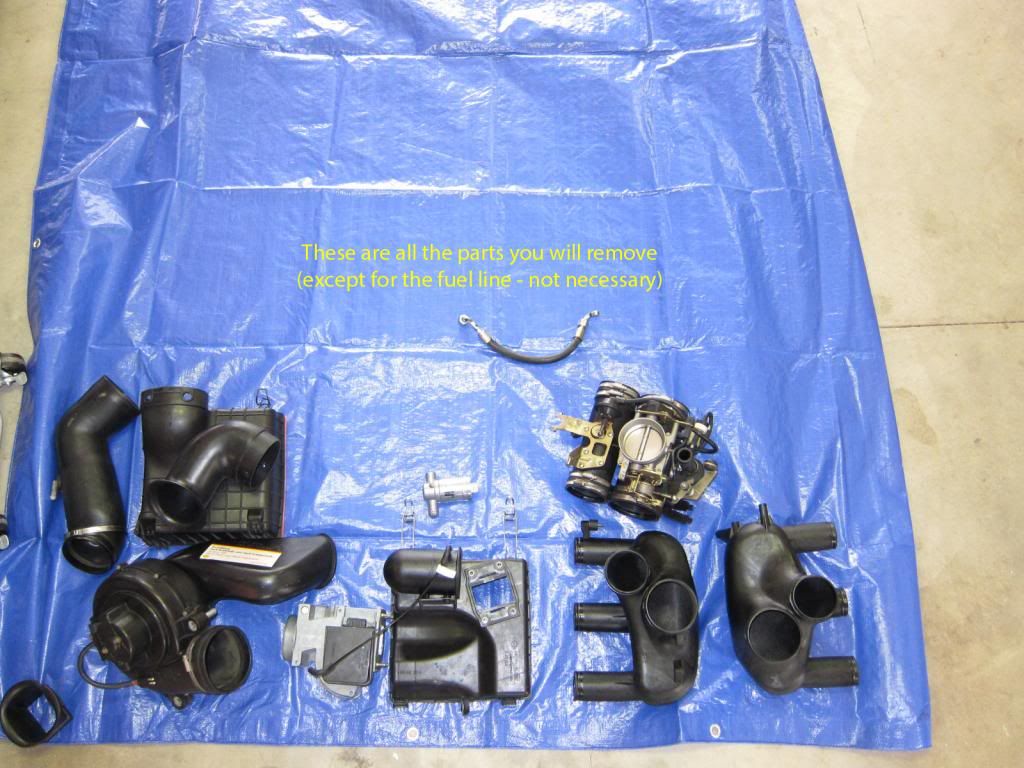
These are all the parts removed (except you don't need to remove the fuel line):
-------------------------------------
It's a lot easier than it looks - just time consuming. I took my time and was very careful and cleaned everything before putting it back together and it took 6-7 hours. Installation is the reverse... go slow and think about the order. Don't forget to tighten the fuel lines and re-connect the breather hose next to the FPR!
The symptoms were:
Momentary random power loss
Hard to start cold
Very hard to start hot
Erratic idle - occasional stall
Small muffled backfire when first accelerating
Overall horrible performance
The FPR was leaking through the vacuum/pressure diaphragm causing raw fuel to empty into the intake manifolds. Pulling the vacuum line from the FPR revealed the leak - fuel drained out of the tube when the fuel pump runs.
Replacing the FPR cured ALL of the symptoms and the car is running better than I can ever remember. Flawless!
----------------------------------------------------
This is what we're after:

First step - remove the electric fan duct.

Next step, remove all connectors and the vacuum line on the throttle body (it's coming out):

Next, Remove the fan by removing the 2 bolts (10mm) and the electrical connector:

This is what it looks like out - notice the piece that rests in the support grommet on the bracket (see next image):

That's where the fan rests:

Remove these two bolts (10mm):

Loosen all three upper clamps on the right intake manifold:

Remove air filter box and AFM housing:

Loosen two large clamps that attach right intake to throttle body and remove the right intake:

Close up of fuel puddling in the intake manifold - Not good!

Loosen all 6 clamps on the left intake - notice the hidden little bugger:

Remove left intake:


Loosen two clamps and remove ISV:

Zip-tie the connectors out of the way. You'll need a 24mm box wrench to remove the large nut on the FPR bracket after you remove the fuel line (19mm) - No photo, you'll need to do it by feel:


Throttle body is removed and the FPR is exposed. Remove the breather hose for better access to the FPR fittings:

So this is where we are:

After removing the fuel return, it will leak fuel everywhere, so plug it as shown:

Close up:

Make sure you use high quality wrenches so you don't round the nuts!

These are all the parts removed (except you don't need to remove the fuel line):

-------------------------------------
It's a lot easier than it looks - just time consuming. I took my time and was very careful and cleaned everything before putting it back together and it took 6-7 hours. Installation is the reverse... go slow and think about the order. Don't forget to tighten the fuel lines and re-connect the breather hose next to the FPR!
Last edited by flypfi; 05-25-2014 at 09:43 PM.

The following users liked this post:
cbracerx (05-25-2022)
05-25-2014, 09:47 PM
#2
Nordschleife Master

Great DIY and congrats on getting all that done in such little time and having it all come back together properly on the first shot! I assume your car is a tiptronic Carrera 2?


Trending Topics
10-13-2016, 09:02 PM
#9
Track Day

Join Date: Aug 2016
Posts: 22
Likes: 0
Received 0 Likes
on
0 Posts
Well, today I pulled the FPR vacuum line off of the manifold and sure enough, Fuel poured out as soon as I started the car. I ordered a replacement, when it gets here, time to get to work!
Phatnine11
Phatnine11
10-14-2016, 12:29 PM
#10
Rennlist Member
Thread Starter
You won't believe the difference it makes in all aspects of your engine operations. The replacement process is tedious, but fairly easy. The hardest part (for me anyway) was getting enough leverage to get a good torque on the forward facing fuel line fitting.
 10-14-2016, 02:13 PM
#13
Rennlist Member
Thread Starter
Apparently photobucket is having site issues. I'll re-post when they're up and running again. In the meantime, does anyone have a better solution for hosting or uploading images on these threads?