When you click on links to various merchants on this site and make a purchase, this can result in this site earning a commission. Affiliate programs and affiliations include, but are not limited to, the eBay Partner Network.
The one from Sleepers Speed Shop works nicely on the C4 (same principle as the old RUF SSK with the pivot point rotated to the top) but they are a pain to get hold of and order.
I'm sure you could use the same principle to do something DIY and I seem to recall someone did that.
Yes to change the pivot point in order to shorten the throw would be easy for me to make / modify.
The shifter I was meaning was the full billet aluminum shaft with integrated machined **** but as far as I can see they only suit C2.
Still planning interior mods so I want to make sure everything will tie in.
Paint on the body should be happening next week too.
It seems the best way of doing it - there's a much greater impact on throw with the pivot at the top.
I guess you are thinking of a shifter like the one that Rothsport do - all one piece. They do look good but they are obviously not for a C4. Sleepers do a billet shaft for their kit, although I used the standard one and put an aluminium cover on it. The Sleepers one isn't round though. I imagine you could get a cover machined in one piece to fit.
What colour are you going for and are you considering something a bit different for the interior?
Yes I'll need to have a look at making something I think although I quite like the stock shifter as well if trimmed nicely.
When I originally purchased the car I bought a bunch of seals and gaskets to tackle the plethora of oil leaks from the engine and gearbox which I never ended up doing. As a result I ended up with a bunch of double ups of quite a few things. The upside of this is that I already had output flange seals and a side cover seal to be able to put the front differential together. Glass bead blasted the output flanges and painted those, just need the input shaft seal to be able to mate it back up to the torque tube. Disassembled and cleaned the torque tube, cleaned all of the dried out old grease from the shift mechanism and then promptly forgot how it goes back together! Back on Porsche PET to find an exploded view. As much as possible reassembled and cleaned the boots but I need to order 2 ball socket bushes for the front shift rod to finish this off. Typically with old cars the best way to restore is to take everything apart, throw a lot of it away and replace with new. Porsche is no different, although great quality when new they are still 30 plus years old and just plain worn out. I'm at that stage where I don't want to leave any stone unturned hence I'm taking everything apart, inspect, clean and replace as needed. Assembly time of some components can begin, rear arms vapour blasted, new wheel bearings in, hubs glass beaded and painted. It's nearly paint time, this part has been in the making for the last 18-20 months and just is so damn close now. My painter is painting the body this coming week!!!! They did the final 800 grit stage and are happy with where it's at, originally we talked about painting the entire thing in one go and then re block the outer panels and flow coat it. This means a smooth as glass, no cutting, no polishing mean as finish off the gun but then Greig rang me last week and told me they would break it down in to more manageable chunks. Getting around the entire thing while trying to avoid dry spray he felt was too difficult, if not impossible so now they will paint the under body, trunk, engine bay etc, back mask that and then paint the exterior. Bake it a few times and leave it to settle for 2-3 weeks, Then re block the exterior and mask it up to re paint the outside with a couple thinner coats of paint. A lot of work but the finish is exceptional, hope to have the body back in the next 3 weeks or so all going well. The doors and other parts will follow over the coming months.
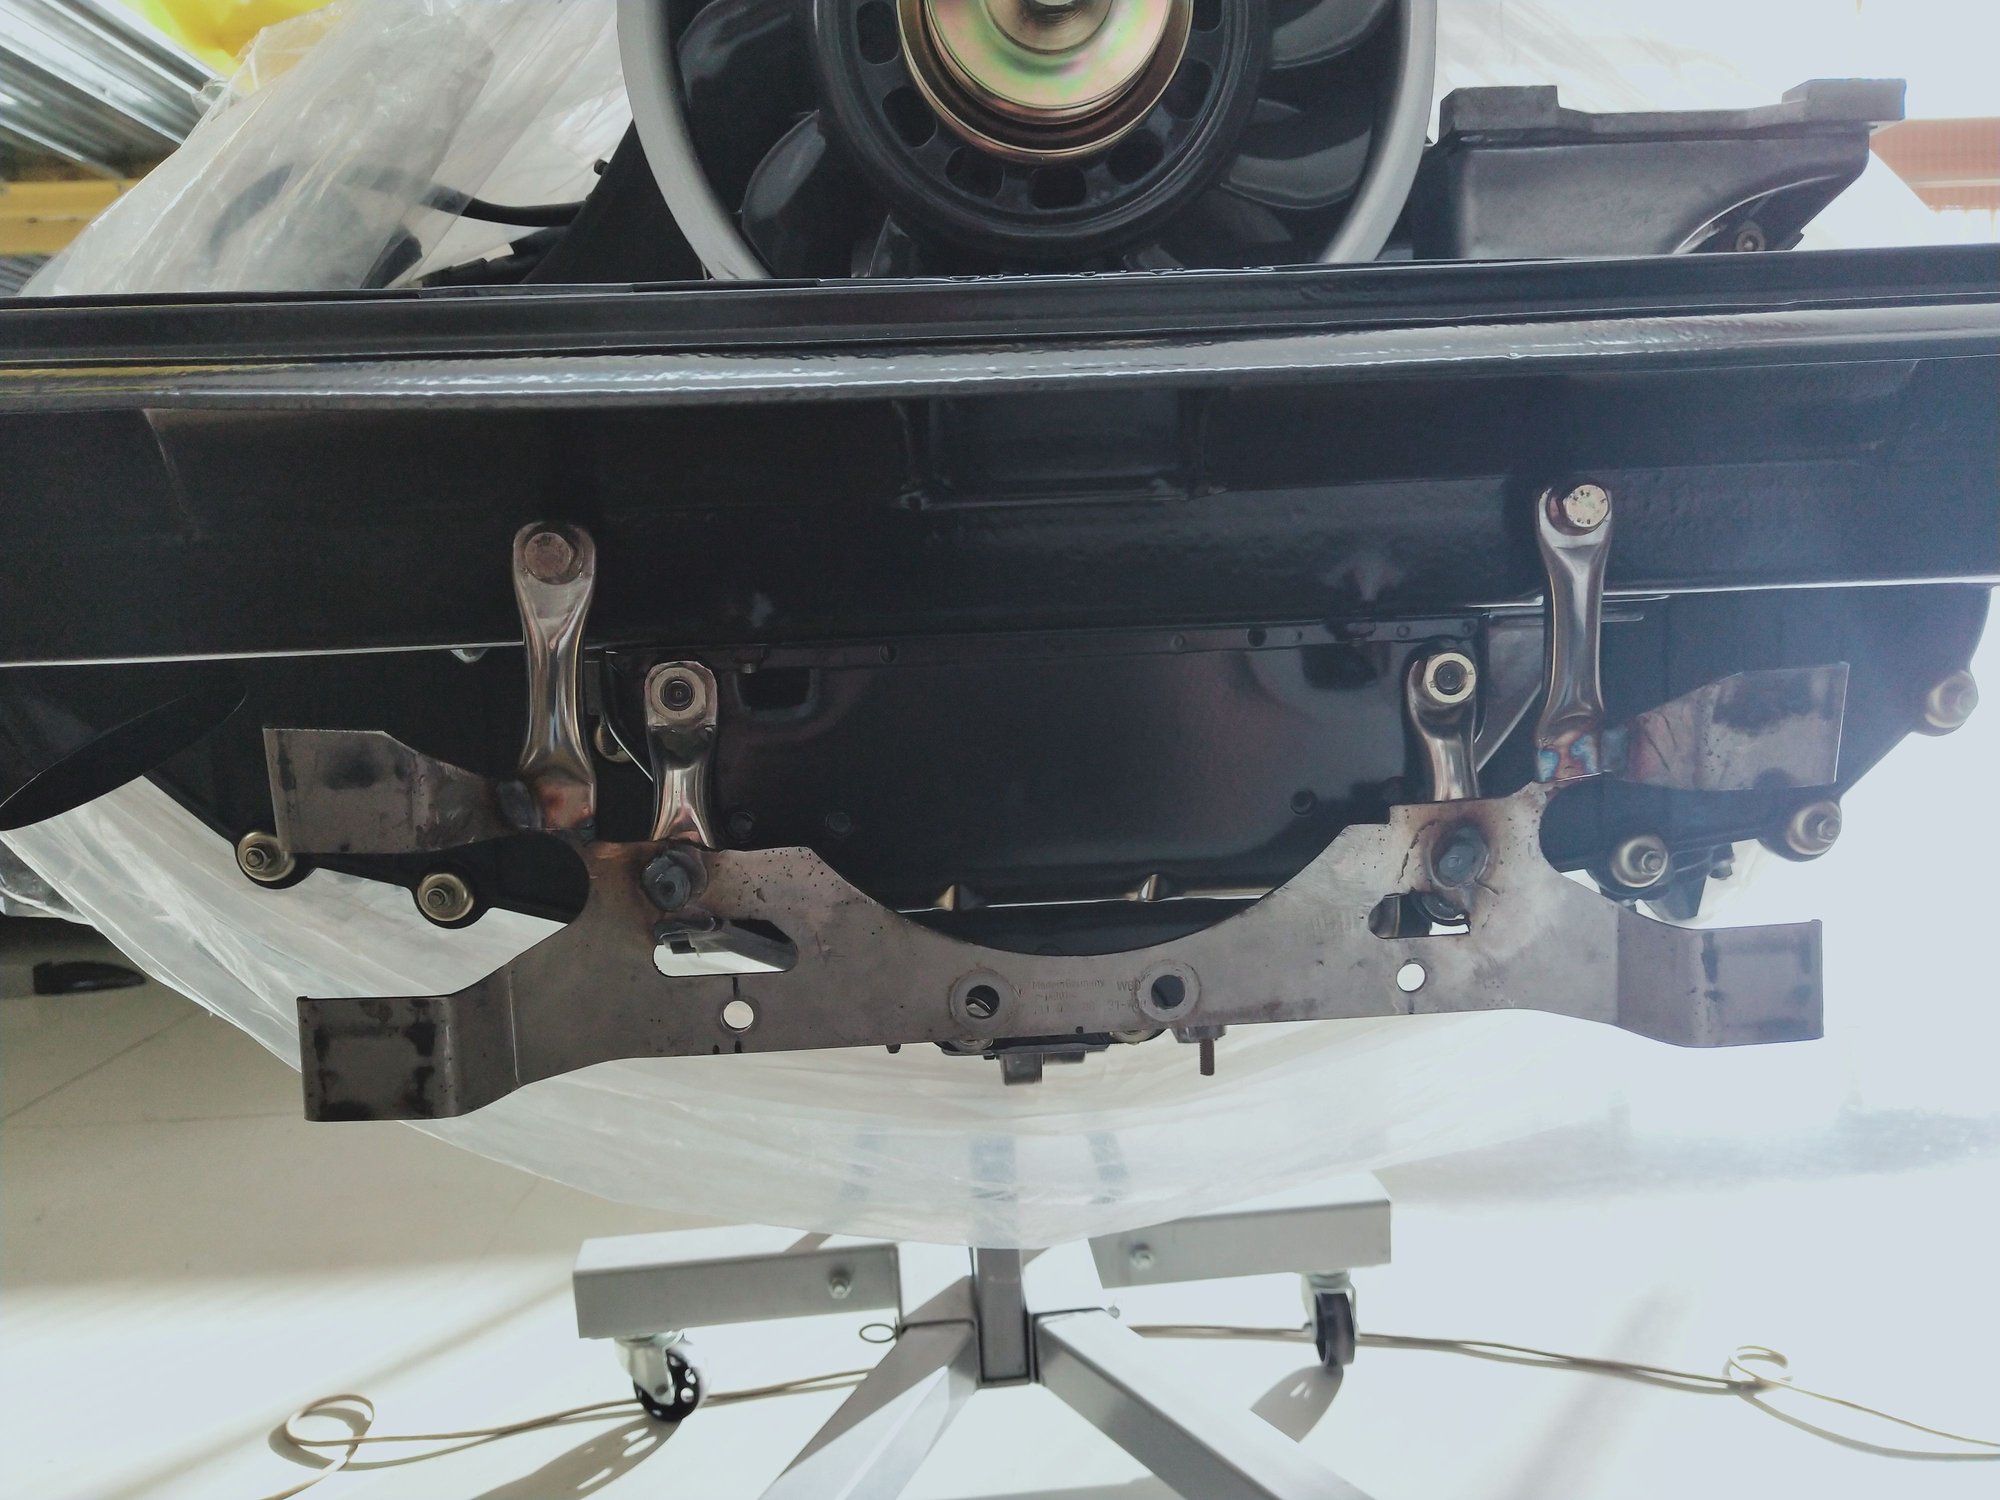
Spring plates, now this is an issue facing many of us 964 owners where the boots perish and nothing is available to replace them.
Something about paying a 1000 odd bucks for new plates when my old ones have nothing wrong with them apart from the boots didn't sit well with me so I started looking for a solution.
Couple of evenings in front of the TV flipping through uncle Google on my phone netted a few possibles.
A local company had a few options that I thought might work so I drove out there to see them.
Seeing the parts in person it became clear these wouldn't work but the guy was really helpful and looking at my spring plate I took with me he came back with a couple of options.
One I thought was definitely worth buying.
Back at work, a trim here and cut there we have this.
used the original Porsche clips to secure it.
Now, keep in mind my pivot joint is perfectly fine and all it needed was a re pack of grease and a new boot.
The other side was considerably more difficult but a helpful on line seller answered a bunch of my questions regarding diameters and with those pretty close to what I needed I placed an order.
Those duly arrived and fitted, bit of a faff to fit and inner clip was quite difficult but it works well.
Outer clip pictured I've since revised with stainless tie wire and is now much more secure.
These are by no means the ultimate solution but I figure their job is to keep lubricant in and dirt / water out which these will most certainly do.
With the body still away at the paint shop I'm tackling random jobs to keep the process going. The more I can get rebuilt and ready the better off I'll be once the body comes back.
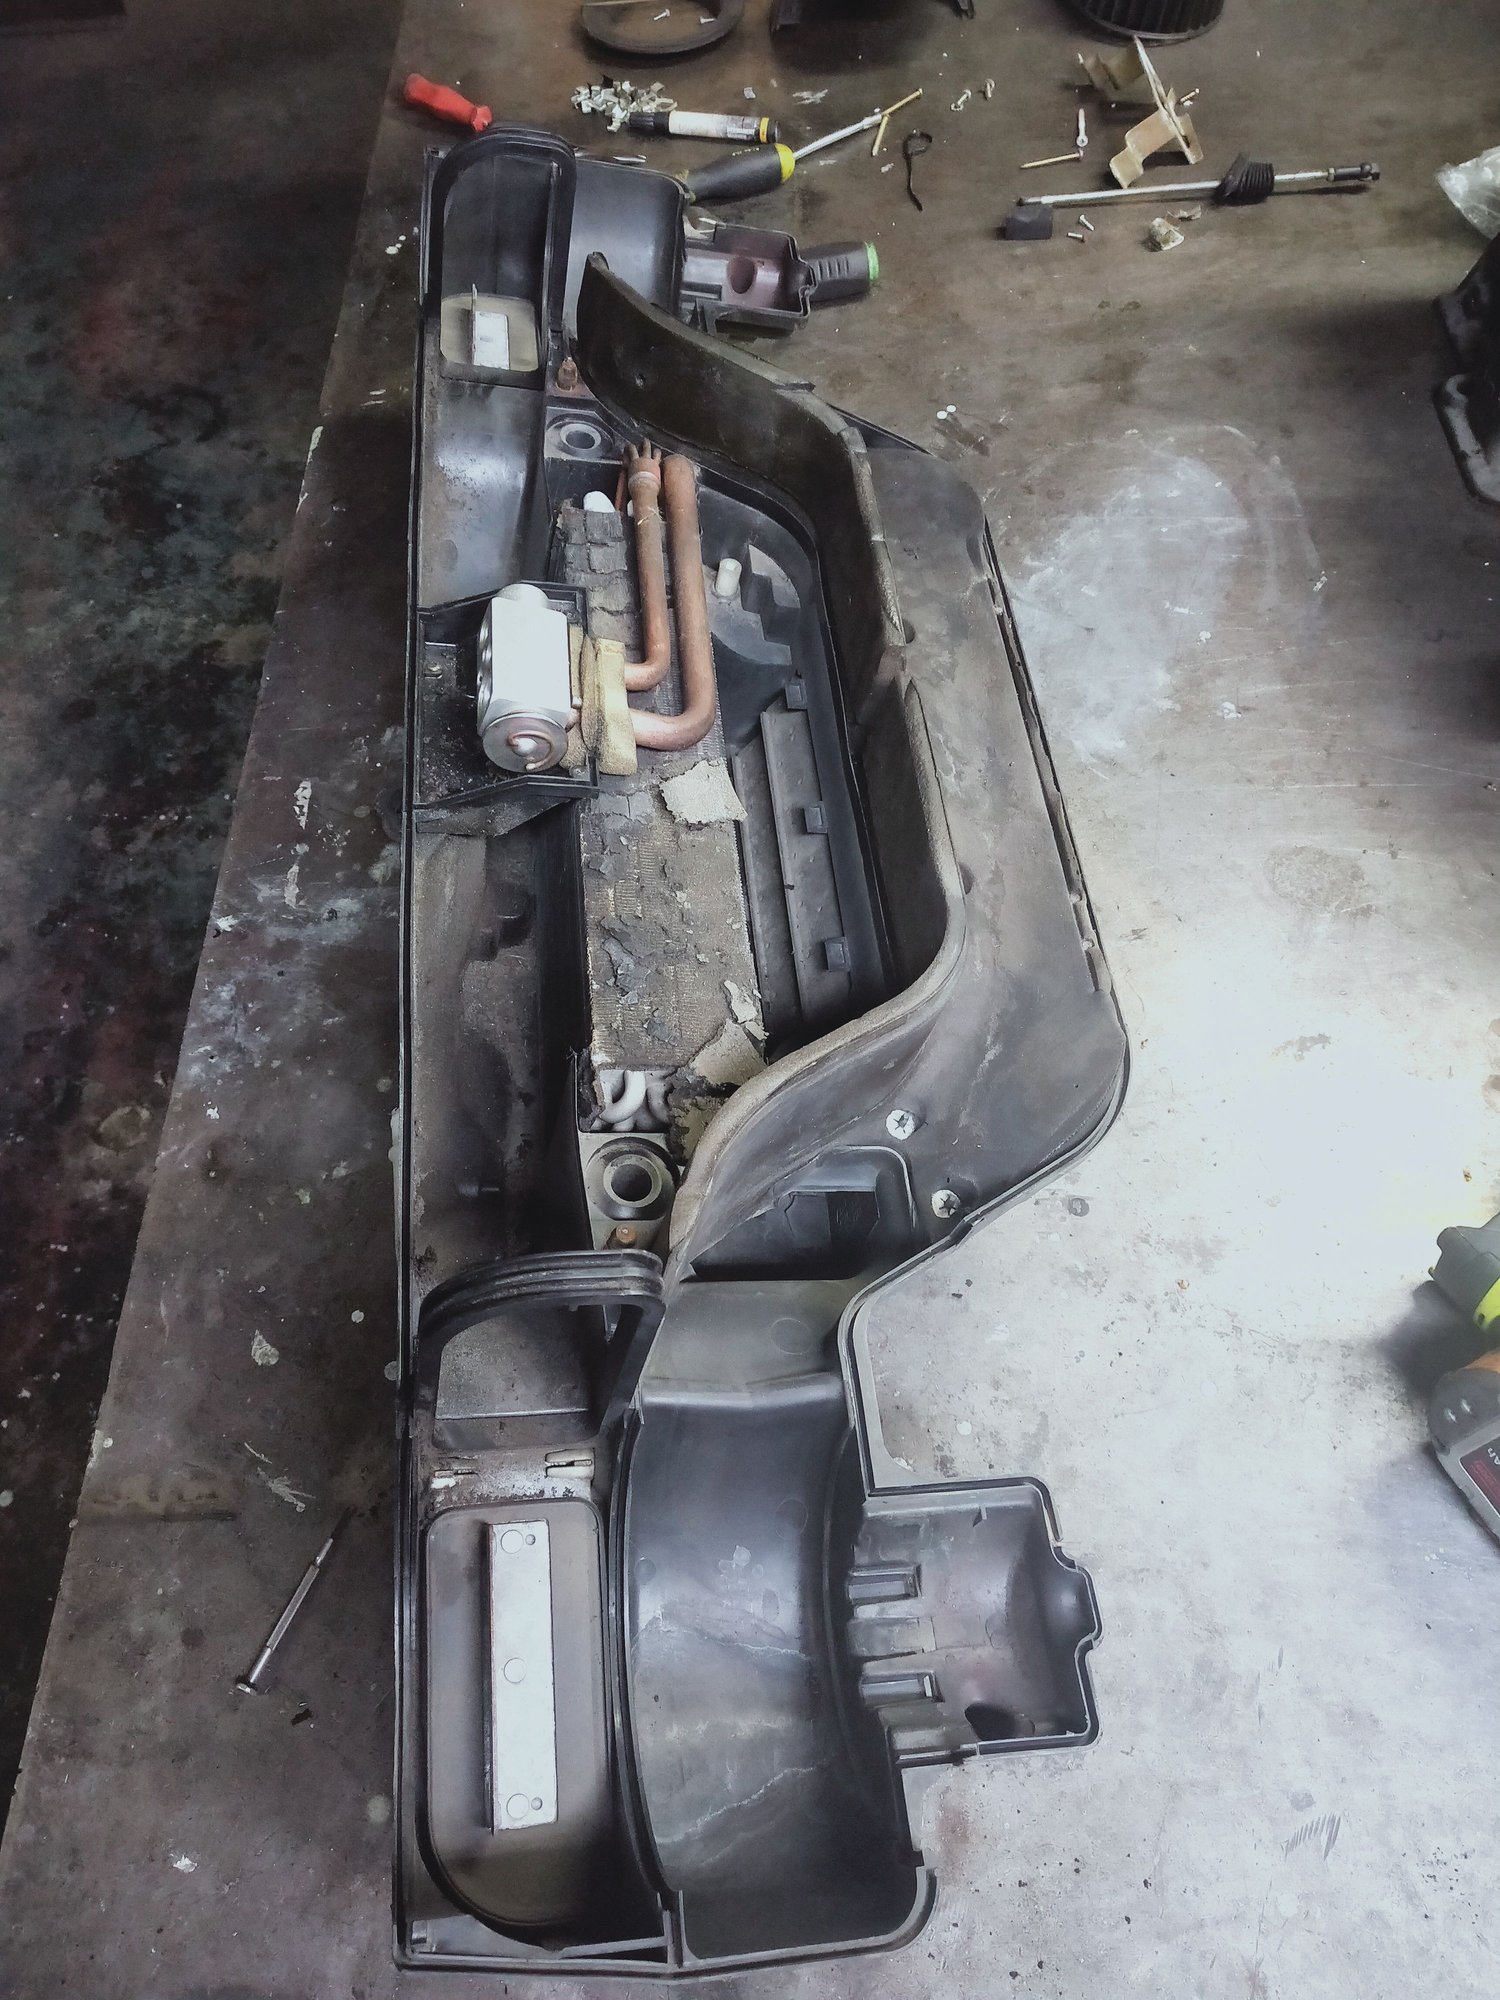
such was the case with the suitcase, decided to completely pull it apart since I had a new evaporator to go in, leaking or not it was going to be changed as I'm not planning on doing this job again.
pretty quickly I could see the foam on the main flap and side flaps was toast. Removed all of the clips, both fan motors, all of the wire harness and the servos. My servos seemed to work the last time the car was together but they will be tested before it all goes back together. I am thinking of pulling each one apart though and at least cleaning the contacts.
With everything out of the box I was quite surprised at the level of filth in the box. It will need a thorough cleaning.
absolutely everything removed from the box I treated it to a chemical cleaning and pressure wash. Had to scrub a few places pretty well to get it clean. Did both top and bottom parts of the box and set those aside to dry for a while.
Once semi dry I had a go at getting the remnants of the broken screws out, 3 very rusty screw heads broke off when trying to get the box apart. One could probably just leave them as there's just so many clips holding the thing together.
Tried quite a few tools but there's barely anything left to grab hold of.
In the end I heated the plastic with a propane torch to soften it and then grabbed the rusty screw with a sharp pair of cutters freeing the screw.
the evaporator looks to not be leaking but it's very dirty, in the bin and new one going in.
Main flap and side flaps need new foam. For many years now I've used headliner material which is foam backed with a woven layer and that has worked very well for me over the years, plus I have loads of offcuts from doing my own headliners in VW Golfs.
Then it's just a matter of cleaning the old foam off and gluing new stuff on with contact cement.
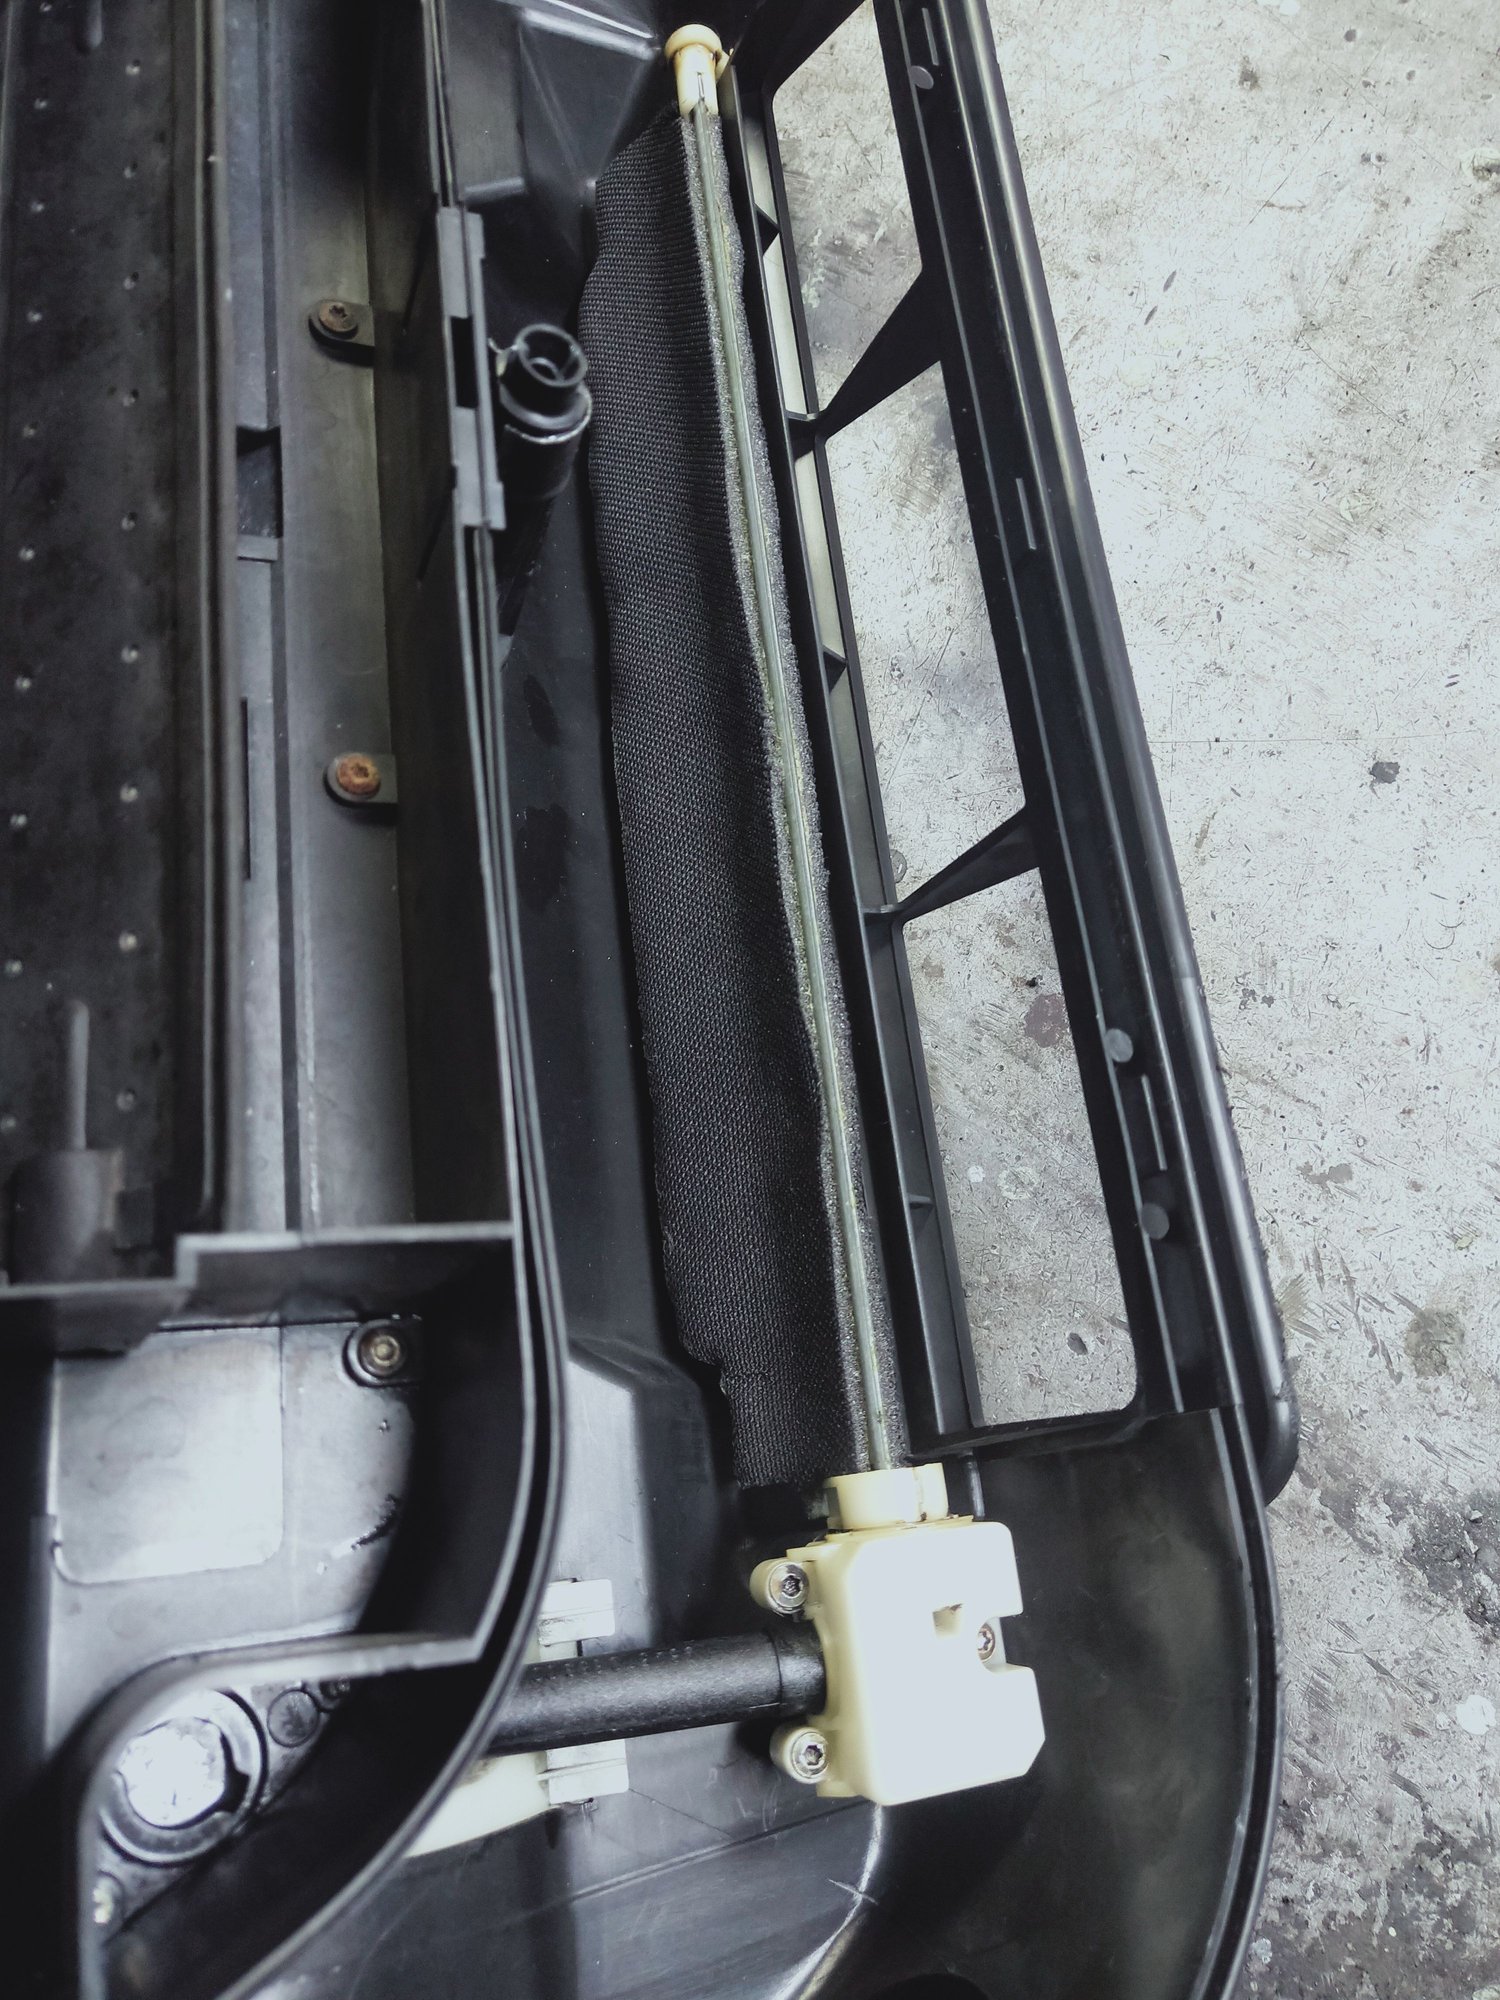
The side flaps I drilled apart, new foam pieces cut to size and riveted back together again.
While I was there I also took the right angle drive gearbox for the flap apart, cleaned it and reassemble with new grease.
A store locally in NZ specializes in all types of rubber and foam products and a trip there last Sunday netted new foam rod to seal the box halves and some flat self adhesive extrusion EVA foam to make new sealing gaskets with.
This meant the rest of the box could go back together the way it came apart, blew out each fan motor with compressed air (lot of dust came out)
New o rings on the TX valve, reassembled the wire harness and servos completing this overhaul for now. The entire car will get new o rings everywhere along with a new drier and compressor.
My compressor actually sounds really healthy just spinning it by hand but decided early on a new one is the way to go.
Thanks, yes the joint being packed with grease rarely fails. I can't quite believe no one offers a sensible solution for this problem 100% of cars have.
A write up with photos (if you have any) of the mods you made would be great, but that's a lot to ask. I will send a PM.
I'm pretty focused on progressing the car right now but I'll look to do a new thread on these at some stage instead of burying in my car rebuild thread.
Did a job for a friend machining some new adapters to repair his Boss 302 wheels that someone had machined the center bore out of taking with it the piece that the cap clips in to. That at the same time yielded just enough material to make the power steering block off plate for my engine. The pump is driven from the RH camshaft and since my new cams do not have a provision for that drive I can block that off. Bit of lathe and mill time later we have this, could have just bought one but I'd rather make things where possible. I did then spend an obscene amount of time making a really nice filler piece for the engine tinware which once finished and fitted I realized was 100% completely wrong. I hadn't taken in to account my valve covers and coil pack so start again I'm afraid. Don't have my billet valve covers yet so this will need to wait a while. Being that the body isn't far away I really need to get A in to G and start looking at the wheels it will need to sit on, back many moons ago I made the rear wheels from some 16x6 genuine Fuchs turning those in to 17x10.5 using BBS RS barrels, lips and hardware but I never made the fronts. I had planned 17x9 for the front and these "should" fit from my measurements I made back then so we'll see. The rears fit as you saw at the beginning of this thread. Lathe already warmed up from machining other bits I started cutting, first the rims were cut off a pair of 16x6 leaving just the center hub. The factory wheels are forged so are incredibly strong and ideal for converting to 3 piece. Early on when starting the rears I did consult Lance at Arrow wheels and he confirmed what I suspected, will be no problem doing what I was thinking. Then its a matter of machining the diameter down so that the old valve stem hole goes away and starting on the flanges where the lip and barrel will locate, once these are done I'm using 32 BBS RS bolts to bolt each wheel together. While my lathe is big it isn't really big enough to handle anything more than 16" rims which is lucky because once the rims are cut off I'm only working with the centers and the lips are just being put on to check the fit of the flange. All working out so far.
Back on the wheels, having machined the outer flange its on to the inner where it needs to locate in the barrel. Annoyingly this measurement is slightly different by 1.5mm but by the time I reconfigure the lathe with a different cutting tool all my prior settings are lost. Problem with that is I don't have a large enough measuring device to measure accurately and I cannot test fit the barrel while the center is in the machine. You don't really want to be removing the center for test fitting purposes as getting it all to run true again can be a headache, in essence the whole thing needs to be cut in one go and then removed. In the end I used a large set of calipers set to the size I need and cuts in 0.2mm increments checking the size as I went with the calipers. Fairly certain I'm good to go, zeroed the lathe and took the center out, couldn't resist a quick test fit. Then there were 3 wheels!!! Man these things are going to look ace in RSR finish. Really loving how they are coming together. Last one cut completing the set, test fitted that one as well and looks all good to me. Final thing left is to drill the 34 holes for the BBS bolts that will hold them together. For this I used the outer lip, carefully marking and drilling 2 holes so that I can then bolt the lip firmly on allowing the rest of the holes to be drilled. Still have to paint strip these two centers before I can start looking at anodizing them, seems the best solution is to vapour blast then clear anodize to achieve the desired results.
Final sizes they worked out to are 17x10.5 rear and 17x9 front. Not entirely sure I'll squeeze a 9 in the front but if it doesn't fit it will just be a matter of finding a pair of slightly narrower barrels.
Back on the engine for as long as it lasts, need to completely revise what I did here before. Had a feeling the muffler sat too high when I originally did this so some weeks ago I took some measurements off a friends car to get an idea where the bumper sits in relation to the muffler can. Unfortunately I was right and cannot afford to wait making the exhaust until the engine is back in the car so onwards we go. Not such an issue since I have to make new headers anyway, going 3.8L, cams, GT3 intake and MoTec were never part of the plan but sort of crept in as it often does. Anyway, to make new headers the muffler needs a home. Got the rear tin and engine support back from powder coat so those were installed first. My rear muffler is 997 GT3 and seems like it hasn't done much work but was fairly dirty so I had this great idea to polish it haha (roll eyes) Many hours later we went from this:
To this: Cut off the mountings I made years ago to start again, made some new ones so that I could place the muffler and get some measurements in relation to where the bumper will sit. Fairly certain that it is sitting correctly this time I made the rest of the mountings to bolt the bracket in place. Ended up going with stainless tube flattened on the end to have something sturdy that still looks ok. Need to finish grinding it up but this will do for now.
Factory straps hold it all in place nicely, headers next. Unfortunately it doesn't look like I can re use the factory heat shields on the engine as these come down too low but since I have a good set and a broken set I'm thinking of cutting reliefs to clear the pipes in my bad set. Not sure how critical it would be to retain these or not but it seems like many delete them. The pipes in to the muffler with the vacuum gate valves I can re use, everything else has to be made from scratch. Bought some nice head flanges and a bunch of 90, 45 and 180 degree stainless bends to start the project with but I'm also still waiting on valve covers to come in so have decided to park this again until I can fully close up the engine first.
Update on paint, body is waiting for flow coating. Doors, hood and rear lid painted first round, front bumper, skirts, mirrors and other parts are primed.


 06-21-2022, 06:25 AM