

DIY shark fin repair
 02-07-2014, 07:39 AM
#1
Rennlist Member
Thread Starter
I knew my car's body condition was average, but I didn't realise how bad until I saw another GPW 1990 C4. I've spent the last week fitting new trim to keep up with the expected standard.
The last job was the shark fins. Both had been touched by the some gorillas in the past either not knowing how to remove them correctly or being lazy using the lift. In any case I had a problem.
The worst one was on the oil tank side. It had popped a sill clip and the two clips on the fin were broken. The previous owner screwed the fin to the body on the rear edge. Effective but the trim won't stay in place unless the gaps are good.
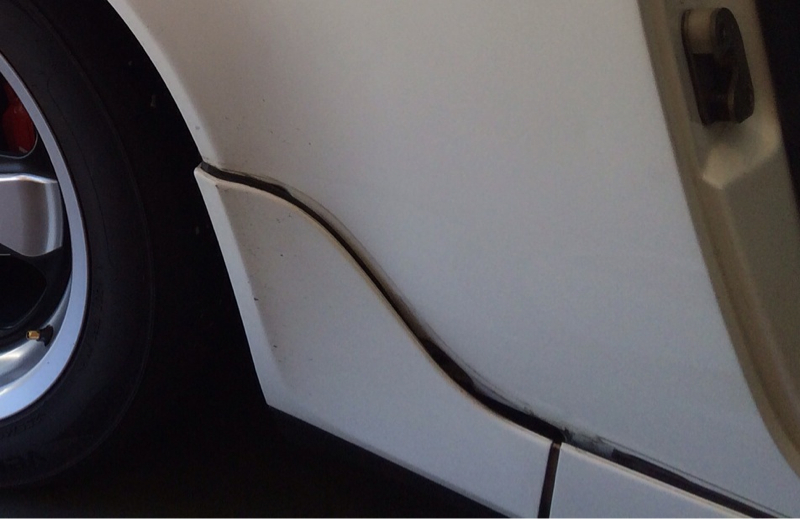
The first thing I did was pop the sill clip back in, after I had readjusted the bolts under the sill, as that allowed the sill to sit square to the body and let the clip do its job.
The next thing was to order replacements for broken or missing pieces. I needed a clip, a nut and a thin plate that holds the trim.
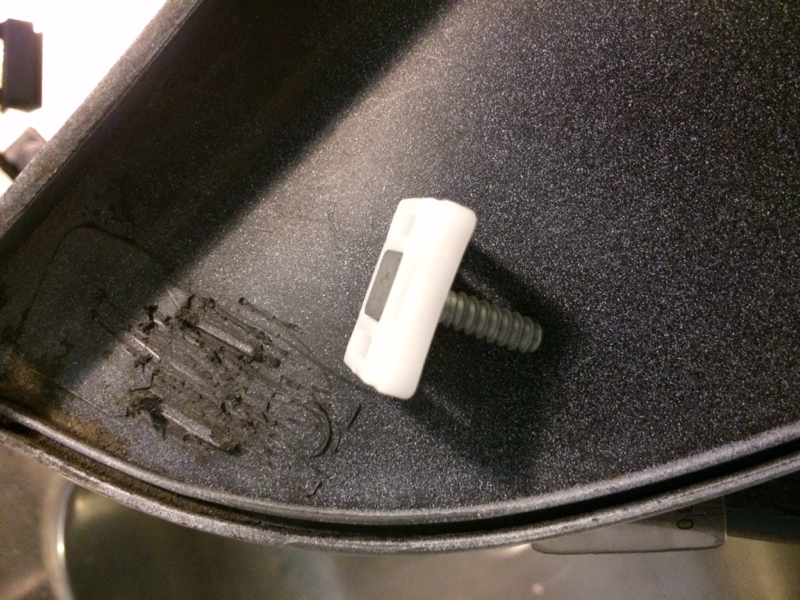
Both clip holders on the shark fin had lost their locating pieces. Unless you get a new shark fin and get it painted you are going to have to glue new pins to whatever's left. In one case here not much.
I roughed up the area with sandpaper and used expoy (araldite) to fix the clips permanently to the fin. This is ok as you remove the fin by undoing bolts that hold it, NOT by pulling on the clips. As this is the first time I've tried this I can't relate how effective this will be in the medium / long term.
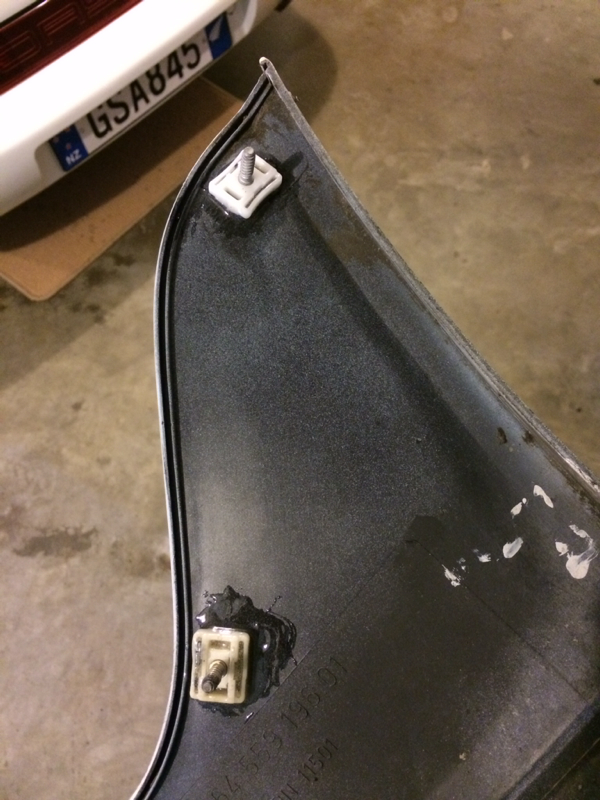
If you look at the fin it's clear what holds it in. There are two screws under it and two clips that bolt through holes in the fender.
If you manoeuvre the fin into place you have to fit the two screws and the nuts on the bolts. The top one has a plate that holds the trim on at the end. It's easy to fit with the wheel in place. The one next to the oil tank needs to have the wheel removed to get to it.
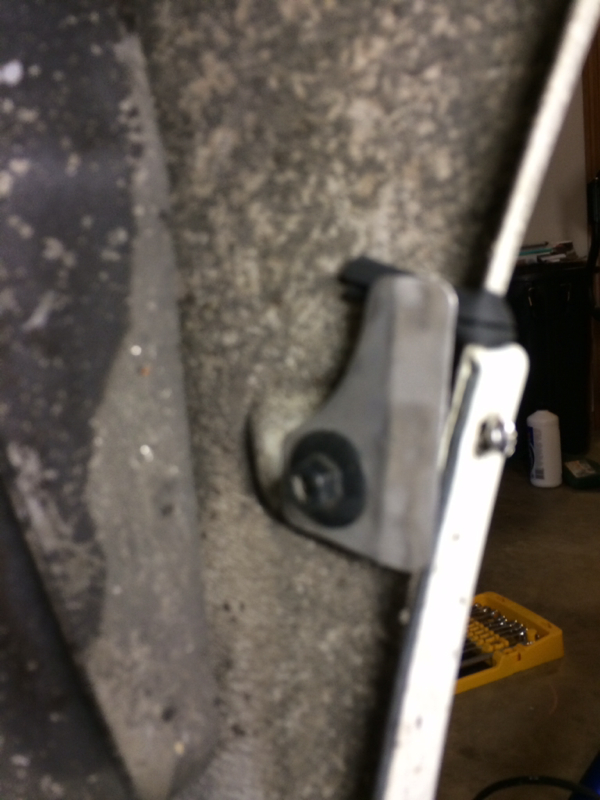
You then fit the trim and tighten the bolts. When you have it right the trim is neatly held.
A simple DIY but very satisfying. GPW needs trim to delineate part of the body. Sloppy trim makes the car look messy.
The last job was the shark fins. Both had been touched by the some gorillas in the past either not knowing how to remove them correctly or being lazy using the lift. In any case I had a problem.
The worst one was on the oil tank side. It had popped a sill clip and the two clips on the fin were broken. The previous owner screwed the fin to the body on the rear edge. Effective but the trim won't stay in place unless the gaps are good.
The first thing I did was pop the sill clip back in, after I had readjusted the bolts under the sill, as that allowed the sill to sit square to the body and let the clip do its job.
The next thing was to order replacements for broken or missing pieces. I needed a clip, a nut and a thin plate that holds the trim.
Both clip holders on the shark fin had lost their locating pieces. Unless you get a new shark fin and get it painted you are going to have to glue new pins to whatever's left. In one case here not much.
I roughed up the area with sandpaper and used expoy (araldite) to fix the clips permanently to the fin. This is ok as you remove the fin by undoing bolts that hold it, NOT by pulling on the clips. As this is the first time I've tried this I can't relate how effective this will be in the medium / long term.
If you look at the fin it's clear what holds it in. There are two screws under it and two clips that bolt through holes in the fender.
If you manoeuvre the fin into place you have to fit the two screws and the nuts on the bolts. The top one has a plate that holds the trim on at the end. It's easy to fit with the wheel in place. The one next to the oil tank needs to have the wheel removed to get to it.
You then fit the trim and tighten the bolts. When you have it right the trim is neatly held.
A simple DIY but very satisfying. GPW needs trim to delineate part of the body. Sloppy trim makes the car look messy.

 02-07-2014, 10:52 AM
#3
Nordschleife Master

Nice DIY.
The first time you get back there is usually a dirty mess. Take the opportunity to degrease all the crap back there.
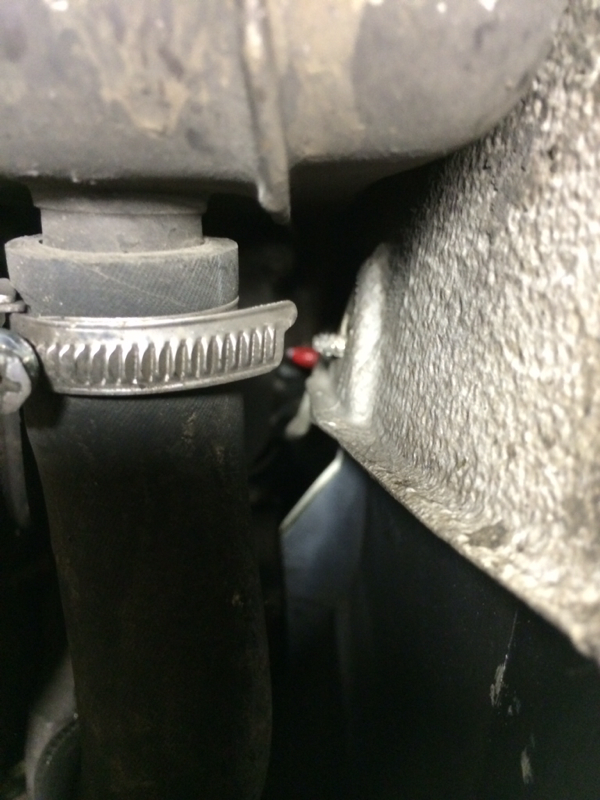
Anyone know what is the purpose of that little metal plate on one of the mounting points? My car has this piece on the driver's side, but it's missing on the oil tank side. I wonder if it's worth sourcing a replacement piece.
The first time you get back there is usually a dirty mess. Take the opportunity to degrease all the crap back there.
Anyone know what is the purpose of that little metal plate on one of the mounting points? My car has this piece on the driver's side, but it's missing on the oil tank side. I wonder if it's worth sourcing a replacement piece.
02-07-2014, 01:07 PM
#4
Rennlist Member
Thread Starter
Nice DIY. The first time you get back there is usually a dirty mess. Take the opportunity to degrease all the crap back there. Anyone know what is the purpose of that little metal plate on one of the mounting points? My car has this piece on the driver's side, but it's missing on the oil tank side. I wonder if it's worth sourcing a replacement piece.
02-07-2014, 01:12 PM
#5
Rennlist Member
Thread Starter
Anyway, good to know that old trim can be made as originally fitted, even if the paint etc around the area isn't perfect.
02-07-2014, 03:04 PM
#7
Rennlist Member

So true. Wavy sils really kill the look of a 964... and faded tail lights.
+1


Trending Topics
02-07-2014, 03:28 PM
#9
Rennlist Member
Thread Starter
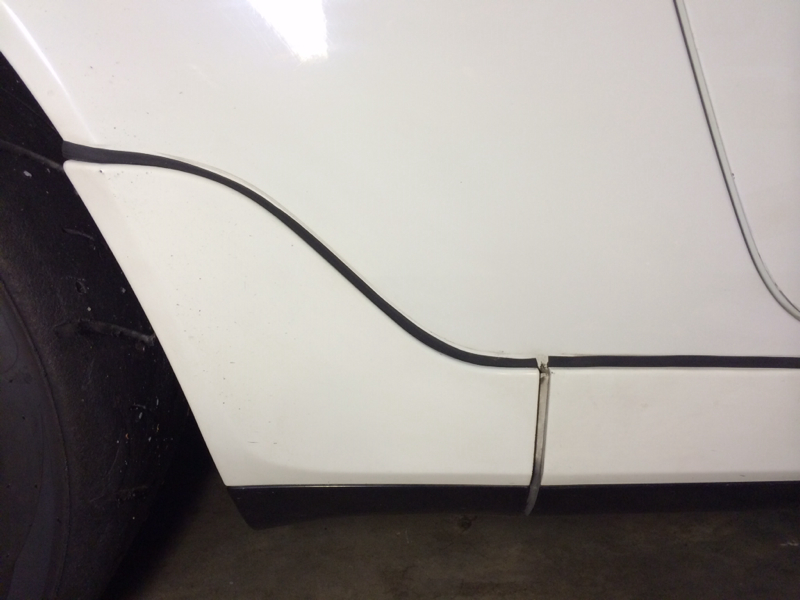
As for lines, previously I had Carrera Decals down the side of the car, which hid the worst of the old trim issues. Now I need those crisp lines to add definition. Before and after pics on left and right flanks show how important it is. Yes, I know it would look better 40mm lower. Working on that.....