
Ceramic resistor for A/C Radiator fan install
 08-06-2005, 11:50 PM
#1
Professor of Pending Projects
Rennlist Member
Rennlist Member
Thread Starter
All the pending projects were on hold due to vacations, work, life... you guys know how it is...
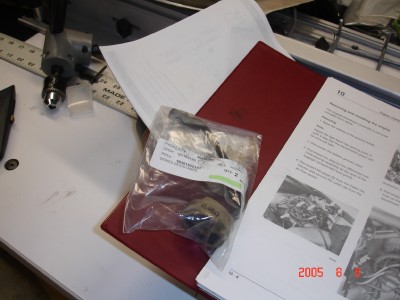
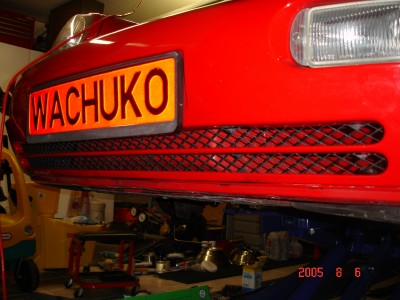
So I had replaced the Ceramic resistor for the oil cooler when my fan was not turning off... turns out there are two of them... the other one for a similar task but for the AC.
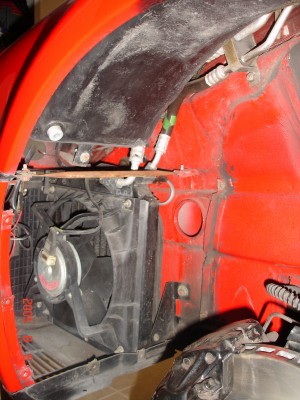
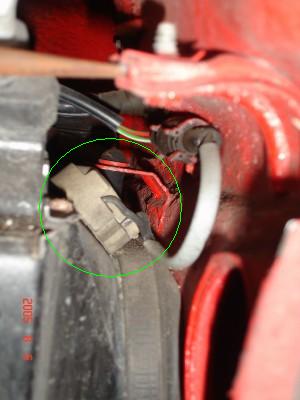
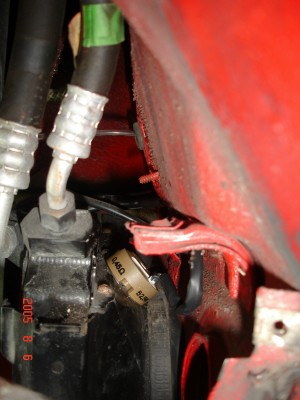
The resistor is located under the front fender on the left hand side.
Start by removing the wheel and the fender liner. There are two, just remove the one towars the front of the wheel. You will see the A/C condenser and the fan..
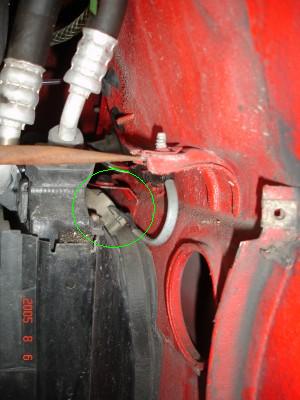
The green circle marks the area where the resistor is located...

So I had replaced the Ceramic resistor for the oil cooler when my fan was not turning off... turns out there are two of them... the other one for a similar task but for the AC.
The resistor is located under the front fender on the left hand side.
Start by removing the wheel and the fender liner. There are two, just remove the one towars the front of the wheel. You will see the A/C condenser and the fan..
The green circle marks the area where the resistor is located...
Last edited by Wachuko; 08-07-2005 at 12:21 AM.
 08-07-2005, 12:04 AM
#2
Professor of Pending Projects
Rennlist Member
Rennlist Member
Thread Starter
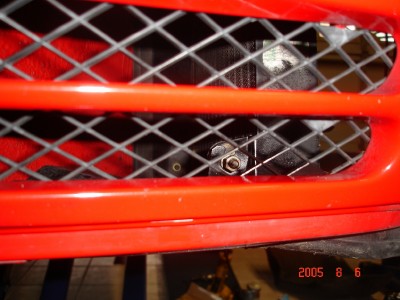
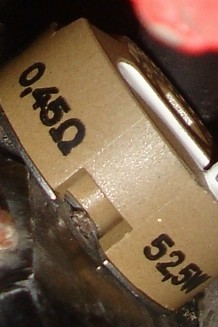
Close-up:
You should be able to just undo the bolt that is in the middle with a 4mm allen wrench... unplug, plug new one, bolt back (with the supplied washer under the resistor and done! But that is IF you are lucky... the bolt in mine was a pile of rust. So trying the easy way to replace this was not going to happen... so... I started to remove a few items to make it easier to remove the old resistor...
I removed the fan. Just undo the 4 10mm nuts that are in each corner and pull out. There are four flat washers so of you can't take them out when getting the nuts out look out for them when they fall on the floor...
I removed the front undertray to get to the bolts that hold the condenser
the front one only needs to be loose... no need to take the nut out since the base slides out without problem
remove 13mm nut...
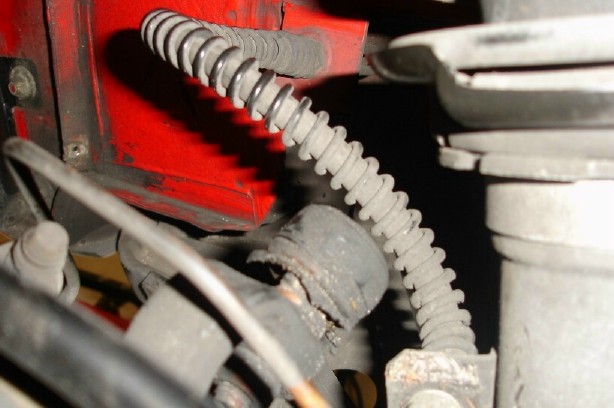
There is a 10mm inside the fender area. Also remove the rod that supports the fender. Once removed you can slide the condenser out a bit to work on the back (careful with the attached lines)... I use a mirror to look behind and to avoid pulling the condenser too much to the front.
(BTW, this is also a good time to deal with fixing the smile in the car if yours is bent
 )
)
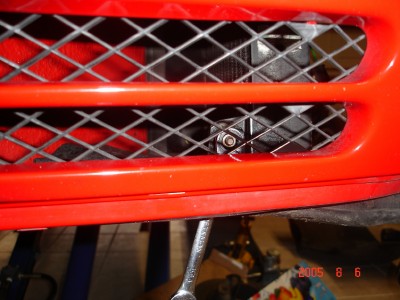
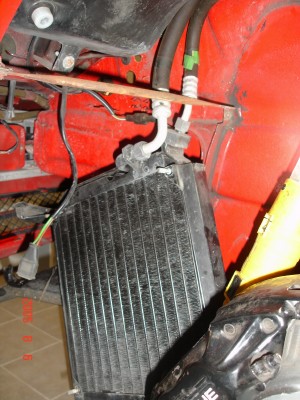
This is what the condenser looks like once is loose...
You should be able to just undo the bolt that is in the middle with a 4mm allen wrench... unplug, plug new one, bolt back (with the supplied washer under the resistor and done! But that is IF you are lucky... the bolt in mine was a pile of rust.
So trying the easy way to replace this was not going to happen... so... I started to remove a few items to make it easier to remove the old resistor...I removed the fan. Just undo the 4 10mm nuts that are in each corner and pull out. There are four flat washers so of you can't take them out when getting the nuts out look out for them when they fall on the floor...
I removed the front undertray to get to the bolts that hold the condenser
the front one only needs to be loose... no need to take the nut out since the base slides out without problem
remove 13mm nut...
There is a 10mm inside the fender area. Also remove the rod that supports the fender. Once removed you can slide the condenser out a bit to work on the back (careful with the attached lines)... I use a mirror to look behind and to avoid pulling the condenser too much to the front.
(BTW, this is also a good time to deal with fixing the smile in the car if yours is bent
)This is what the condenser looks like once is loose...
Last edited by Wachuko; 08-07-2005 at 12:20 AM.
08-07-2005, 12:29 AM
#3
Professor of Pending Projects
Rennlist Member
Rennlist Member
Thread Starter
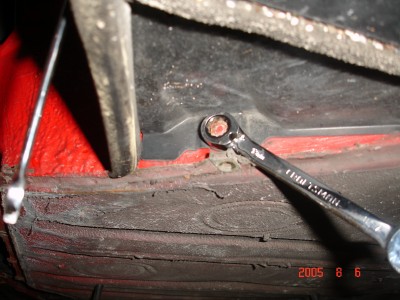
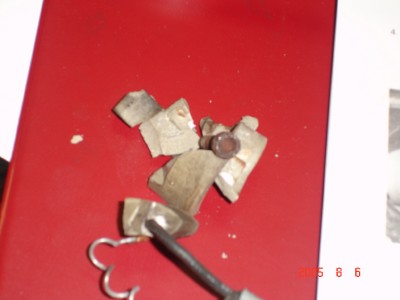
Like I said... the old one came out but not without a fight... I had to break it in pieces with some pliers and to be able to grab the bolt and turn it...
But it came out...
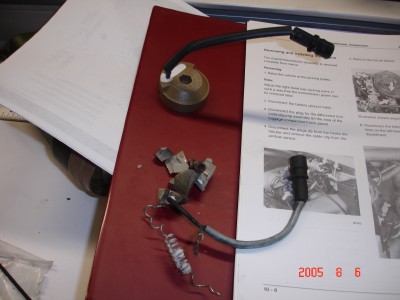

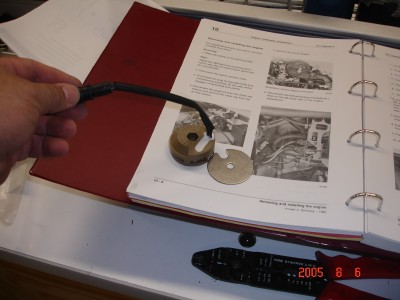
New one goes in (remember the metal washer and to align the notch in the washer and the resistor with the small bump that is in the metal):
Install a new bolt with flat washer (I could not find one is stainless steel... so had to do away with the same style it had).
Assembly is, as they say, the reverse...
But it came out...
New one goes in (remember the metal washer and to align the notch in the washer and the resistor with the small bump that is in the metal):
Install a new bolt with flat washer (I could not find one is stainless steel... so had to do away with the same style it had).
Assembly is, as they say, the reverse...
08-07-2005, 12:34 AM
#4
Professor of Pending Projects
Rennlist Member
Rennlist Member
Thread Starter
Mount the condenser back on its supports... put the 10mm bolt, 10mm nut, 13mm nut...
Install the fan back in place...
There are some rubber seals under the condenser mount and the fan... remember to insert those back in place...

Remember to reconnect the the fan
Install under tray and fender liner... wash hands (hopefuly you are using gloves...) and have a cold one...
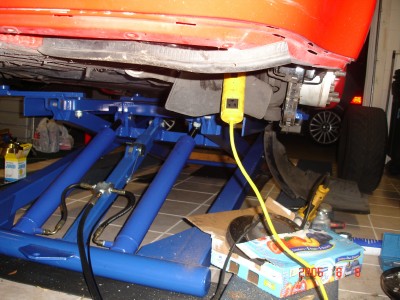
(now I need to continue with the brakes, as you can see in that second-to-last photo I am doing new rotors and pads... and painting the calipers red)...
Install the fan back in place...
There are some rubber seals under the condenser mount and the fan... remember to insert those back in place...
Remember to reconnect the the fan
Install under tray and fender liner... wash hands (hopefuly you are using gloves...) and have a cold one...
(now I need to continue with the brakes, as you can see in that second-to-last photo I am doing new rotors and pads... and painting the calipers red)...
Last edited by Wachuko; 08-07-2005 at 01:06 AM.
08-07-2005, 09:42 AM
#5
Super Duper Moderator
Lifetime Rennlist
Member
Lifetime Rennlist
Member
Originally Posted by Wachuko
(now I need to continue with the brakes, as you can see in that second-to-last photo I am doing new rotors and pads... and painting the calipers red)...
Marc
08-07-2005, 10:21 AM
#6
Professor of Pending Projects
Rennlist Member
Rennlist Member
Thread Starter
Originally Posted by Marc Shaw
Excellent write-up! Looks like a great DIY candidate.....
Don't forget to bed-in new pads with old rotors and new rotors with old pads (not new pads and new rotors) - I'm not sure why but many threads on the racing forum state this.
Marc
Don't forget to bed-in new pads with old rotors and new rotors with old pads (not new pads and new rotors) - I'm not sure why but many threads on the racing forum state this.
Marc


using any of them for bed-in the new ones would ruin them... I need to go new new... That is new to me... I always thought that new rotors go with new pads, always...
I also notice that I need to change the stabilizer links...

I will add them to the list...
Trending Topics
 08-07-2005, 12:19 PM
#9
Super Duper Moderator
Lifetime Rennlist
Member
Lifetime Rennlist
Member
08-07-2005, 02:53 PM
#10
Burgled
Rennlist Member
Rennlist Member
I just got back from Jaime house. I think one of those lifts is going to find its way to my house real soon. Its a real nice rig. Looks alot better and stronger in person. Thanks for the demo Jaime 
08-07-2005, 09:20 PM
#11
Professor of Pending Projects
Rennlist Member
Rennlist Member
Thread Starter
Originally Posted by jimq
I just got back from Jaime house. I think one of those lifts is going to find its way to my house real soon. Its a real nice rig. Looks alot better and stronger in person. Thanks for the demo Jaime