When you click on links to various merchants on this site and make a purchase, this can result in this site earning a commission. Affiliate programs and affiliations include, but are not limited to, the eBay Partner Network.
Guys I will try to describe in the few upcoming posts ( that I will try to keep photo rich ) the road I went through with developing custom billet timing chain covers.
And the most important part - why, even though there are billet ones available in the market.
So to start with something catchy...
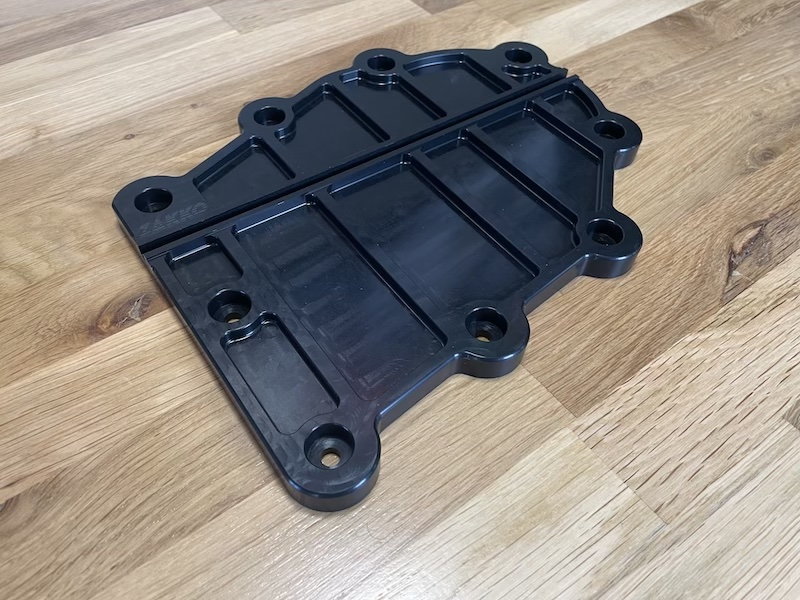
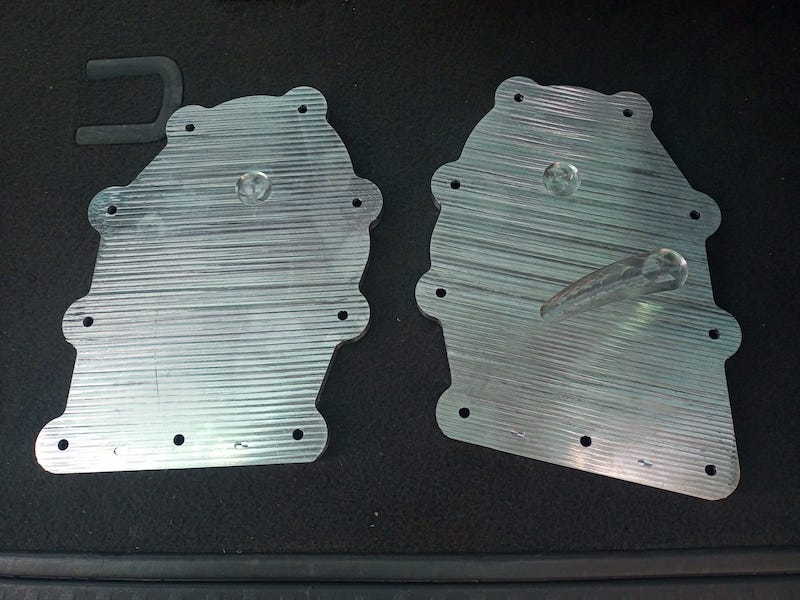
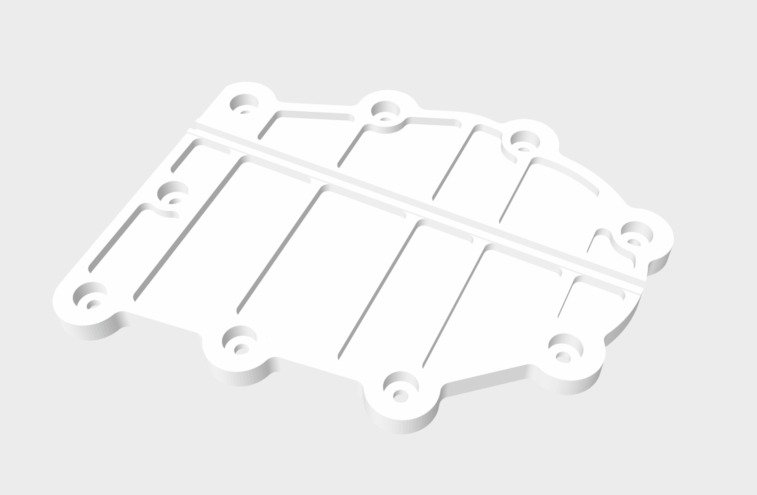
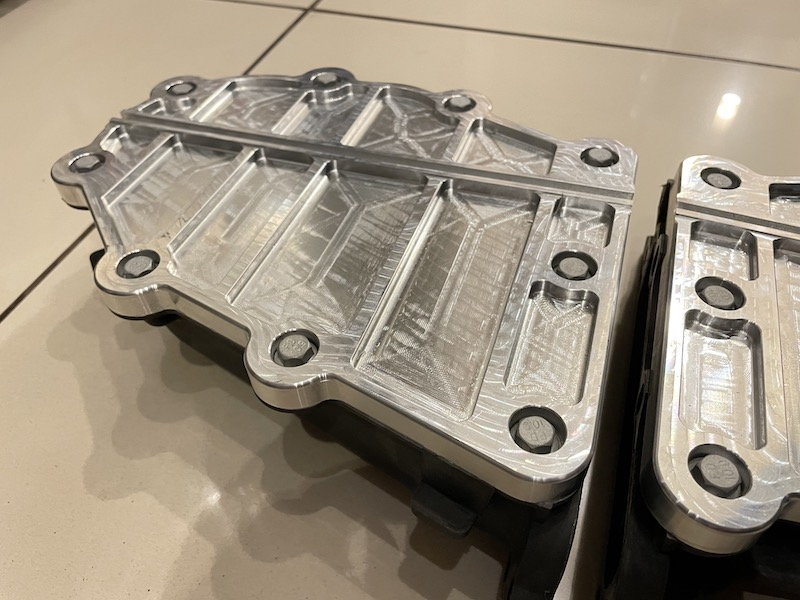
Left billet timing chain cover Right timing chain cover
The above is the 3rd set I made in total from billet aluminium, anodised in black.
Some folks might have seen some my other CNC made parts for 924/944/968 already, and this time it was no different - I developed something for myself and if there is a need / wish from the forum members I can make a few extra sets of these as well.
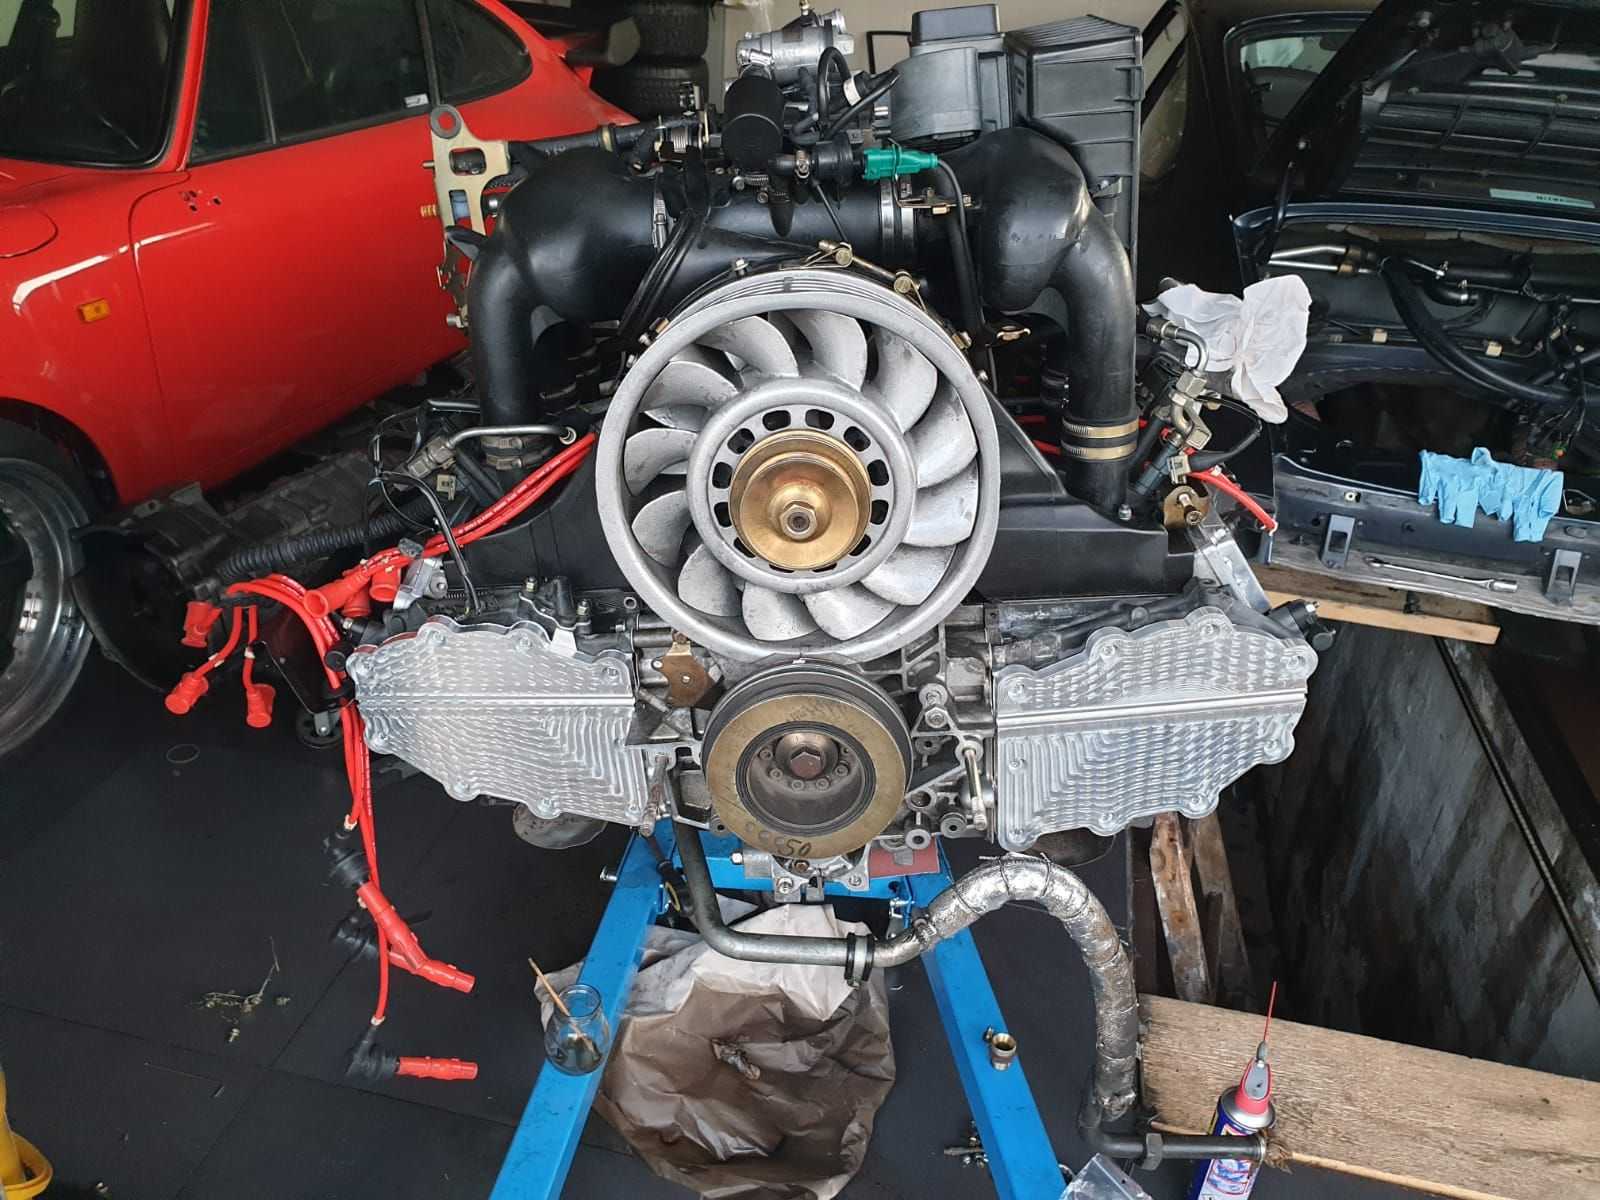
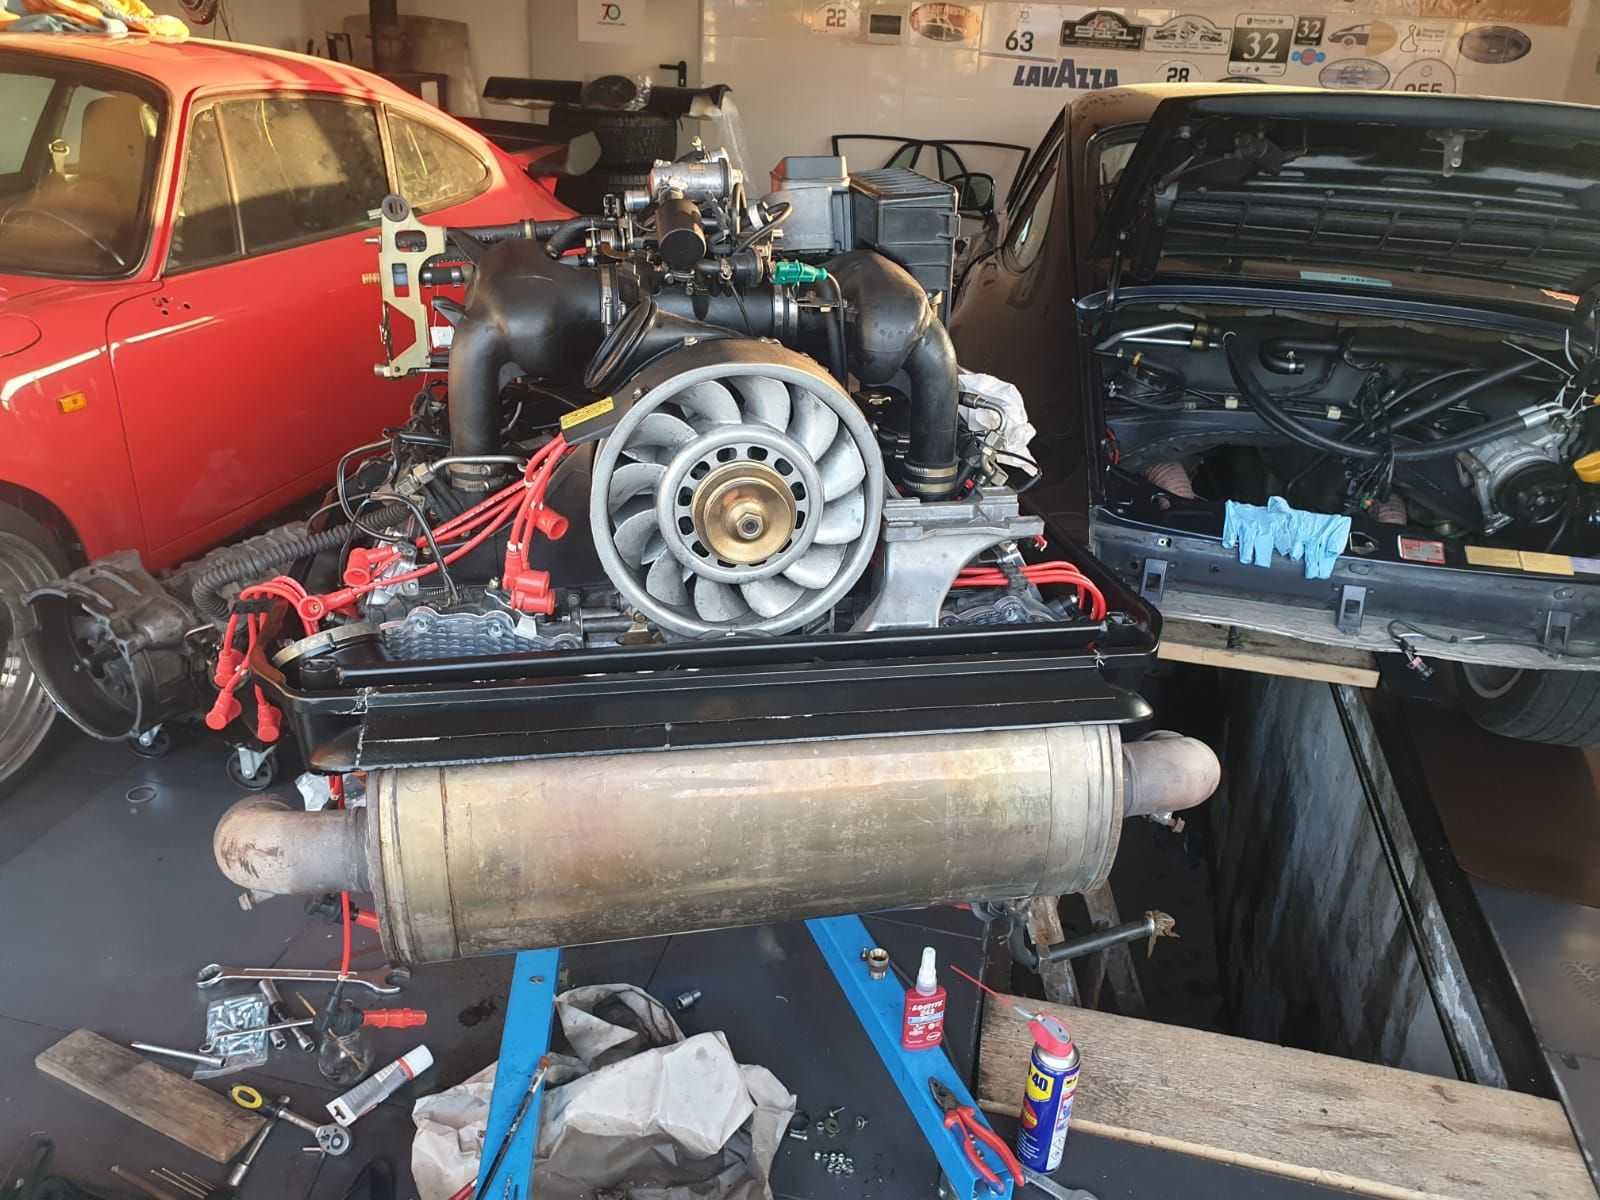
So the story is I'm (re)building an early 964 engine and "while I'm there" trying to make few other things slightly better.
With most of my 964 and some of my 993 friends timing chain covers are leaking, even with new rubber seals/gaskets and surprise surprise new timing chain covers.
Funny enough the earlier engines, when assembled properly don't have that issue.
So I started scratching my head what went wrong when Porsche changed the way the covers seal to the boxes.
In theory there are rubber seals, special bolts with seals, rubber gasket, and still these leak after some time even when replaced with new.
One may say the covers are bent and should be replaced with new ones - well, the old ones might be bent, but when replacing with new covers it may not help anyway.
Why?
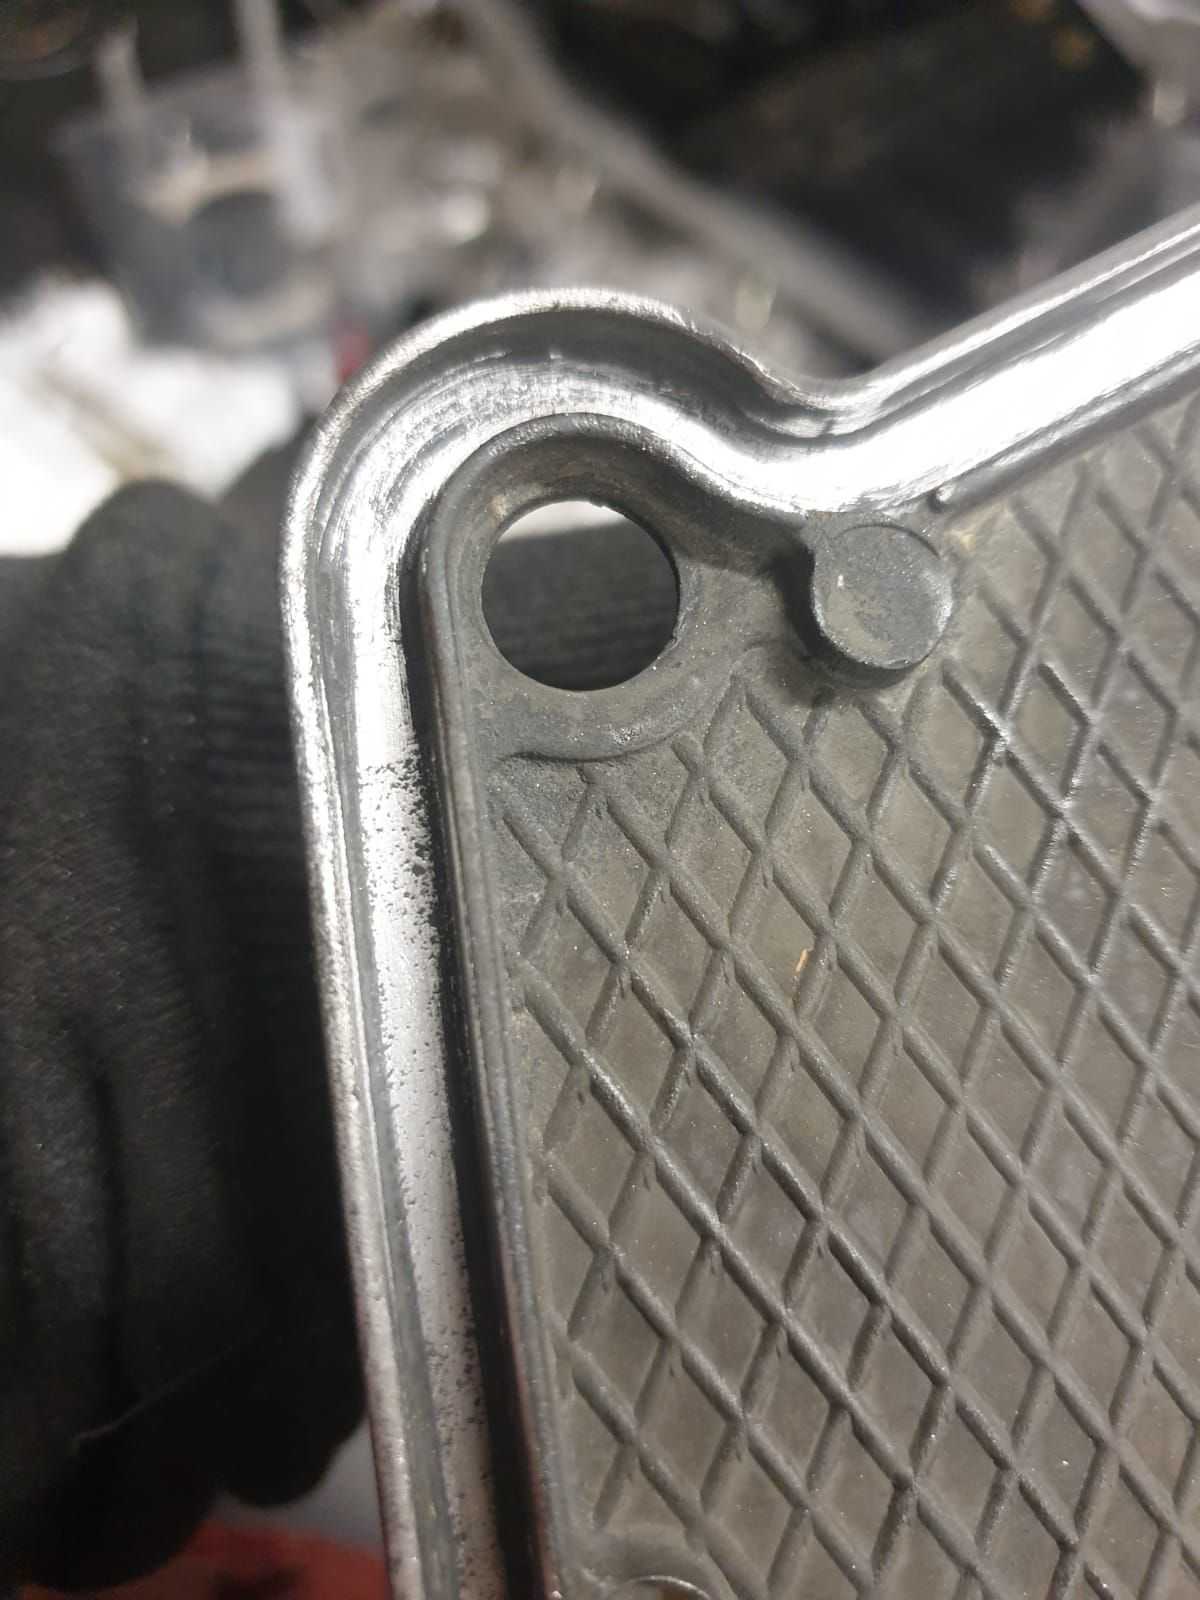
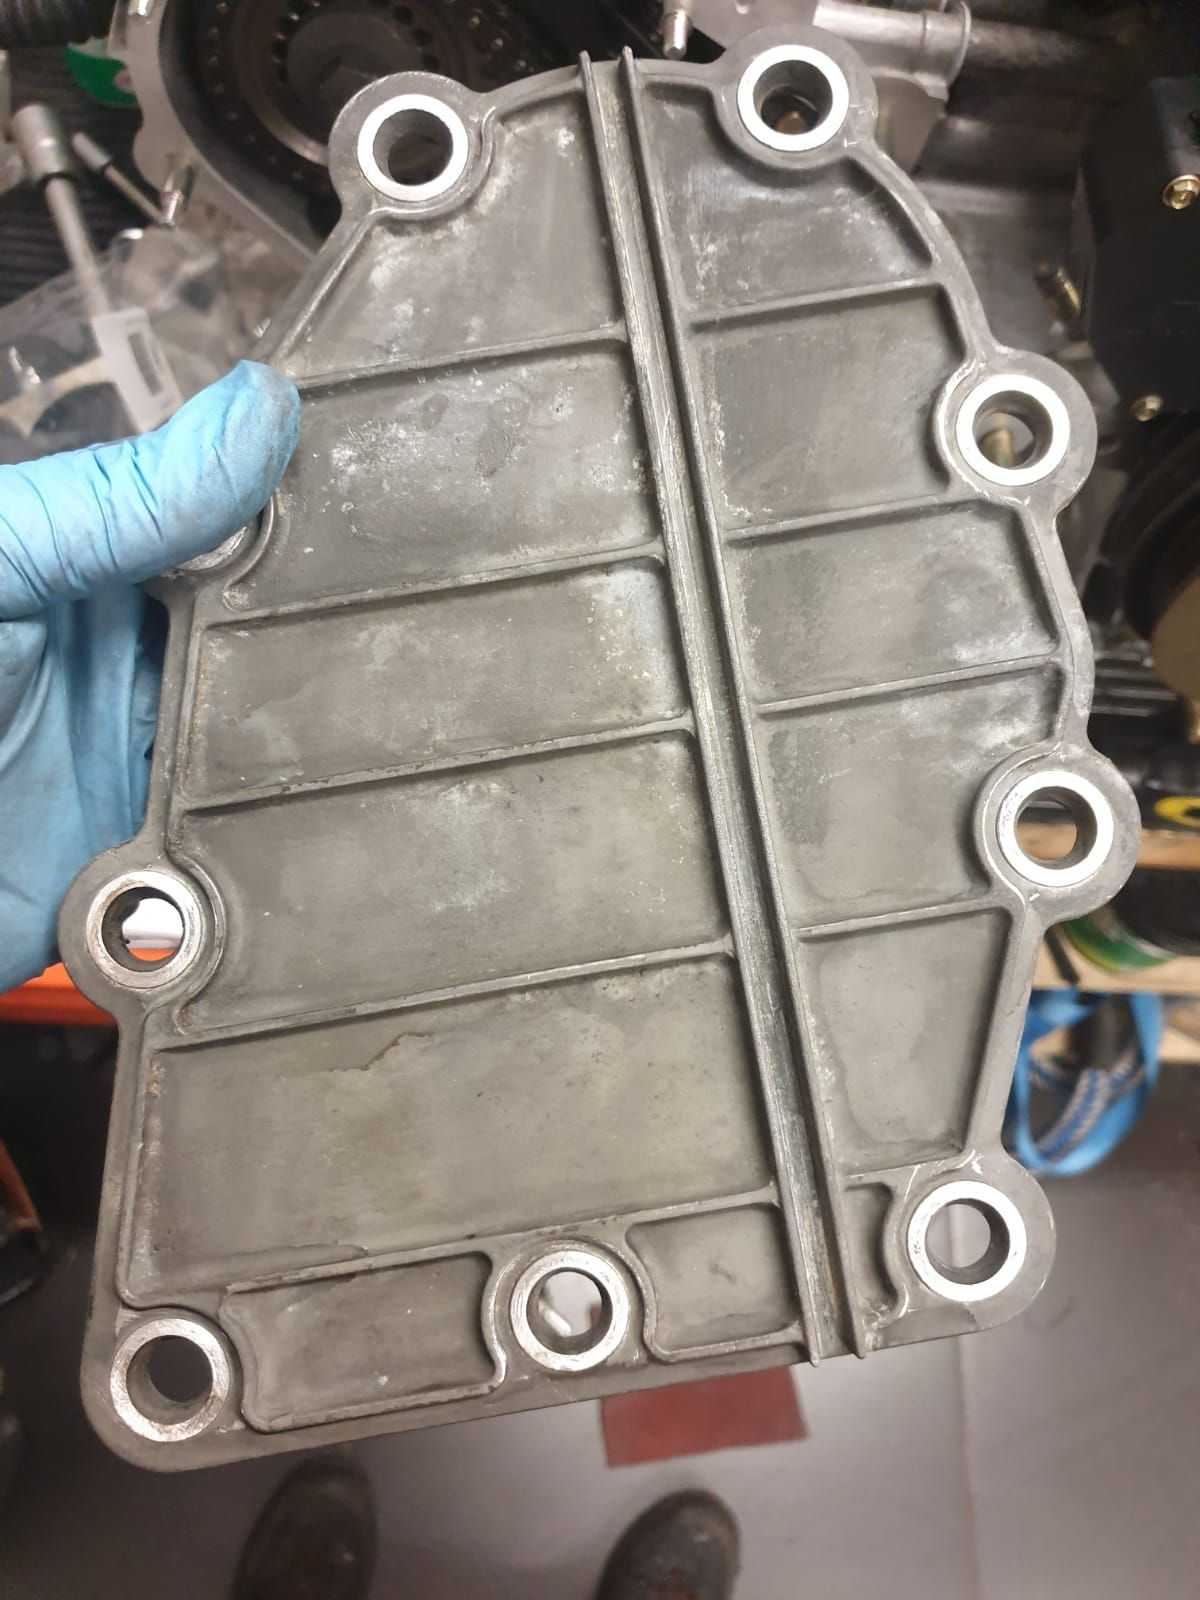
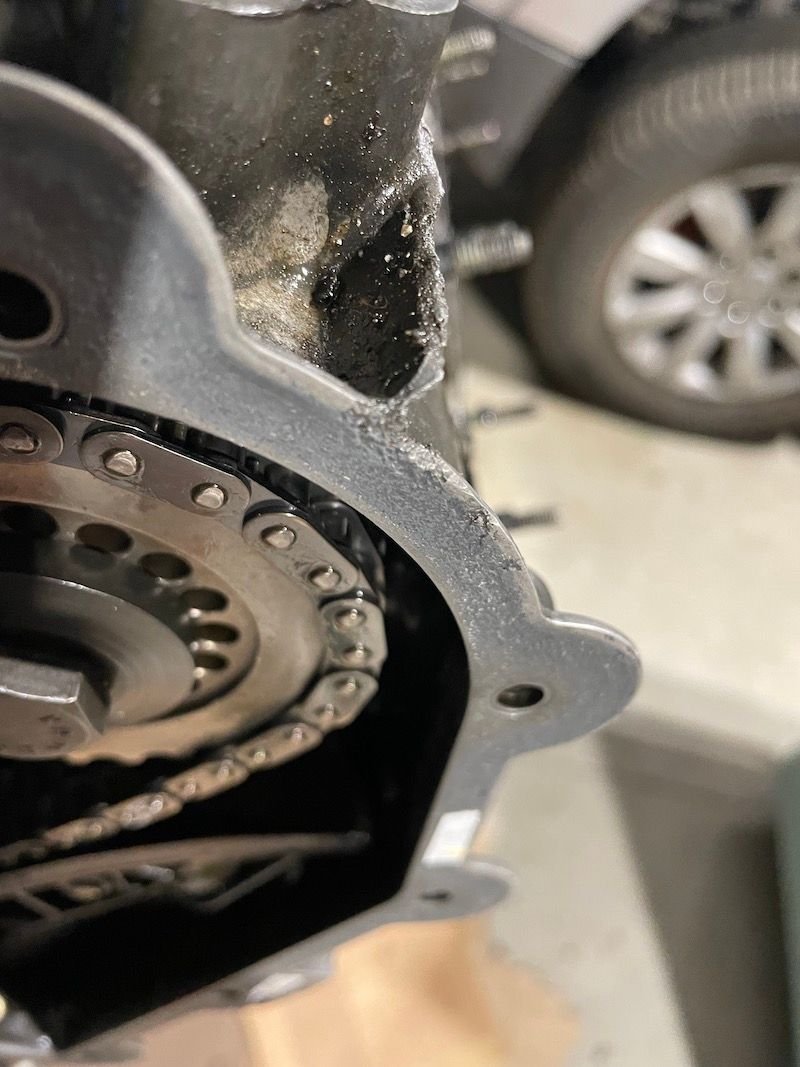
Well I hope this gives you some answers:
As you can see above the cast part is far from being perfect. There are leftovers from the casting process and corrosion...
So you might think, hey, there are covers that address that thing. Made from billet aluminium on CNC and so on.
Well that's true, but that's just half of the equation.
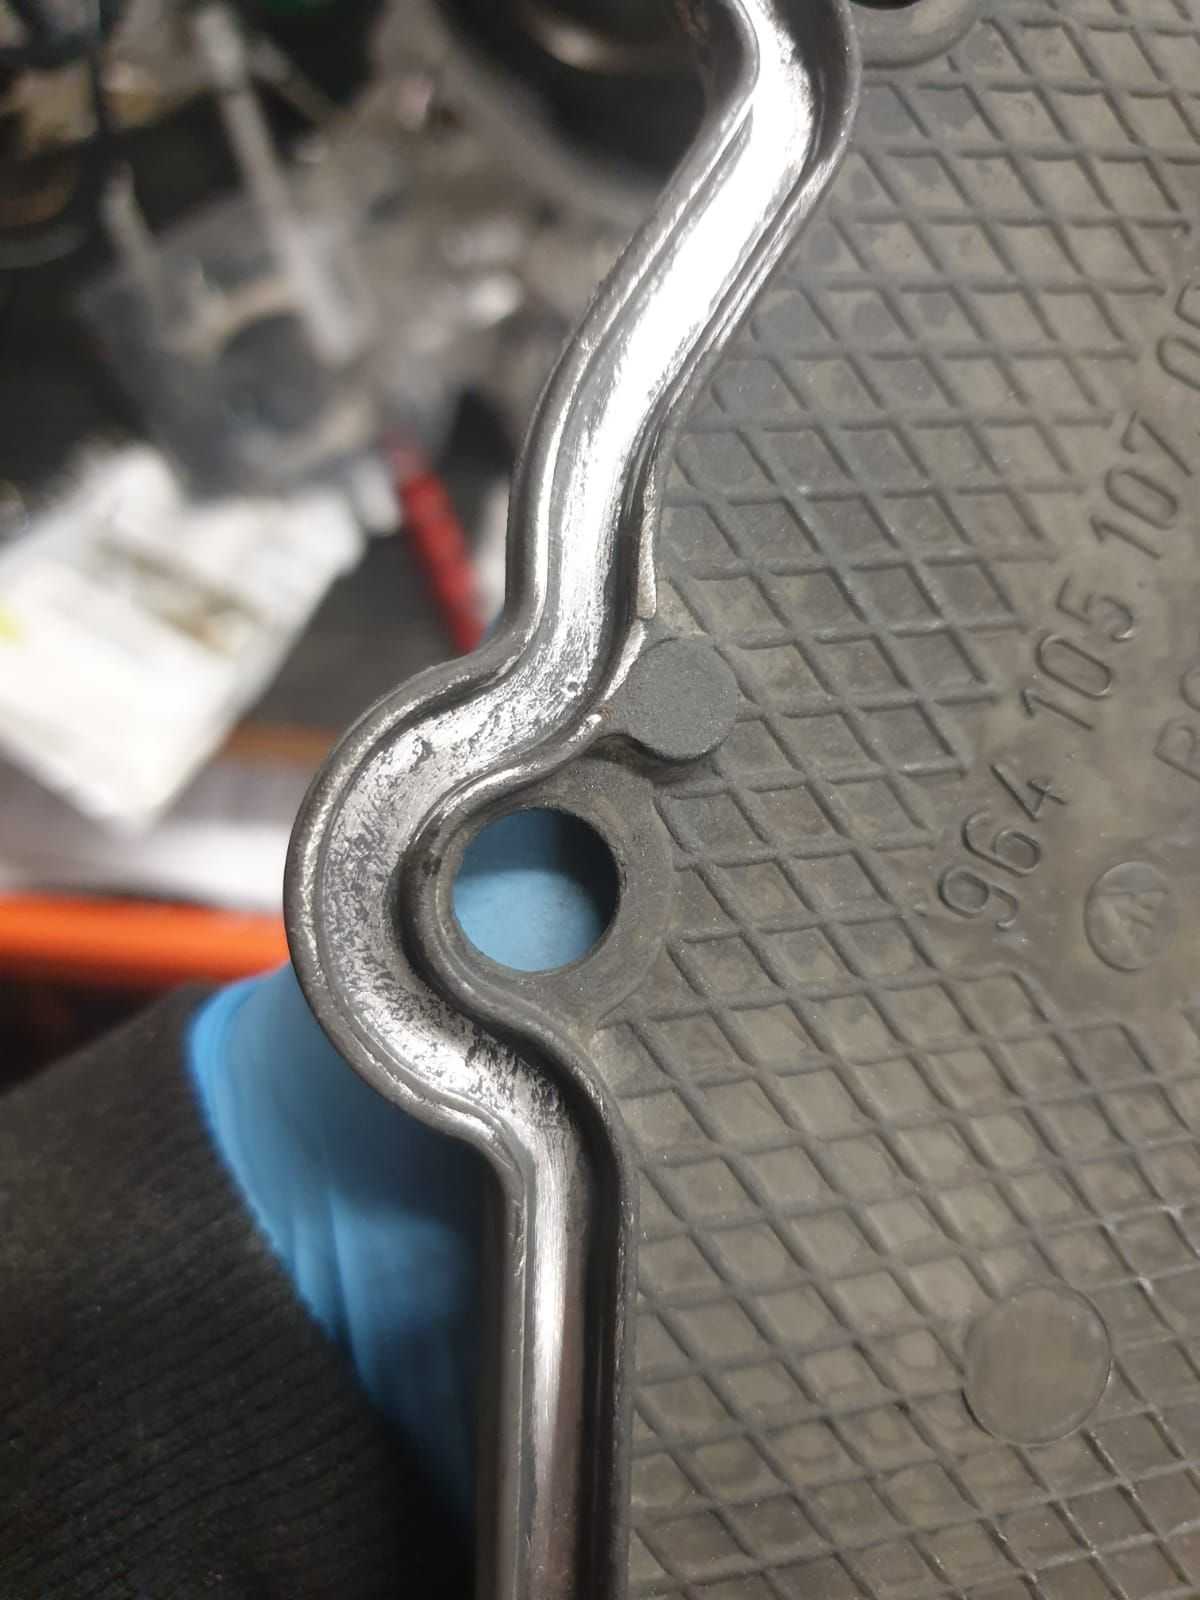
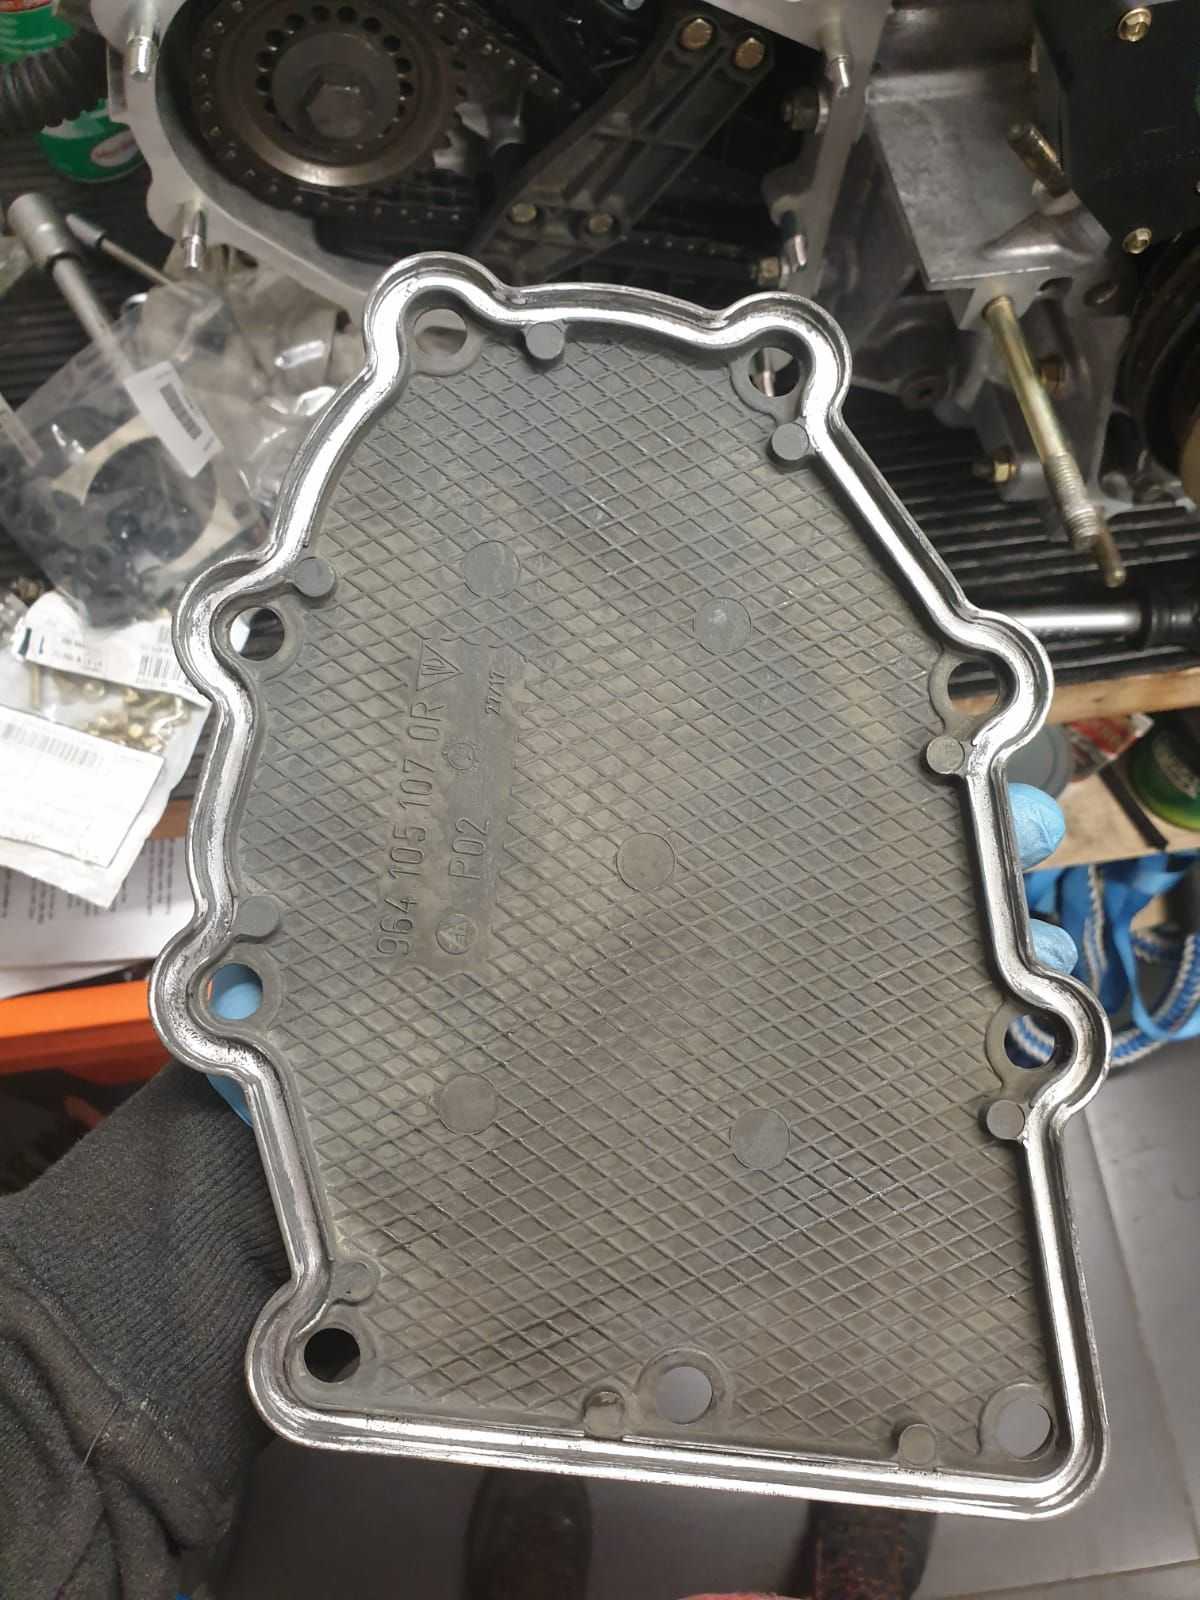
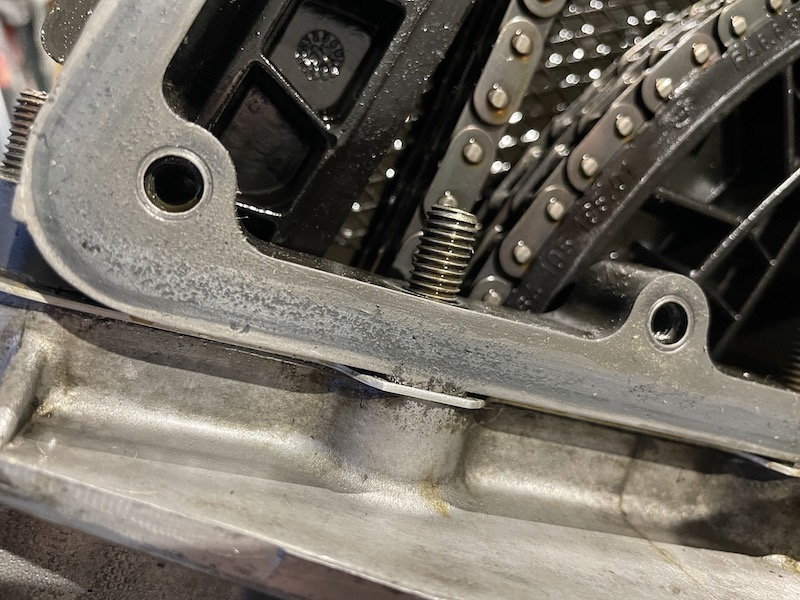
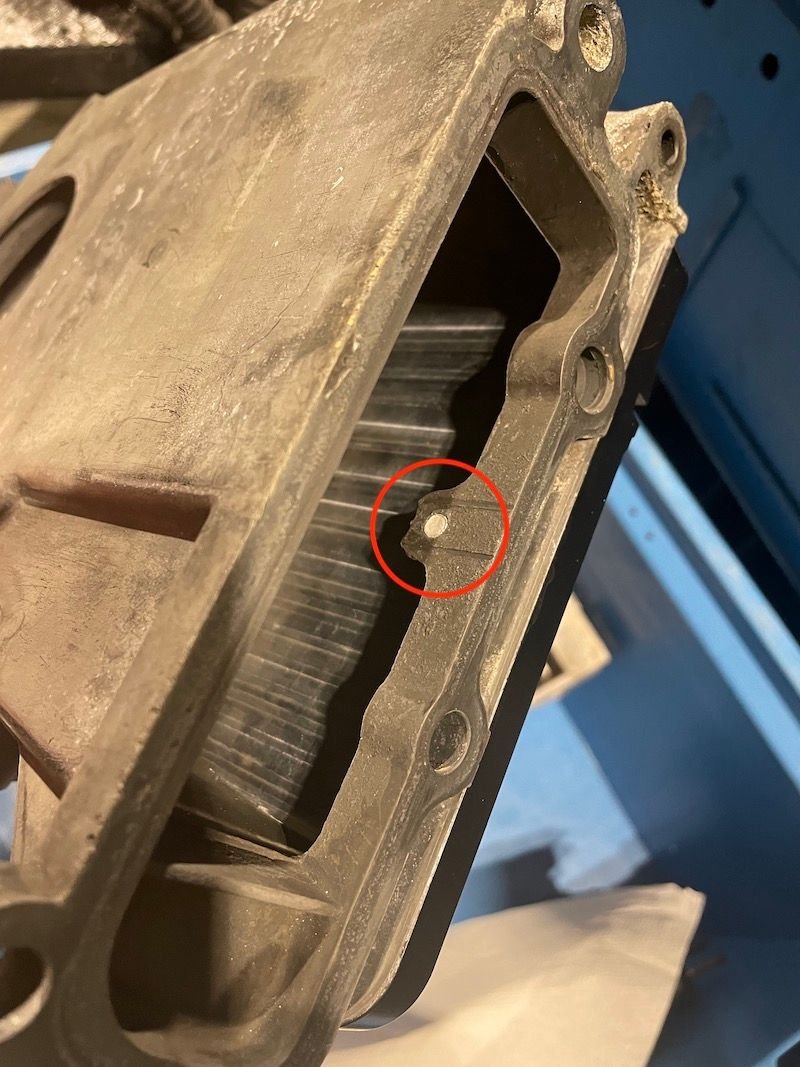
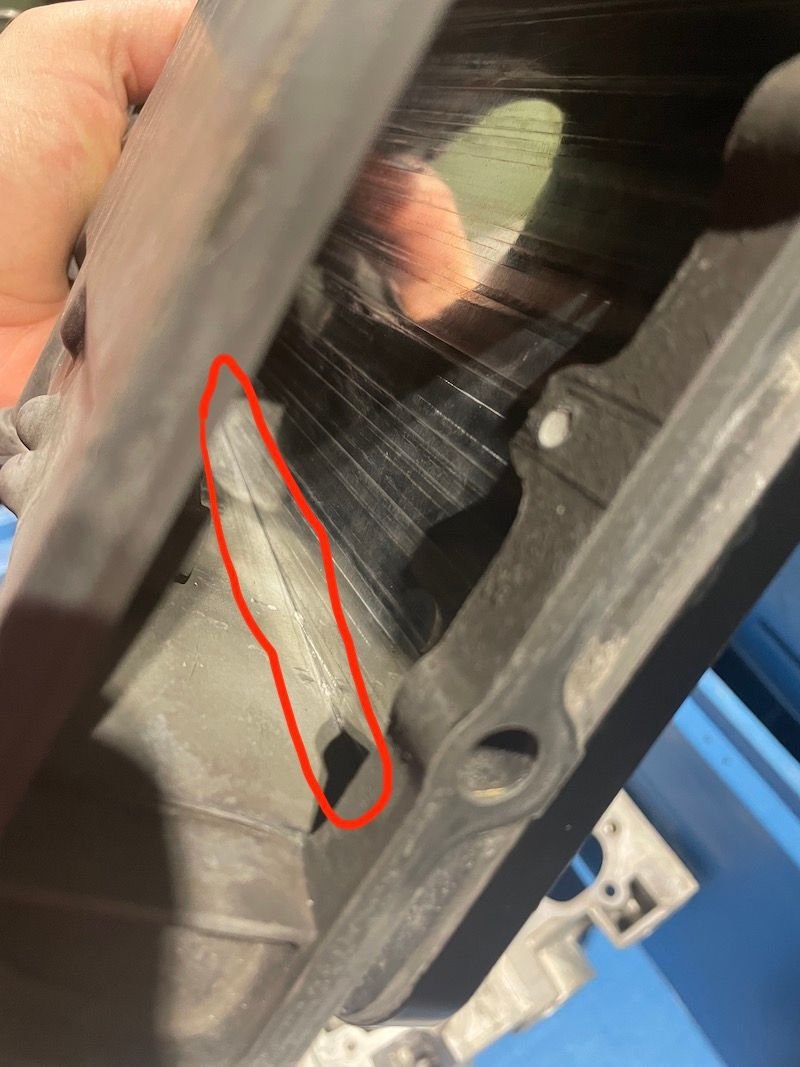
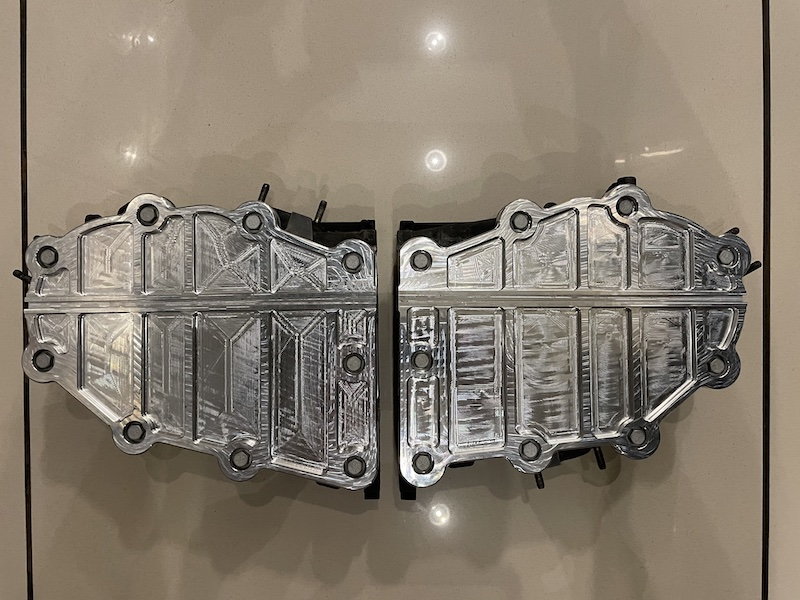
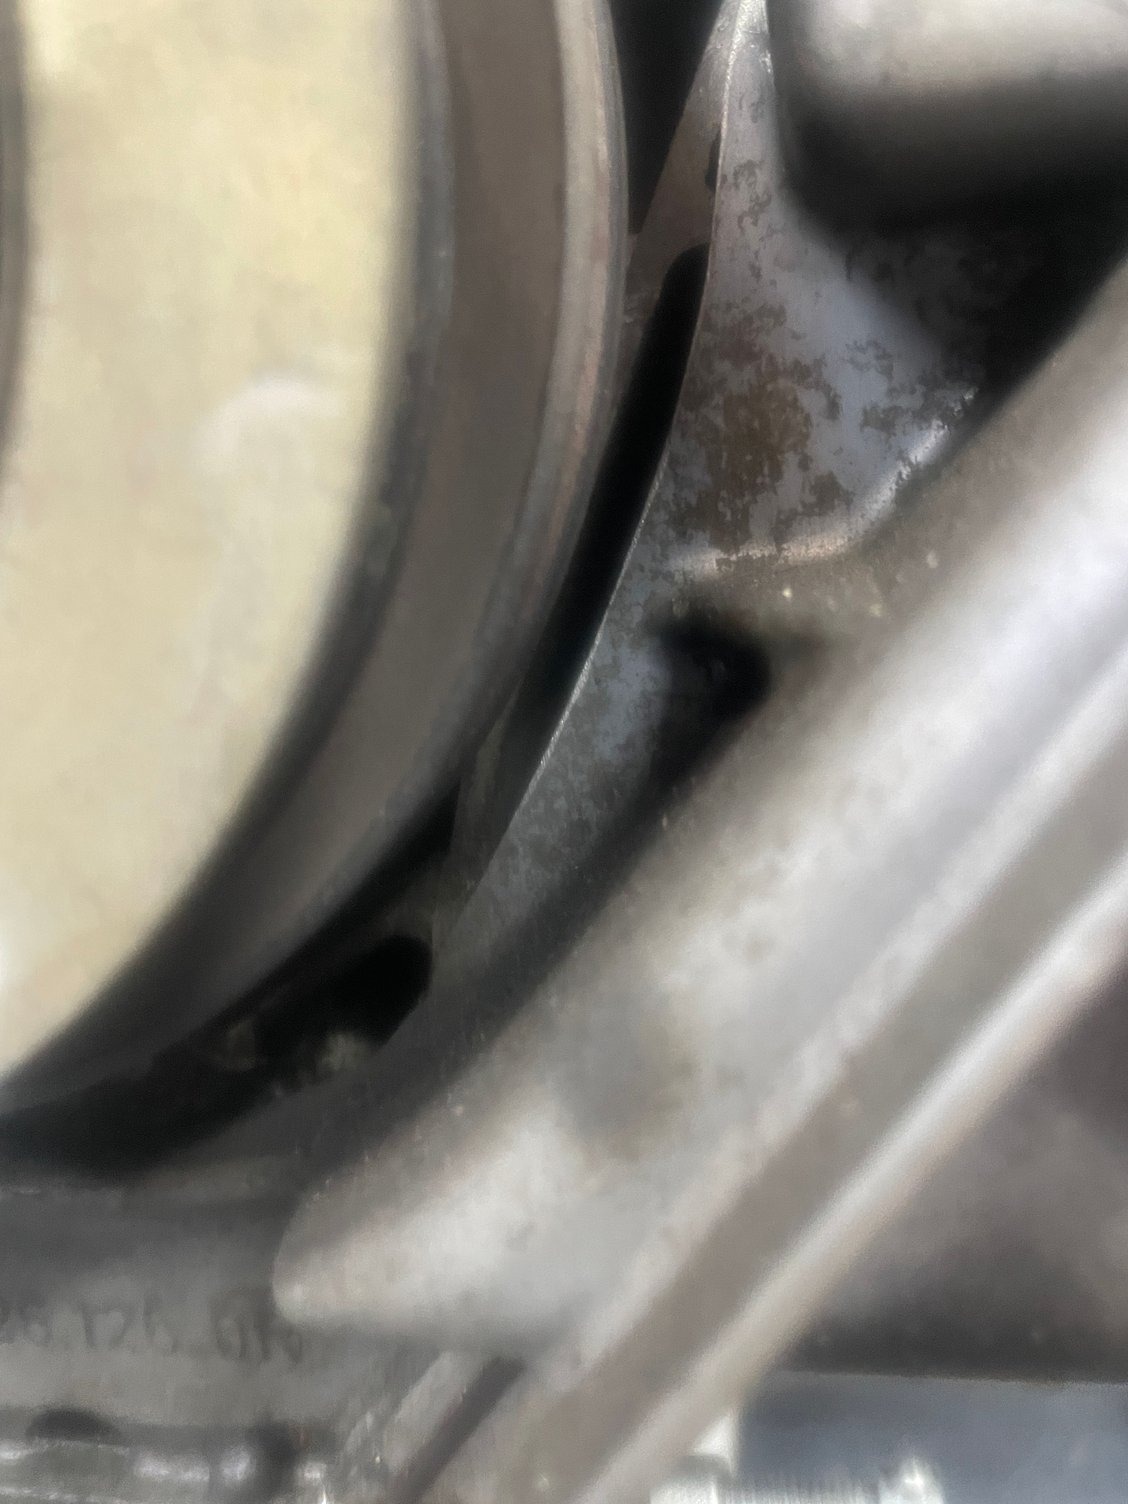
The rubber gasket will seal nicely with aftermarket billet covers nicely, but only on the cover side, but the boxes alone look most of the time like this:
There is no freaking way the rubber gasket would seal properly against such surface, the oil is penetrating the gasket all the time in addition in the OEM design there are "pockets" where oil is left and always penetrating the gasket.
Very interesting. I completely agree regarding the imperfect mating surfaces. I've replaced these seals/orings/bolts on 8 or 9 993s over the years while installing Clewett serpentine belt setups.
Looking forward to more information on your version.
Subscribed. I have my right side box "weeping" to a point where it doesn't drip, perse...but enough to bug me and "mist" the area with grime. I have a new timing cover gasket set and have yet to do the job because I've been researching this very topic. Will simply replacing the rubber gasket solve the leak? This confirms that likely it won't.
Nice work but the issue here is the pitting on the housing face. Magnesium doesn't like moisture and in many cases cars are not properly maintained or warmed. The oil condensates and corrosion sets in.
I have never had an issue with leaking covers on countless engines but if the housings are that poorly pitted it might be an issue. I have had some faced a few thousands and the issue was gone but that requires pulling cams and the boxes.
145k miles on these housings and as you can see no pitting and no leaks.
I rarely see the need for billet valve covers or timing chain housings or covers so long as they are properly maintained and cleaned properly when service is done. They do look pretty but that is the only reason I would change something unless it is worn out after 30 years parts do wear.
Anthony I do agree that when in good condition the factory sealing will work, for some time.
But at least for me and many other these are 30+ years old cars with multiple PO, mainly because the boxes, not the covers.
So rather than over engineering I went the opposite way, simplified.
With the nice sealants we have currently available in the market I decided to go with no seals nor gaskets.
This means mating the surfaces and filling any corrosion craters with the sealant - that does work as intended. Period.
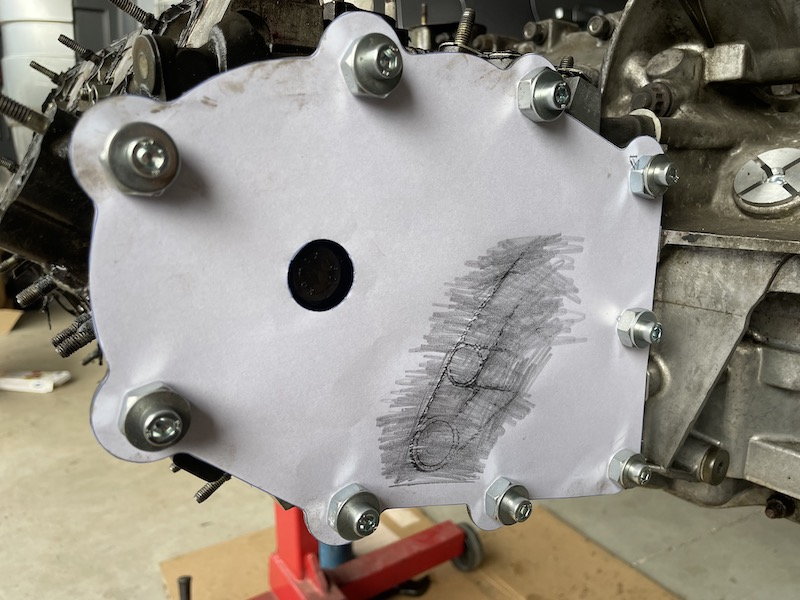
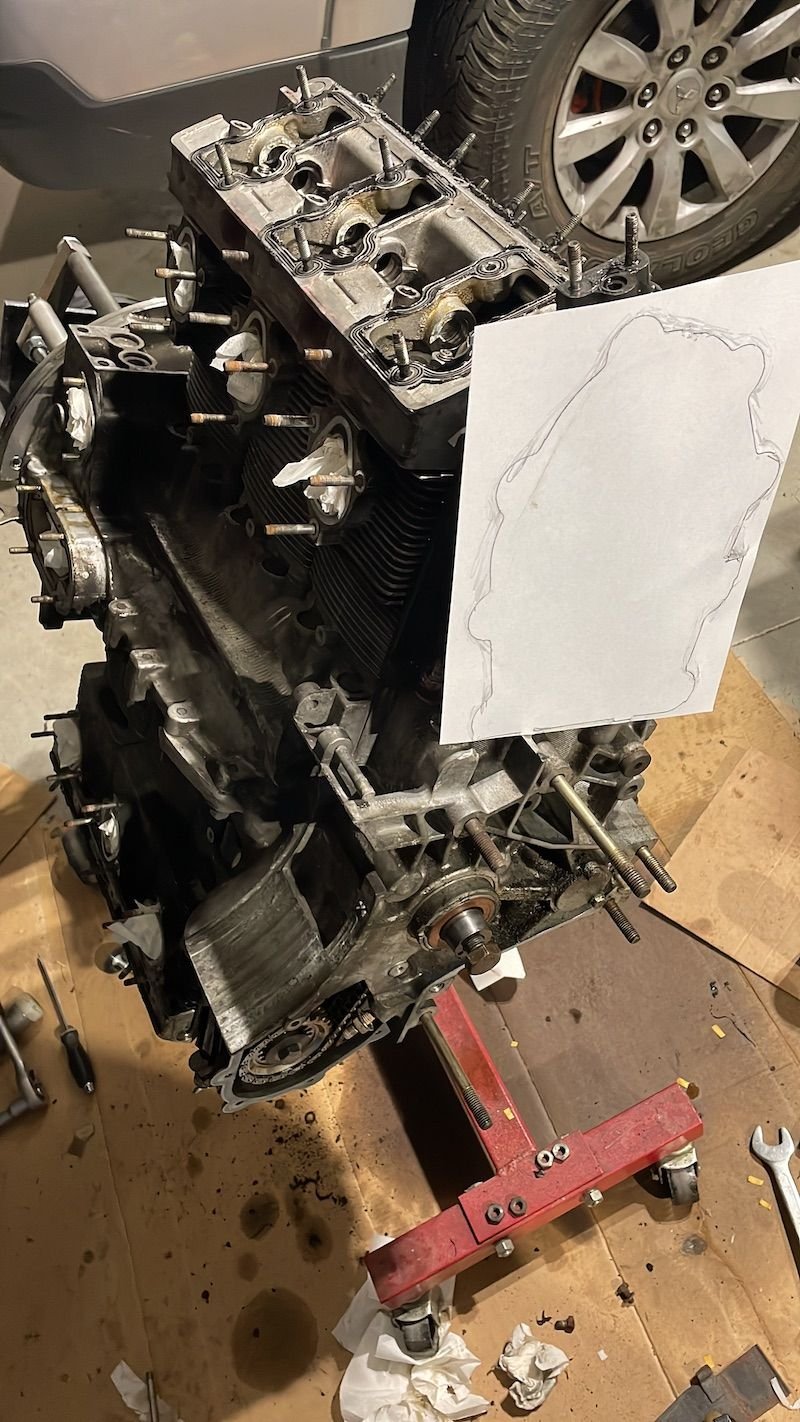
I started with doing some measurements and prototyping using a pencil and sheet of paper.
Finding any regularity in the placements of the holes or thinking these covers were symmetric was a no go :-)
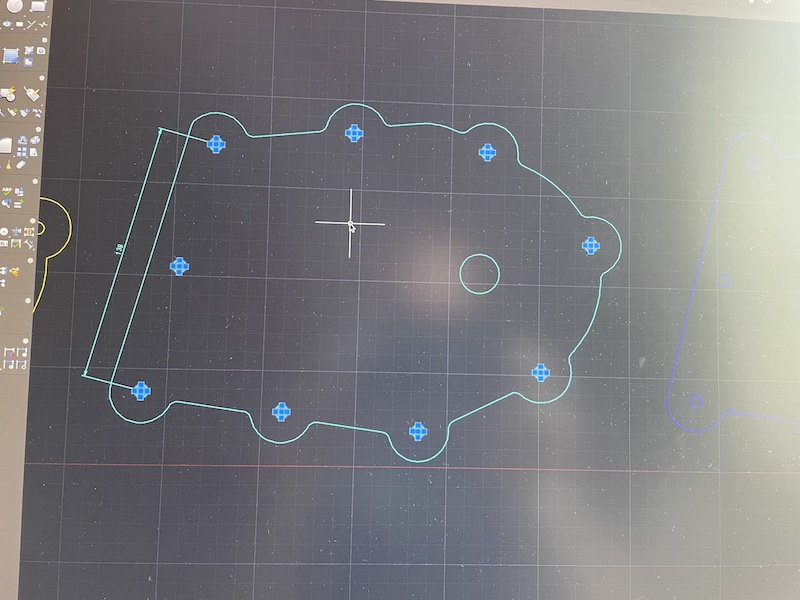
So this was pure art that I later converted into CAD.
I have a small 3D printer that I use when prototyping some smaller parts, but that just did not fit into 200x200mm area I'm limited.
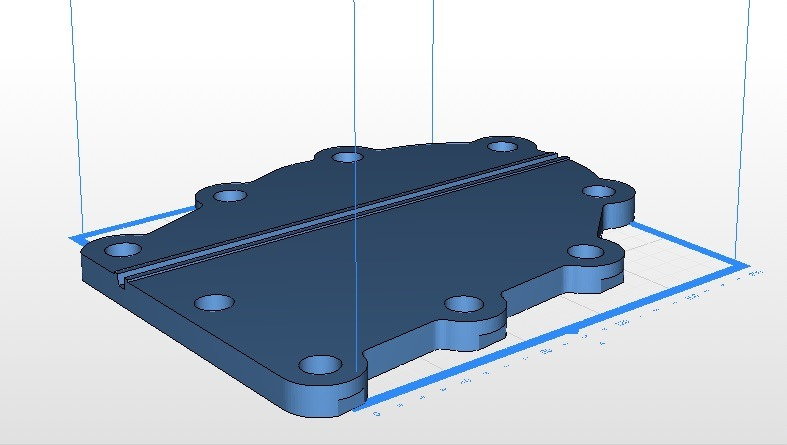
Therefore I decided do to the first prototype in billet aluminium with as little CNC milling as possible.
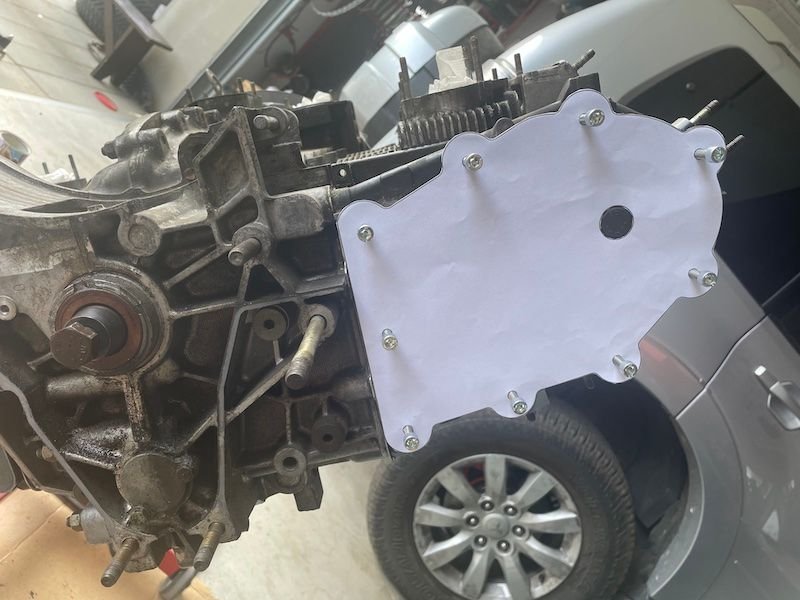
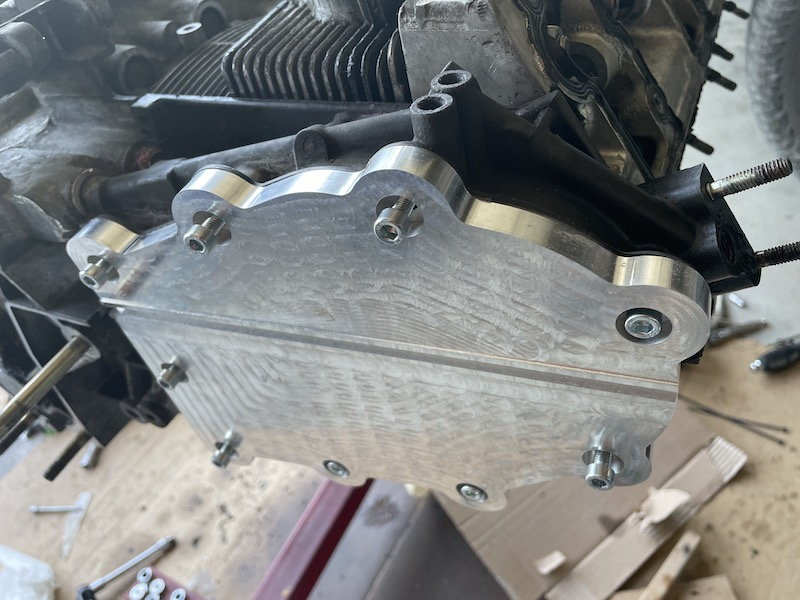
This is the #1 prototype:
This is neither good looking nor weight saving, but it does the work...
Are these threaded inserted bolt holes blind , or do they open up into the chainbox? If blind no problem, if not then oil could leak out along the bolt.
Looks like you're going to use allen head cap screws?
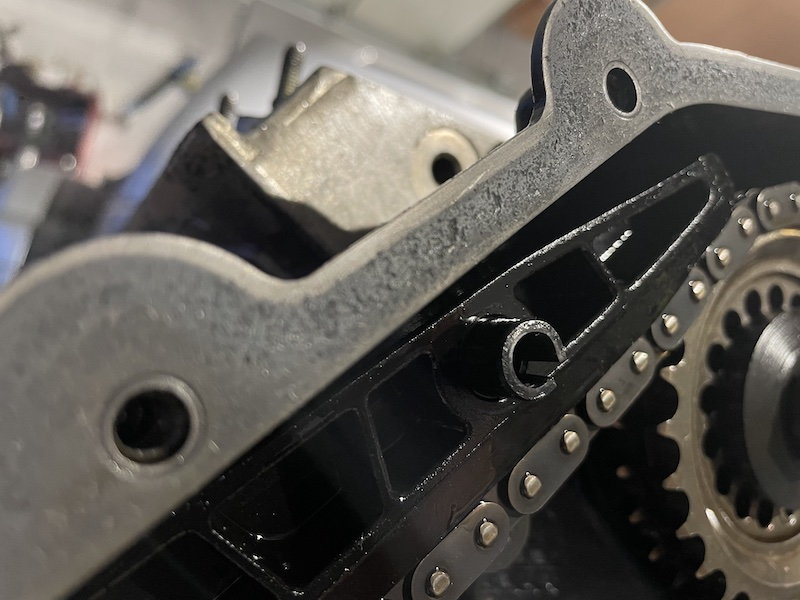
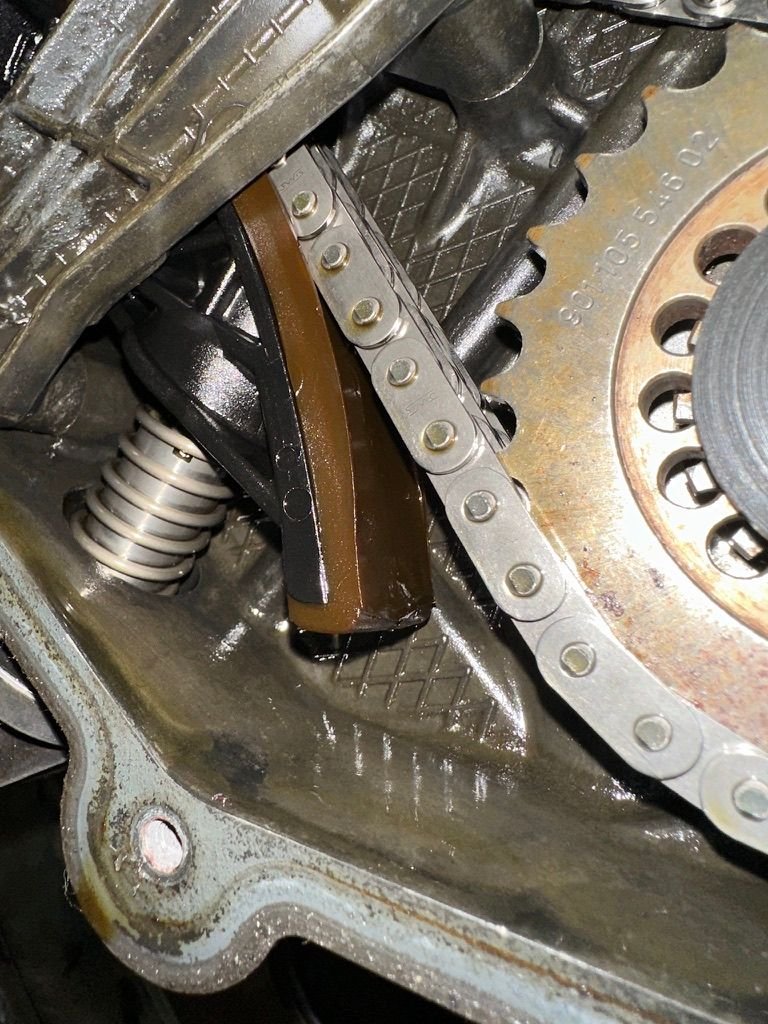
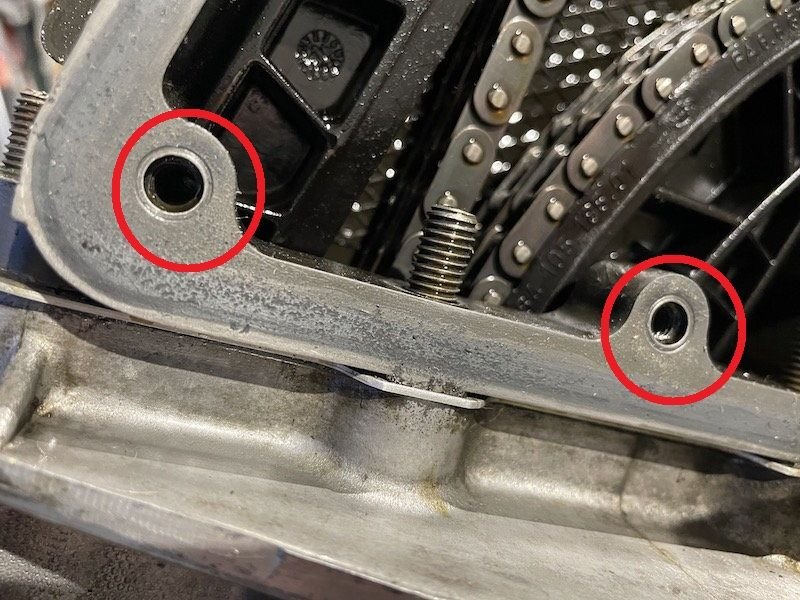
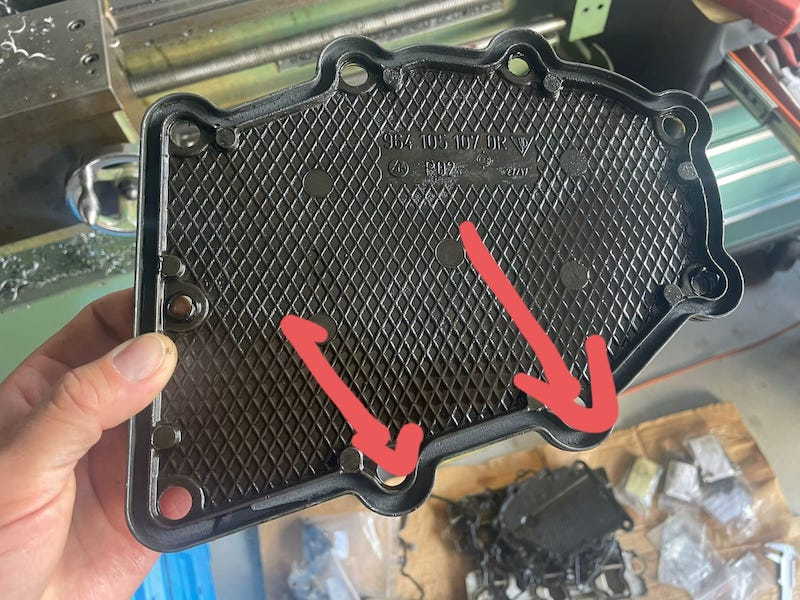
There is one through hole every box as indicated in this picture:
The remaining ones are blind. I was thinking about using a washer with integrated rubber seal, but during the tests we did not use anything, just a bit of lactate on thread and the bolt flange...
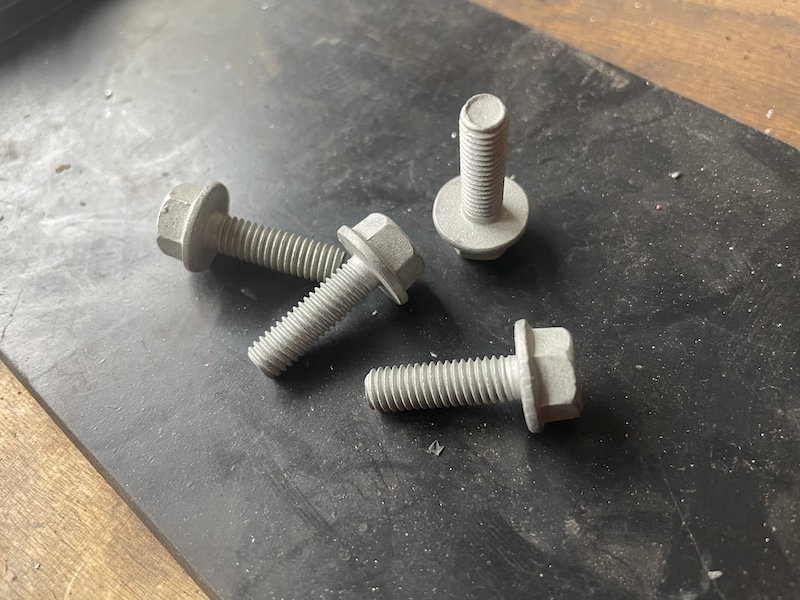
Regarding the bolts. I'm a big fan of an OEM old-school look / design. That's why the "final" covers are milled to have an OEM look rather than whatever is cheap on the CNC
This brought me to using these bolts:
These are 10.9 hardened, zinc coated and will survive a lot, and look OEM :-)
The flange allows to have a bigger area where sealant / loctite can be applied for insurance for not leaking on this one bolt with a through hole in the boxes.
Seems this was a good idea, as the test car currently has around 3k miles on the odo with the #1 prototype and all good
So regarding solving the leakage issues. One thing is the mating surfaces quality which was indicated above already.
The other thing is the design of the covers. One of the biggest problems I see is that stock covers have pocket, or two to be honest, where the oil is dripping and staying there 24/7 all the time penetrating the rubber gasket.
As you can imagine this does no good to keep everything dry.
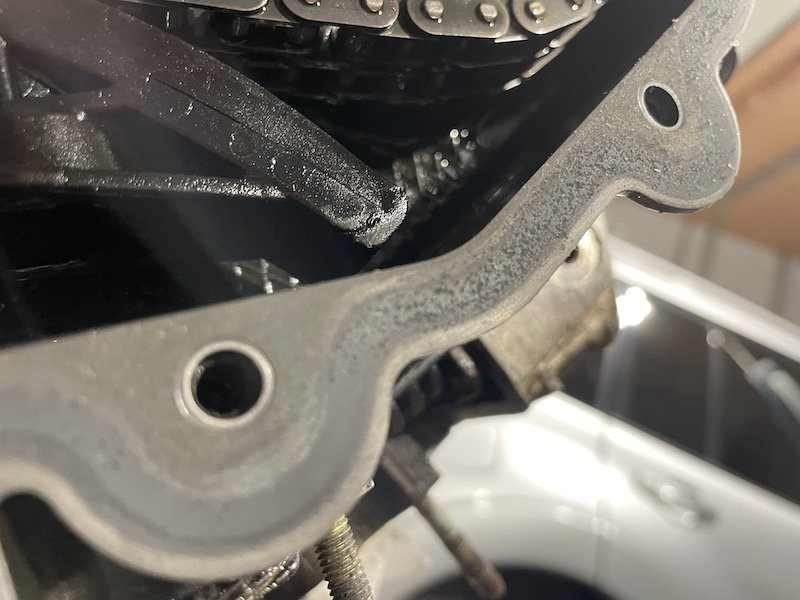
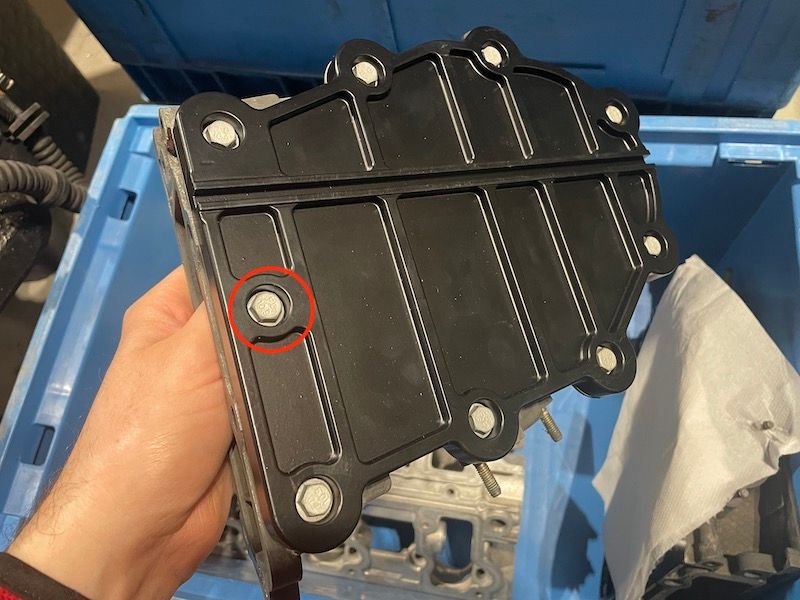
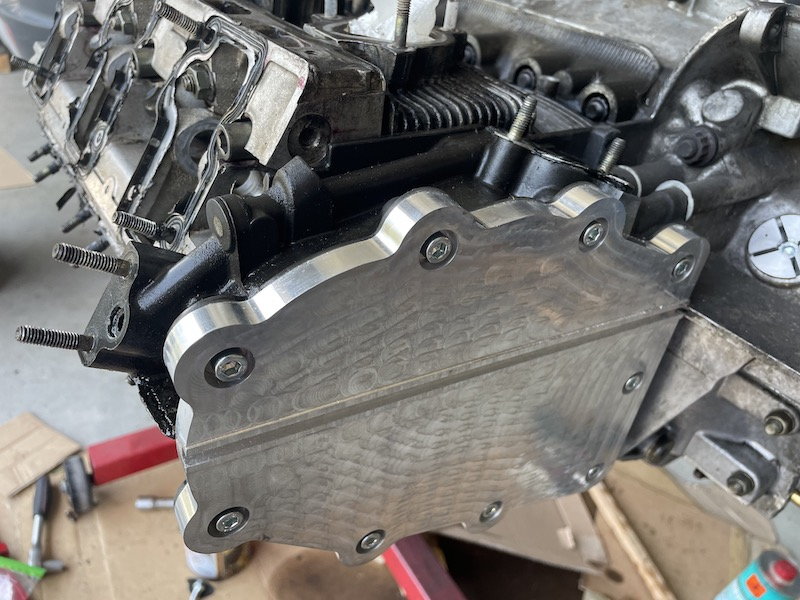
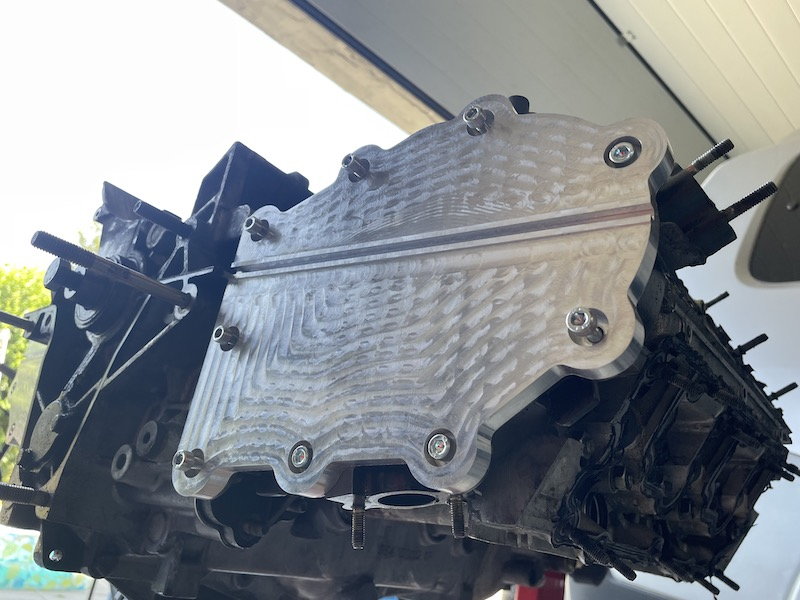
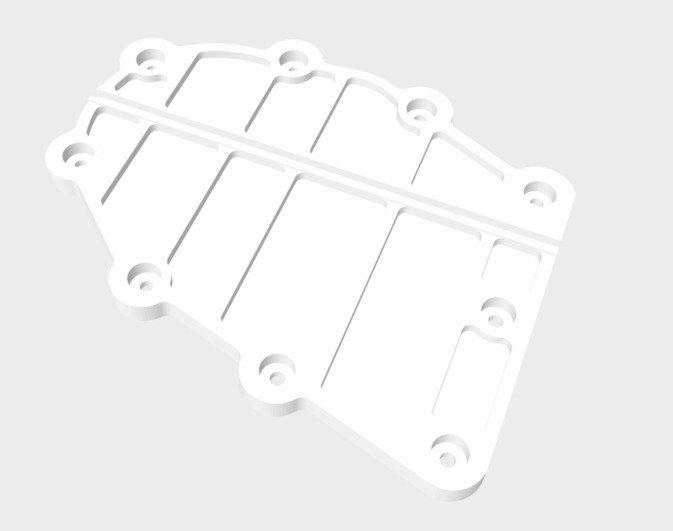
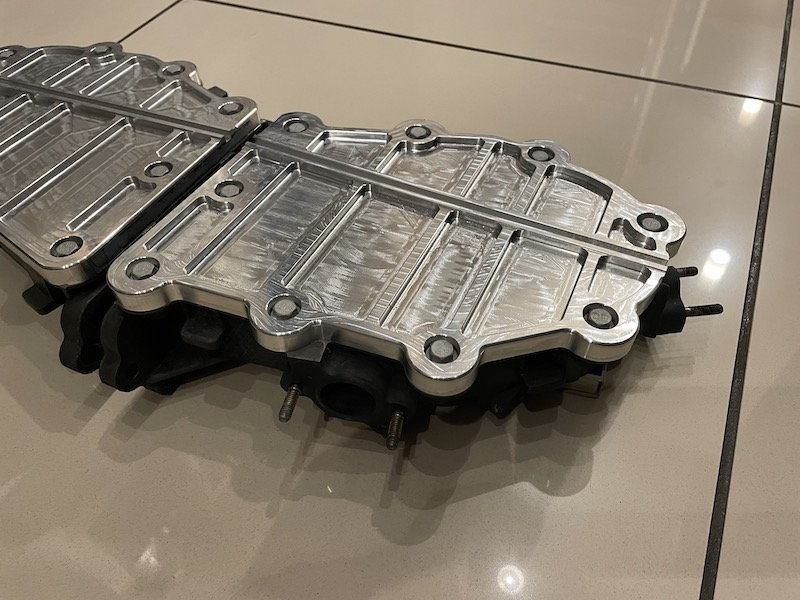
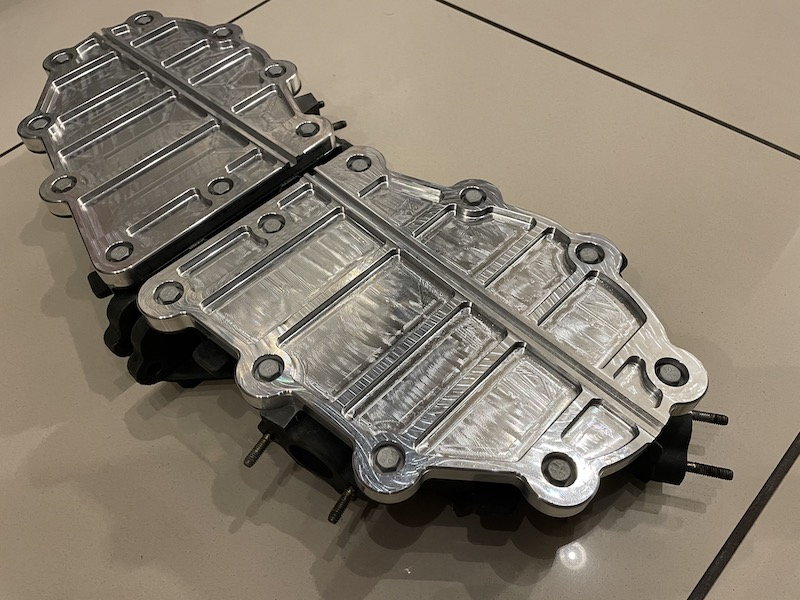
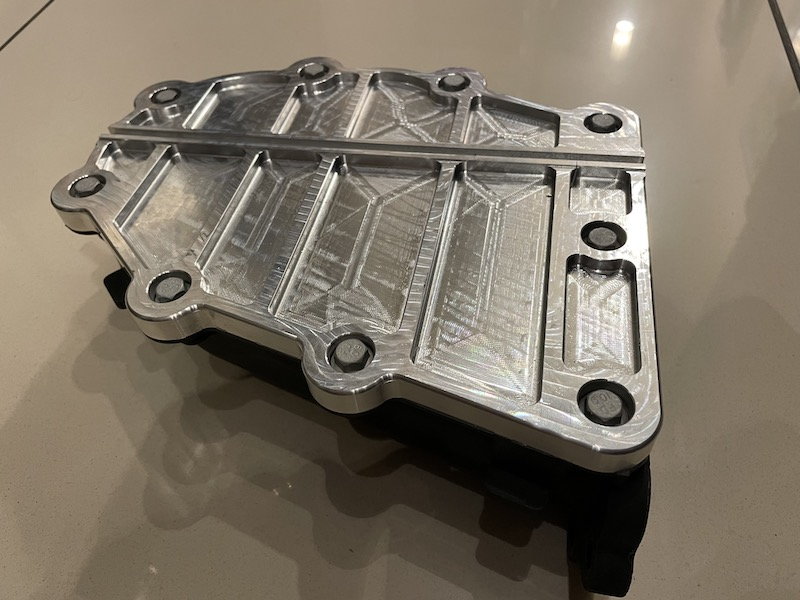
So the boxes alone have the mating surface quite wide. I wanted to utilise that as well address the pocket issue. That's why I decided to go completely flat in the mating surfaces.
You can see in this picture how nicely this matches with the boxes leaving no pockets where the oil can gather.
During the tests as the sealant we used Elring Dirko (grey) sealant that proved to be a good fit here. I'm sure other sealants will work as well.
18570268[/url]]Mine are weeping as well and I have been holding off switching them out so I very interested in these. Now if you do valve covers also...
Well the valve covers is slightly different story and I hope other more experienced engine builders might chime in.
IMHO these leak only due to the stock covers. These are magnesium and usually rather bent.
The cam towers in contrast to the chain boxes are aluminium, so no issues with corroding. The mating surface on the cam towers is good.
The aftermarket valve covers utilise the rubber gasket, but either cast or billet CNC that are available are made out of aluminium rather than magnesium.
Having said that I didn�t see much to improve here.
But if there is demand for such upgrade with sealing surfaces for the valve covers as for the chain boxes covers, I may consider developing these as well.
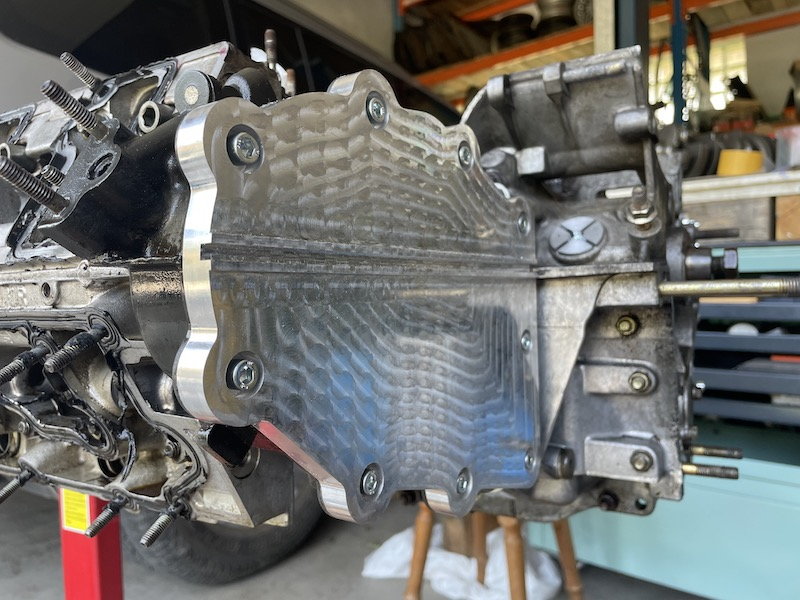
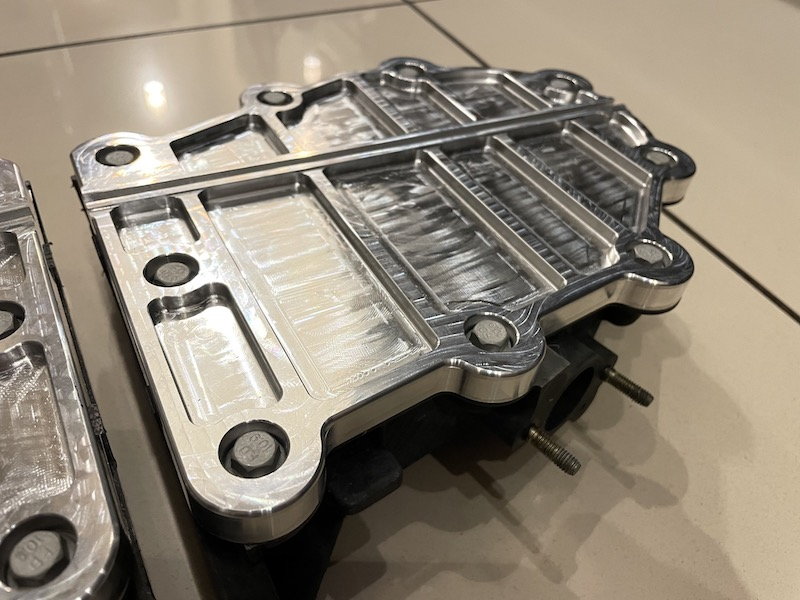
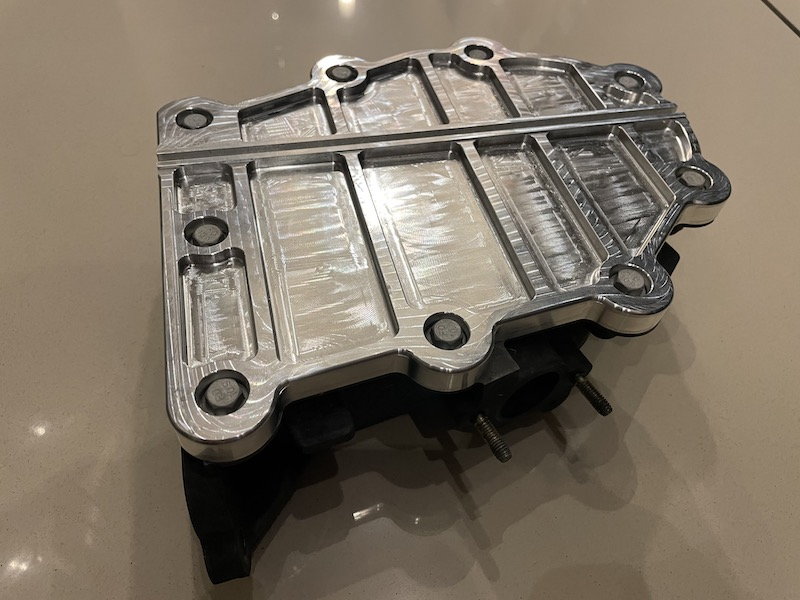
So getting back to the prototype. At the boxes side there are few areas of collisions so I had to mill out certain areas to address that, including the aluminium washers for the boxes mounting bolts.
I also milled on the front the line that keeps the metal shields around the engine (sorry I don't know the proper name for it, not a native speaker :-)).
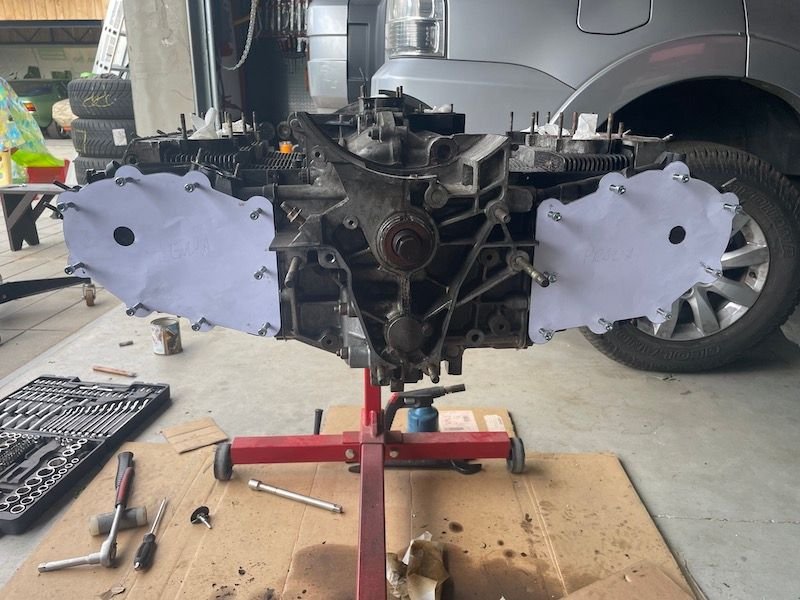
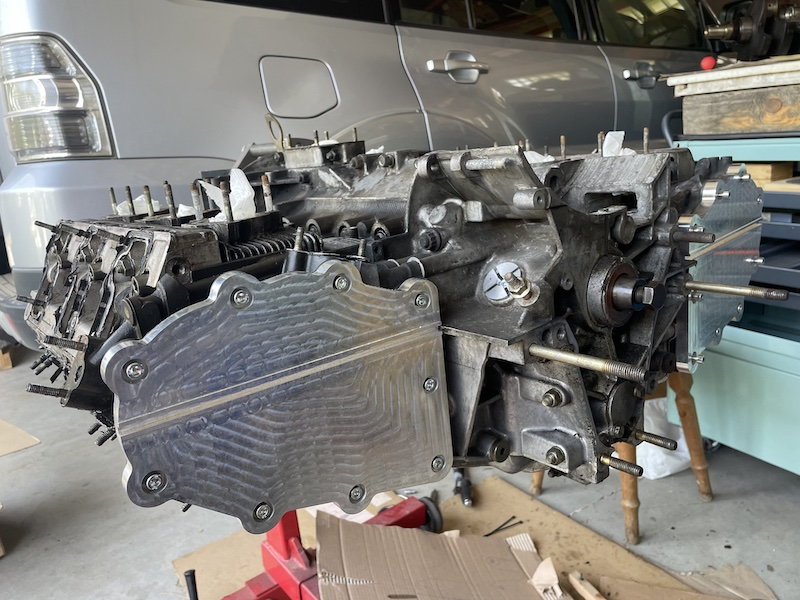
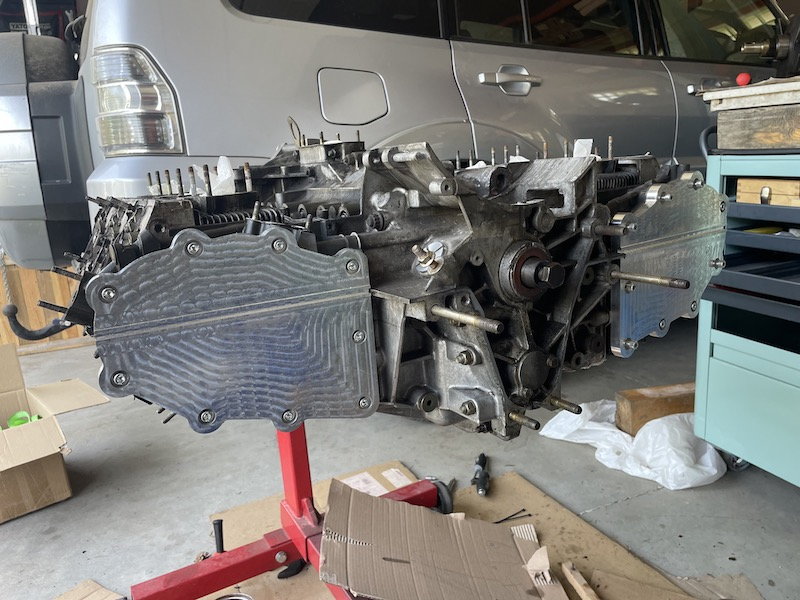
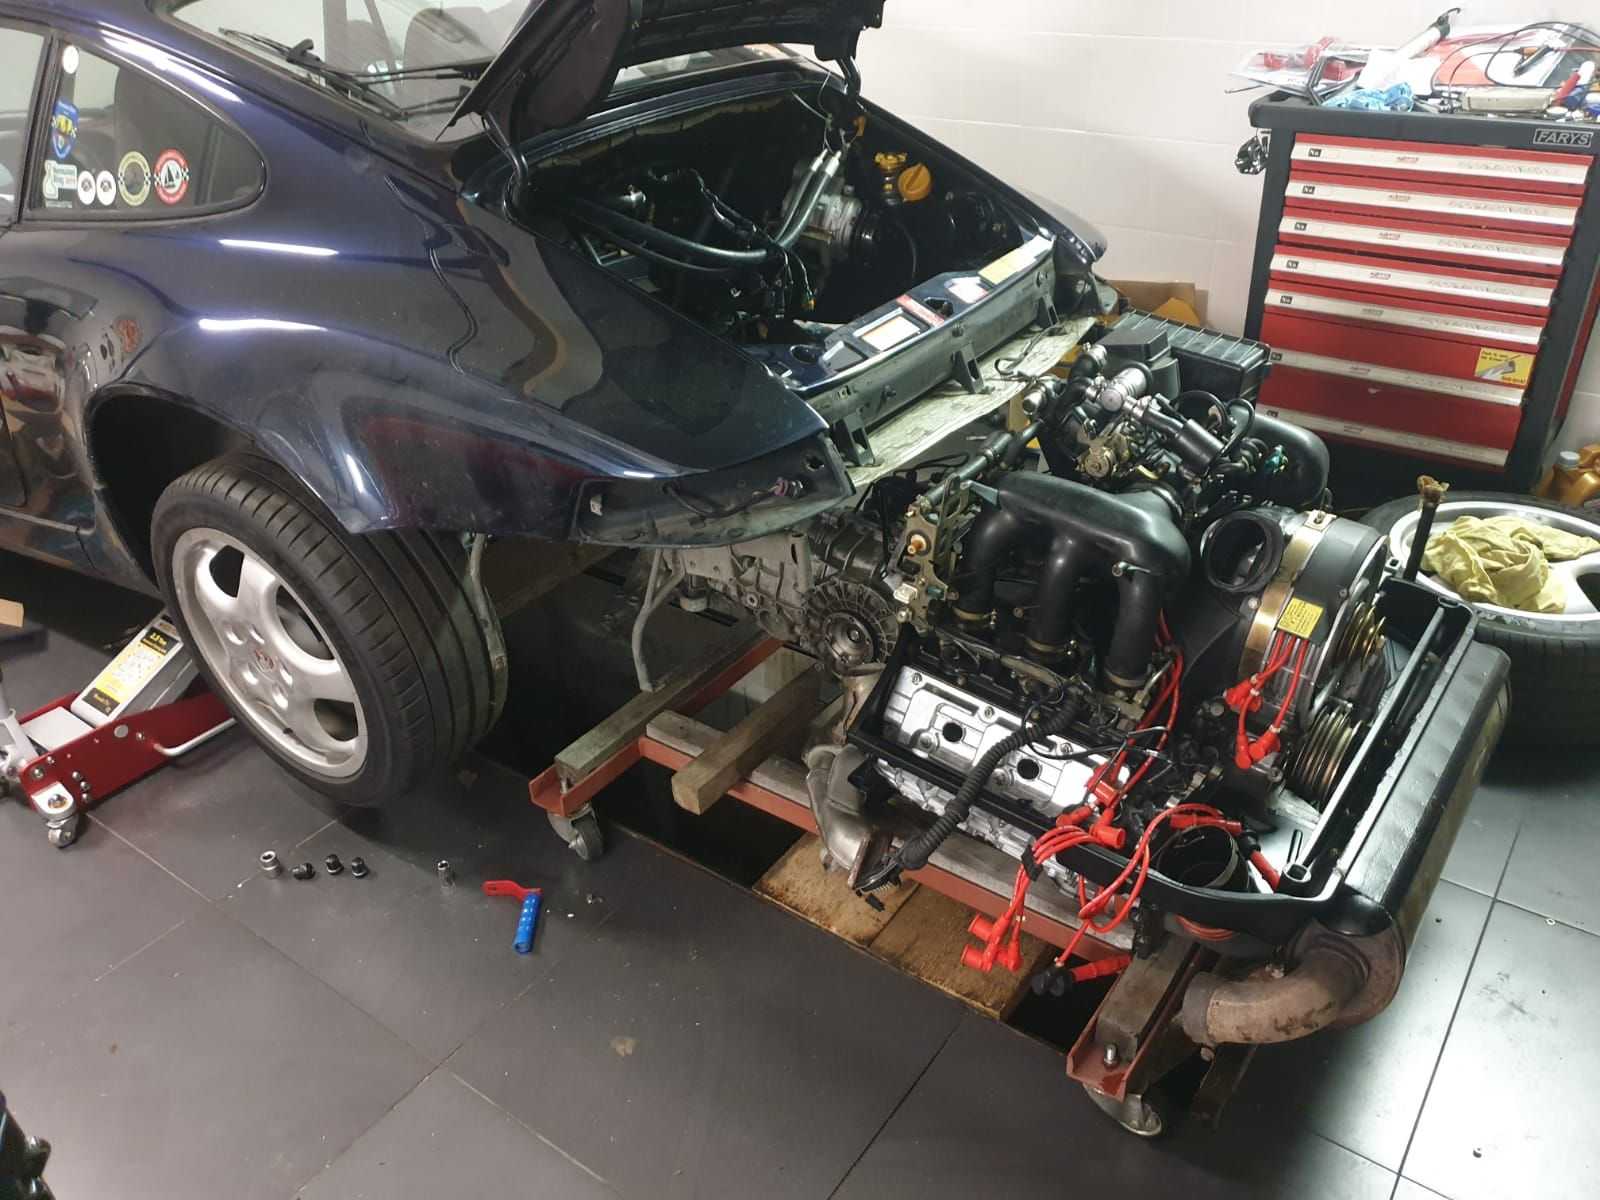
Here's the prototype #1 test fitted on the engine I'm currently working on... It was about a year ago or so. Time flies.
Regarding the tests. The Prototype #1 was installed at my friend's 964 about a year ago.
As mentioned earlier this was about 3000 miles ago and 4 seasons around the clock (we have -20 celsius in winter and 30+ celsius in summer).
So far so good, both the design and the sealant proved to be successful combination.
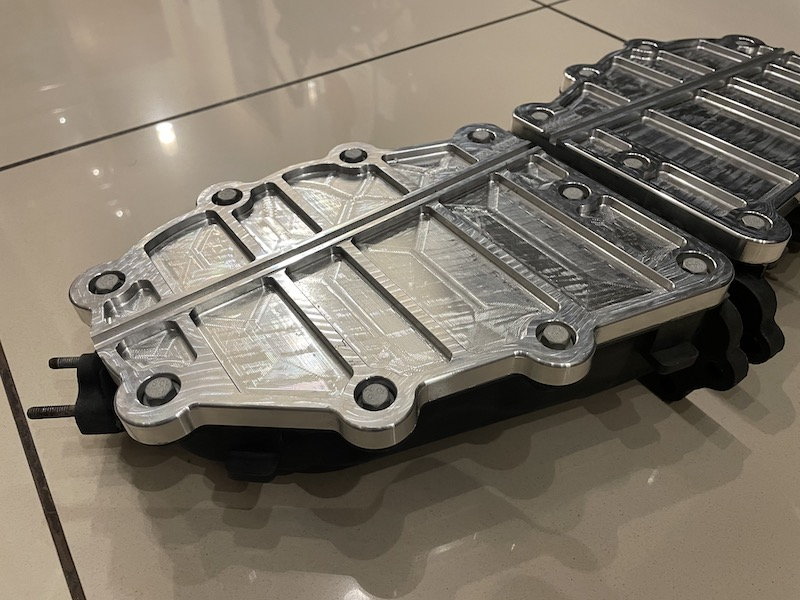
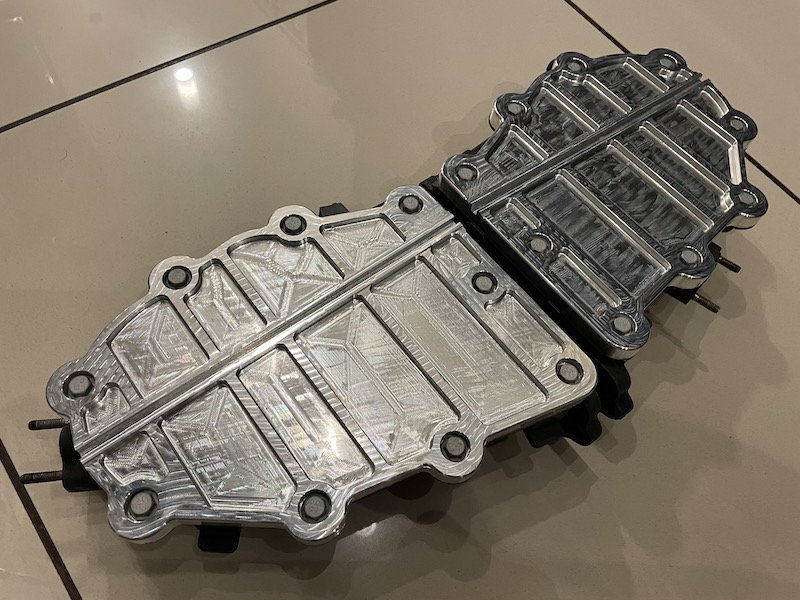
As this is up and running I started to play around with the look.
I wanted to achieve something clean and similar to the OEM look, and one of the results you've seen already in the first post.
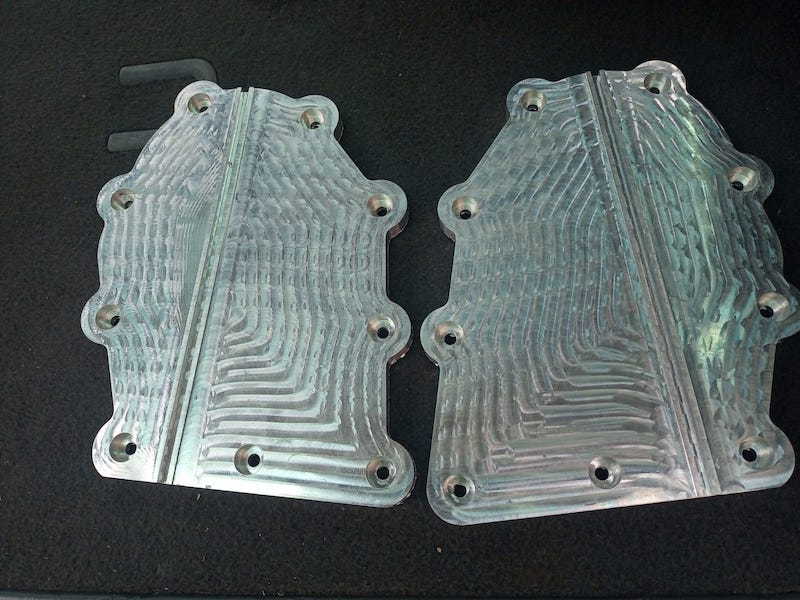
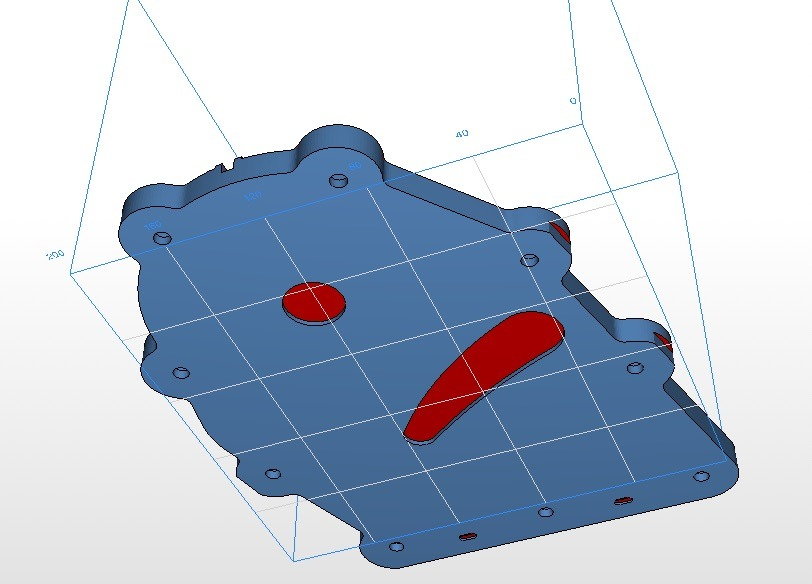
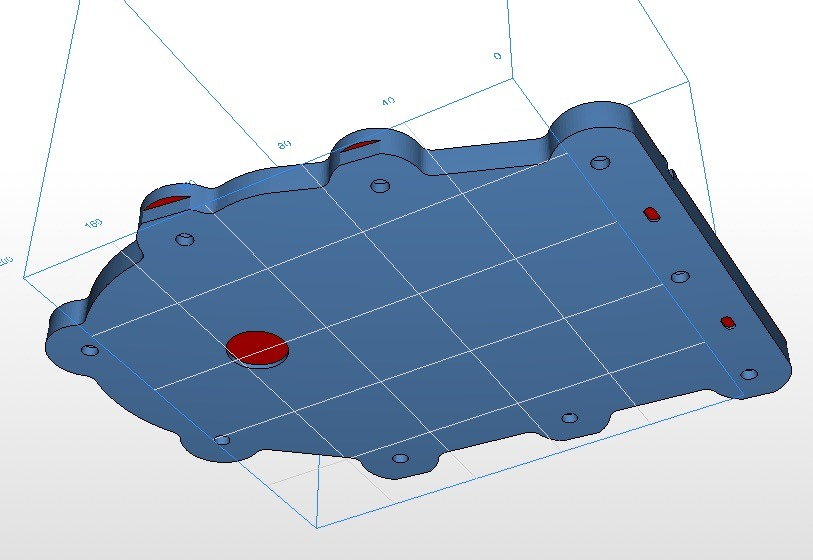
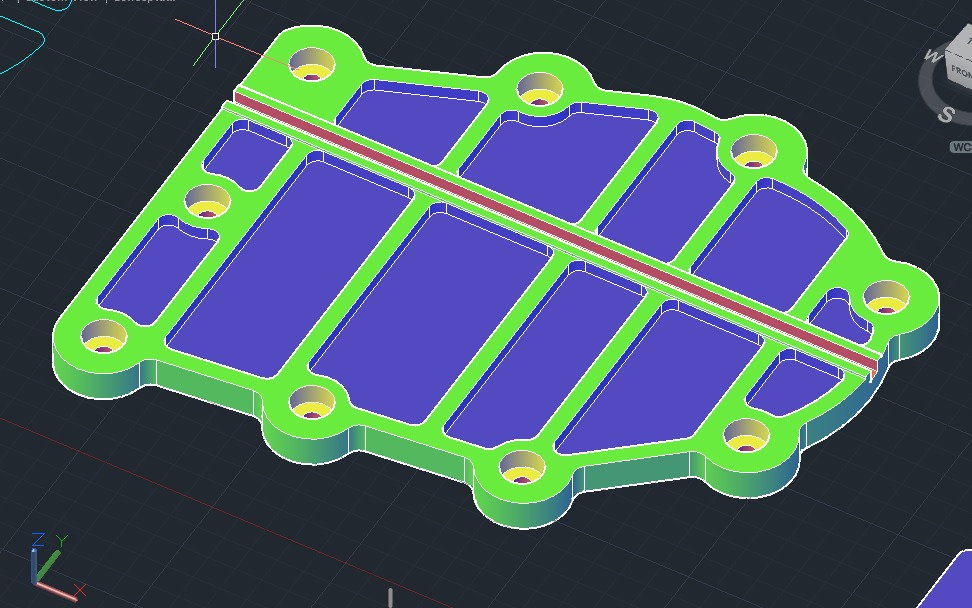
The 3D model looks like that with milled "pockets" for OEM look and removal of some weight.
Still the covers have a lot of "meat", which makes them really solid (but they weight more than stock - I will compare as have both at hand, just need to find to do it).
Here is the set #2 with milled pockets. I was very happy with the result, however this bling bling is so much distracting, therefore I searched for OEM look finishes... But that's later :-)
PS. In the milling of pockets we used a rounded edge milling cutter so there are no sharp edges to accommodate dirt.
Looking much better! I also considered this idea- simple is better and I'm not concerned about dampening engine noise as the originals are said to be designed to do. Typically using a non hardening sealant such as hylomar will stop a leak at a though hole without causing issues with removal of the fastener. Light loctite should be good as well. Looking forward to seeing the finish and definitly interested if you are making more.
I think your work is top notch and well done. There was someone looking for someone to machine the housings a while back as he felt the housing itself warped but it really is not possible.
Just an FYI. Magnesium if properly cast should be adequate and as strong as comparable cast aluminum. Similar to carbon steel but nowhere as strong as billet aluminum. For me I have no issues with just replacing with new except the housings are stupidly expensive and the one side is currently discontinued. Superseded by the 993 version but still nearly $1k for each. Your timing might be right on for this. It takes years of poor maintenance to do the damages I usually see. The true issue why these leak is due to lack of maintenance and age. Most never consider that they exist until they drip and by then it is probably too late. Just like new cars there are mileage and age requirements and most don't adhere to either.
As we all know Porsche went from a machined fit to a rubber gasket for noise reduction they also went to the curved fan blade to reduce noise as well. Half the reason I enjoy these cars is the sound so it is unfortunate they went this direction.
The issue why these begin to leak usually starts with the rubber grommet shrinking. I have seen them shrink in height by as much as 0.100". This takes the pressure off the cover and rubber seal and starts the leak. Then the crud from not changing oil frequently enough finds its way to the gaps created by the shrinking grommets. Combined with condensation, an enemy of magnesium the crud builds and the motion of the engine grinds the surface and exposes the raw material resulting in the pitting you are seeing. I have yet to find a donor to send out for spectrochemical testing but believe that these were made from an obscure alloy known as AlMag35 or similar. It is actually an aluminum alloy with extremely high mag content. 35% magnesium vs the usual magnesium alloys which are mostly mag with 9% or so aluminum. It is actually a great material and takes a fair amount of time to degrade as we are seeing after all these years. Strong as anything but doesn't require heat treatment to obtain full hardness. It also can be anodized unlike most aluminum or magnesium cast alloys. If there is silicon in the alloy it will show up as white spots. I agree there is no need for the rubber seal since noise on our cars is no longer a factor but I suspect there will be some drivetrain noise introduced that wasn't there before. Some like myself might like that others maybe not so much. Magnesium also deadens the sound as aluminum will transmit more. When people tell me it warps I have to laugh. I cast tether cars in Almag35 and AZ92T6 magnesium which held the land speed record for a long time until electric came along at over 200MPH actual speed 800mph to scale so I am told, pulling upwards of 11g's and they never warped, crack or anything after countless runs.
New gromet left one is new right one I pulled from a 100k mile engine that never had the cover removed. Pretty common and will cause most leaks. A PITA to change especially the right side with A/C if you do this once I recommend modifying the A/C carrier to make it easier to remove the bracket and leave the pulley in place.
Grind away the material so the bracket clears for future issues if any.
The valve covers suffer from a similar condition however the covers were initially a magnesium alloy. In 1992 Porsche switched from mag to aluminum alloy valve covers. Same tooling as the magnesium. They just changed the alloy. Both Magnesium and aluminum have the same shrinkage factor when cast. I have seen warped covers but always appears to be the result of improperly torquing down the cover. It is a small amount of torque around 7ft pounds IIRC and most believe that torquing them down flush or well beyond the tq spec is correct and don't use a torque wrench or stagger when bolting down. If they leak they think cranking down on them is going to help but it makes it worse. There should be some gasket showing if not they have been over torqued and this is a problem in itself. The bigger issues with both the covers and fans is the lack of proper chemical conversion to the magnesium prior to painting. A Dow 7 process at minimum should be applied prior to paint and they skipped that step. So most covers I dispose of are due to degradation of the material due to exposure and lack of proper maintenance. If we all did our valve lash adjustment at proper intervals more than likely many would be saved from this. However many shops I see don't spend the time to properly clean and if needed paint the covers prior to installing and most don't follow proper torque procedures.
I have no doubt there will be a market for these if not just for looks alone. Nice work and GL with the project. If you can keep the price down I don't see why it shouldn't sell.

 01-12-2023, 06:12 PM