When you click on links to various merchants on this site and make a purchase, this can result in this site earning a commission. Affiliate programs and affiliations include, but are not limited to, the eBay Partner Network.
Thanks -nick. So, I have validated that all three switches work. (Both doors, and the front hood latch). I have verified by testing each one - and all of the lights go off when actuated.
What is bizarre, is when the luggage light (front passenger fender two-pin plug) is plugged in - not only does it stay on, all interior lights stay on. This makes you think the luggage latch isn't working, but I have determined it is, because when the luggage light is unplugged, the interior lights stay on until I close the hood, then they go off (indicating the switch works).
The question is....why...when the luggage light is plugged in, will it not shut off when the trunk/doors are closed. Unplugged, everything operates as it should.
Mine performed identically - these are all connected in the alarm system, thus why I thought it was the culprit. But, when I found, and corrected, the heater hose internal wire touching the starter cable post, all was fixed.
You can try going through the fuse box 1 by 1, pulling a fuse and checking for milli-amps current flow with an multimeter. Others have found battery drain root causes in doing this. In my case, there were none in the fuse box with current draw.
Be persistent.
@DWS964 Thanks man! Sorry to ask, but would you be willing to walk a blind man (me, but not literally lol) through where exactly this heaterhose/starter is? what side/access? I'd like to just verify mine isn't intermittent or something... Thanks brother!!
I've been meaning to update this thread with a few fixes. My front rubber "smile" was cut, so I purchased a new one from Porsche.
Part number 964-505-143-02-01C and if you have a turbo, you'll need the wider one. This part number is only for narrow bodies. That being said.
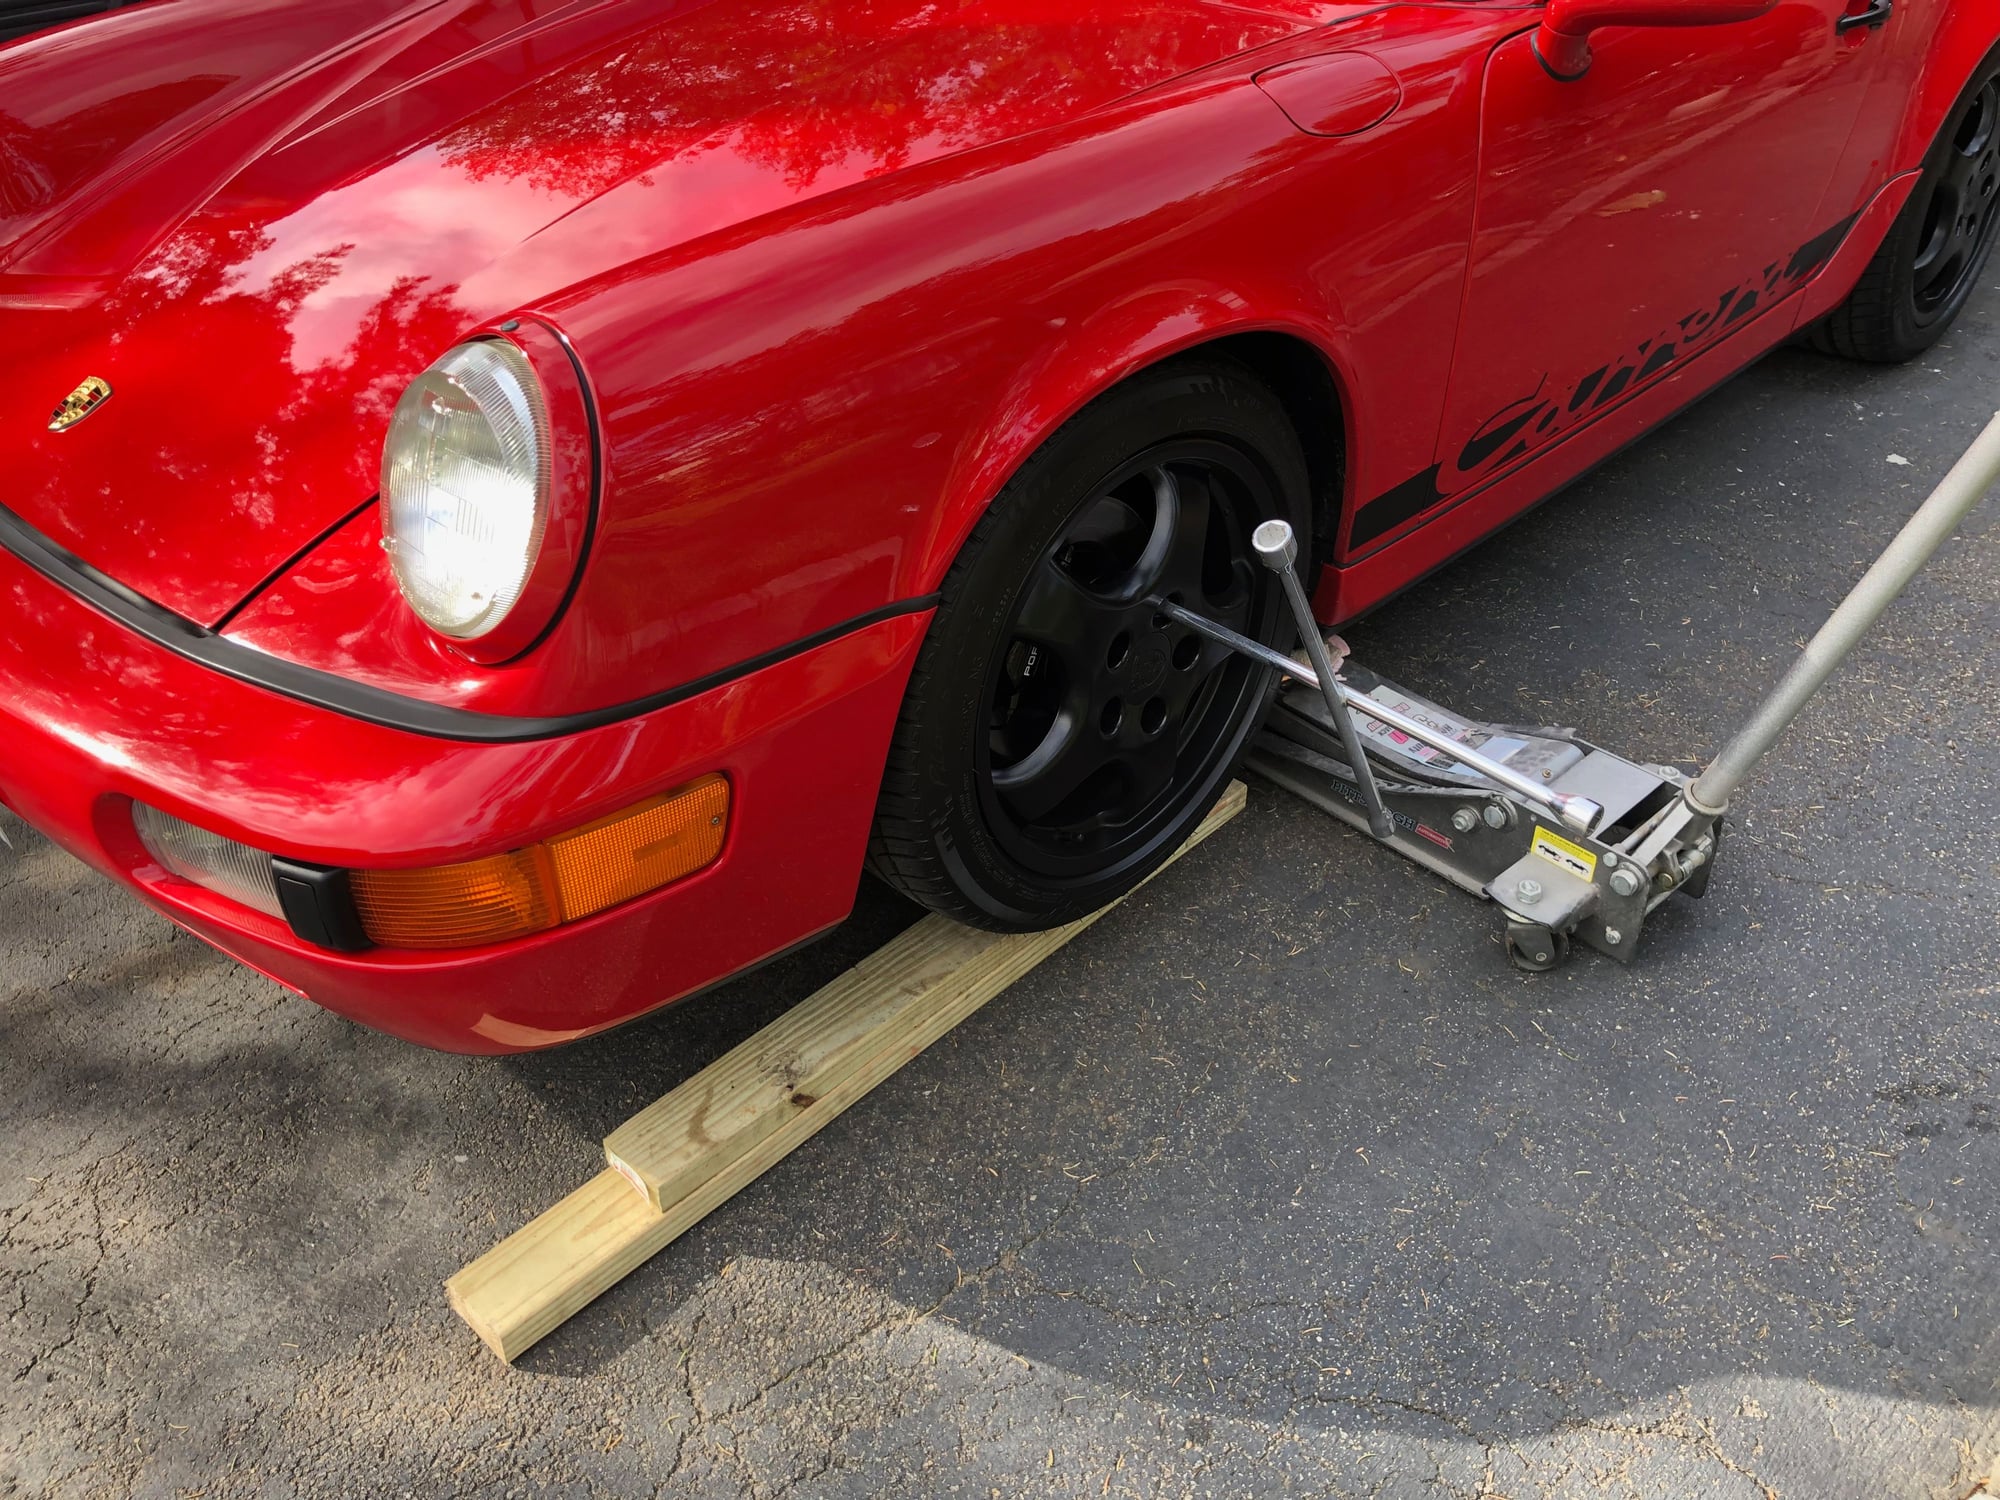
1. Elevate your front end so you can work under/around it. In this case I pulled onto some 2x4's but 2x6's would be preferred. Loosen your lugnuts and jack up the car:
2. Support your car, using OTHF jack stands. (other than harbor freight). Here, you can also see that giant groove cut into my rubber smile - apparently to compensate for sausage fingers in opening the (or a poorly adjusted) hood.
3. Remove the FOUR (two halves in the front and to forward wheel well covers. Pretty self explanatory - keep each screw organized so you know where they go back into exactly. Also a good opportunity to clean things up.
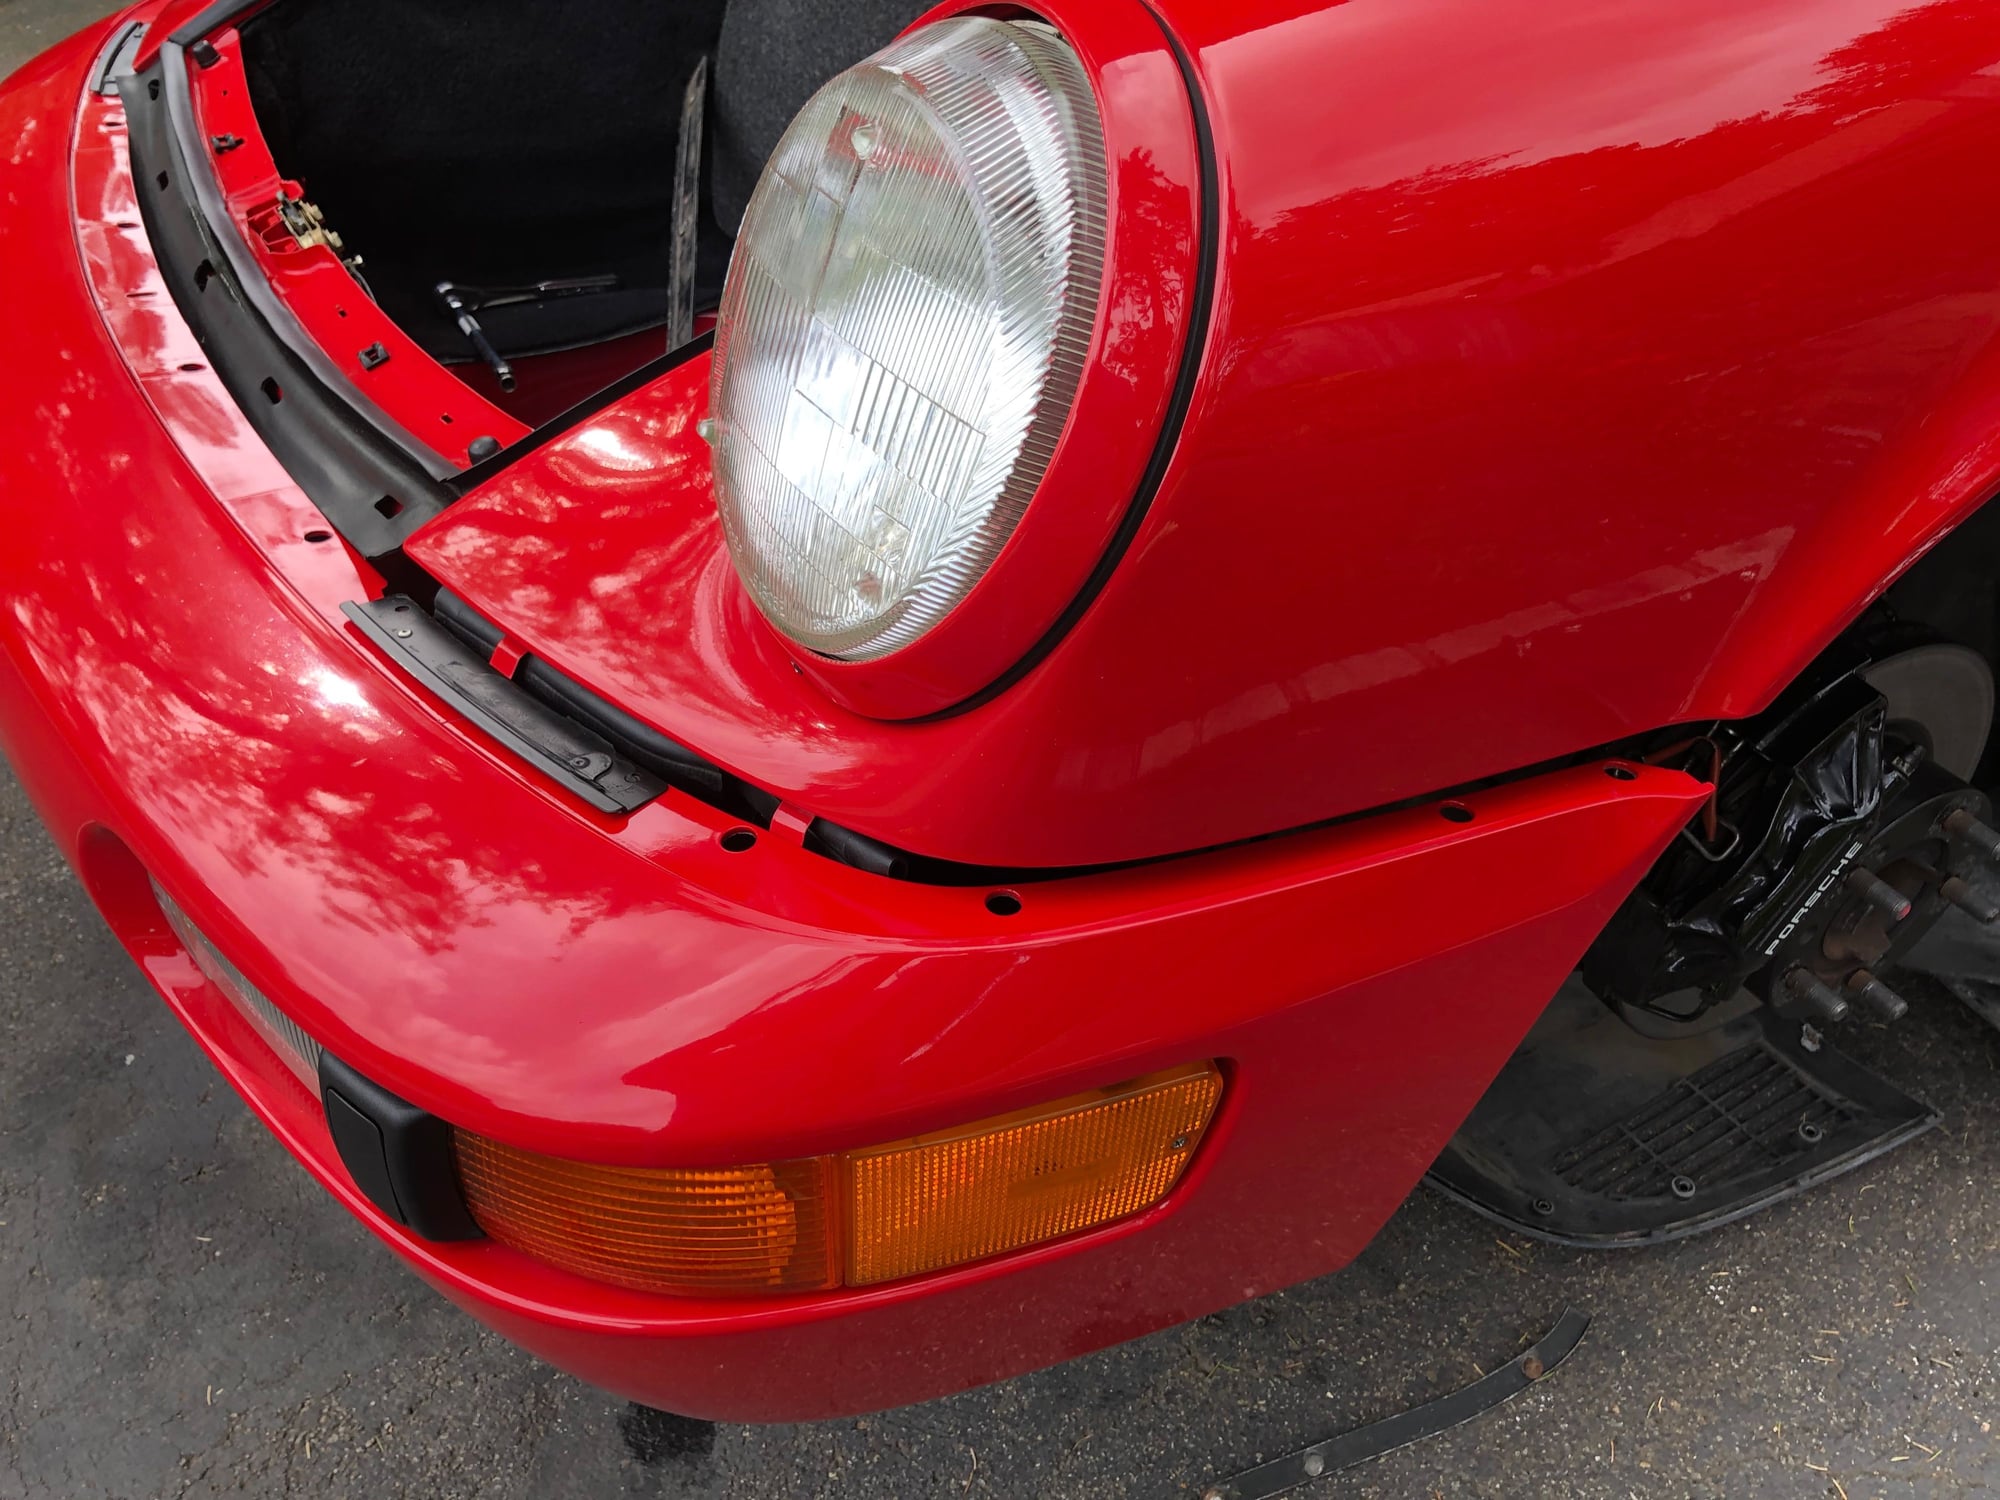
4. Now, the front bumper (don't forget the four 10mm nuts inside the luggage compartment) will lift and slide forward. There is no need to disconnect any electrical or other bits - keep it all together.
5. After which, the old gasket can easily be removed. Note the two metal lips just under each headlight that lock the gasket into place around the corners:
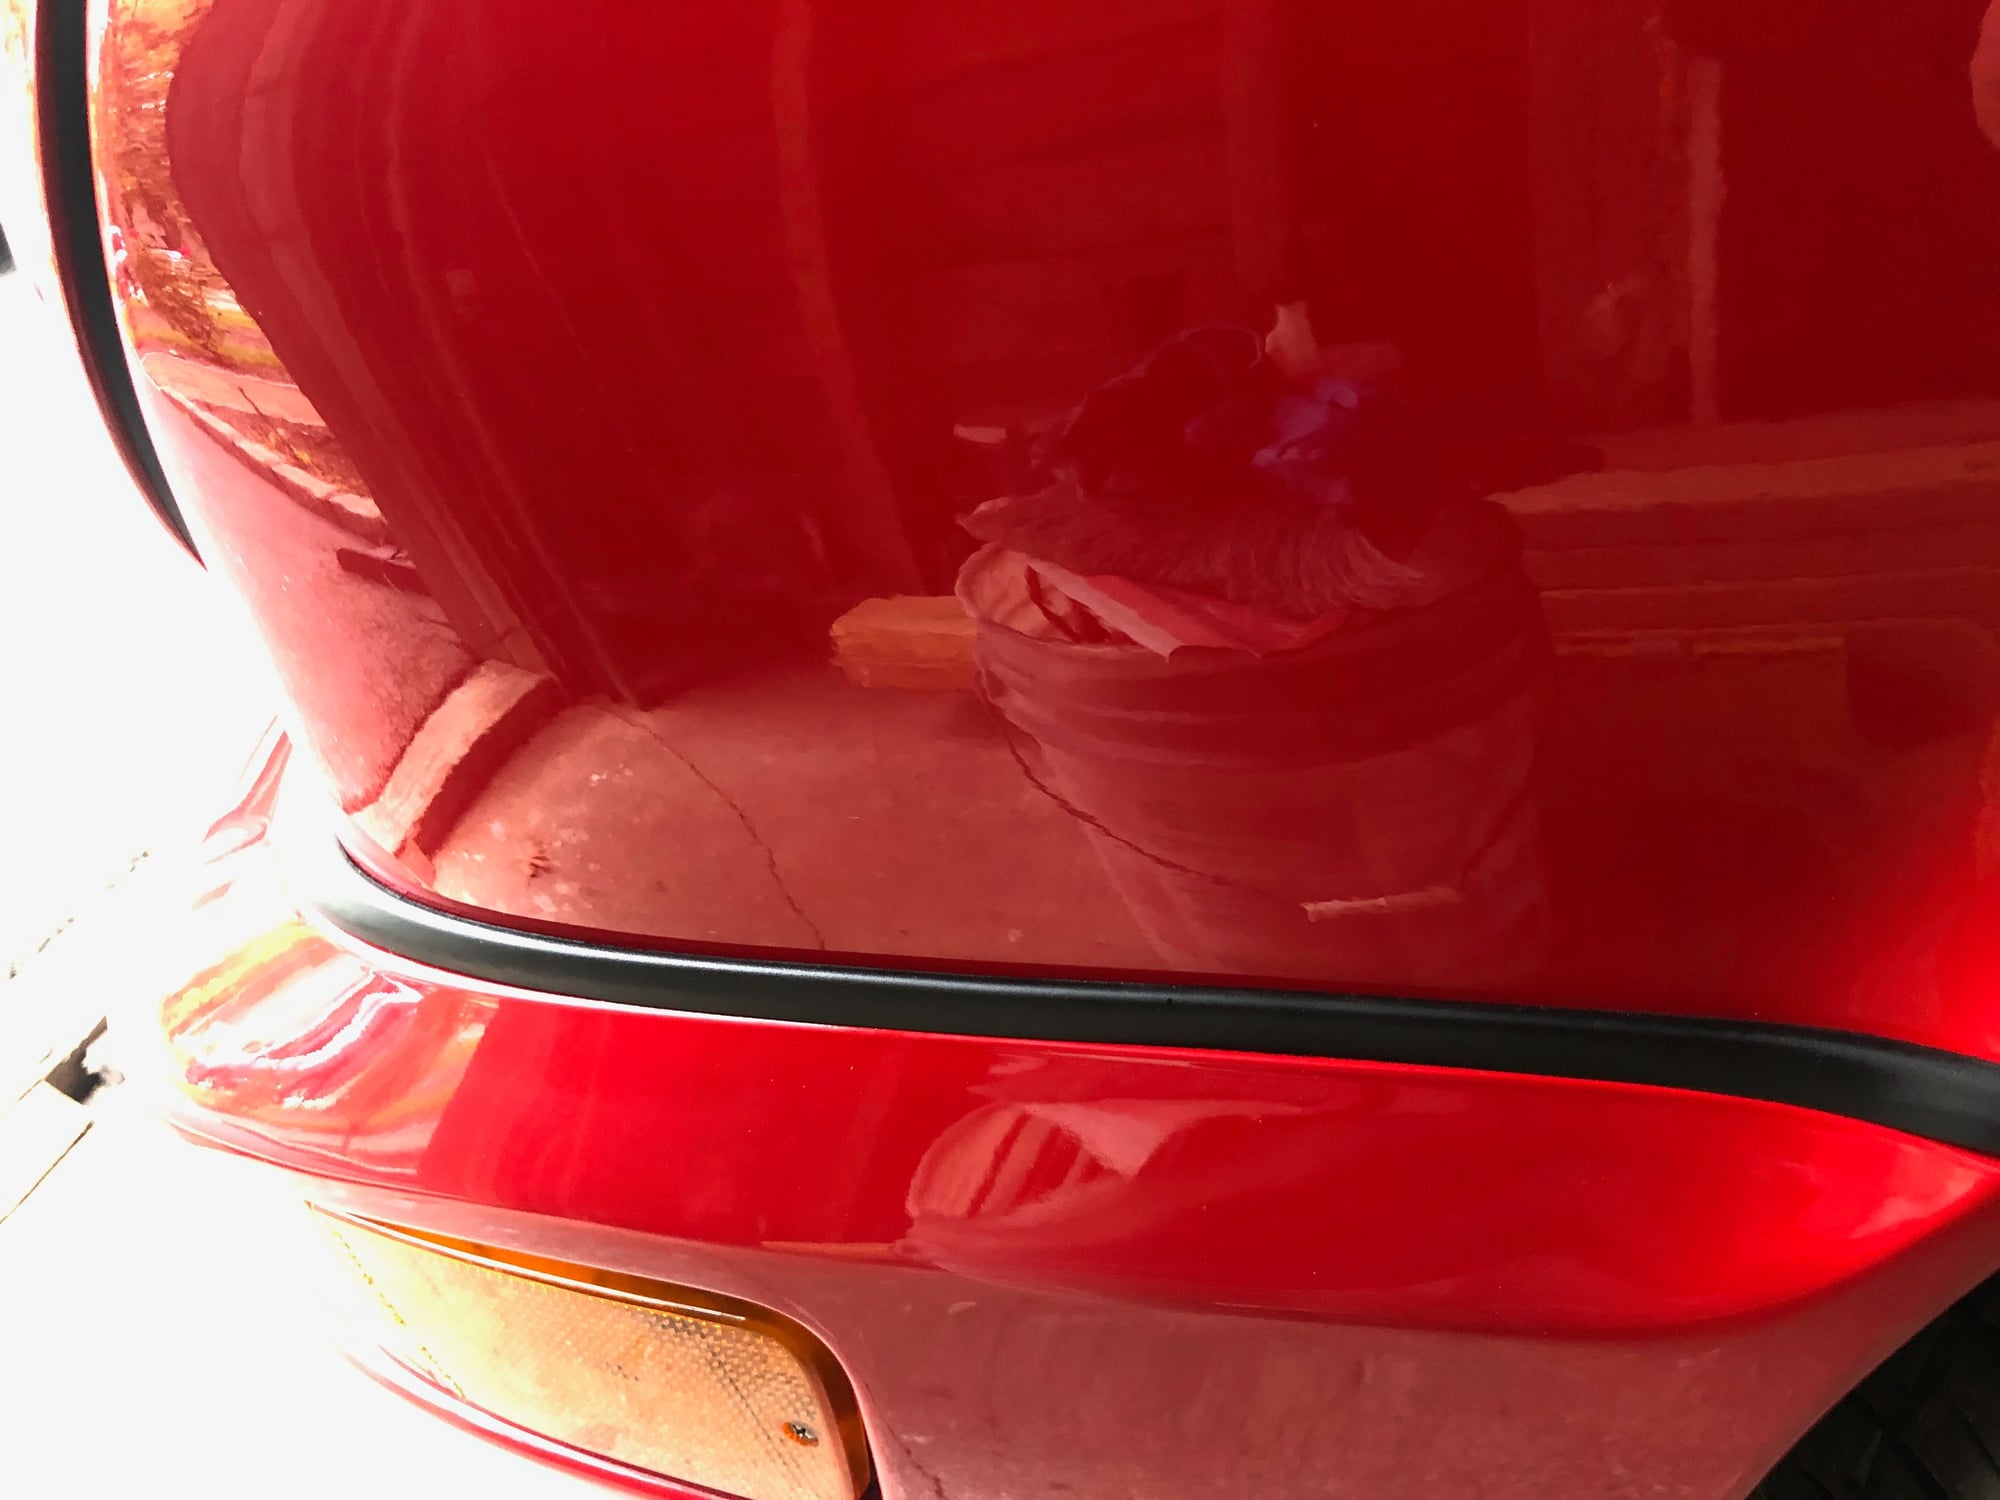
6. With everything pulled apart I noticed how much buildup of dirt, wax, buffing compound and whatever else over the years had gathered up there. So, I used some simple green to soak the entire area for 10-15 minutes.
6. After is soaked and I cleaned up (very carefully) I used a VERY light cutting buffing compound to polish the area:
7. I then cleaned the area again, and claybar/waxed the area afterwards:
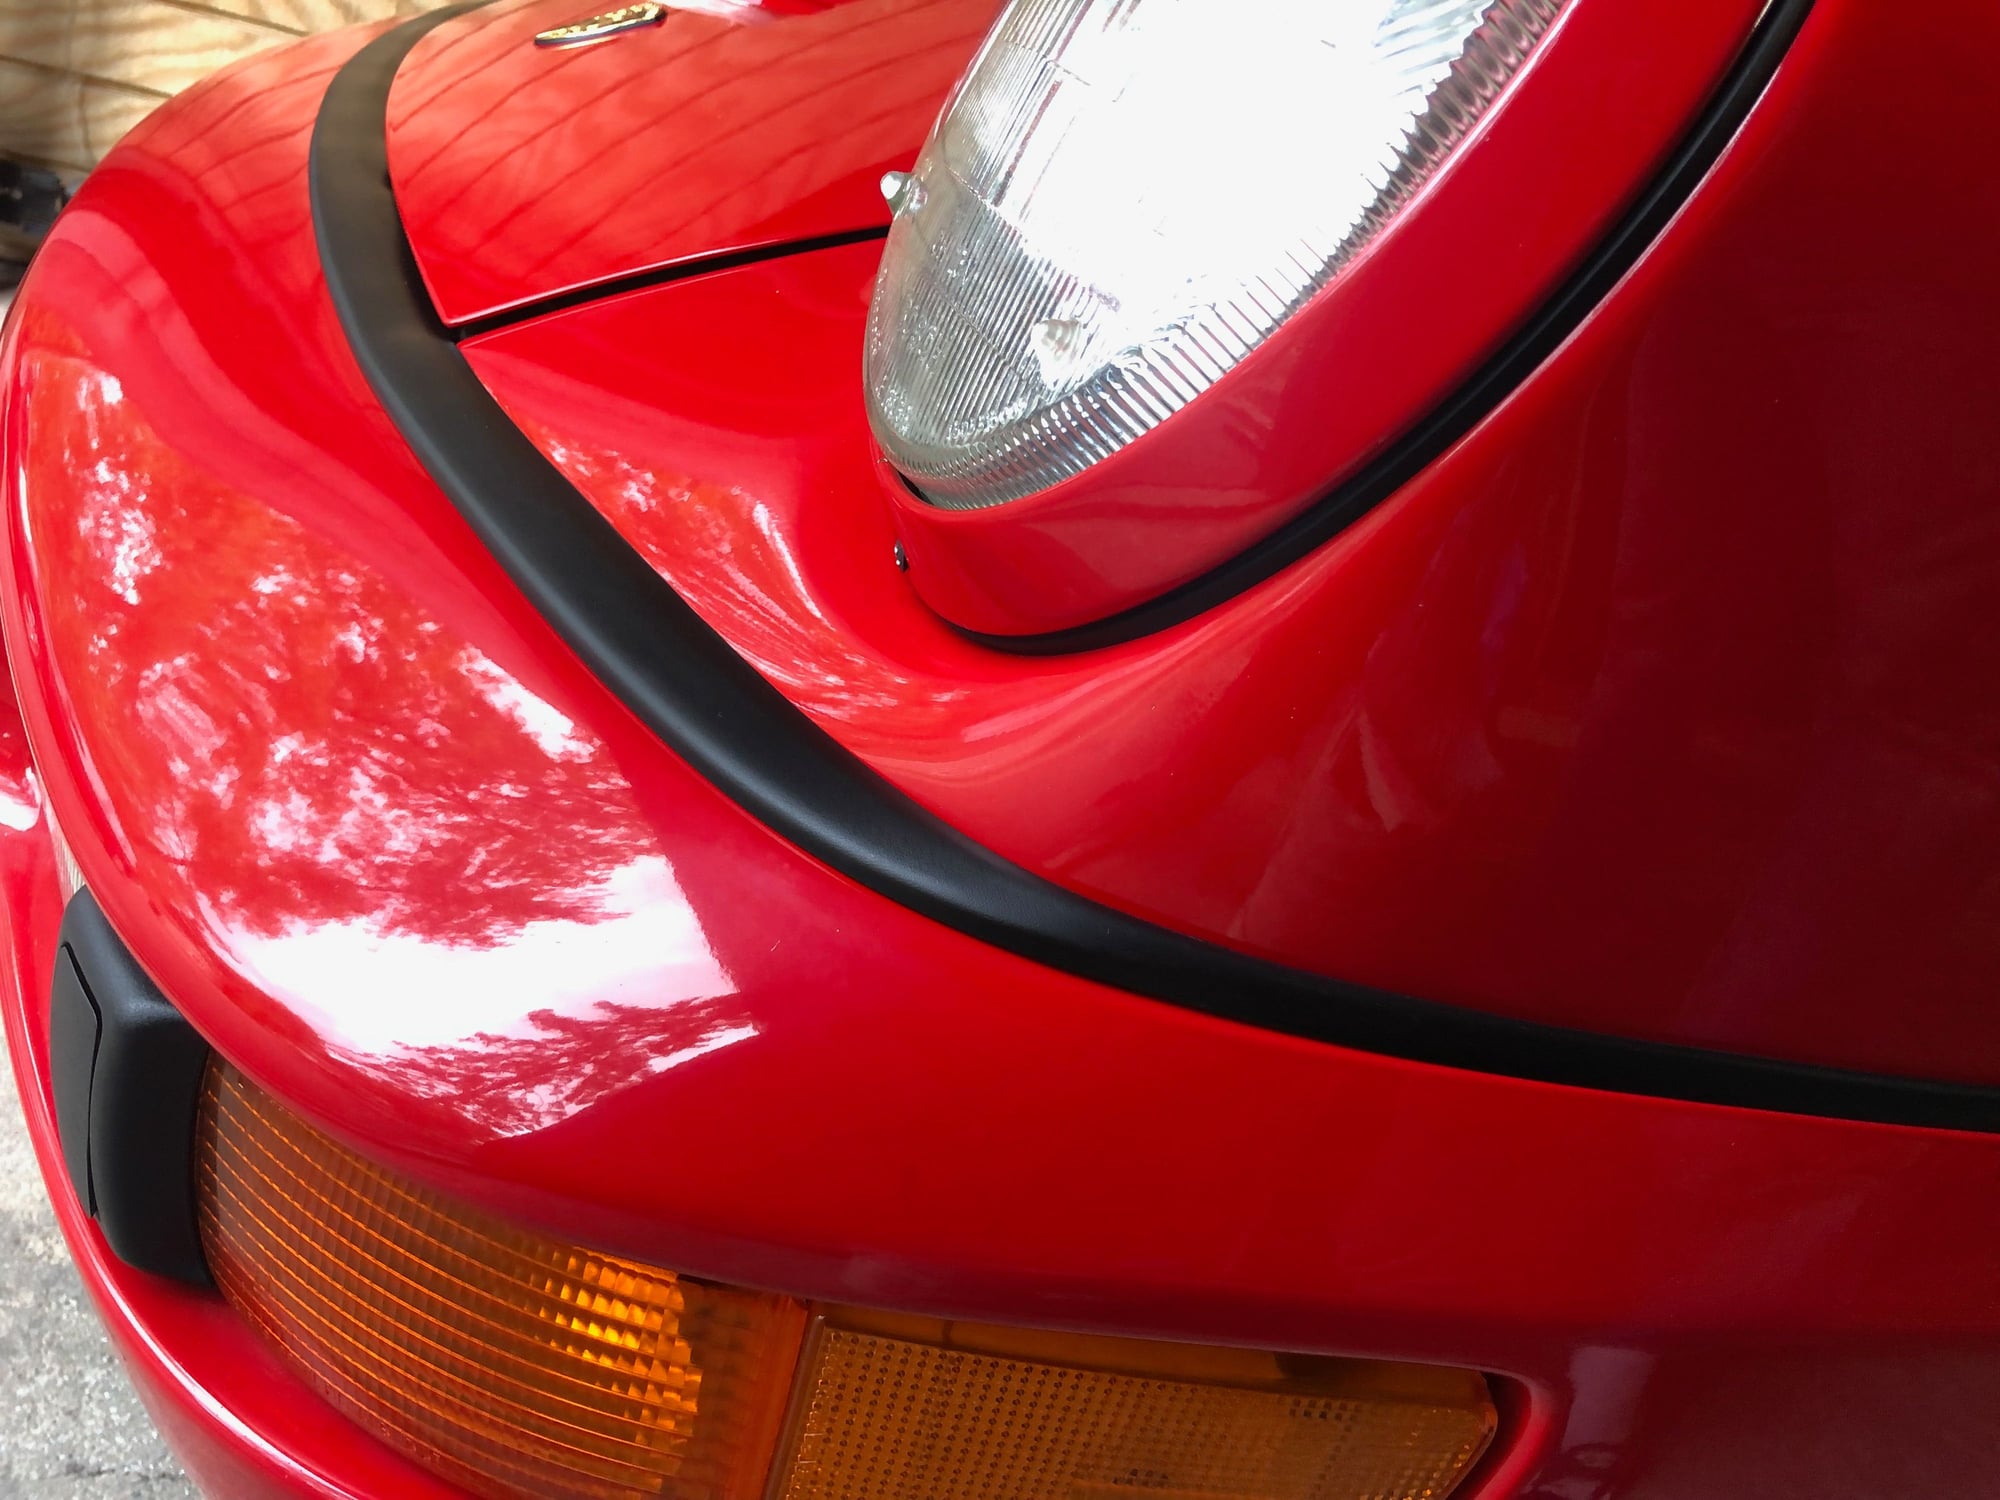
8. After drying the area thoroughly, it was ready for the new rubber smile.
9. Before installing, I cleaned and lubricated the new smile with armor all so that it was all protected as it could be. The only real "trick" here, is to ensure that the smile gets fed into each of the riveted clips around the corners. However it was relatively easy.
10. Button it all back up, replace all of the underfairings and wheels/lower the car. Pretty easy fix.
With the new gasket in there, I have since adjusted the hood to be level/smooth so it rested nicely (no ripples).
Since purchasing this car a few months back, something that has been bothering me a bit is the ride height in the rear. It sits really low. So much so that even when pulling out of my flat driveway I noticed a very light snag of the exhaust. NOT good. While there was zero rubbing or any other issues, the scraping and the "tuner look" of the car have been a bit of a turn off since acquiring the car.
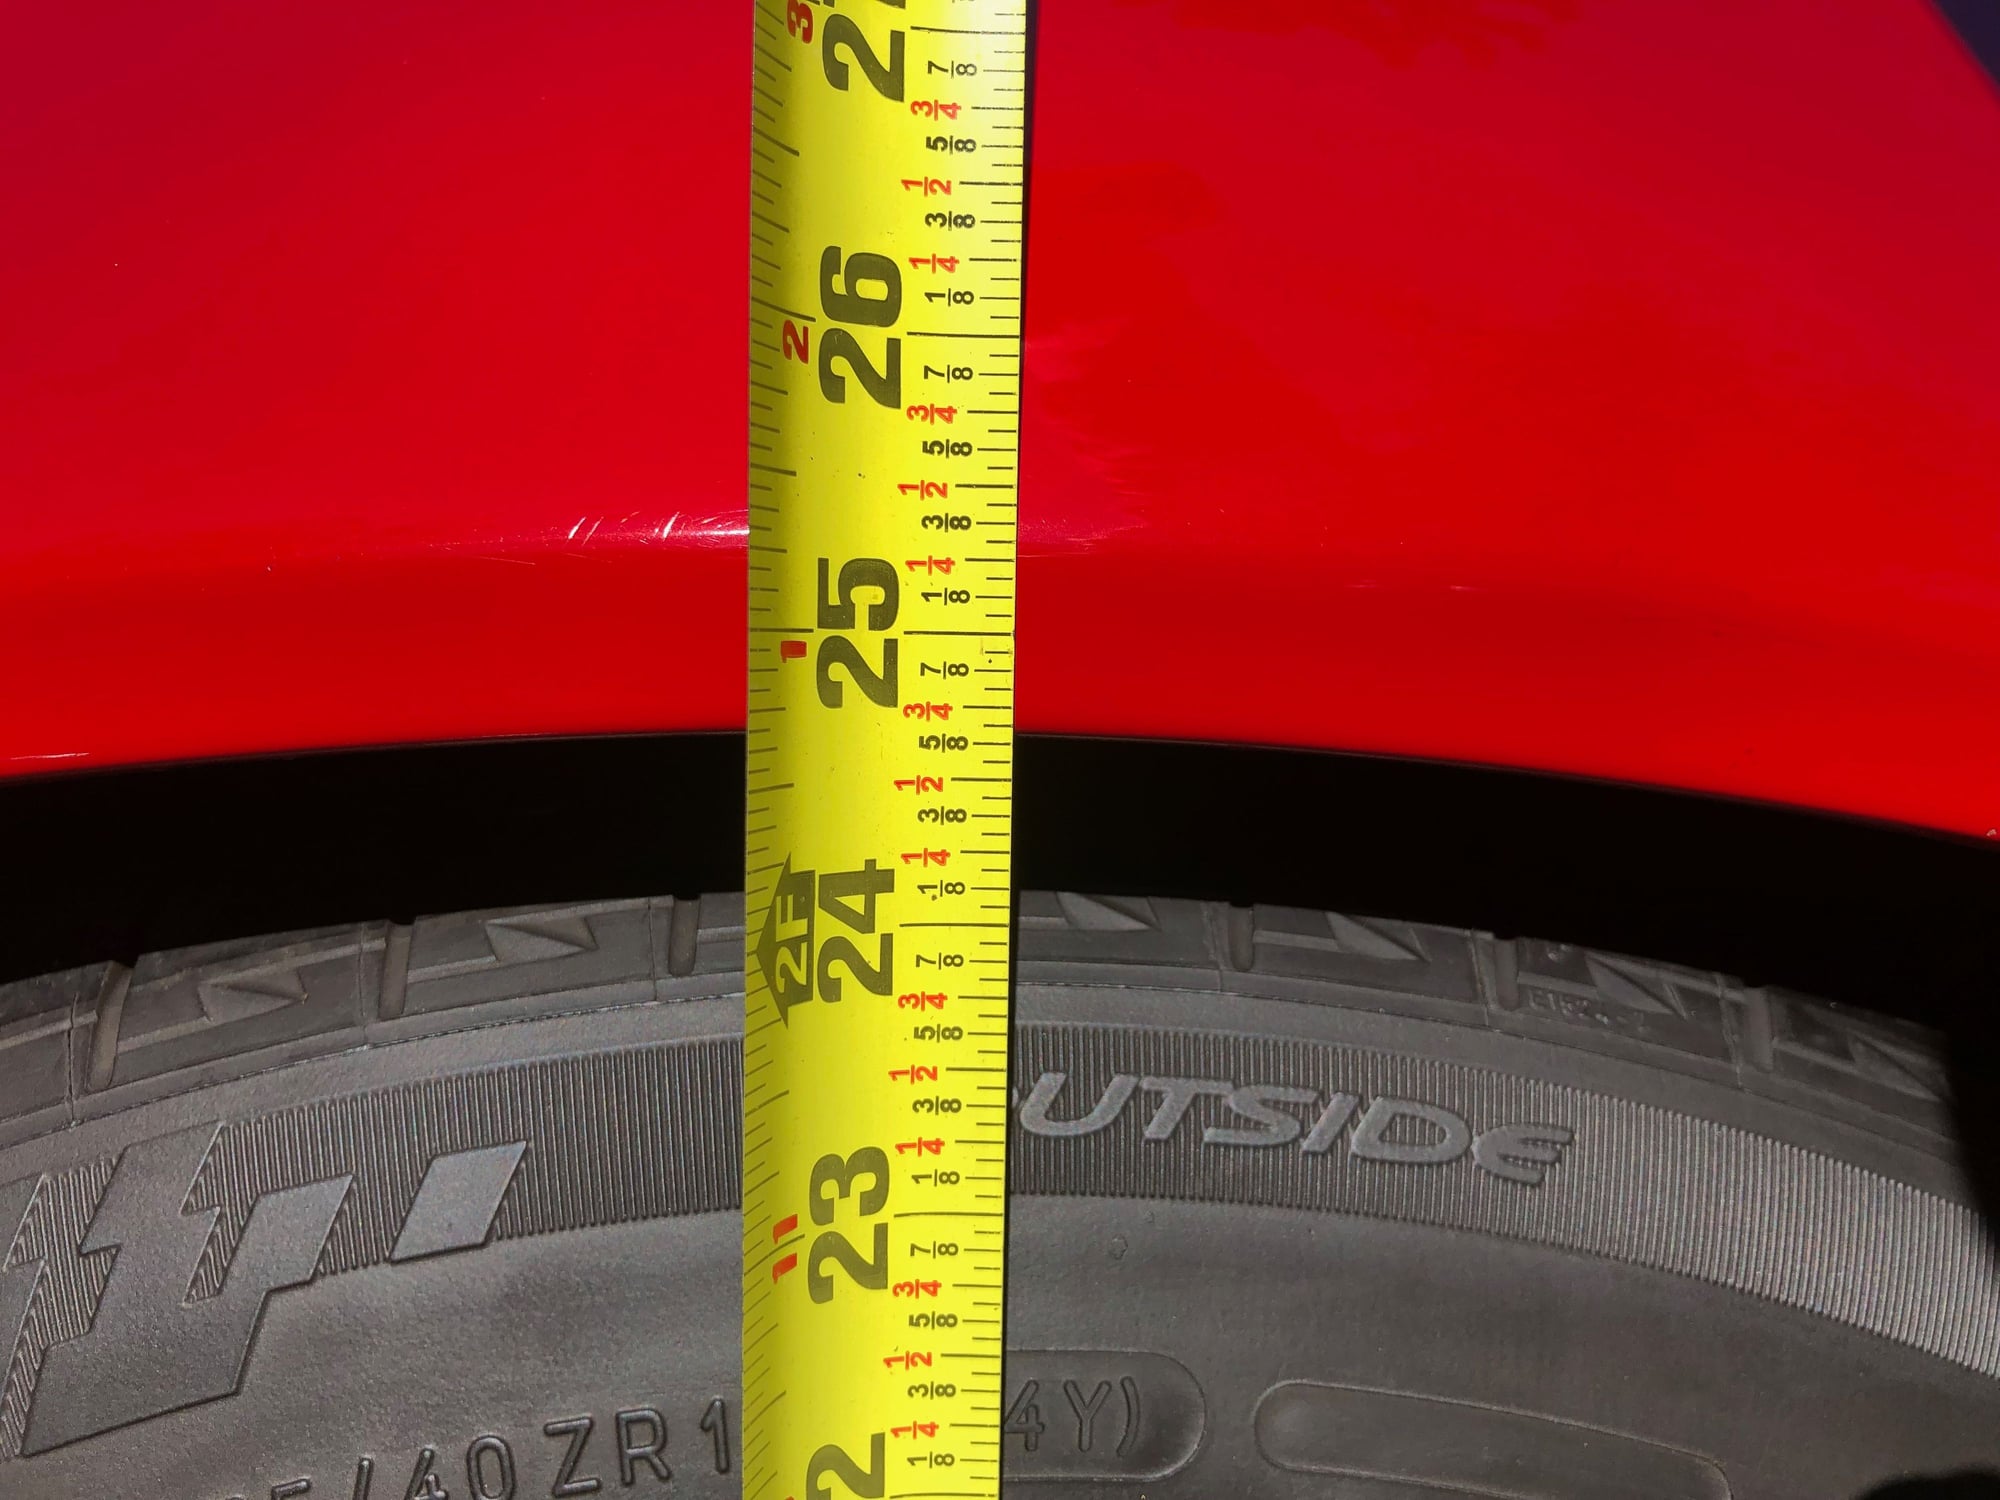
Here is a picture of the car as I started the project this weekend:
24.25" exactly from ground to top of wheel well, with tape measure going directly through the center cap:
Do the usual.....loosen the lugs, jack up the car, support the car and remove the wheel.
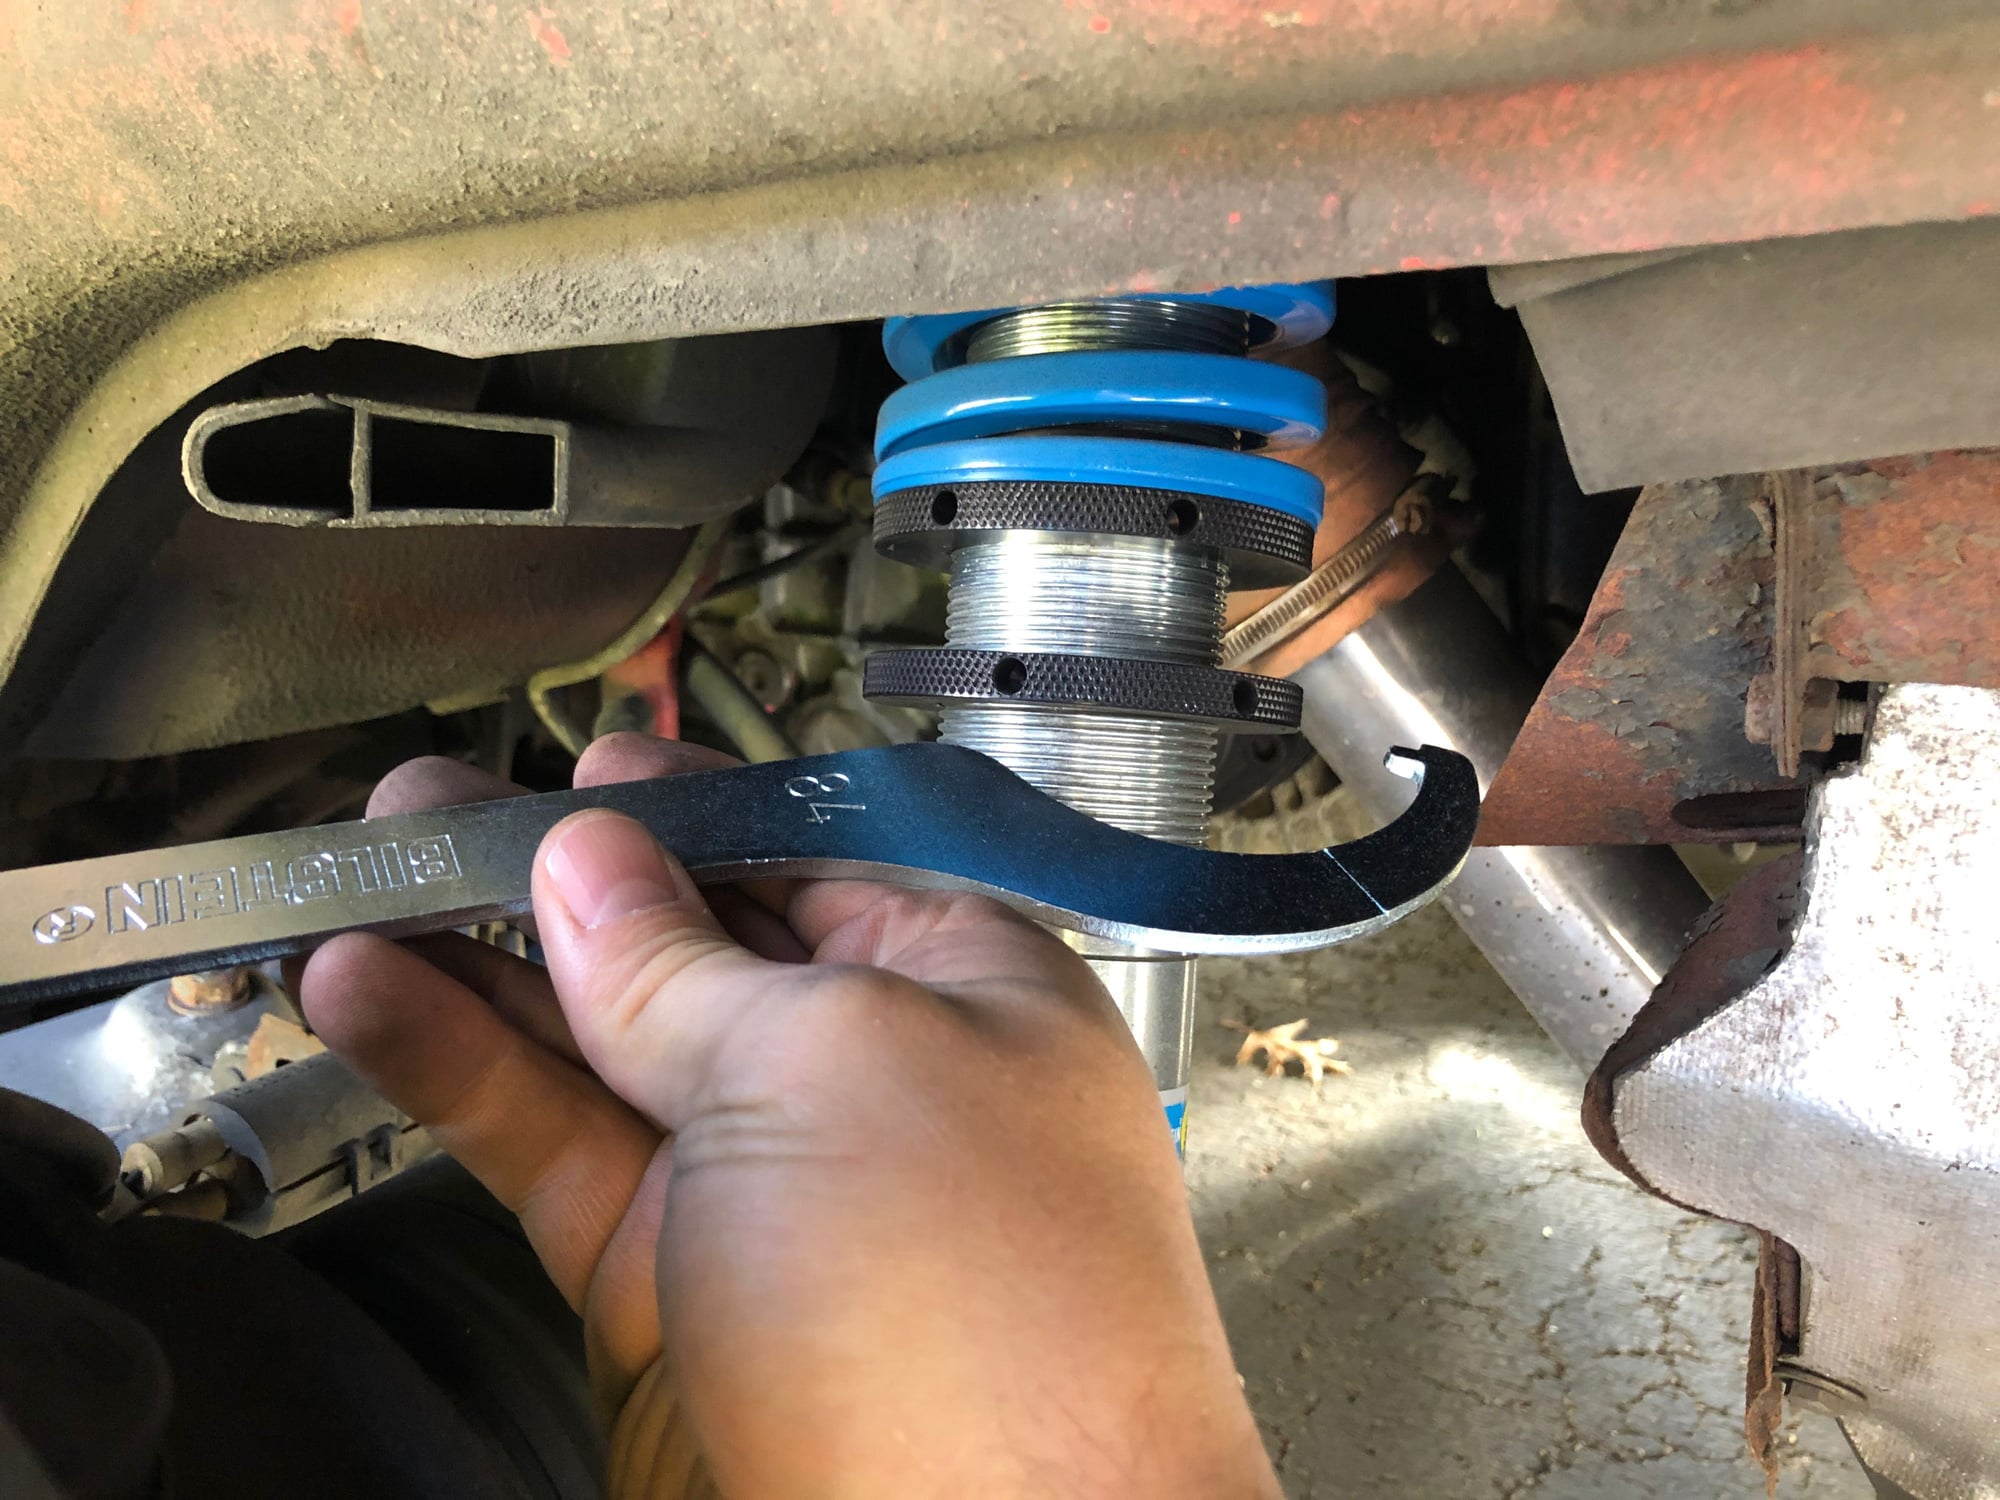
This car is equipped with Bilstein PSS10 adjustable suspension which has two threaded rings. The lower ring simply locks the upper ring that the coil sits on.
If you don't have, you'll need (for the PSS10's) the special "pin style" wrenches from Bilstein. The slot type that are so highly available will not work.
Start by unlocking the lower threaded ring and spinning it down out of your way:
After several up and downs...it is a 1:1 lift/drop. You raise the collars up by 10mm, it will raise the care 10mm. This goes for all four corners.
Snug everything up and reassemble.
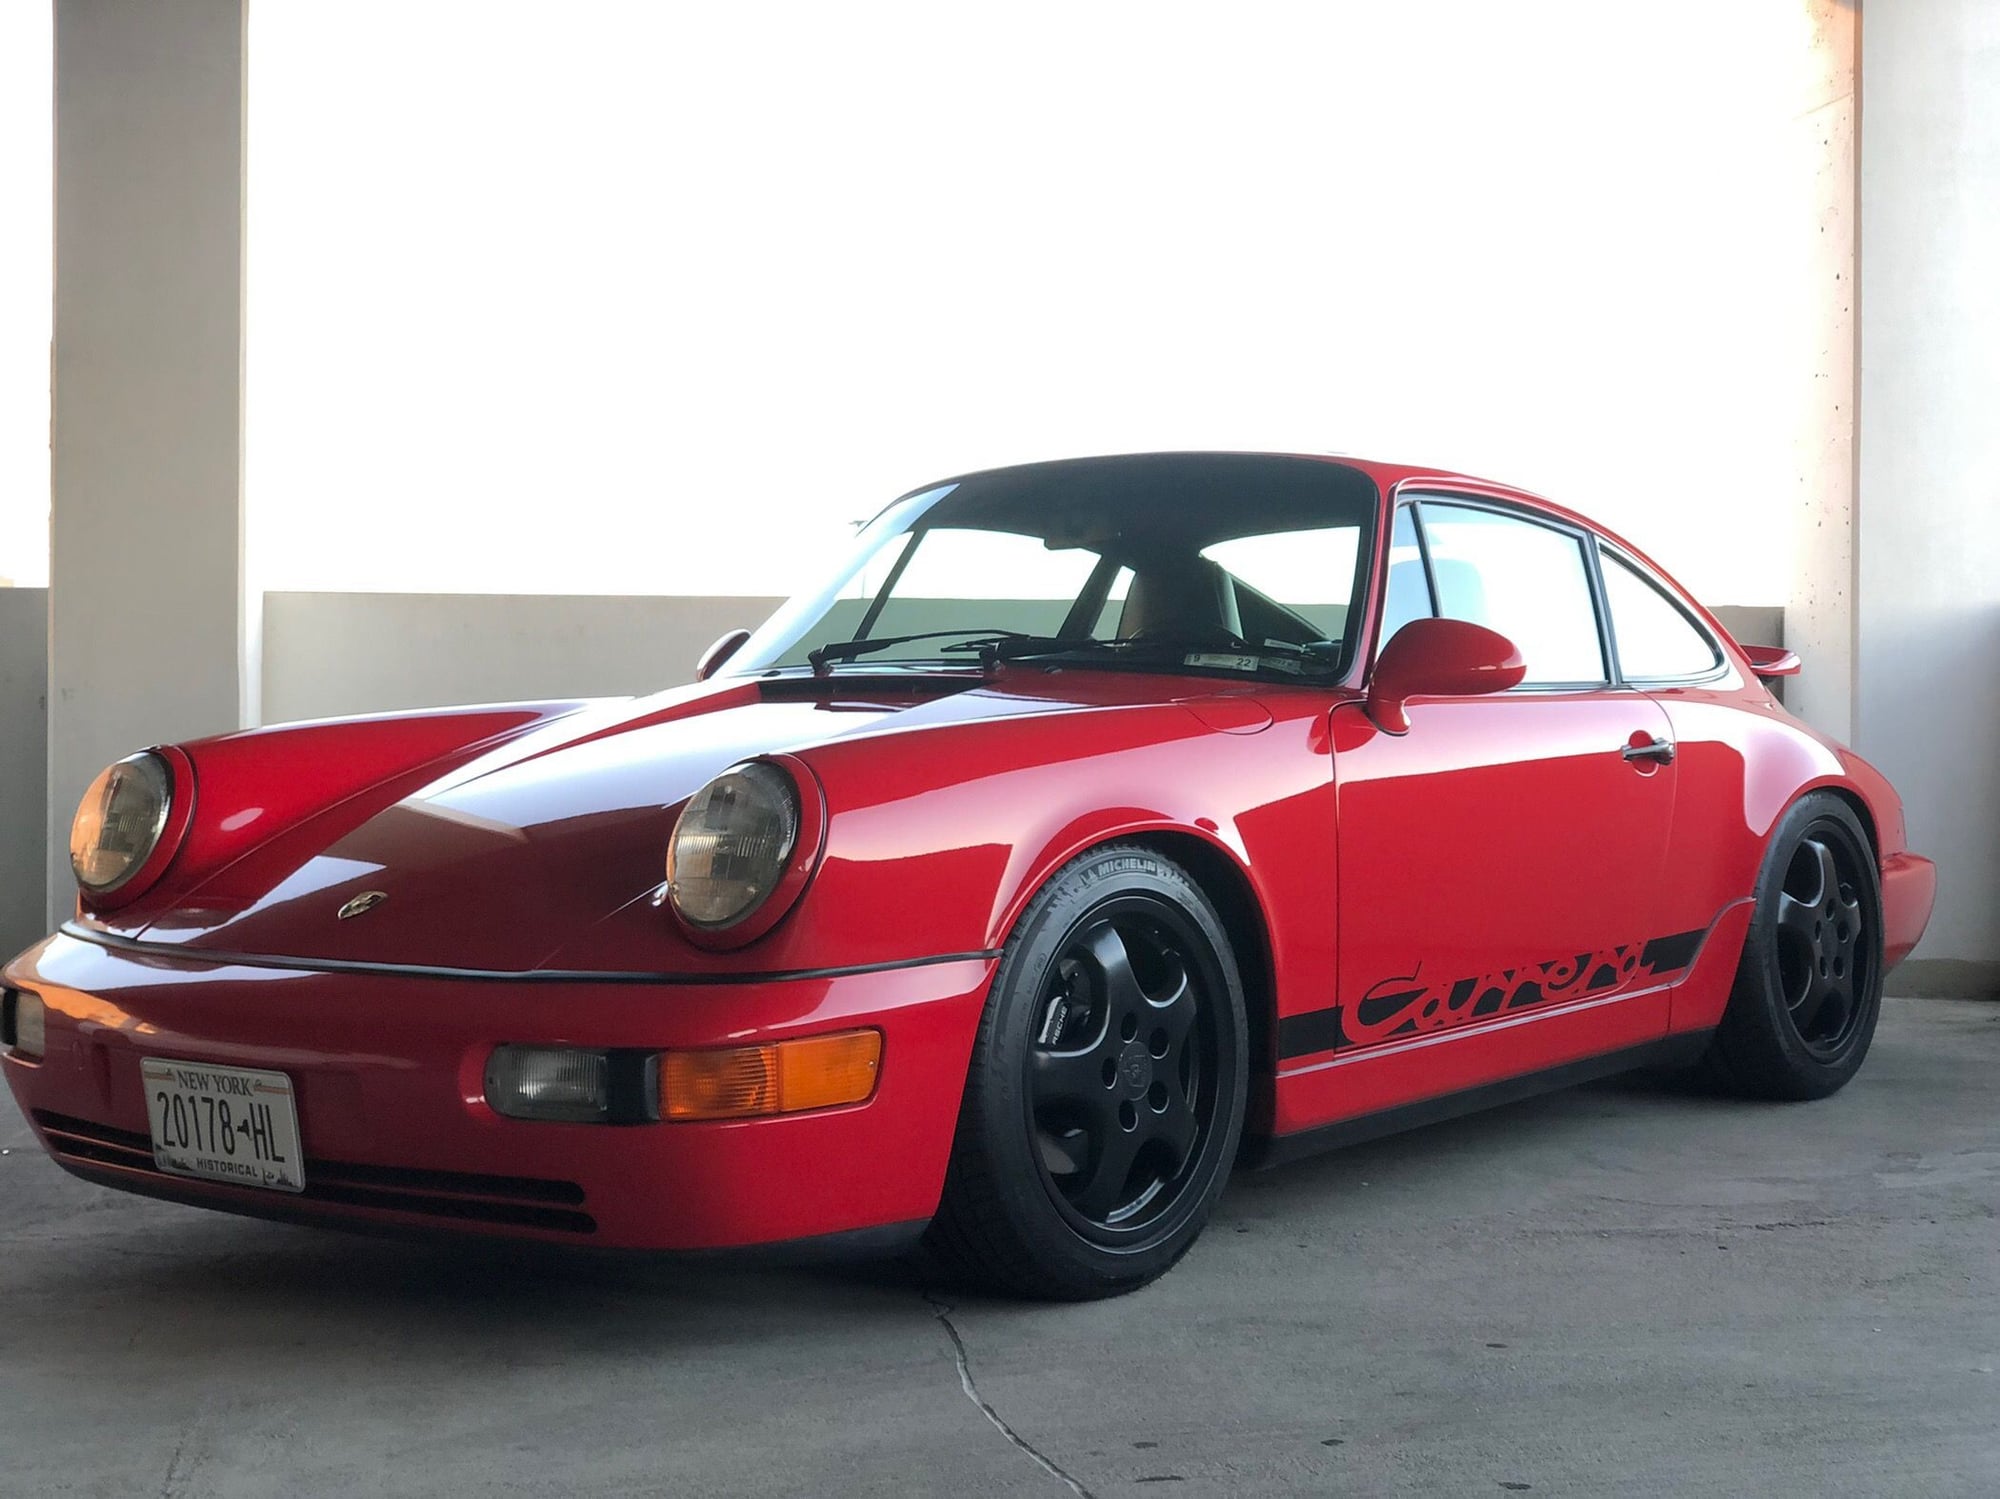
Here is a reminder photo of how low the car was....granted I only raised it 10mm, but still a noticeable difference and I didn't scrape leaving the driveway.
....and after adjustment (raising 10mm):
I think this is a much more "RS" level stance....it looks cleaner and more level. I dig it.
Naturally, I had to take it out on the town (date night) and snag a photo or two. What do you think about the suspension and stance?
Both stance settings look great. However, for me I preferred it the 10mm lower. I did notice in one of the pics the tail pipe isn't flush with your rear bumper? I could just have bad eyesight (which I do). If so, I would adjust so that it's flush with the rear bumper.
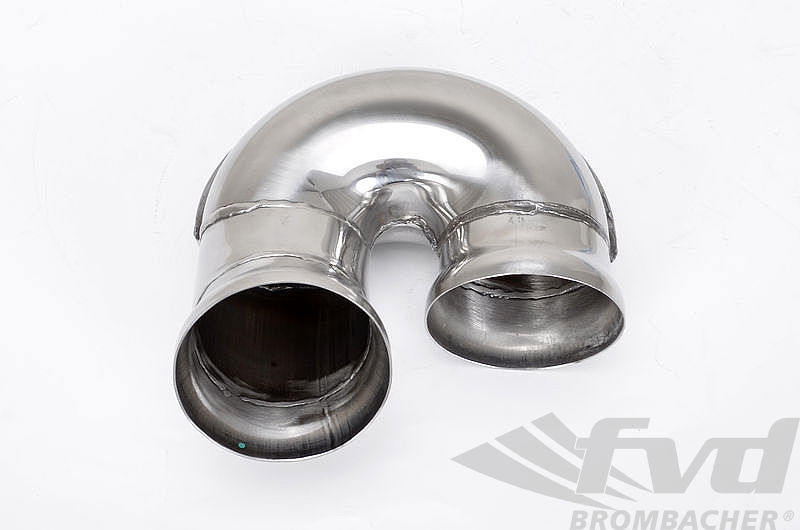
Great question @964Luftballoon I am not sure. As mentioned, the car is new to me and I have been sorting it all out. If the exhaust pipe is a "loosen - pivot - tighten" design (Fabspeed) then yes, I am hungry to straighten it and I'll have to investigate. Otherwise, I may have to heat and bend? I'm not sure.
You may just have to loosen and adjust the length. Nothing as drastic as heating and bending. I'm relatively new to the 964 as well (03/2018) and experienced this issue. I have a secondary muffler delete (sometimes called a "G" pipe) which was installed by the previous owner incorrectly causing my exhaust tip to stick out a bit. So that caught my eye.
Whenever you take a look at how the tip is installed and you see this type of tube installed. That's a "g" pipe. Just flip it around and it will make it flush with the fender.
Very cool - thanks for the insight. I'll dive under there and take a look. I've been wrenching for years and have rebuilt all manner of things, but this 964 is new to me, and I have owned only one other Porsche, a 1968! A few more vacuum lines and wires on this beast :-)
All a matter of personal taste of course, but I would actually go a little higher at the rear (not a lot, just a little). I like to see a touch of front to rear rake as opposed to the pancaked look.
I examined the Fabspeed exhaust elbow and tip. I centered as best as I could. For now I think this is as good as it�s going to get. Again, being new to these cars and in particular the fabspeed pieces, I�m not sure what �right� looks like. I did my best to center and snug it down.

 09-23-2021, 11:04 AM