When you click on links to various merchants on this site and make a purchase, this can result in this site earning a commission. Affiliate programs and affiliations include, but are not limited to, the eBay Partner Network.
My car is lowered, and I like how it looks, but the constant scraping was making my skin crawl. So I bought this HLS 2 hydaulic noselift system from KW (part number 19299299).
It's a universal kit and seems pretty well designed. The kit consists of the pump/controller unit, the hydraulic cylinders for the front dampers, and all the required plumbing and wiring.
I was impressed by how lightweight the kit is. I didn't bother to weigh it, but I bet all the installed hardware and it's fluid amount to a little over 10 pounds. In other words, the noselift kit weighs about the same as the spare tire I removed to mount it.
Perhaps the biggest downside is the cost. The kit was 2800 plus a 225 freight charge. It also had to be special ordered and took a month to arrive.
The only specialty tool I'd recommend is a metal chop saw for cutting the hydraulic line cleanly and a 4AN flaring tool for properly installing the hydraulic line on the fittings
I found a good spot for the noselift button where my foglight switch used to be (I'd previously traded my foglights for air ducts). I had to dremel the hole in the dashboard a little larger, but it ended up looking pretty clean. There's an option for a remote as well.
The noselift works pretty fast taking about 4-5 seconds to fully lift (it's fast enough that I'm unable to press the button then get out quick enough to film the whole lifting sequence). Once you press the button it flashes red while lifting, then stays illuminated red while lifted. It seems to lift the nose about an inch or so and makes a noticeable difference in what I can get over without scraping (assuming I remember to press the button). Here are pictures of the approximate raised and lowered heights referenced to the scrape bar (FVD?) I'd installed previously: Fully-down height
Fully-raised height
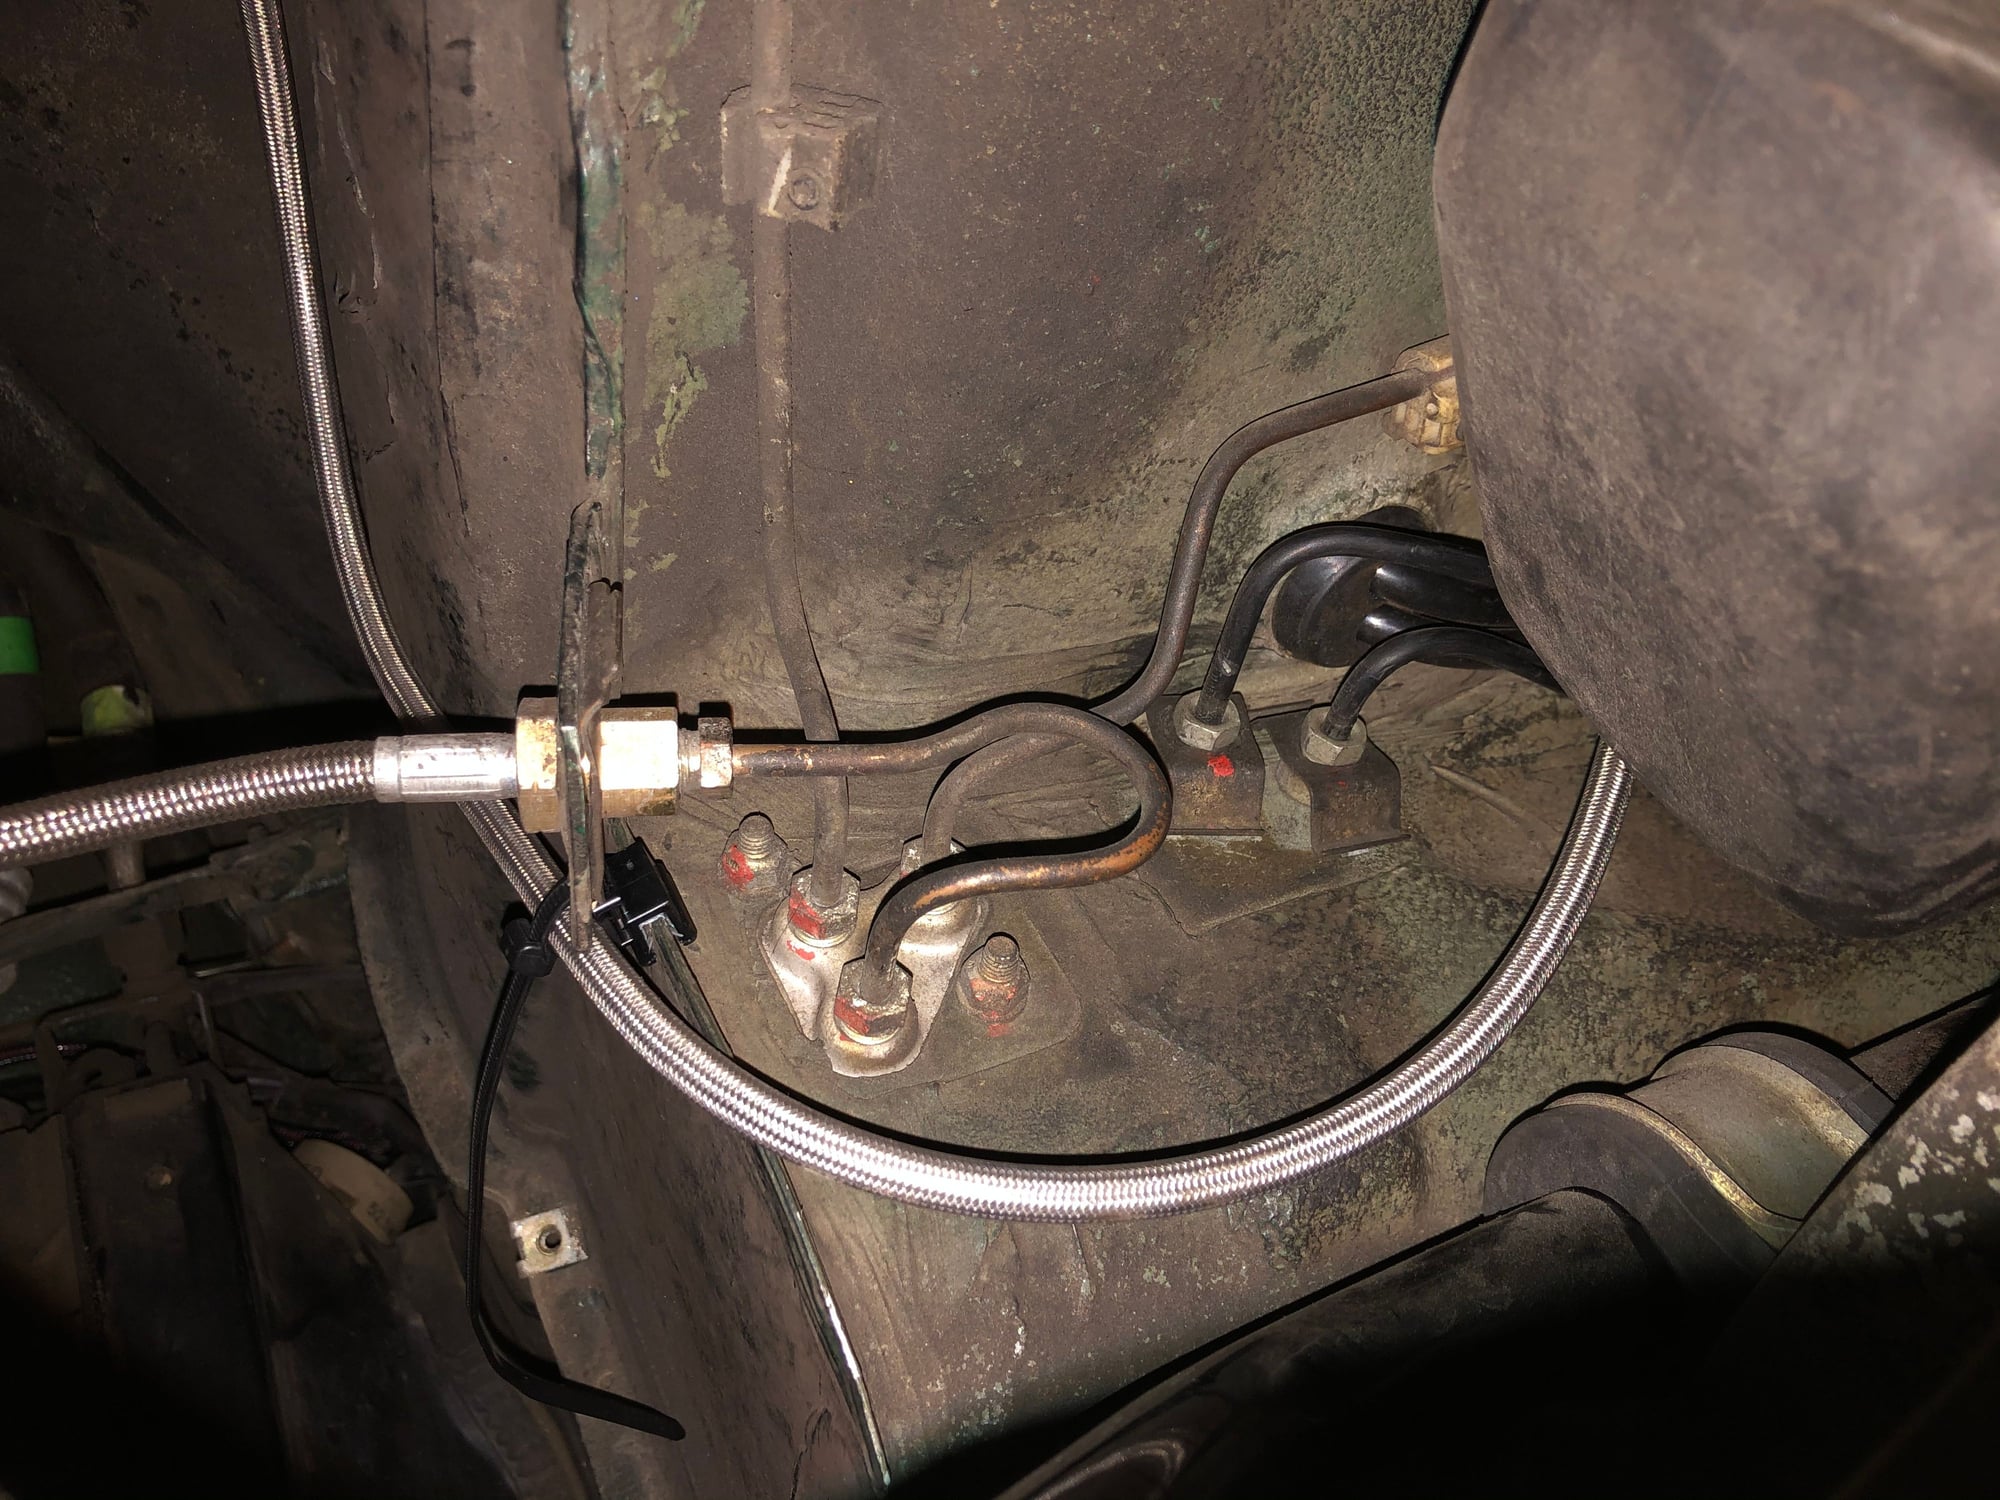
Plumbing
I found an existing grommet to snake the hydraulic line through to the chassis wall near the front sway bar, this position giving good access to the lifting cylinders on both coilovers. Plenty of 4AN hydraulic line is supplied. I mocked up all the lines, then cut them to length and installed the fittings on the ends. As far as mounting the hydraulic lines, the kit includes a bunch of clip-on brackets with zip-ties. To be honest, I'm not entirely confident in my routing and mounting of the lines. I tried to keep a large service loop in the lines to allow for damper motion. I'll keep an eye them to make sure the mounts don't fail or the lines get scuffed by the tires.
Location where hydraulic supply line was snaked through firewall at existing grommet on passenger side of frunk
Backside of frunk firewall, looking forward, driver's side. Notice mount with zip-tie. There's also a small manifold I bolted to this wall that splits the lines off to each side (I forgot to get a picture of it, sorry)
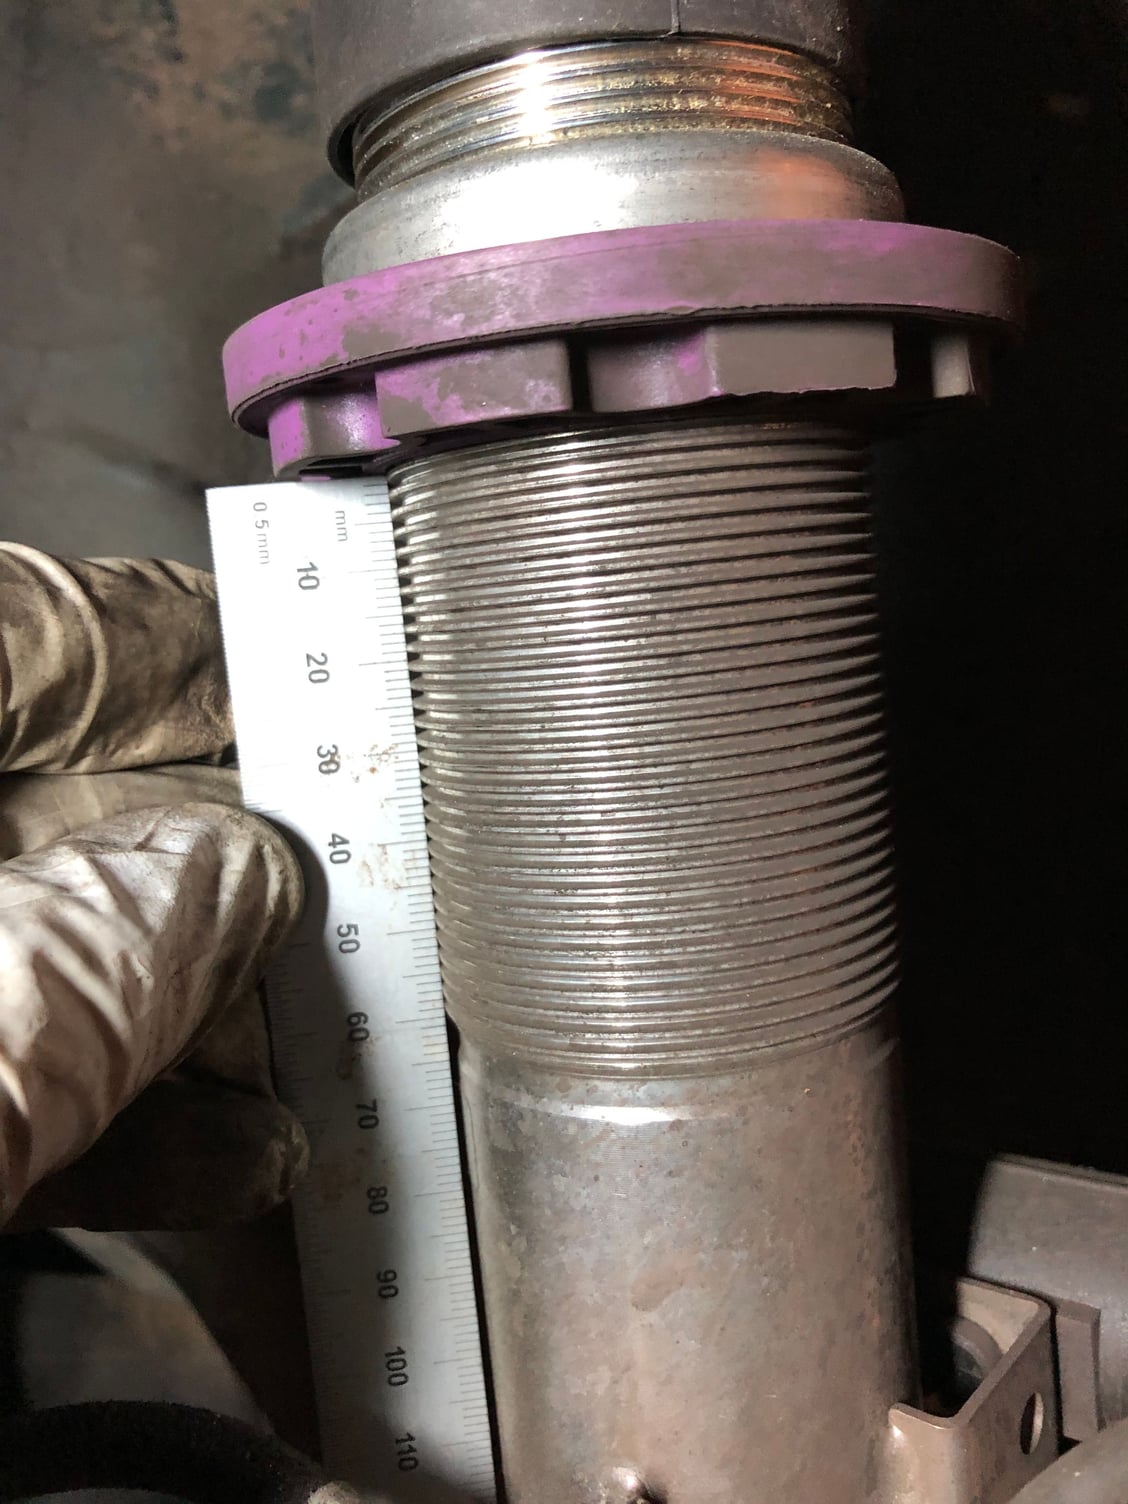
Measuring spring-perch offset required to fit hydraulic cylinder. Because of where I want my ride height, this perch ended up at it's lowest possible position on the coilover threads
Coilover with hydraulic cylinder installed and plumbed
Wiring
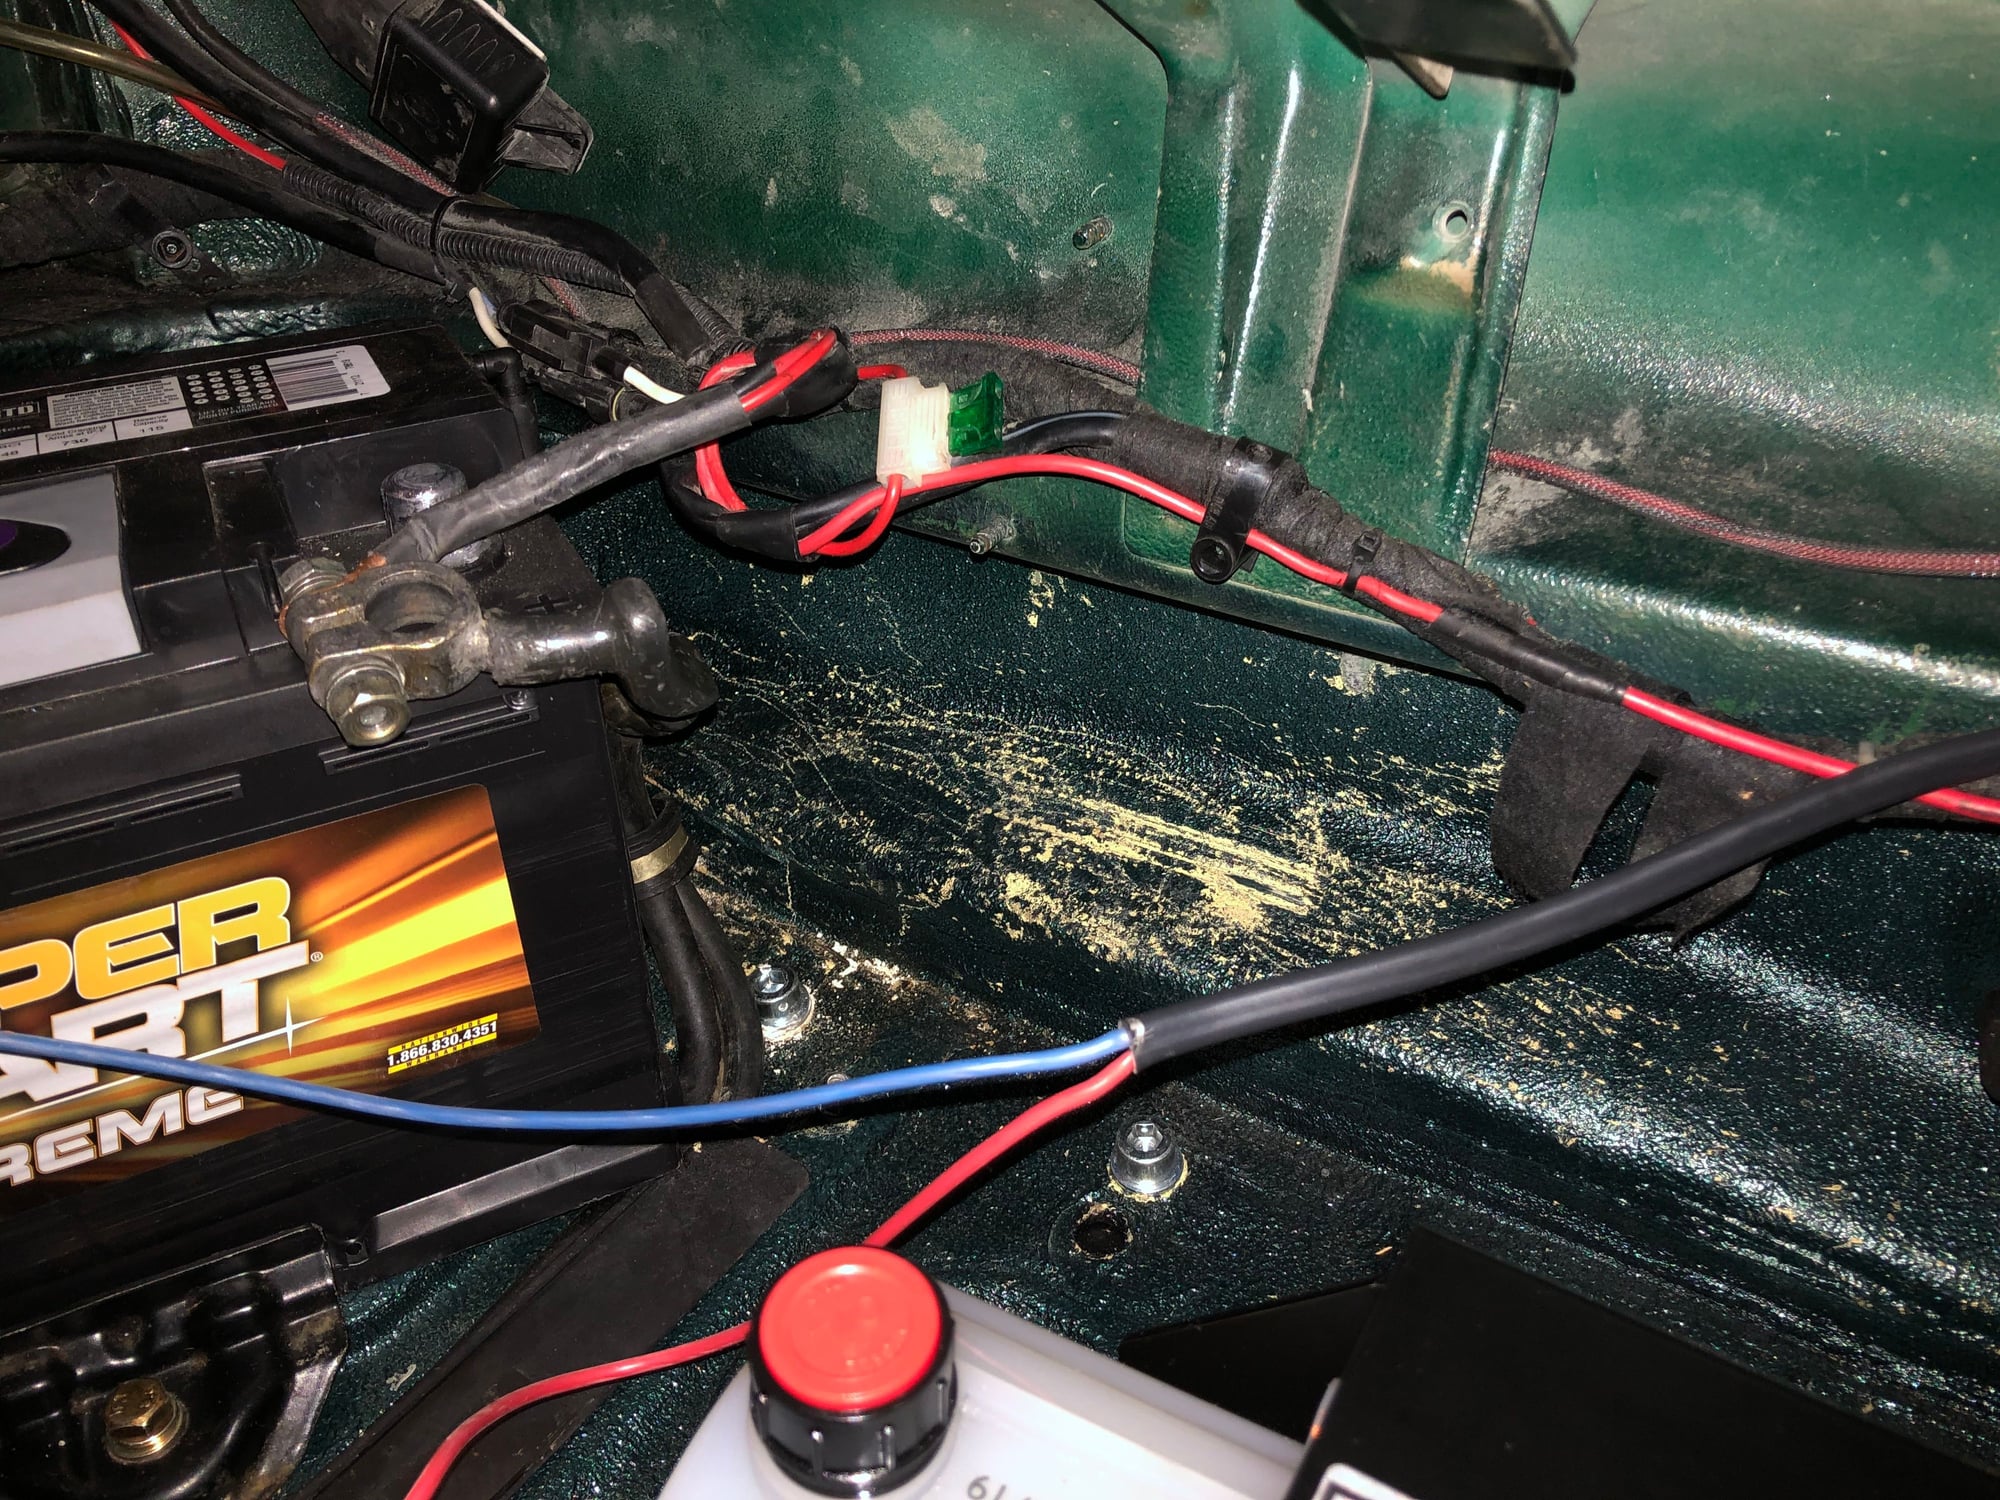
As far as wiring goes, power and ground were pretty simple because my pump is right by the battery in the frunk. There's also a white/black wire for the "key-on signal" so that the pump can only be run when the ignition is on. I spliced that wire to fuse 28 in the central electric panel (fuse 28 also powers the mirrors). There's also a blue wire for a speedometer signal so the noselift automatically lowers above a certain speed. I spliced this wire to pin # 2 on the speedometer by way of pin G15 in the CCU harness. Finally, there's a cable for the activation button that has to be snaked to the dashboard. This cable was a pain. I ended up finding my way into the cabin through the cut-out in the passenger-side inner fender wall where there's a cut-out for RHD fuel fillers.
Can you raise it while moving or do you have to be fully stopped?
Also, how quickly does it lower back to normal height?
Yes, it can be raised while moving. There�s a wire connected to the speedometer output (assuming I wired it right) that�s supposed to lower the noselift at 50mph if you forget to press the button. It lowers the nose in about 3 seconds.
Originally Posted by Peteinjp
Nice mod! Wouldn�t it make sense to have the actuators installed on top of the springs so the line can remain static and can be fixed in place?
That�s a good point and you had me questioning if I installed this stuff wrong, but I checked the manual again, and that is indeed where the lifting cylinders are supposed to go. I don�t know why they�re not above the springs instead:
Some more details:
The included splitter for the hydraulic lines that I mounted near the front sway bar (picture is from the manual, not a 964 obviously)
This is fantastic. I've been thinking about this kit. I have the FAL on my GT3 and would really love it on my 964 as well. Did you buy it directly from KW or somewhere else?
This is fantastic. I've been thinking about this kit. I have the FAL on my GT3 and would really love it on my 964 as well. Did you buy it directly from KW or somewhere else?
Thanks. I bought it through EBS, but I recommend going directly to KW if you can. I�ve heard of people getting deals that way.

 12-31-2020, 12:04 AM