

Replacing Evaporator
 04-05-2010 | 12:24 PM
#76
Thread Starter
Professor of Pending Projects
Rennlist Member
Rennlist Member
Joined: Nov 2001
Posts: 9,891
Likes: 23
From: Orlando, FL
 04-05-2010 | 12:59 PM
#77
Burgled
Rennlist Member
Rennlist Member
Joined: Aug 2003
Posts: 22,384
Likes: 14
From: Altamonte Springs, Fl/Gwynns Island, Va.
 We should get with the usual suspects and any newpeople that might want to hang out and look at cars.
08-06-2014 | 12:37 AM
We should get with the usual suspects and any newpeople that might want to hang out and look at cars.
08-06-2014 | 12:37 AM
#78

Nordschleife Master
Joined: Jul 2007
Posts: 5,614
Likes: 50
From: DFW, TX
Okay guys, bumping an old thread here, but I need some guidance from those of you who have done this job.
I've removed a bunch of the torx screws throughout the HVAC unit and removed all the metal clips, however, I still can't get the halves to separate. I believe the culprit is this one screw in the center of the unit, right behind the top intake, and it resides deep inside the box.
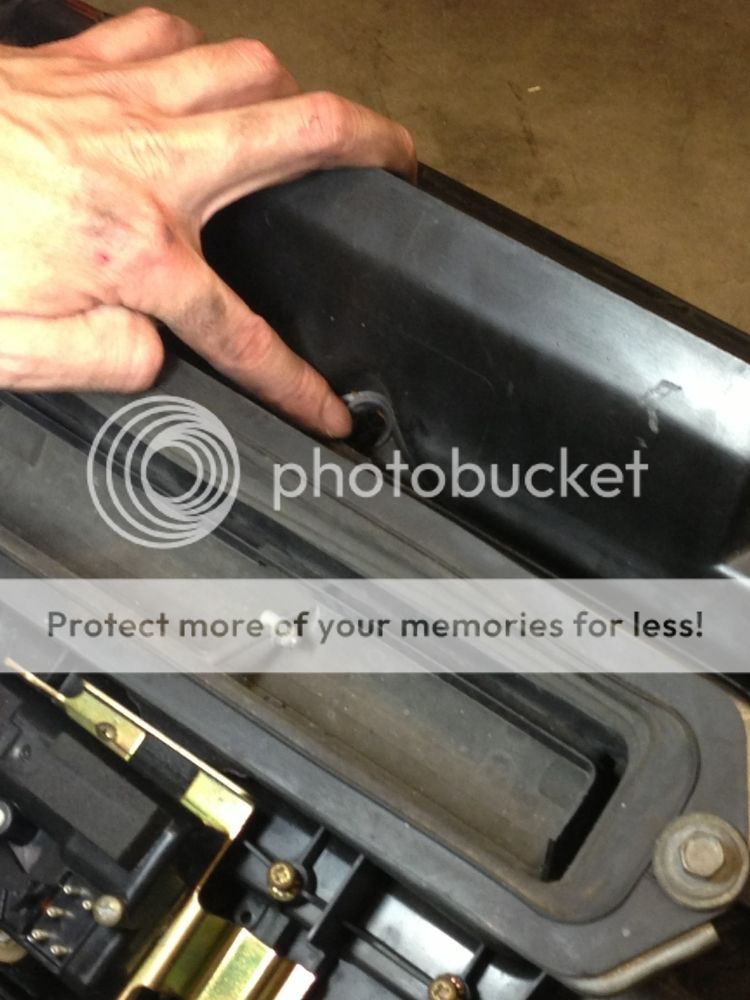
The screw head appears to be pretty much rotted away and I can't get any grip on it w/ a torx or allen head driver. The head of the screw doesn't really appear to have a torx shape either.

I assume this fastener needs to be removed and it is what is holding me back from splitting the case? It's going to be a pain in the d' to drill this out since it is so deep in there, you can't really see what you're doing...
Also, what about these two fasteners that are on the leading edge of the unit, right in front of the expansion valve?
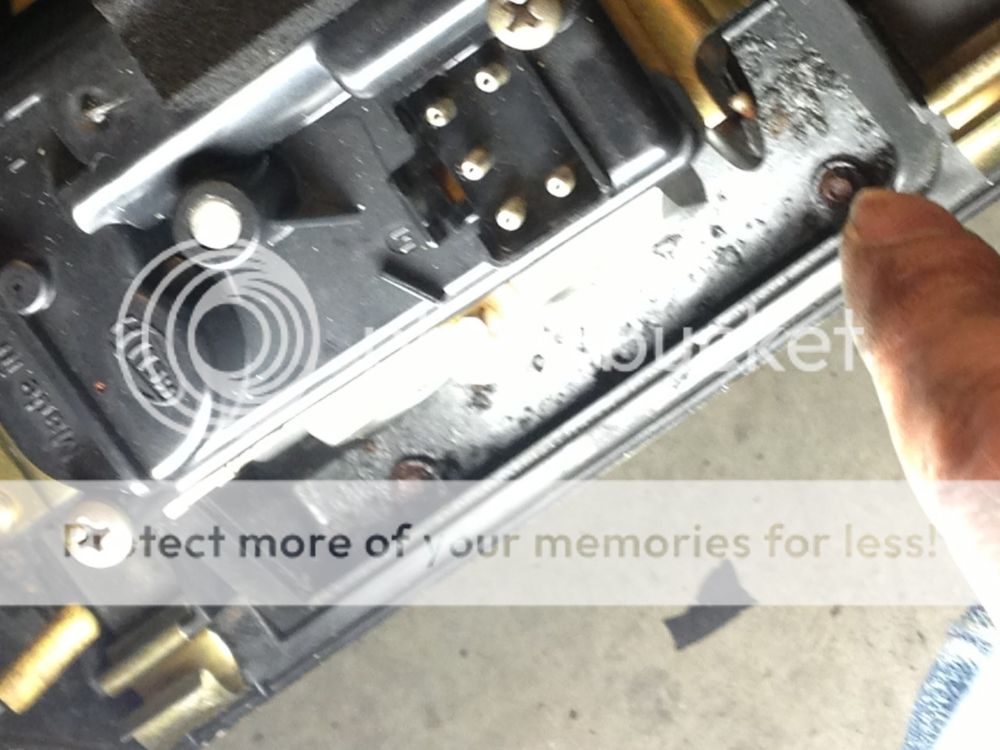
Similar to the center fastener above, these fasteners are corroded, but even then, they do not appear to have a torx or allen head. They seem like they have no grip on the head. Is that the corrosion, or is that the fastener design? Do I need to remove (i.e. drill) these too?
I've removed a bunch of the torx screws throughout the HVAC unit and removed all the metal clips, however, I still can't get the halves to separate. I believe the culprit is this one screw in the center of the unit, right behind the top intake, and it resides deep inside the box.
The screw head appears to be pretty much rotted away and I can't get any grip on it w/ a torx or allen head driver. The head of the screw doesn't really appear to have a torx shape either.
I assume this fastener needs to be removed and it is what is holding me back from splitting the case? It's going to be a pain in the d' to drill this out since it is so deep in there, you can't really see what you're doing...
Also, what about these two fasteners that are on the leading edge of the unit, right in front of the expansion valve?
Similar to the center fastener above, these fasteners are corroded, but even then, they do not appear to have a torx or allen head. They seem like they have no grip on the head. Is that the corrosion, or is that the fastener design? Do I need to remove (i.e. drill) these too?
08-06-2014 | 12:36 PM
#80
Nordschleife Master
Joined: Jul 2007
Posts: 5,614
Likes: 50
From: DFW, TX
Yes, it's all out of the car, i've removed all clips and torx fasteners in sight (even the ones hiding under the servos). The unit is on the cusp of being split open, but I think this one fastener I posted above is holding me back. I want some confirmation before I try to drill it out.
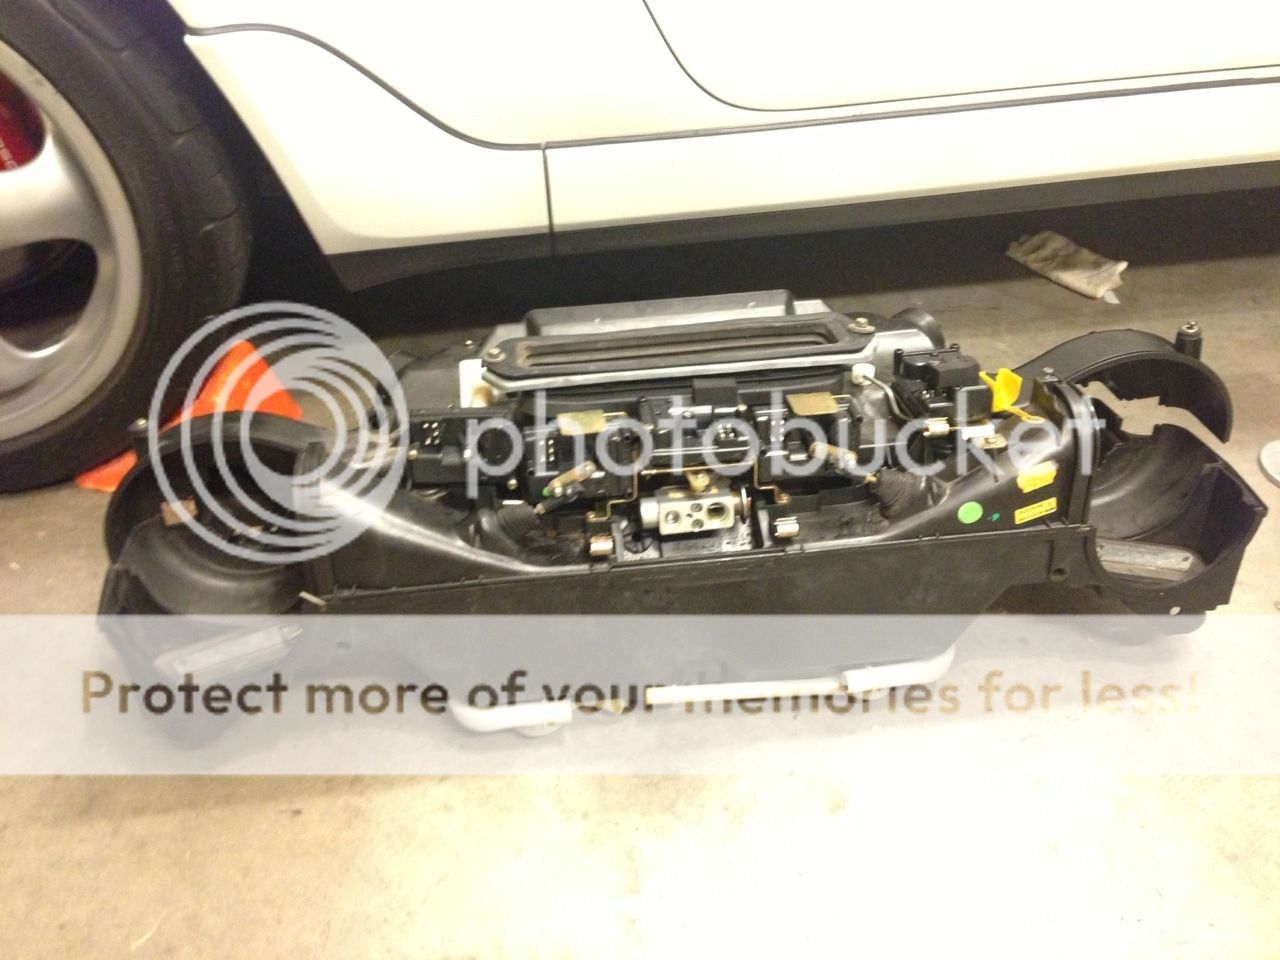
^pic after I removed the unit from the car (including blowers and harness), but before I moved forward to opening it up.
^pic after I removed the unit from the car (including blowers and harness), but before I moved forward to opening it up.
08-06-2014 | 02:22 PM
#82
Nordschleife Master
Joined: Jul 2007
Posts: 5,614
Likes: 50
From: DFW, TX
Those stay on the car as they are permanently attached to the wiring harness. You can see the empty hole for the right-side sensor on the left side of the photo above.
I've been taking a bunch of detailed pics of all the HVAC unit fasteners as I work throigh them. Once I get through with this job, I will do a nice illustration of all their locations since the current guidance is lacking in the nitty-gritty detail.
I've been taking a bunch of detailed pics of all the HVAC unit fasteners as I work throigh them. Once I get through with this job, I will do a nice illustration of all their locations since the current guidance is lacking in the nitty-gritty detail.
08-06-2014 | 02:51 PM
#83
Thread Starter
Professor of Pending Projects
Rennlist Member
Rennlist Member
Joined: Nov 2001
Posts: 9,891
Likes: 23
From: Orlando, FL
I can check the workshop manual to see if it gives any additional details on that... or do you have the workshop manual as well?
Apologies about the photos in the thread... there was a crash on Rennlist many years ago and all those links got lost along with the photos... and I can't seem to find them in my backups to reload them.
Apologies about the photos in the thread... there was a crash on Rennlist many years ago and all those links got lost along with the photos... and I can't seem to find them in my backups to reload them.
08-06-2014 | 03:09 PM
#84
Nordschleife Master
Joined: Jul 2007
Posts: 5,614
Likes: 50
From: DFW, TX
I should have the workshop manuals. I will need to refer to them tonight.
I saw in your replies from when you did this project, you did mention the following...
Do you remember if the bolt you're referring to is the same one that is causing me trouble?
I saw in your replies from when you did this project, you did mention the following...
Now remove the 32 small clips around the air box to give you the ability to remove the blowers... there are small screws (some 12) that you will find along the way... too many to remember where there all are...
you will see them.... all but one that sits in the middle of the air box in a deep deep hole that you will curse the gods trying to get to it... and they rust and there not phillips nor flat but a small 6 points head that will strip easy
you will see them.... all but one that sits in the middle of the air box in a deep deep hole that you will curse the gods trying to get to it... and they rust and there not phillips nor flat but a small 6 points head that will strip easy
08-06-2014 | 04:44 PM
#85
Thread Starter
Professor of Pending Projects
Rennlist Member
Rennlist Member
Joined: Nov 2001
Posts: 9,891
Likes: 23
From: Orlando, FL
 05-08-2017 | 02:46 AM
#86

Instructor
Joined: Apr 2013
Posts: 148
Likes: 1
Reviving this thread again...
shame about the photos going missing...
My 1990 964 holds a charge for approx 4 months then slowly loses it... So I have bought myself a new evaporator, exp valve, drier but not a new compressor (yet).
My compressor is a bit whiny... sounds like a supercharger, when the AC is on..
Finally, to my question.. how much of a pain in the *** is this job?
I have managed to rebuild my motor successfully, but for some reason, the idea of pulling the fuel tank and all the associated crap to get the exp valve and evaporator, doesn't fill me with excitement...
Should I just send it to an aircon shop? Or should I be worried they might not do it as thoroughly as an owner?
Yes, I am one of those painful people who doesn't like other people working on my stuff...
05-08-2017 | 05:42 AM
#88
Instructor
Joined: Apr 2013
Posts: 148
Likes: 1
One of the parts of this process I am unsure of, is the "oil" and also the refrigerant.
Because my system has some "gas" still inside, it would need to be evacuated before removing any components to be ozone friendly; am I right?
When evacuating with the vacuum pump.. where does it go? or does the aircon shop have another machine that vacuums and also collects remaining refrigerant....
And with regard to oil.. I have read some threads where the oil has come inside a new/rebuilt compressor...But some videos online suggest to put oil in the hose before connecting to the refrigerant source and that would draw the oil in when you open the low side valve...
Is it important to evacuate all oil (and previously applied UV dye) before recharging?
I'm considering buying my own vacuum pump and gauges, but I think buying refrigerant to DIY is more difficult to do here in Australia...
05-08-2017 | 05:51 AM
#90
Racer
Joined: Mar 2005
Posts: 445
Likes: 9
From: Malaga (SPAIN)
Yes, speaking from experience.
Do yourself all the work without paying too much attention to the gas or oil. When you are done replacing components, go to an A/C workshop where they will vacuum empty all the system, clean it and refill it with the appropriated equipment.
Do yourself all the work without paying too much attention to the gas or oil. When you are done replacing components, go to an A/C workshop where they will vacuum empty all the system, clean it and refill it with the appropriated equipment.