
Changing Spark Plug Cables


 07-21-2008, 09:21 PM
#32
Professor of Pending Projects
Rennlist Member
Rennlist Member
Thread Starter
 07-25-2008, 12:20 AM
#33
Nordschleife Master
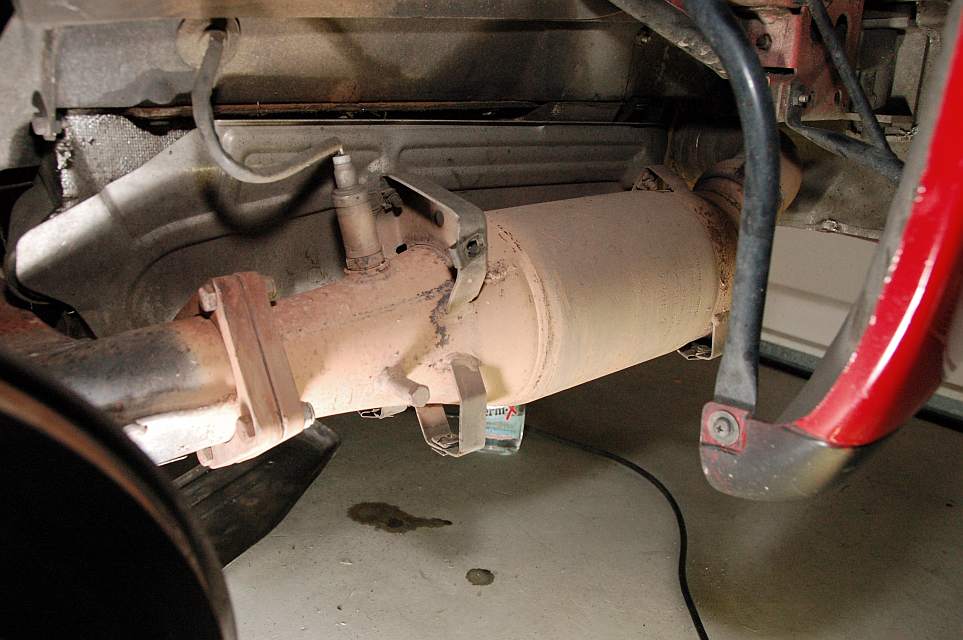
Latest stopping point in installing spark plug wires: the lower left side.
I don't see a ready way w/o disassembling the exhaust.
So, how do you get in there -- how do you make access behind the the two lower heat shields, shown?
Thanks in advance.
I don't see a ready way w/o disassembling the exhaust.
So, how do you get in there -- how do you make access behind the the two lower heat shields, shown?
Thanks in advance.
07-25-2008, 07:25 AM
#34
Burning Brakes
I could be wrong, however I do not think it can be done with out taking off the cat. You can see if you get off the plastic heat shield without removing the cat. They may give you enough room, however maybe not.
Sorry for the lack of real help.
Sorry for the lack of real help.
07-25-2008, 07:49 AM
#35
Addict
Rennlist Member
Rennlist Member
07-25-2008, 09:30 AM
#37
Nordschleife Master
agreed (and in my post).
The question is, How can the shields be taken off?
[exasperated sigh]
" -- We can SEE the enemy's within transporter range, Mr. Sulu -- and that we need to drop shields to transport in the remaining tribbles, err... spark plug wires -- but HOW do we drop shields?!"
If cat-breaking is the ONLY way, will new cat seal (at flange) be needed, too?
And, if the cat's broken off, won't that mean everything will be dangling from that O2 sense line, if not supported otherwise?
So, if busting cat is the way in, I may put this part off till I do valves, and also replace the O2 sensor, and plugs, and wires, and cat flange seal, and, and...
[...nuts]
Last edited by elbeee964; 07-25-2008 at 09:50 AM.
07-25-2008, 07:00 PM
#38
Addict
Rennlist Member
Rennlist Member
07-25-2008, 07:26 PM
#39
Racer
Join Date: May 2006
Location: Altamonte Springs, Florida
Posts: 423
Likes: 0
Received 0 Likes
on
0 Posts
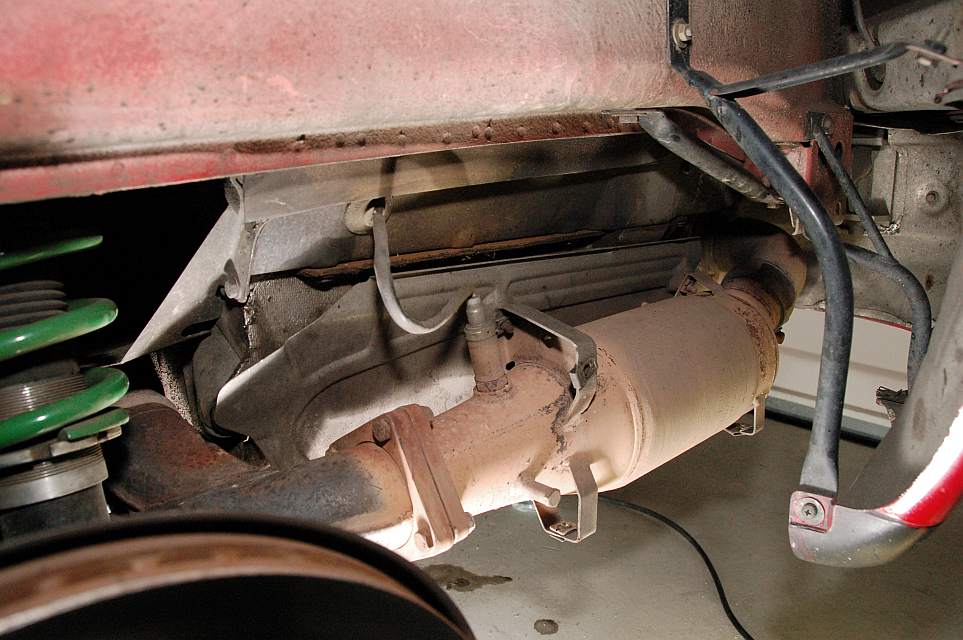
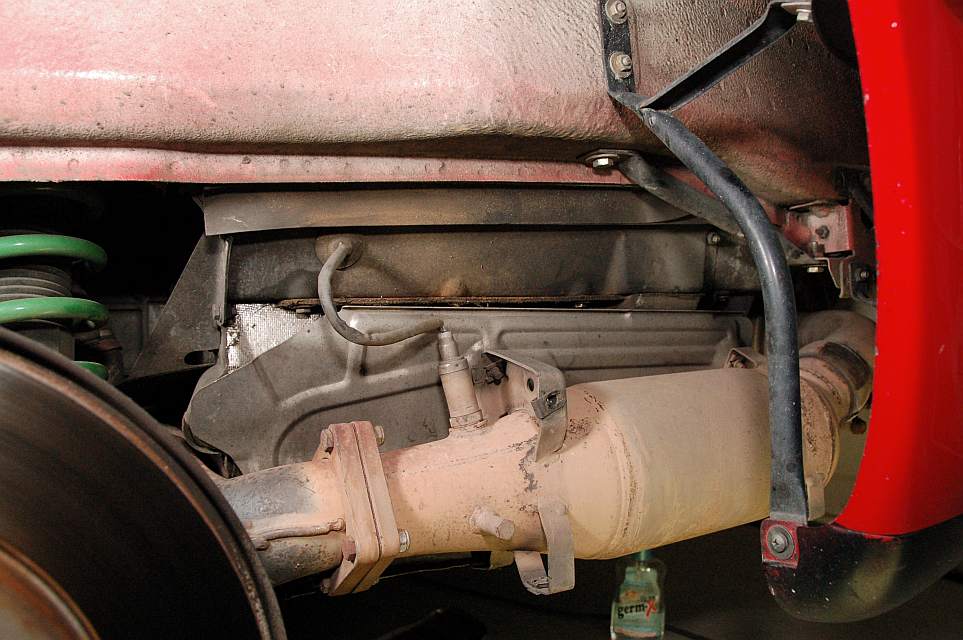
Take the shield and cat off. 4 bolts and a clamp for the cat, 5 or 6 10mm bolts for the shield. Here's what they look like without shields. Lots of room, worth the effort. The rubbet boots where they go through the tin can be pulled out to make replacing wires easier. I used non-conductive dialectric silicone grease to help them through the boot.


07-25-2008, 08:21 PM
#40
Nordschleife Master
[mentally adding cat flange gasket to the shopping list...]
-Spring, thanks. Great point.
-Fred, illuminating photos, as usual. You & Jaime are photo-snappin' brothers.
Think I'll leave these three plug wires alone and button up this job for now, with the 9 new wires, 6 refurb'd injectors, new pres. xsducer head o-ring, and a wiped clean engine top side.
Hope I haven't knocked dirt into anywhere, and remember how everything kinda fits back together.")
(...feeling a little like Gen. MacArthur leaving the PI. "I shall return...")
-Spring, thanks. Great point.
-Fred, illuminating photos, as usual. You & Jaime are photo-snappin' brothers.
Think I'll leave these three plug wires alone and button up this job for now, with the 9 new wires, 6 refurb'd injectors, new pres. xsducer head o-ring, and a wiped clean engine top side.
Hope I haven't knocked dirt into anywhere, and remember how everything kinda fits back together.
(...feeling a little like Gen. MacArthur leaving the PI.
"I shall return...")
07-25-2008, 08:33 PM
#41
Rennlist Member
The cat is not hard at all.. and I have re-used the flange gasket without incident. Its especially easy if you remember to use the Wurth Copper Compound on the parts when you put them back together (clamp threads especially if you drive in the NE)
Hate to see you abandon your PI, just as you are about to close in on the green breasted goddess of victory, Captain Kirk.
Hate to see you abandon your PI, just as you are about to close in on the green breasted goddess of victory, Captain Kirk.
07-26-2008, 02:46 AM
#42
Nordschleife Master
I'm leaving on vacation on Monday (oshkosh), and had only started out innocently to do the injector refurb and fuel filter change two weeks ago. The new spark wires were there, the pressure xsducer o-ring looked easy... so I went off on a few unintended tangents and things snowballed a little. Started this without the parts to do valve/O2 stuff.
But not to worry...
I saw what you meant.
Loosened the four cat flange bolts & O2 sensor, and saw the flange gasket rattled loose of both surfaces. (It'll be an easy thing... once I have the replacement parts in hand.)
Screwed everything back tight and went back to the engine bay.
Injectors are back in, now. Up next, check fuel line torques, reinstall all that ventilation/intake/MAF crappola... And fire this puppy up. Ooo-yeah. Finally a cleaned engine top.
But not to worry...
I saw what you meant.
Loosened the four cat flange bolts & O2 sensor, and saw the flange gasket rattled loose of both surfaces. (It'll be an easy thing... once I have the replacement parts in hand.)
Screwed everything back tight and went back to the engine bay.
Injectors are back in, now. Up next, check fuel line torques, reinstall all that ventilation/intake/MAF crappola... And fire this puppy up.
Ooo-yeah. Finally a cleaned engine top.
Last edited by elbeee964; 07-26-2008 at 03:08 AM.
03-11-2011, 01:36 PM
#43
Burning Brakes
Still in the middle of renovations on ignition system (Got the old distributor out and put the new one back in , Now I am stuck again, removing plugs 4 and 5 on the top, the plug fell off the wrench, is there a way to get them out of there...I still havent tackled plug 6 and am not looking forward to it at all
 03-11-2011, 02:47 PM
#45
Burning Brakes
Is the engine tin the "cover" over the head...does that also entail removal of power steering pump?
I have had such a difficult time with this project that I once the top 4/5/6 plugs are done I am going to put it back together and get it to a proper lift to do the bottom 1/2/3 as I am having major issues removing the cat (and dont have a cat flange gasket on hand ...yet)
I have had such a difficult time with this project that I once the top 4/5/6 plugs are done I am going to put it back together and get it to a proper lift to do the bottom 1/2/3 as I am having major issues removing the cat (and dont have a cat flange gasket on hand ...yet)