When you click on links to various merchants on this site and make a purchase, this can result in this site earning a commission. Affiliate programs and affiliations include, but are not limited to, the eBay Partner Network.
Glad you didn't strip the cosmoline. Leave as much of that as you can. Good protection. I wish i had a source for spray cans of that stuff...I'd goop it all over the underside of my car. Instead, I've been using other stuff. But the cosmoline is super effective
Nice work on the cleaning. I did this job last fall and know exactly what you are going through. I have found xylene to be a very effective against cosmoline.
I got distracted today, new snow. Anyways, I did a quick toe adjustment off string lines, and a caster adjustment just to see how far it was out. Next weekend I will do a proper job and document a DIY alignment.
The FVD tie rods are a pleasure to setup. Looking forward to driving the new setup.
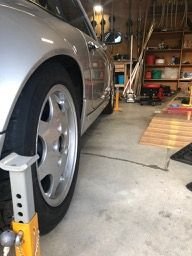
I finally finished off the DIY alignment. A lot of learning here for me (happy to receive any feedback, if I have made a mistake). At times I thought this might be too hard, but I wanted to learn, and also living in a small town there is no one I would trust. A local shop who put my new tyres on managed to scratch / mark the wheels, grrr! So I pushed on, reading, stopping, thinking my way through, I finally finished the alignment (3 days on and off) and nailed all the numbers I wanted. I have driven the car. I have zero pull, even under full acceleration the car holds straight with limited hands on the wheel. Cornering is precise, and steering is very direct.
So here are my alignment pics. Local roads are still a bit messy (winter), but in the next few weeks I will get out and put a few hundred Ks on the clock, and recheck everything.
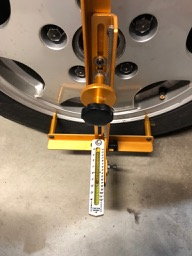
Setting the camber is relatively easy. Settled on -1.0.
To adjust the camber I used a second magnetic camber gauge. I noted how much I wanted to correct from the fastrax gauge. I also used the special elongated tool. Undo the bottom strut bolt first. Then slowly and marginally undo the top bolt. Fit the elongated tool, and adjust. If you undo the top bolt too much the strut will move in the slot under its weight and you have to start again!
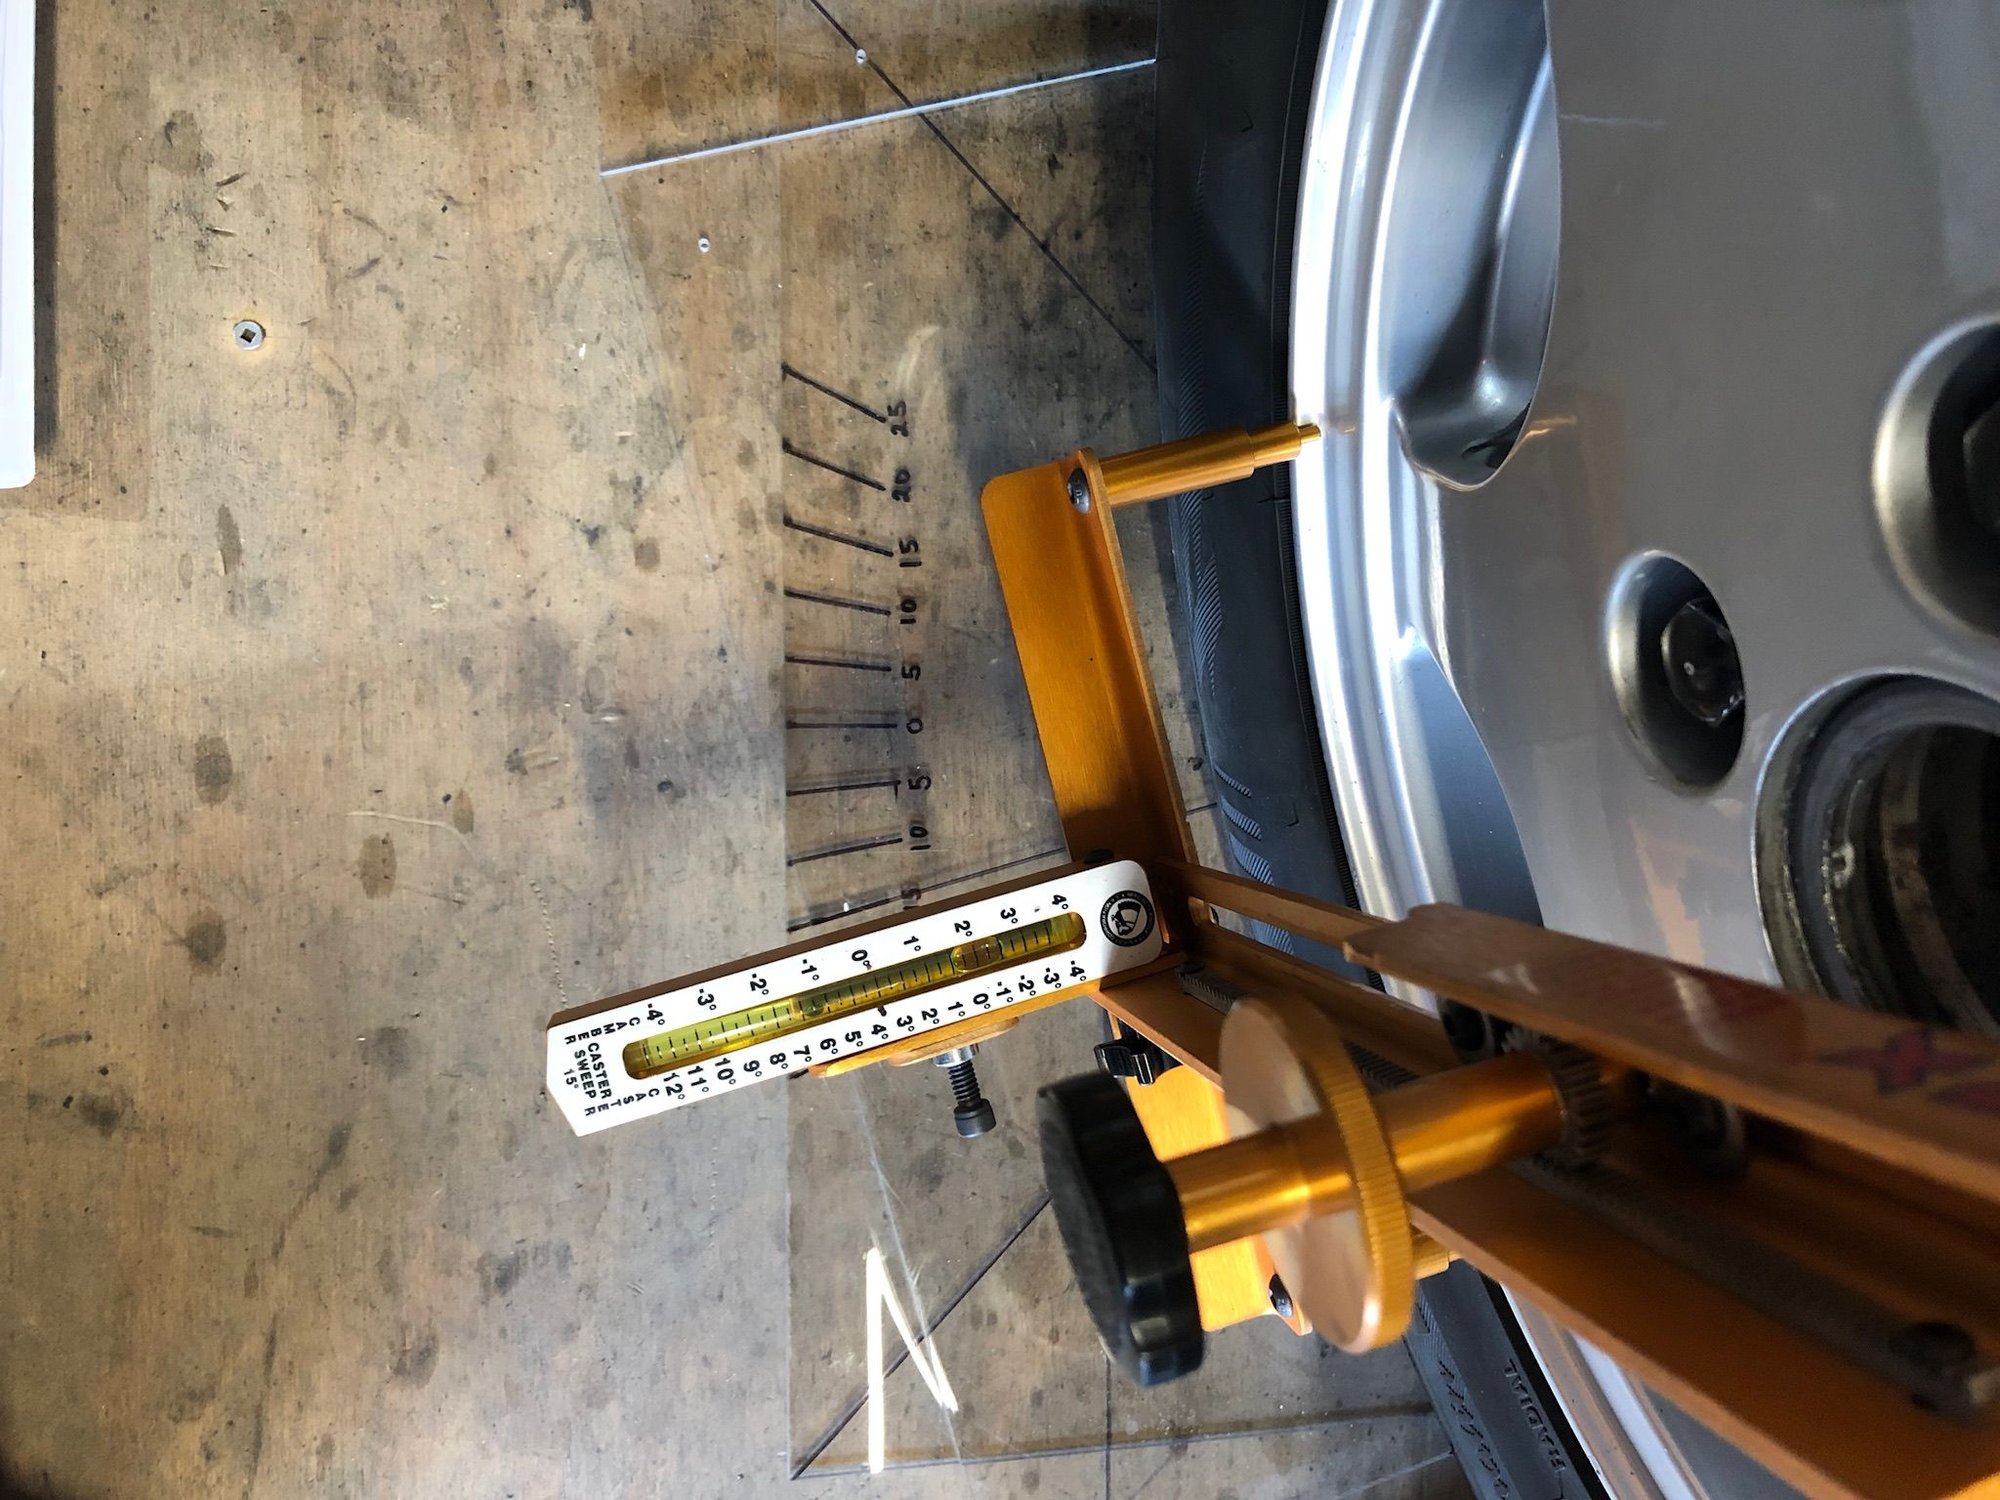
Next Caster. I did build some DIY slip plates - total failure (I will look out for some slip plates.). So back to basics. I marked out the 20deg on the garage floor. I used plastic bags under the wheels. The wheels were easily turned by hand to the 20 deg marks. Measure the camber. Turn the wheel the other direction. Measure the camber. Do the maths. E.g -1.25+1.50=2.75; 2.75x1.5=4.125 caster. Adjusting the caster is via the ball joints and the elongated bolt.
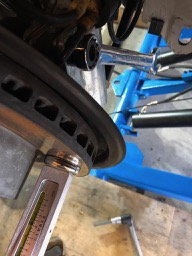
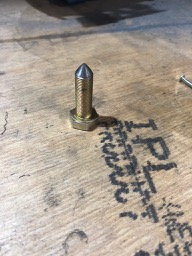
Toe. Manufactured a bolt to lock/centre the steering. M10x1.0x30mm bolt. I ground the end to a conical to match the special tool. I cant remember who I should credit for this idea, but thanks.
Setting the strings. I used the jacks and fishing line pulled tight by weights. I had setup a square system prior. But I learnt that the easier way was to set the line parallel off the axle. This method did correspond to the square methodology. The track is ~6mm wider at the front. So by compensating the track difference you can set the string.
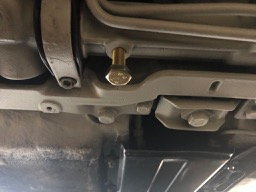
Bolt in place, to centre the steering and lock it off.
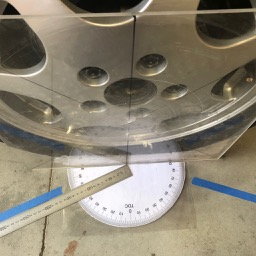
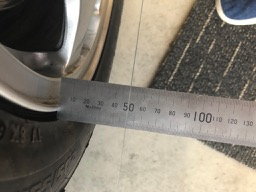
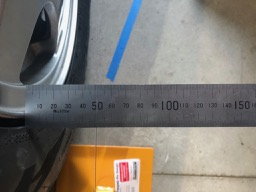
Setting the toe. Measure the rear edge to the string.
Front edge. Just over 1mm between the front and back. ~12.0'. The FVD tie rods are a easy to adjust.
Glad you didn't strip the cosmoline. Leave as much of that as you can. Good protection. I wish i had a source for spray cans of that stuff...I'd goop it all over the underside of my car. Instead, I've been using other stuff. But the cosmoline is super effective
9 Vehicles Porsche Helped Engineer that Aren't Porsches
Slideshow: Long before engineering consulting became trendy, Porsche was quietly helping other automakers build everything from supercars to economy hatchbacks.
9 Features and Characteristics That Only Porsche People Understand
Slideshow: Some brands build cars. Porsche builds traditions, obsessions, and a few habits that stopped making sense decades ago but somehow became part of the charm.
This Builder Is Turning Heads With Its Slantnose 911 Creation
Slideshow: A small Polish tuner has reimagined the Porsche 911 Slantnose for the modern era, blending 1980s nostalgia with widebody tuning culture and serious performance upgrades.
Porsche 911 GT3 Artisan Edition Pays Homage to Japanese Culture
Slideshow: Porsche has created a Japan-only 911 GT3 Artisan Edition that blends track-ready hardware with design cues inspired by traditional Japanese craftsmanship.
Porsche Reveals Coupe Variant of the Electric Cayenne With a Fresh Look
Slideshow: Porsche's latest electric Cayenne Coupe blends dramatic styling with supercar acceleration, turning the brand's midsize SUV into a 1,139-horsepower flagship.