

SFR FMIC users, how the #$@$%#@ did you get this to fit??


 04-13-2010 | 12:08 AM
#32
Drifting
Joined: Jan 2002
Posts: 3,318
Likes: 188
From: Edmonton AB
Mine is getting close to being upright, but I daren't trim any more from the plastic because I'd have to cut the upright peices and nobody wants a sagging bumper. Being upright has all the advantages with the only drawback is cutting a ton of plastic off the bottom horizontal. Ground clearance actually gets better with more vertical IC. The AIR splitter will cover it easily and it's now the same level as the radiator.
04-13-2010 | 12:12 AM
#33
Rennlist Member
Joined: Sep 2006
Posts: 3,819
Likes: 57
From: Seattle, WA


 04-13-2010 | 08:04 AM
#37

Addict
Rennlist Member
Rennlist Member
Joined: Feb 2002
Posts: 5,384
Likes: 1
With the heat load of the oil cooler and a larger inter cooler in front of the radiator, did you notice any change in the water temperature under load? Are you using the stock radiator?
04-13-2010 | 08:20 AM
#38
Advanced
Joined: Nov 2009
Posts: 86
Likes: 0
From: Near Stuttgart / Germania
I don't go on the track with my car. But i have no problems with the 3l Turbo and stock radiator on the streets. Highway with 290km/h and more no problems.
04-13-2010 | 11:15 AM
#39
Thread Starter
Nordschleife Master
Joined: Jun 2003
Posts: 9,980
Likes: 8
From: San Diego, CA
Wishmaster, it looks like you were able to get most of the angle out of intrecooler? How much did you cut out of the bumper to achieve this? Or was your fitment different once you finally bolted the IC in place with the brackets and had the bumper cover back on?
04-13-2010 | 11:55 AM
#41
Advanced
Joined: Nov 2009
Posts: 86
Likes: 0
From: Near Stuttgart / Germania
I attached a pic for you. I don't cut out so much as you. Perhaps the us bumper is bigger? After the bumper cover it was minimum further to the rear. I haven't cut something out at the bumper cover.
Last edited by Wishmaster; 11-02-2014 at 08:35 AM.
04-13-2010 | 12:06 PM
#42
Advanced
Joined: Nov 2009
Posts: 86
Likes: 0
From: Near Stuttgart / Germania
 04-13-2010 | 12:42 PM
#43
Thread Starter
Nordschleife Master
Joined: Jun 2003
Posts: 9,980
Likes: 8
From: San Diego, CA
Thanks for the pictures, i had to do the same with cutting the factory support for the IC out. I cut it enough so it could be bent out of the way actually incase i ever decide to go back to stock (we will see..).
I just finished mocking everything up again for the drivers side plumbing. I think the 4'' long reducer and hump couplers from ExtremePsi.com will be enough to get the pipes to sit correctly. As of right now, the couplers i have in 3'' lengths are just not long enough. I could probably get this to work with a 4'' long straight 2.5'' dia. coupler off the end tank but it would be kinked so badly it would probably blow off as soon as i hit boost.
Seriously, these 2.5'' diameter extension pipes completley made this job even more difficult than it had to be. I probably would have not needed to cut the stock IC mount out of the way, or atleast would not of had to do it so much. The bumper bar would not need to be cut out so much. I would not be in a situation where i need to find a 2.25 -> 2.5 reducer coupler in a 5+'' length which is custom order basically anywhere you go....
I just overnighted the two couplers so tomorrow i will finally have this completed, 4 days and too many hours after i started.
04-13-2010 | 03:02 PM
#44
Thread Starter
Nordschleife Master
Joined: Jun 2003
Posts: 9,980
Likes: 8
From: San Diego, CA
Here are some more pictures to show the fitment of the drivers side pipe. I have the coupler at the very edge of bead on both sides, basically i cannot possibly get anymore length out of the coupler without clamping right over the bead.

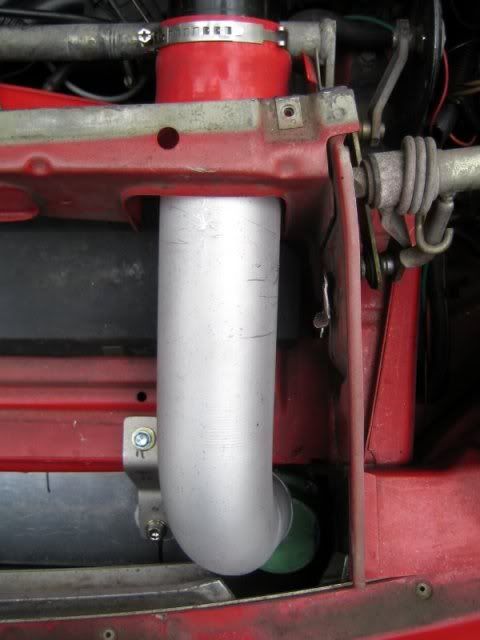
As you can see if the frontmount were to not sit angled this probably wouldnt be such a big deal, but the angle is really want makes this difficult. I am confident however the 4'' long reducer and the 4'' long hump coupler will be enough to coax the parts together.
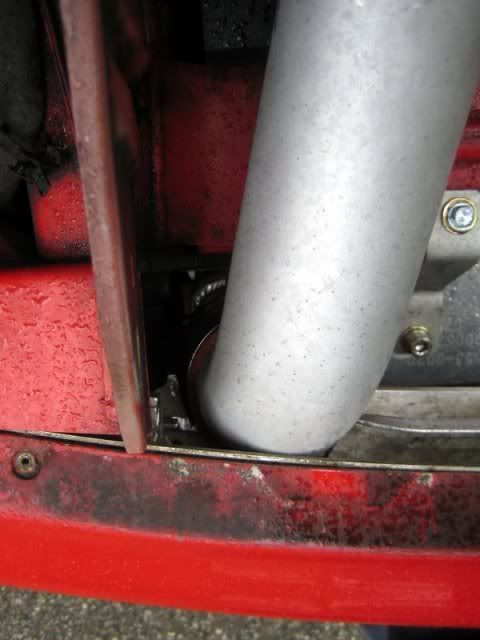
Also you can see the extension pipe is probably going to rub along the area it slips through the chassis. Again, a 2.25'' extension pipe would probably have made this not as much a problem. You may be saying 'well gee, the core can be moved over'...but i assure you the core is about as even on both sides as i could get it. Moving it over anymore to the passenger side will result in none of those couplers fitting (its a tight squeeze already).
Here is the passenger side all hooked up. Thankfully all of this went together pretty easily, though i wish the 3'' long 2.25->2.5" coupler was a little longer (ordered a 4" long one also). I also ordered some more stepless screw clamps from Oetiker to replace the worm drives. I have these clamps on my current IC pipe couplers and like them alot.

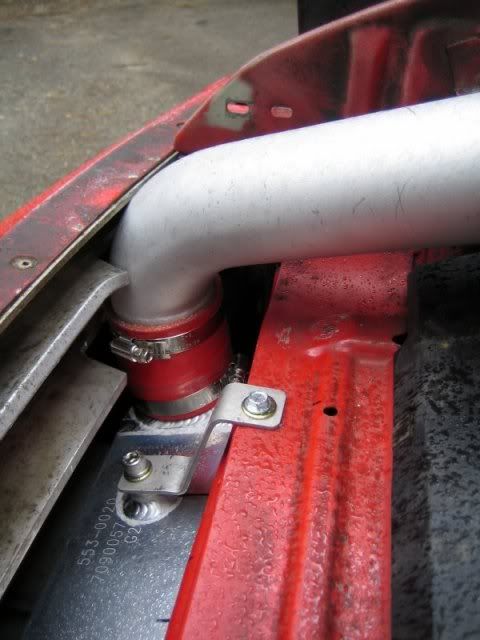
I might have to grind more more material off here... and i just hope this does not cause a problem with the nose panel fitment now. I sound like a broken record, but 2.25'' pipes would have given some needed clearance here..
Also regarding cutting more of the bumper out to decrease its mounting angle. I grinded more out of the bumper this morning and right now there is no possible way i can get the core to sit any straighter than it is now without cutting out the center supports...which is not happening. My grinding this morning might have straightened it out a minuscule amount.. maybe 1-2 degrees of angle if i am lucky.
Tim, want to make me some 2.25'' extension pipes of the same diameter??
As you can see if the frontmount were to not sit angled this probably wouldnt be such a big deal, but the angle is really want makes this difficult. I am confident however the 4'' long reducer and the 4'' long hump coupler will be enough to coax the parts together.
Also you can see the extension pipe is probably going to rub along the area it slips through the chassis. Again, a 2.25'' extension pipe would probably have made this not as much a problem. You may be saying 'well gee, the core can be moved over'...but i assure you the core is about as even on both sides as i could get it. Moving it over anymore to the passenger side will result in none of those couplers fitting (its a tight squeeze already).
Here is the passenger side all hooked up. Thankfully all of this went together pretty easily, though i wish the 3'' long 2.25->2.5" coupler was a little longer (ordered a 4" long one also). I also ordered some more stepless screw clamps from Oetiker to replace the worm drives. I have these clamps on my current IC pipe couplers and like them alot.
I might have to grind more more material off here... and i just hope this does not cause a problem with the nose panel fitment now. I sound like a broken record, but 2.25'' pipes would have given some needed clearance here..
Also regarding cutting more of the bumper out to decrease its mounting angle. I grinded more out of the bumper this morning and right now there is no possible way i can get the core to sit any straighter than it is now without cutting out the center supports...which is not happening. My grinding this morning might have straightened it out a minuscule amount.. maybe 1-2 degrees of angle if i am lucky.
Tim, want to make me some 2.25'' extension pipes of the same diameter??
04-13-2010 | 03:13 PM
#45
Rennlist Member
Joined: Mar 2005
Posts: 8,809
Likes: 0
From: In the garage trying to keep boost down
John just buy a silcon line and extend it. Dude when i am going to see this car? u still have my number ?