

Clutch replacement pictorial
 06-21-2009, 04:20 AM
#1
Nordschleife Master
Thread Starter
Just felt like starting the thread so far. Will post more detailed info and pictures later...though this thread will not be nearly as detailed with pictures as my head gasket and turbo swap were. Its not that im rushing, but trying to stay focused on this.
I put in about 12 hours today at my friends shop. Only 10 or so were actually spent on the car. It only took about 3 hours to get the exhaust and transmission removed and slide back the torque tube. Once the bellhousing was in clear sight is where i started having problems. Nothing terribly impossible, but just stuff that took a ton of time
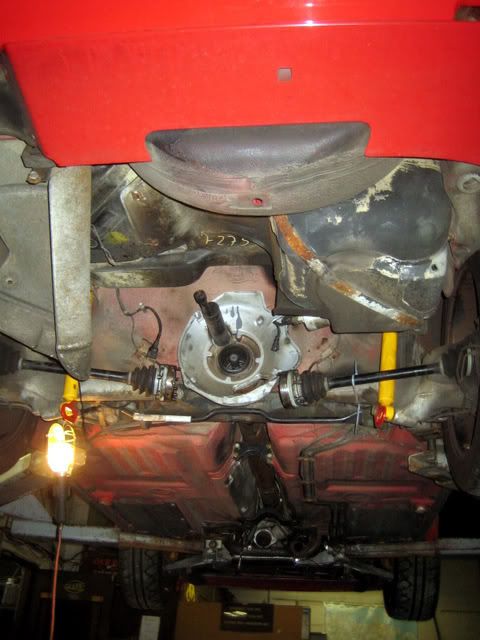
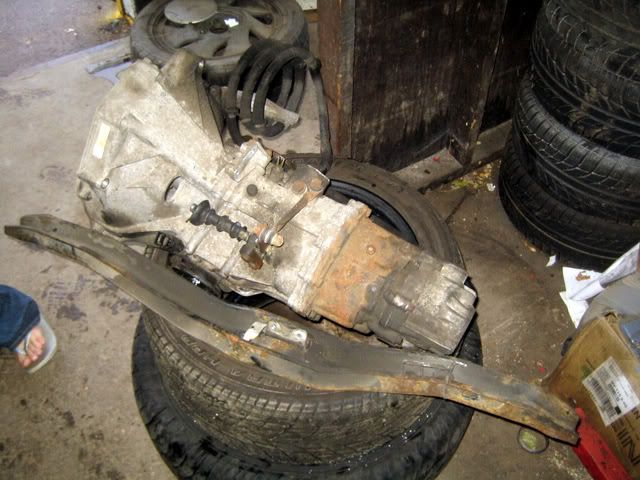
Transmission removal was actually surprisingly easy. The only thing i wish i did was buy that LR semi-solid trans mount..my stock rubber one is completley shot. I am just going to leave it be for now and replace it in a few months. The car isnt going to be driven at all between July and sometime this winter as i am moving away for a few months and the car wont be coming with me.
It took me over 1.5 hours to get the speed and reference sensors out... the forward most sensor came out no problem but the rear most took FOREVER to get out. Very tight spaces and it was not wanting to slide out at all. This was by far the worse part of the disassemble phase. And you can be damn sure i will be slotting the bell housing so they never have to come off again in the future!!
Another 30 minutes or so was spent trying to get the bell housing separated from the engine. What ended up being the problem was the metal sleeve for the speed and reference sensors was still in the bracket.. so.. after some application with a pry bar the sensor bracket broke in half and the bell housing came right out.. . Lucky i have a spare sensor bracket on hand.
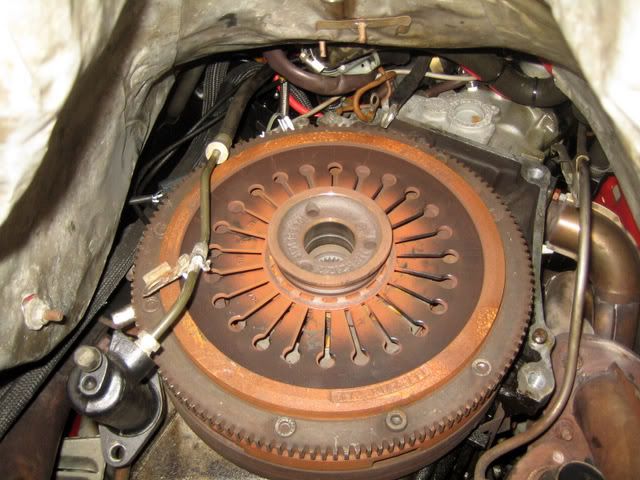
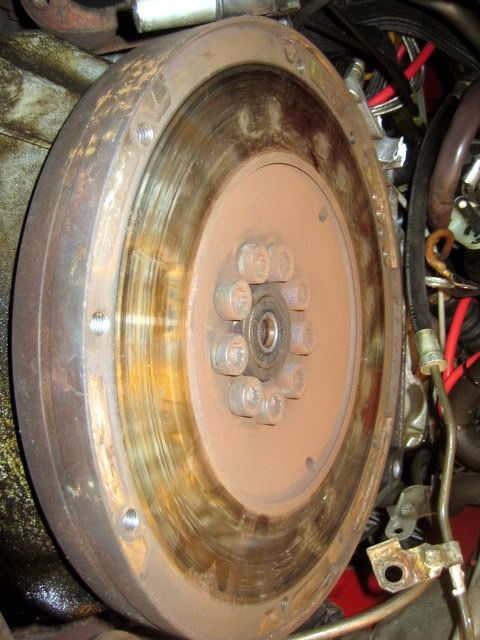
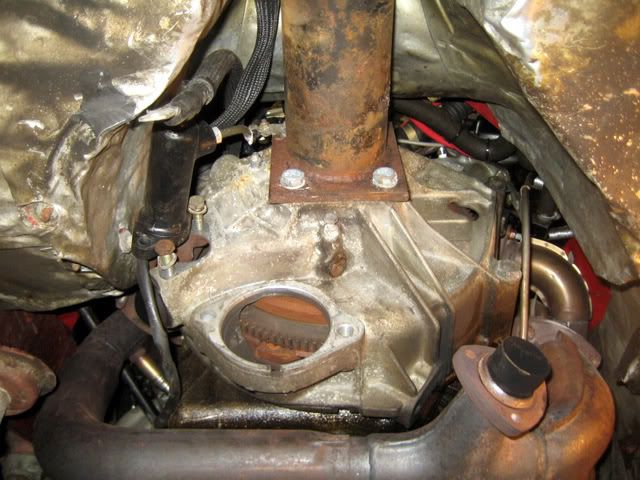
With the pressure plate exposed, i was able to verify it was indeed the throwout bearing that was making a racket. The end play was very noticeable.. probably 1mm of movement. This was a relief as i was having some doubts about the throwout bearing during some points.
The next PITA, but only took about 20 extra minutes were the pressure plate bolts. All but two of them came out and required me to drill the heads off.
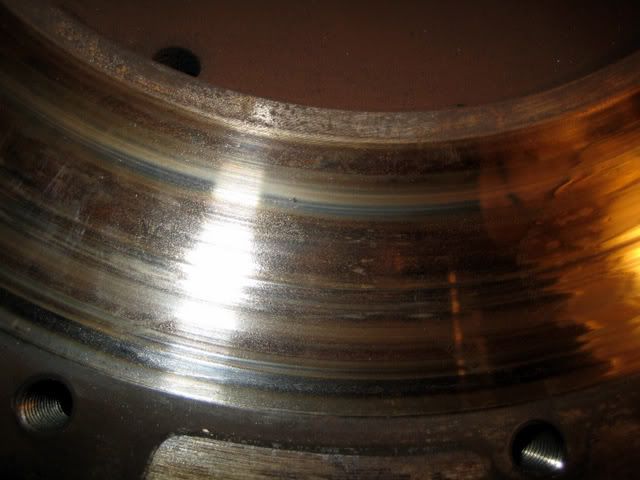
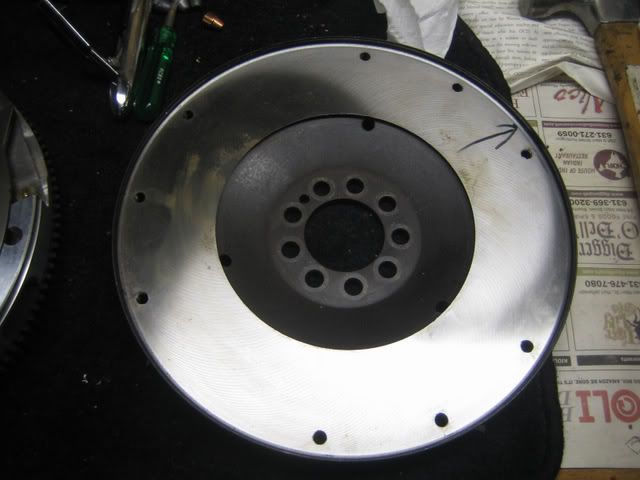
With all of that out of the way, the flywheel was next. All of the bolts came out no problem, but not to say i cringed a little on a few of them. Felt like i was on the verge of them stripping. The flywheel itself was pretty uneven. Clearly the 10k or so miles the pushrod on the clutch was adjusted wrong not only killed the throwout bearing, but also wrecked hell on the clutch disc and flywheel. Plenty of friction material, but the clutch was very badly glazed in a few sections.
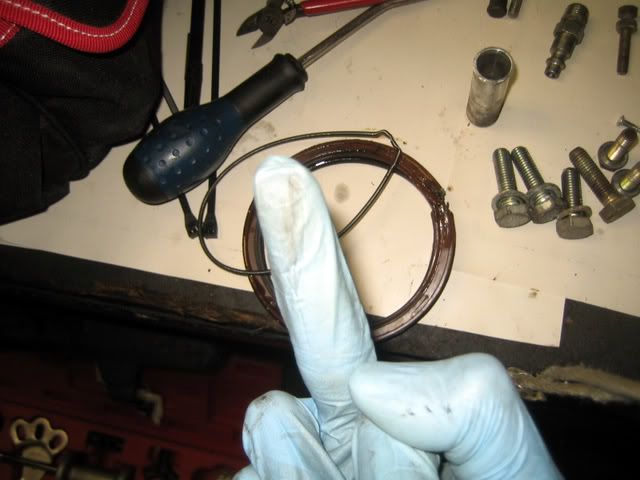
Another PITA was getting the pilot bearing out. Not much room to fit anything up there and none of the pullers were small enough to fit that pilot bearing. I used the old trick of a bolt, with washer, vise grips and a hammer. After about 15 minutes of messing around with it i finally got it out. I used the long turbo mounting bolt for the turbo which i just so happened to have in my tool box...
The last nightmare was getting the RMS out. I did not have a seal puller on hand, so an hour of carefully using a flat tip screwdriver and a pick i was able to finally get the seal out.
I installed the new RMS using the special arbor press i borrowed from mtnman82 and it went in perfectly. I used Hylomar on the edges of the gasket.. but neglected to oil the inside (Whoops!). I am going to use a syringe tomorrow wit ha very small flat tip screwdriver to carefully lube the inner lip of the seal with oil tomorrow. I have no pictures of this i was rushing a little to get the seal in so we could close up the shop for the night (was past midnight). I will try and get some detailed pictures with it tomorrow.
I expect to have the assembly finished by tomorrow, i figure another 10 hours or so to complete the reassembly, which would put me at roughly 20 hours total of just me working on it with my friend helping out with those two person jobs (transmission removal, torque tube sliding back, bell housing removal).
Honestly speaking, this job isnt so bad so far (disassemble wise). I however am very happy i am not doing this on jackstands! Its just a lot of stuff that needs to be removed from the car is what makes it such a daunting task. If everything went smoothly (mainly no issues with the sensors and RMS), it would not have taken more than 5.5 hours to get the disassemble phase complete. That is also taking into consideration removing the transaxle the first time has a little bit of a learning curve.
I put in about 12 hours today at my friends shop. Only 10 or so were actually spent on the car. It only took about 3 hours to get the exhaust and transmission removed and slide back the torque tube. Once the bellhousing was in clear sight is where i started having problems. Nothing terribly impossible, but just stuff that took a ton of time
Transmission removal was actually surprisingly easy. The only thing i wish i did was buy that LR semi-solid trans mount..my stock rubber one is completley shot. I am just going to leave it be for now and replace it in a few months. The car isnt going to be driven at all between July and sometime this winter as i am moving away for a few months and the car wont be coming with me.
It took me over 1.5 hours to get the speed and reference sensors out... the forward most sensor came out no problem but the rear most took FOREVER to get out. Very tight spaces and it was not wanting to slide out at all. This was by far the worse part of the disassemble phase. And you can be damn sure i will be slotting the bell housing so they never have to come off again in the future!!
Another 30 minutes or so was spent trying to get the bell housing separated from the engine. What ended up being the problem was the metal sleeve for the speed and reference sensors was still in the bracket.. so.. after some application with a pry bar the sensor bracket broke in half and the bell housing came right out..
. Lucky i have a spare sensor bracket on hand.With the pressure plate exposed, i was able to verify it was indeed the throwout bearing that was making a racket. The end play was very noticeable.. probably 1mm of movement. This was a relief as i was having some doubts about the throwout bearing during some points.
The next PITA, but only took about 20 extra minutes were the pressure plate bolts. All but two of them came out and required me to drill the heads off.
With all of that out of the way, the flywheel was next. All of the bolts came out no problem, but not to say i cringed a little on a few of them. Felt like i was on the verge of them stripping. The flywheel itself was pretty uneven. Clearly the 10k or so miles the pushrod on the clutch was adjusted wrong not only killed the throwout bearing, but also wrecked hell on the clutch disc and flywheel. Plenty of friction material, but the clutch was very badly glazed in a few sections.
Another PITA was getting the pilot bearing out. Not much room to fit anything up there and none of the pullers were small enough to fit that pilot bearing. I used the old trick of a bolt, with washer, vise grips and a hammer. After about 15 minutes of messing around with it i finally got it out. I used the long turbo mounting bolt for the turbo which i just so happened to have in my tool box..
.The last nightmare was getting the RMS out. I did not have a seal puller on hand, so an hour of carefully using a flat tip screwdriver and a pick i was able to finally get the seal out.
I installed the new RMS using the special arbor press i borrowed from mtnman82 and it went in perfectly. I used Hylomar on the edges of the gasket.. but neglected to oil the inside (Whoops!). I am going to use a syringe tomorrow wit ha very small flat tip screwdriver to carefully lube the inner lip of the seal with oil tomorrow. I have no pictures of this i was rushing a little to get the seal in so we could close up the shop for the night (was past midnight). I will try and get some detailed pictures with it tomorrow.
I expect to have the assembly finished by tomorrow, i figure another 10 hours or so to complete the reassembly, which would put me at roughly 20 hours total of just me working on it with my friend helping out with those two person jobs (transmission removal, torque tube sliding back, bell housing removal).
Honestly speaking, this job isnt so bad so far (disassemble wise). I however am very happy i am not doing this on jackstands! Its just a lot of stuff that needs to be removed from the car is what makes it such a daunting task. If everything went smoothly (mainly no issues with the sensors and RMS), it would not have taken more than 5.5 hours to get the disassemble phase complete. That is also taking into consideration removing the transaxle the first time has a little bit of a learning curve.
 06-21-2009, 05:37 AM
#2
Rennlist Member
Glad to hear things are progressing for a couple reasons ... happy for you, and I may be needing that press back sooner than later (I f'ed up on my MAF install).

 06-21-2009, 12:38 PM
#6
Nordschleife Master
Thread Starter
mtnman82, i should be able to have it back in the mail sometime this week. Really i cant thank you enough for letting me borrow it!
K-Bit, i will have a picture of the slotted bell housing later tonight hopefully.
Heading back down to the shop right now to finish up. Hopefully will be out of there before midnight.
K-Bit, i will have a picture of the slotted bell housing later tonight hopefully.
Heading back down to the shop right now to finish up. Hopefully will be out of there before midnight
.
06-21-2009, 01:26 PM
#7
Nordschleife Master
Thread Starter
Waiting for my friend to come pick me up, so here are some more notes in the mean time..
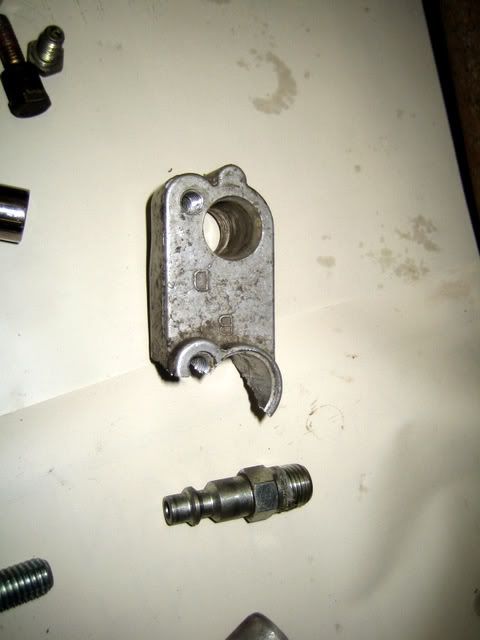
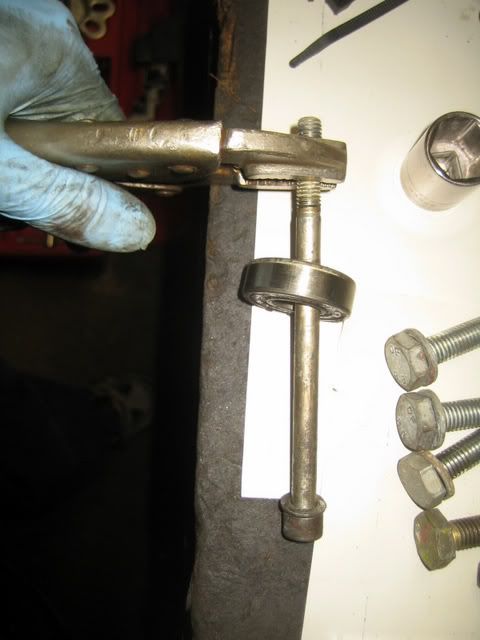
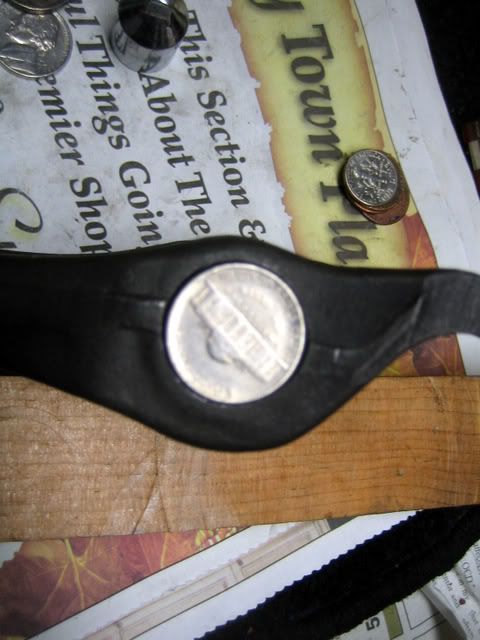
I wanted to replace the needle bearings on the spare clutch fork i bought. I was looking around for something i could use as a stand off on the bearing to press them out. I originally used a socket, but they were quite clumsy and hard to get everything lined up in a vise / clamp. I found using a nickle was the perfect size of the bearings and worked great..
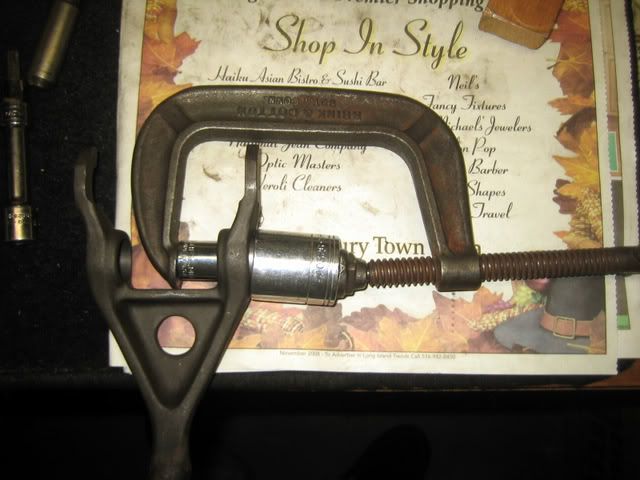
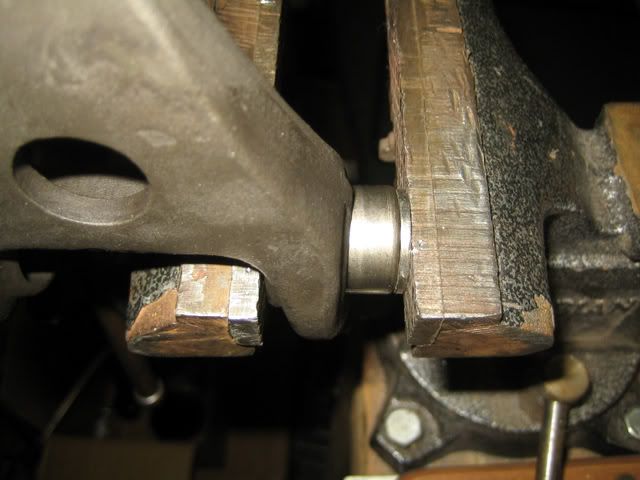
I used the same method to press in the new needle bearings..
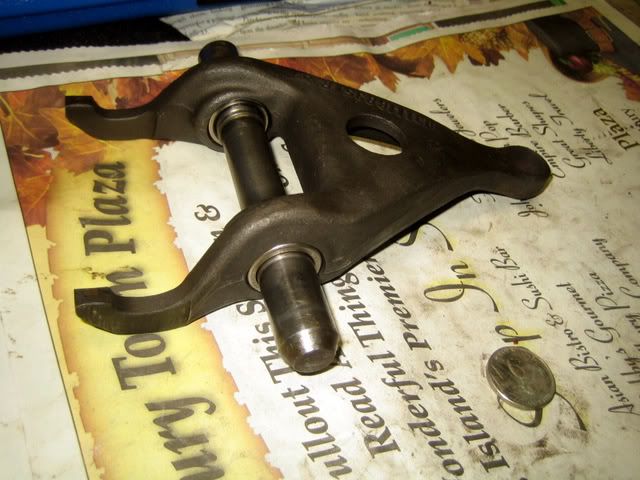
Clutch fork with new bearings..
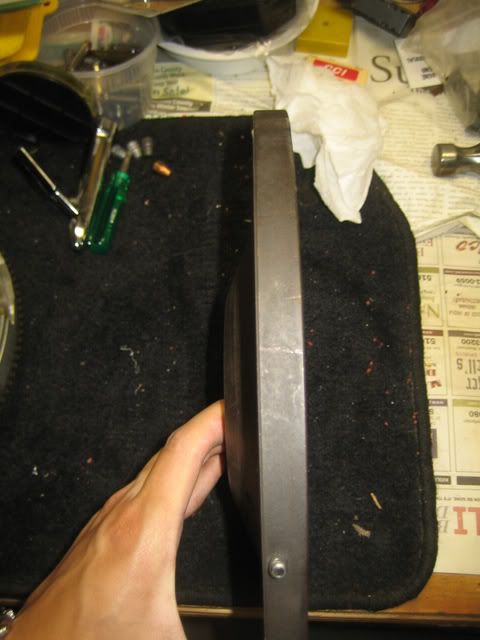
And here is some info about the parts i am using. I had a stock flywheel lightened by a local machine shop. It was lightened to about 8.5lbs compared to a stock disc which is around 14-15lbs.

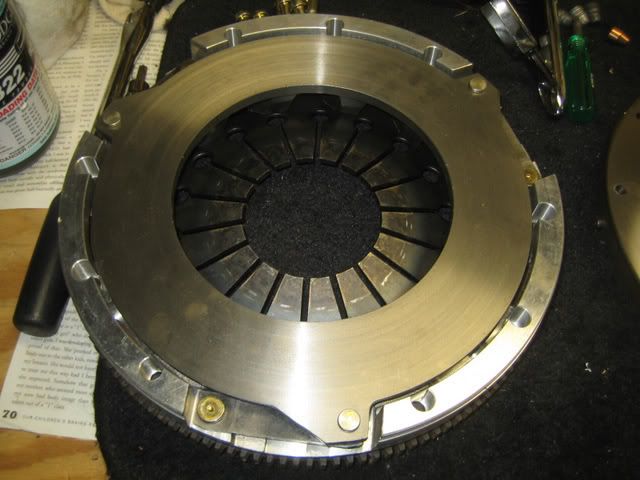
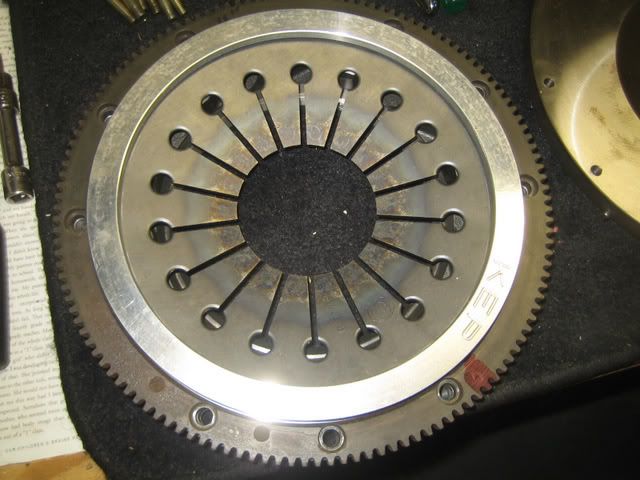
I also went with a KEP stage 1 pressure plate which from what i read should be able to support around 600ft-lbs of torque using a stock type disc (930 or 951Cup). I went with a 930 disc as they are a bit cheaper than the Cup disc. I estimate now my car is around 300whp at 15psi with the 60-1 and i would like to be reliably hold 325-350whp which should be do-able at 18ish psi i think with this turbo. So this setup should work great. The stock setup is said to only hold about 350whp at the maximum, so i have plenty of room for growth from here.
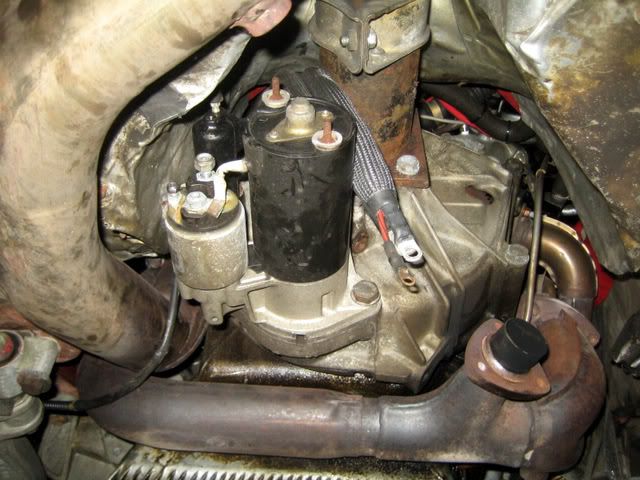
Here are some more pictures from the disassemble phase. Starting out you may wonder how the heck you can get access to the bellhousing, but once everything starts getting removed you get a nice clear shot at it. Here is how it looked with only the wastegate out..
I wanted to replace the needle bearings on the spare clutch fork i bought. I was looking around for something i could use as a stand off on the bearing to press them out. I originally used a socket, but they were quite clumsy and hard to get everything lined up in a vise / clamp. I found using a nickle was the perfect size of the bearings and worked great..
I used the same method to press in the new needle bearings..
Clutch fork with new bearings..
And here is some info about the parts i am using. I had a stock flywheel lightened by a local machine shop. It was lightened to about 8.5lbs compared to a stock disc which is around 14-15lbs.
I also went with a KEP stage 1 pressure plate which from what i read should be able to support around 600ft-lbs of torque using a stock type disc (930 or 951Cup). I went with a 930 disc as they are a bit cheaper than the Cup disc. I estimate now my car is around 300whp at 15psi with the 60-1 and i would like to be reliably hold 325-350whp which should be do-able at 18ish psi i think with this turbo. So this setup should work great. The stock setup is said to only hold about 350whp at the maximum, so i have plenty of room for growth from here.
Here are some more pictures from the disassemble phase. Starting out you may wonder how the heck you can get access to the bellhousing, but once everything starts getting removed you get a nice clear shot at it. Here is how it looked with only the wastegate out..
Trending Topics
06-21-2009, 03:08 PM
#8
Rennlist Member
Dig the wiring/cables, Jon (and from other pics you've posted too). I have a pic of the notch I did in the bellhousing if you want me to post it up. Great progress! FWIW, I also had a bear of a time getting the ref sensors out - I think the same one as you in particular - also why I notched the housing and wound up having to buy new sensors.
06-22-2009, 04:14 AM
#9
Nordschleife Master
Thread Starter
Just wanted to do a quick update.. just got home (took the 951 home.. ). Everything seems fine so far, only issue is the catback is knocking against the body of the car. Pretty sure i know why, but it was evident it was probably going to do it when we bolted it up. Only have about 3 miles on it so far.
Will post the rest of the writeup tomorrow. But here is one of the funnier pictures taken from today. That is me standing on the trans jack trying to get those damn mount bolts in..
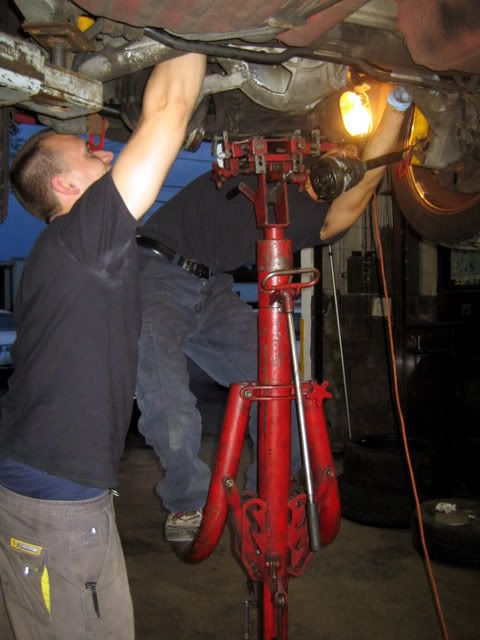
). Everything seems fine so far, only issue is the catback is knocking against the body of the car. Pretty sure i know why, but it was evident it was probably going to do it when we bolted it up. Only have about 3 miles on it so far.Will post the rest of the writeup tomorrow. But here is one of the funnier pictures taken from today. That is me standing on the trans jack trying to get those damn mount bolts in..
06-22-2009, 05:09 AM
#10
Drifting
Join Date: Jan 2004
Location: Michigan
Posts: 2,023
Likes: 0
Received 0 Likes
on
0 Posts
I use the same exact socket/vice method for the clutch fork bearings. Works great everysingle time. For the pilot bearing I normally use a $12 puller I bought Harbor Frieght. I had to grind it down some but it's done the job on many pilot bearings.
I usually use this except when I'm in the middle of a clutch job a realize I left it with my other tools 2 hours away. lol This time I used a slide hammer puller which still worked ok.

I usually use this except when I'm in the middle of a clutch job a realize I left it with my other tools 2 hours away. lol This time I used a slide hammer puller which still worked ok.
Last edited by eniac; 06-23-2009 at 04:35 AM.
06-22-2009, 09:32 AM
#12
Drifting
Join Date: May 2008
Location: Virginia Beach, VA
Posts: 2,080
Likes: 0
Received 15 Likes
on
11 Posts
I tried the bolt/washer, slide hammer, the grease method, and a tool similar to the one Stephen posted. The last one pulled out the center of the bearing and I ended up having to use a die grinder to get the outer race out of the crank 
06-22-2009, 03:13 PM
#14
Nordschleife Master
Thread Starter
John, check page 30-1 of the factory transmission manual for a good explanation with pictures..but basically the push rod i am talking about is on the clutch pedal linkage under the dash. If you look up under the dash where the clutch master is mounted to the firewall, there is a pushrod that connects to the pedal linkage and engages the master. This adjustment can be changed by loosening the locknut and threading the pushrod in or out. According to the factory manual, there should be 3mm of freeplay in the pedal before the pushrod engages the master. If the push rod has no freeplay it can essentially cause the clutch to be engaged all the time. This is why my throwout bearing was toast i think, 10k miles of it being engaged pretty much. The flywheel and disc were also badly glazed from when the clutch was slipping..but amazingly as soon as i adjusted it back it held the power just fine. The clutch only slipped when the car warmed up and on full boost. Once i readjusted the pedal everything was fine.
For the pilot bearing, were you guys using a small slide hammer or a larger one? I have a HarborFreight one and its about 2ft long maybe when fully assembled. I could not see how to get the slide hammer up there without hitting the torque tube. I did not want to pull it out at an angle either.. so i just used the vice grip / bolt method.
For the pilot bearing, were you guys using a small slide hammer or a larger one? I have a HarborFreight one and its about 2ft long maybe when fully assembled. I could not see how to get the slide hammer up there without hitting the torque tube. I did not want to pull it out at an angle either.. so i just used the vice grip / bolt method.