When you click on links to various merchants on this site and make a purchase, this can result in this site earning a commission. Affiliate programs and affiliations include, but are not limited to, the eBay Partner Network.
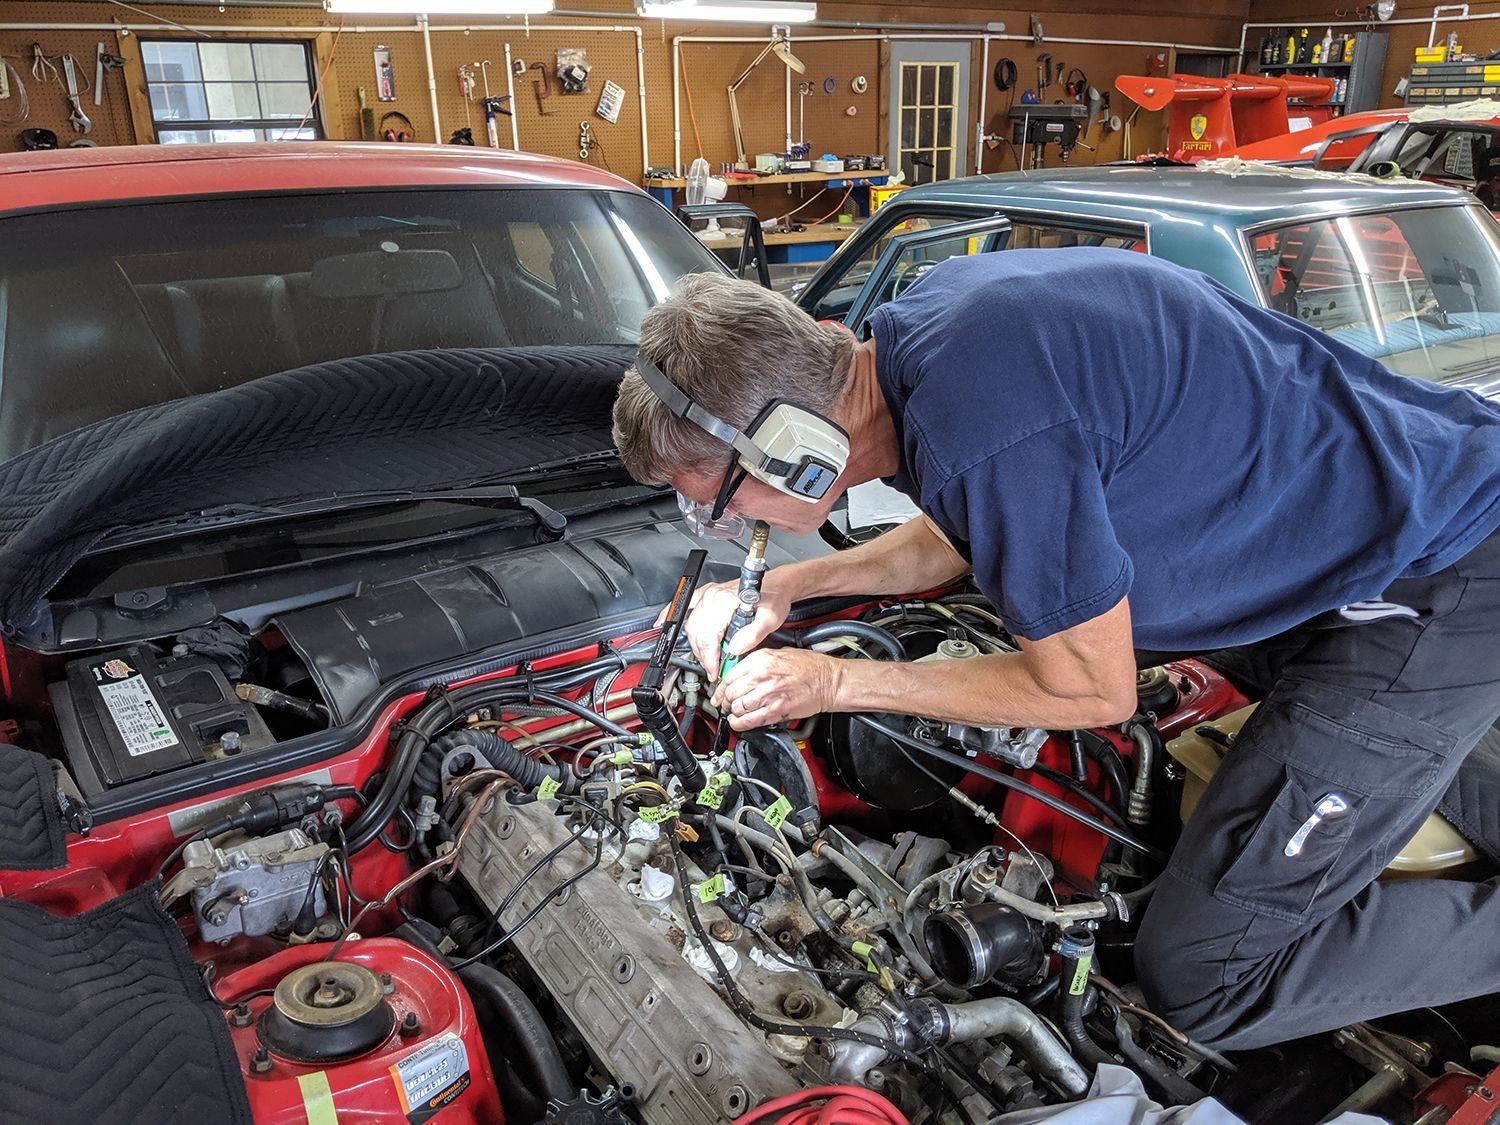
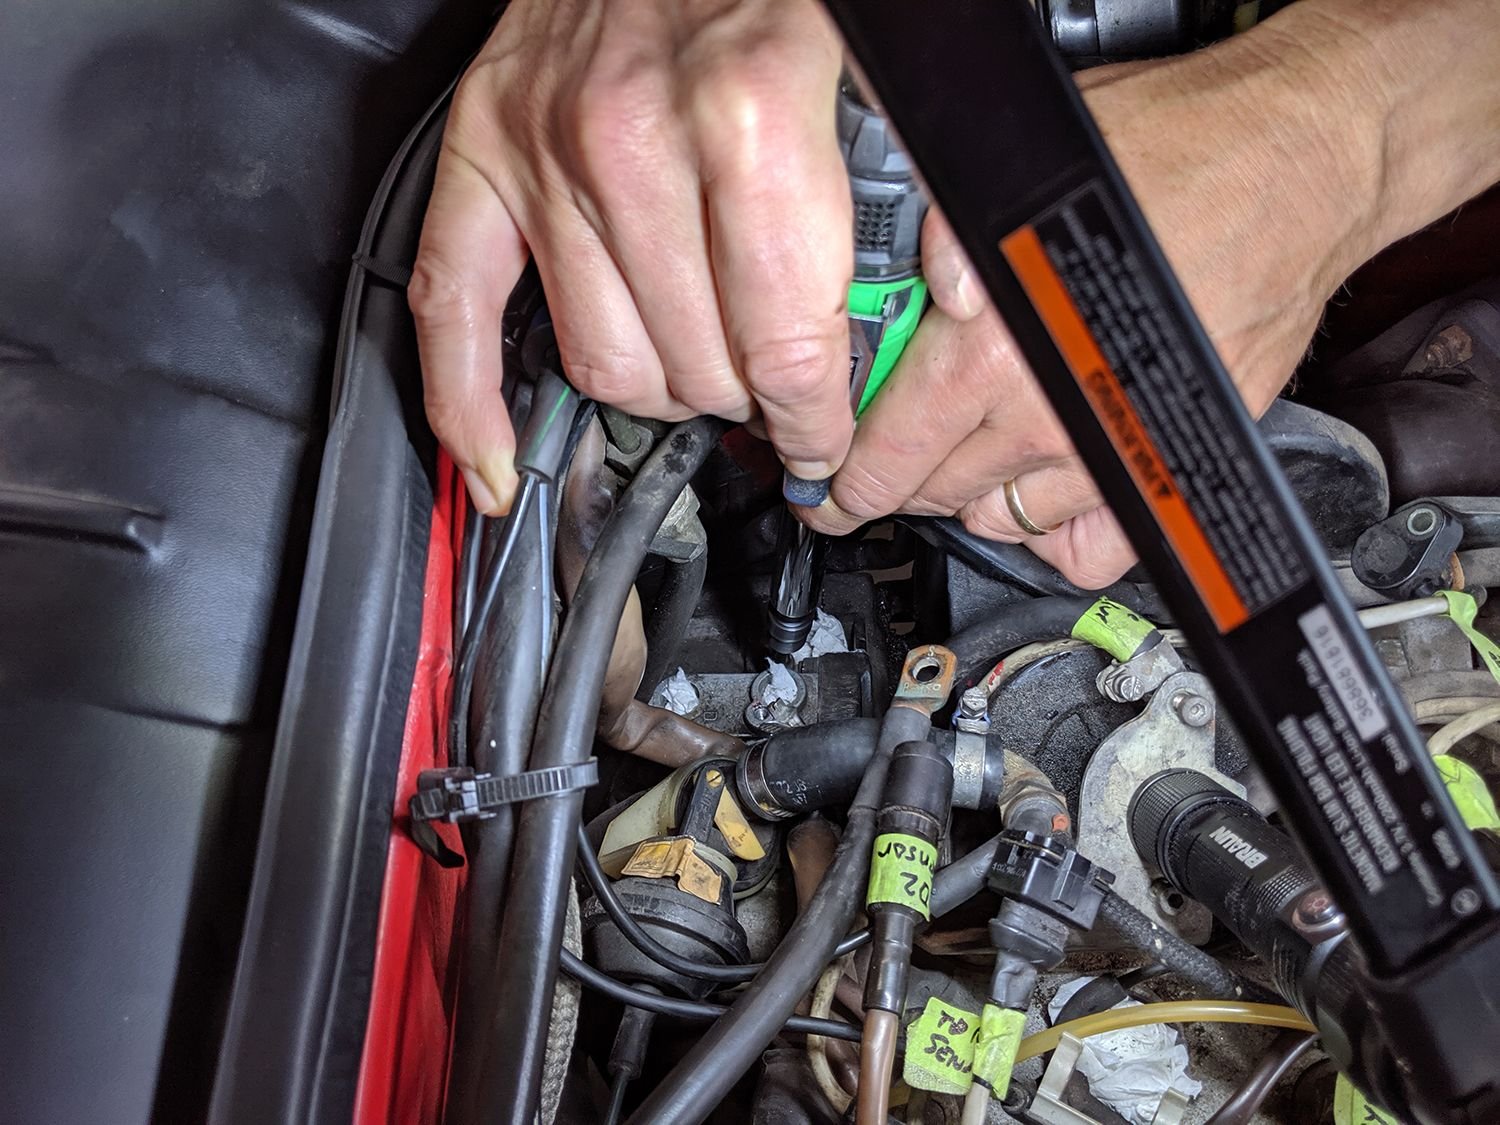
Black51, thanks for the suggestion on the venturi. I think I've identified it in the photo here. The black plastic thingy was sticking loosely in there, which I'm assuming is correct since it's supposed to suck air in around it like a venturi? (I guess the small plastic point shoots air into the Y tube, creating a venturi effect, drawing air in...) When you delete it, how do you do the plumbing? Any photos of your setup? I guess I can search the forums... probably somebody's got some photos of it. By the way, the idle control valve was flopping around in there and it seems like many of the hoses are loose. I'll definitely be able to seal off some vacuum leaks here.
You got it. The plastic thing you're pointing at is the venturi. You'll be amazed at how much better it will look under there. Here is the link for the vacuum diagram. You'll need to find which year and setup you are running and go off that setup. In your case, I believe you will want to go off the "86-88 944T w/Stock Intake (1 vac port), Stock WG, Venturi Delete" diagram. The blue hose will be the new delete hose.
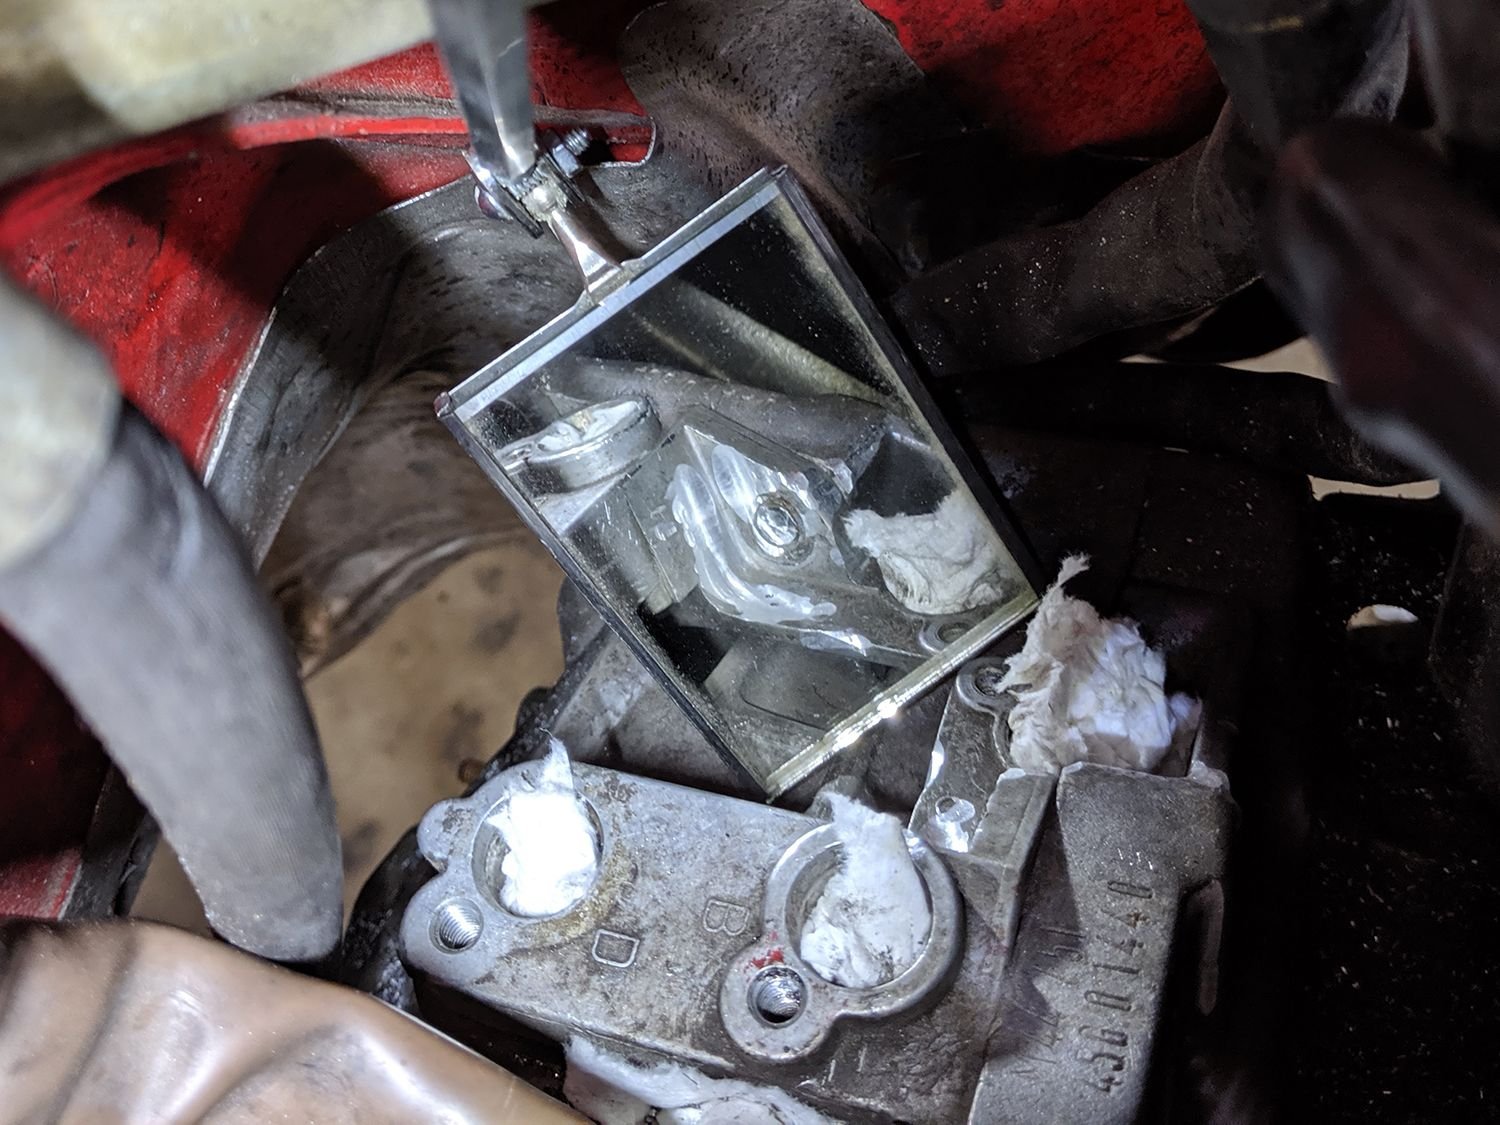
Finally got the reference sensor bracket bolt off this evening... by grinding the head off! I'd stripped out the allen socket, so I took off the hood, clambered up onto the fender and engine with an extended die grinder, and 15 minutes later I had the bellhousing in my hands. I wish I hadn't wasted three hours prior to that will various tools trying to remove the bolt.
It was a tight fit there, but I had enough clearance to get one finger on the grinder to apply pressure while holding the trigger down with the other finger:
Here's a closeup in the mirror of the removed bolt head. I was happy I didn't grind into the bracket any more than I did.
YAY!! Now with some prying, yanking, jiggling, and a bit of cursing, I got the bellhousing free of the the block.
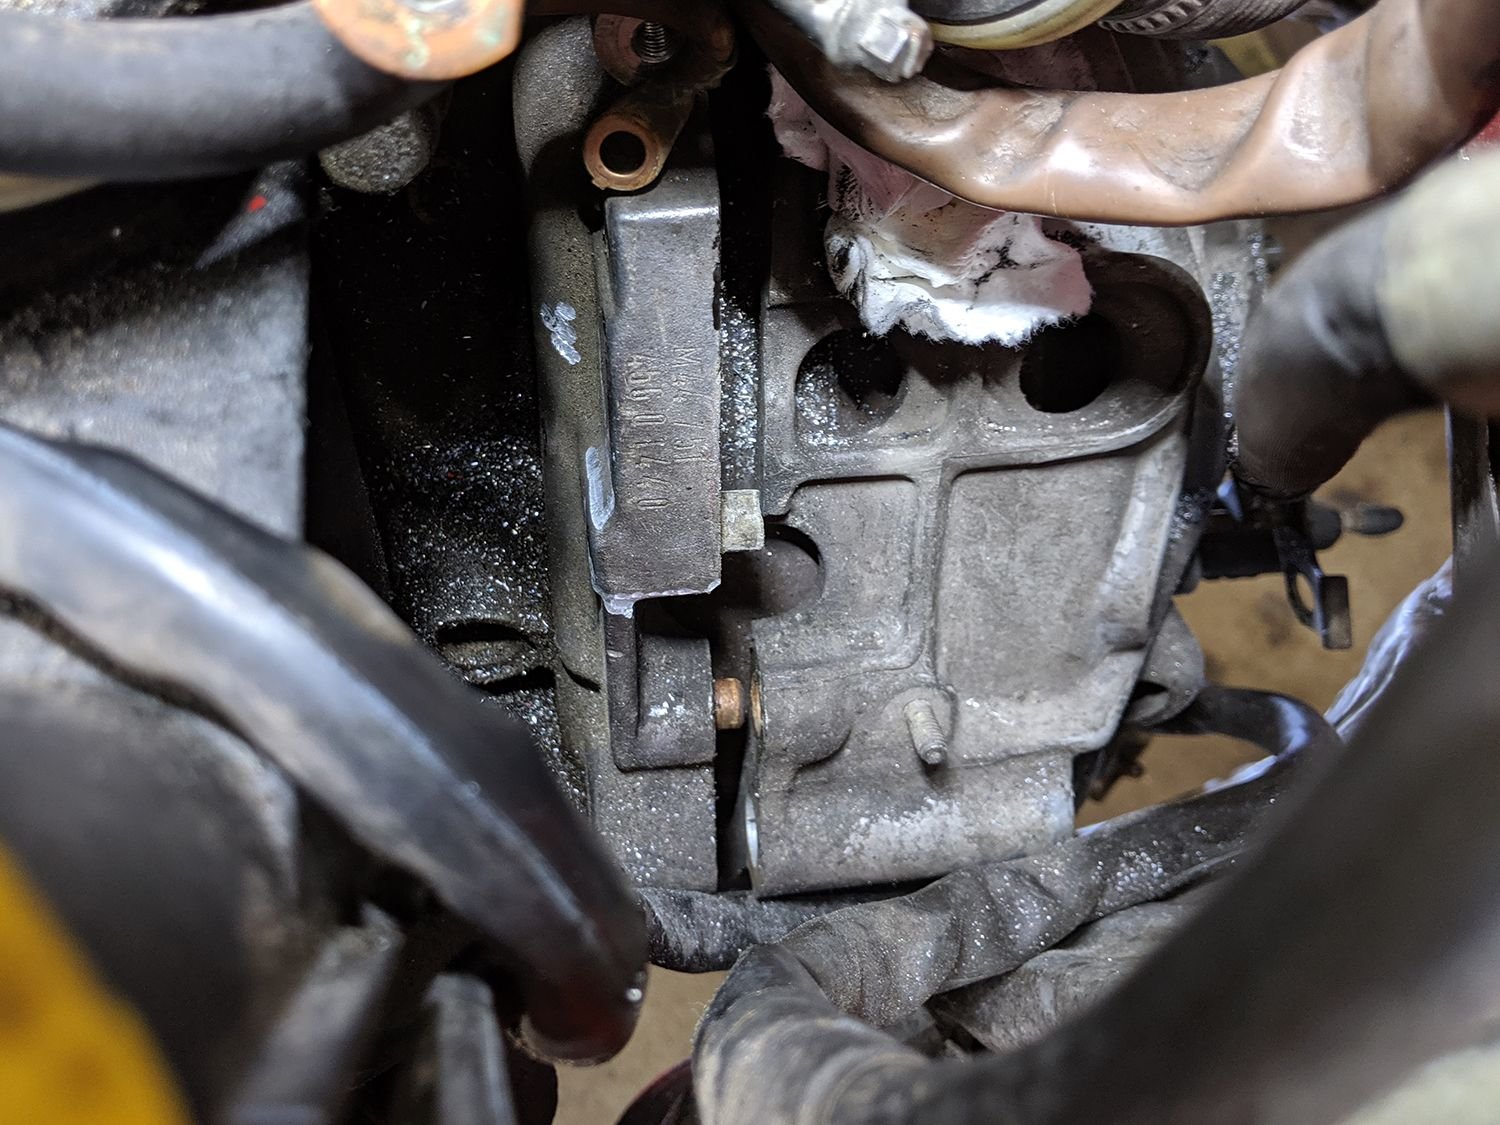
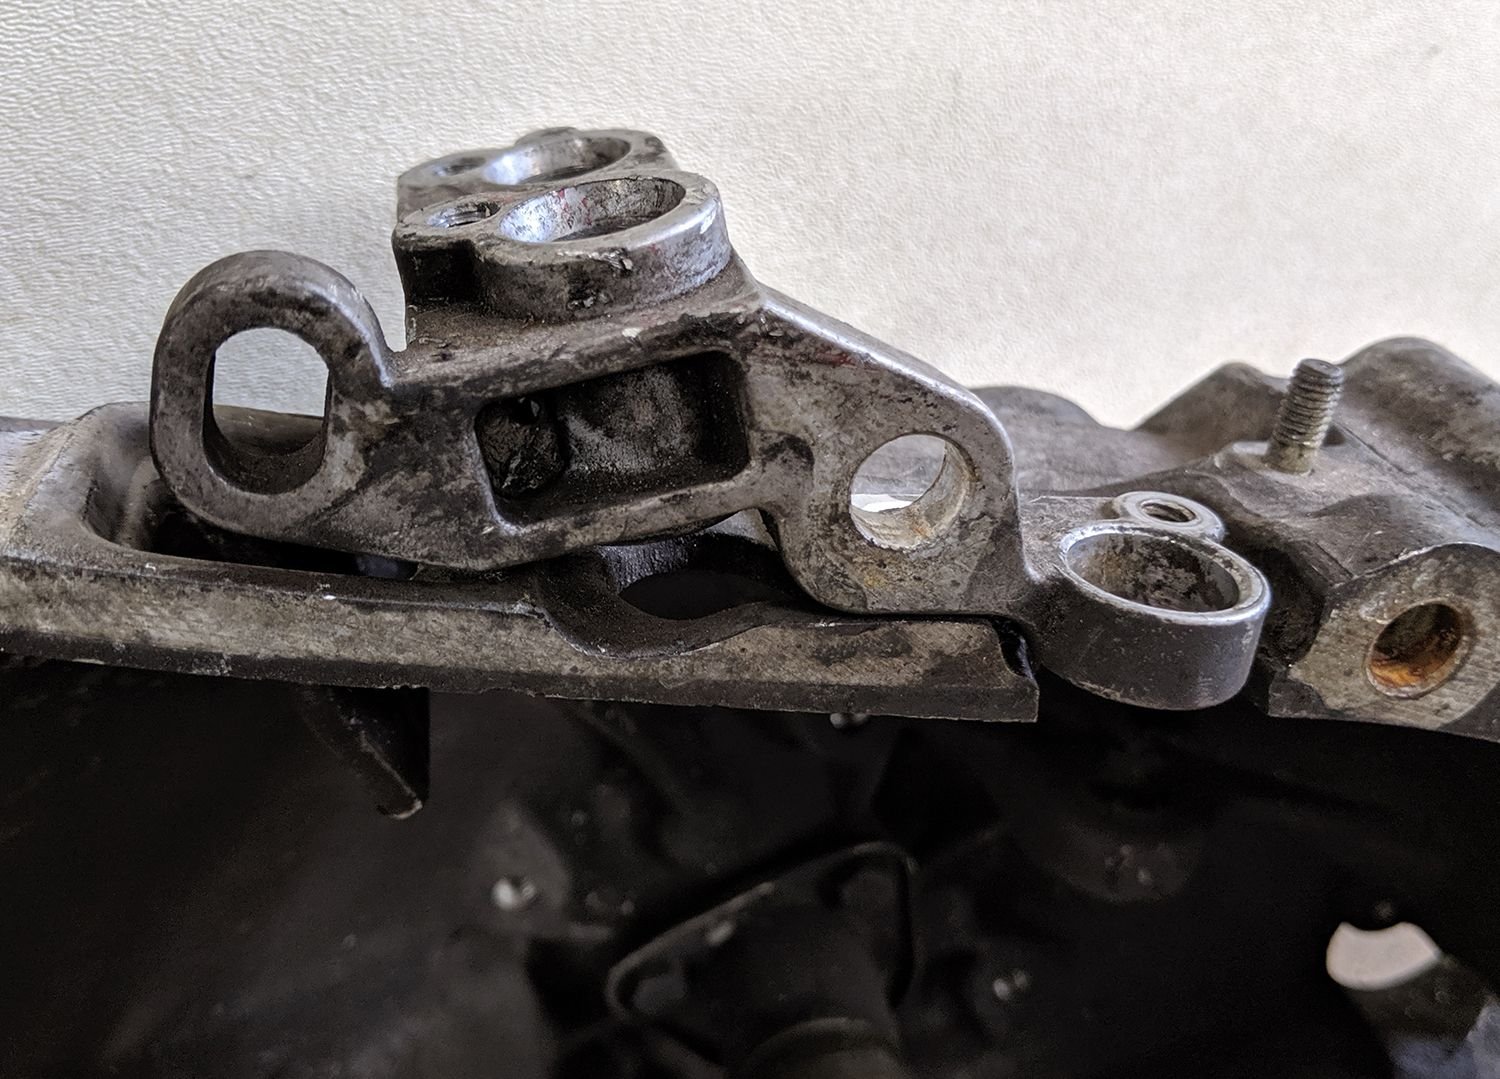
Now I wanted to post a couple of photos of the reference sensor bracket. Looking at it, it appears that I should have been able to slide the bellhousing off without removing the bracket. However, I think the problem is that the clearance between the parts is too tight, and it's not like you've got the engine out on a laboratory table with plenty of clearance... you have to pry and jiggle to get it to come apart because you only have an inch between the firewall and the back of the bellhousing. I thought this photo might be helpful to someone trying to envision the fit-up between these parts.
Mine did not have a bolt in the oval hole on the left side... I don't know if it vibrated out or what. I'm just glad that the car ran well. I'll definitely put in two HEX HEAD bolts when it goes back together!
Oh, I forgot to ask, what is the sensor hole on the right in the photo in the previous post? I think in the Van Svenson YouTube video, he says it is not used and takes a special joy in throwing it into the trash. Just curious.
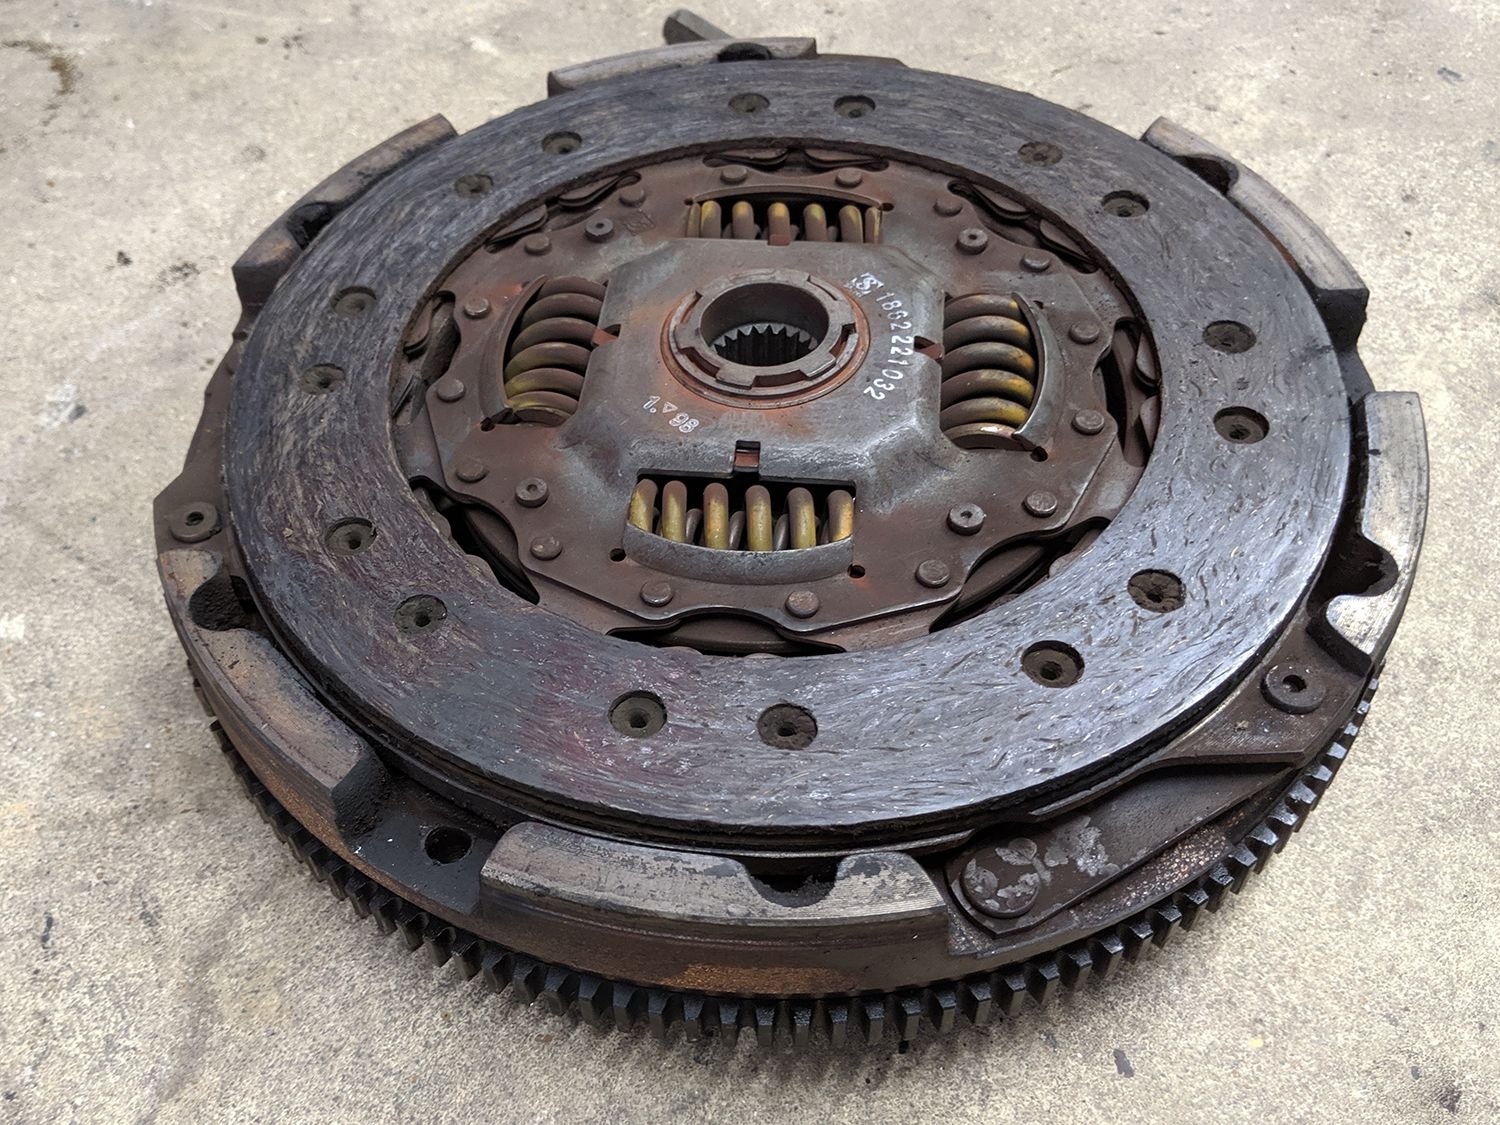
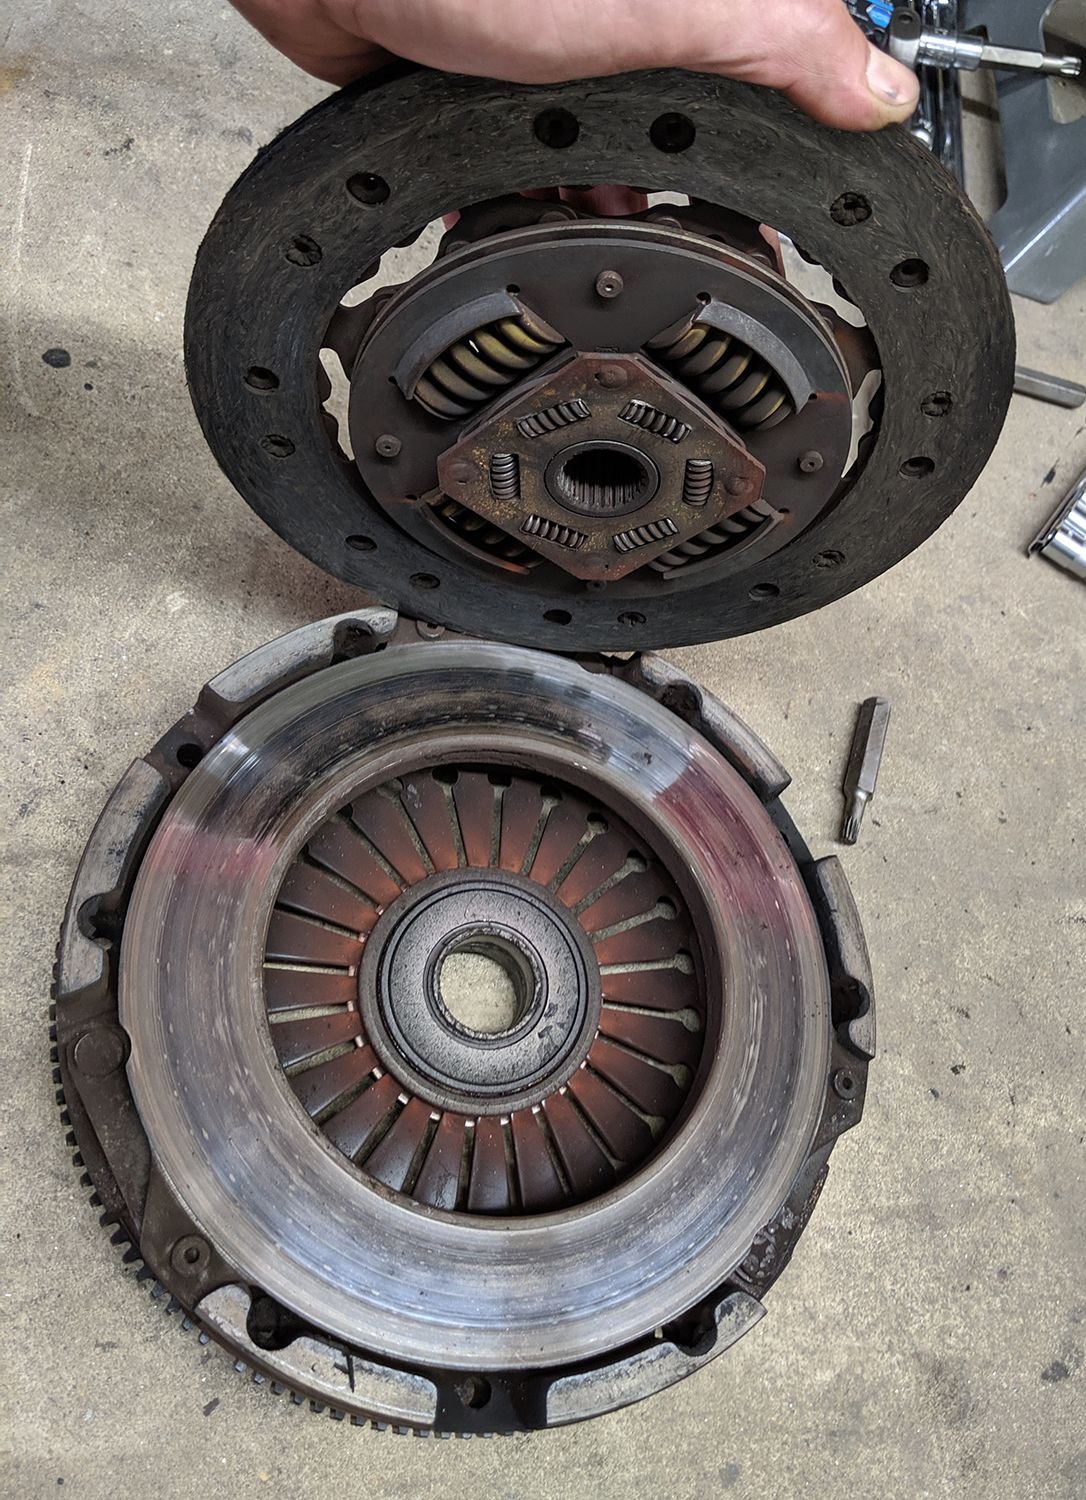
Finally, I got a couple photos of the clutch and one comparing the new one to the old:
It doesn't look bad! The pressure plate and flywheel also look good. Here's the pressure plate:
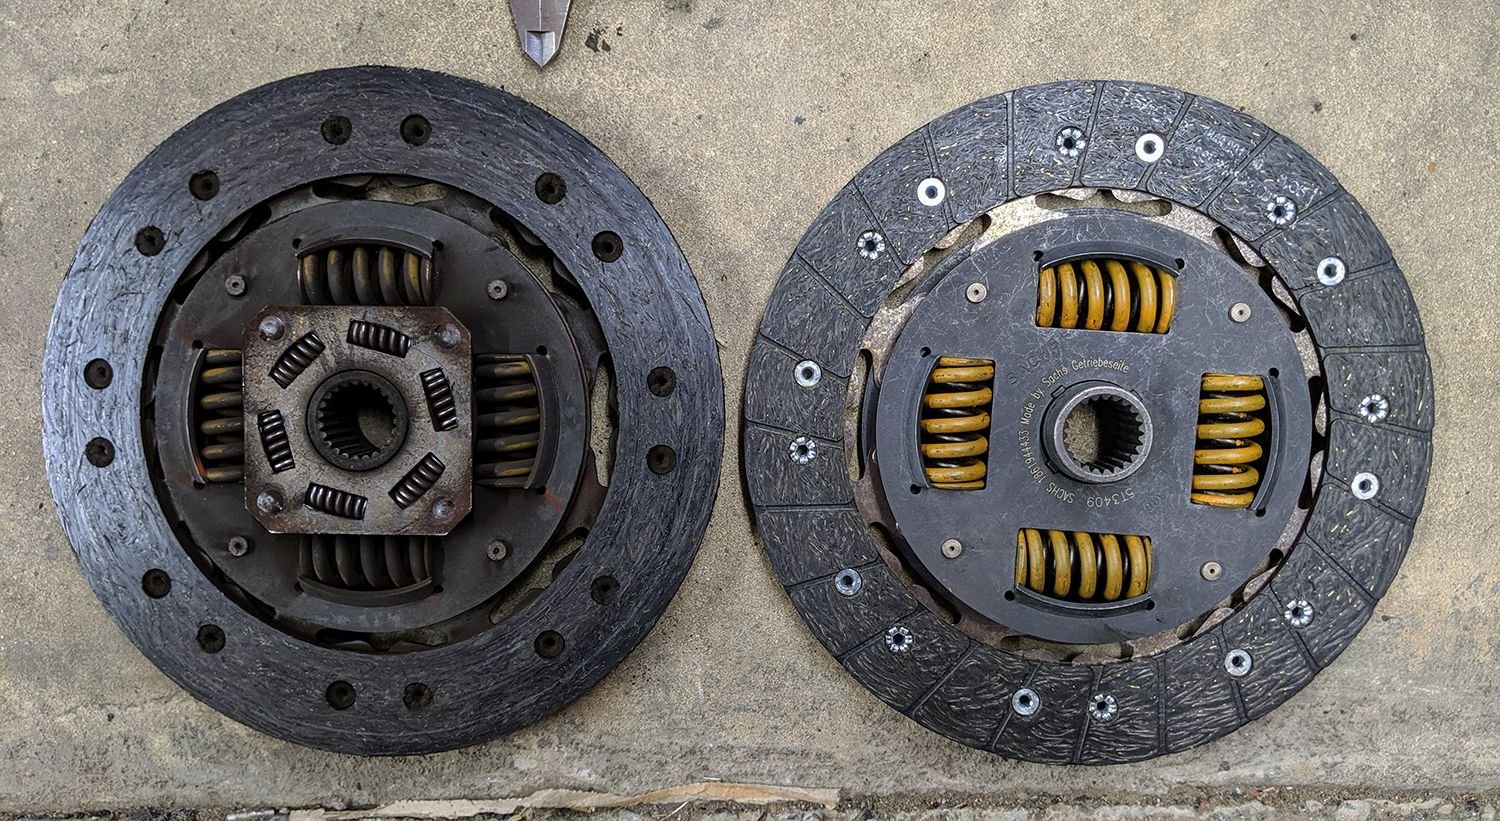
Here's a photo comparing the new to the old clutch disc. They are both Sachs. However, the old one has an extra little flange with tiny springs. Any idea what the difference is? Oh, and the new disc is 9.0mm thick, and the old one is 8.25 mm. So I think I may have been premature in my clutch replacement. Any thoughts on that?
That's some serious operation you did there. Seems like your bolt may have been pretty frozen... lots of anti-seize for the new ones
As for prematurely replacing your clutch.. my original disk was still half to spec; it's the throw-out bearing that went. After thirty years, something's gotta go
Re-assembly time coming... the fun part.. new parts!
When I replaced mine in my 89 I thought "Holy cow, This clutch disk isn't all that bad" I had a New PP and FW but I had to re-use the TB and when I pushed the PP down with my hands to release the clips from the TB, I didn't think anything of it...�. Until I had to compress the New PP.... Wow...(Lets say I couldn't just push down on it with my hands) My clutch was slipping due to it having low clamping pressure not because the disk was bad... I replaced everything anyhow but I would never have thought that....
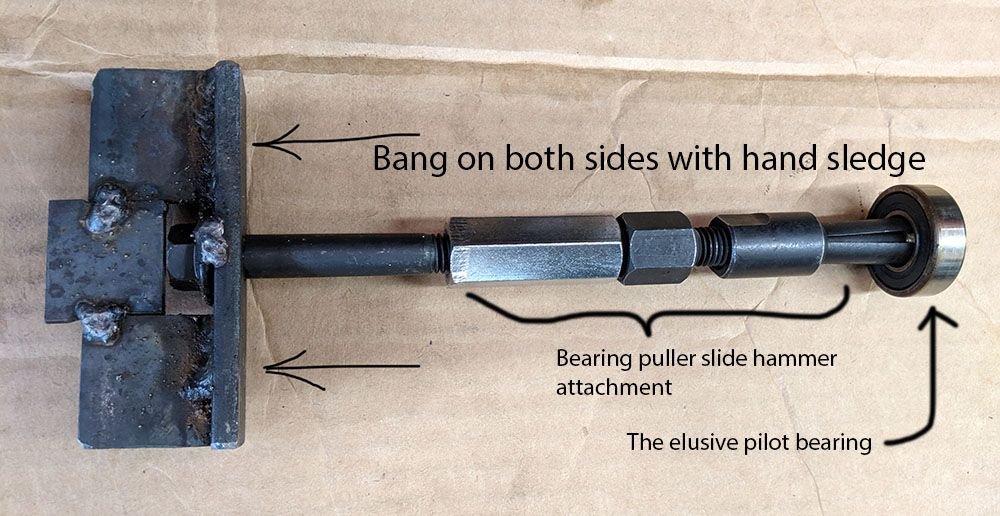
thanks for the input, Dan & Black51. I am happy to report that I am now going back together with the clutch! My final challenge was removing the pilot bearing. I bought a bearing puller kit on Amazon (less than $30) with a 2 lb hand sledge. Unfortunately, the length of the tool put it way back behind and above the torque tube, so I couldn't slam the hammer. So I spent an hour fabricating my own tool that allowed me to pull it out using the attachment from the bearing puller kit. A few whacks with the hand sledge and it didn't budge. "What?!" I kept whacking it and landed a few good square hits and it came out. It took a lot of whackings to get the new one in, but I can now officially say that I'm going back together with it now.
My custom pilot bearing removal attachment, allows you to bang out the bearing with a hand sledge.
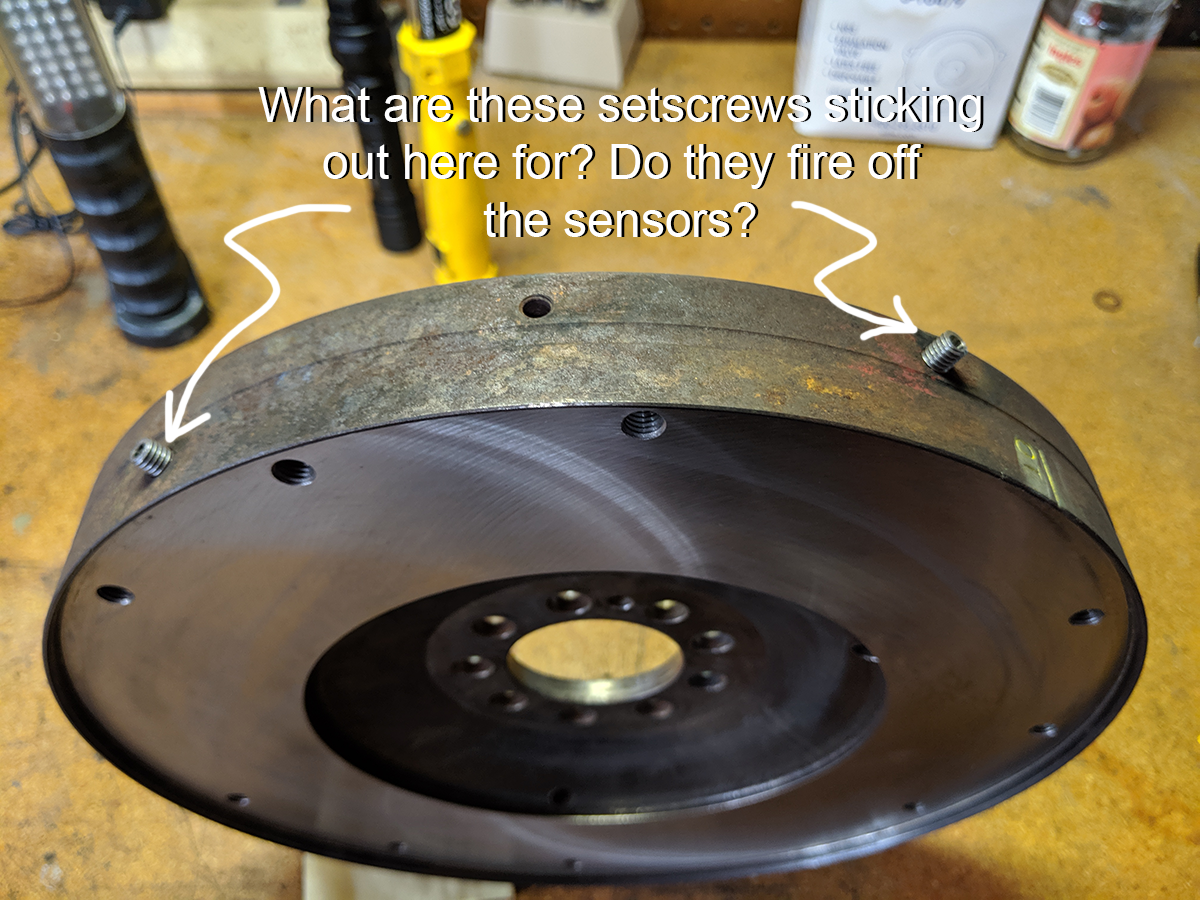
Well, I was premature in proclaiming that I was "going back together with the clutch"... I decided to replace the heater hoses and the heater control valve, which put me back a little while waiting for the parts (thank you Emanuel Istudor at 944 Store.com!). I put the heater hose in last night and put the flywheel back on. I had a question... what are the two threaded set screws sticking radially out of the edge of the flywheel? Do these trigger the speed and position sensors? If so, do I need to measure the clearance between the top of the setscrews and the sensors (0.8 mm clearance I think is what Van Svenson said in his video). If they don't trigger the sensors, then what do they do?
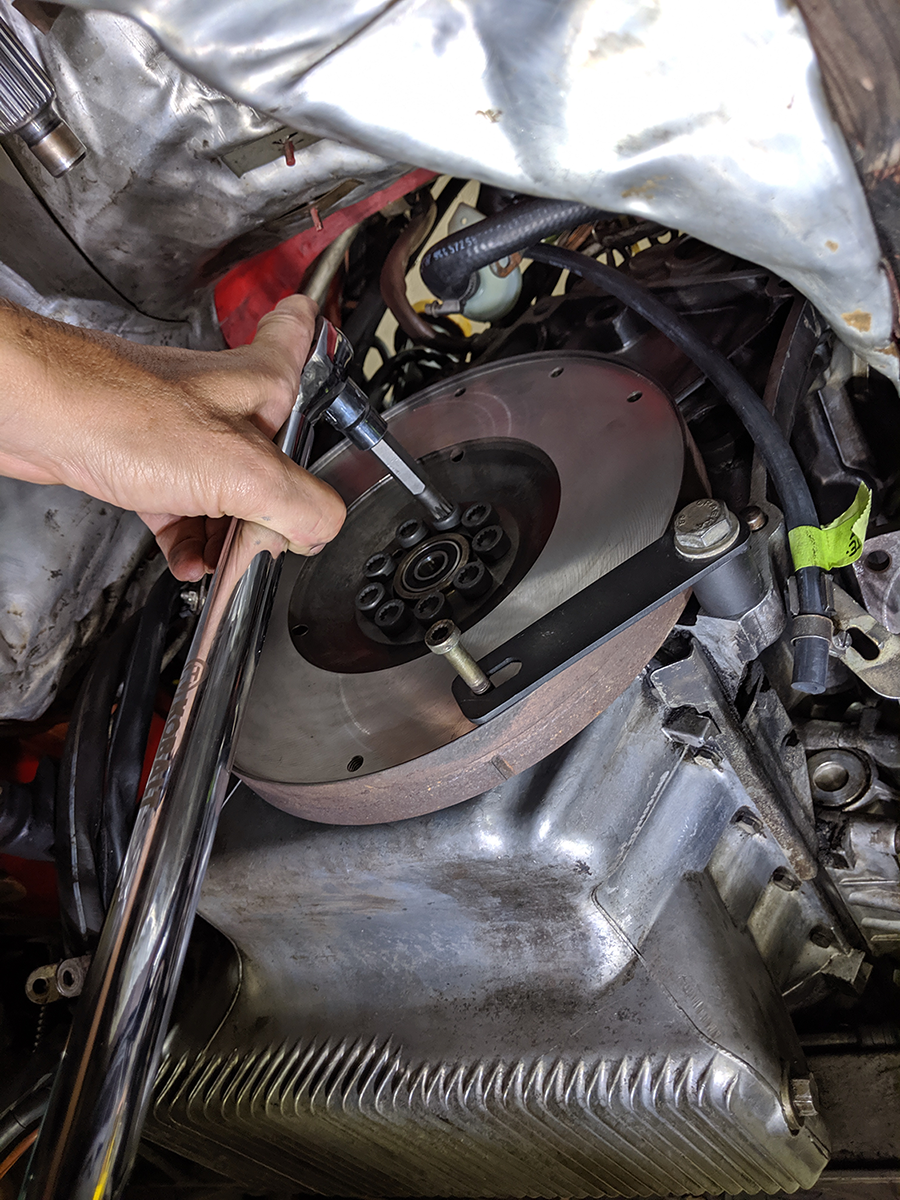
Here's a photo of me getting ready to torque down the new flywheel bolts to 65 ft-lbs. Thankfully I got the flywheel retaining tool from Arnnworx so I could do the job by myself last night. Next job is to install the pressure plate, bell housing, etc.
In your photo below, on the left, that is not the AOS, it is the Cycling Valve (CV). If you have either a Manual Boost Controller (MBC) or Electronic Boost Controller (EBC) it is not need.
Second, third, etc. the suggestions to do the venturi delete and replace as many hoses as you can while in there. Lindsey has a kit.
Thank you for the info... I have learned this since I made that post and have already taken your advice and ordered the Lindsey Racing venturi delete kit. It's amazing that my car ran at all with all the vacuum leaks it had! Right now I'm reinstalling the clutch and driveline. After that's done, I will do the engine mounts and install a sensor for an Air-Fuel ratio gauge.
-Kurt
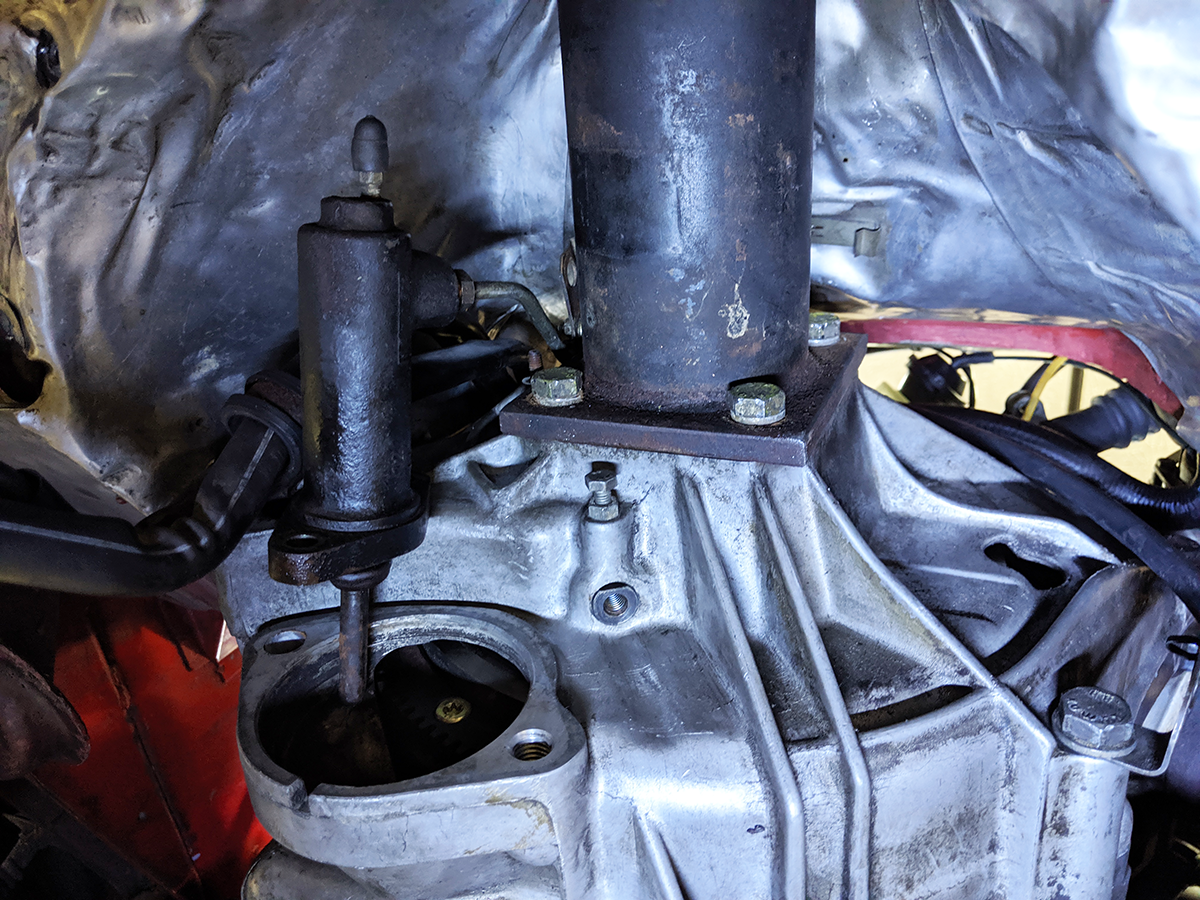
One step forward, one step back tonight. Last week I got the bellhousing on. What a pain those bolts are! Three of the four require a u-joint. For some reason I couldn't get the bellhousing to sit flat at the top. So I took off the heater hose going to the heater valve and cleared up enough space that I could attack the top bolt from above. That was the key... I was able to get enough torque on it and draw the bellhousing in. Tonight got the torque tube back on. It wasn't that hard, but I just couldn't push it forward that last half inch before the flanges met. Thankfully I was able to thread the torque tube bolts in enough to draw the flanges together with the wrenches. I just cranked two opposite bolts until the flanges met, then cranked it down. Everything seemed to sit well. Showing bellhousing and torque tube installed. I'm going to have to remove the slave cylinder because it's leaking and the rubber boot is torn.
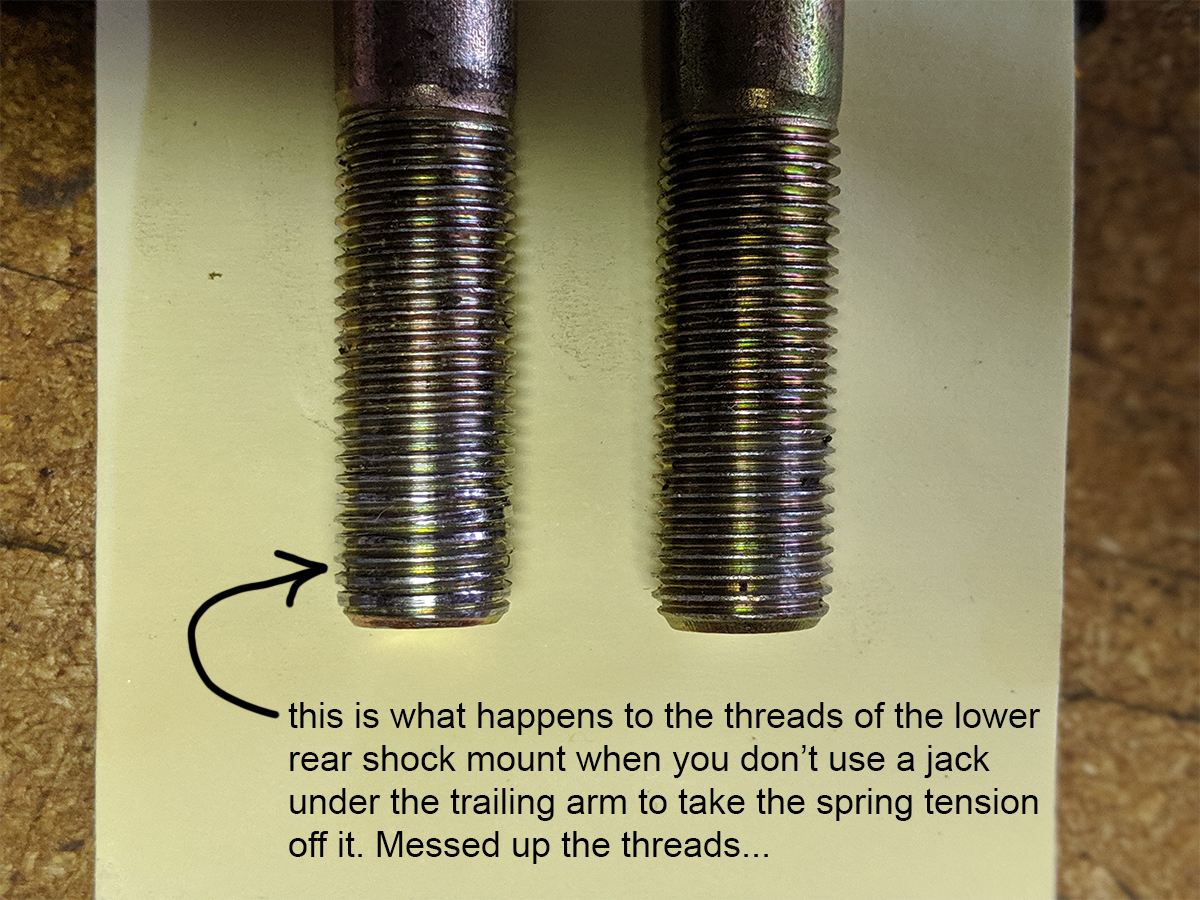
I should have just kept going with the transaxle install, but I thought, "this is a good time to put my new yellow Konis on the back". I started with the shock lower bolts. I should have read Clark's Garage, because the torsion bar is wanting to press down on the lower shock mount, so by the time I see the bolt getting jacked to the side, it's too late... I've stripped the thread. Ugh. Time to buy a new bolt. I used the jack on the other side and, after I broke the torque, I could unthread it by hand.
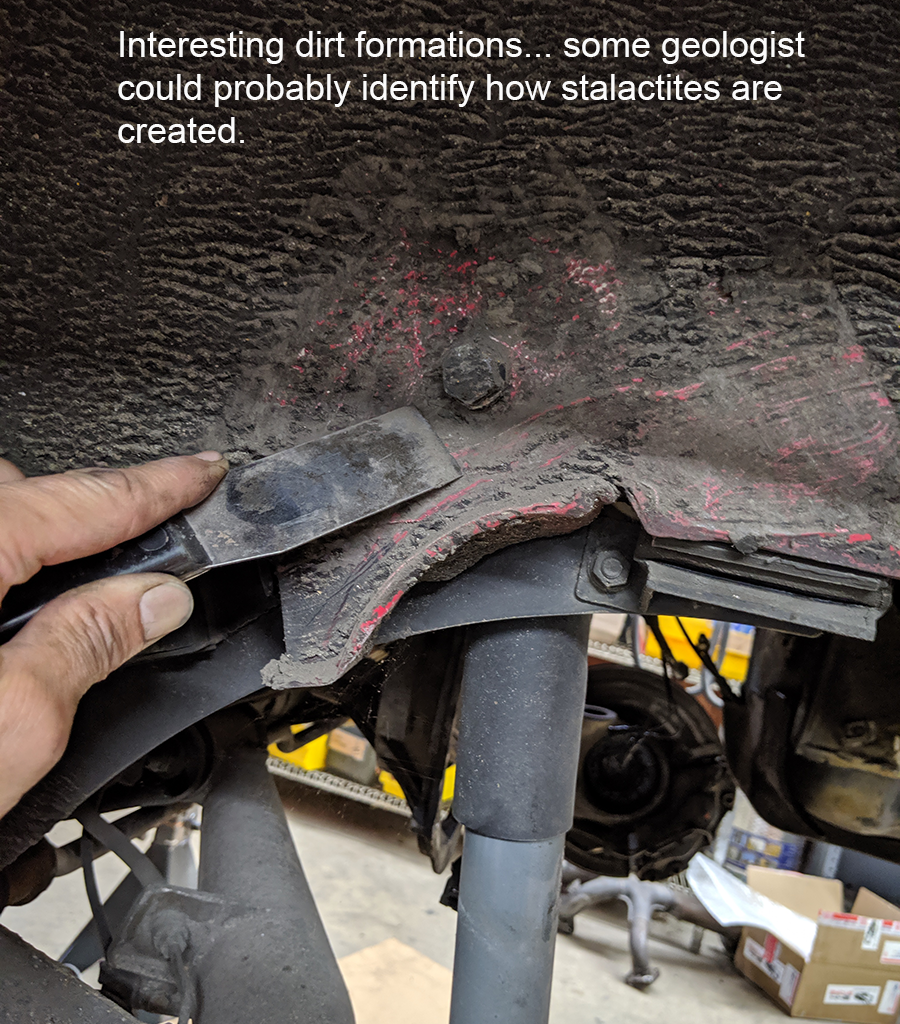
Finally, I was stymied in the removal of the upper shock mounts until I saw the photo in the Pelican Parts shock replacement guide. The bolt head actually is on the inner fenderwell! I couldn't even see it for all the dirt built up there. After scraping the dirt off, I was able to break the nut loose on the passenger side, mainly because I could get my box end wrench around the nut. On the driver's side, there's not enough clearance between the nut and the fuel tank, so I have to use the open end. And, BOY, is that thing tight! I couldn't loosen it from the outside, either. I soaked it with more PB Blaster and called it a night. Maybe next session I can get someone to help me. Or I may just have to attack the bolt head with a grinder.
If you change the slave cylinder, do yourself a huge favor and change the master and the hose/pipe that runs between them too. A million years ago, one of the first things I had to repair on my car was a master cylinder that was leaking onto the carpet inside the car. I fixed that and was happy for a week. Then suddenly the slave cylinder went bad a week later (on a hill in San Francisco!). So I fixed that and was happy for another week. Then the hose/pipe the runs between them went bad, so I fixed that and have been happy for 20+ years. They apparently like to age together, and the old parts don't survive the new-found pressure of new parts... Once you bleed the clutch once, successfully, you'll want to do everything you can to avoid doing it three weekends in a row. Get the Motive pressure bleeder too.

 07-04-2019, 12:55 AM