When you click on links to various merchants on this site and make a purchase, this can result in this site earning a commission. Affiliate programs and affiliations include, but are not limited to, the eBay Partner Network.
I guess I can also start the seal off crooked, with the problem end shoved in first over the smooth bore edge, but then I'd risk bending the seal to get the other end in
Don't start the seal in crooked! I think that your problem was likely caused by someone trying to install a new seal, then got it started going in crooked and the sharp edge of the seal gouged out the soft aluminum case when driven in with a hammer. Soften that sharp edge in the case somehow, put some sealer around the outside of the seal and drive it in straight.
The seal is metal clad with rubber coating.
You literally push this type seal in with your fingers, without a driver.
Doubtful it could have damaged an aluminum housing.
I'd tilt the seal to get initial starting past the damage and stand seal straight once past the damage.
Not a big deal.
If I absolutely had to refinish the seal bore, I'd clamp a hard cutter (like from a brake lathe) with small vice grips and use rotation of the shaft to "machine" the high spot back into spec.
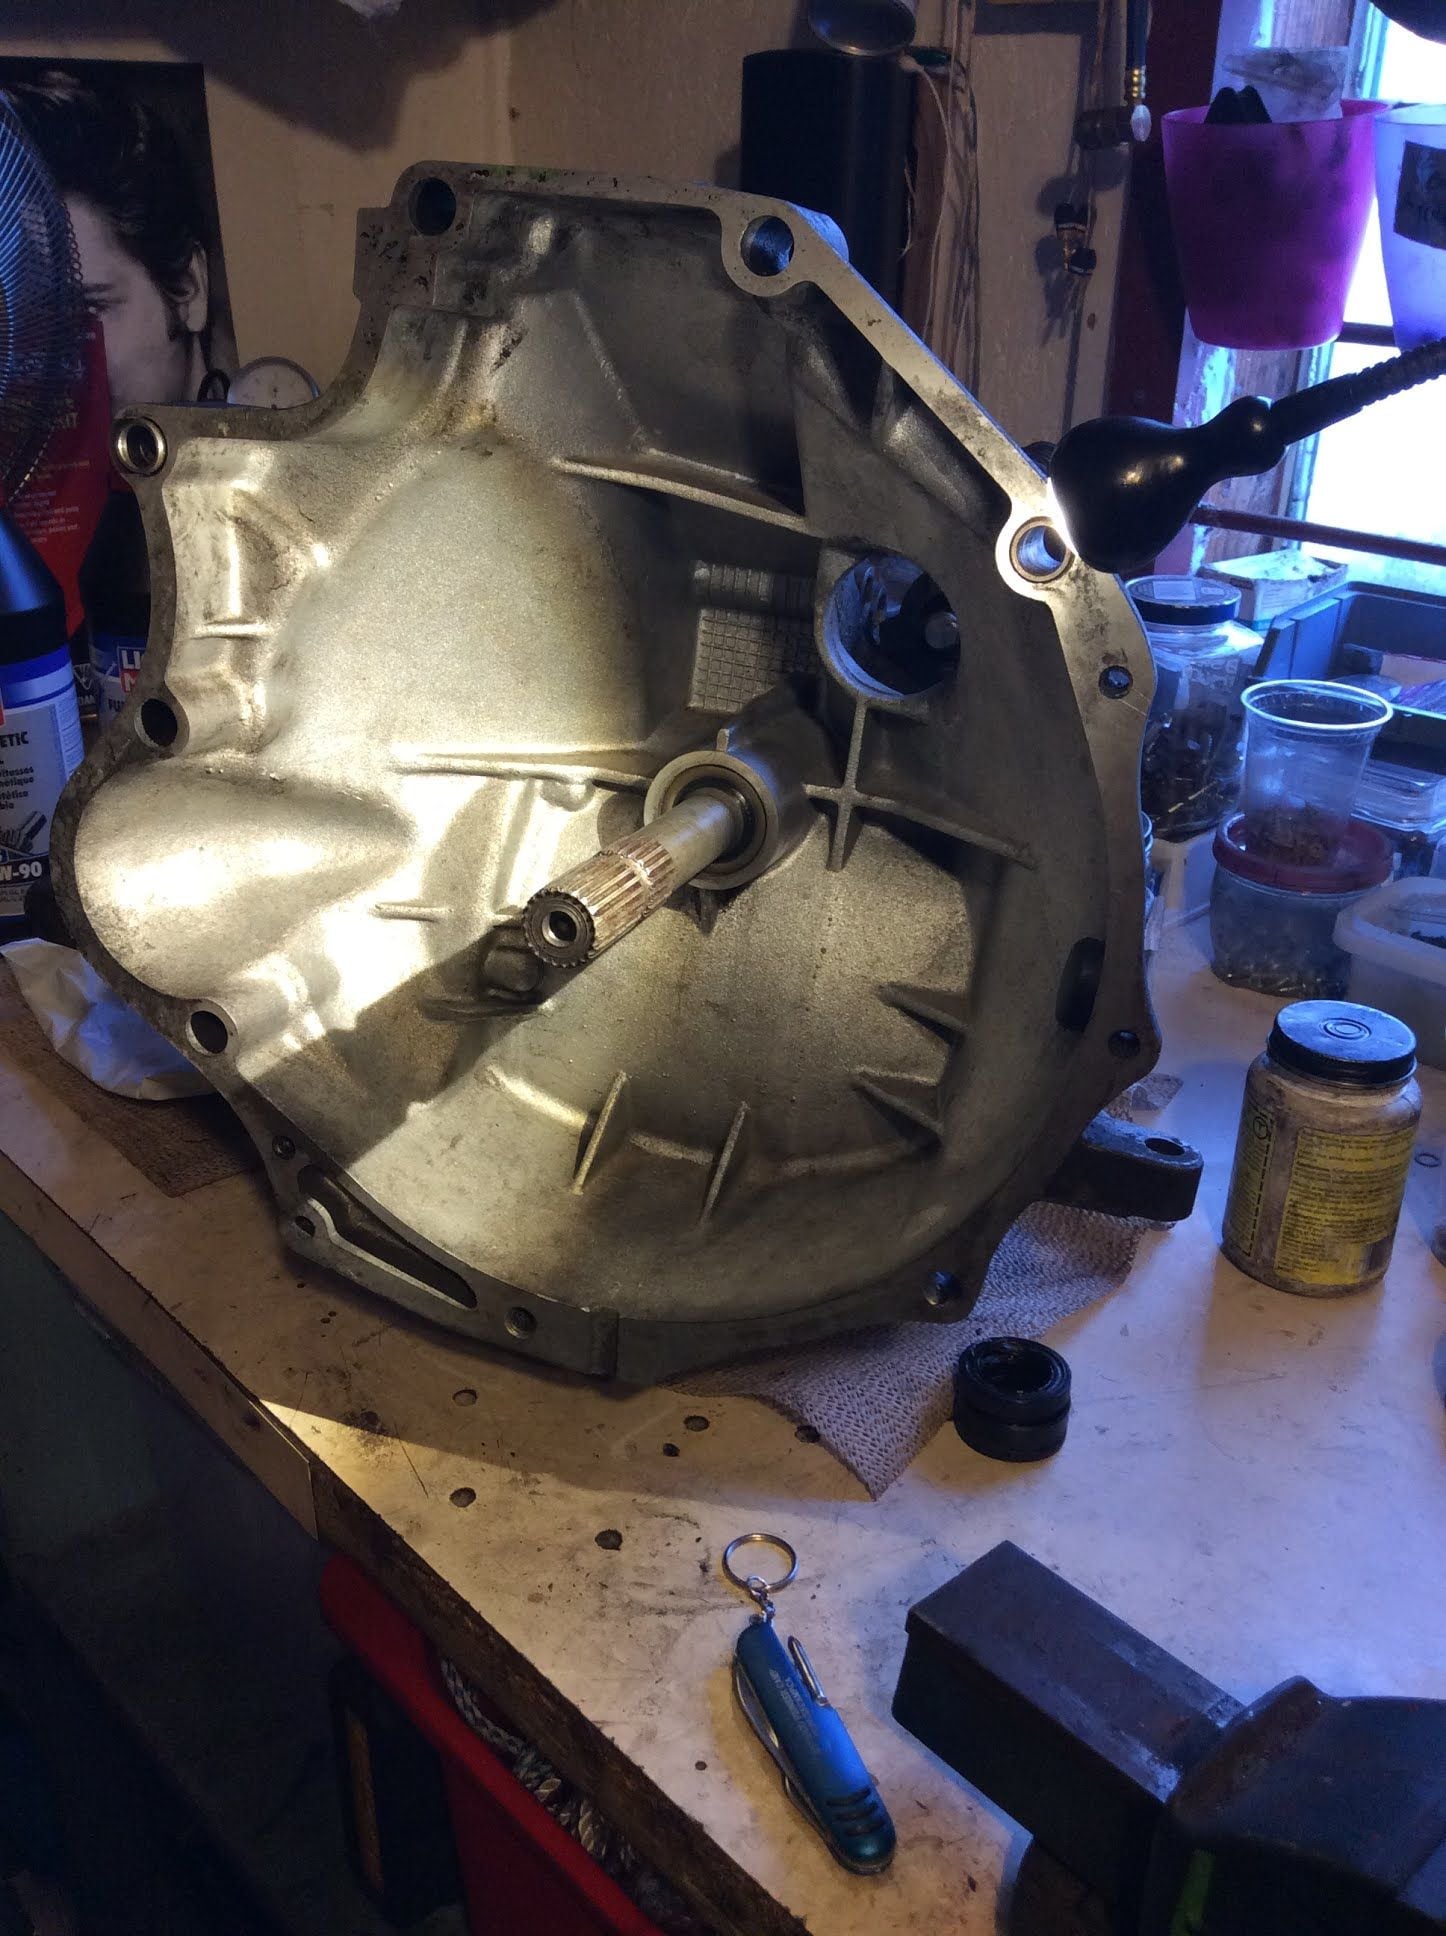
Kevin.. there is no edge higher than the smooth bore; it's just that in the problem area the smooth bore ends without a bevel, making it impossible to start the new seal without getting caught (there is still about 1-2mm from end of smooth bore to hole opening, and the seal starts tight to the hole opening as is)
BTW the WM says to put 'oil' on the seal before installing. Do they mean regular oil or trans fluid?
Well, I'm not sure of the issue but would simply smooth out whatever's going on at the lip so that you can drive the seal in. Someone must have awfully big fingers to install it just with his fingers... I use the factory tool with a few hammer taps. You can use a pipe section (if ambitious) or a large, flat-headed drift working (gently but firmly!) around the circumference to start it and drive it to position. Yes, it should be set perhaps 1 or 2 mm in from the edge of the bore -- something else the factory tool takes care of. (Actually a tool for the 968 series transmission, but works brilliantly for the 944 series too, sets the seal to just the right depth.)
It doesn't matter what oil you use on the outside, the idea is to make installation a bit easier with some lube. I smear some of the grease I use to fill the seal's innards on its outside as well. This need is true for all radial oil seals. VW/Audi makes a special grease for filling these seals, I get about three transmissions out of a tube, it's easy to work with and does not have MoS2 so is "safe" for the LSDs. Dimi's suggestion of electrical tape is a good one. Good luck!
Wow thanks for all the input! I am still waiting on a new seal.. this time from a local Porsche dealer; I'm curious what it will look like.
My JB Weld restoration looks pretty good, so I'm just going to lube the seal (with grease), start it just a bit deeper on that area, and slowly tap it in using the same tool I tried the first time: the end half of my floor jack's 2-piece handle. Yep, it's the perfect size--sits on the face dead centre
I did find that this particular seal goes in quite easy; it's nowhere near as tight as, say, the rear main seal I installed or even the trans seals on the sides behind the axles
If I absolutely had to refinish the seal bore, I'd clamp a hard cutter (like from a brake lathe) with small vice grips and use rotation of the shaft to "machine" the high spot back into spec.
T
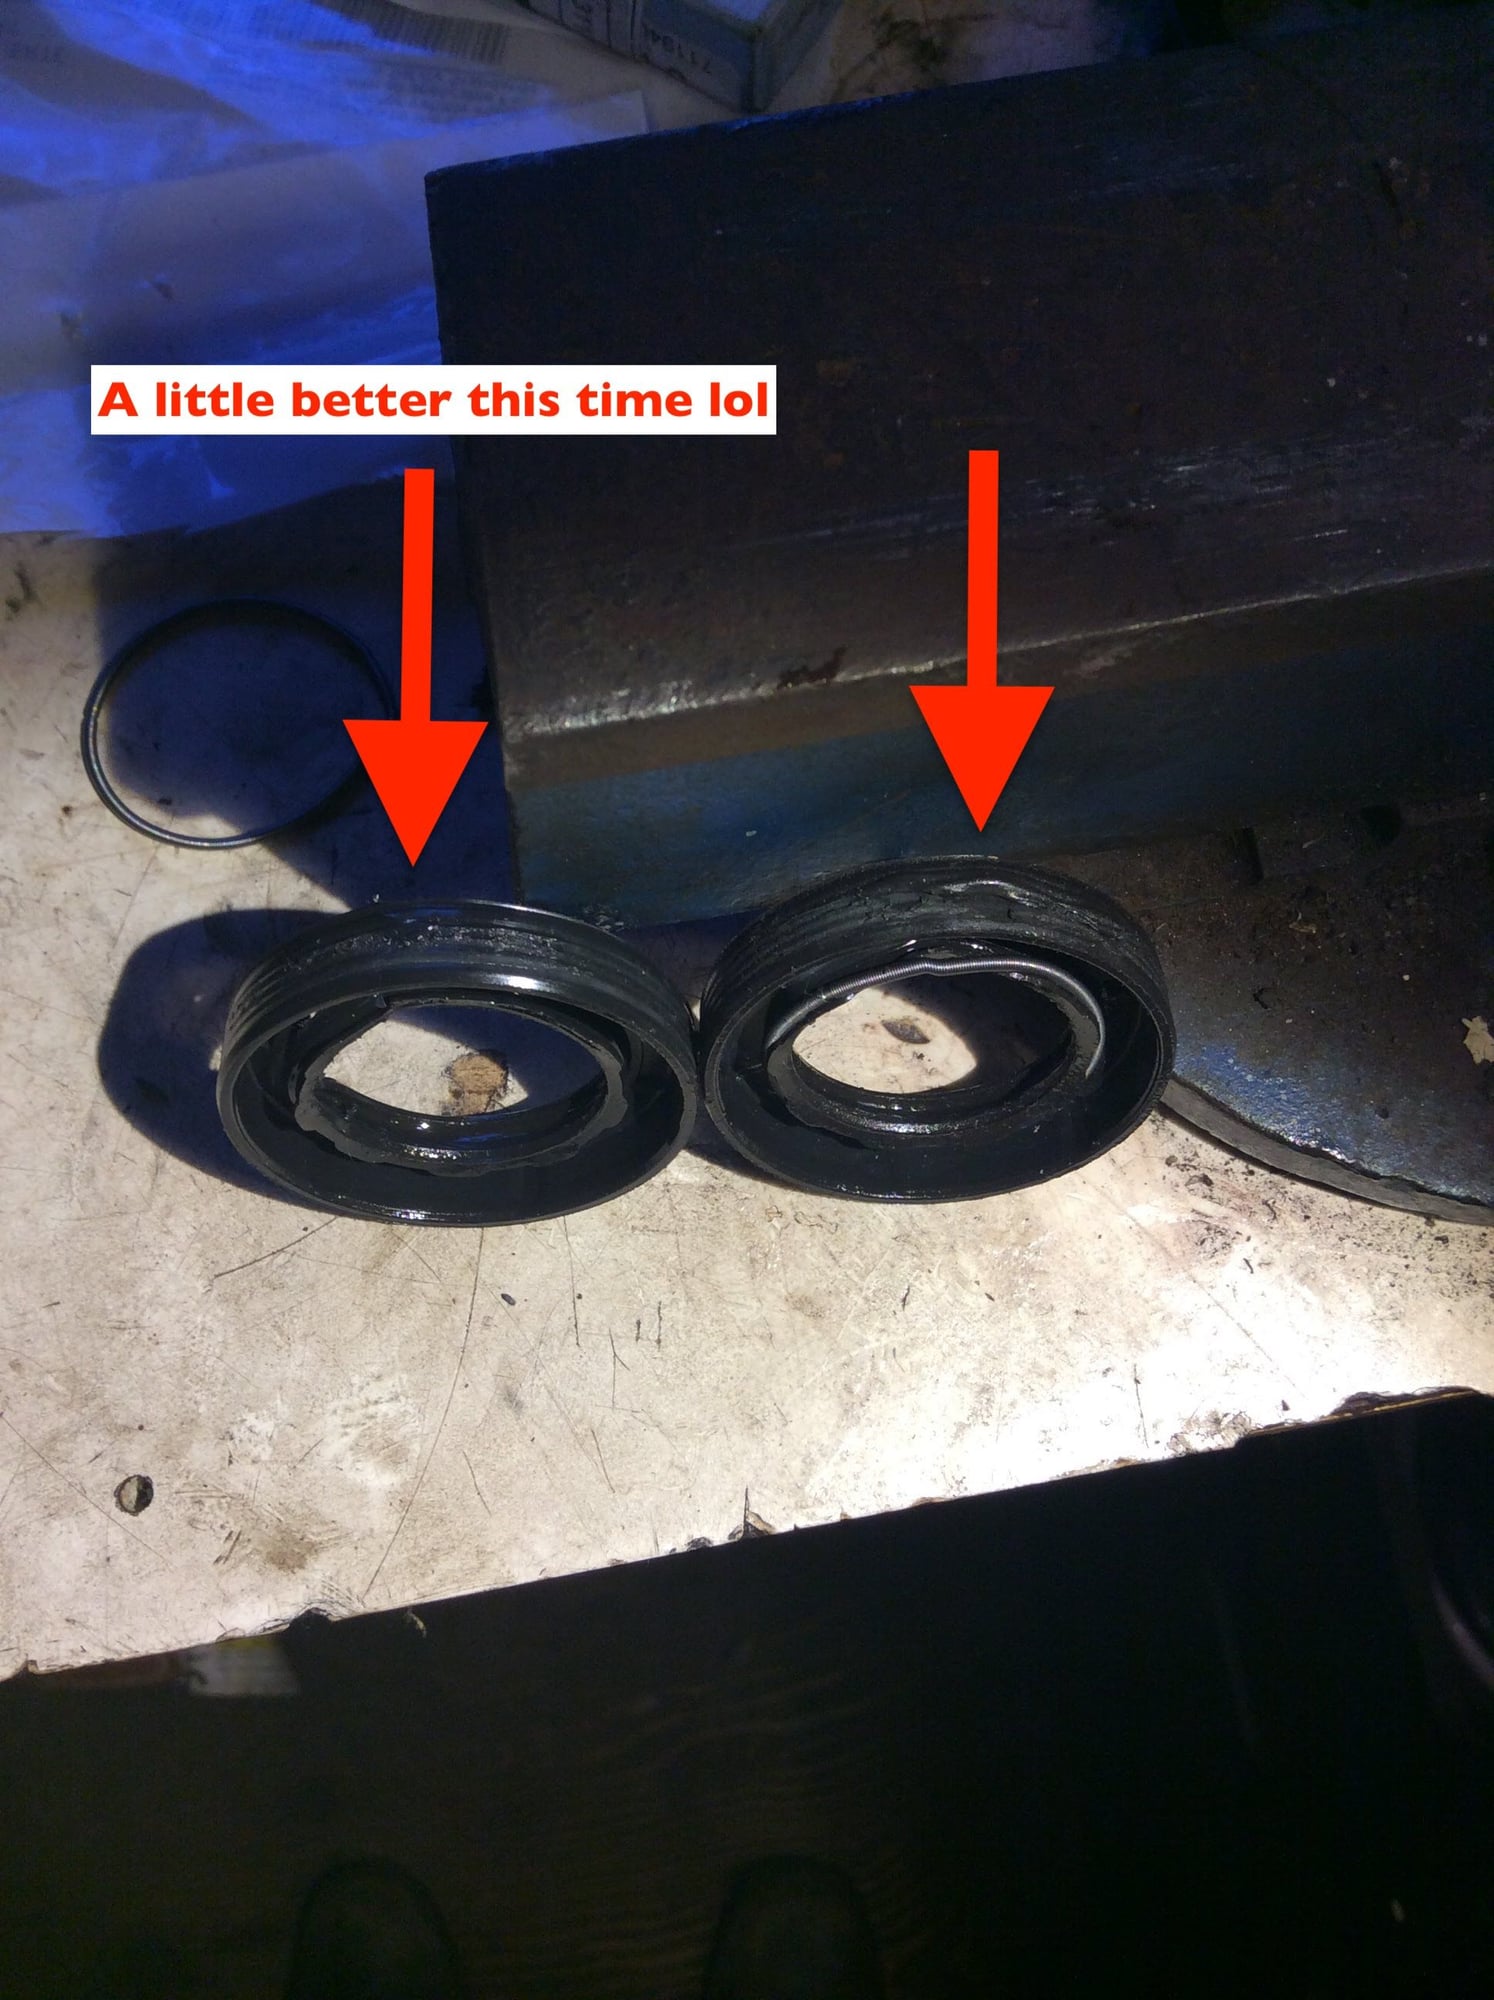
This is a neat idea! But in my case, there was no high spot; it was the bevel that was torn missing in the one section. Btw the parts diagram shows that the smooth part is in fact an installed sleeve; this is installed 1-2mm deep, so I guess they fill the gap and make a bevel. Now that I think about it, I could very well have damaged this bevel when removing the old seal. I used the Harbour Freight mini-slide hammer with hook attachment and pushed "down" to grip behind the seal and pull. Didn't notice any bevel pieces though. And there is evidence of a rotating action to the missing bevel's profile.
I'm convinced it was the original seal in there... it's got the vw / audio on it matching the transmission case. Clutch was stamped 8 / 87 and RMS was elring one
Well.. despite my added JB Weld, the new seal also got caught--albeit less so. Added some More JB Weld, this time higher than I need, and will somehow try to sand it down and try that. If the third time isn't a charm, I'll try that Timken seal mentioned above. But, I'm curious: doesn't the rubber keep the trans fluid in?
Heck, if the rubber on the outside isn't necessary, then I shouldn't care if it gets built up a little in one spot
Also I would use a scalpel knife to cut away excess rather than sanding. You should be able to remove material that way. Sanding will make the bore out of round. I have done that before with aluminum at work on bearing bores in various applications having raised surface scratches. Much safer process to do.
Thanks for the tip! I'm pushing the seal in past the trouble area so I'll be careful not to sand (or cut) on the inside sleeve part--just the very front tip of it.
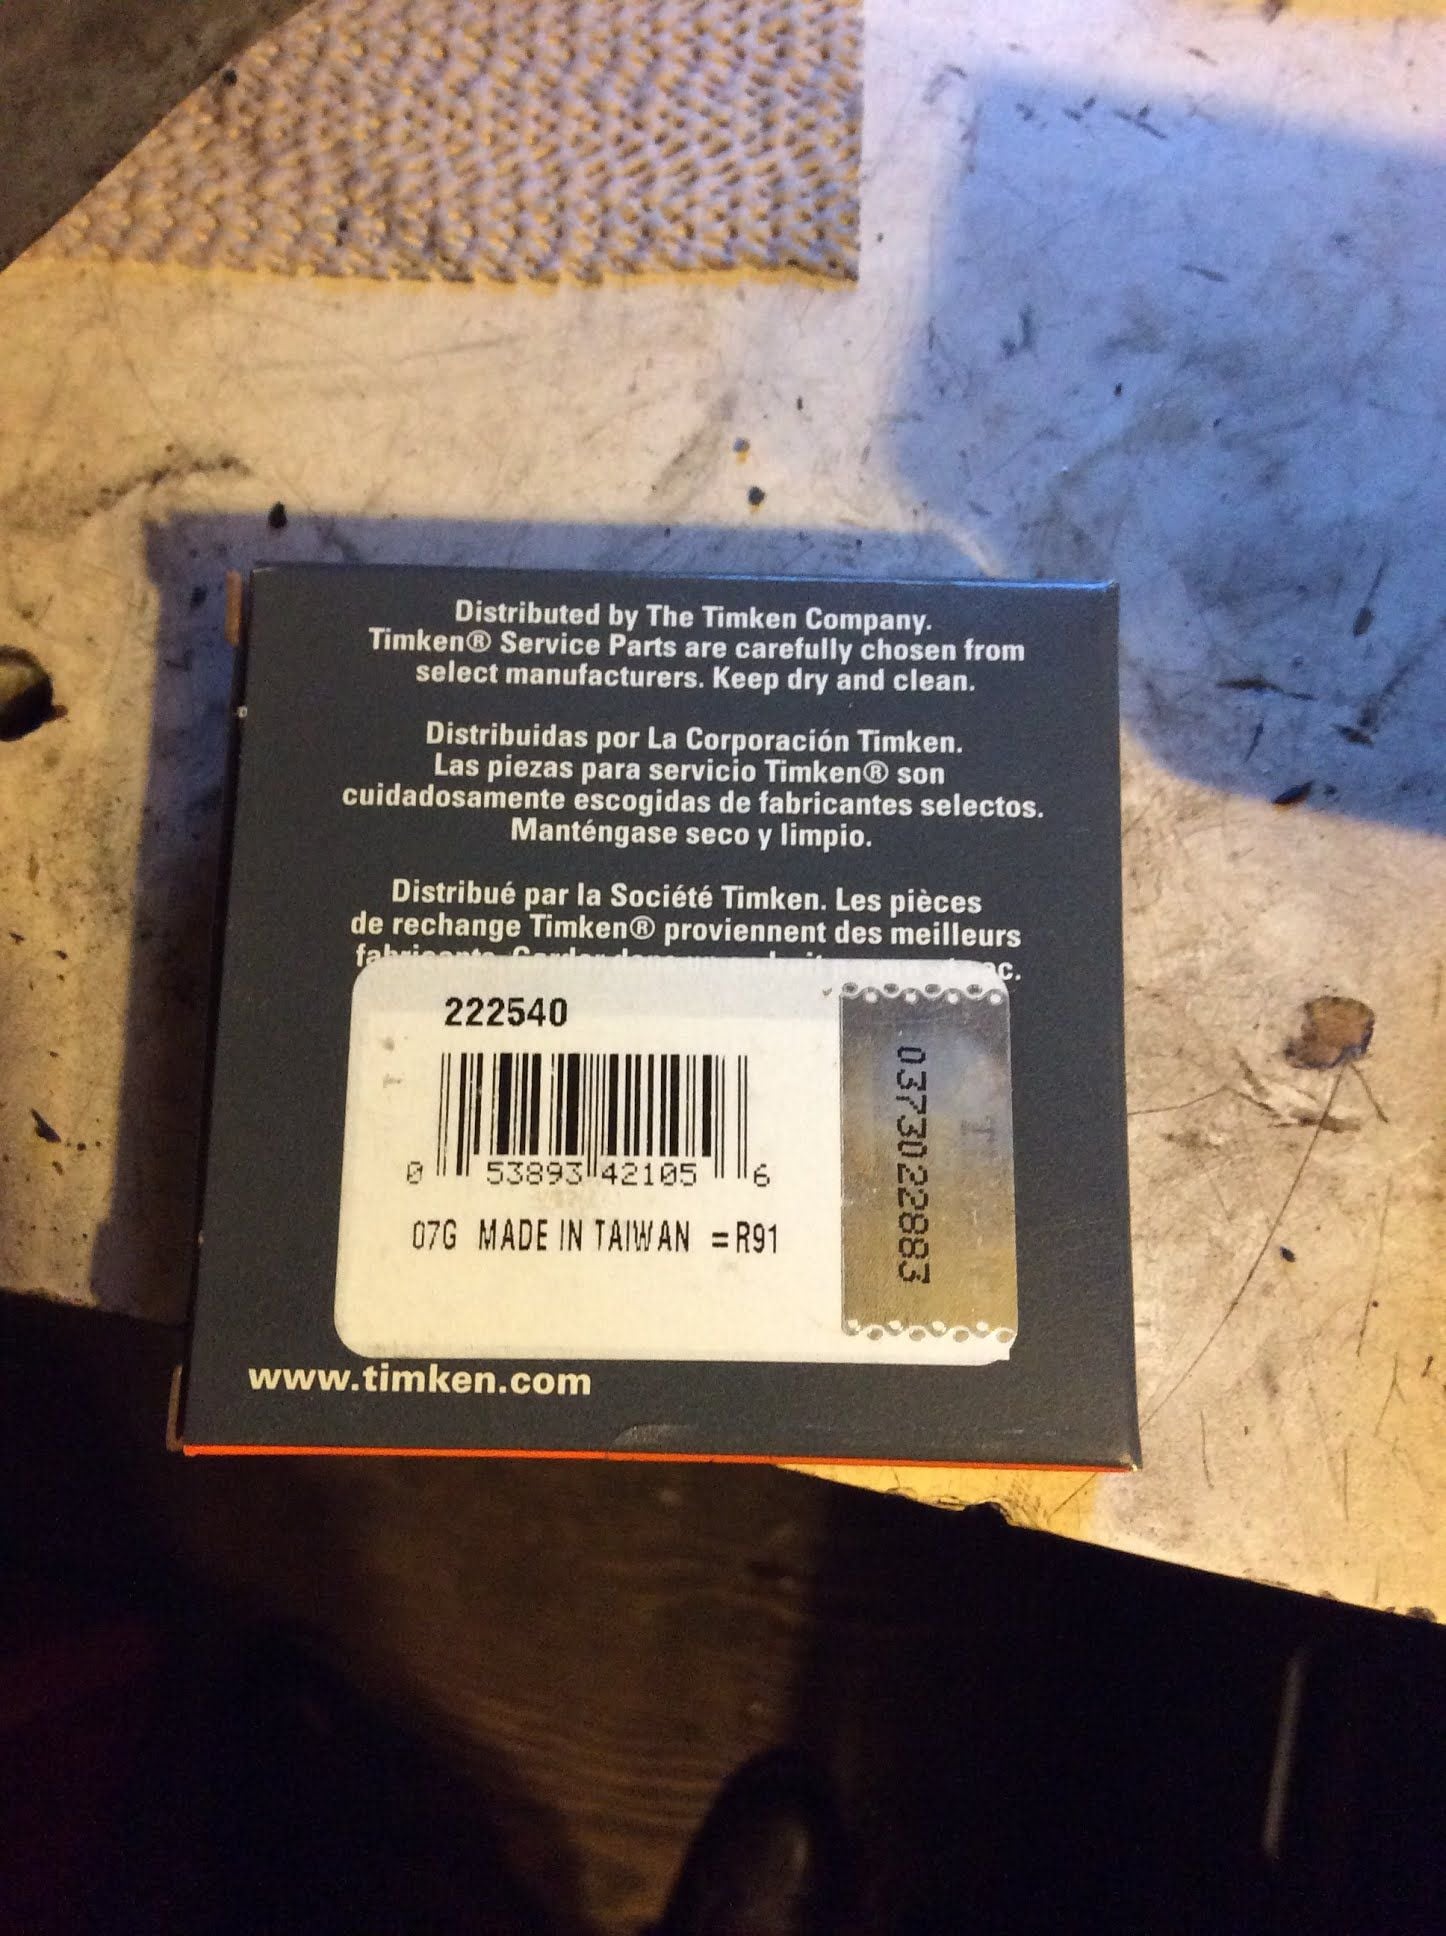
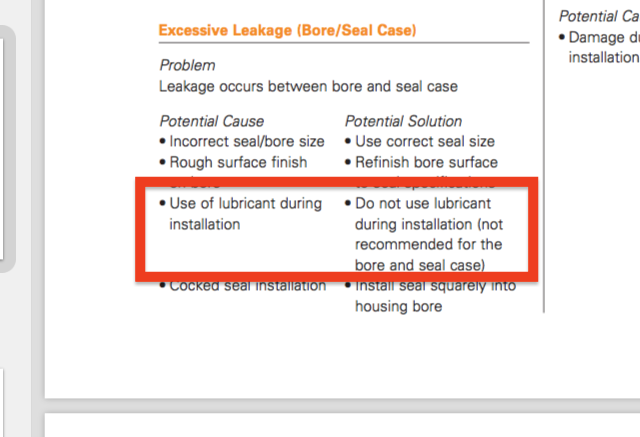
I checked out that resource but couldn't find the exact seal (by product number anyway). However, came across this interesting instruction not to use oil on the bore or "seal case".. to me this is suggesting no lubrication on the OD of the seal? This appears to be a general tip regarding all their seals, rubber OD or not (it's on pg 45 if anyone is interested)
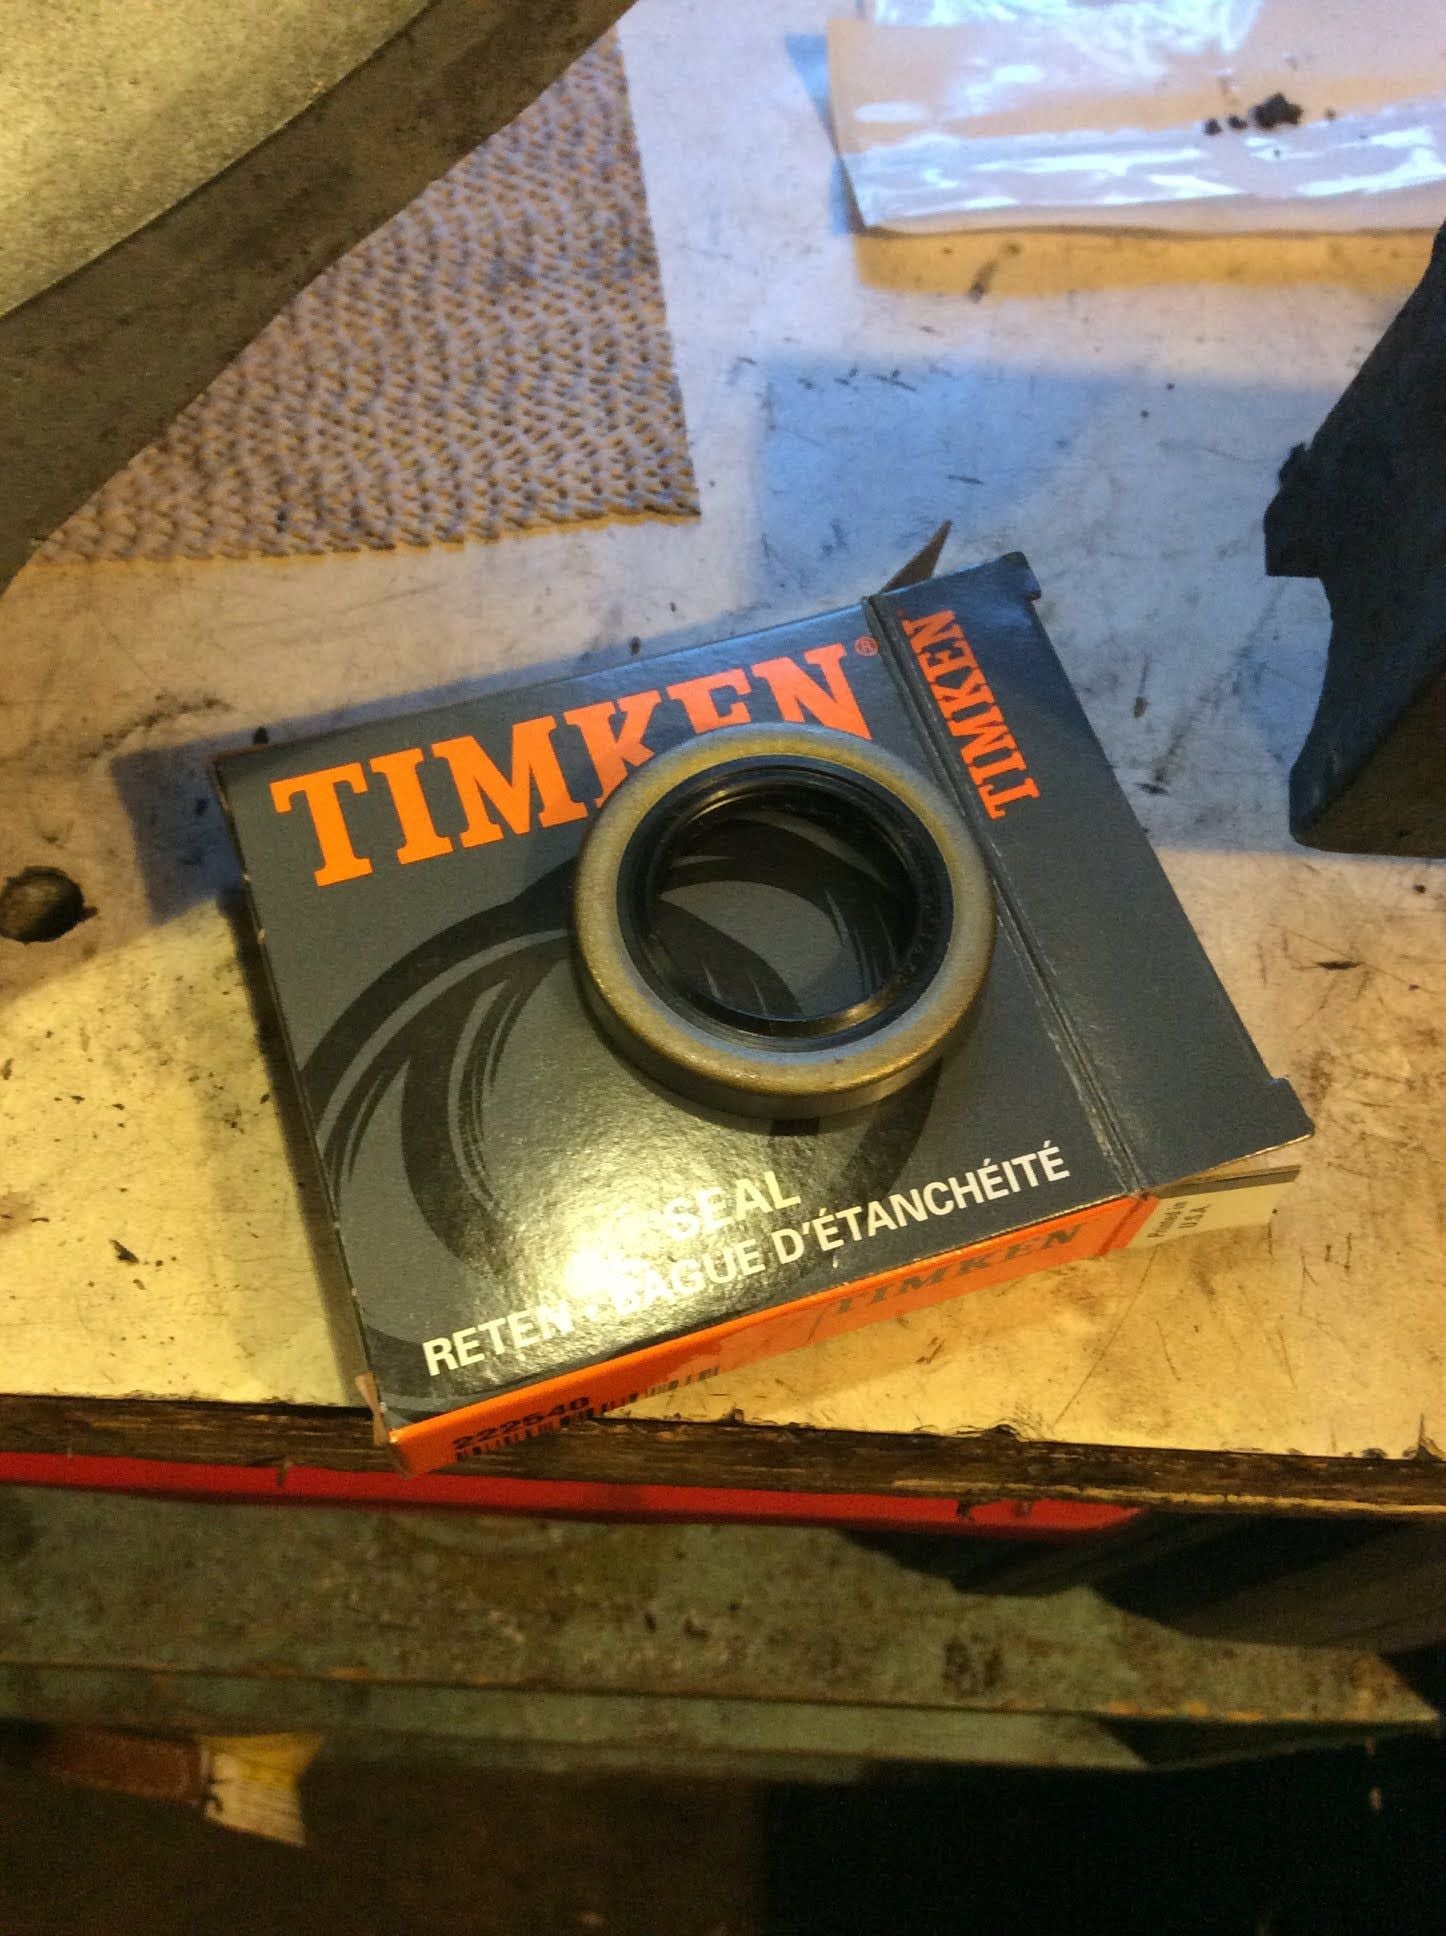
I put in the Timken no-rubber OD seal. I have no idea if got scratched in the trouble area; there's no rubber bulging out the end to show me. Ah, well. Guess I'll find out

 01-06-2018, 12:43 AM