When you click on links to various merchants on this site and make a purchase, this can result in this site earning a commission. Affiliate programs and affiliations include, but are not limited to, the eBay Partner Network.
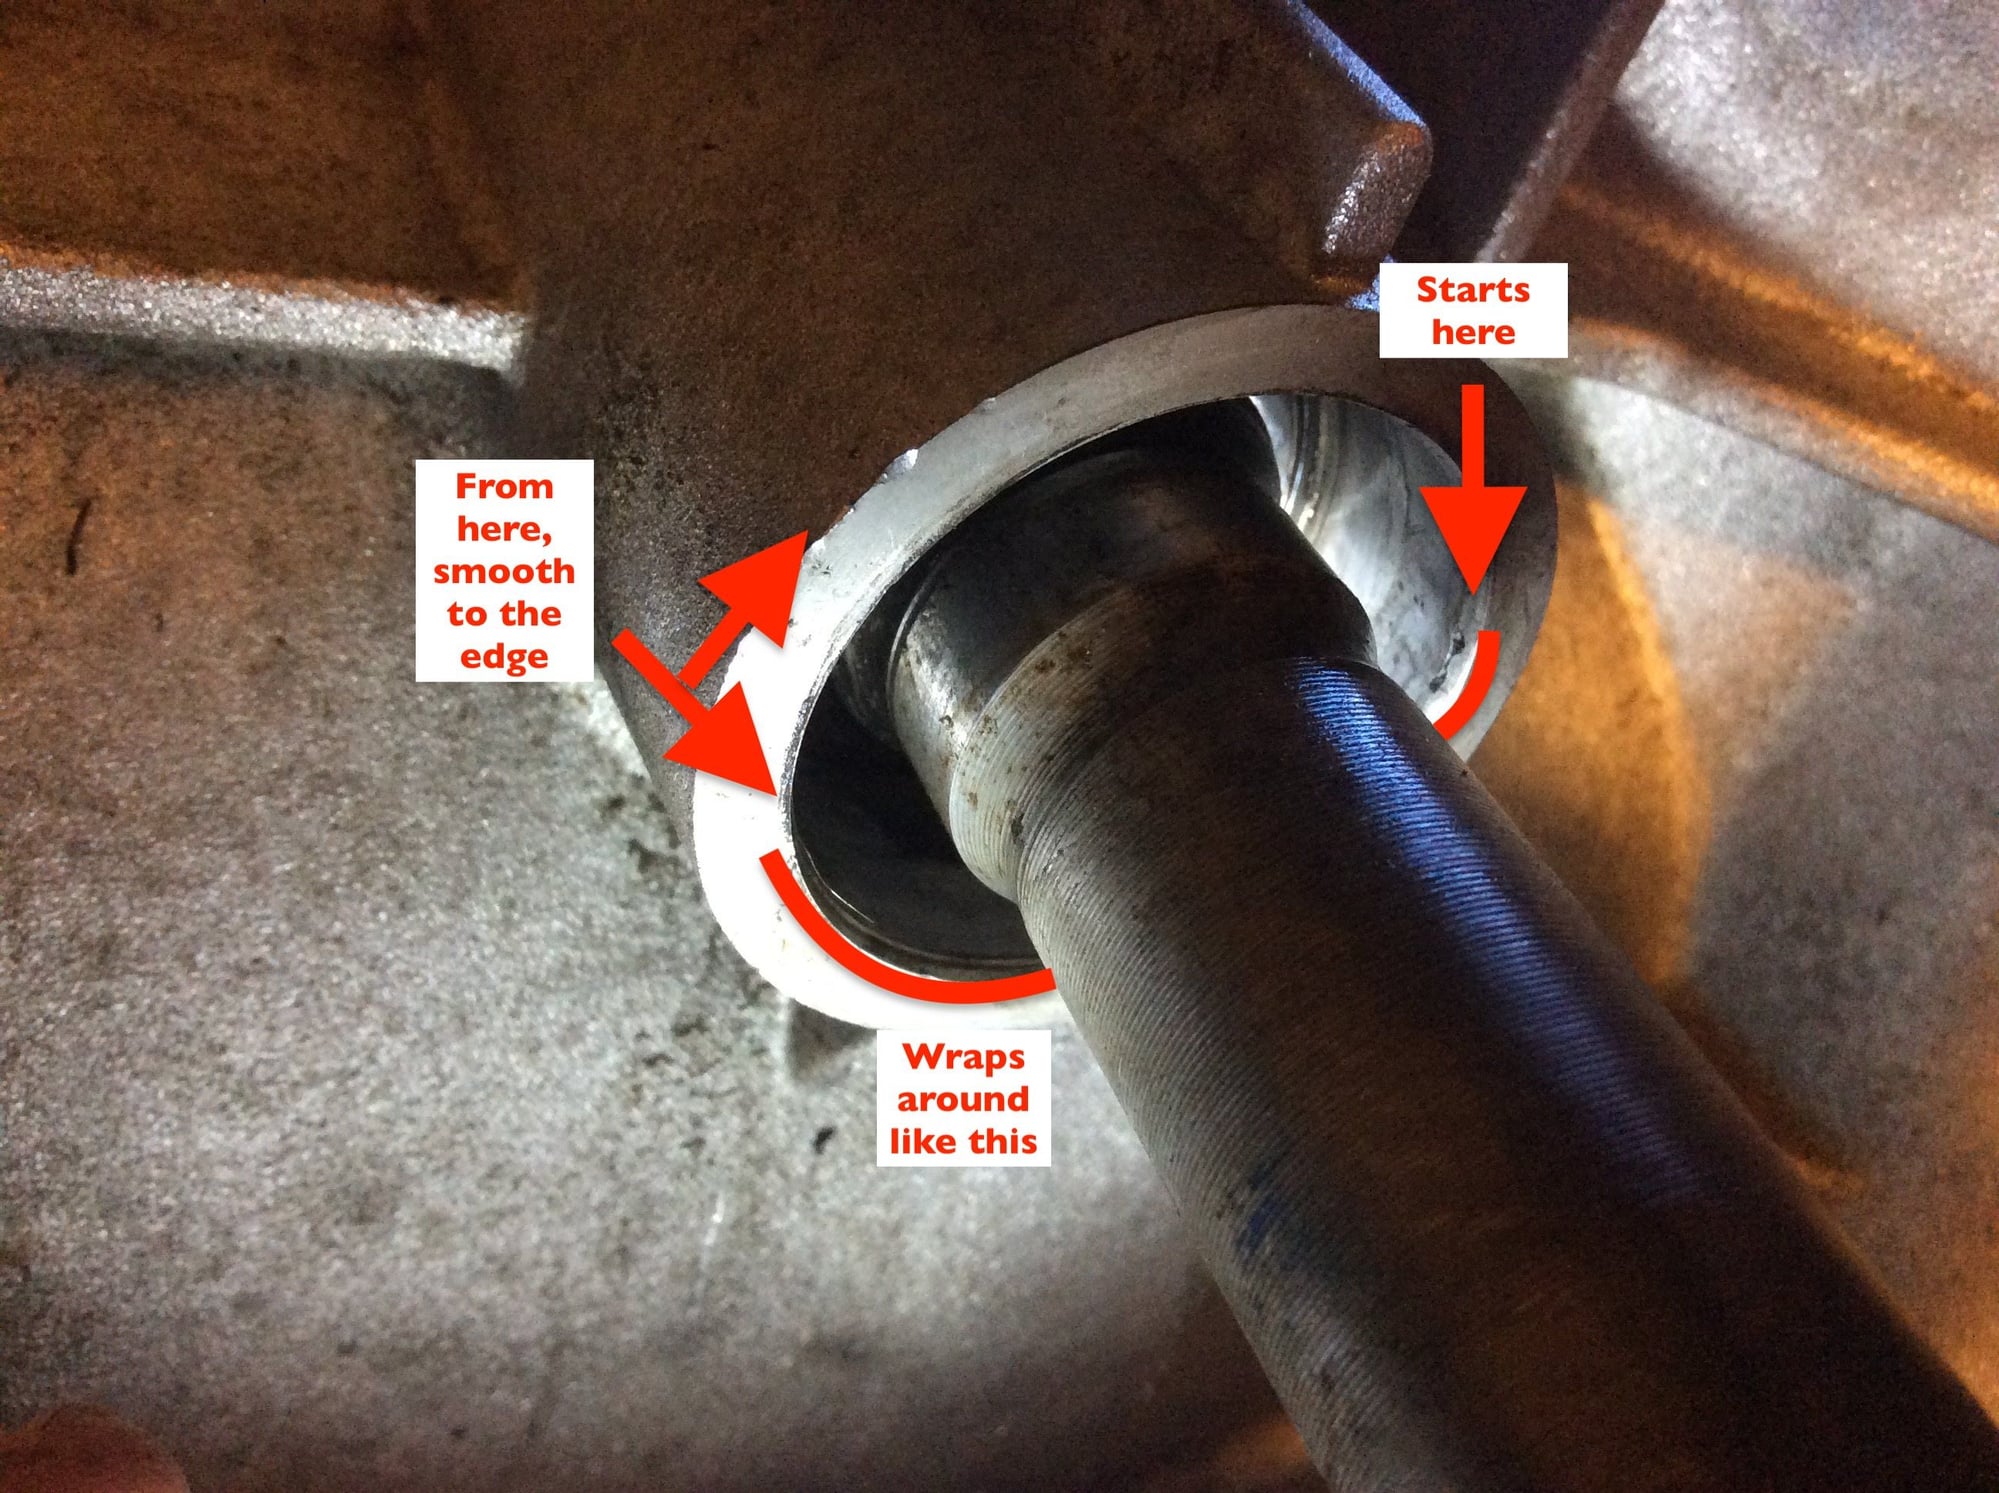
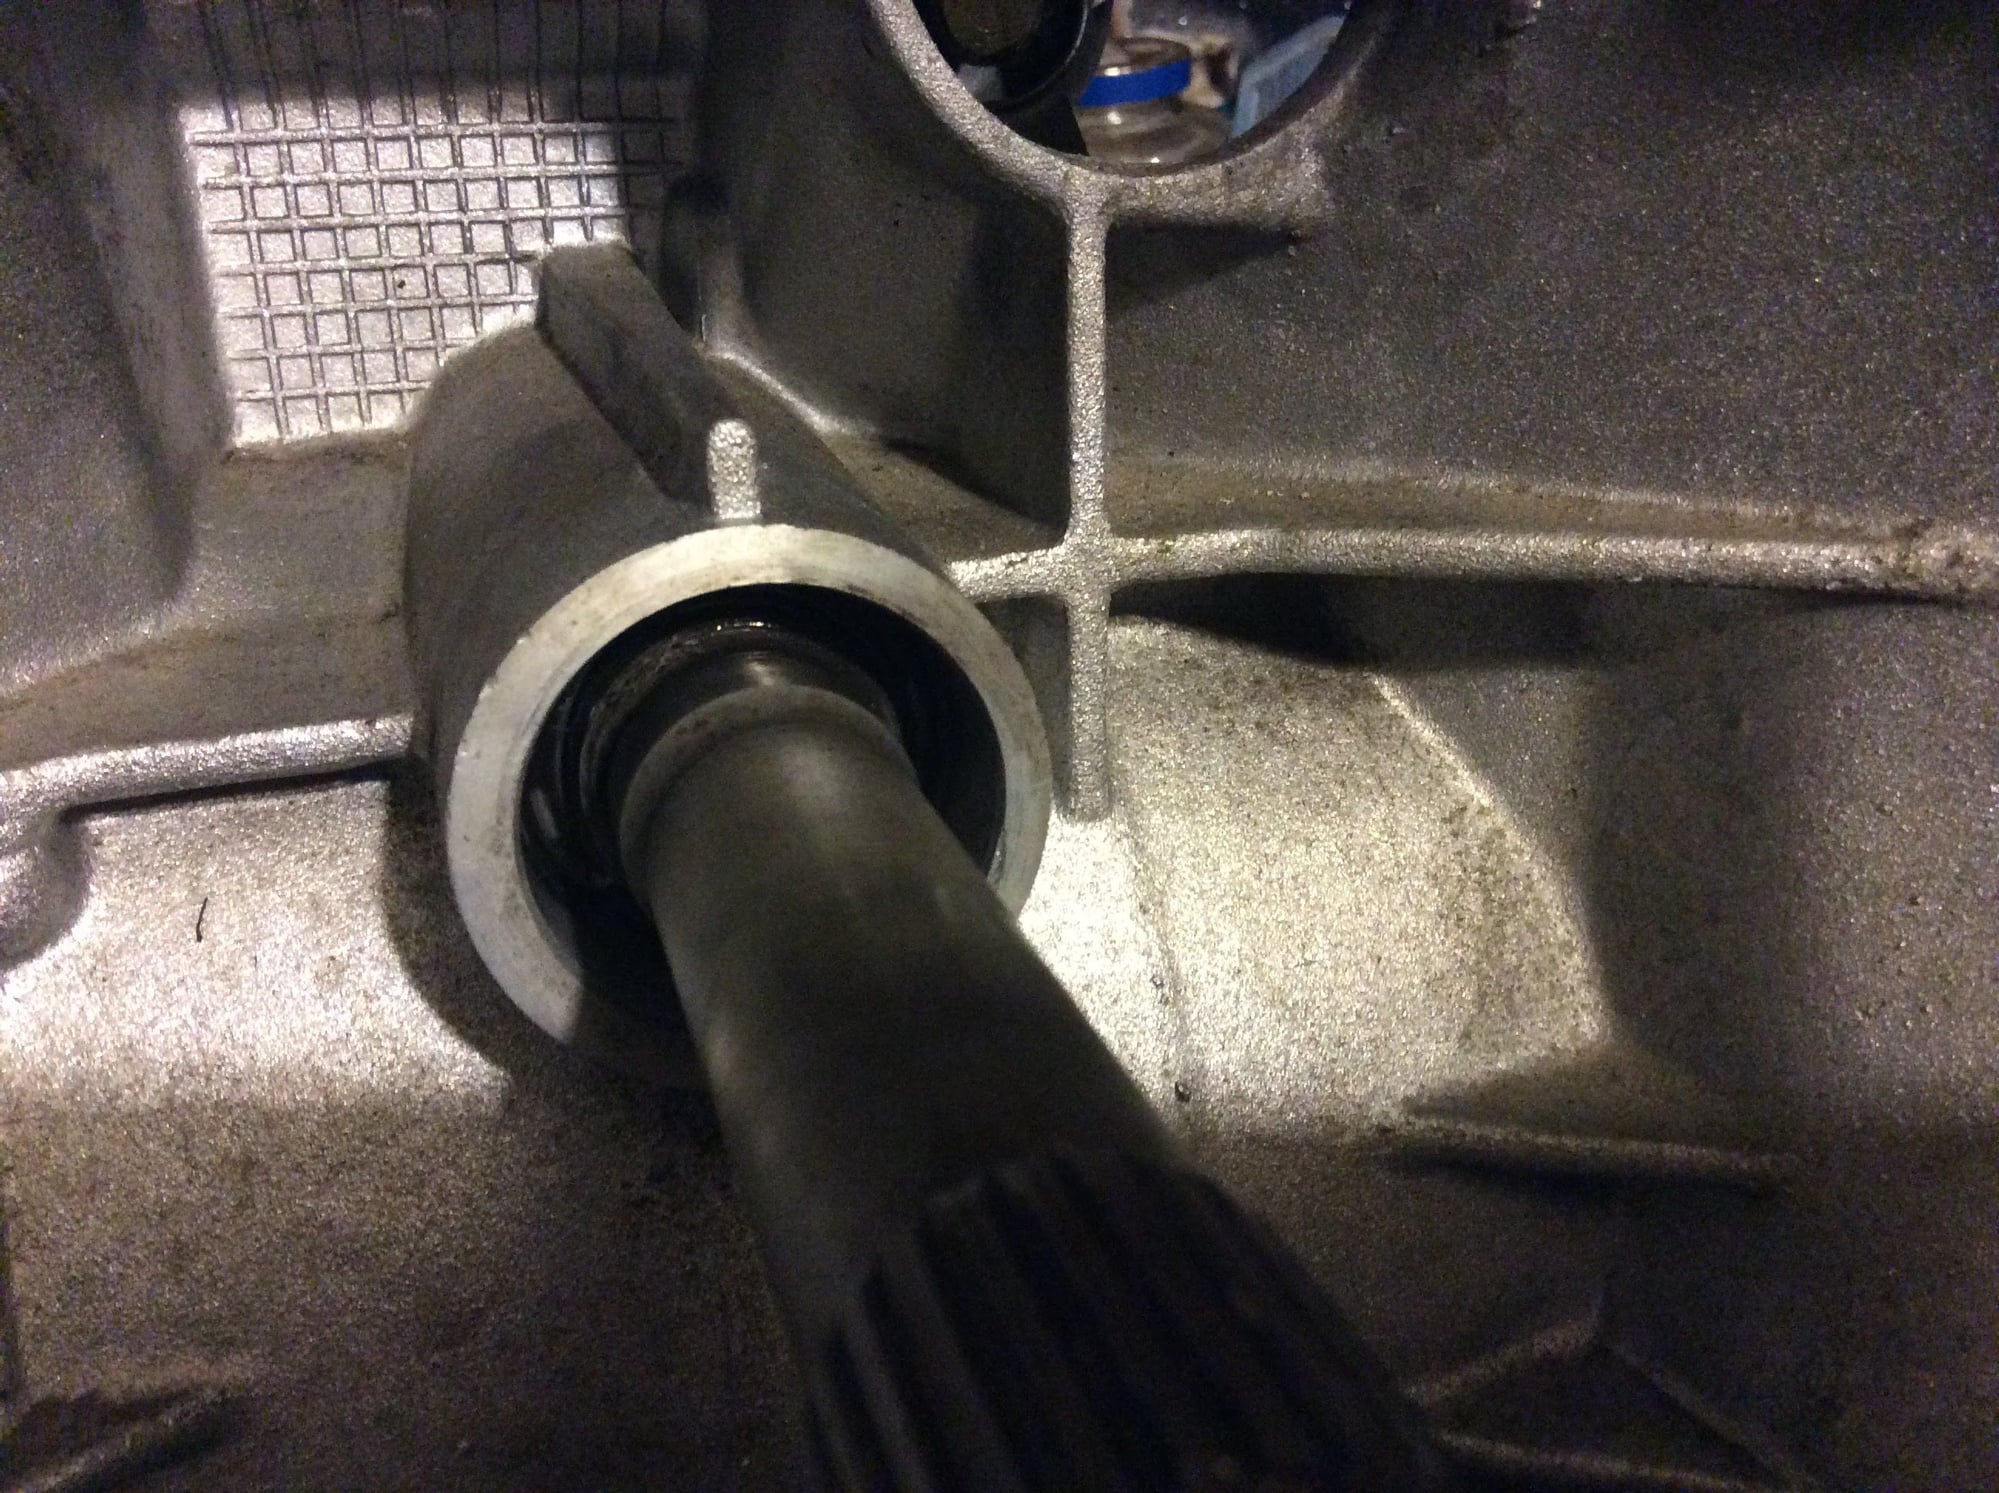
There is an "edge" in the transmission input shaft seal hole that grabs and ruins the seal on install.
This transmission appears to be all original and never removed; indeed, the yellow paint was untouched on the drive shaft connection.
This edge appears to be some sort of defect in casting? How did the seal get installed? FYI it wasn't leaking noticeably, just a little hint (I'm in the middle of a clutch job & changing a few extra things while I'm there)
The "edge" is like the starting thread on a threaded hole in nature... except behind it is flat (ie. this edge is the face end of the smooth flat surface the seal sits on).
It starts at one point (where there are two tiny holes in the case material) & wraps about half way. The seal catches at the last part where the edge is recessed about as far as the original seal face sat
How do I approach this?
Last edited by Dan Martinic; 01-04-2018 at 07:42 PM.
What worries me is this "edge" is more like a lip--it's pretty high! It's not a ridge that can be flattened; it is literally the end of the smooth flat surface behind it (the surface the seal sits on)
To smooth it out, I'd have to add material to extend the smooth flat surface behind it to the end of the case hole.
It's almost like the last part of the hole was suddenly damaged; like the cutting tool got pulled down as it left the hole or something.. or.. since the new seal starts off tight, like the hole suddenly jumps up there (out-of-round?)
Are you planning to remove the shaft from the case to work on the whole separately or will you be doing the work with the shaft still installed if the shaft is still installed I think some Emery cloth as suggested before and possible a little RTV sealant behind the seal to make up for the irregular surface might be your best option. If you're planning to remove the shaft possibly some machine work to add a spacer similar to a bearing race behind it to bring the surface back up to a uniform method or machine it over sized for a slightly different seal
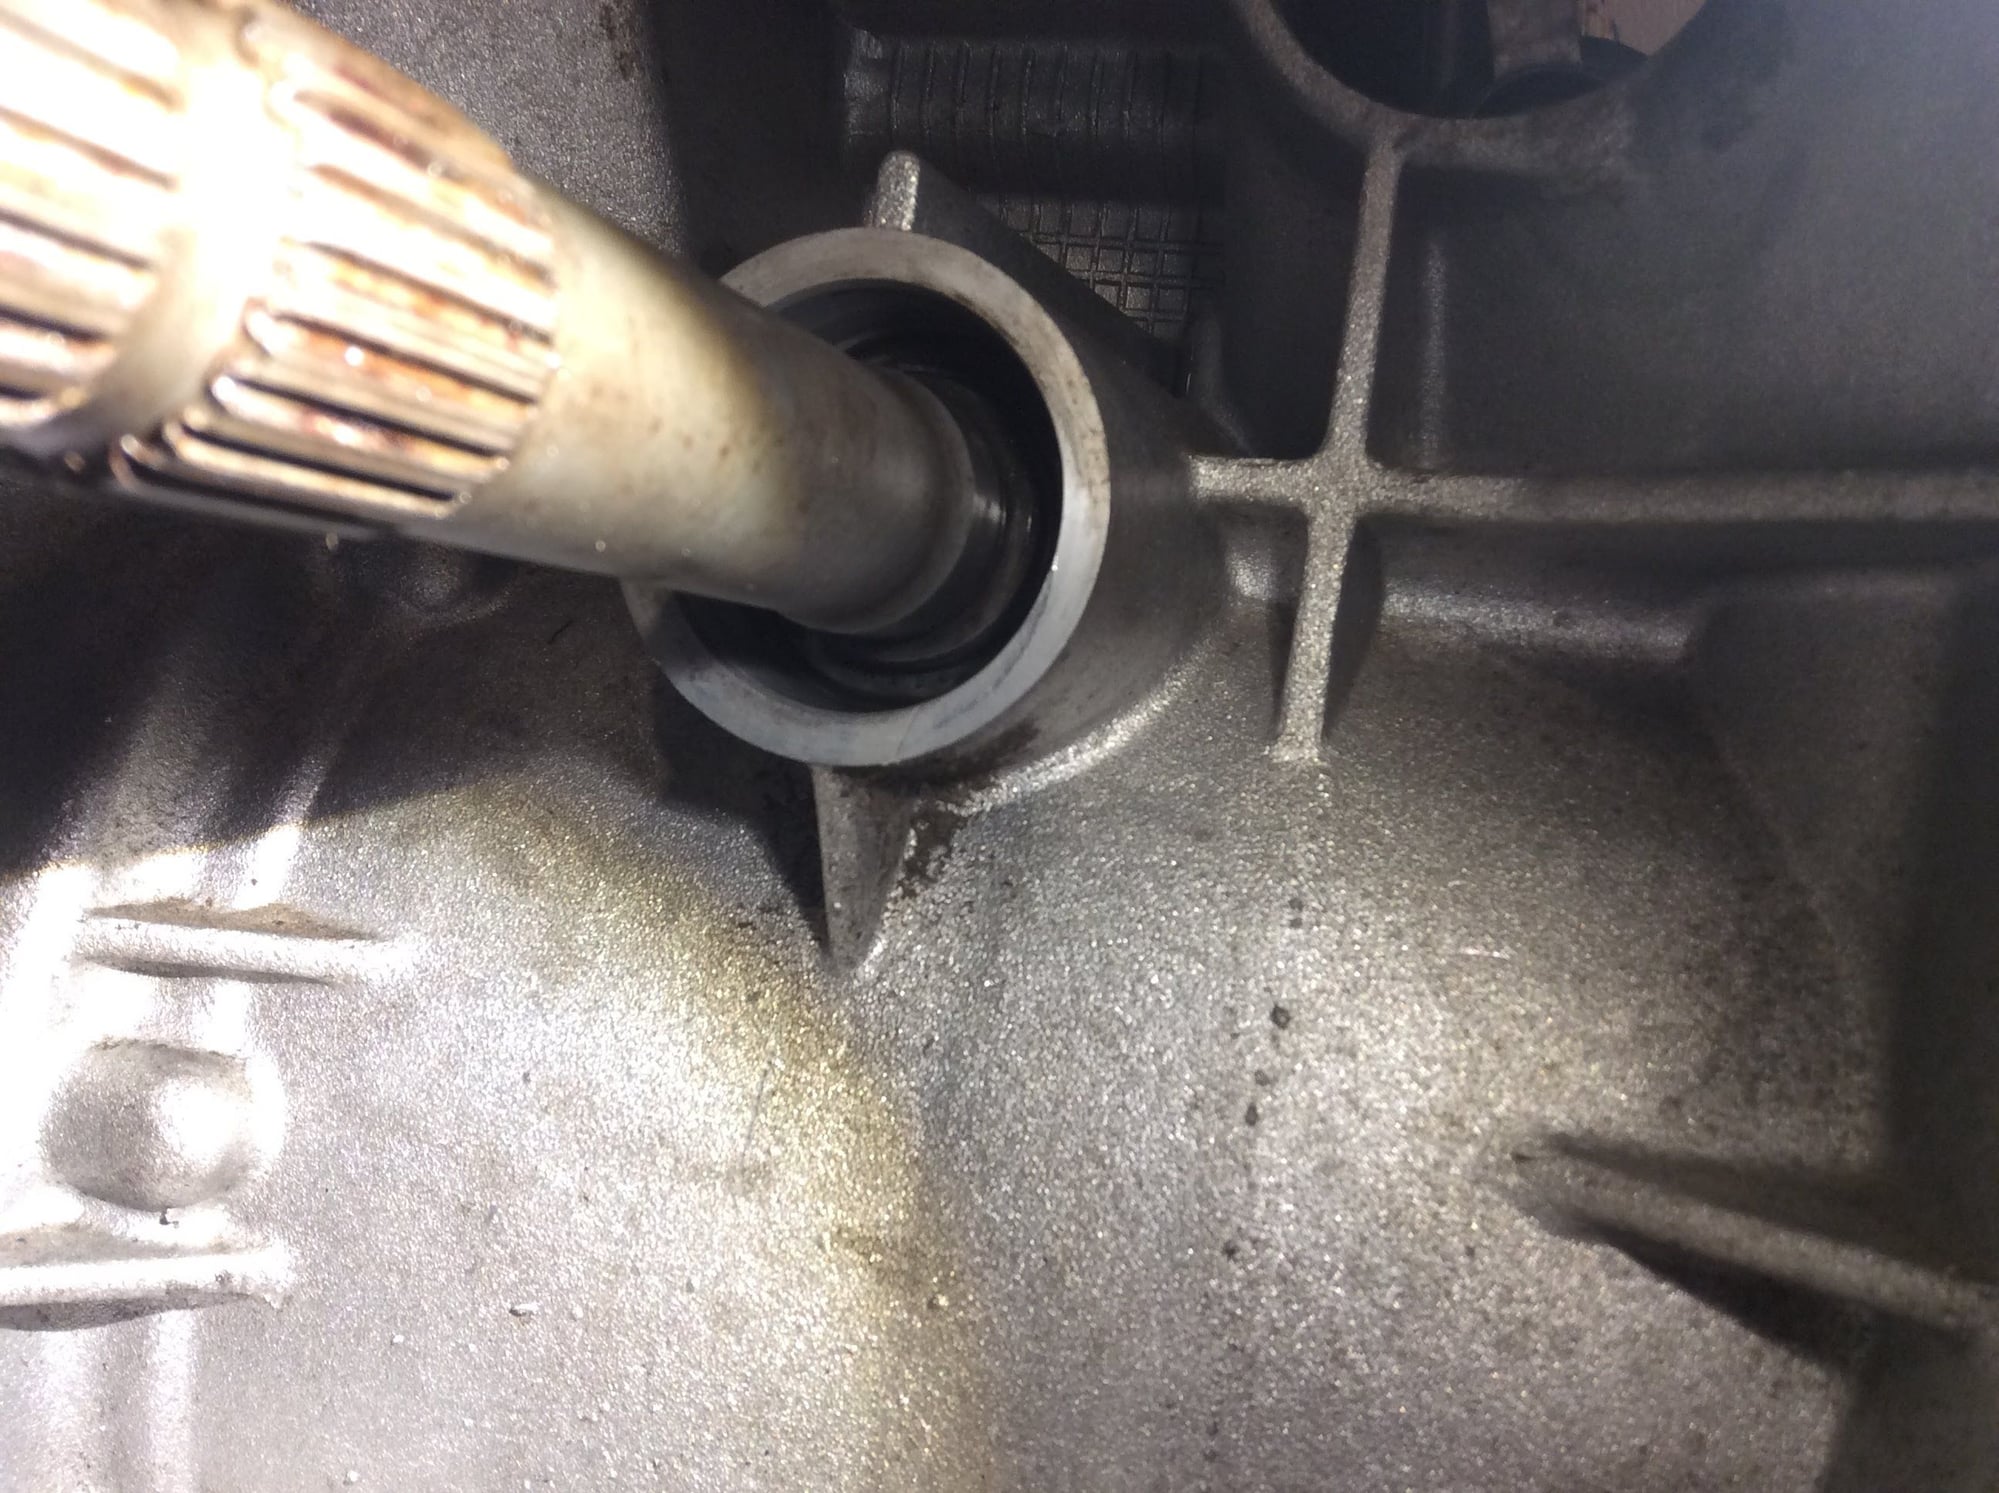
I'm not planning to remove the shaft; just changing the seal. Took another look with better lighting.. I have a better explanation of the issue:
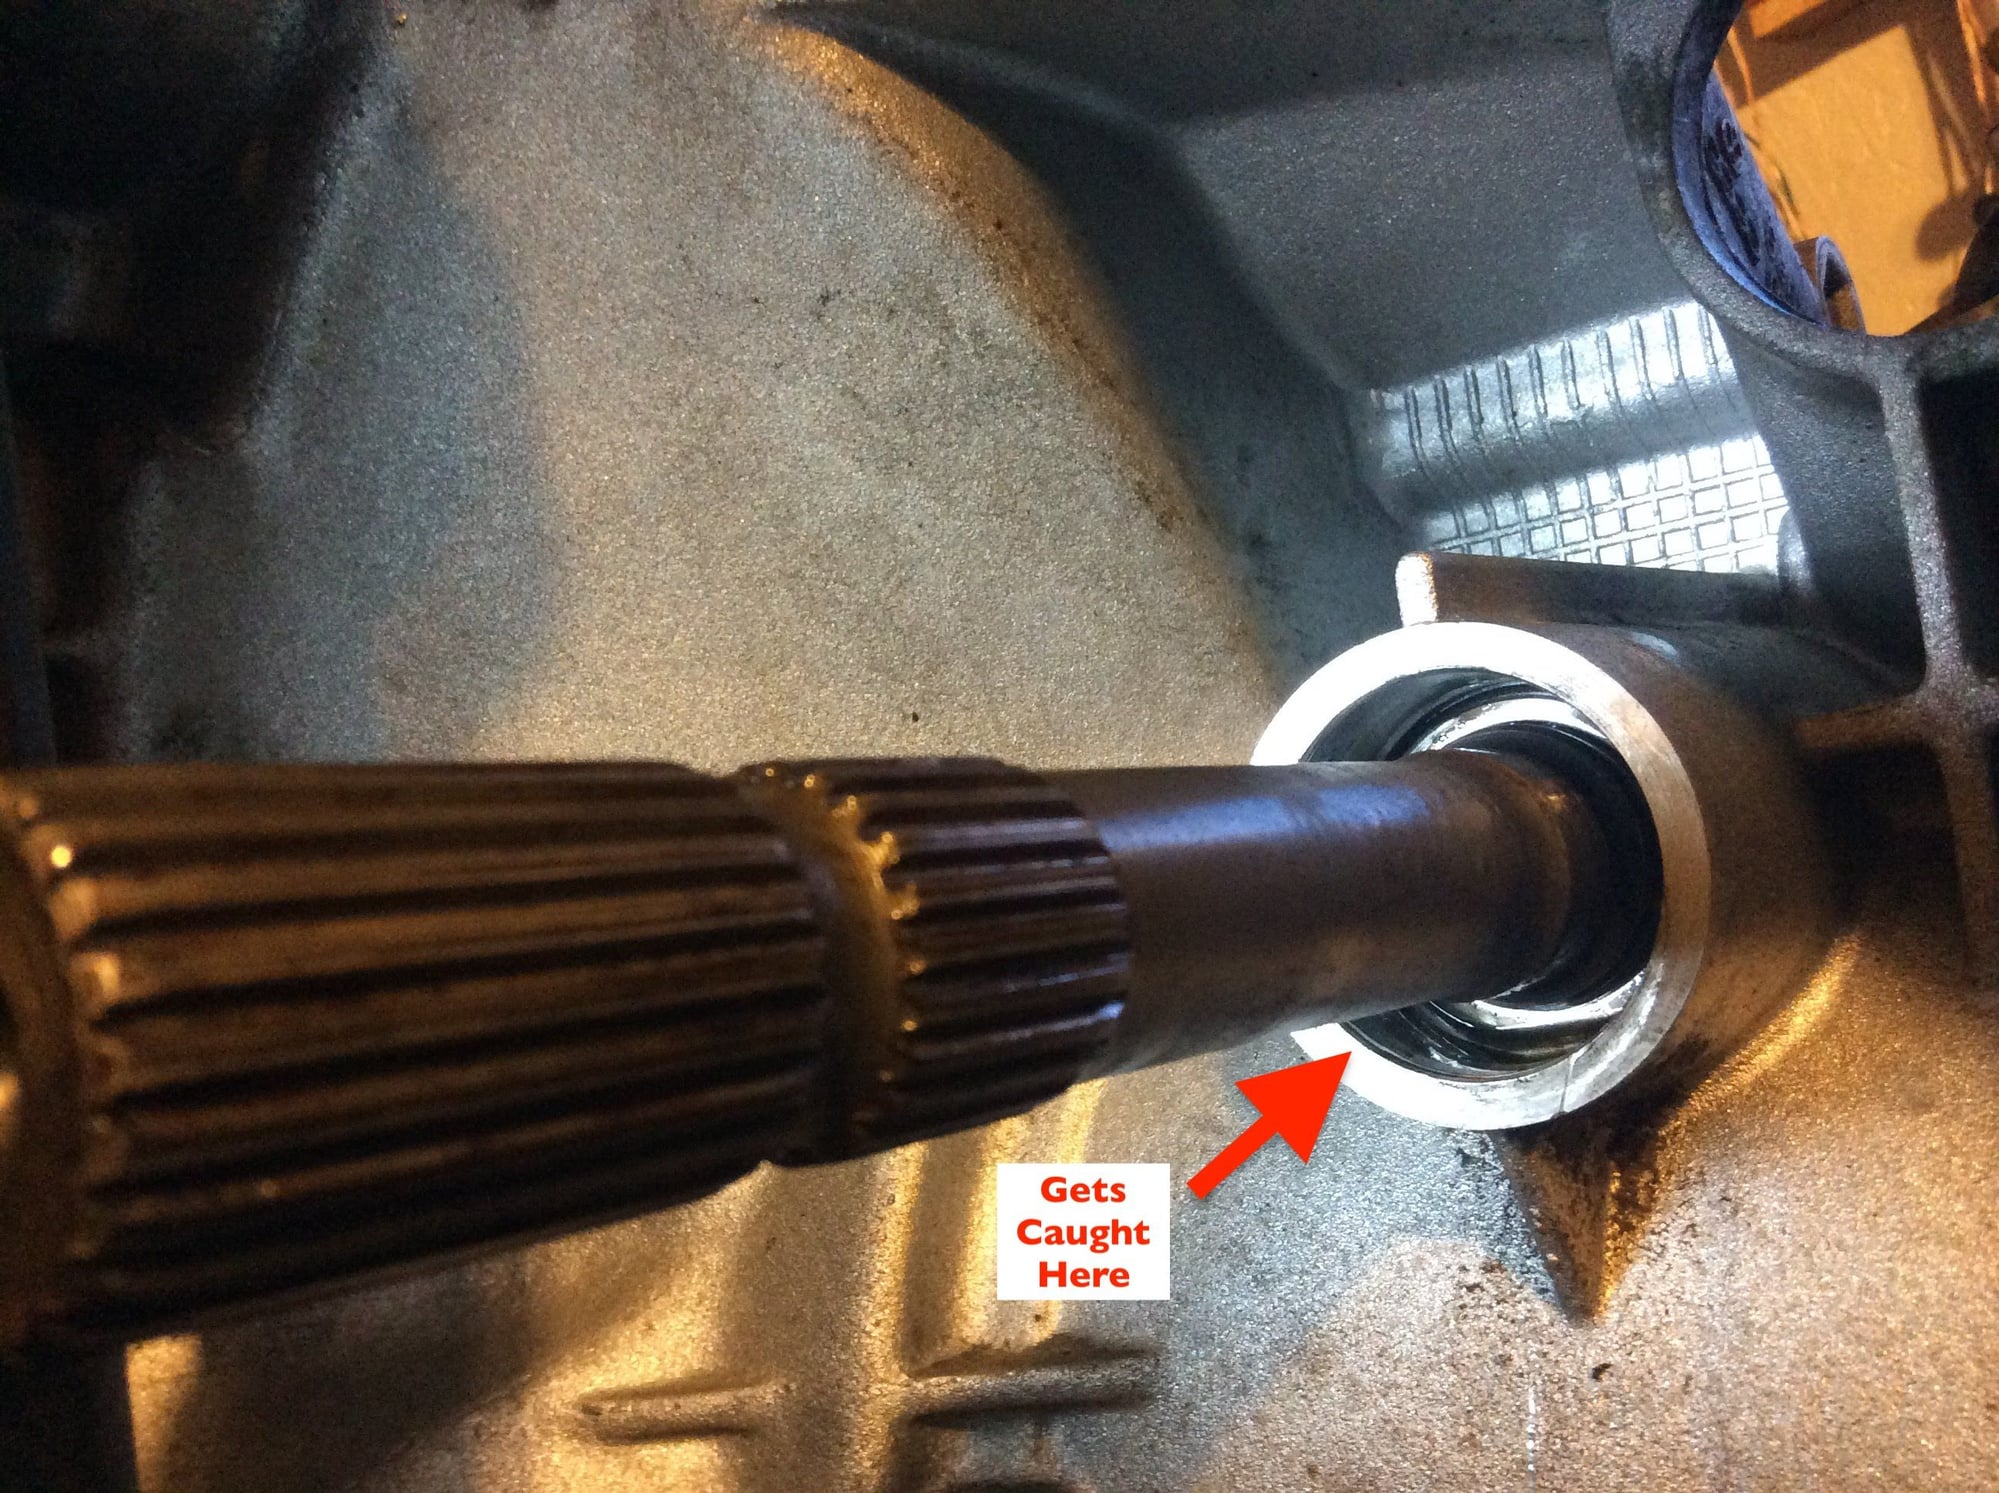
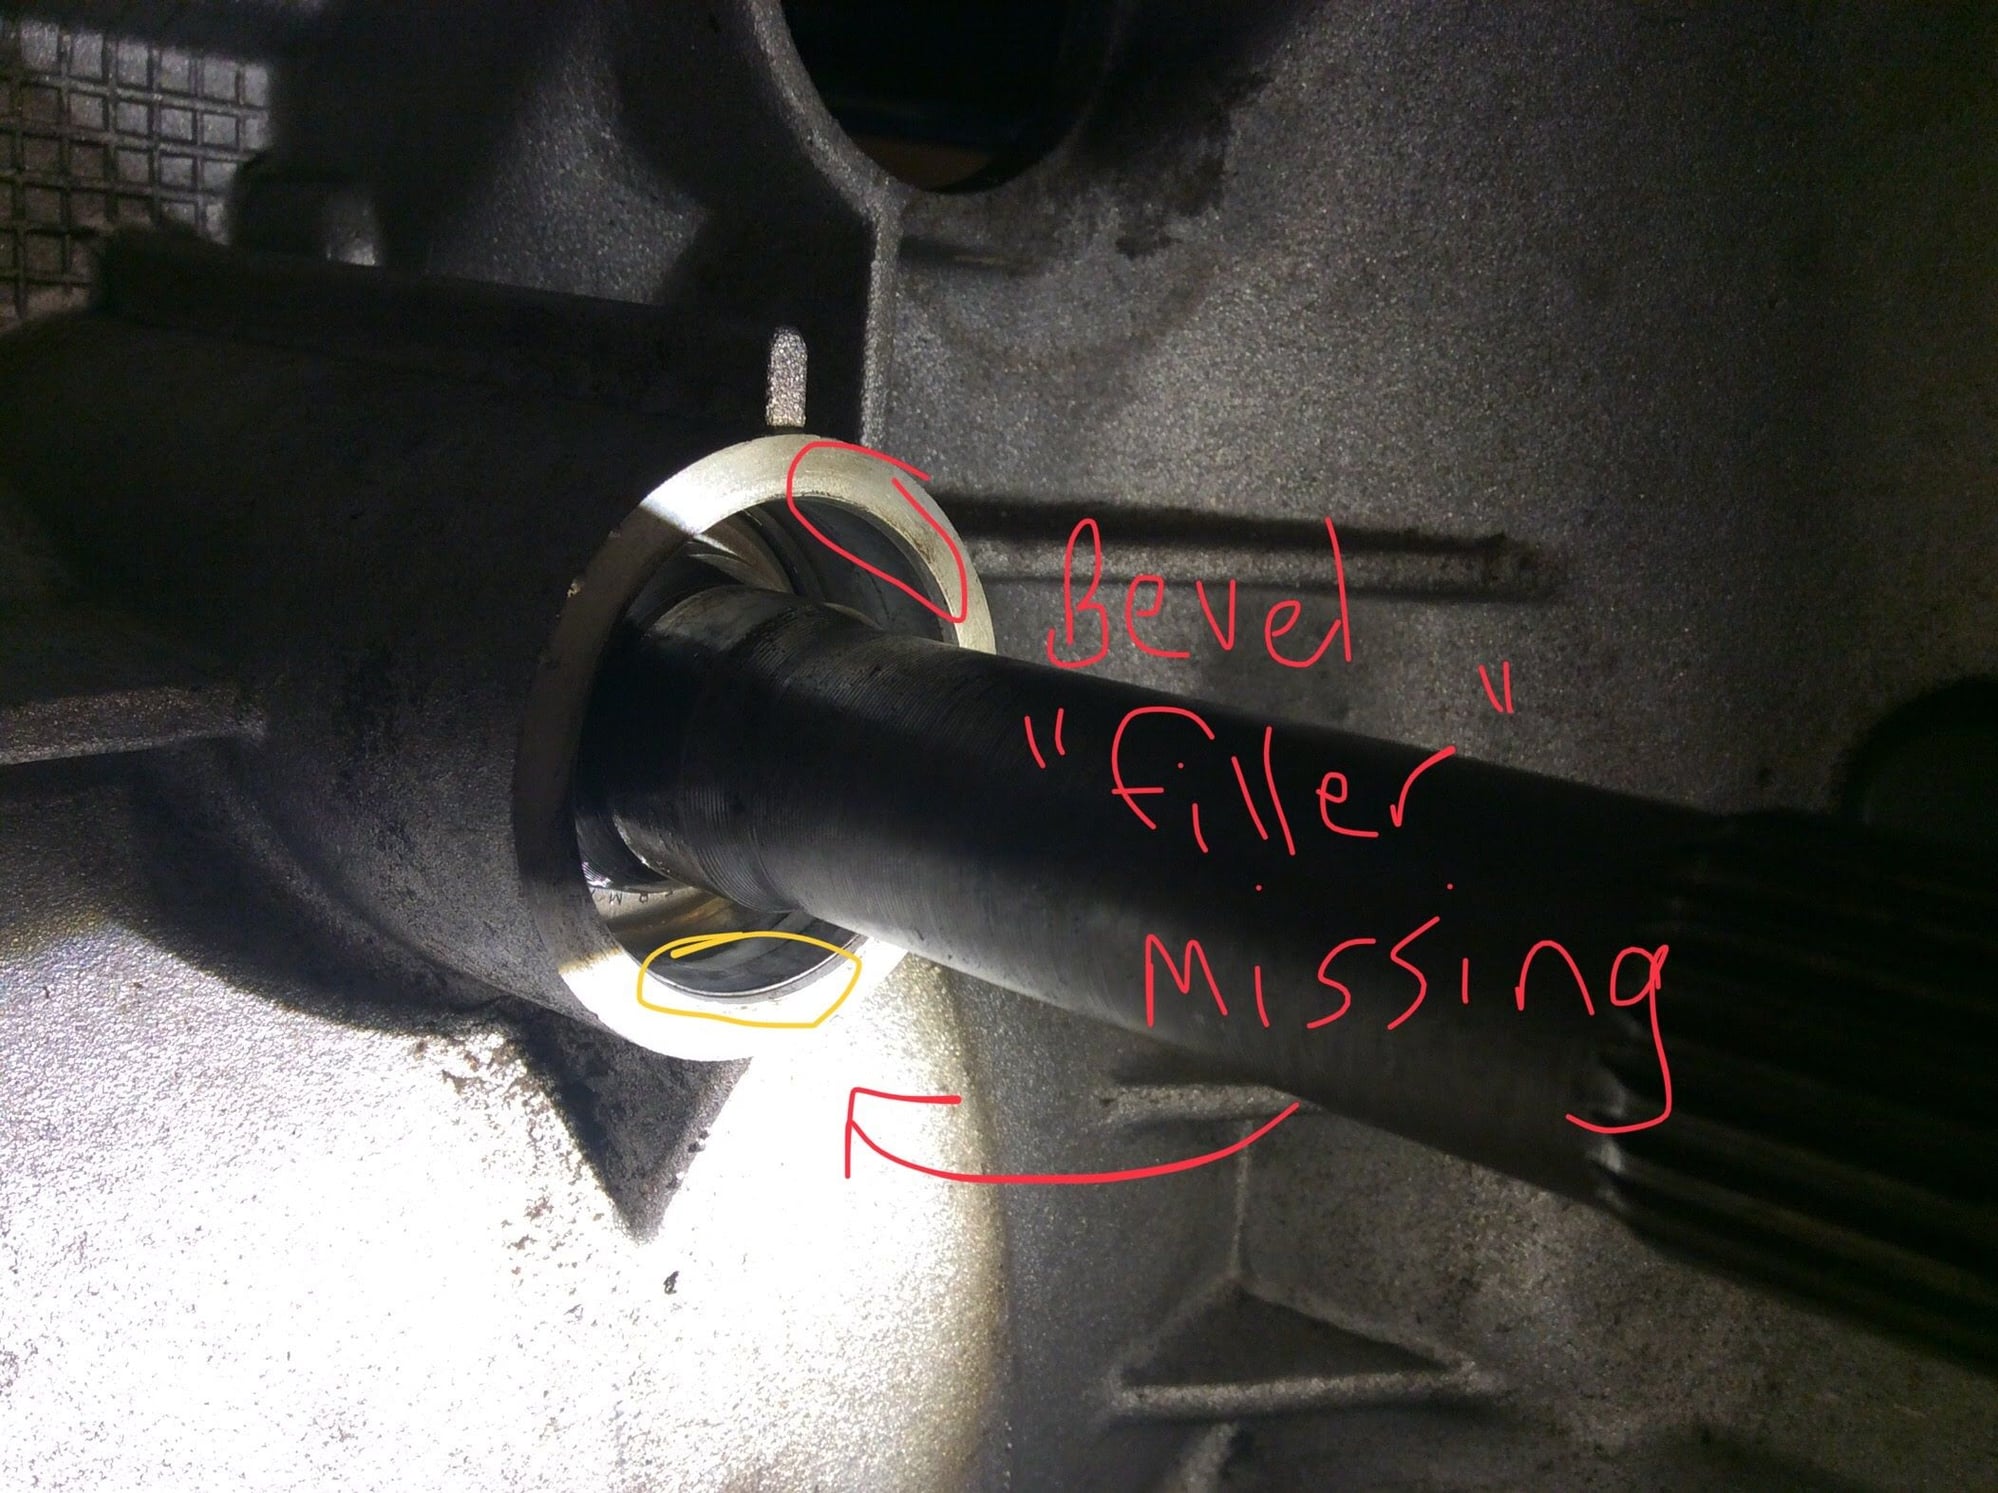
I don't know much about the construction of these things, but to me, it appears that there is a long smooth sleeve pressed into the transmission case hole. This sleeve stops short of the opening--about 1.5 or 2mm. Material is added to fill in the difference and create a bevel or smooth drop to the opening.
This bevel material is missing in the problem area. Thus, I have a smooth rise all around except for the problem area which is now a step.
The surface that the seal rests on is perfectly smooth. Problem is, I can't get the seal "up" past the first 1.5mm in the problem area where the bevel is missing.
(The workshop manual says to push the seal in 1.5mm and the original was set in about that much)
What kind of material can I use to fill in the missing bevel?
Circled in Red is the good, smooth bevel. The problem area with missing bevel is in yellow below
Here, the red shows the area where the bevel is missing
I wouldn't be concerned about this. As others have suggested, sand / file down any edge or lip that is "higher" than the smooth bore's radius. The oil seal you will install has a wide surface that faces the bore, so loss of a bit of that surface to this lip won't be an issue.
Be sure to set the radial oil seal deep enough that its lip rides properly on the input shaft surface. Pack the seal with grease before installing so that its gaiter (metal spring) is kept in place. Be careful guiding the seal over the splines - I use the factory "condom" tool when installing but I do a lot of transmissions and can justify its expense! Good luck,
Kevin.. there is no edge higher than the smooth bore; it's just that in the problem area the smooth bore ends without a bevel, making it impossible to start the new seal without getting caught (there is still about 1-2mm from end of smooth bore to hole opening, and the seal starts tight to the hole opening as is)
I suppose I could file a ramp but that would eat into the smooth bore quite a bit! The WM says to push the seal in 1.5mm only (?)
I guess I can also start the seal off crooked, with the problem end shoved in first over the smooth bore edge, but then I'd risk bending the seal to get the other end in
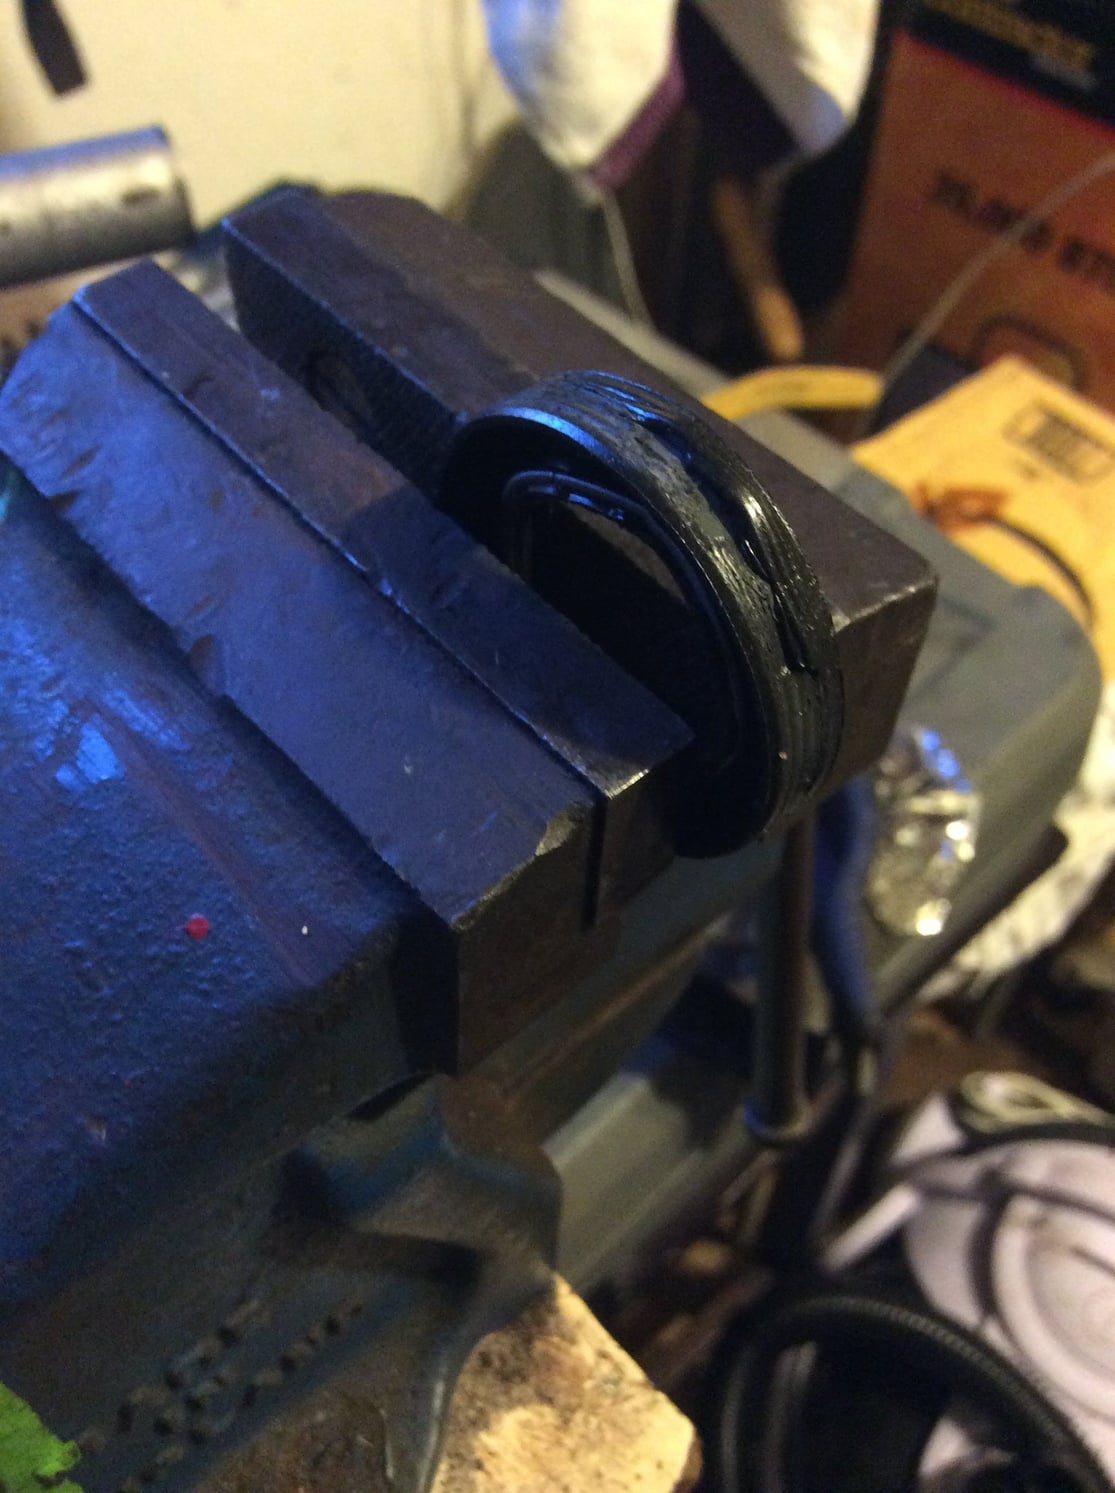
I bought a JB Weld 'steel' tube to try and fill in the missing bevel part
BTW the WM says to put 'oil' on the seal before installing. Do they mean regular oil or trans fluid?
They also oddly direct to fill the driveshaft seals with grease (and no mention of oil for those) but no mention of grease for input shaft (?)
Last edited by Dan Martinic; 01-05-2018 at 05:33 PM.
Tonight, I applied JB Weld "Steel" to try and restore the missing bevel area.
Have to say, this JB Weld stuff isn't what I thought it would be; it's quite brittle and dry, difficult to finely drag along a 2mm line. Kept crumbling then suddenly got too hard.
I used a toothpick to work it.. finger doesn't fit in there lol. Will see tomorrow if there's enough of it there to harden up and become one with the case
I haven't looked very far into this, but it looks like a 222540 seal is compatible and made with a steel outer. That might go past the irregularity without deformation...
Try using a thin feeler gauge blade to assist installing the seal in the problem area after smoothing it some with a scotch brite pad. You can use the feeler blade to help walk it area the area until it reaches a uniform depth.


 01-04-2018, 06:11 PM