When you click on links to various merchants on this site and make a purchase, this can result in this site earning a commission. Affiliate programs and affiliations include, but are not limited to, the eBay Partner Network.
I�ve been struggling with the antilock warning until I�ve found your post.
Thank you sooooo much!!!. I�ve managed to locate the problematic sensor and it�s been quite easy to repair it following your instructions.
My 928 83� shines as new now!
If you ever come to Madrid I owe you some pints!!!
Originally Posted by coach928
I'm actually quite shocked. I was able to fix my two broken sensors.
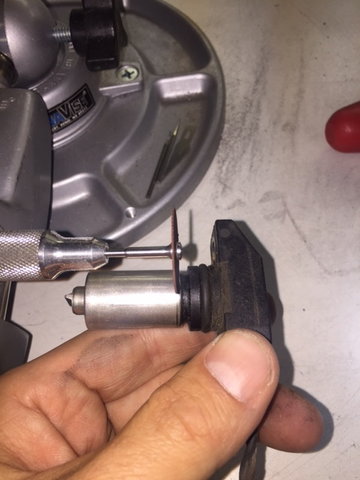
Note this procedure is to be performed only AFTER you've confirmed that the sensor has no resistance and the wires leading into the sensor are not broken.
1. Using a dremel, cut the rounded back end off of the metal shell.
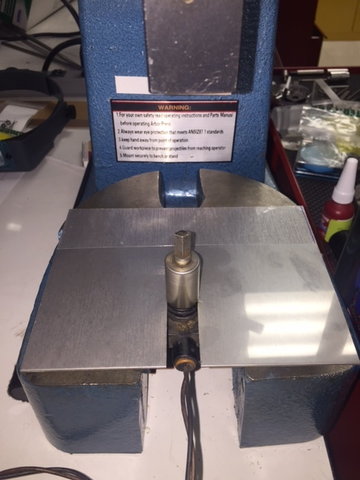
2. Drill a 5/8" hole in a 1/16" steel plate. Cut a 5/8" slot to the hole.
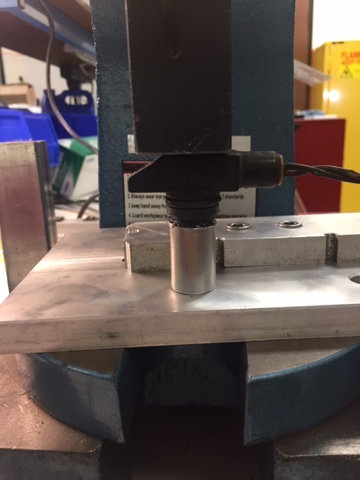
3. Slide the sensor into the slot under the arbor press as shown, and press the sensor through the shell.
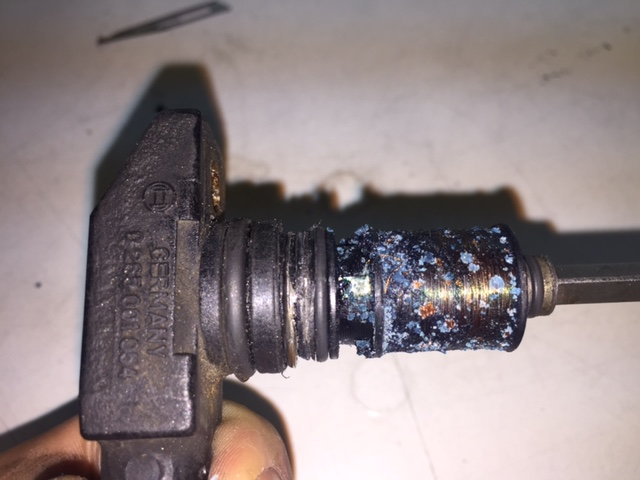
4. GENTLY remove the sealant around each of the two solder connections. Just move it aside, you can use it later after you've fixed the sensor. Using the voltmeter, verify that there is infinite resistance across the 2 contacts.
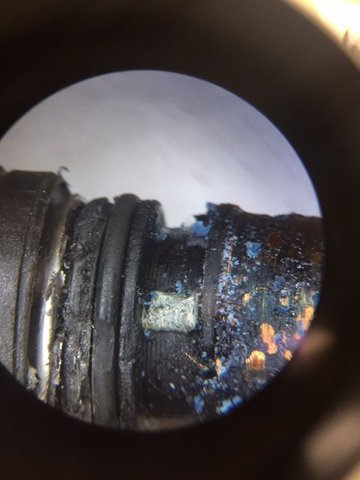
5. Look for a broken wire. The fine gage wire is wrapped around the magnetic core thousands of times. It will not fail inside this coil. It is likely to fail where it is soldered to the contact. Near the beginning and the end the wire is stranded together with 2 other fine gage wires for mechanical reinforcement. Only one of these wires continues to wrap around the core. In one of my cases, the stranded wire looked like it was soldered to the contact, but one of the strands (the most important one) and broken free.
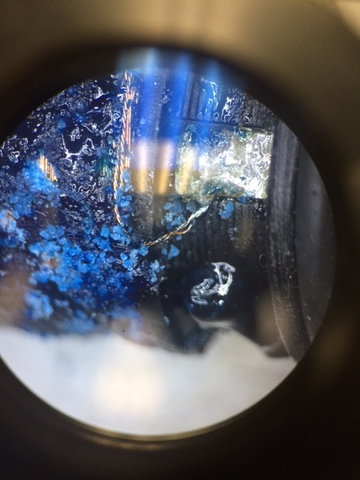
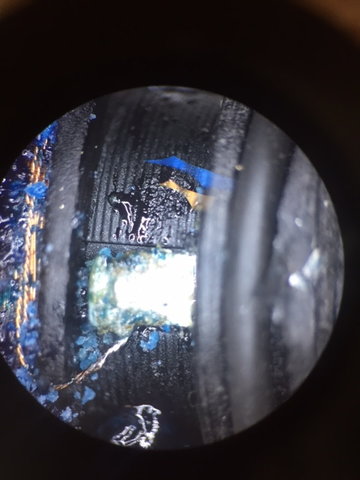
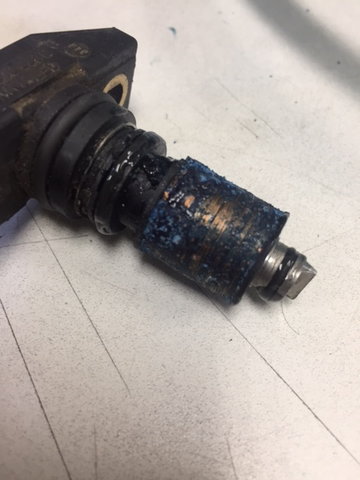
Broken sensor 1 (more obvious):
Broken sensor 2 (less obvious):
5. Very carefully, strip the insulation from the tip of the broken wire. I did the with a exacto blade, using virtually no pressure.
6. Using a fine point soldering iron, carefully solder the broken wire back onto the contact.
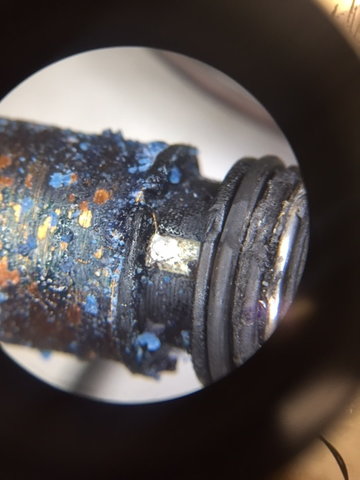
Fixed sensor 1:
Fixed sensor 2:
7. Test resistance with voltmeter. It should be ~1 kohm across the contacts. Hopefully it is fixed at this point.
8. Use some of the excess sealant in the sensor to cover the solder connections and contacts.
9. Clean up the cut ends of the sensor shell that you previously cut off. Verify there are no sharp edges. Clean the inside of the shell.
10. Clean any debris remaining around the sensor. Try to remove the metal shavings remaining from your initial cutting.
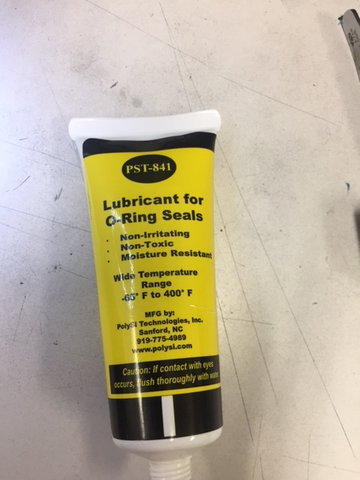
11. Apply o-ring lubrication to both the small and medium o-rings.
12. Carefully put the metal shell back on the sensor. It is difficult to slide the medium o-ring under the metal shell. Get it started using a tweezer to push it under the shell. Then go back to the arbor press and slowly press the shell back on while verifying that you are not pinching the o-ring.
13. Crimp or roll the back edge of the shell over the o-ring to mechanically hold the shell on. Disclosure: I have not yet completed this step, but I plan to put it on a lathe and contain the wires in a tube while rolling the back edge.
14. Re-install the sensor in your car and enjoy never pressing the red fault indicator again!
@Borja B I�m glad you were able to get your ABS back! I think there are too many of these sensors that have ended up in the trash because everyone assumed they were not able to be refurbished.
I had a friend make me a tool that bends the cut end of the shell when it is reinstalled on the sensor body.
I�ll take you up in your offer of a few pints. I�d love to see your 928; however, I don�t think they will let us Americans back into the EU anytime soon. 😬
Originally Posted by Borja B
I�ve been struggling with the antilock warning until I�ve found your post.
Thank you sooooo much!!!. I�ve managed to locate the problematic sensor and it�s been quite easy to repair it following your instructions.
My 928 83� shines as new now!
If you ever come to Madrid I owe you some pints!!!
Last edited by coach928; 09-05-2020 at 03:17 PM.
Reason: Typo
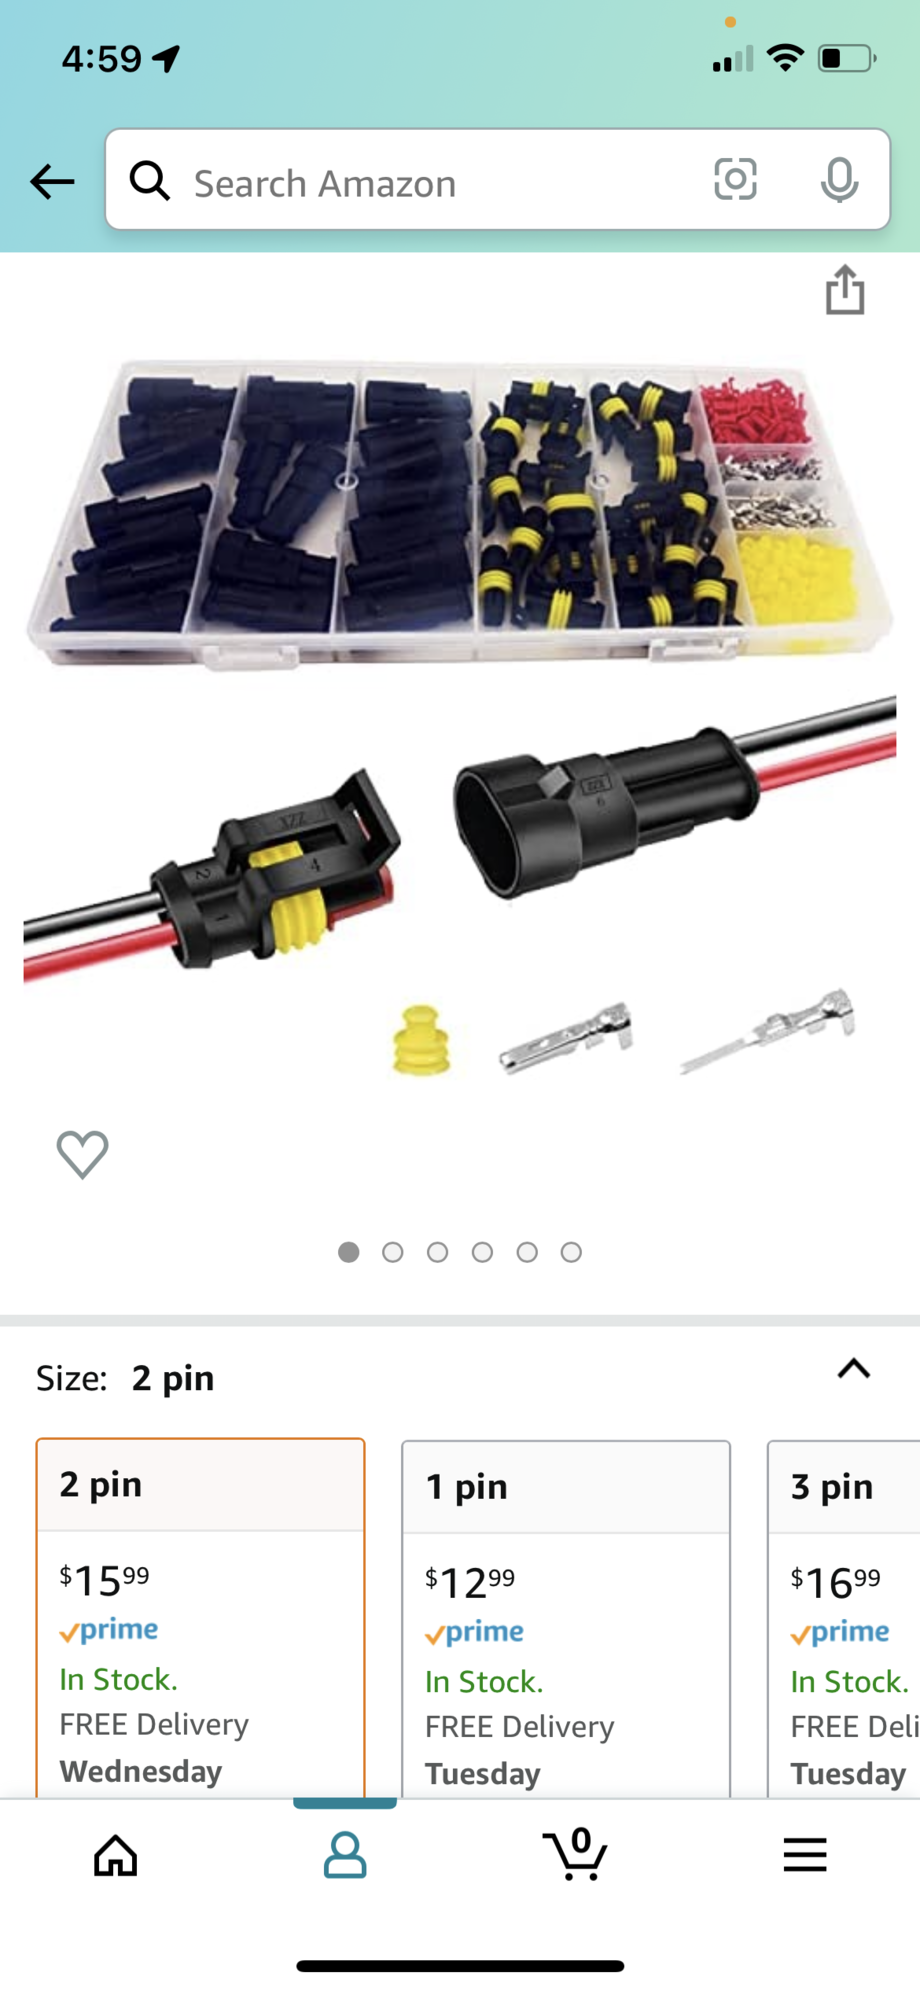
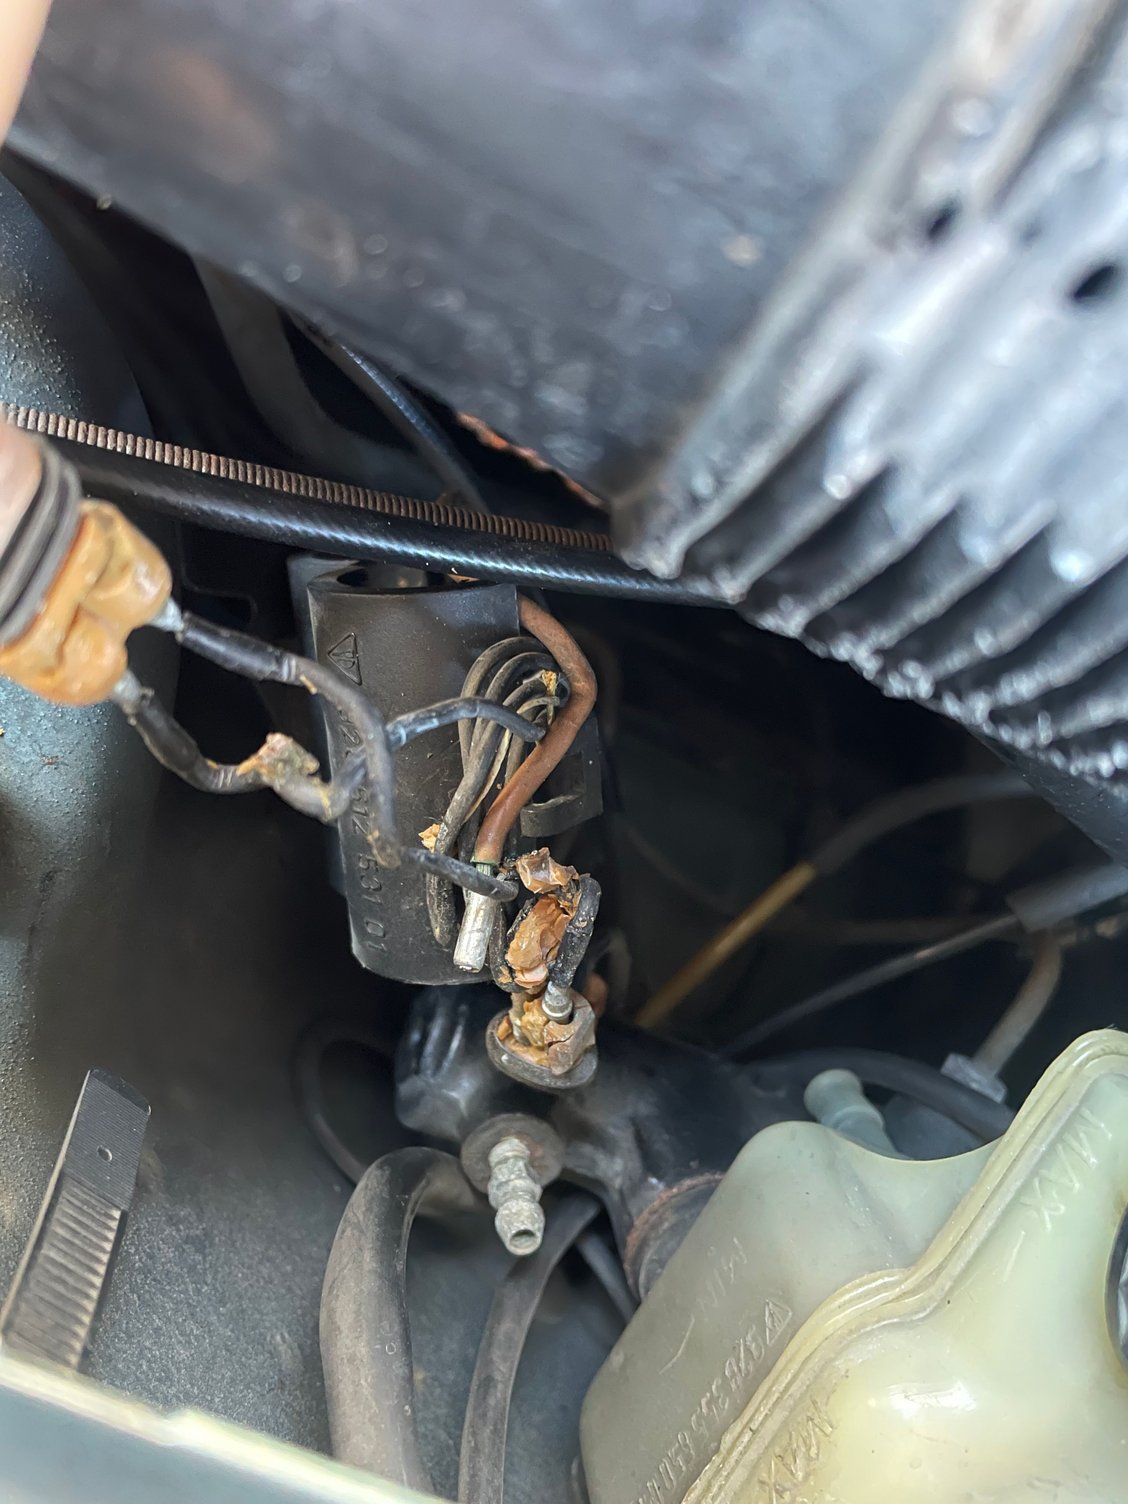
After reviewing much of the forum information and acquiring an oscilloscope for checking sensors my issue of ABS light coming on after driving a while was inner fender loom being disintegrated. Missed that on my diagnosis sessions previously. Wires touching ground when driving I think. These connectors on eBay were great and give a OEM feel also.
Anyone in South Carolina area needing help with electrical diagnosis and mechanical work let me know as I�m here to help fellow shark owners.

 09-05-2020, 01:08 PM