When you click on links to various merchants on this site and make a purchase, this can result in this site earning a commission. Affiliate programs and affiliations include, but are not limited to, the eBay Partner Network.
This past weekend, I made some meaningful progress on the Red Witch. I have completed most of the work under the cowl panel.
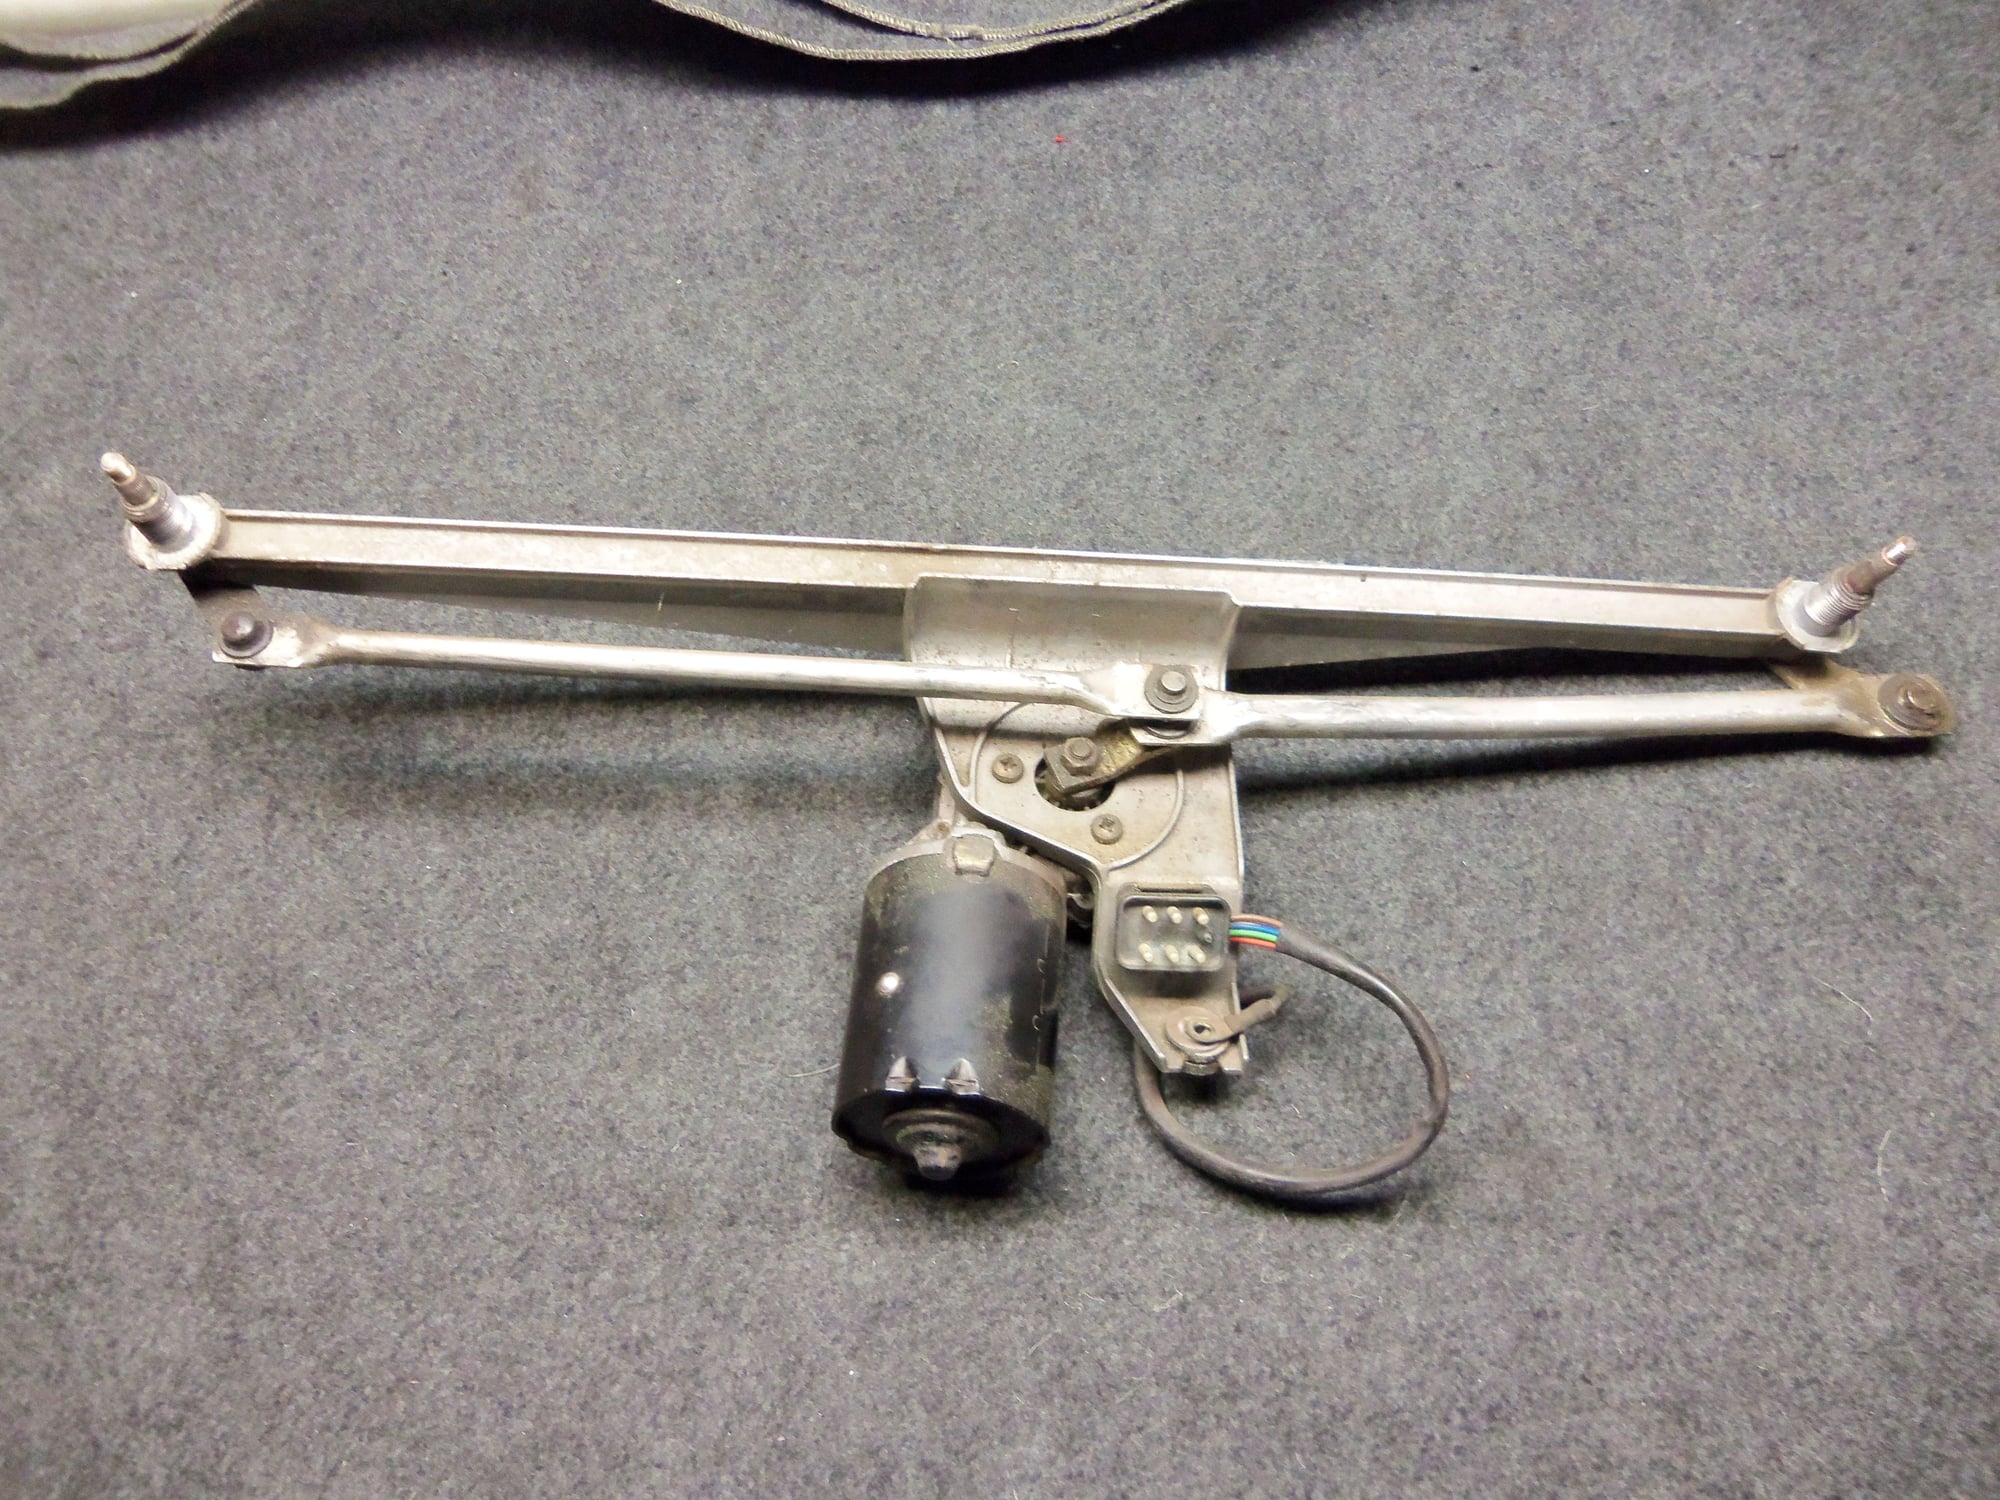
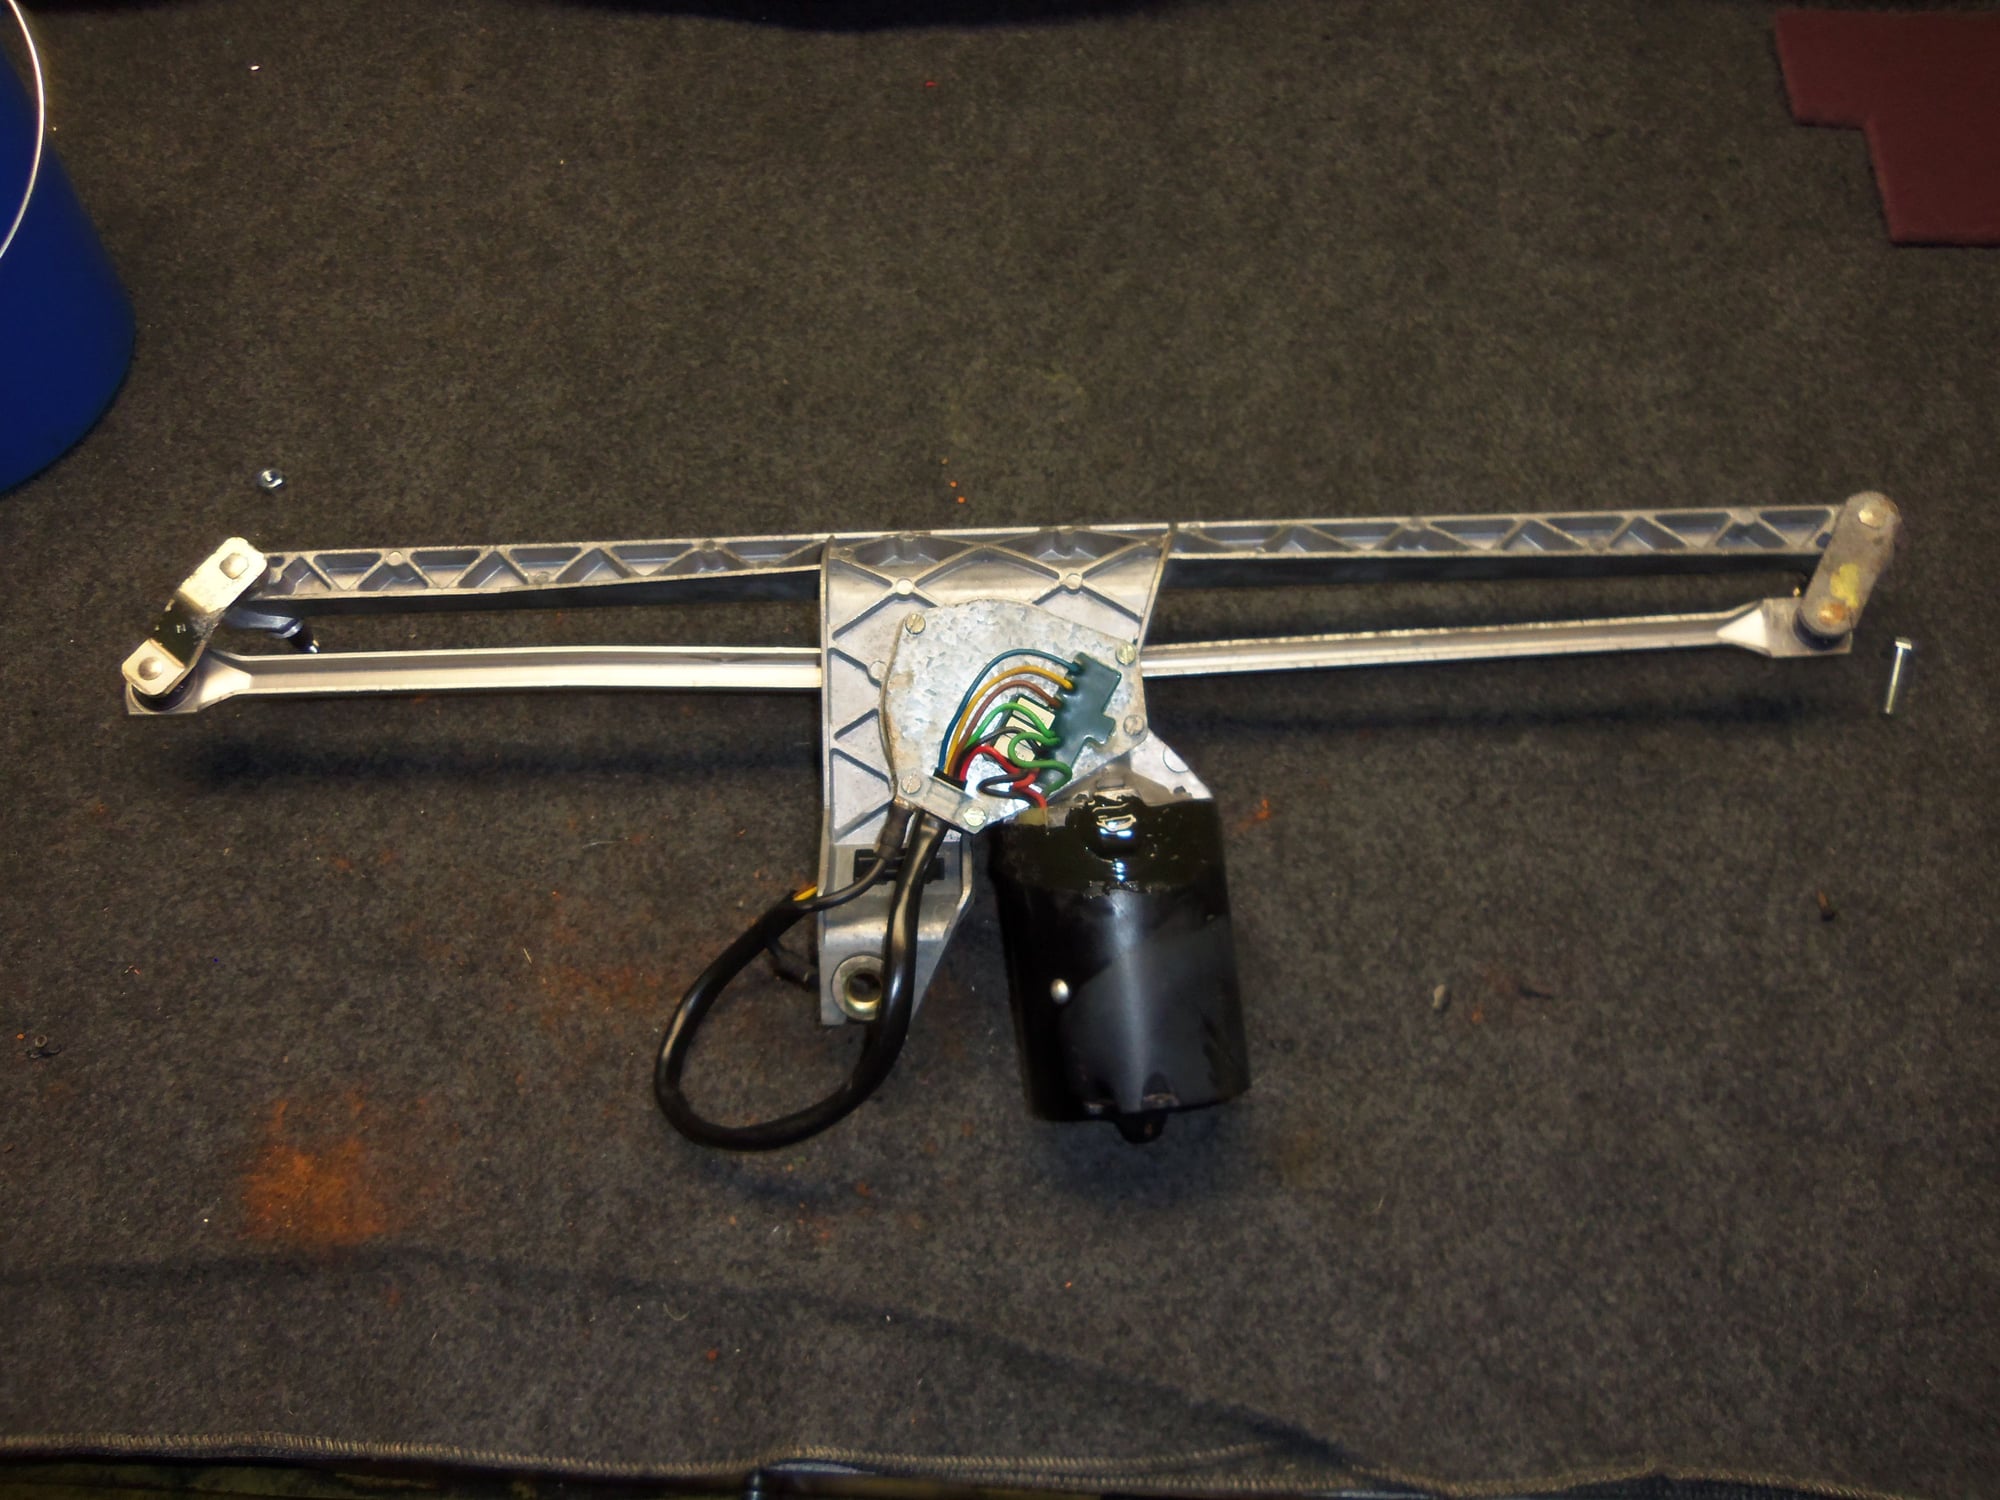
Back in February, I pulled the wiper assembly for cleaning and repair. When I bought the Red Witch, Mike warned me that the sealed bearing in the motor had most likely failed. The motor was cranky to operate. And it howled.
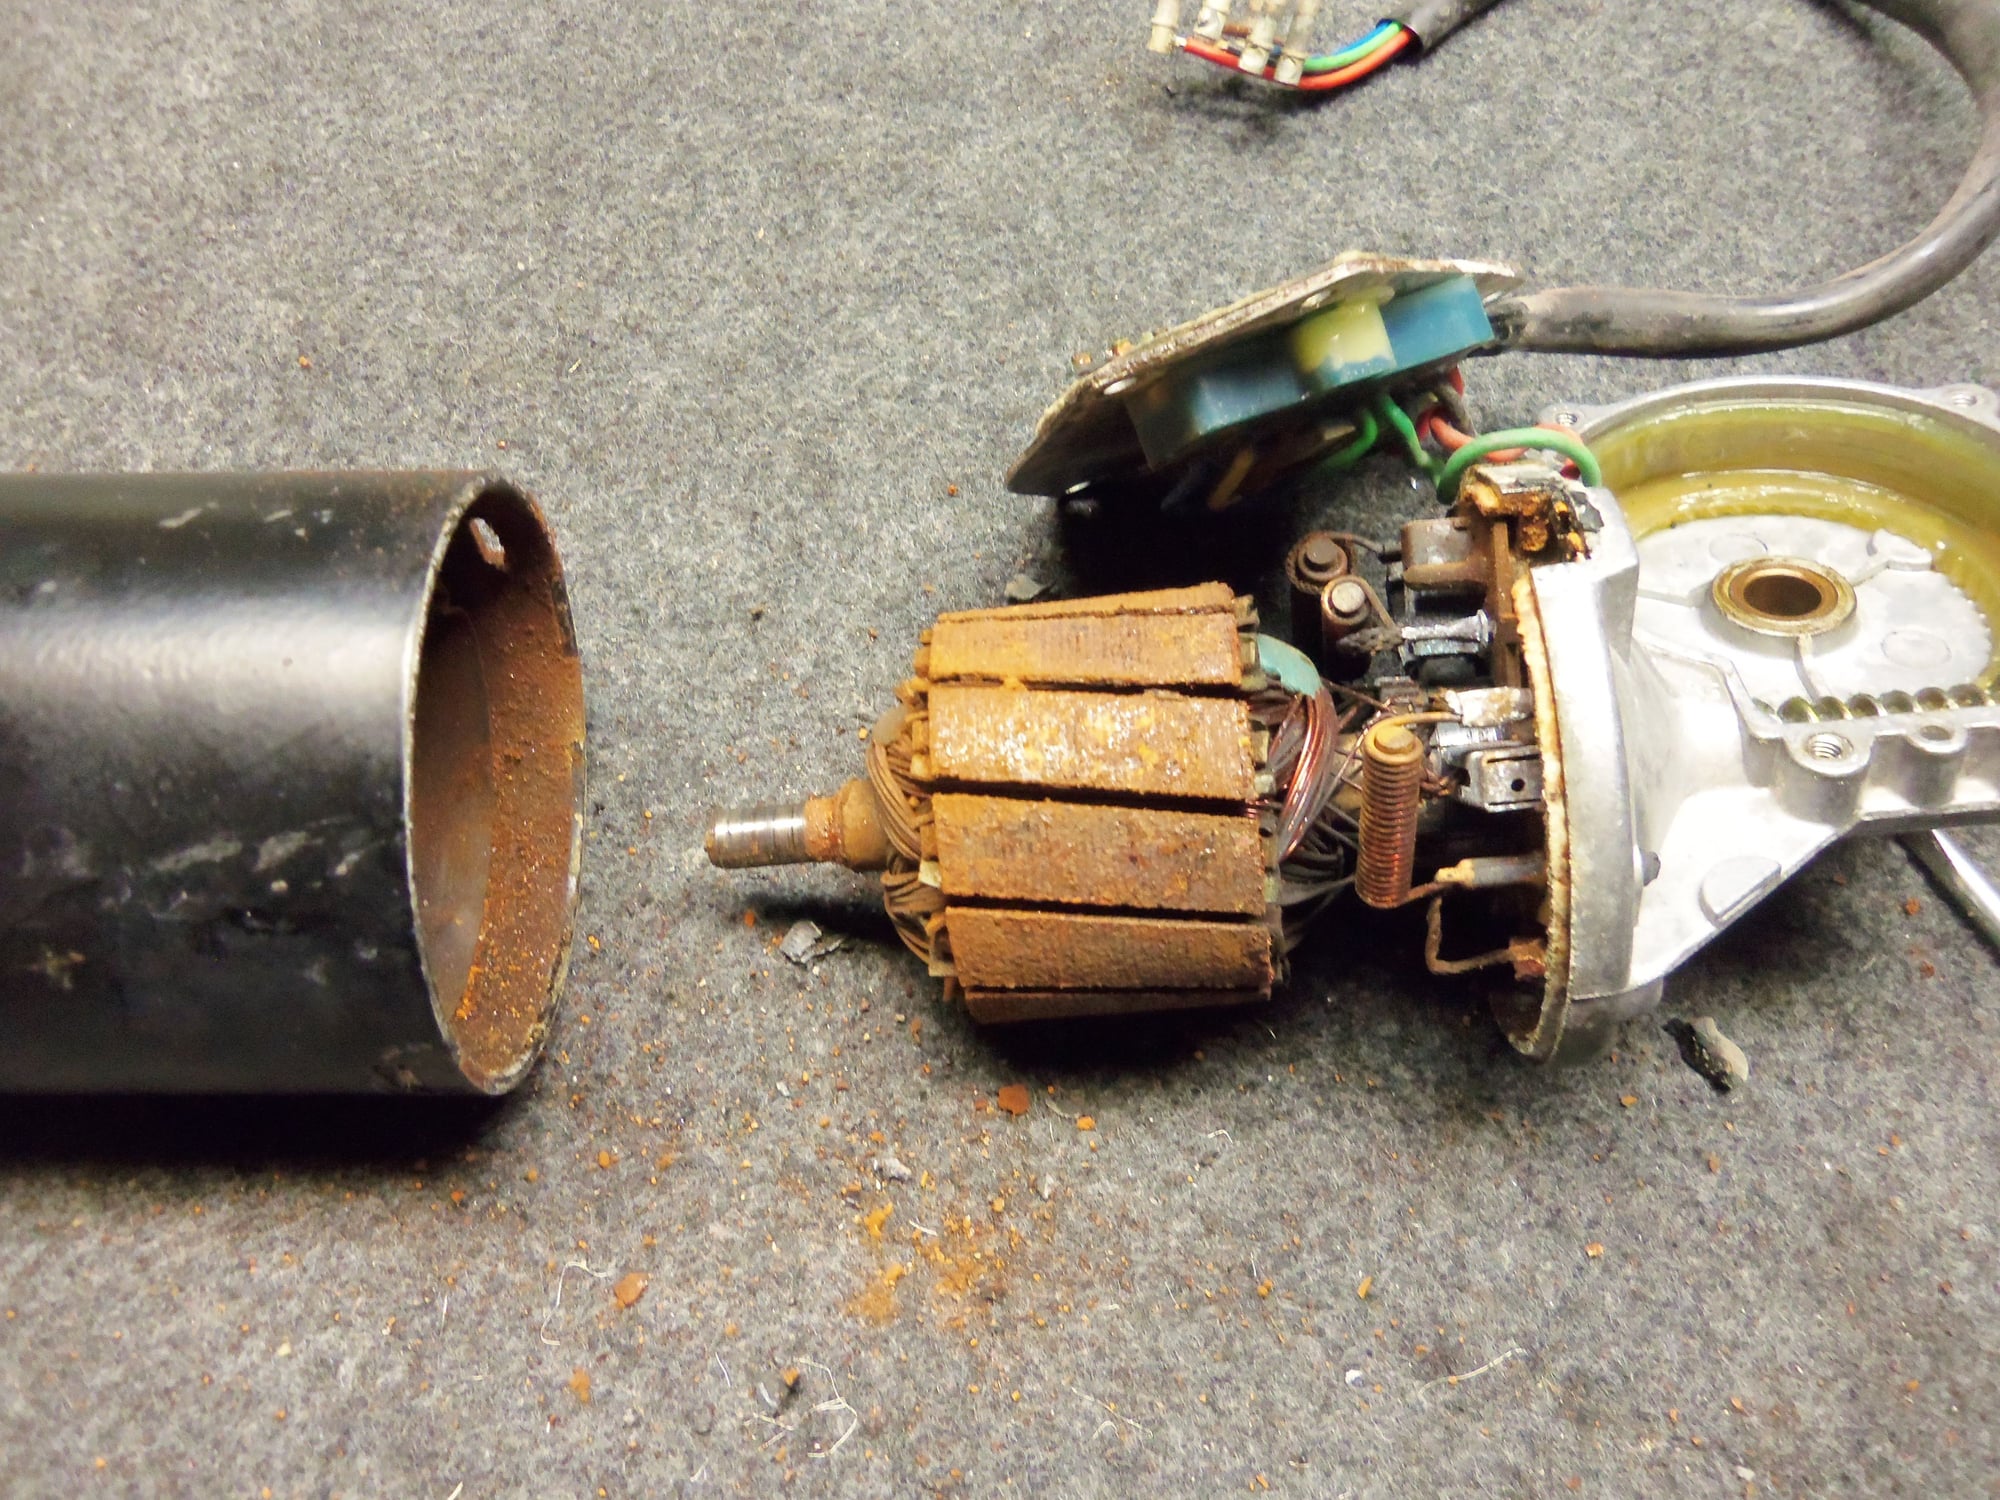
In May, I finally got around to working on the wiper assembly. I was lulled into a false sense of security by the outside. Not too much corrosion. Inside, was a horror show of rust.
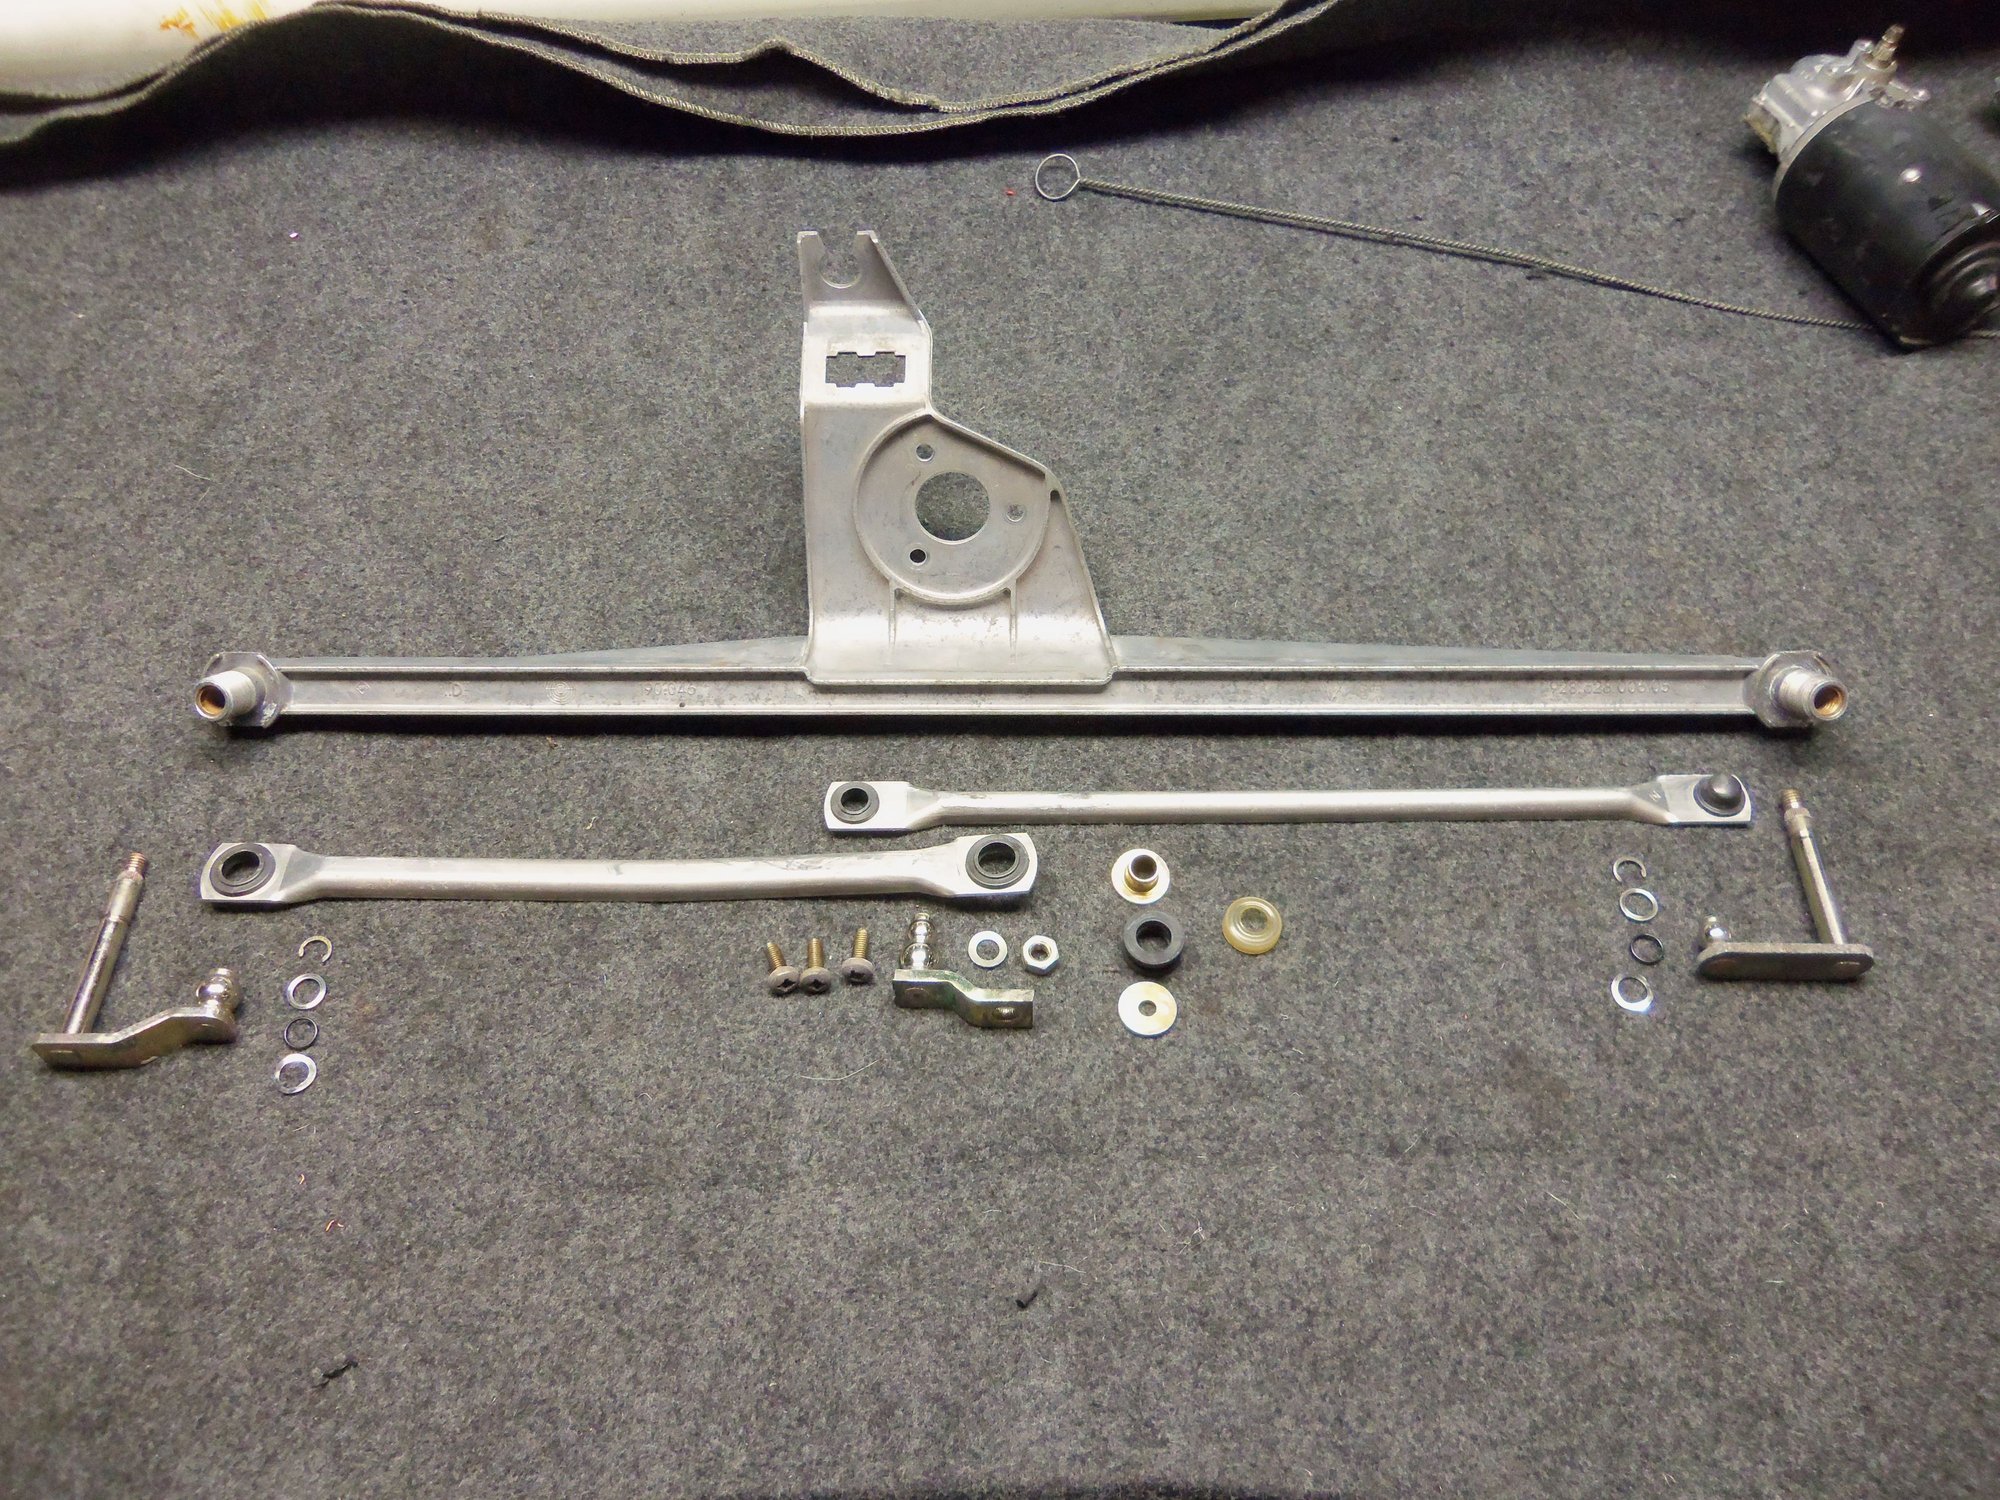
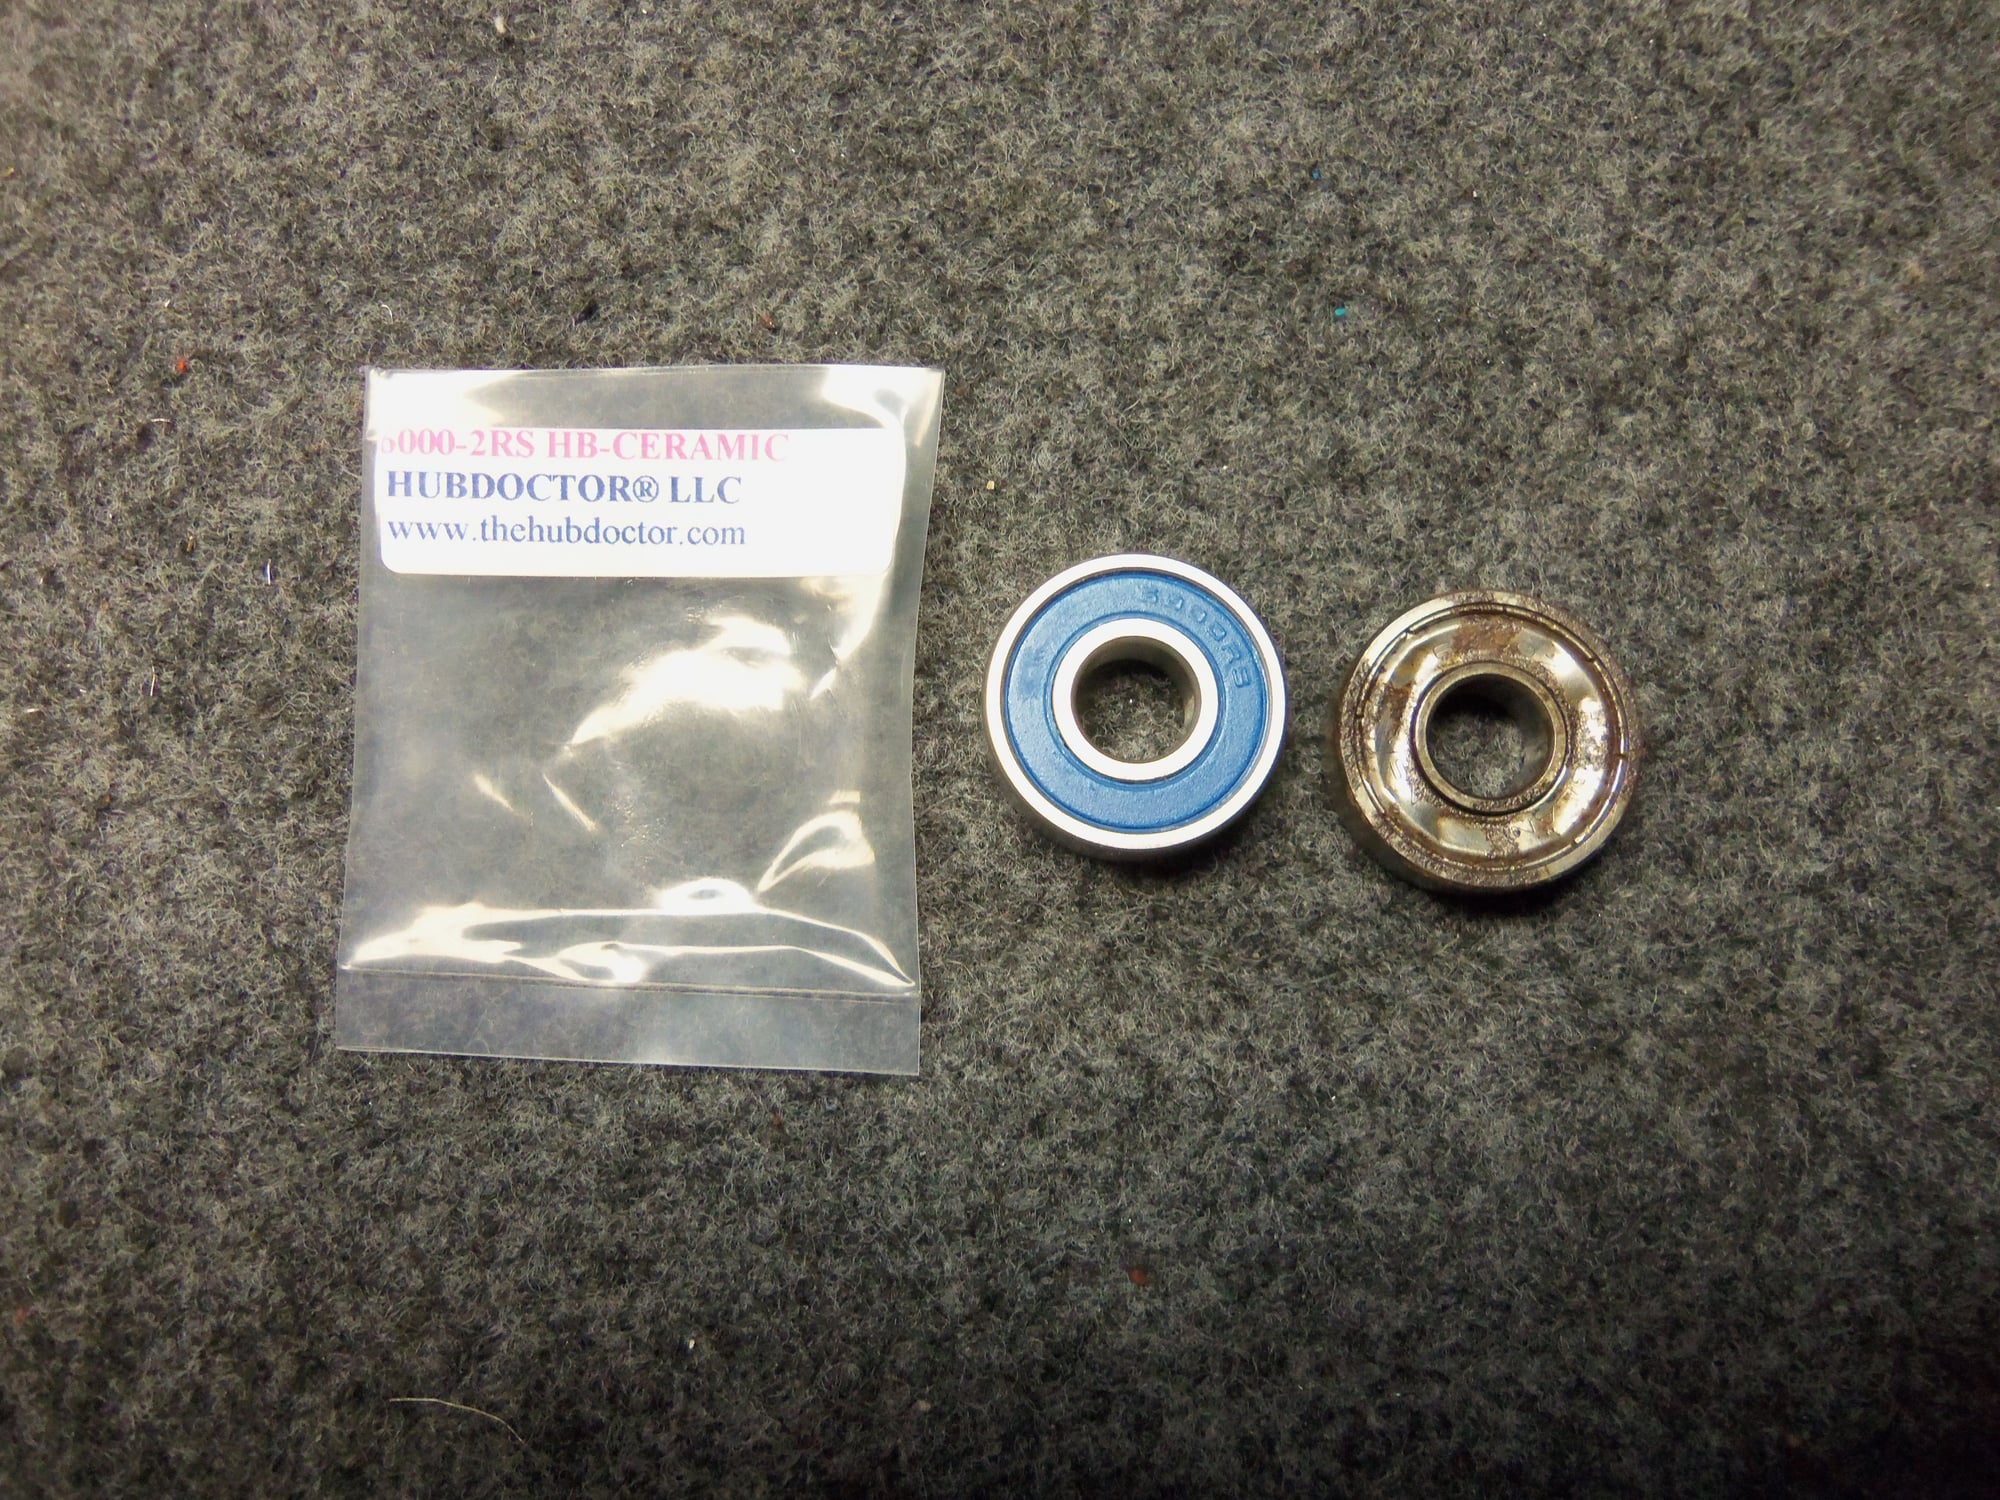
I disassembled the transmission, arms, and motor. I cleaned all as best as possible, and replaced the failed bearing. For giggles, I used a ceramic bearing. We shall see if that was a wise decision or not.
Before.
Transmission disassembled for cleaning and lubricating.
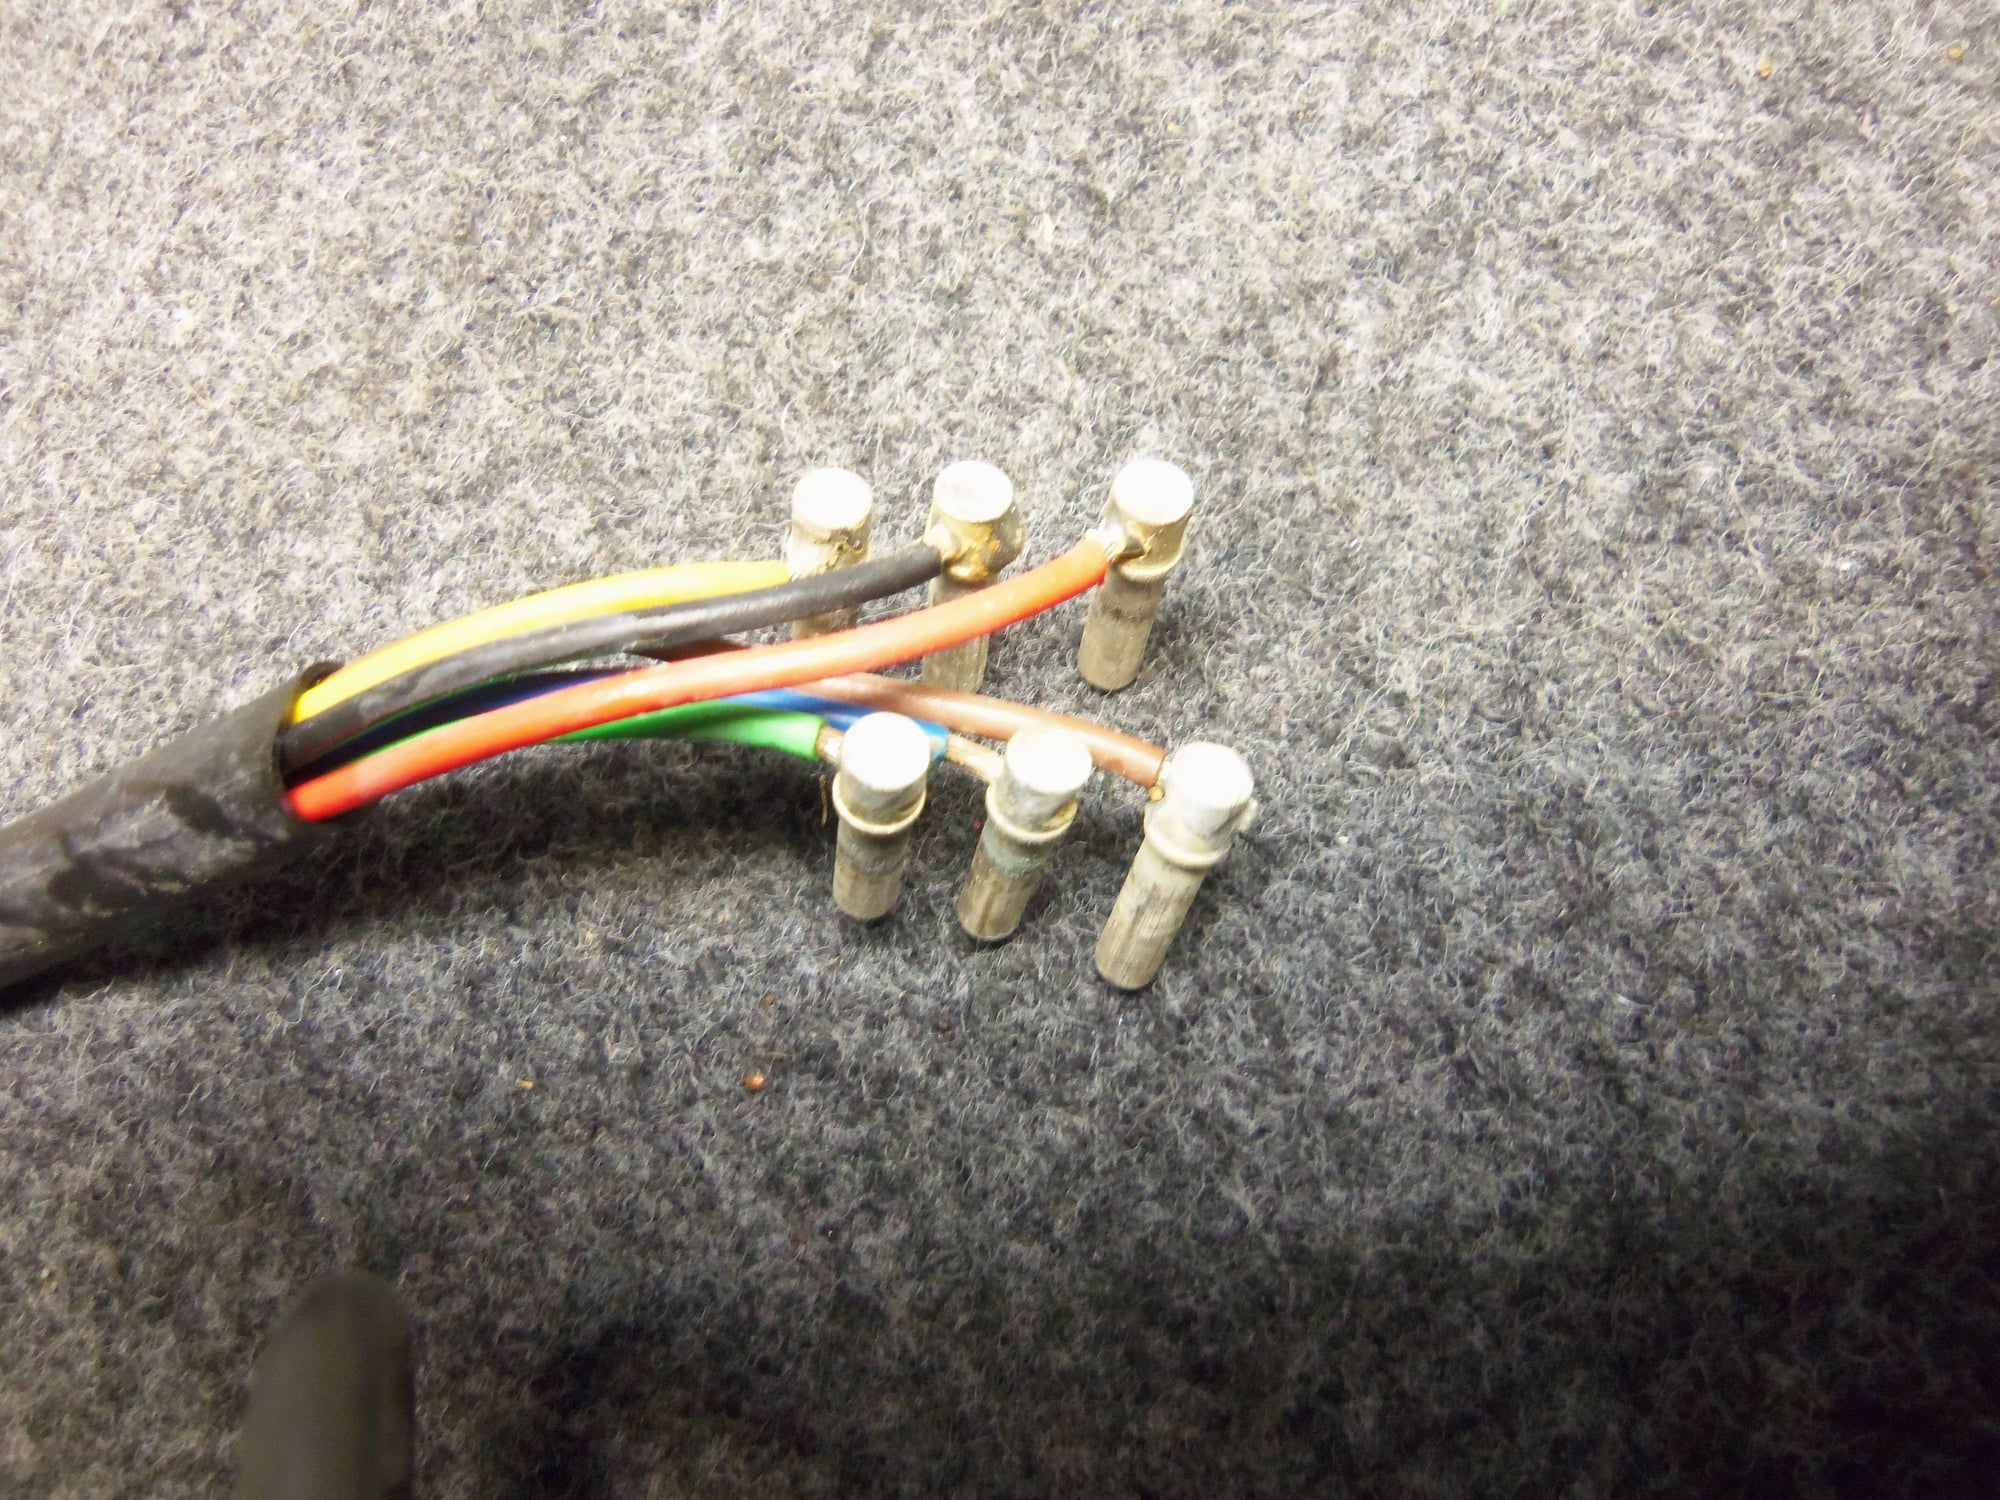
Disassembled plug to clean terminal pins.
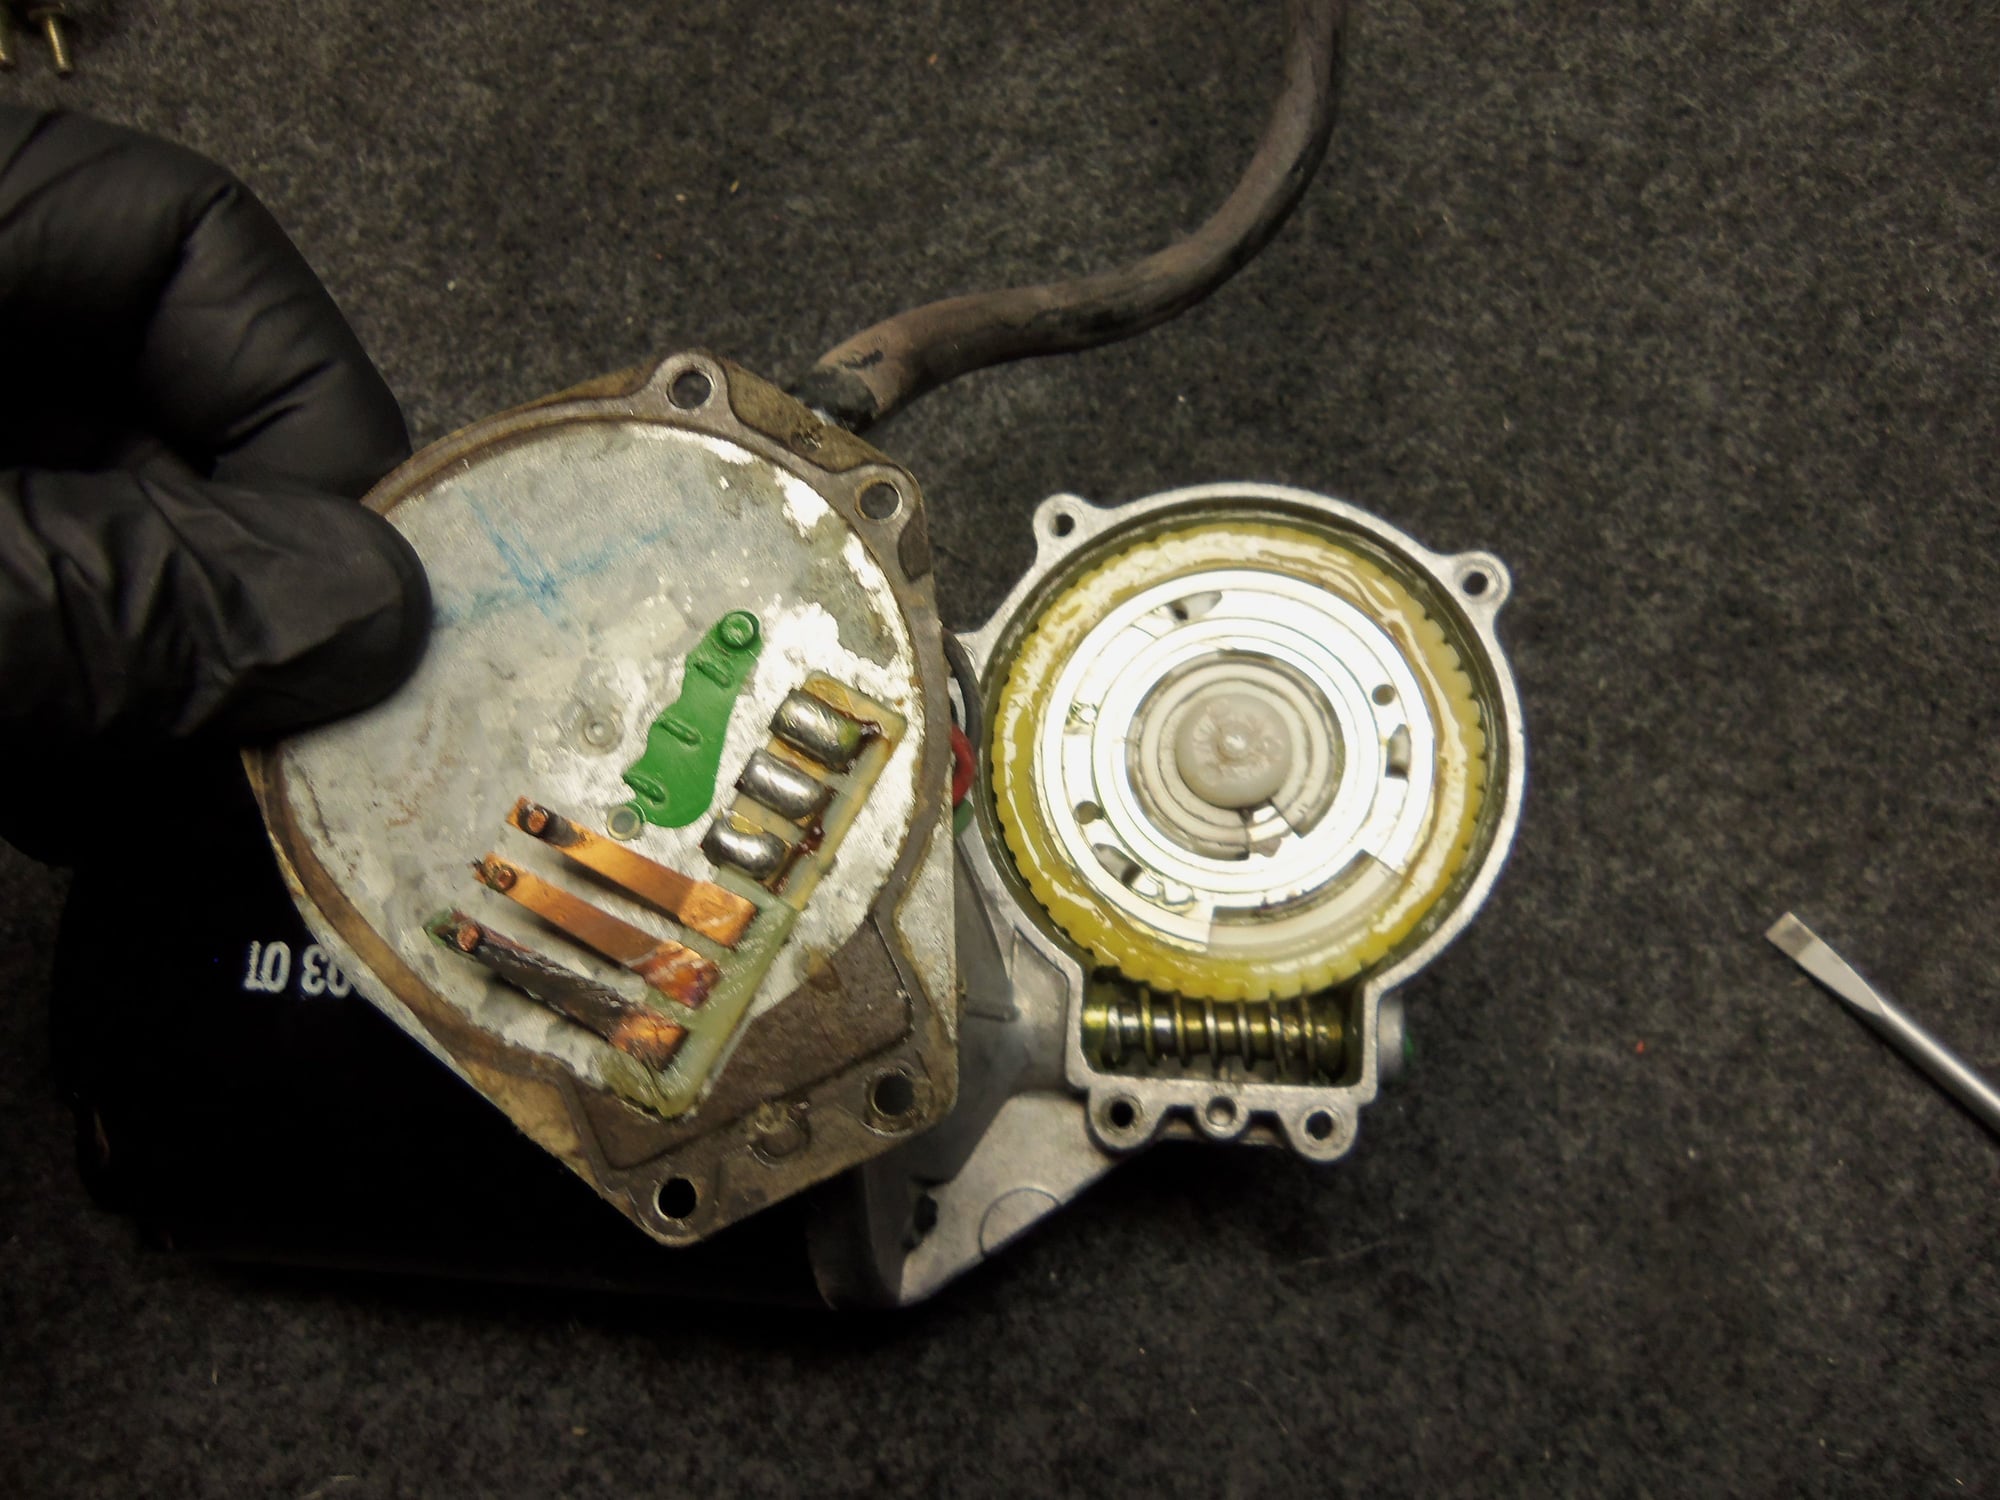
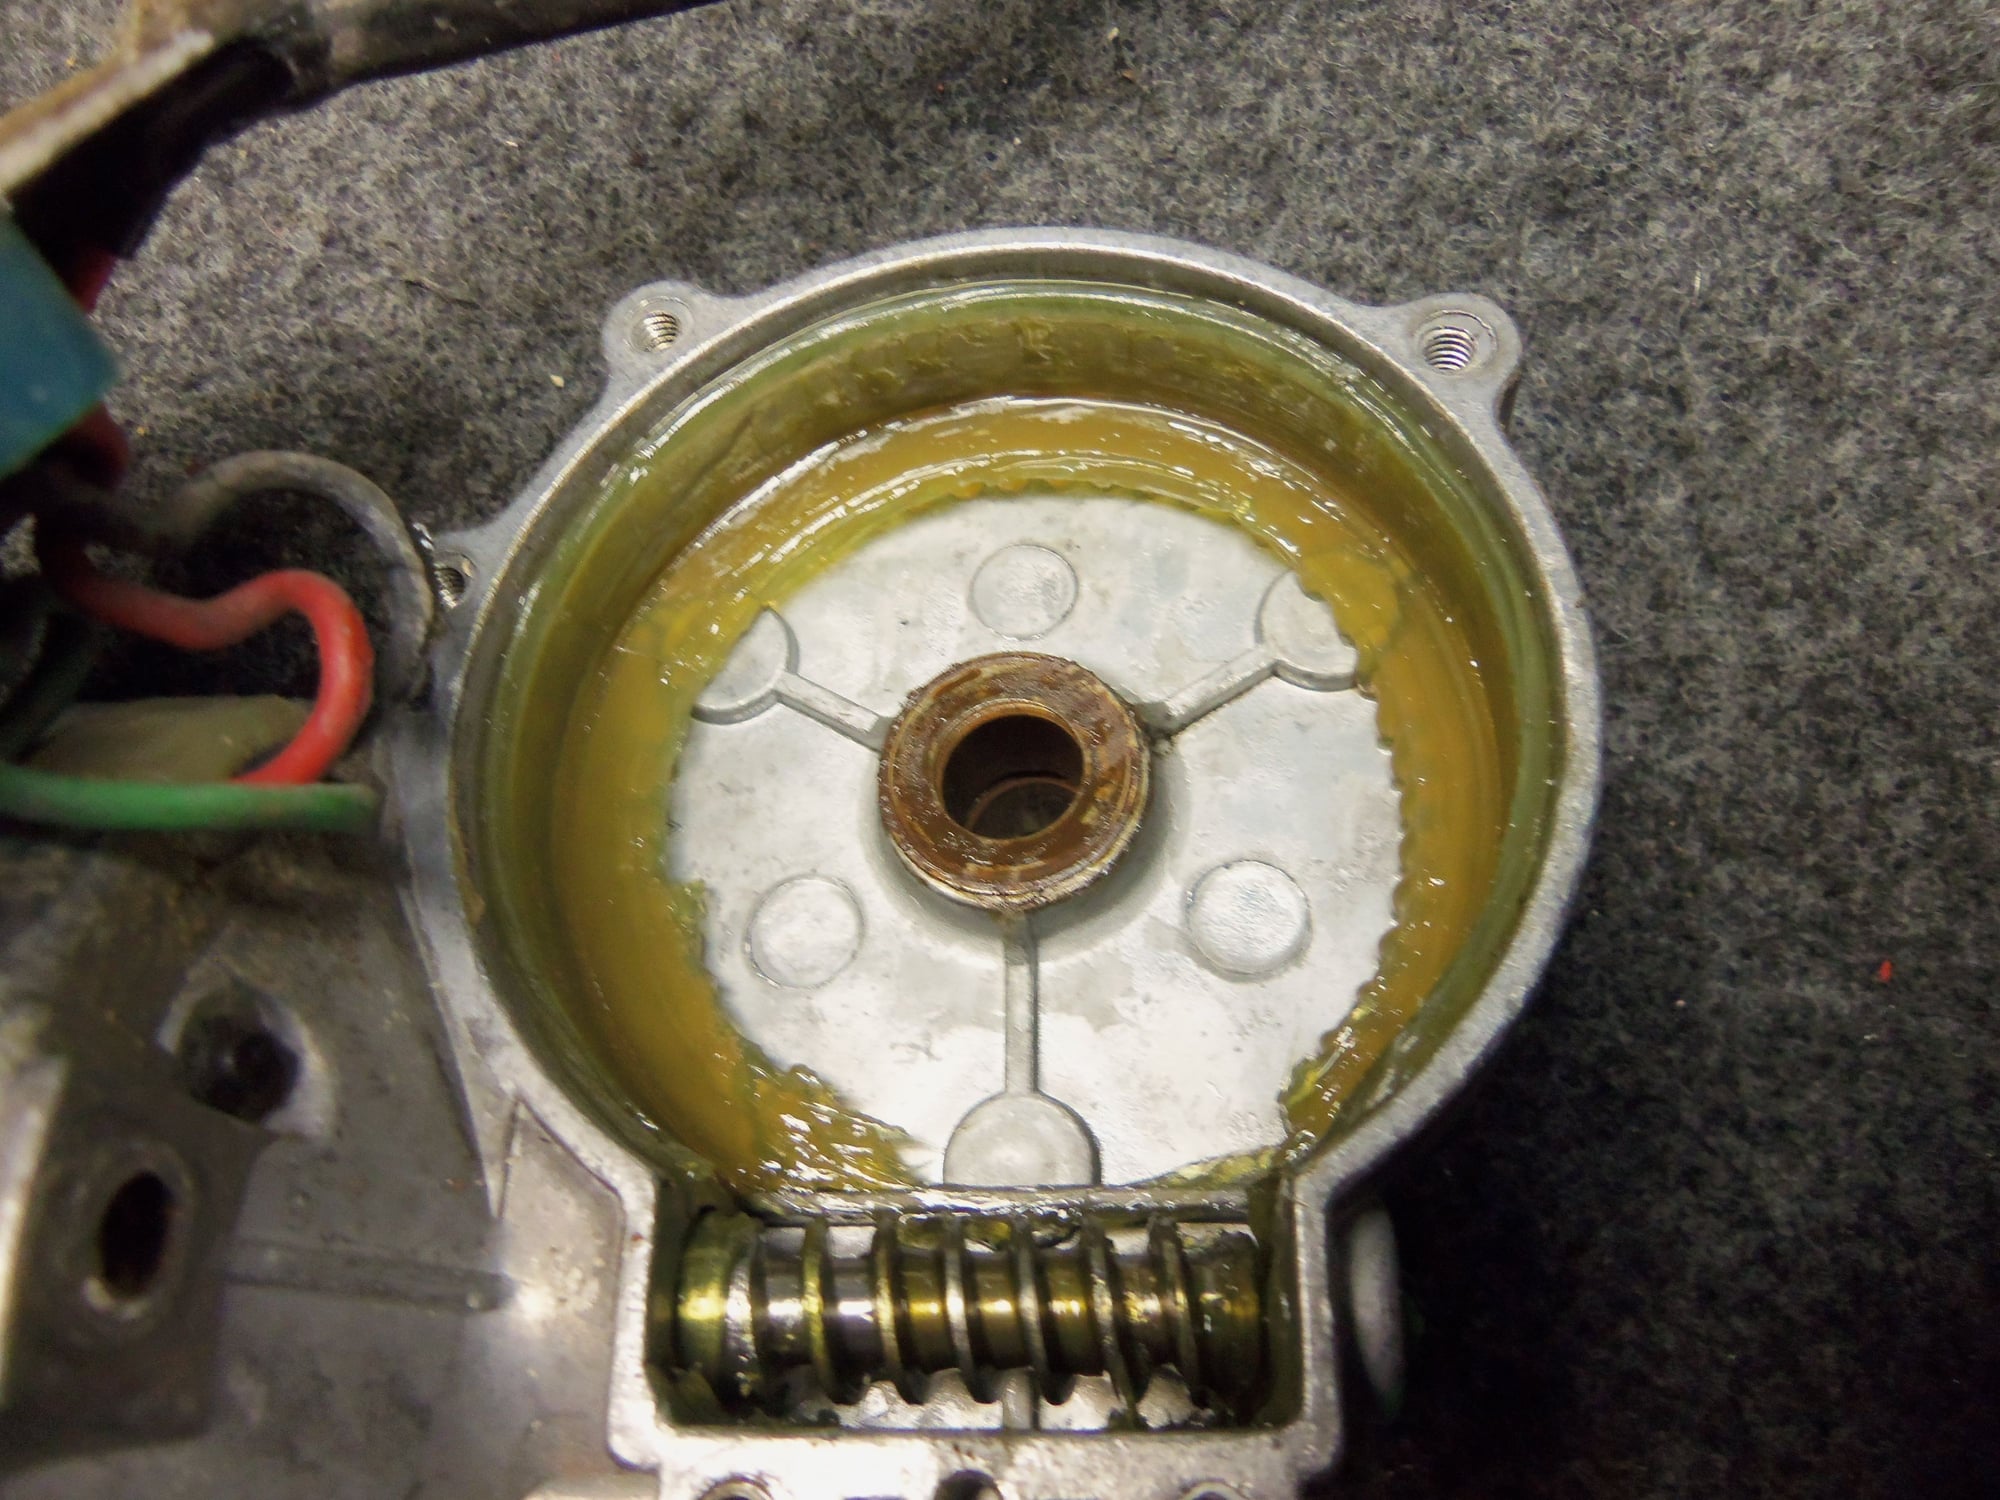
Gear and terminals looked OK.
Grease was not caked and hard.
Uh-oh...
Yikes!
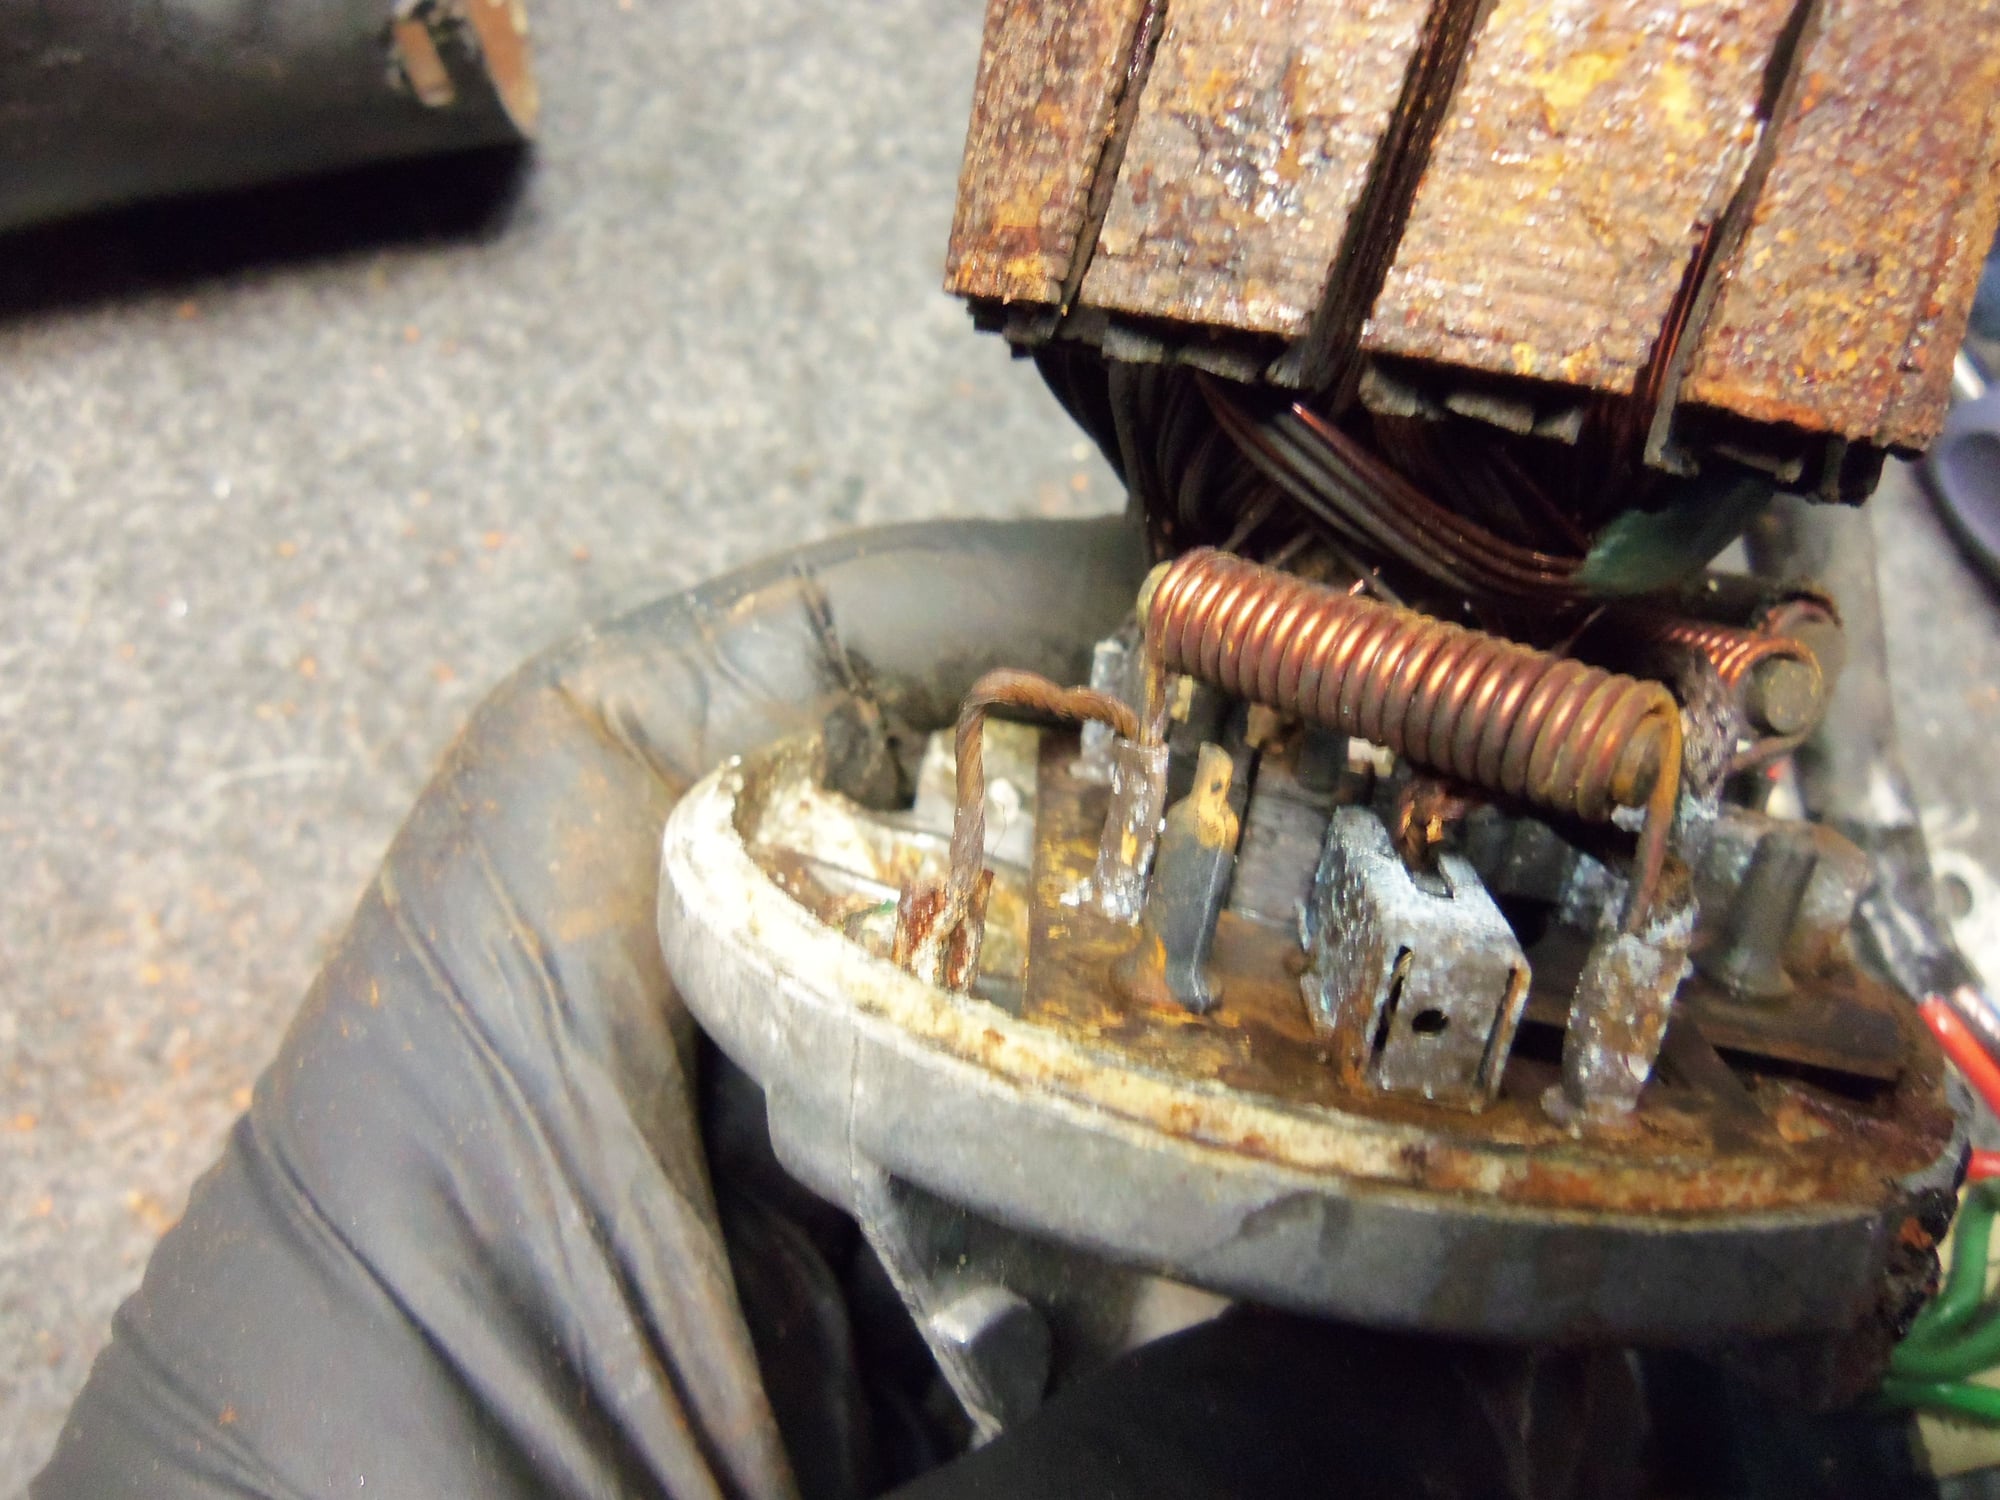
Oh my...
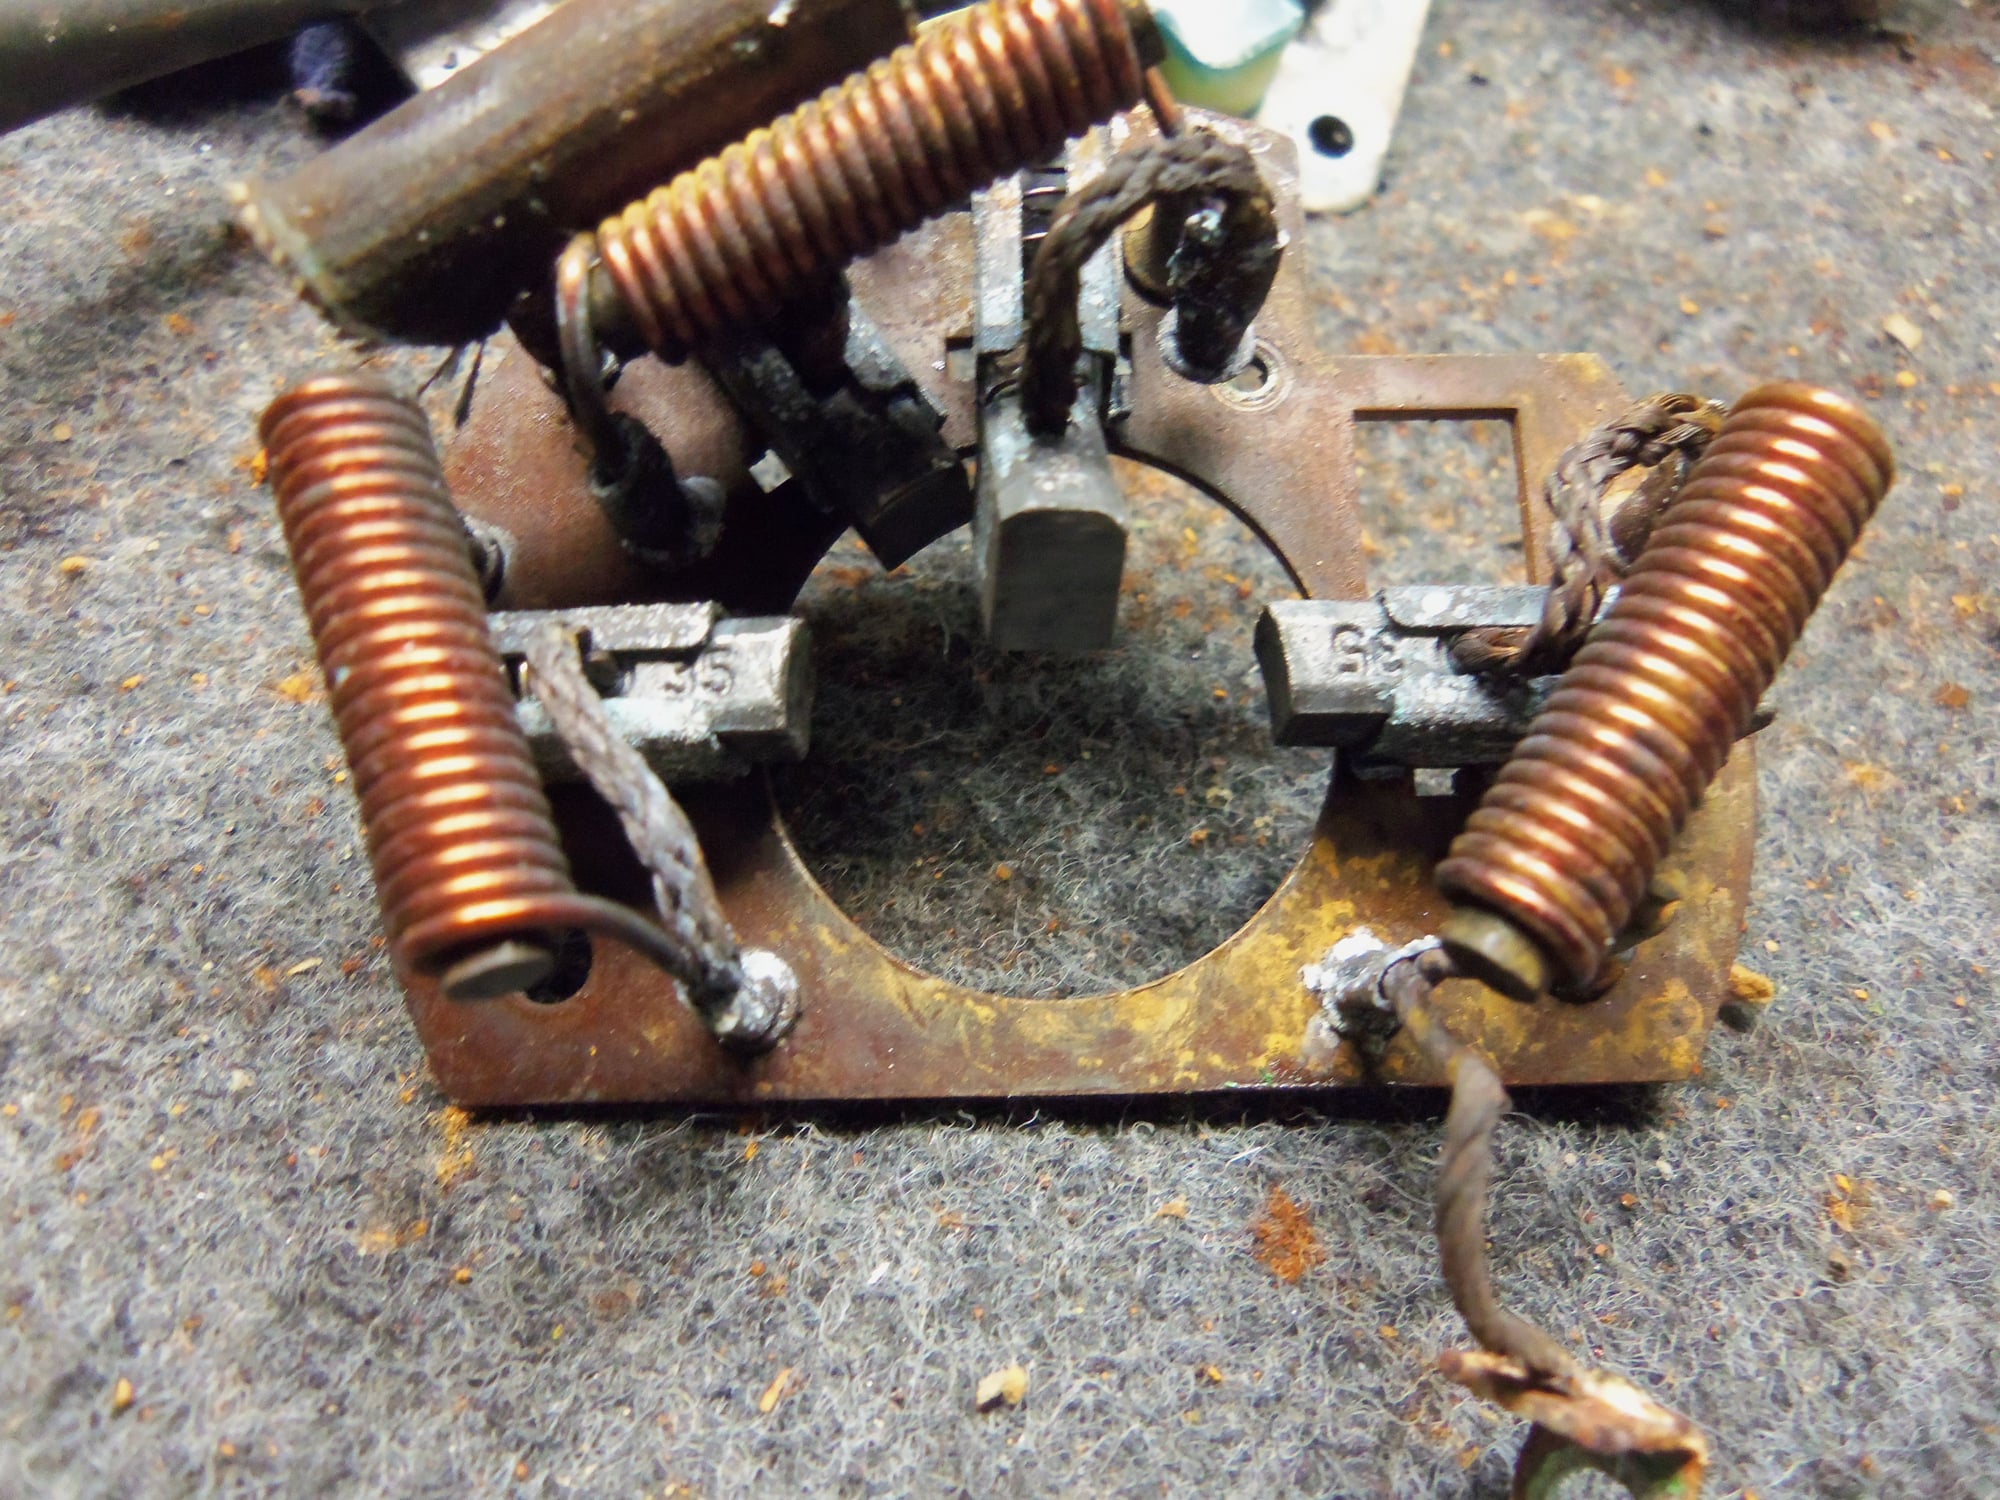
Brushes still had life to them.
Ceramic bearing versus failed original bearing.
After. Cleaned. Lubricated. Potted. Ready to go.
Everything cleaned up acceptably. I lubricated the various bushings, gears, and thrust washers with good grease. I was able to reassemble the brush plate using the old bearing as a spacer for the brushes. Thanks Rennlist 928 for ideas like this!
I potted the motor casing seam with Permatex non-hardening sealant.
Poring over the wiring diagram, I was able to figure out how to jump the terminals to get the motor to run. It ran smoothly and quietly, with a surprising amount of torque.
As Ed China would say, 'Result!'
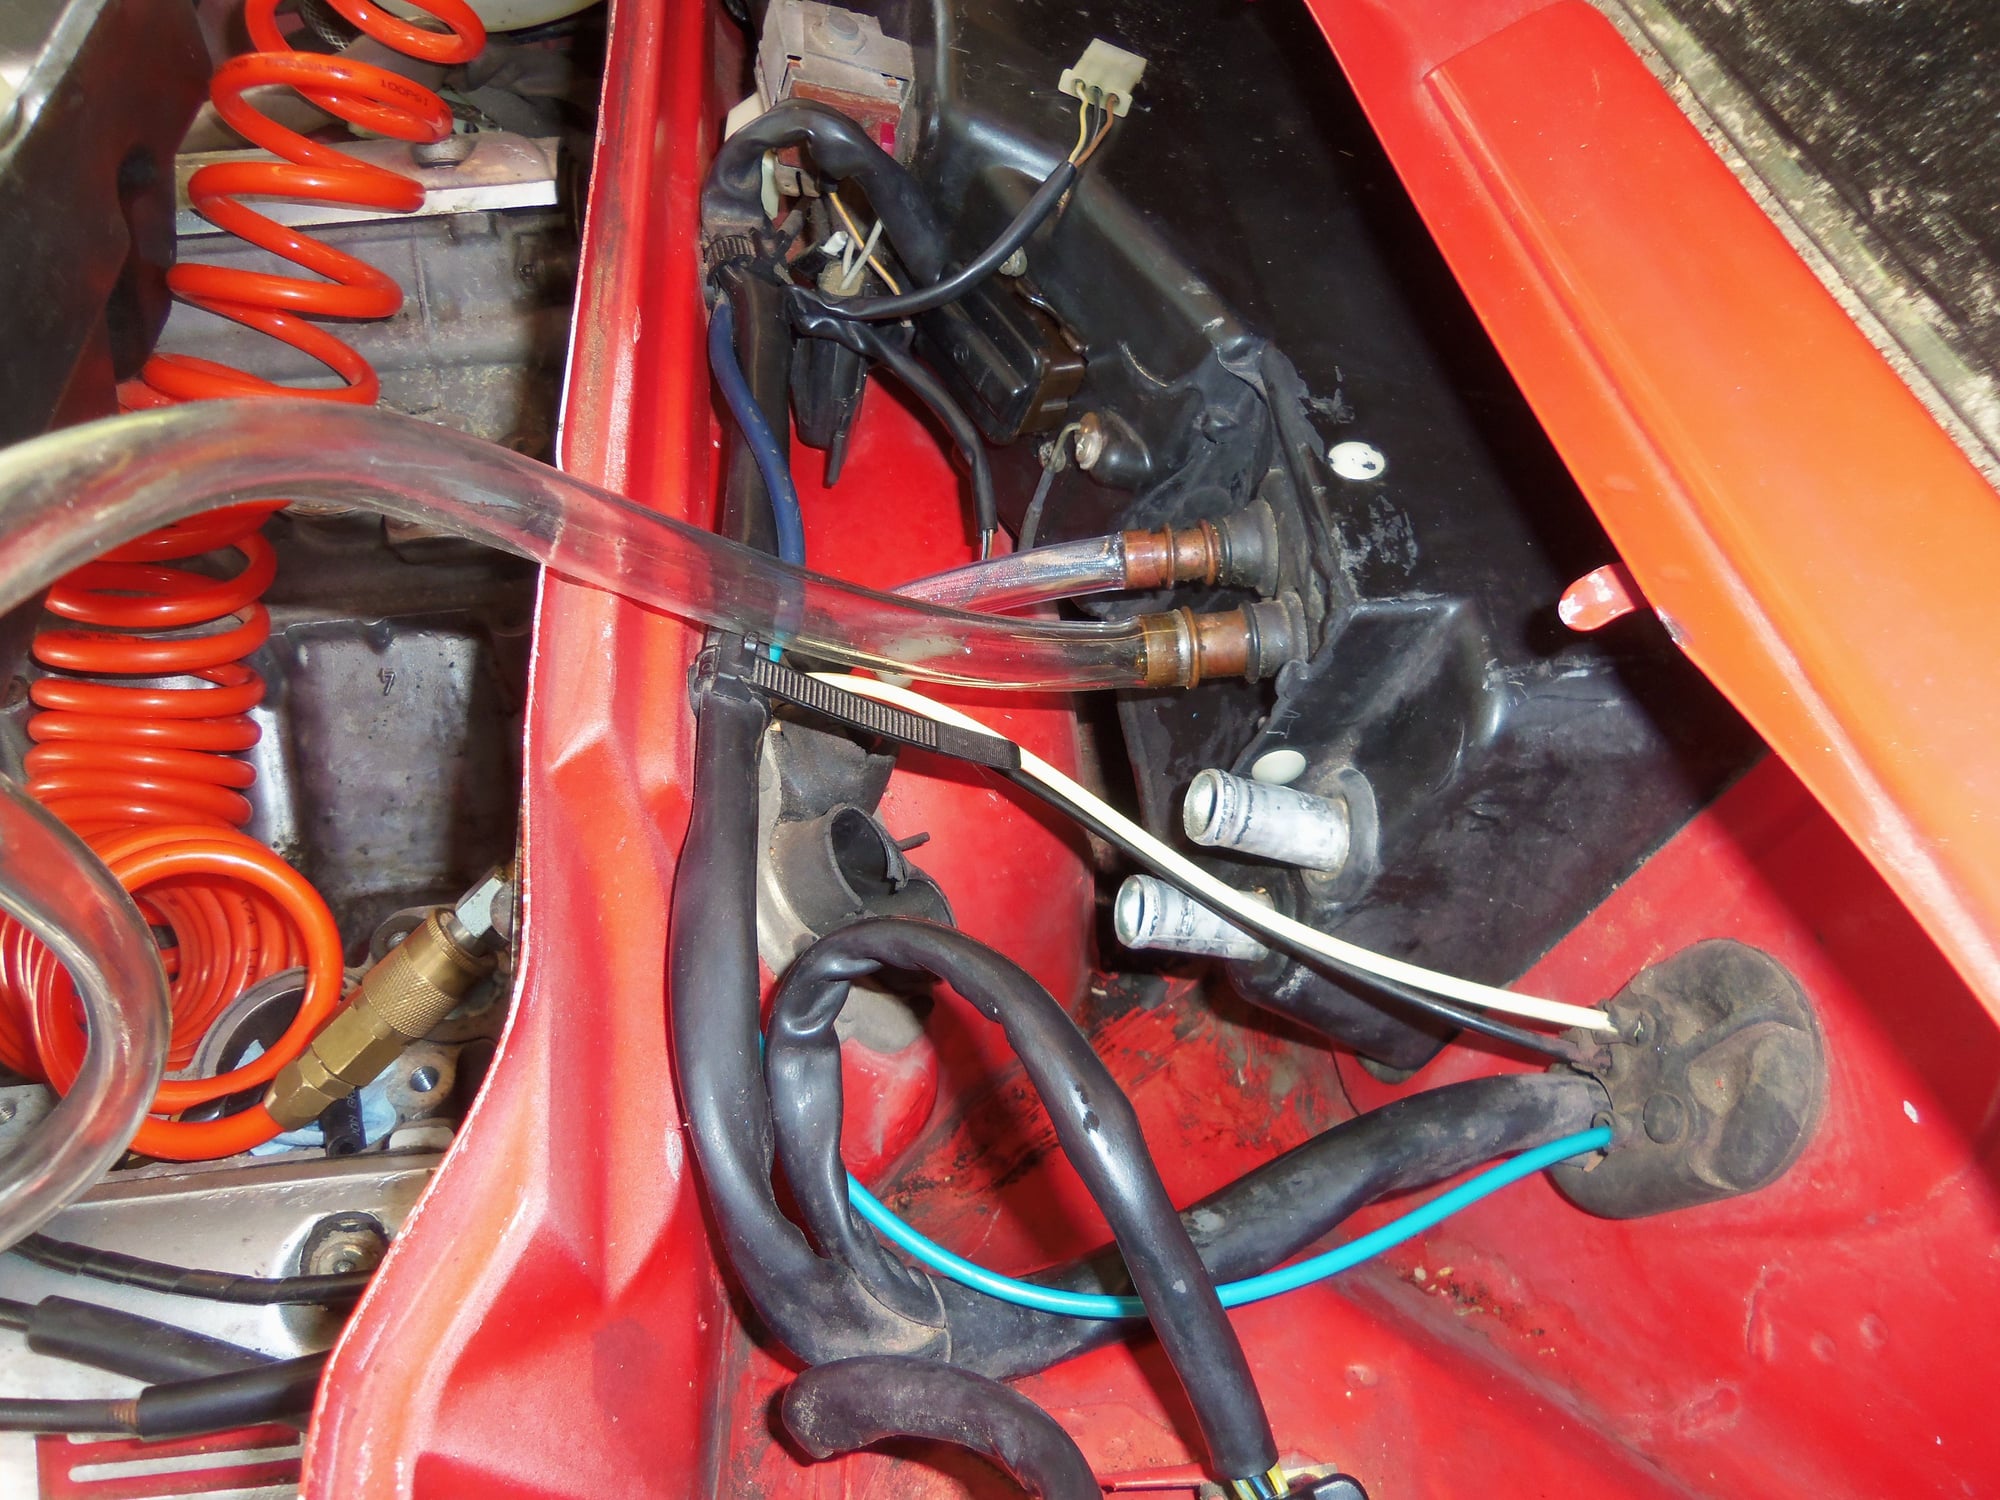
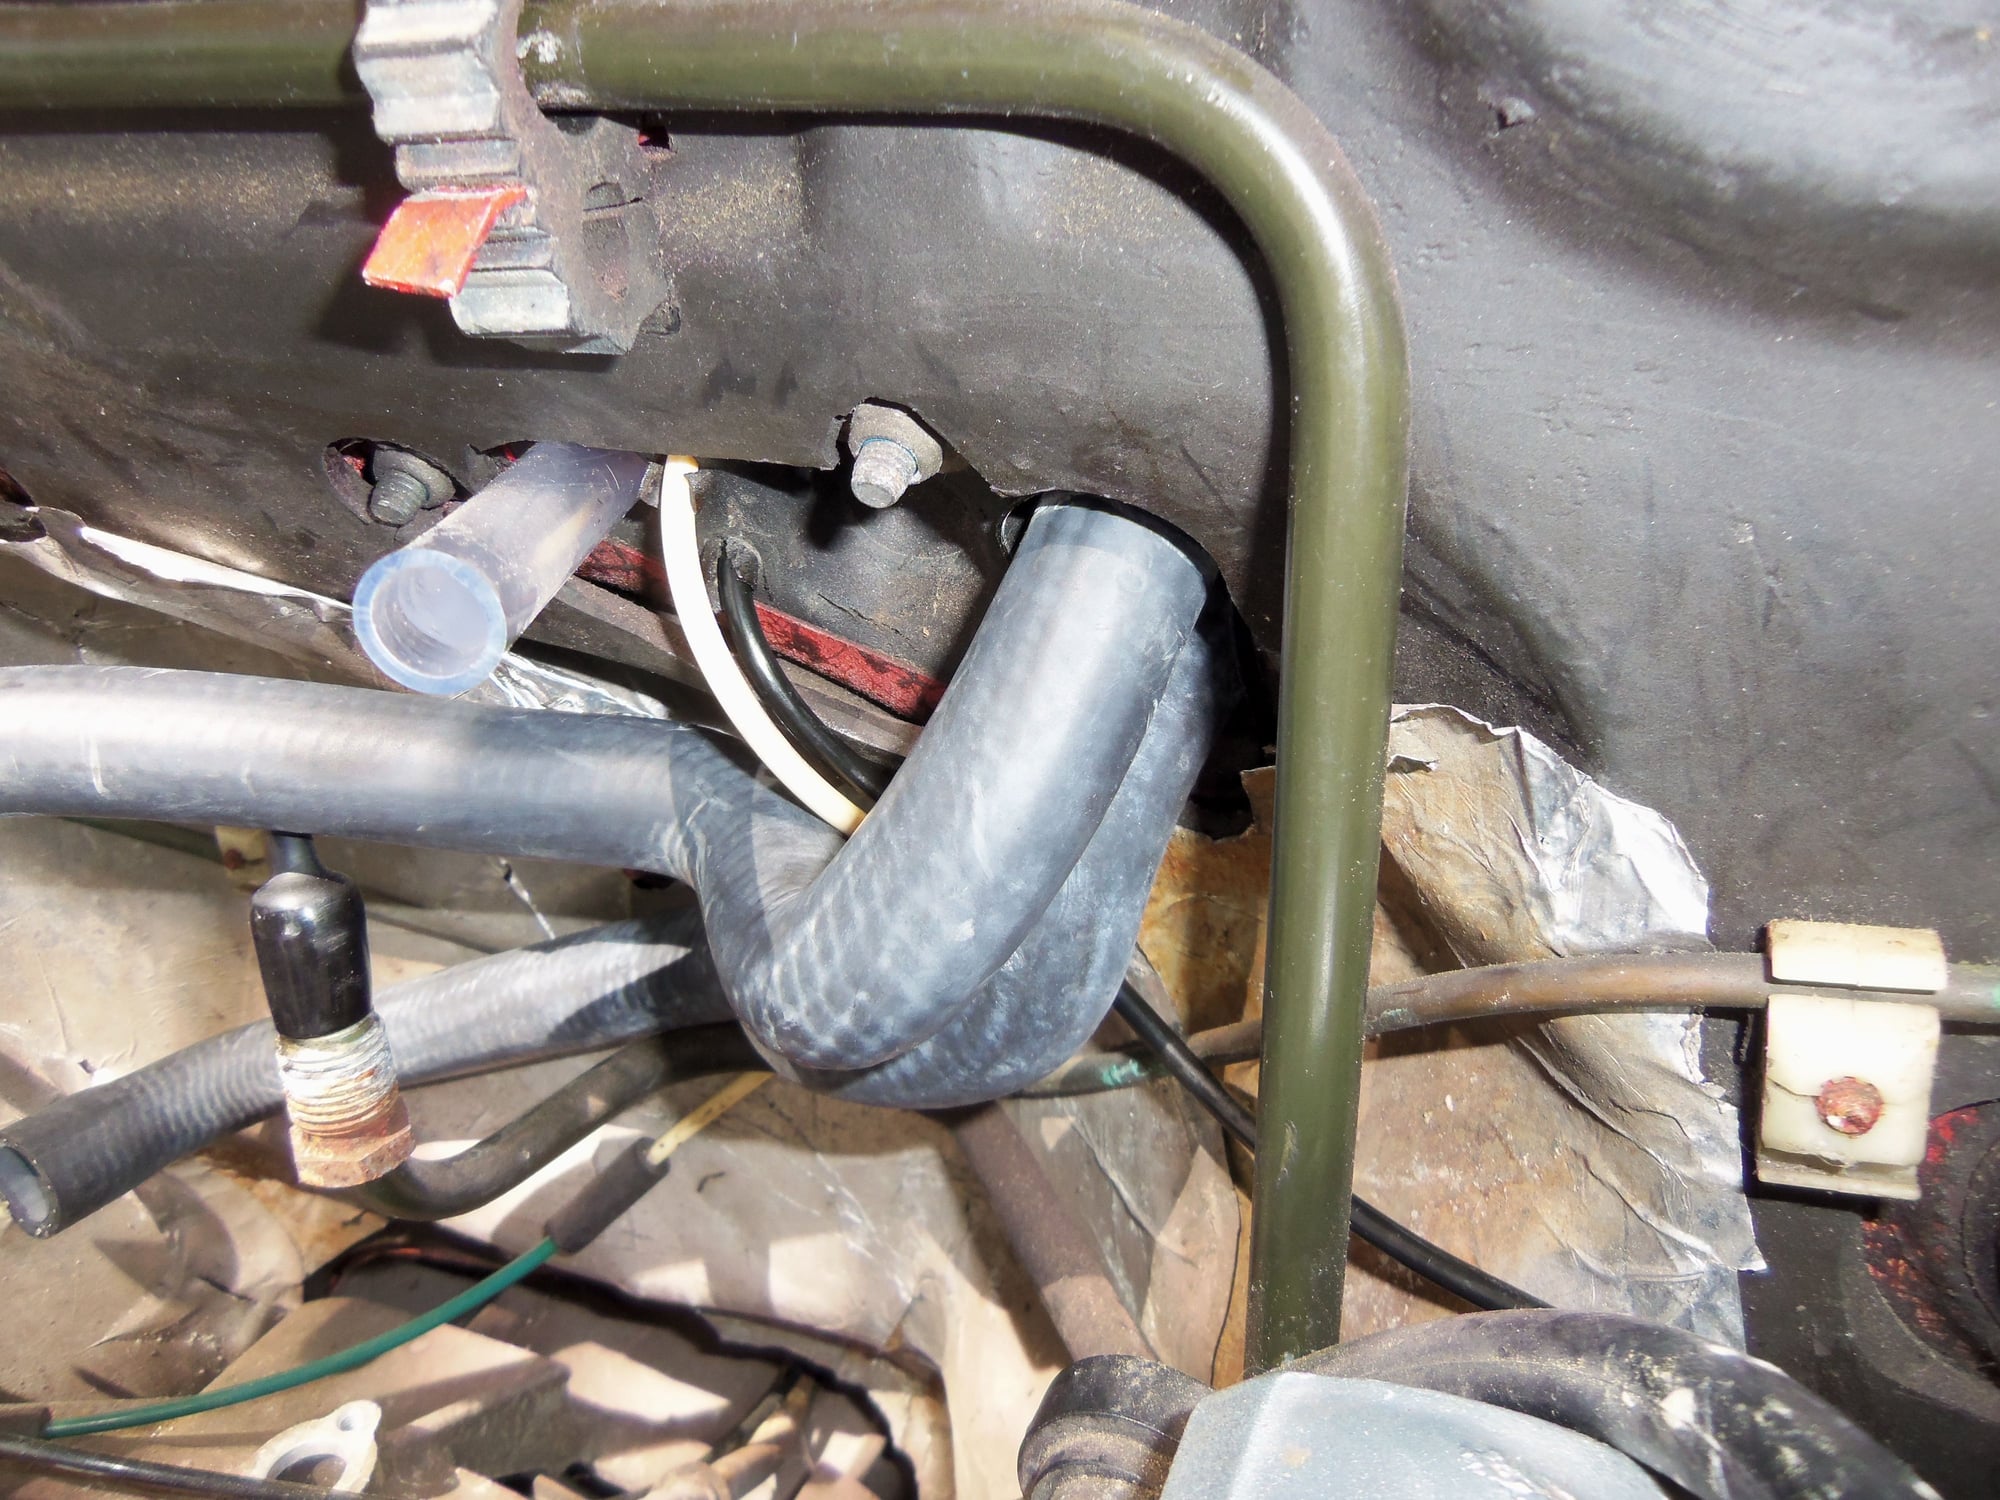
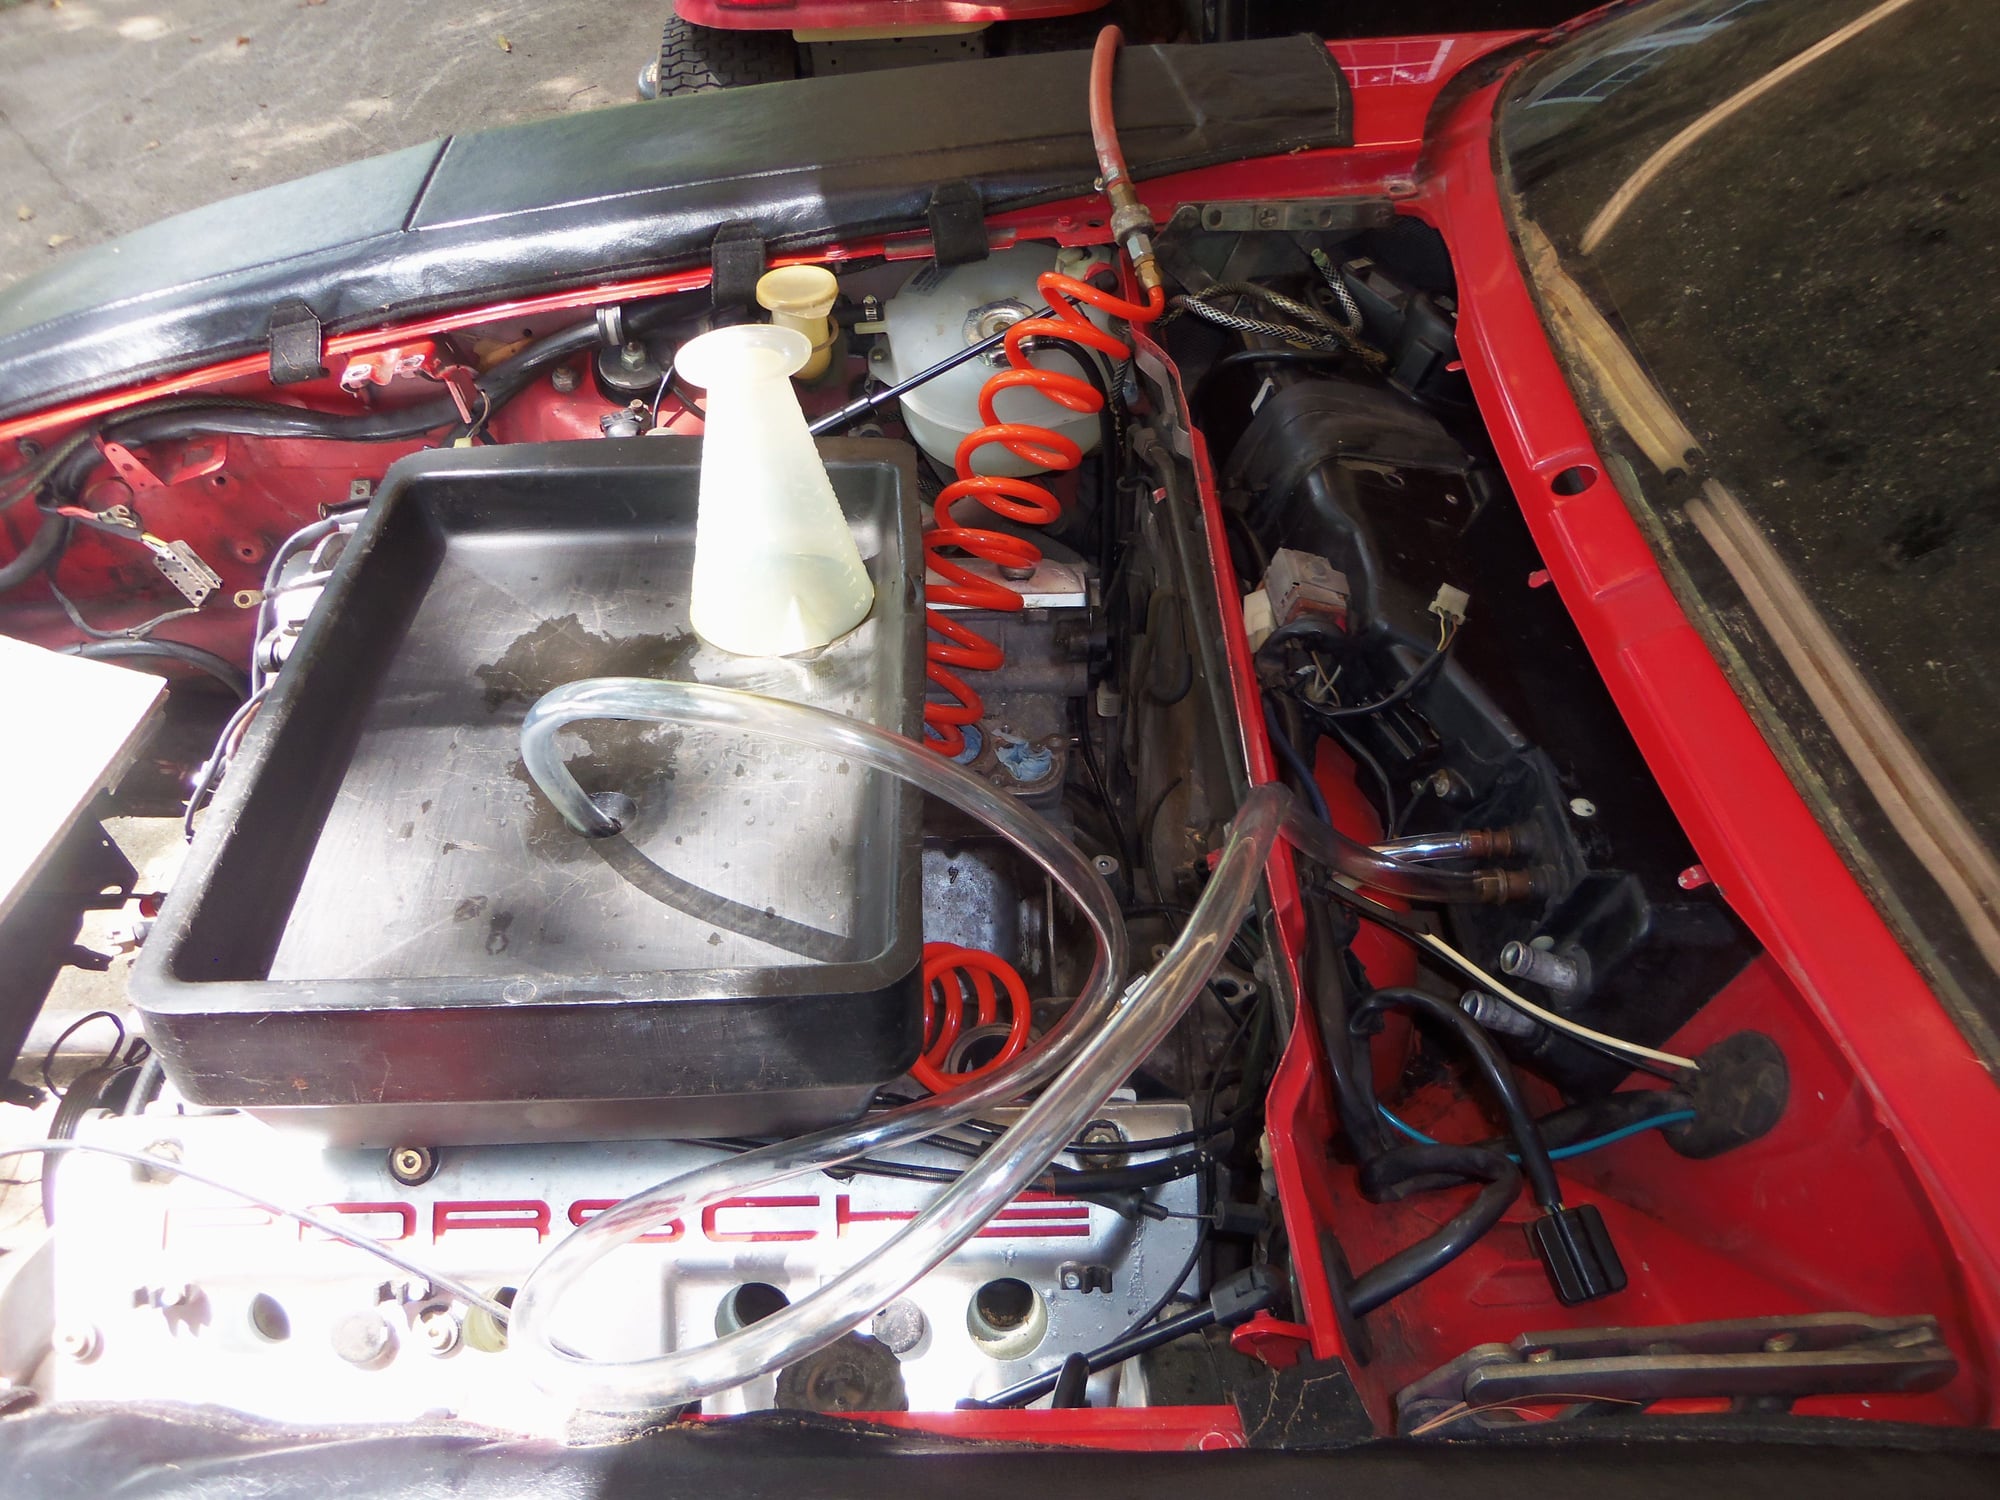
This past weekend, my intent was to install the wiper assembly and get the cosmetic cowl panel back on. However, before doing that, I needed to install the heater hoses to the heater core. The wiper motor makes access to the clamps a pain. I installed the new hoses with new clamps, dry onto the cleaned heater core pipes. I routed them along the firewall, out of the way for now.
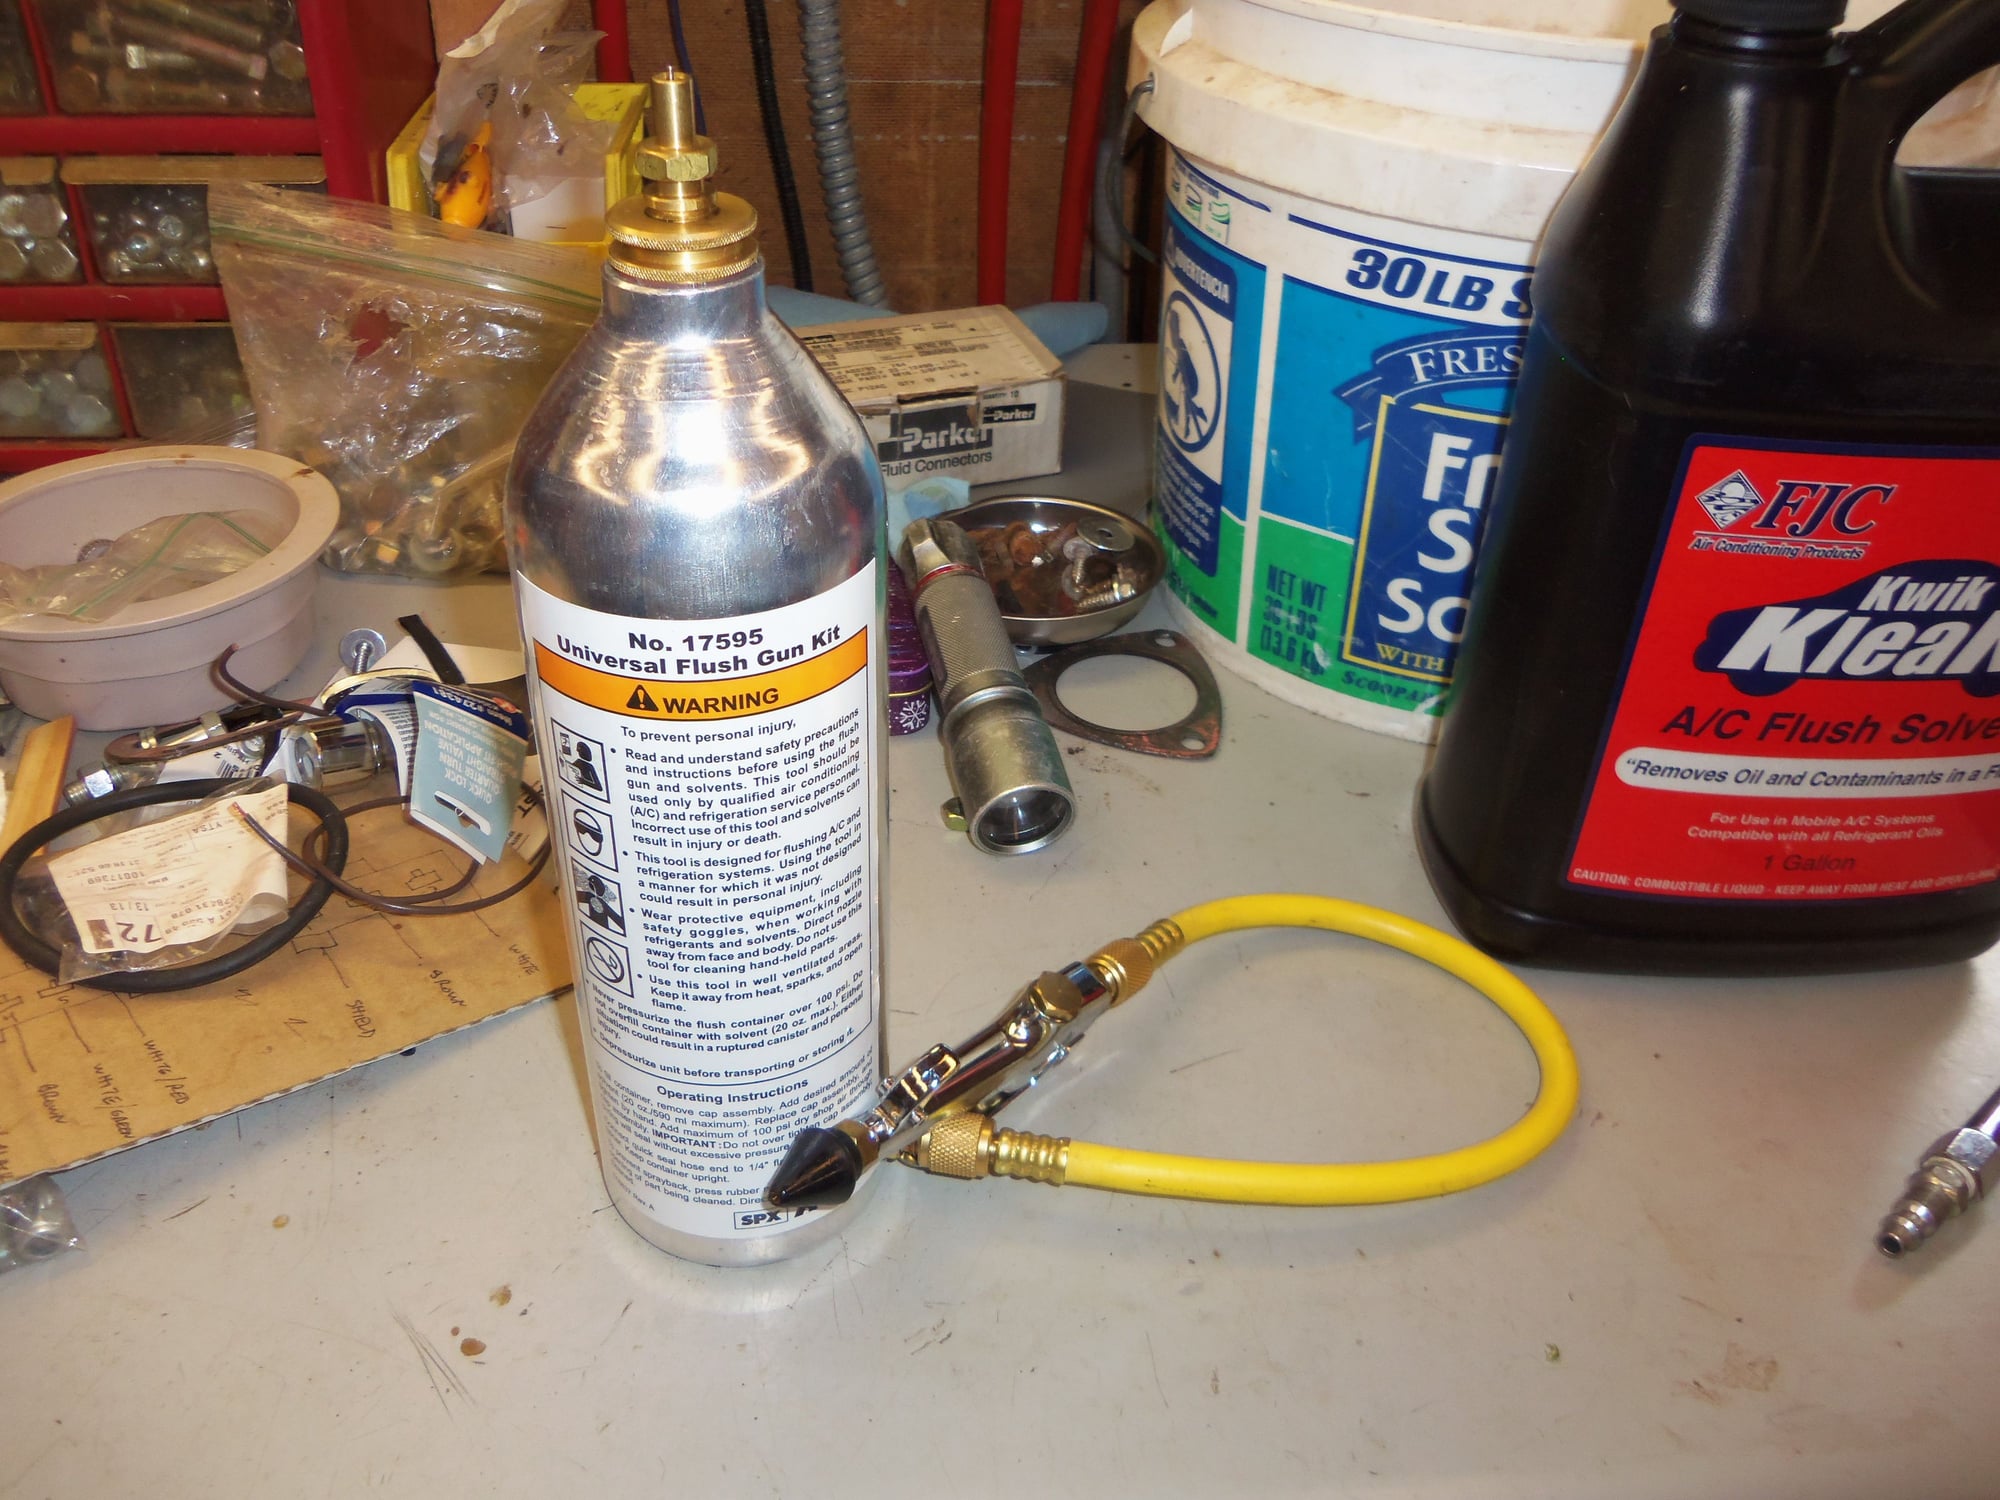
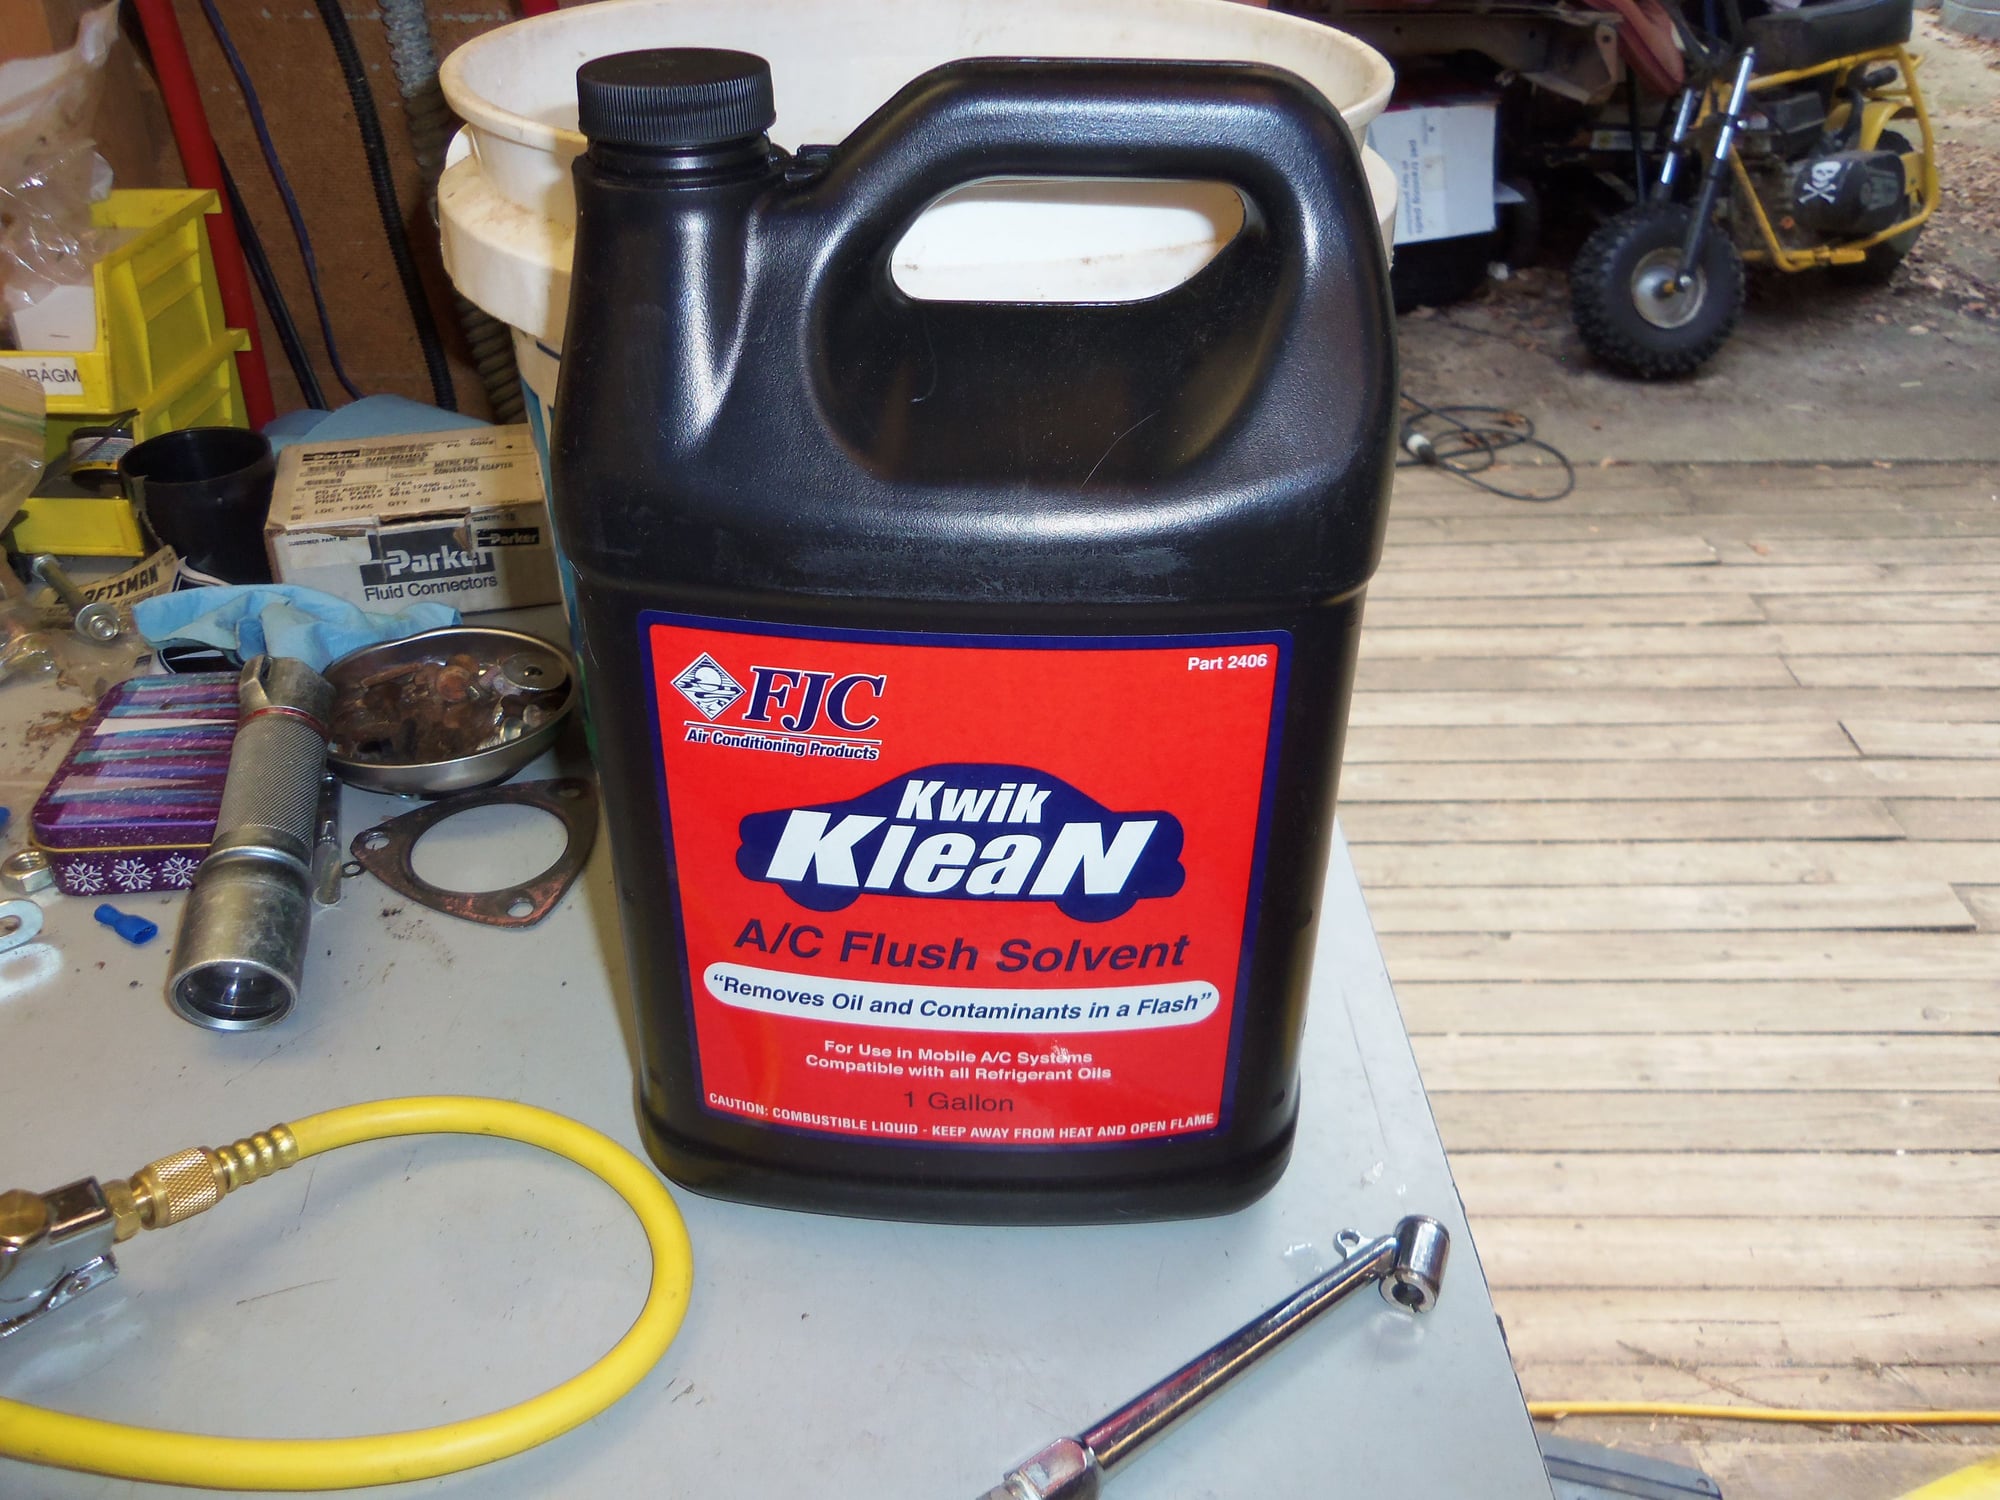
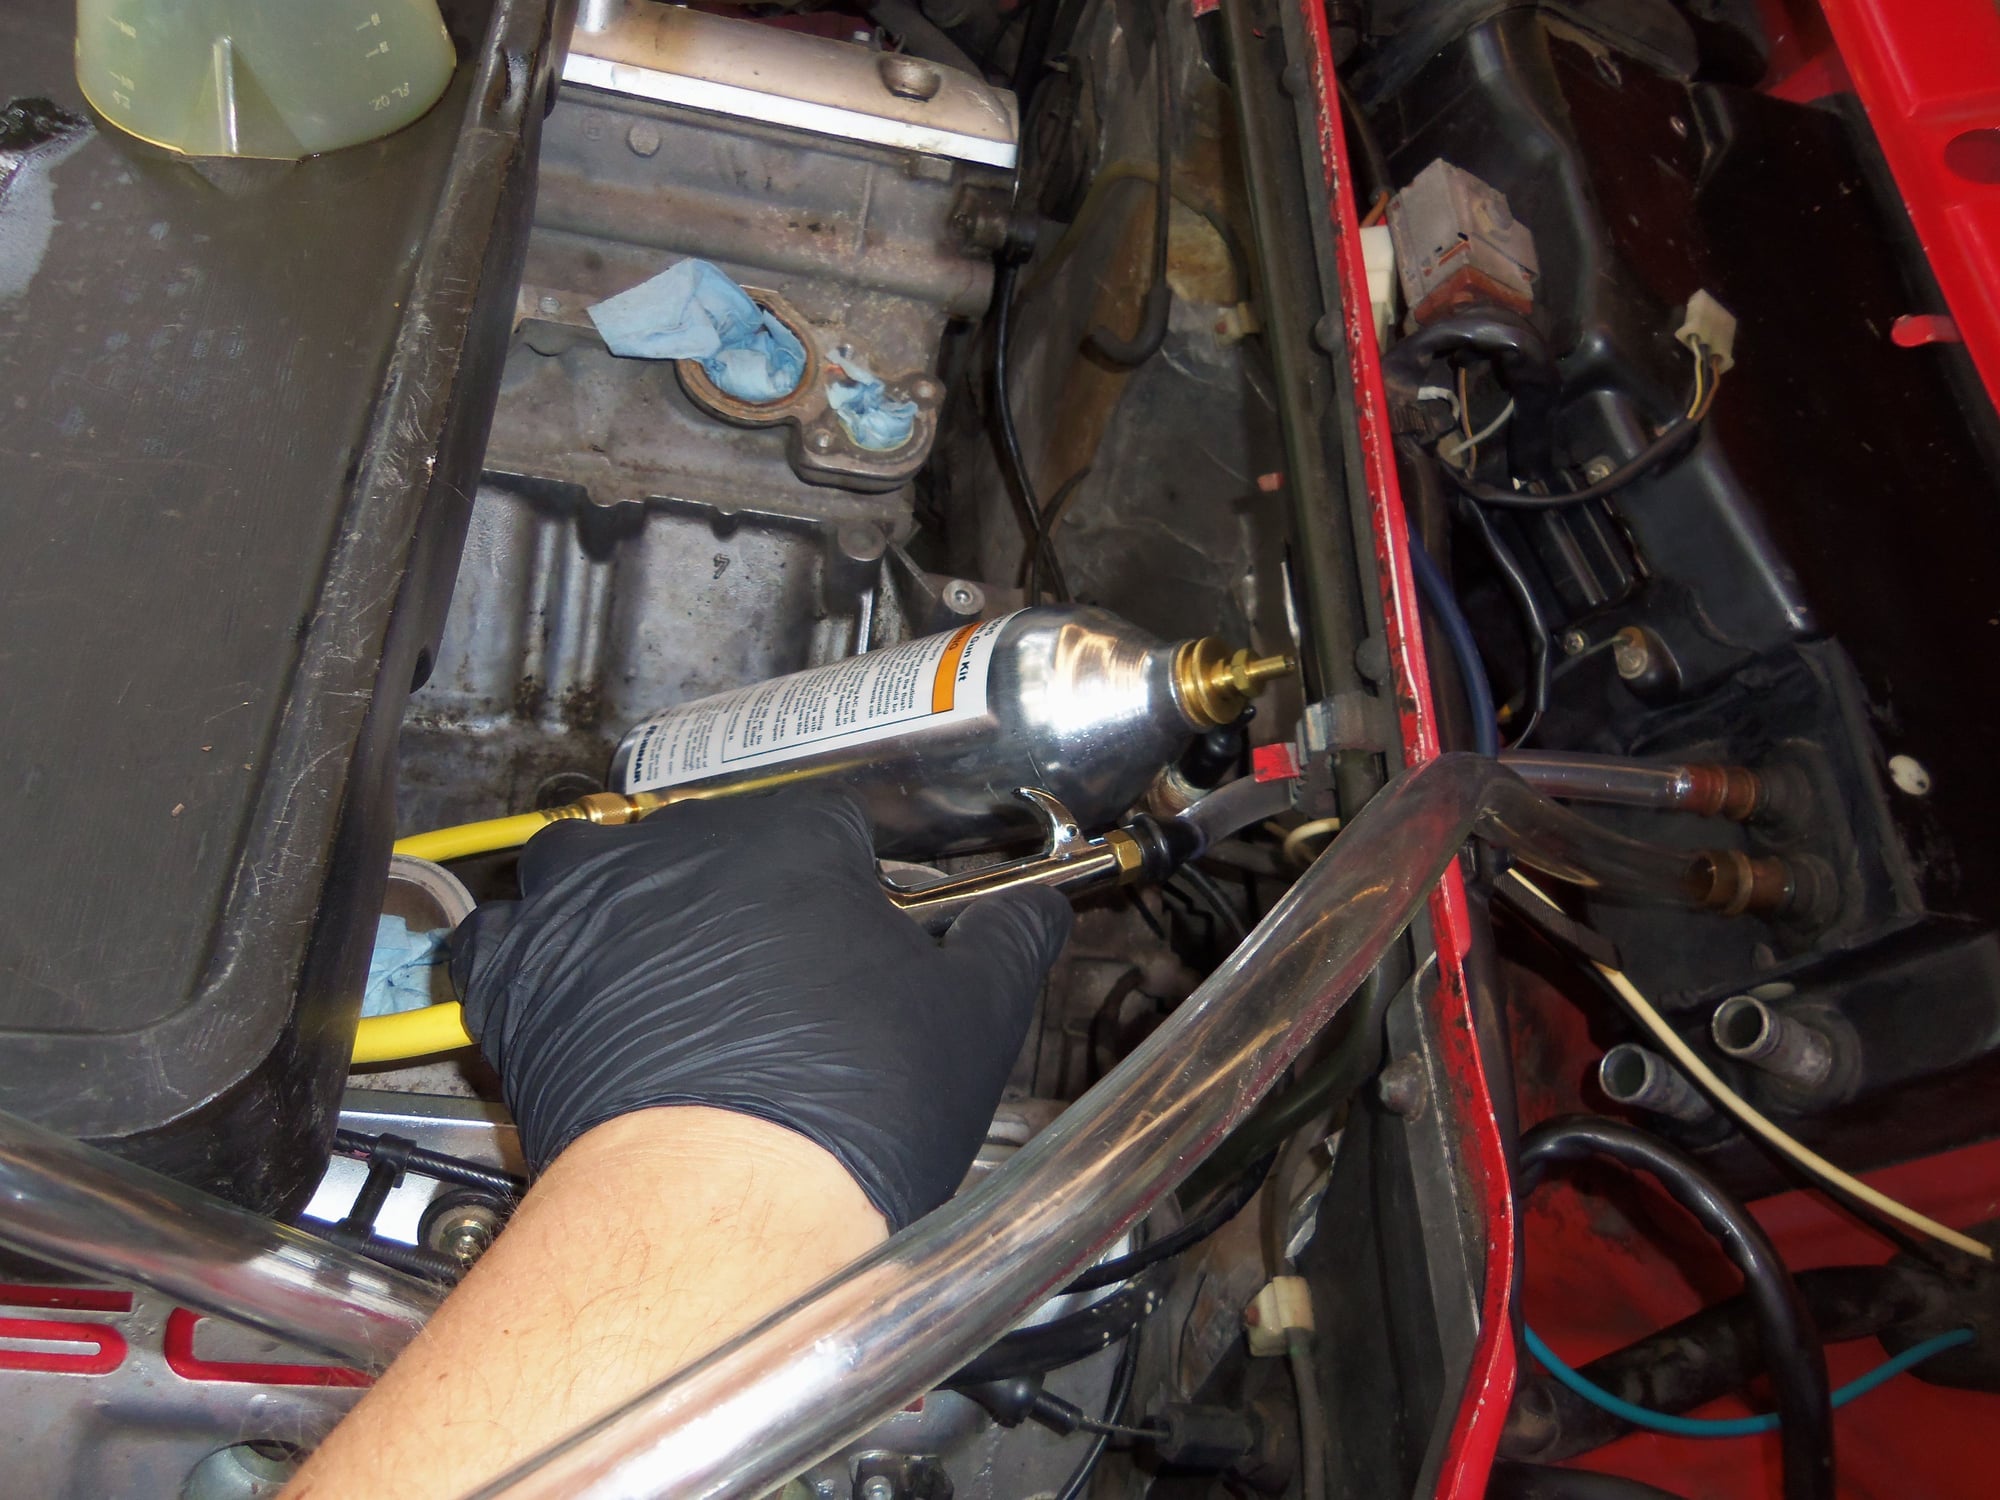
Since I was in there, I decided to install the AC plumbing. First, I had to flush the evaporator core. I had bought a flush gun and gallon of AC flush solvent for just this purpose. I pumped 35oz of solvent through the evaporator. I got oil and solvent back out, but saw no contaminants. However, there was still raw, liquid solvent in the evaporator. I tried just using air in the flush gun. It worked, but was an ice cube in a furnace. So...I rigged up 30PSI regulated air from my air compressor and just let it blow for 20 minutes. Much better.
Flush gun kit.
AC flush solvent.
Flushing evaporator core.
Purging remaining solvent from evaporator core with 30PSI regulated air.
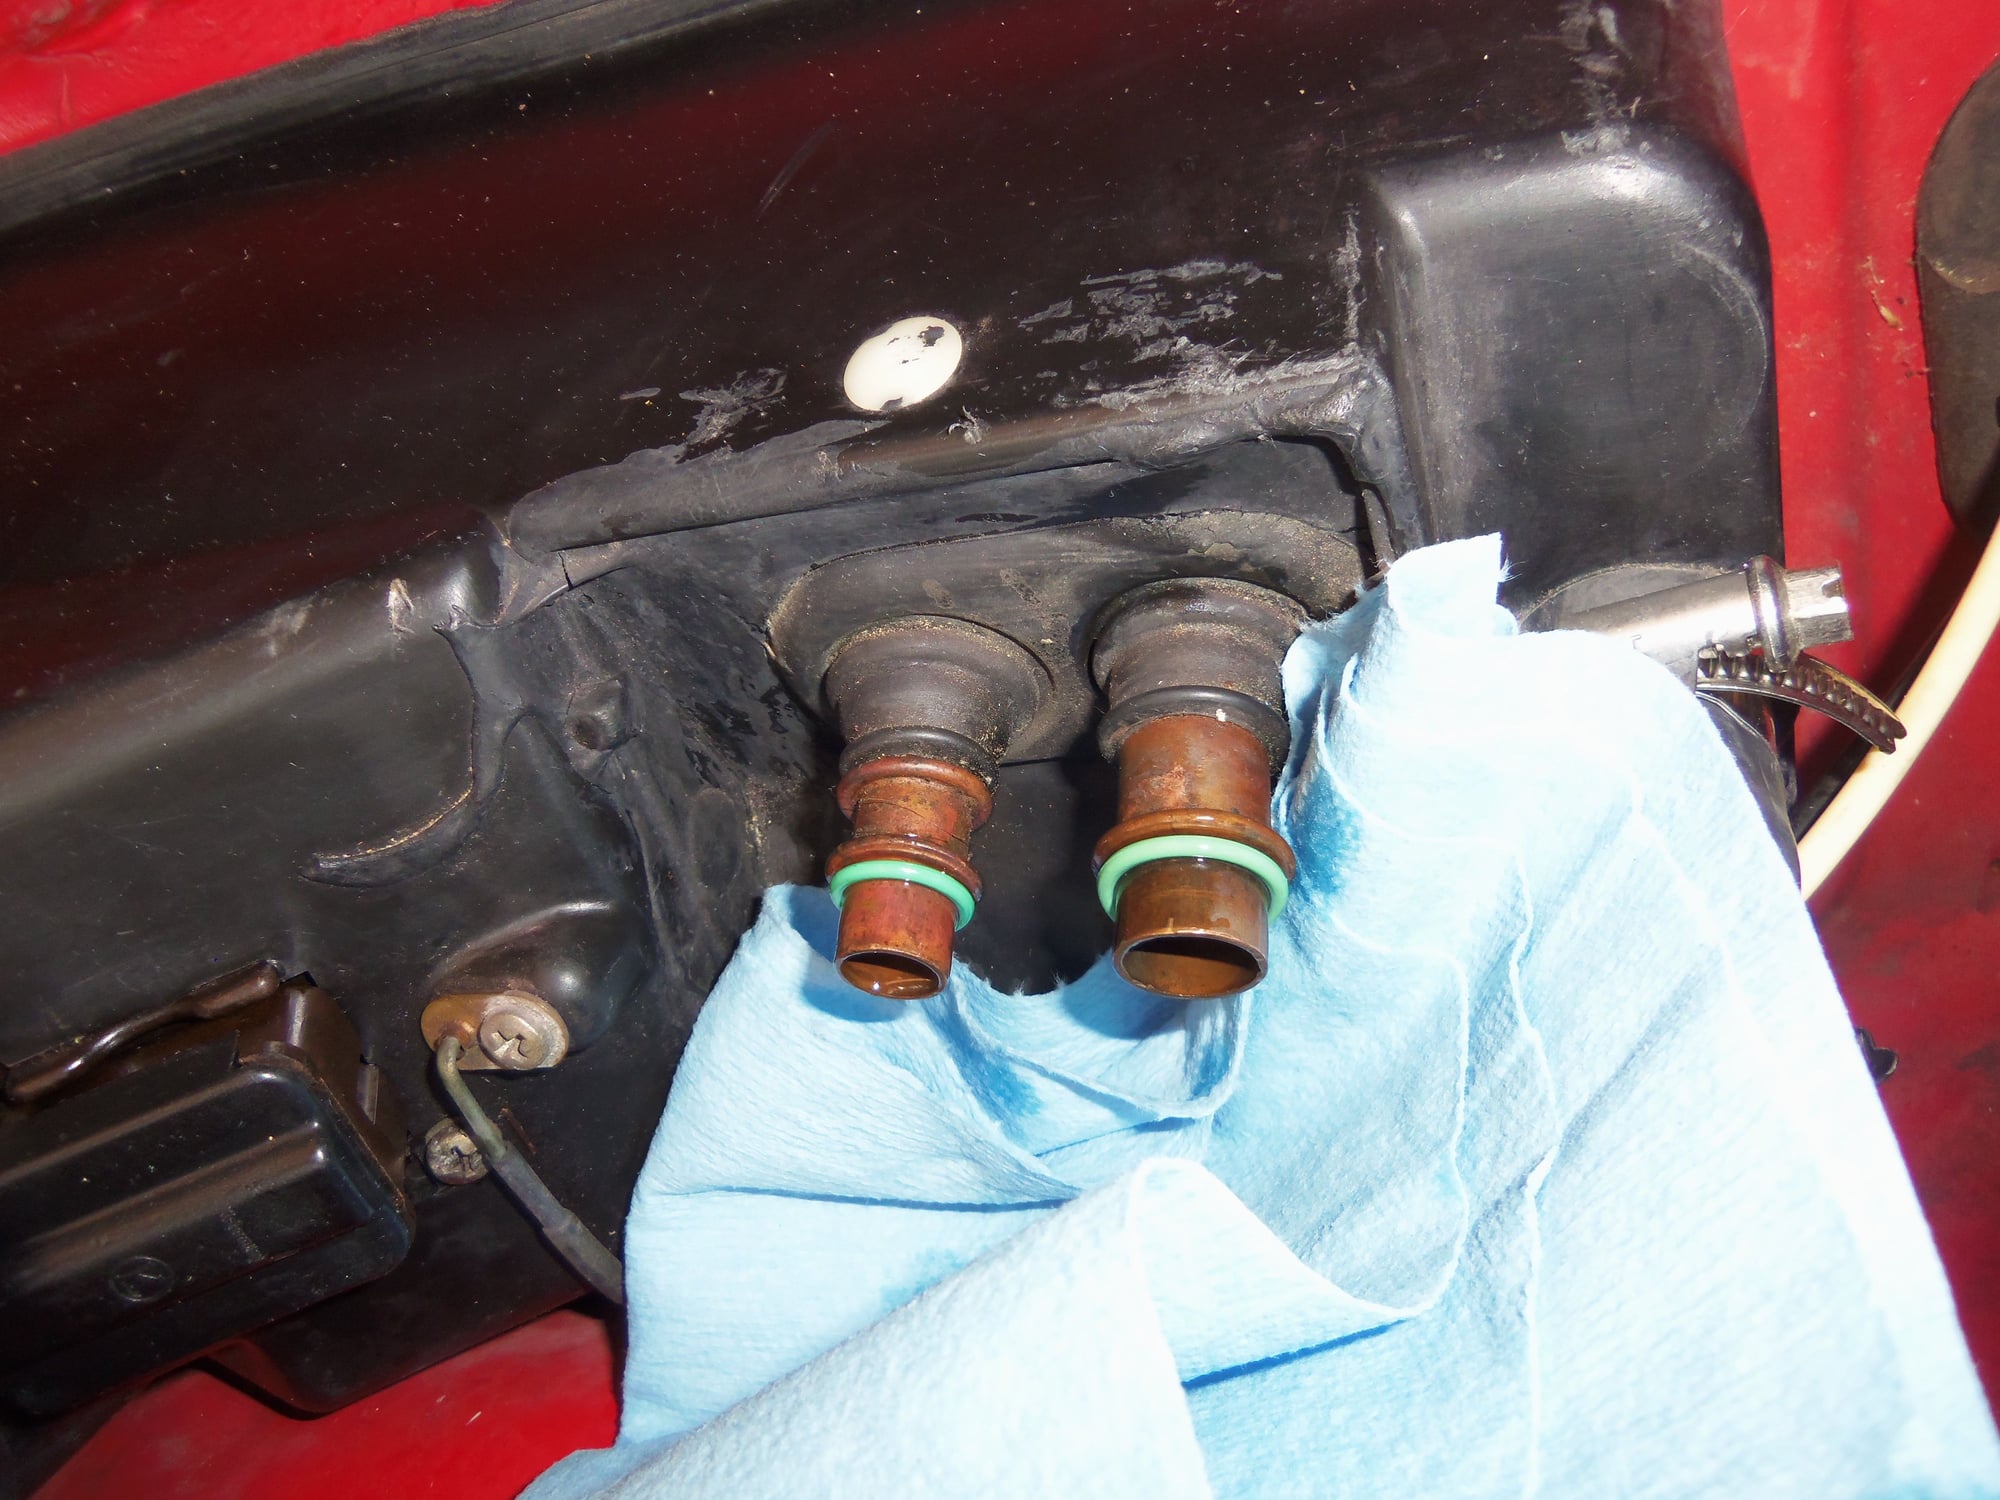
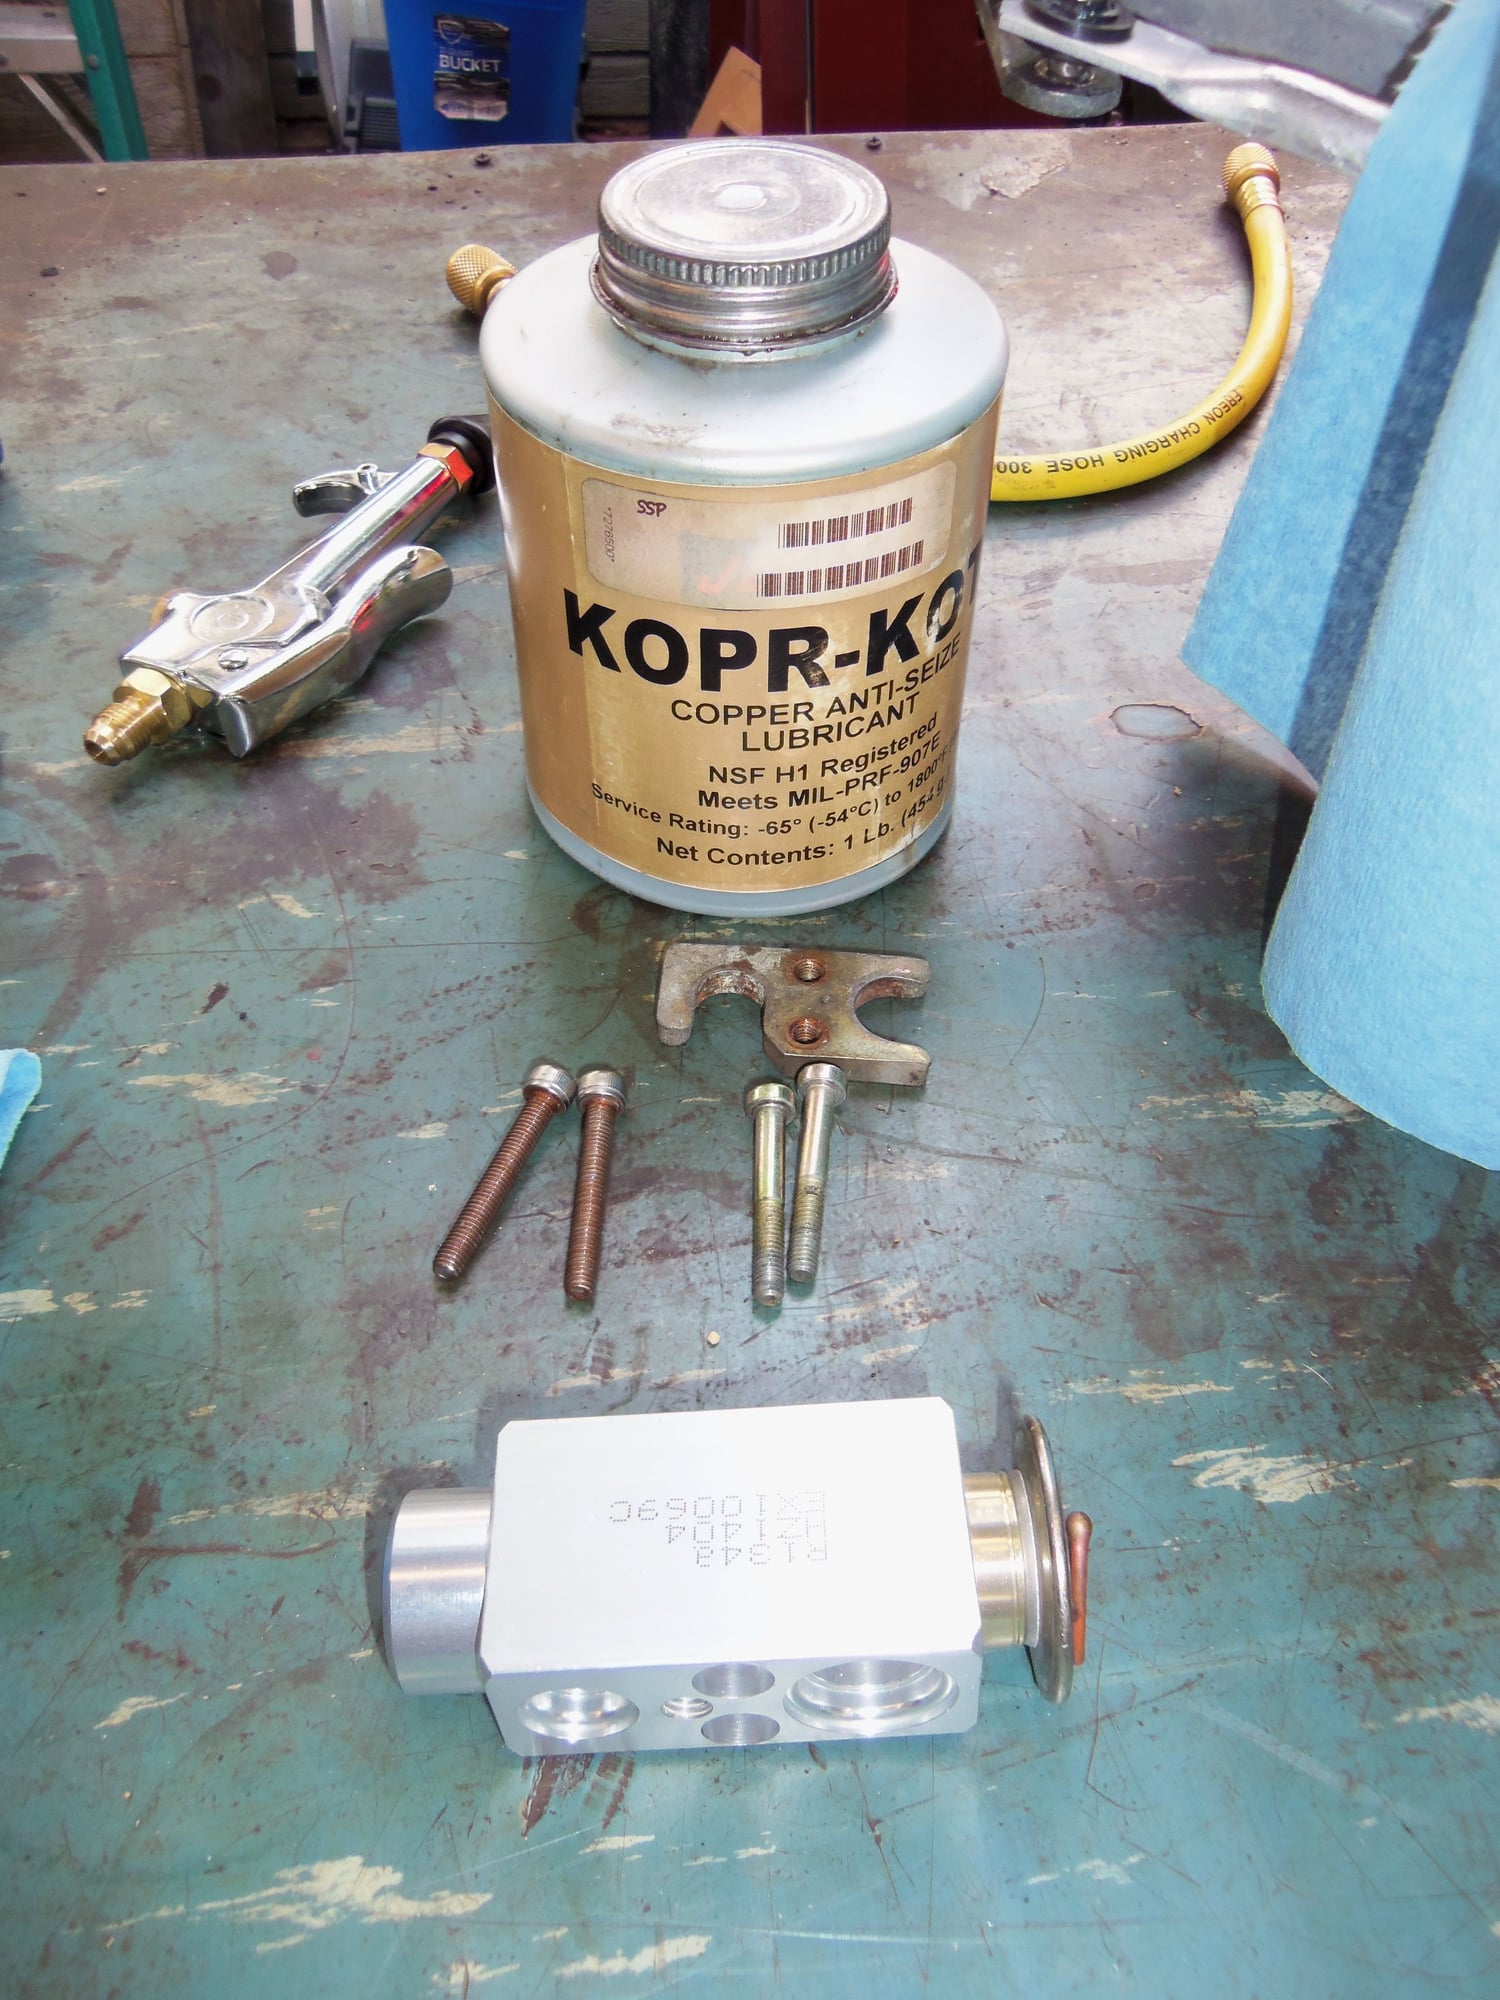
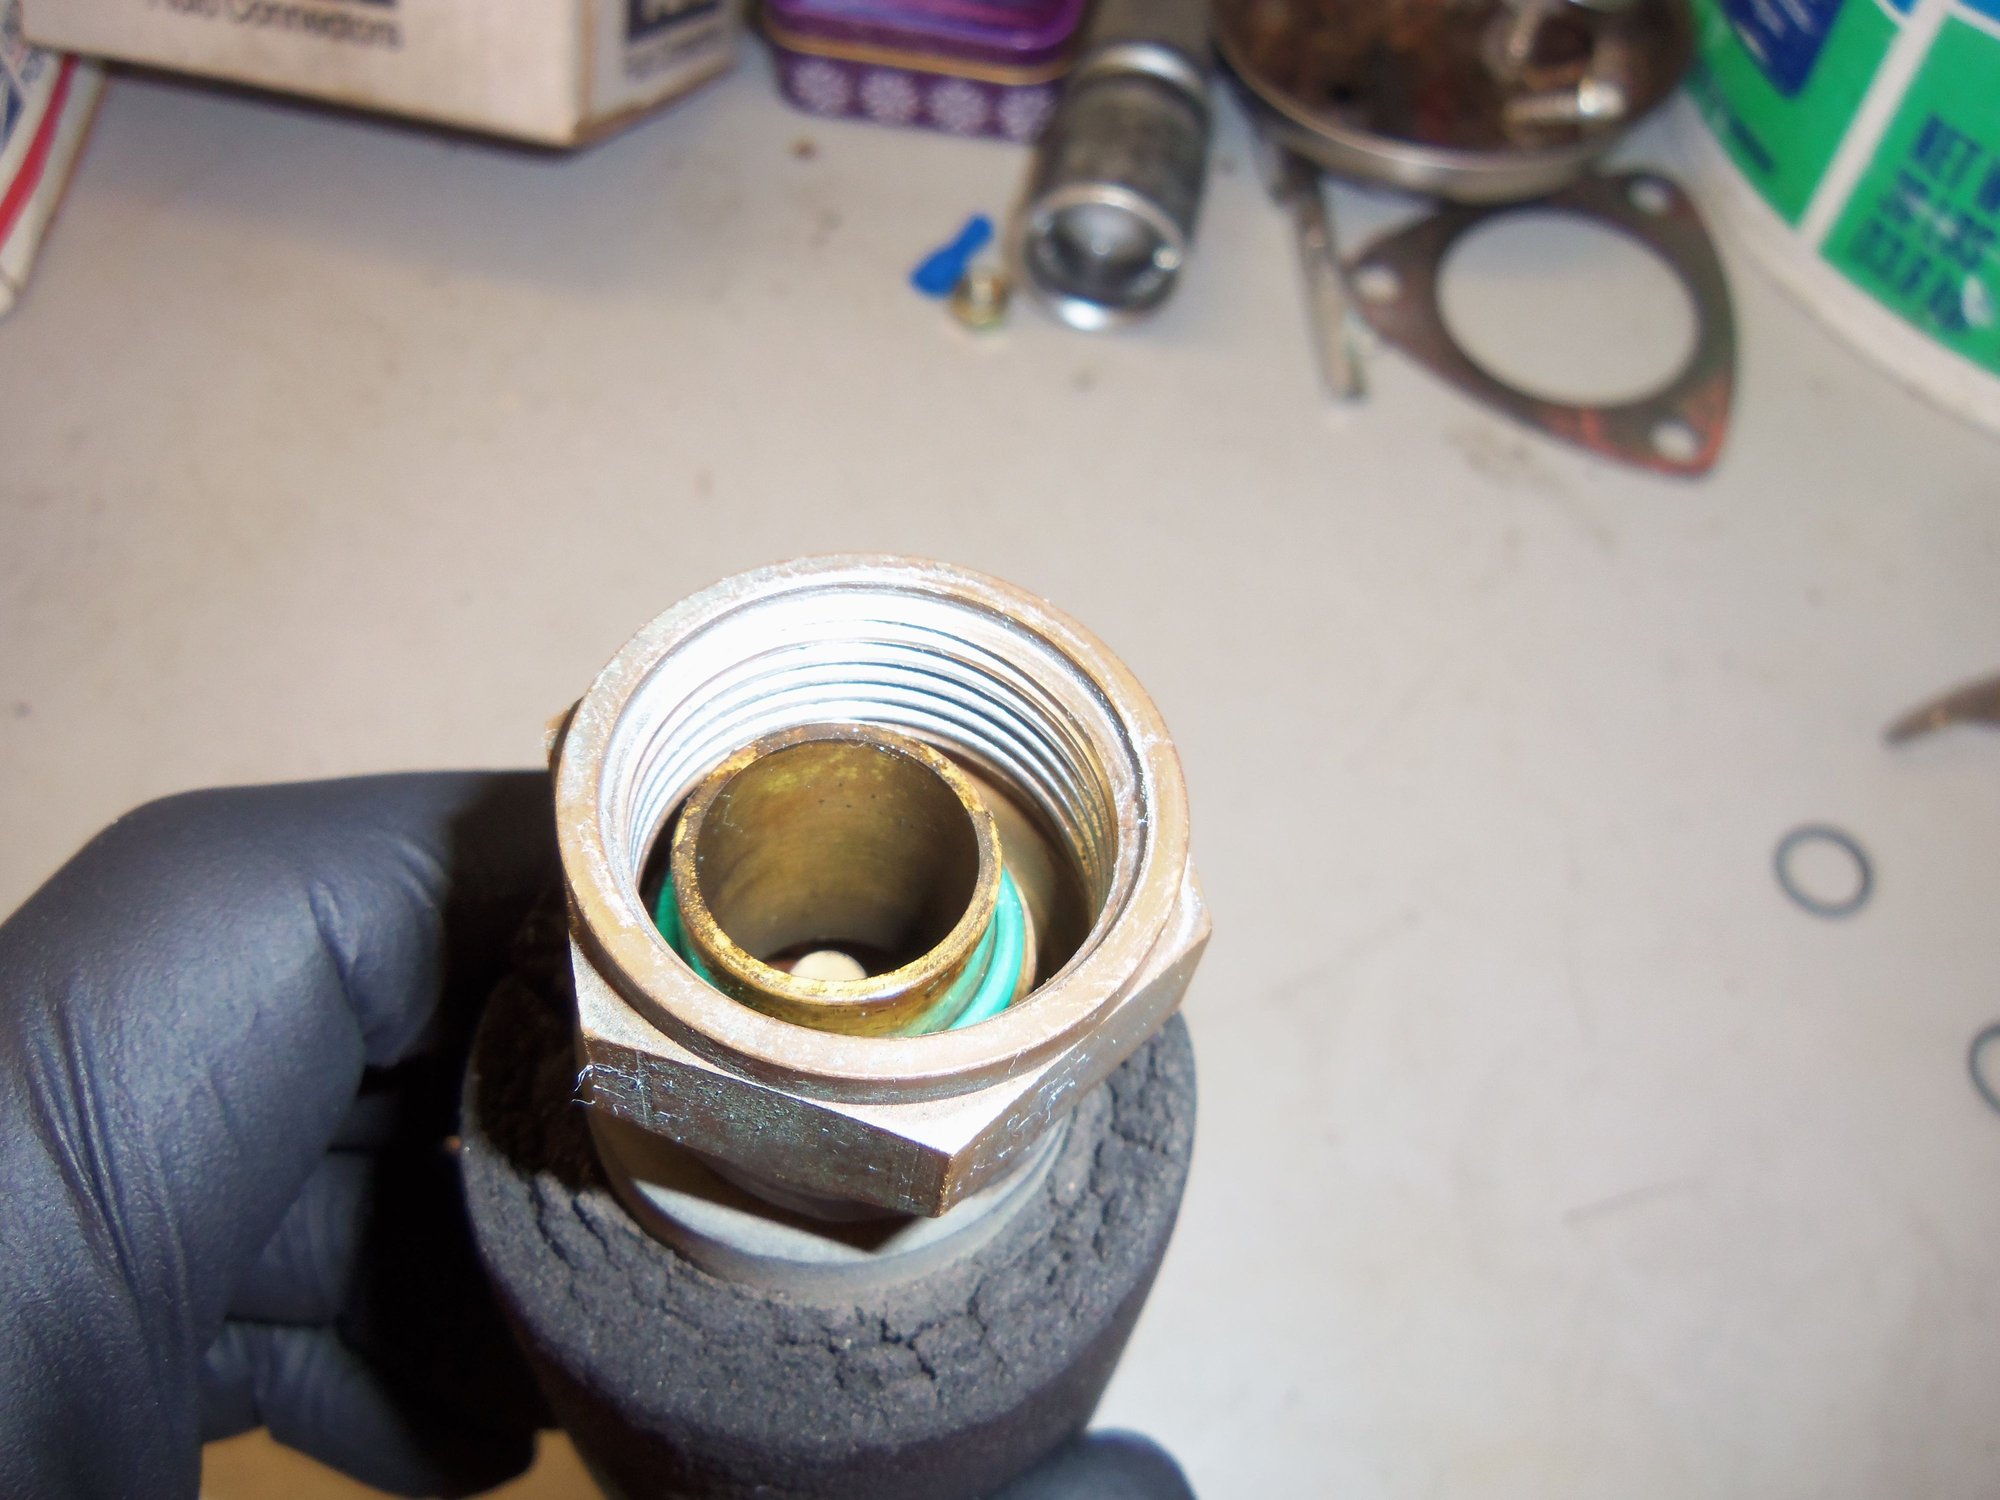
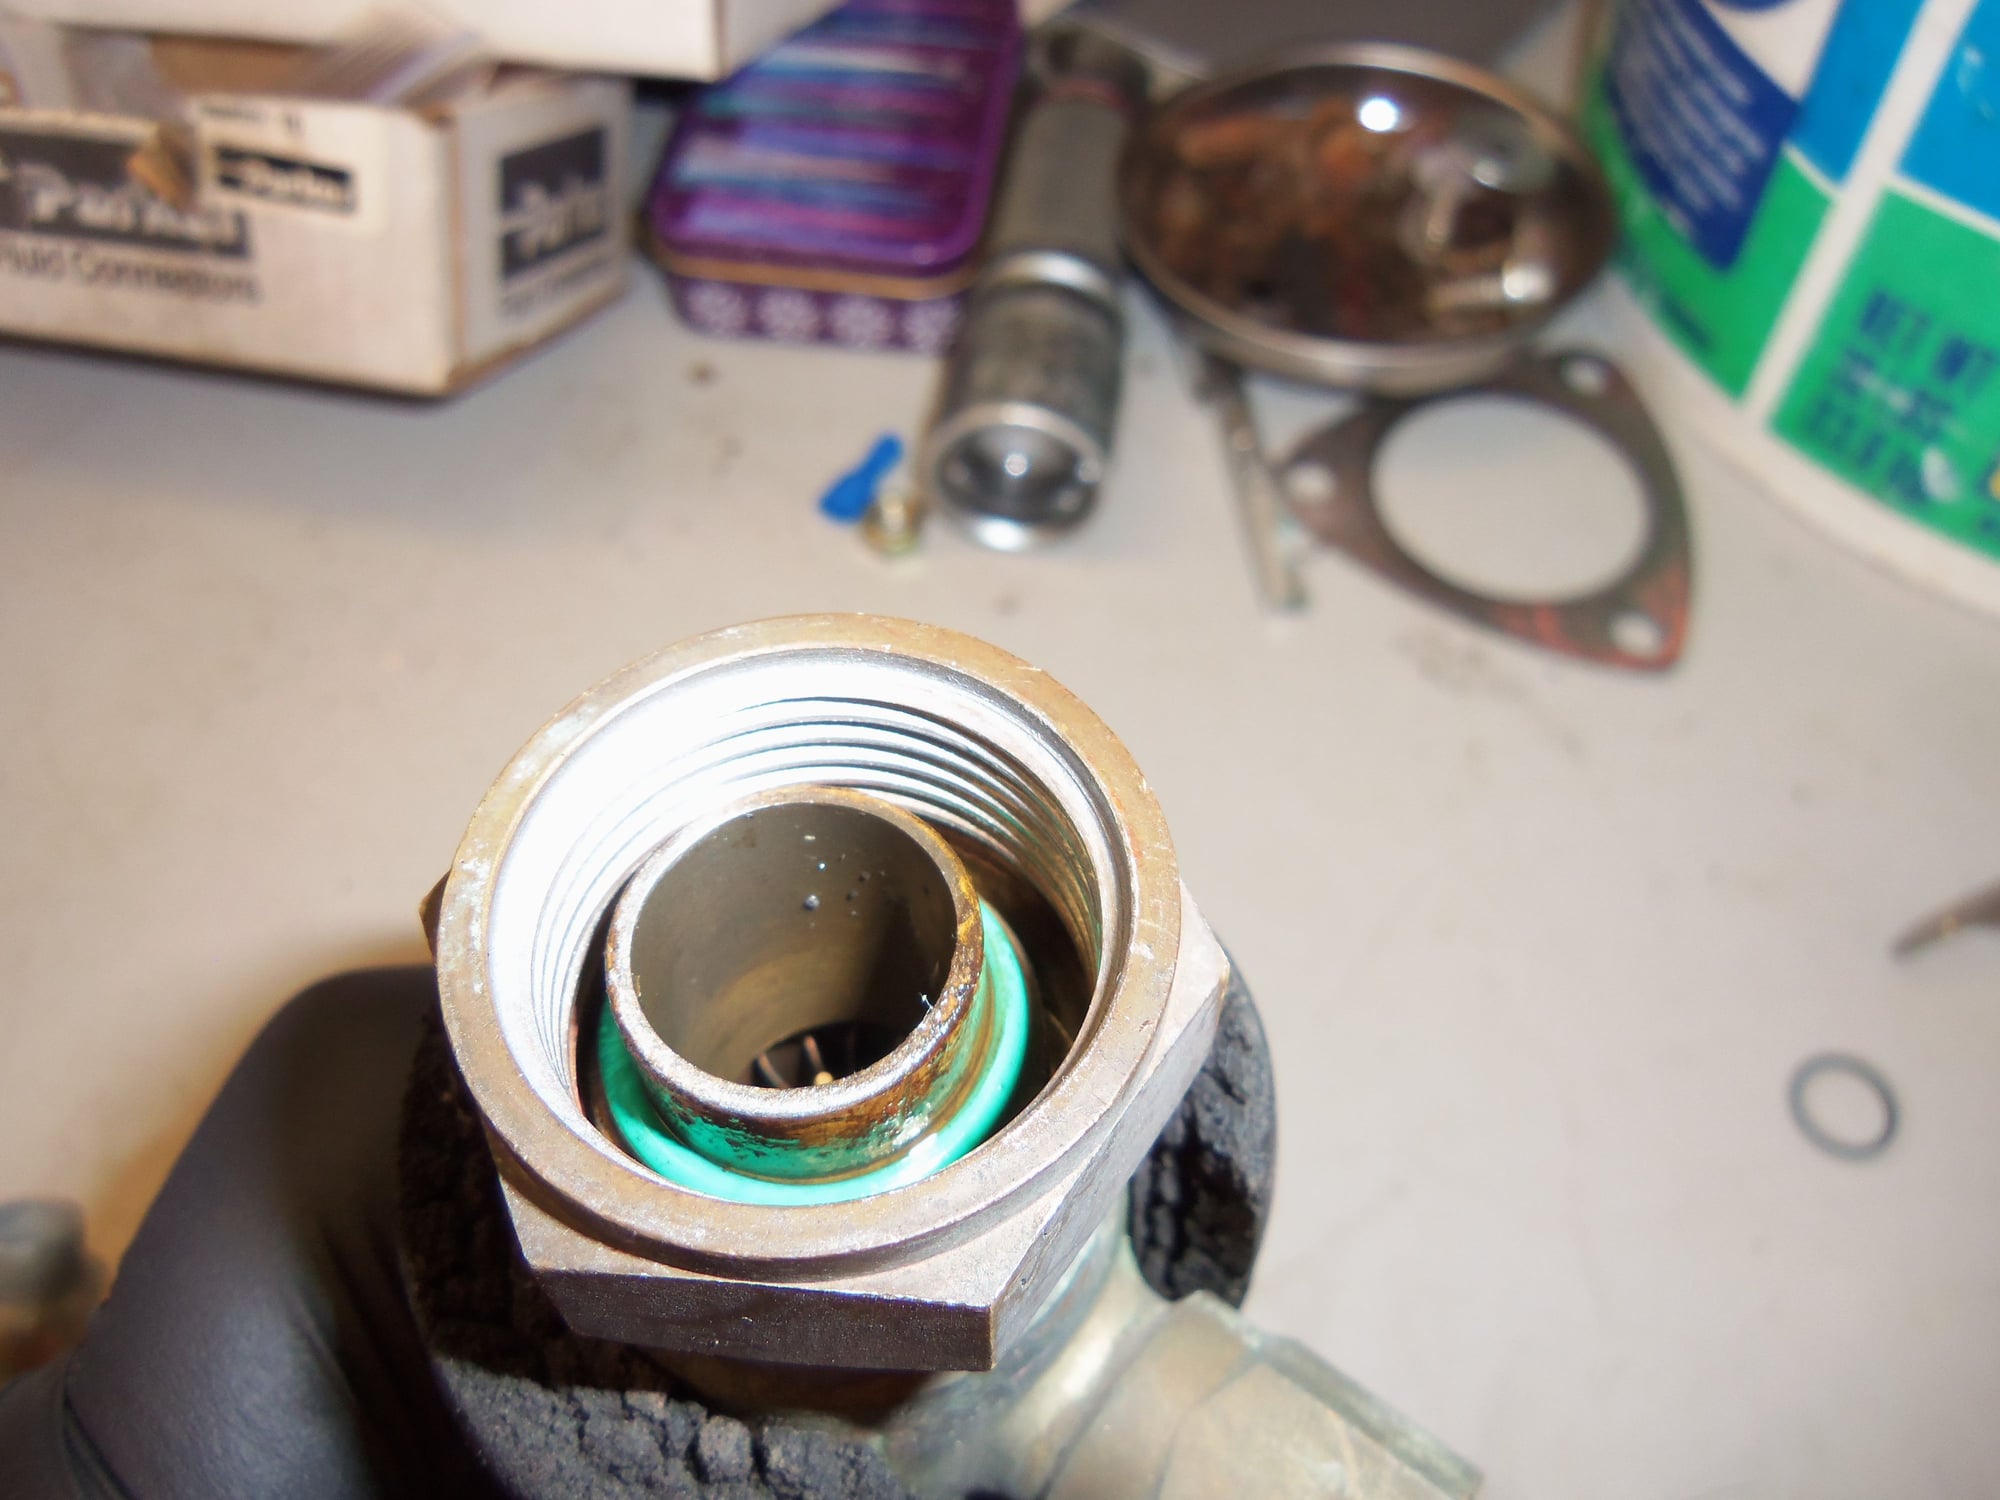
Lubricating all with plenty of Ester oil, I installed new green O-rings on the evaporator tubes. I also lubricated the O-ring bores in the back of the new expansion valve. I sourced new M5 x 35mm screws for mounting the expansion valve. The 3mm hex inside one of the original screws started to strip out during removal. All I could find were stainless steel. I lubricated the new screws with copper antiseize then installed the expansion valve.
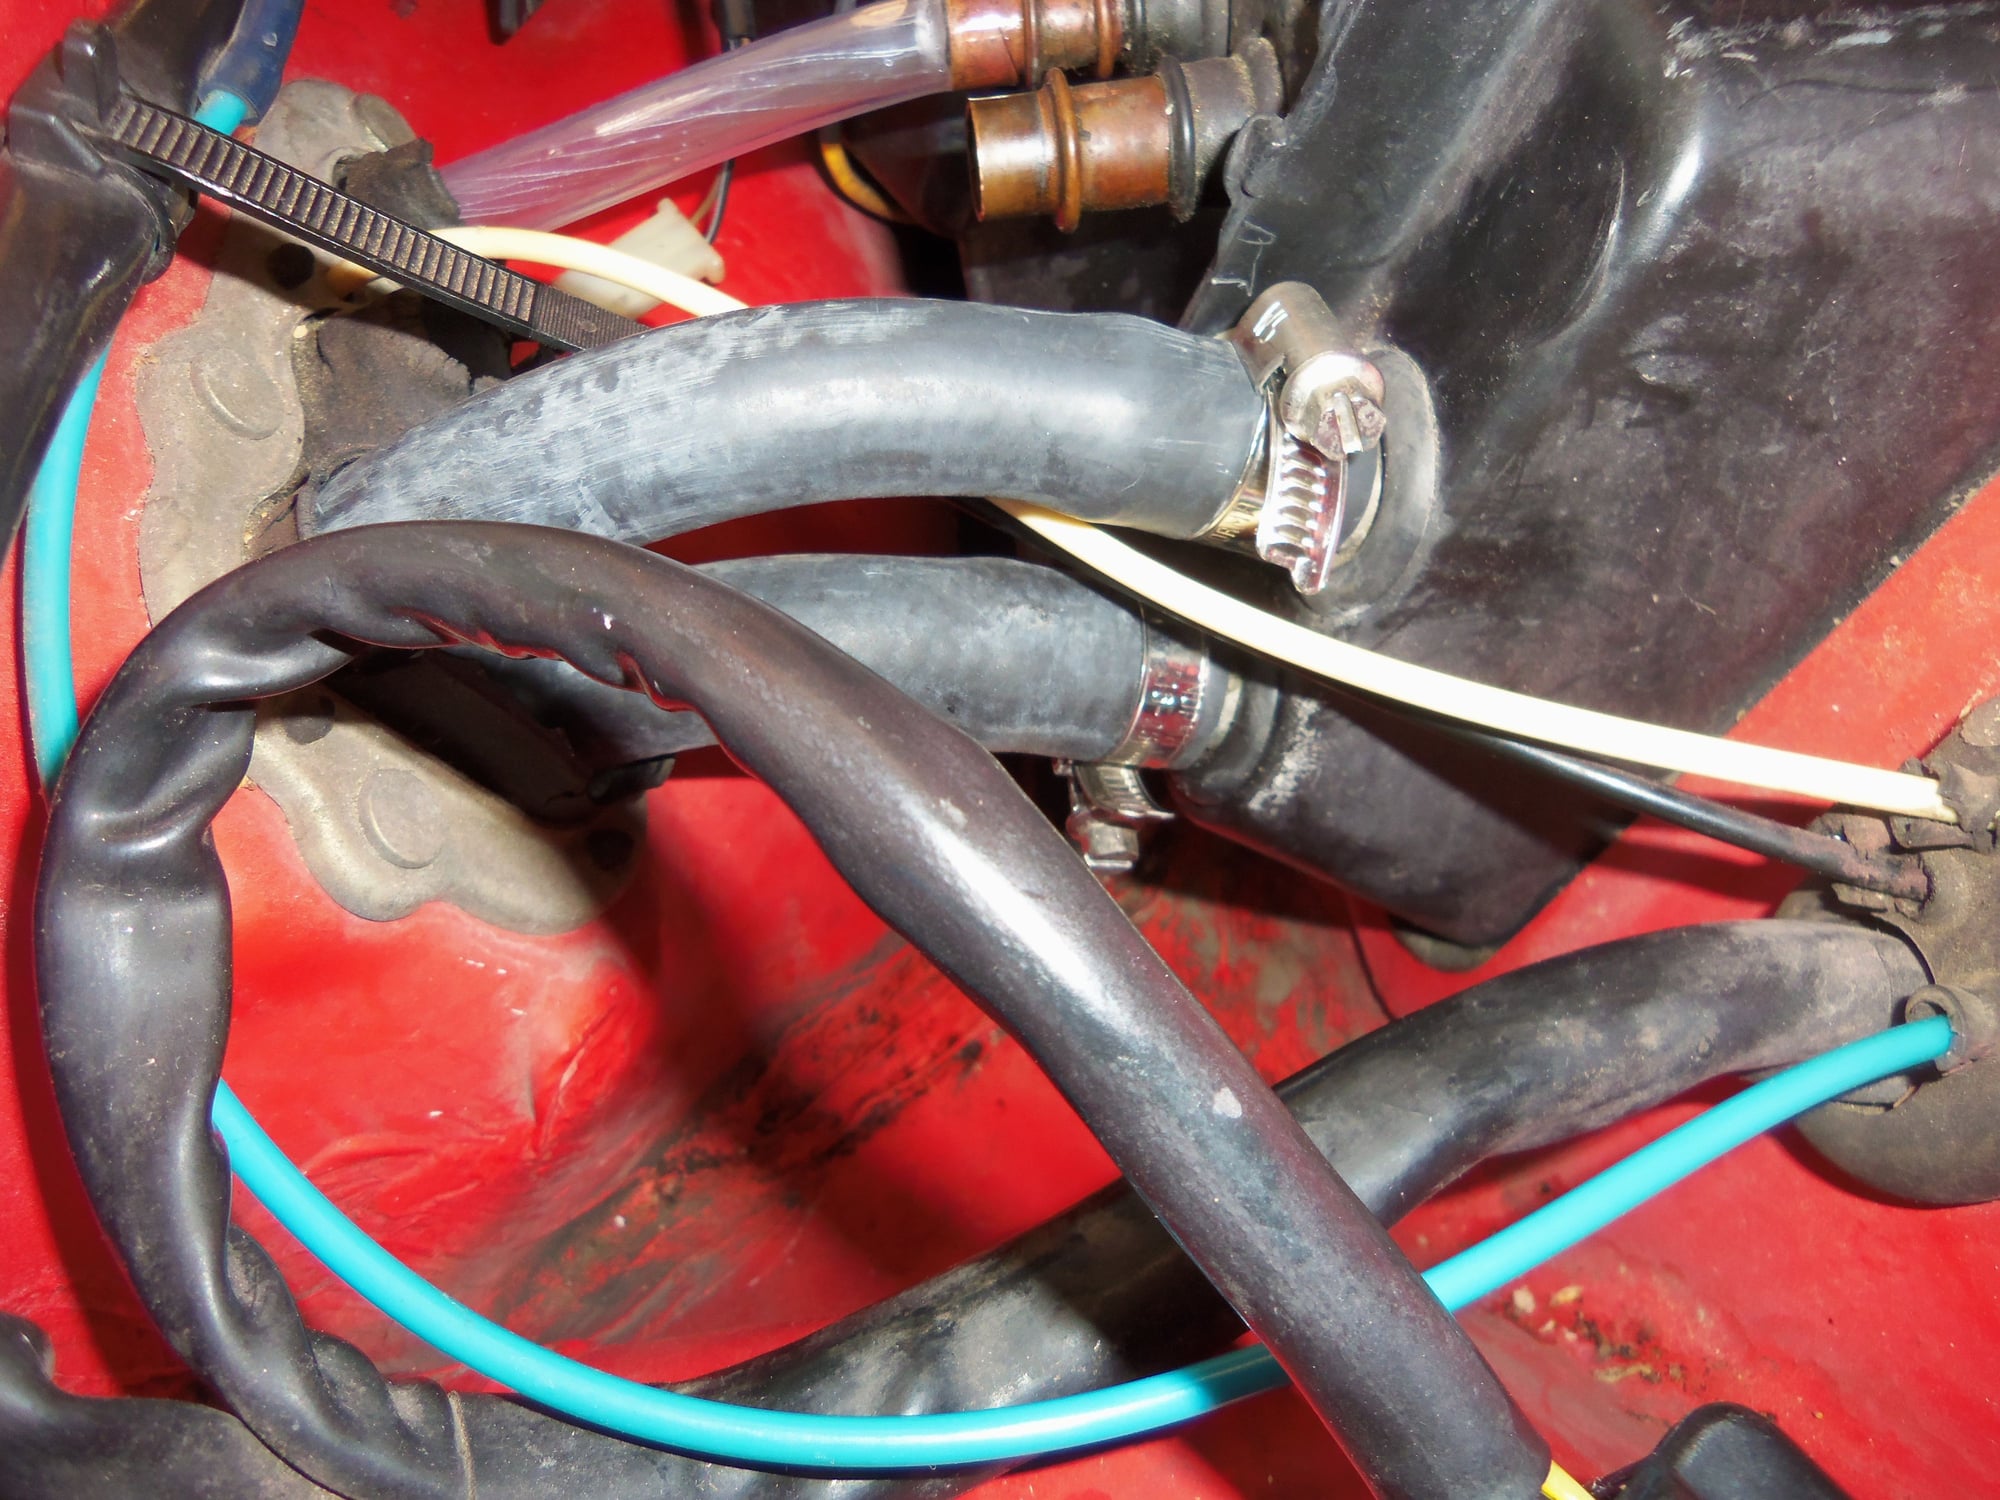
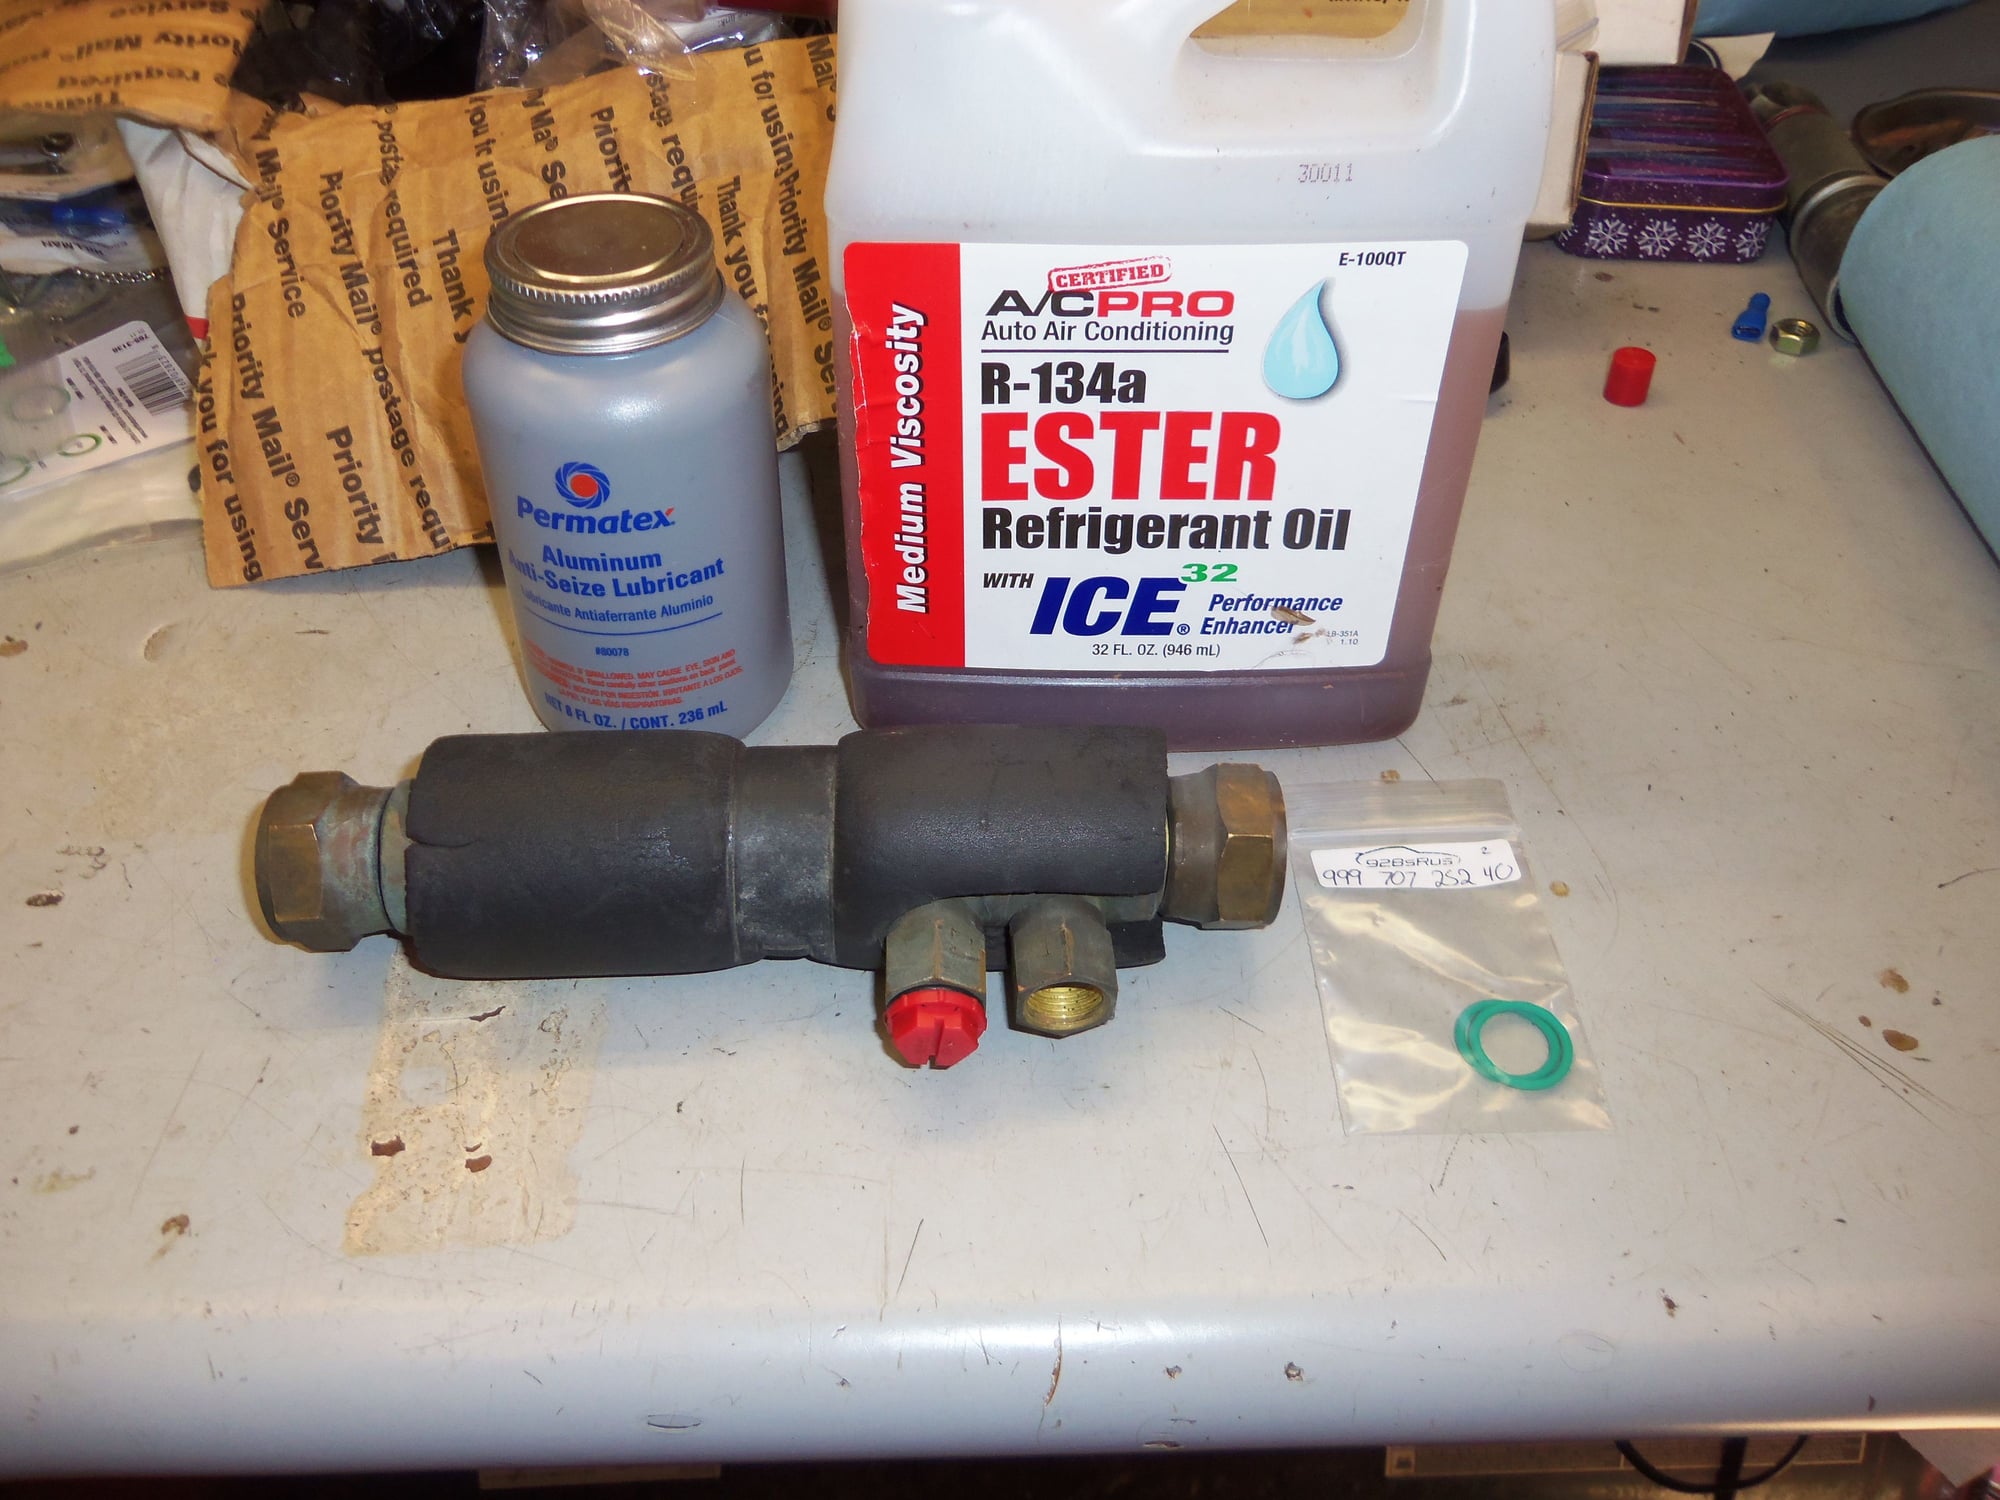
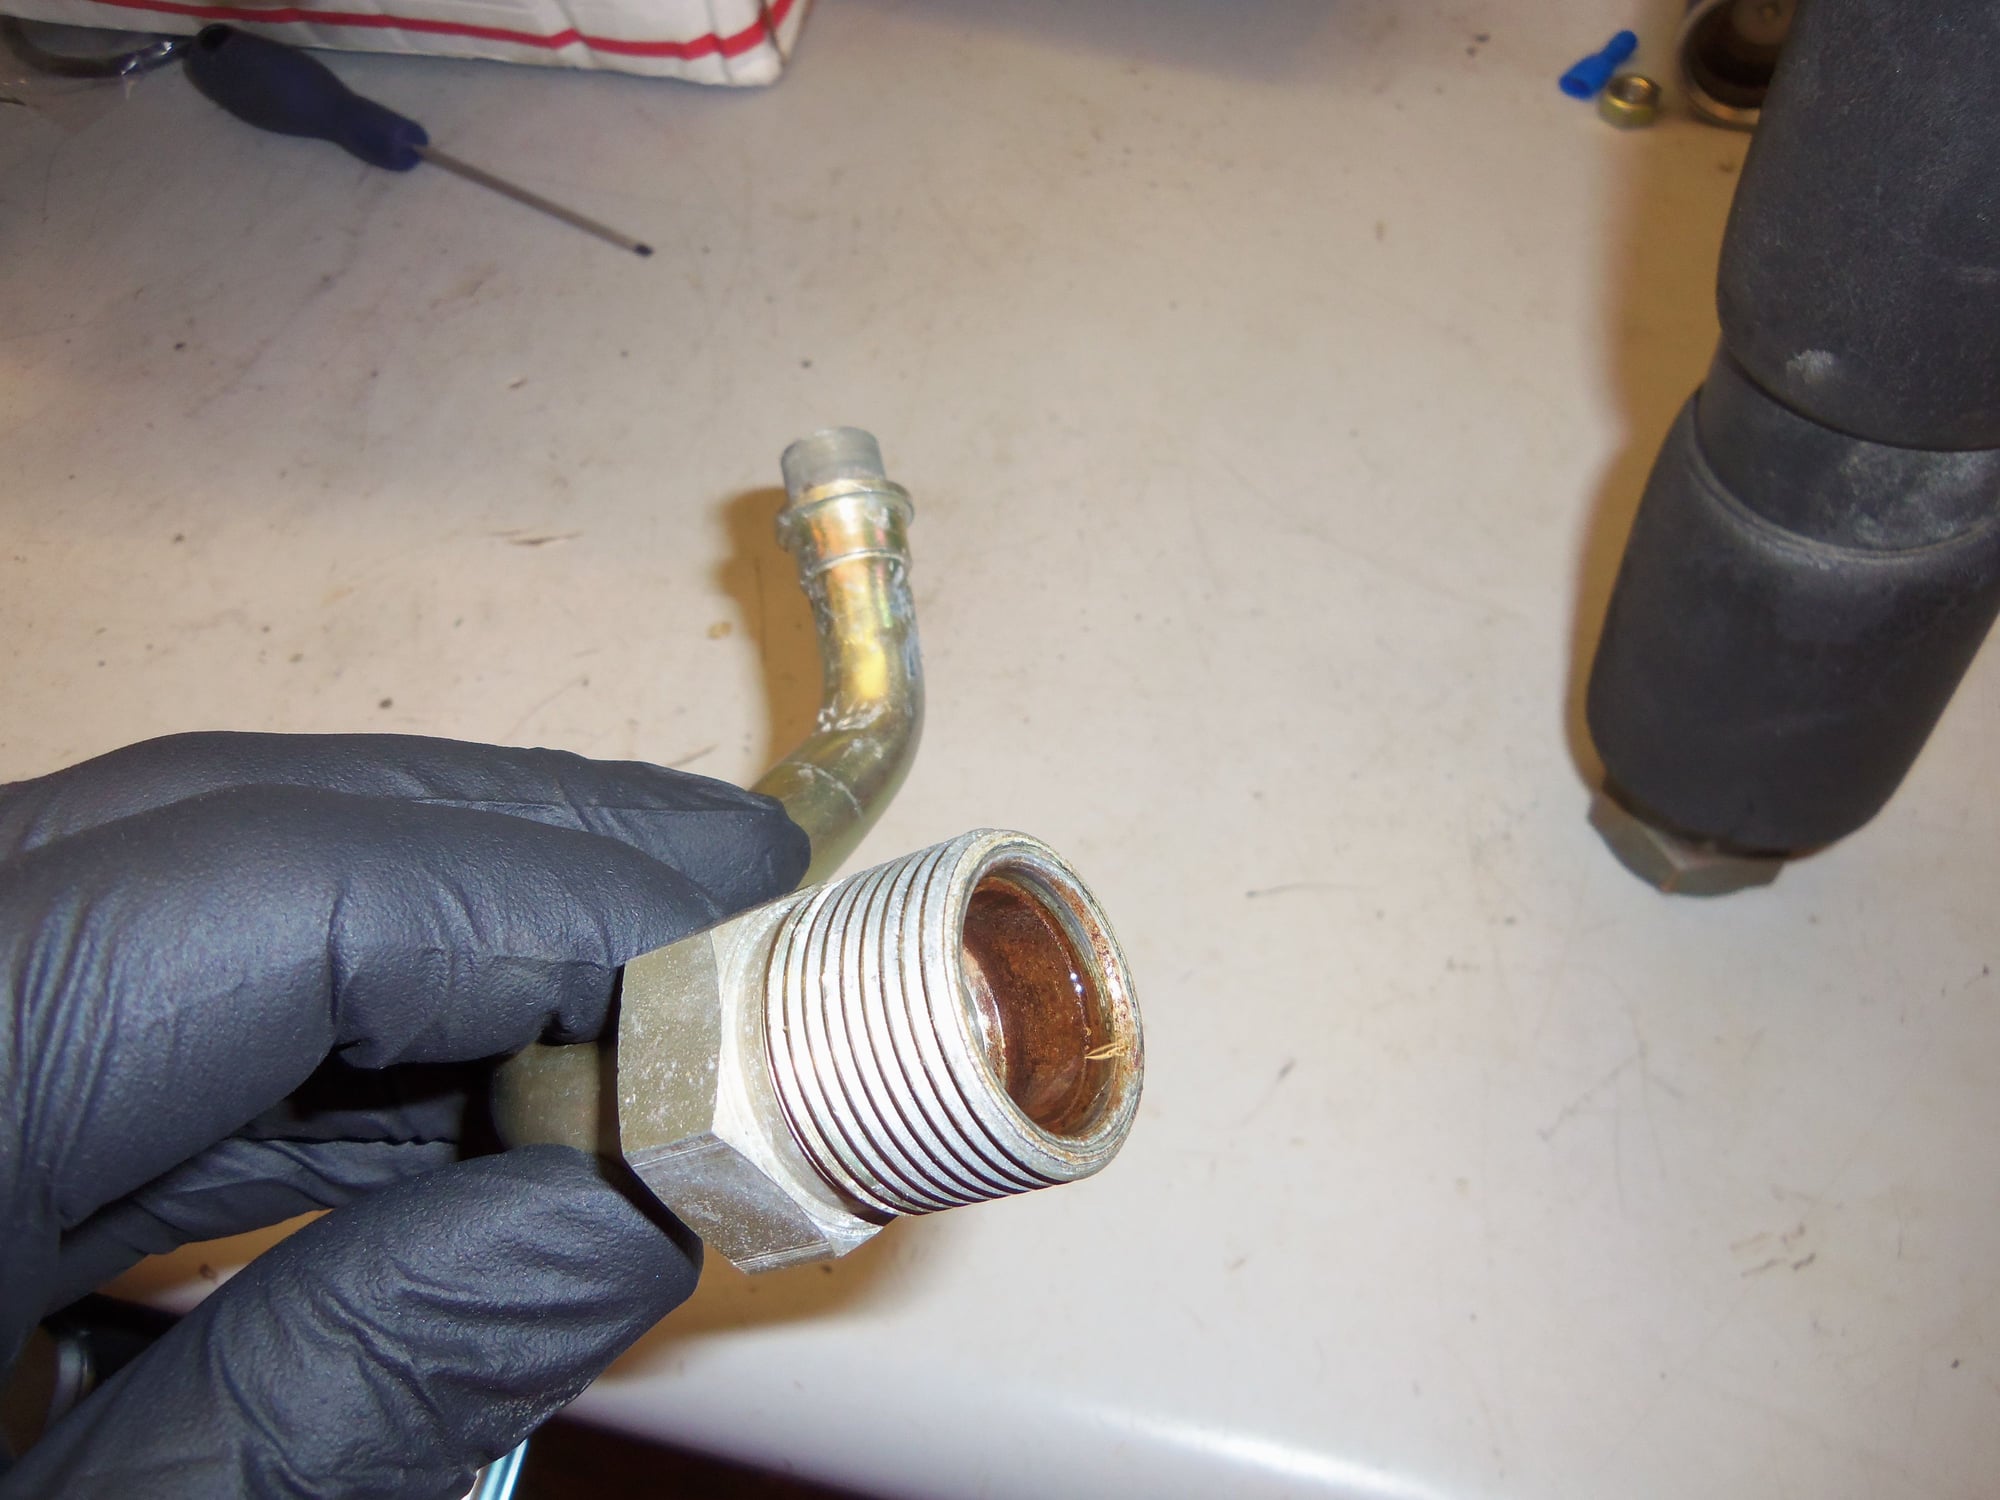
Next came the fun part. I flushed the fuel cooler (both sides), the large aluminum AC line that connects to the fuel cooler, the large short steel AC line that connects to the fuel cooler, and the rebuilt AC line that runs along the passenger's side inner fender. I lubricated the threads on the large AC lines with silver antiseize and screwed the fuel cooler onto them. After unscrewing, I wiped off the excess antiseize. Then, again with the Ester oil to lubricate the O-rings, I fitted new large green O-rings to each end of the fuel cooler.
Next was to lubricate the O-ring bores and tubes on the large aluminum AC line, short steel AC line, and the long line along the inner fender. I fitted new green O-rings as applicable. I also cleaned the threads on the fuel line that threads into the fuel cooler. I lubricated its threads with a little bit of silver antiseize.
With much cursing, wiggling, looking at disassembly photos, and gnashing of teeth, I got the large aluminum AC line and the long AC line that runs along the inner fender back into place in the engine bay.
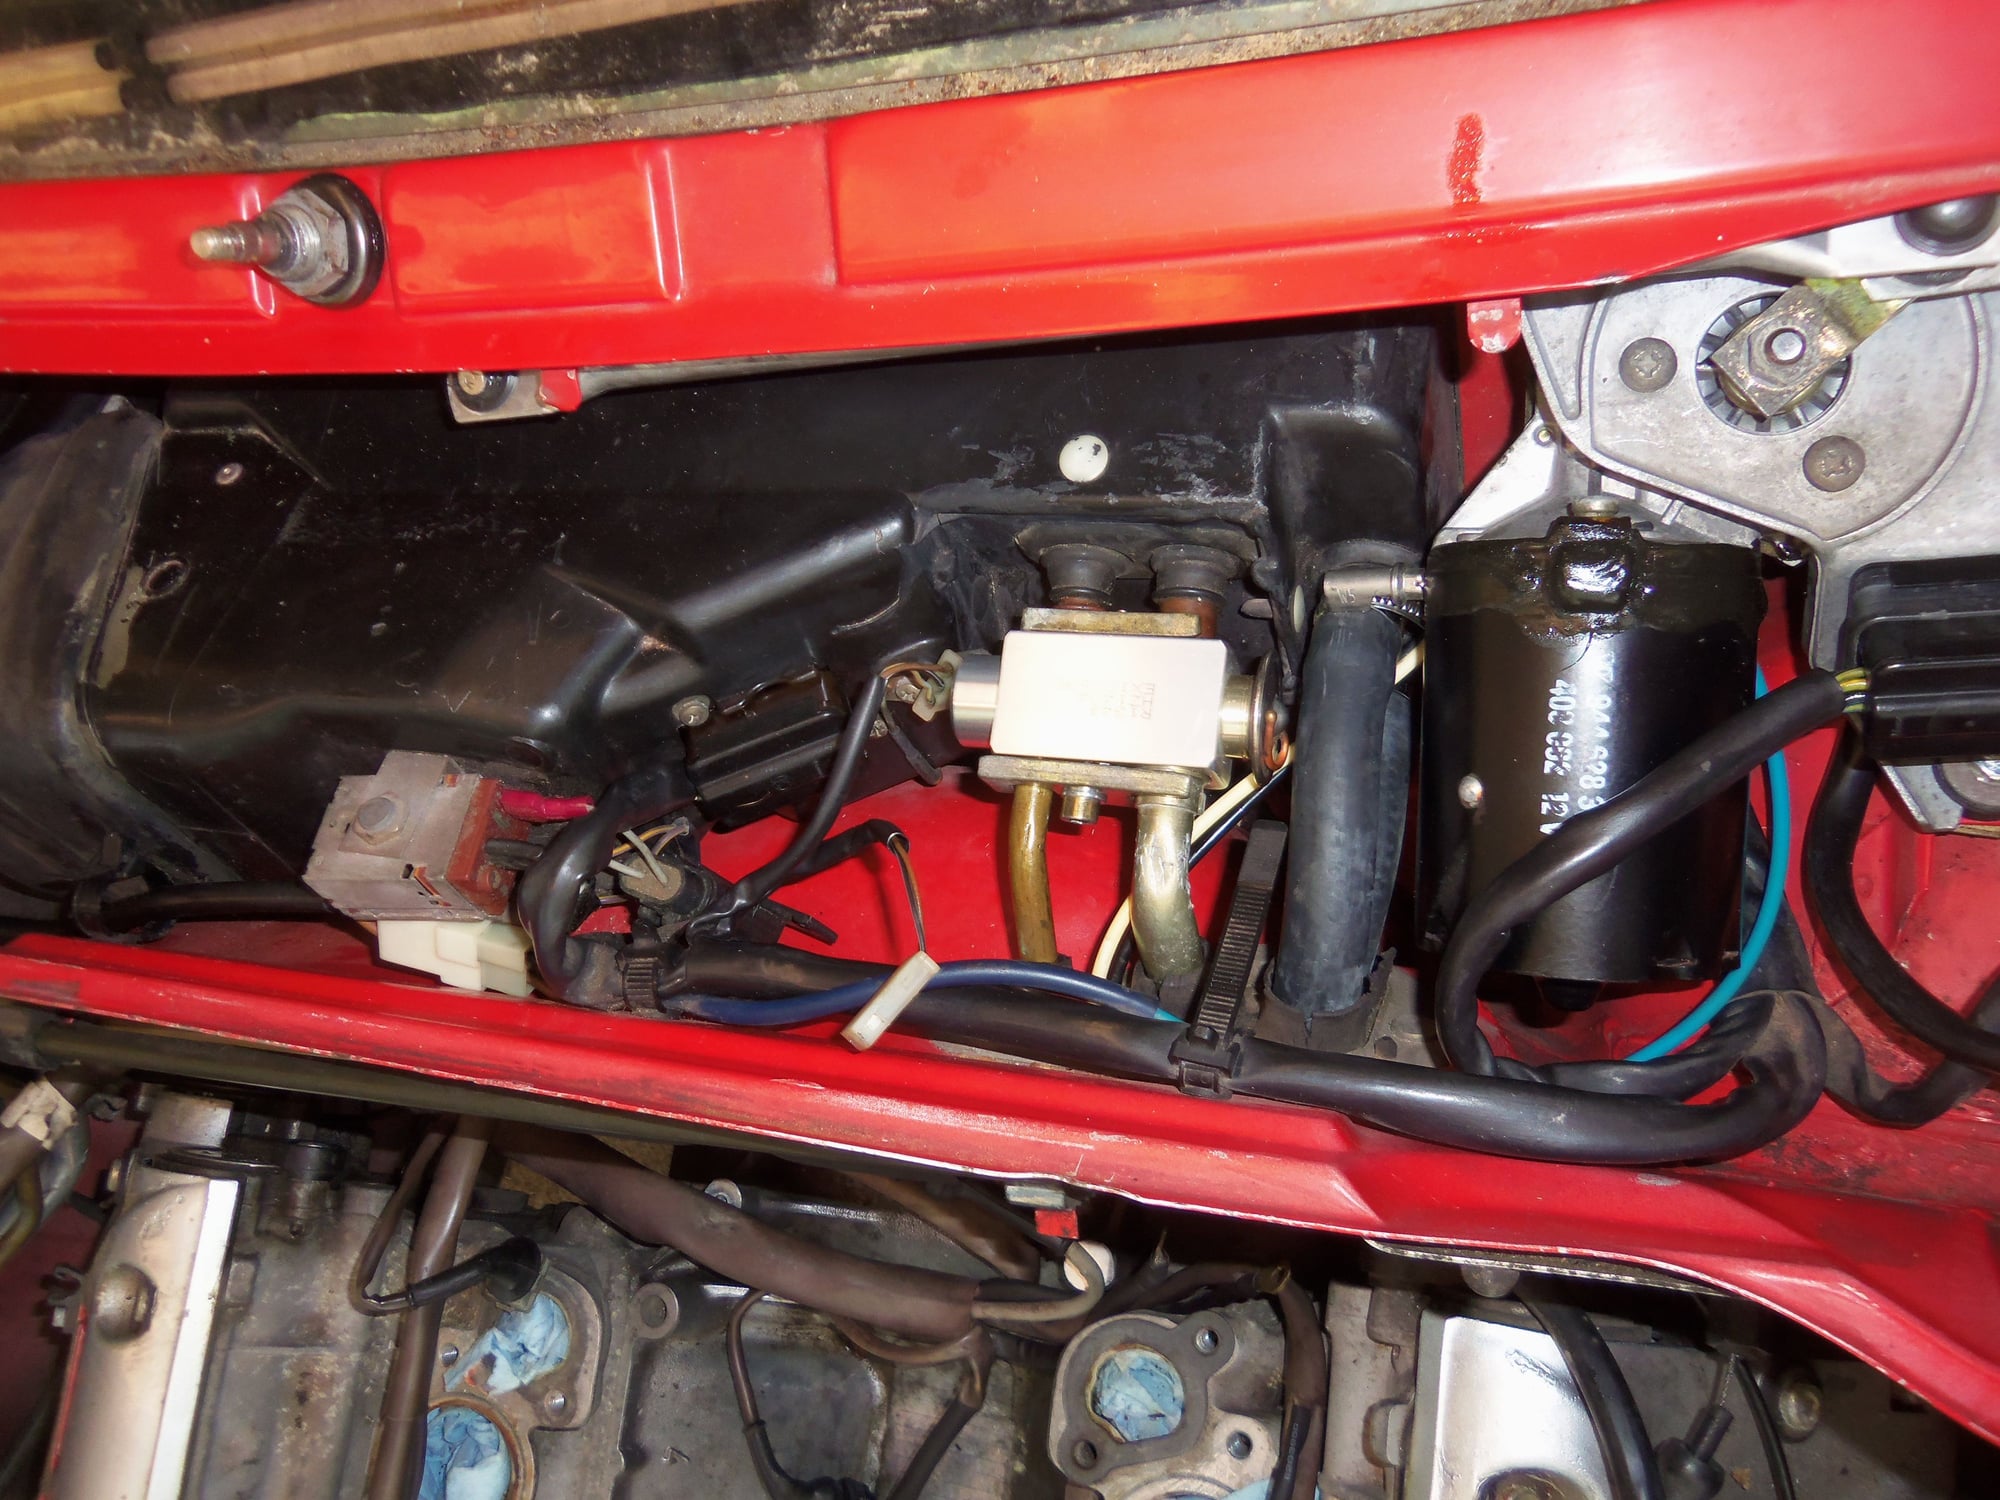
I assembled the jigsaw puzzle of long line to left side of the expansion valve, the short steel line to the right side of the expansion valve, and then the steel keeper plate on the front of the expansion valve. I started the fuel cooler on the short steel line, and started the fuel line into the fuel cooler. I started the aluminum line on the other side of the fuel cooler. I threaded everything down, but left it all loose for final positioning.
I used new rubber lined P-clamps to position the AC lines along the inner fender. Once all was in position, I then tightened down all the threaded fittings, using double wrenches as required. I verified the AC lines went into the expansion valve straight. However, after reading Kevin In Atlanta's issue with the bent keeper plate for the rear AC expansion valve, I am going to reverify my keeper plate is not bent.
As of right now, the ends of the AC lines at the front of the engine bay have been capped off.
Best photo I have of the expansion valve and AC lines. Will get better photos soon.
With all that ran, I then installed the powdercoated water tube and connected the heater hoses and the short hose off the bottom of the overflow reservoir. I used new clamps for all. The open end of the water tube has been capped off for now.
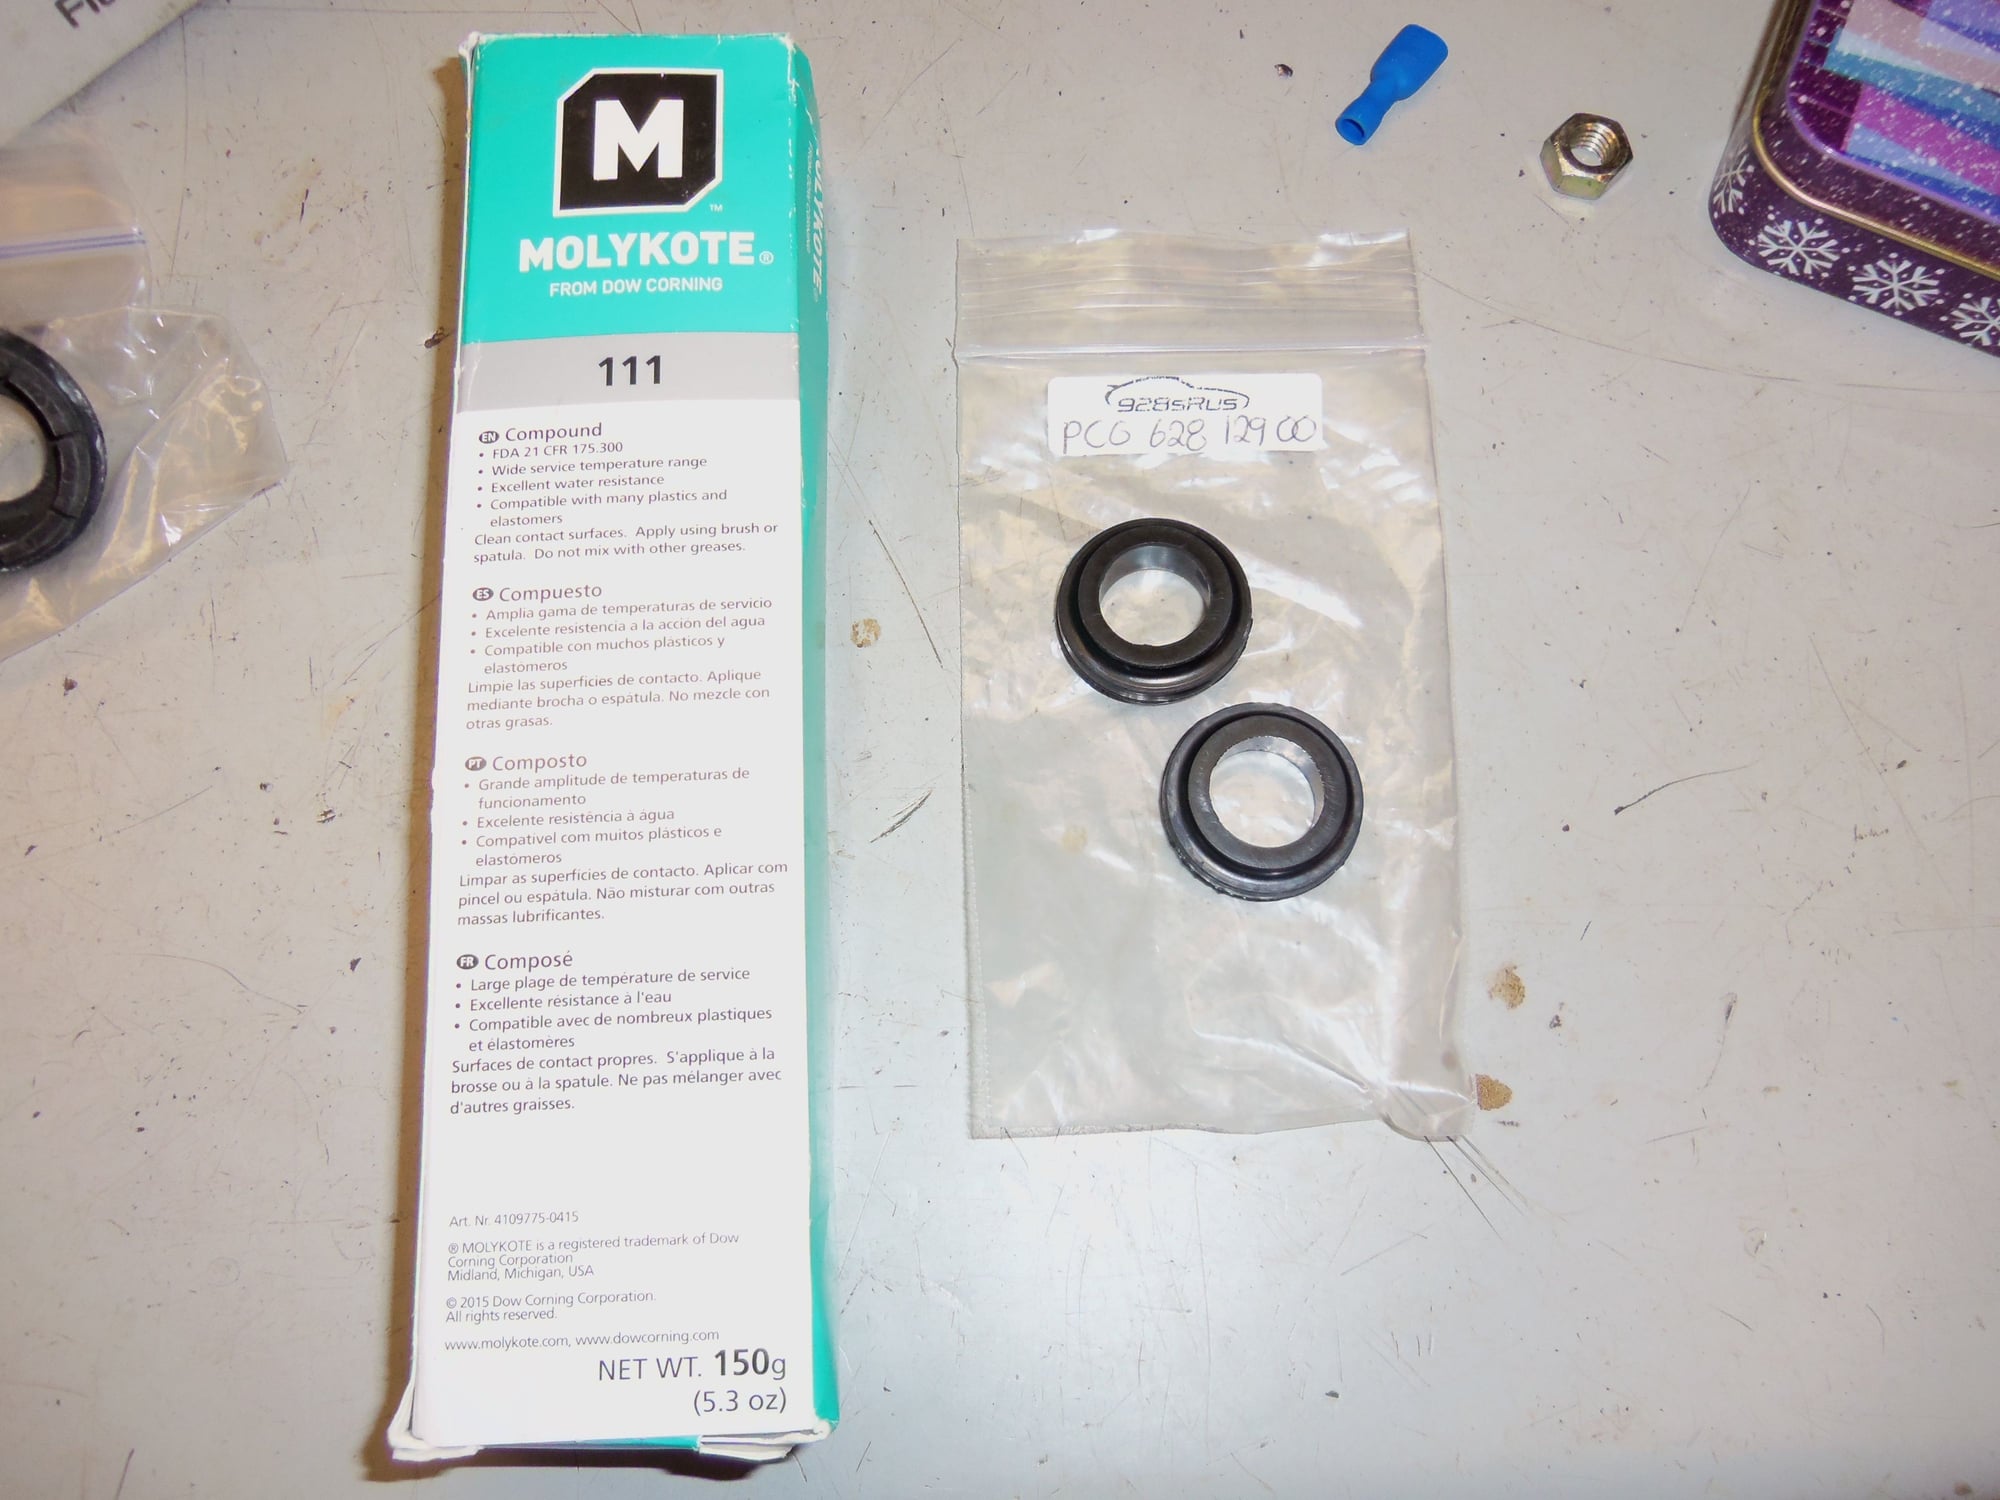
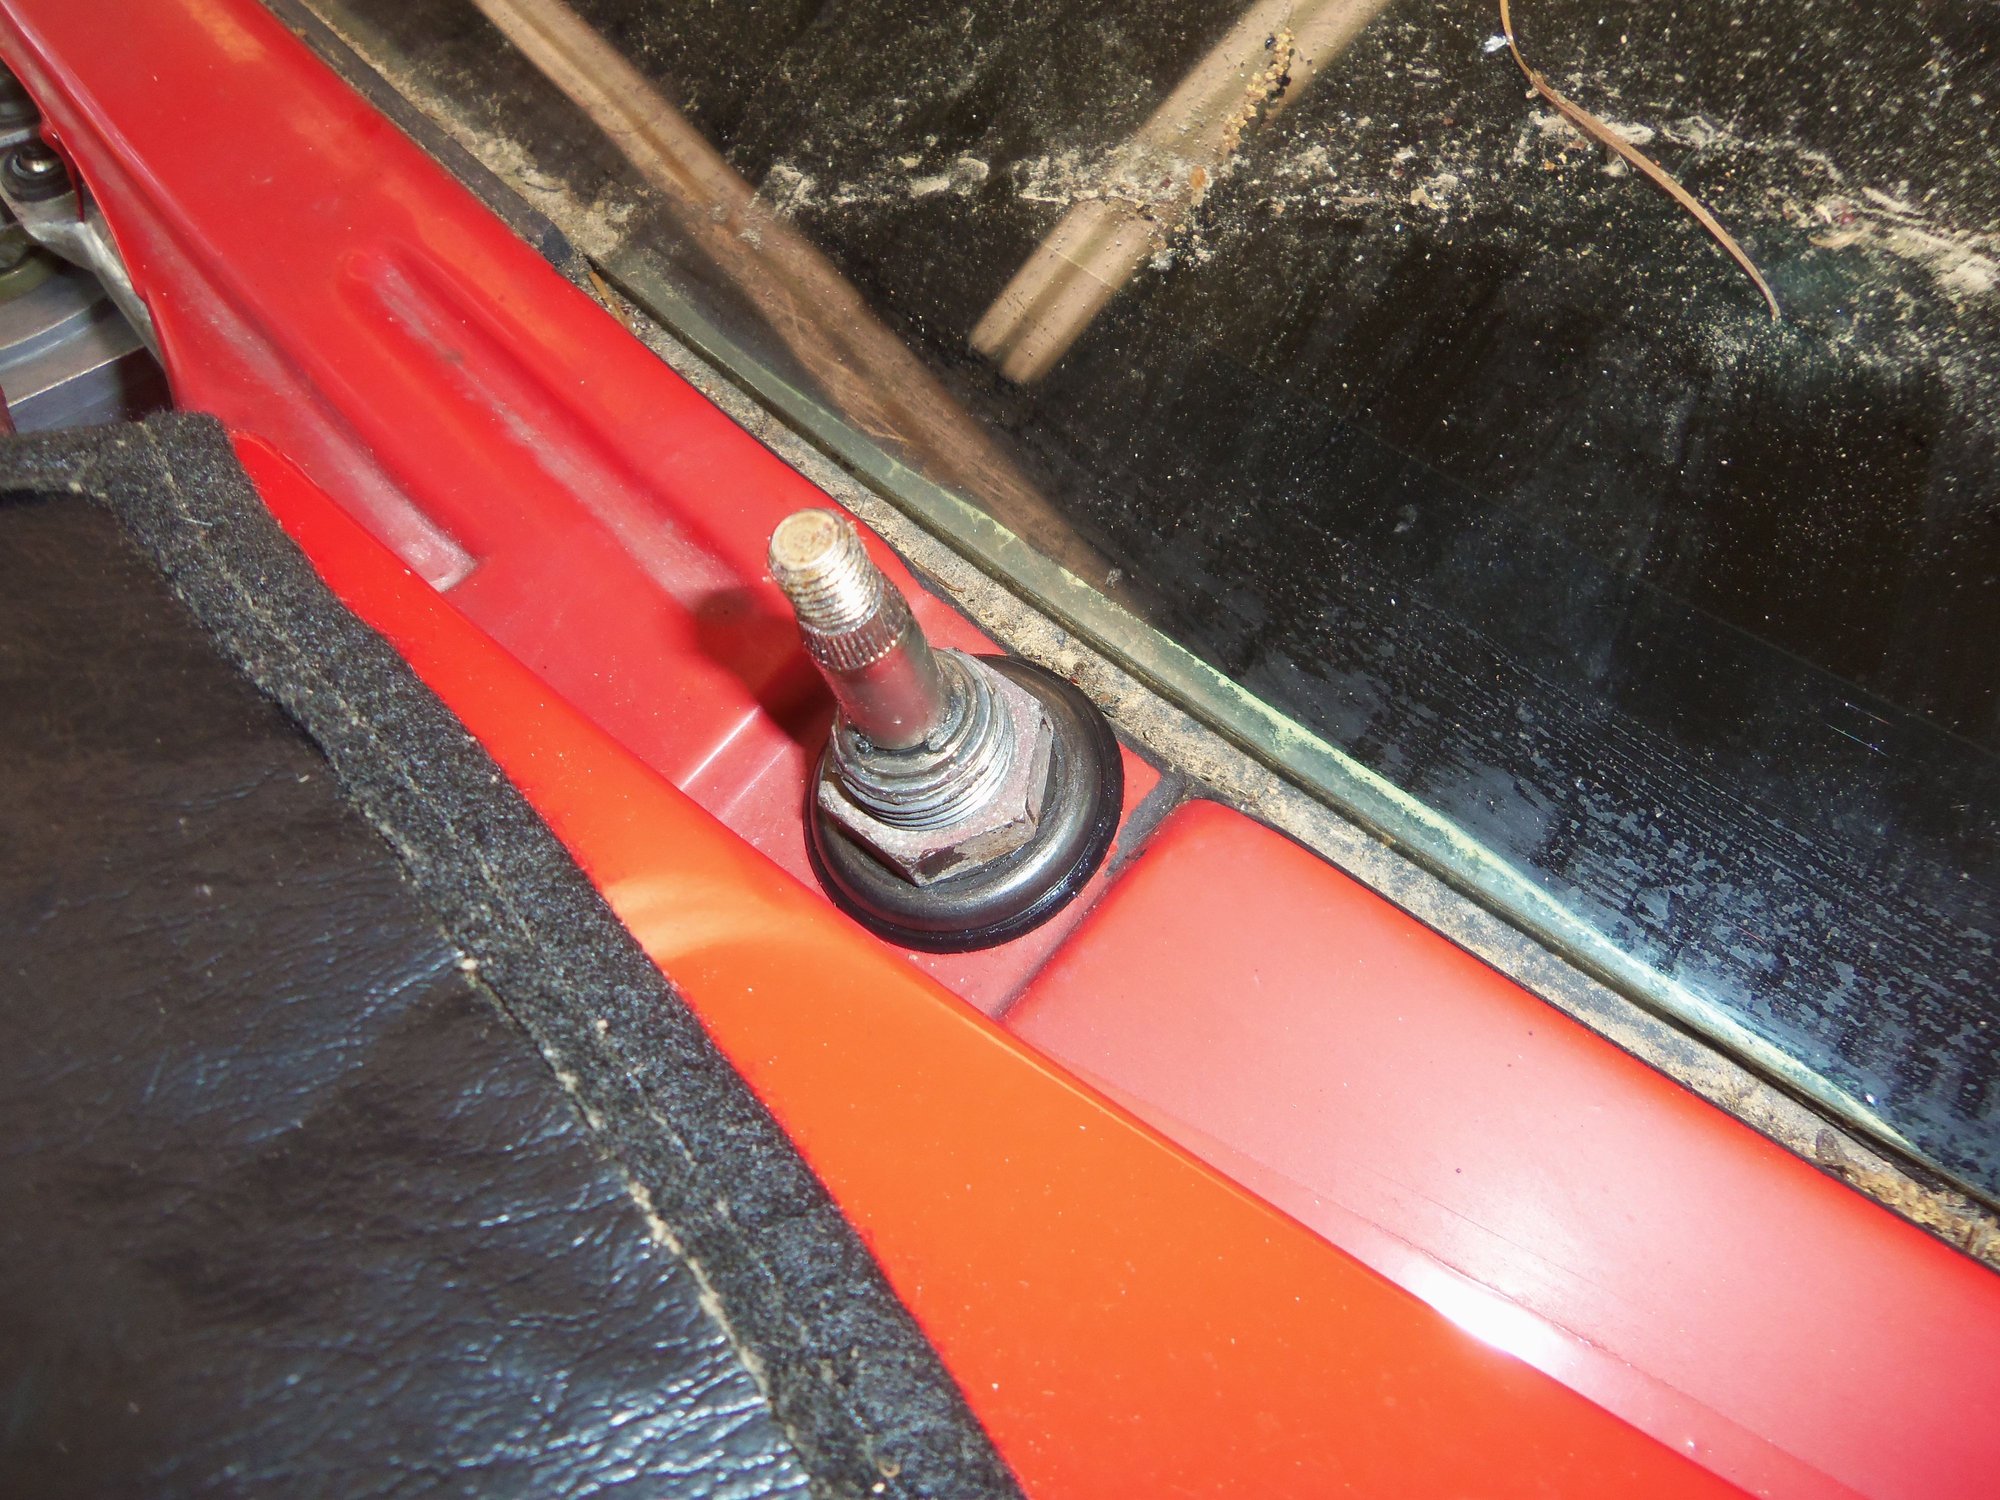
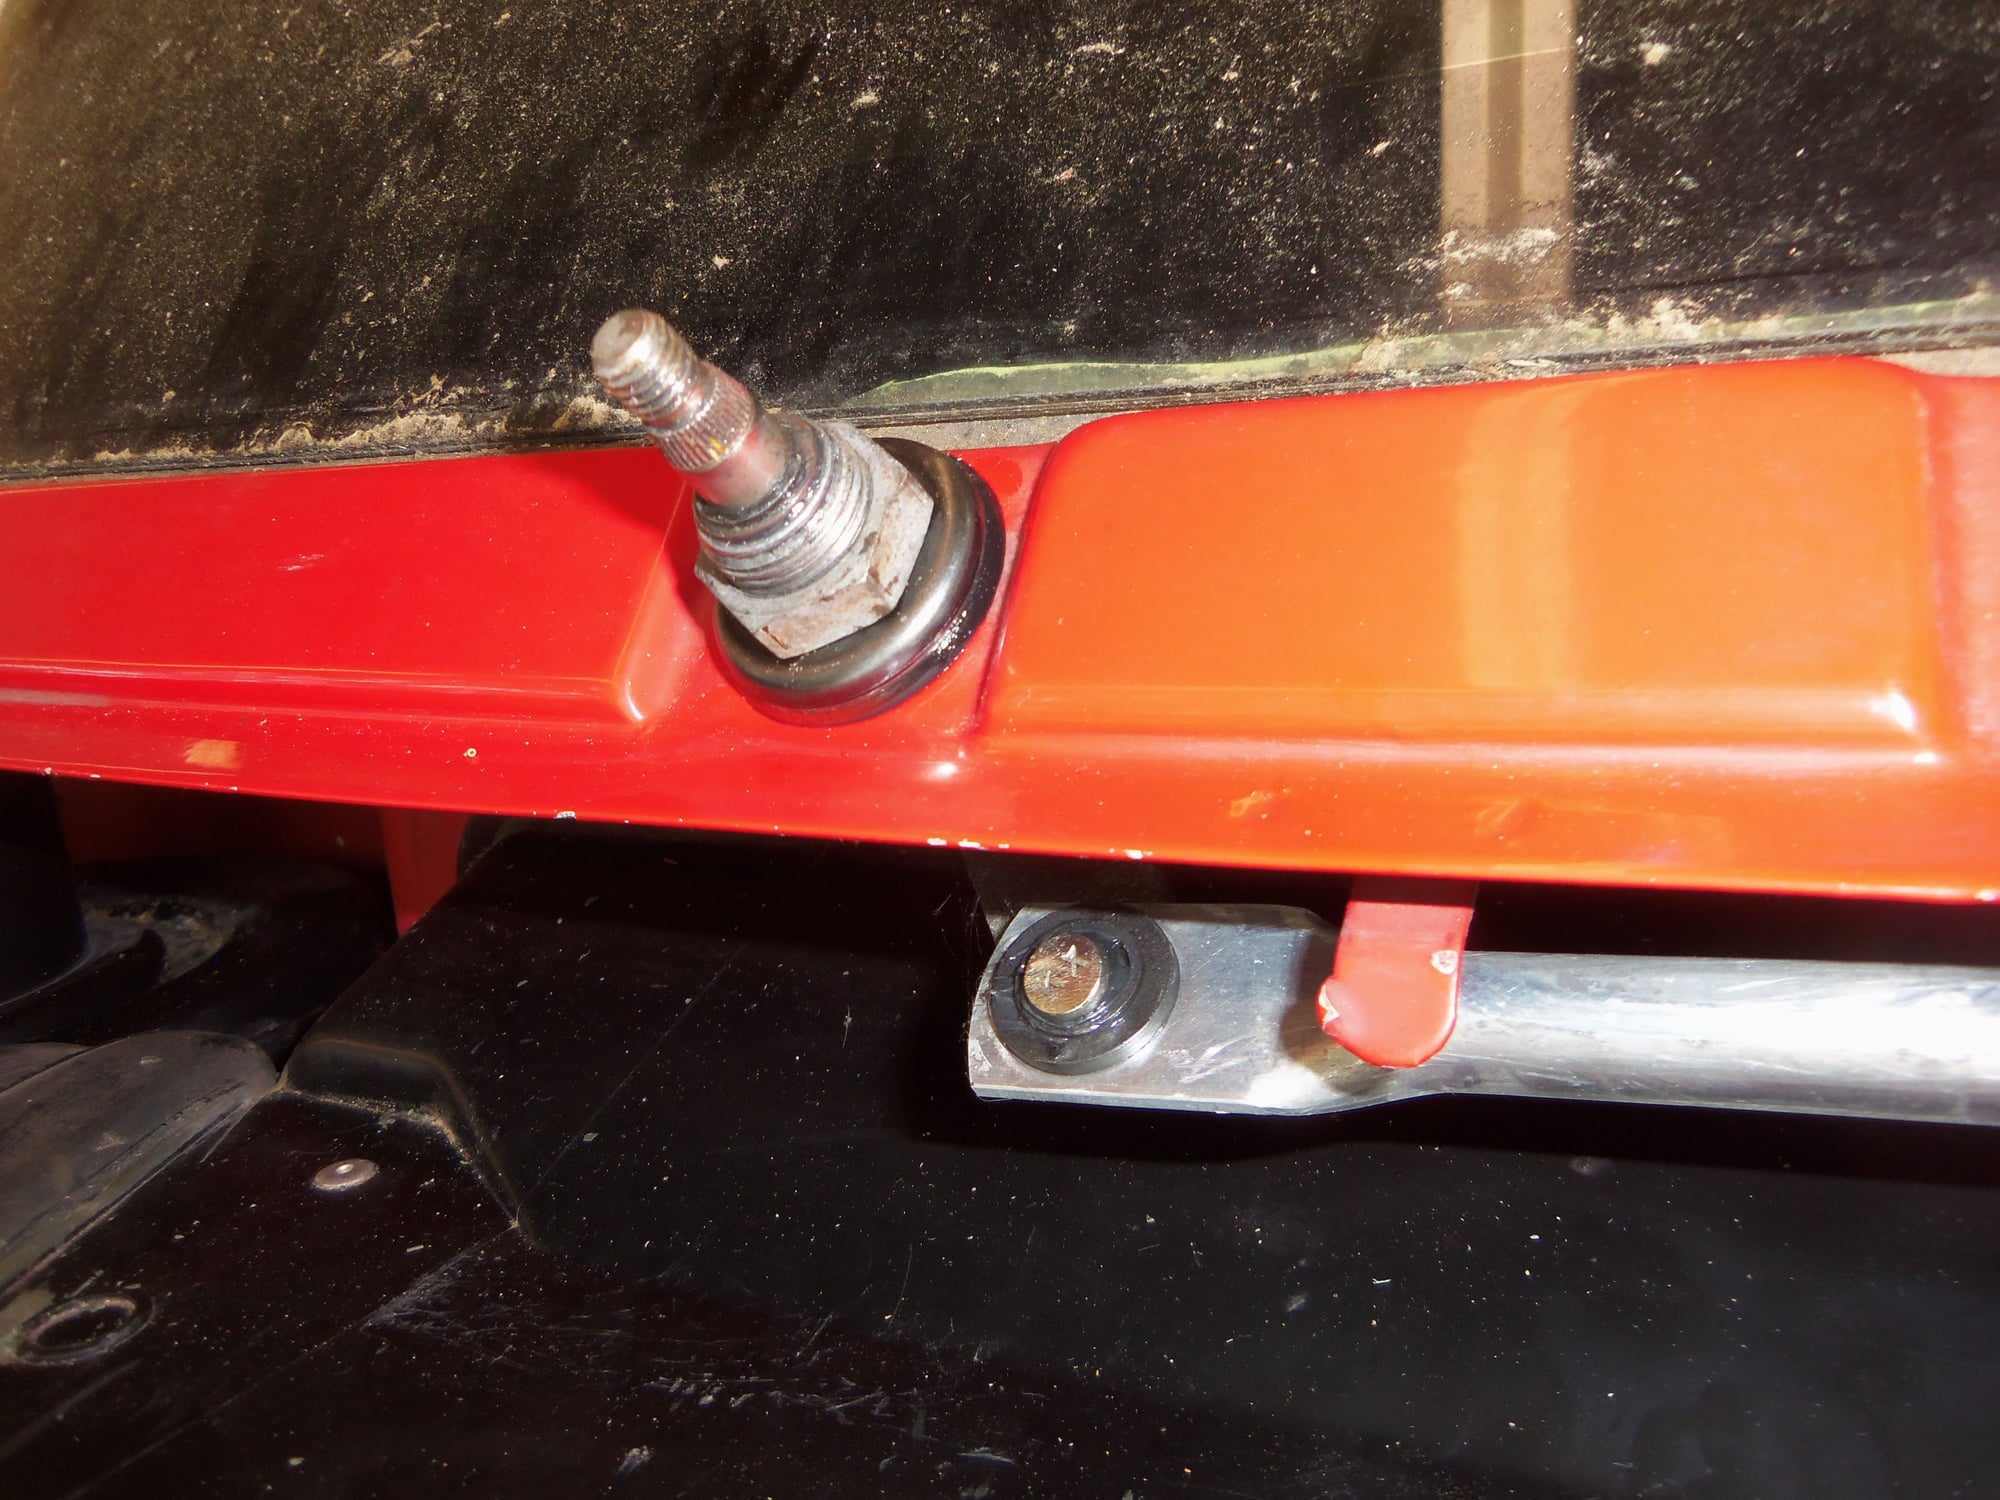
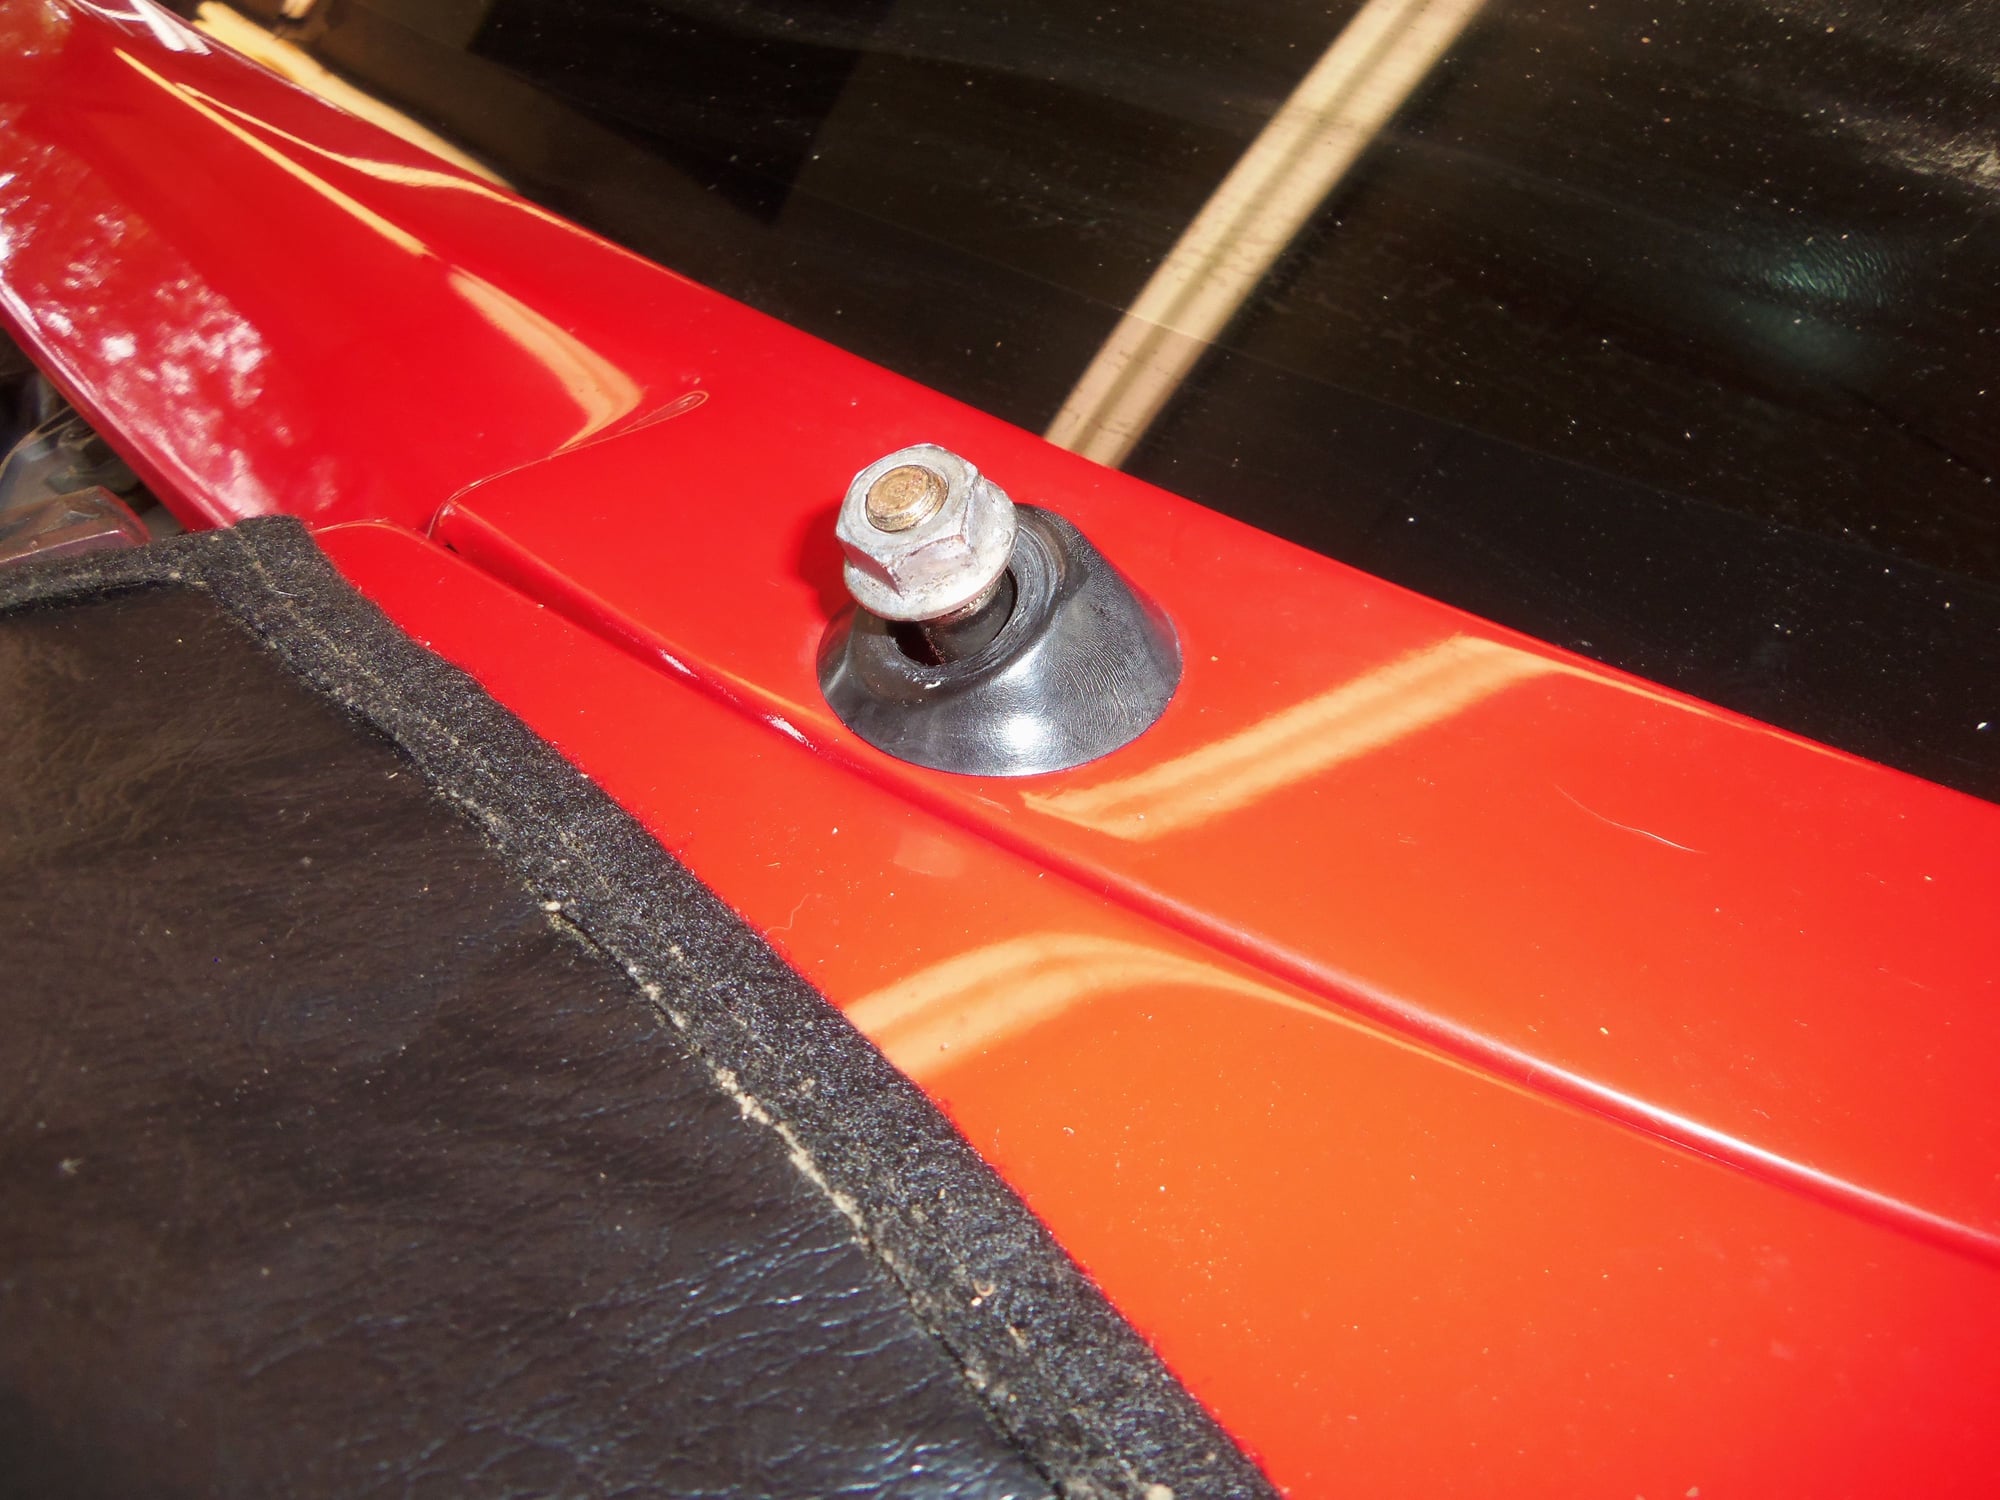
So...with all the side track work done, I could now install the refurbished wiper assembly. That was actually anti climactic. Lubed the new rubber grommets with Dow 111. The assembly slid into place and I tightened the post nuts with new washers on top of the grommets. I could not find a torque spec, so I tightened by feel with my hand at the head of a 1/4" drive ratchet.
Reinstalled the cosmetic cowl panel, and was done. I will install the windshield trim in the near future.
I have not installed the wiper arms, because I want to run the motor through a few cycles and then get it to park. Then install the arms.
As well, I did some general clean up on top of the HVAC box. I understand now is the best time to pull the blower motor to clean the evaporator and replace the motor. However, I have to draw the line somewhere. As easy as it is to remove the hood, I will deal with this sometime in the future.
Onward!!! I hope to get more work done in the next couple of days, as I am off work.
Before you go much farther you might consider replacing the rubber bulkhead that the A/C and heater hoses go through at the firewall. Now is an opportune time.
Well done. Just as a future reference to others, the regular wiper motor bearings are standard off the shelf items that any local bearing shop would have. They are about $10.


 06-14-2017, 02:13 AM