When you click on links to various merchants on this site and make a purchase, this can result in this site earning a commission. Affiliate programs and affiliations include, but are not limited to, the eBay Partner Network.
Hahaha, just spent ages looking for this interior fan fix on Rennlist - got wildy distracted by all the other posts that come up when you search, convince I need a supercharger now, and rod bearings and etc..... Finally remembered what I logged in to do, gave up and looked on 928org and found the link immediately so posting it here.
I have 2 of these suckers and they are both deviant. Fixing the fan motor allows me to ignore other pressing issues, you know how it is....the 928 is a "target rich environment"
Oh sorry maybe I could see it as I am registered/logged in...anyways Woodie's original post was:
"You shouldnt have much difficultly getting the motor out of the plastic housing, yes you could try and prize it out but be carefull. There should be two small screws holding the motor into the top of the plastic housing. If these are removed, with a little bit of jiggling the motor should come free. It is a tight fit.
Once the motor is free, leave the fan on. Turn to the other end of the motor and you should see for equally spaced tangs which are bent over onto the "cap of the motor" Take a very hard piece of metal, stainless or tungsten. I used a tool that I use for removing the different layers of skin from an aircraft fuselage, but anything as long as its hard and thin and about 10mm at least wide will doo.. The harder the material, the thinner it can be. Carefully use this thin piece of material and prize upwards the four tangs. Once you have done this, use a large pin punch and tap them so they are now at 90 degrees at least. Take the thin tool that you have used previously and gently prize the cap upwards, use a hammer to tap it if it is tight.. be sure to do this at equal amounts all the way round the motor cap. Once it is lifted enough use a pry bar and prize off the cap. This will then expose the brush pack. carefully prize this off noting the position and
the no. of washers and spacers..........
Once the cap and brush pack is off turn up the other way and hold the motor housing in a vice with some soft jaws fitted to it. take a 4mm pin punch and punch the shaft where the fan is downward gently, but with enough force to start to move the motor shaft downwards. Then you should be able to remove the fan without any damage to it. Once the fan is off carry on tapping the motor out of the remainder of the steel housing.
For those that have a siezed motor bearing....
Once you have the motor out and on the bench, close the jaws of the vice up so that the motor shaft is only just able to slide into the vice. slide the motor shaft into the vice with the hardend steel bearing now beeing supported on the vice jaws. spray generous amounts of penetrating oil, I used TKX, but im sure GT40 will do. Use a 2Ib ball pein hammer, but be carefull not to damage the motor shaft, and with some heavy blows you will push the shaft down into the vice whilst the bearing is stationary thus inturn freeing the shaft which will be siezed onto the inside of the bearing.
Remove from the vice and you will eventually see the intergranular corrssion on the bearing and the pitted corrossion on the shaft where the bearing was siezed. Once you have completly freed up the bearing take some medium Emery paper and with forward and aft motions, remove, clean and polish the shaft and also the inside of the bearing.. Do not take too much material away as you will cause osscillations once the motor is spinning at speed. Remove just enough to get it free... Be sure to also clean throughly the bearing housing which is located within the motor housing. I put copper slip on this just as it was a little coarse and would be good to reseat the motor and bearing in the housing when you rebuild everything.
This is really all you need to do. Clean the rest of the motor and motor housing and rebuild. Use a good quality light oil to lubricate everything. Follow the removal steps and you should be able to rebuild everything with ease.
Once you have rebuilt it hold the motor housing carefully in the vice and connect to a 12volt supply....
brown = ground
red= live..
Motor should fire into life at a good rate of knots!!
Hope this helps everyone, please accept my appologies if some of this is not quite correct, but this to the best of my knowledge is how i repaired my motor.
Sorry, I have not put this back into the car, as I have run out of time due to trying to sort my golf out and trying look after an 8 mounth old!!!
I think this thread describes a repair procedure on a RHD motor. If anyone's aware of an alternative for RHD then I'd be interested to know as I have one seized motor and one which is intermittent and trying to find a second hand replacement on eBay is a lottery as they're all around 30 years old.
Thanks for the replies guys, I knew I wouldn't have been the first person with this or in fact any 928 problem - target rich etc...
Shawn thanks for the link, I will keep it in mind but haven't ordered anything from across the pond yet
GP great write up and thanks for the photos.
DuncanF - yes I think, have a look at Tazzieman's post in Shawn's link
Will try and post some photos of any work I do on mine. I have one viable car and a spares car so something to practice on. What's the worst that can happen - don't answer that....
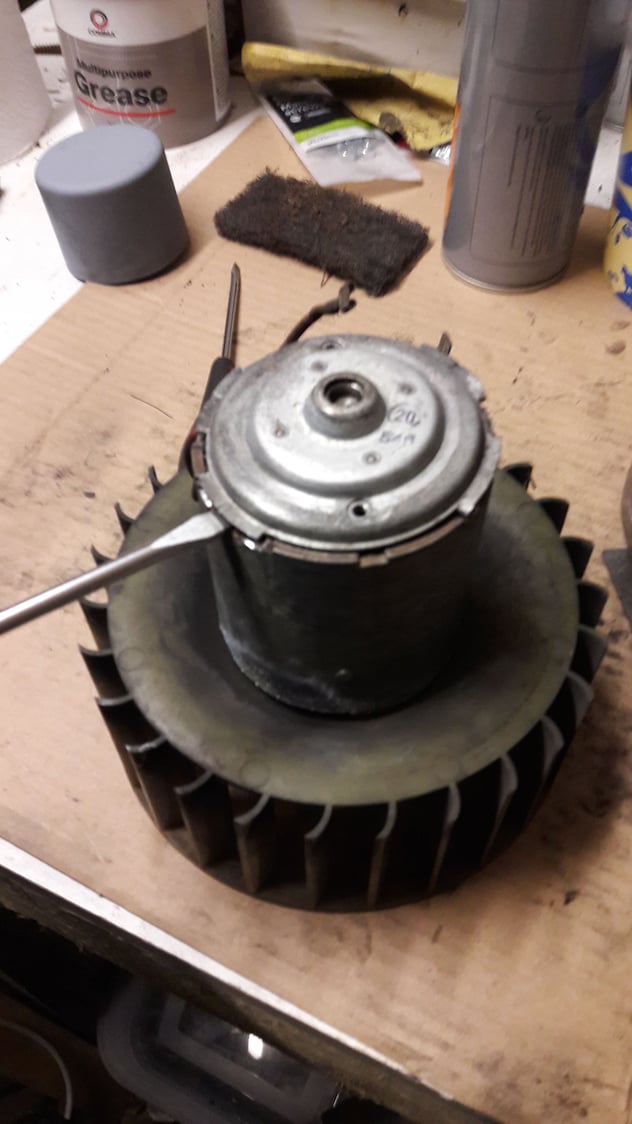
Finally got around to stripping the motor prior to inspection as to repair replace. Comes apart quite easily although haven't managed to remove fan from motor to get at the bearing. Flipside is that hammer blow to shaft got the shaft rotating in the bearing but I suspect it needs to come off if there is any chance of getting it running smoothly. Latest below
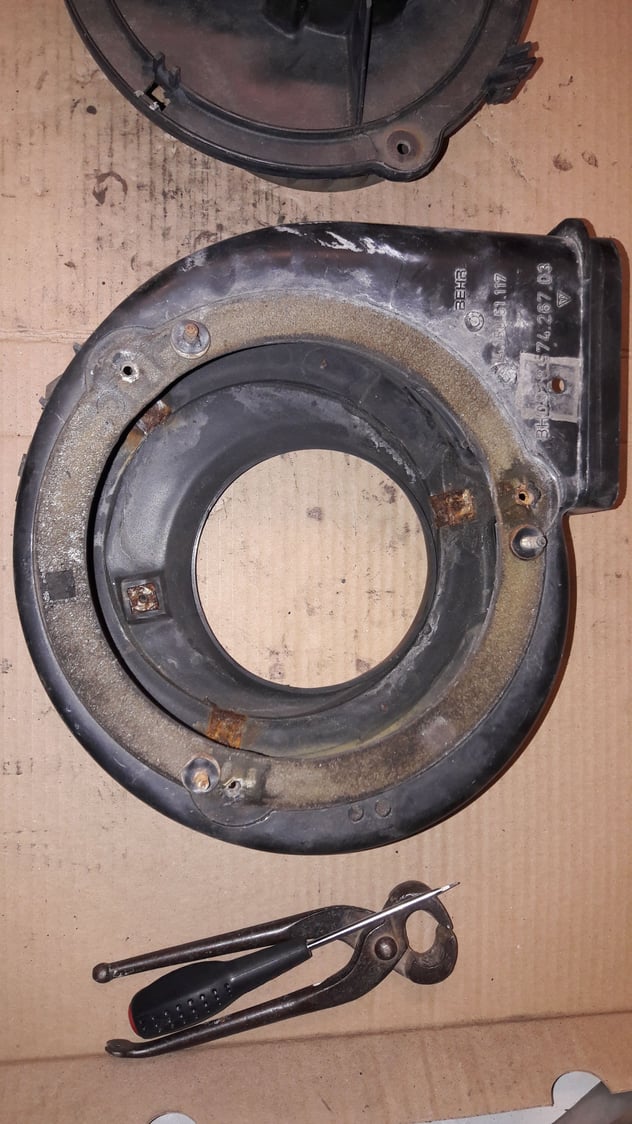
Cover removed - held in place by 3 bolts
Remove 2 screws from top hosuing
Rust, my favourite. I will soak this in vinegar to get rid of the worst of it...
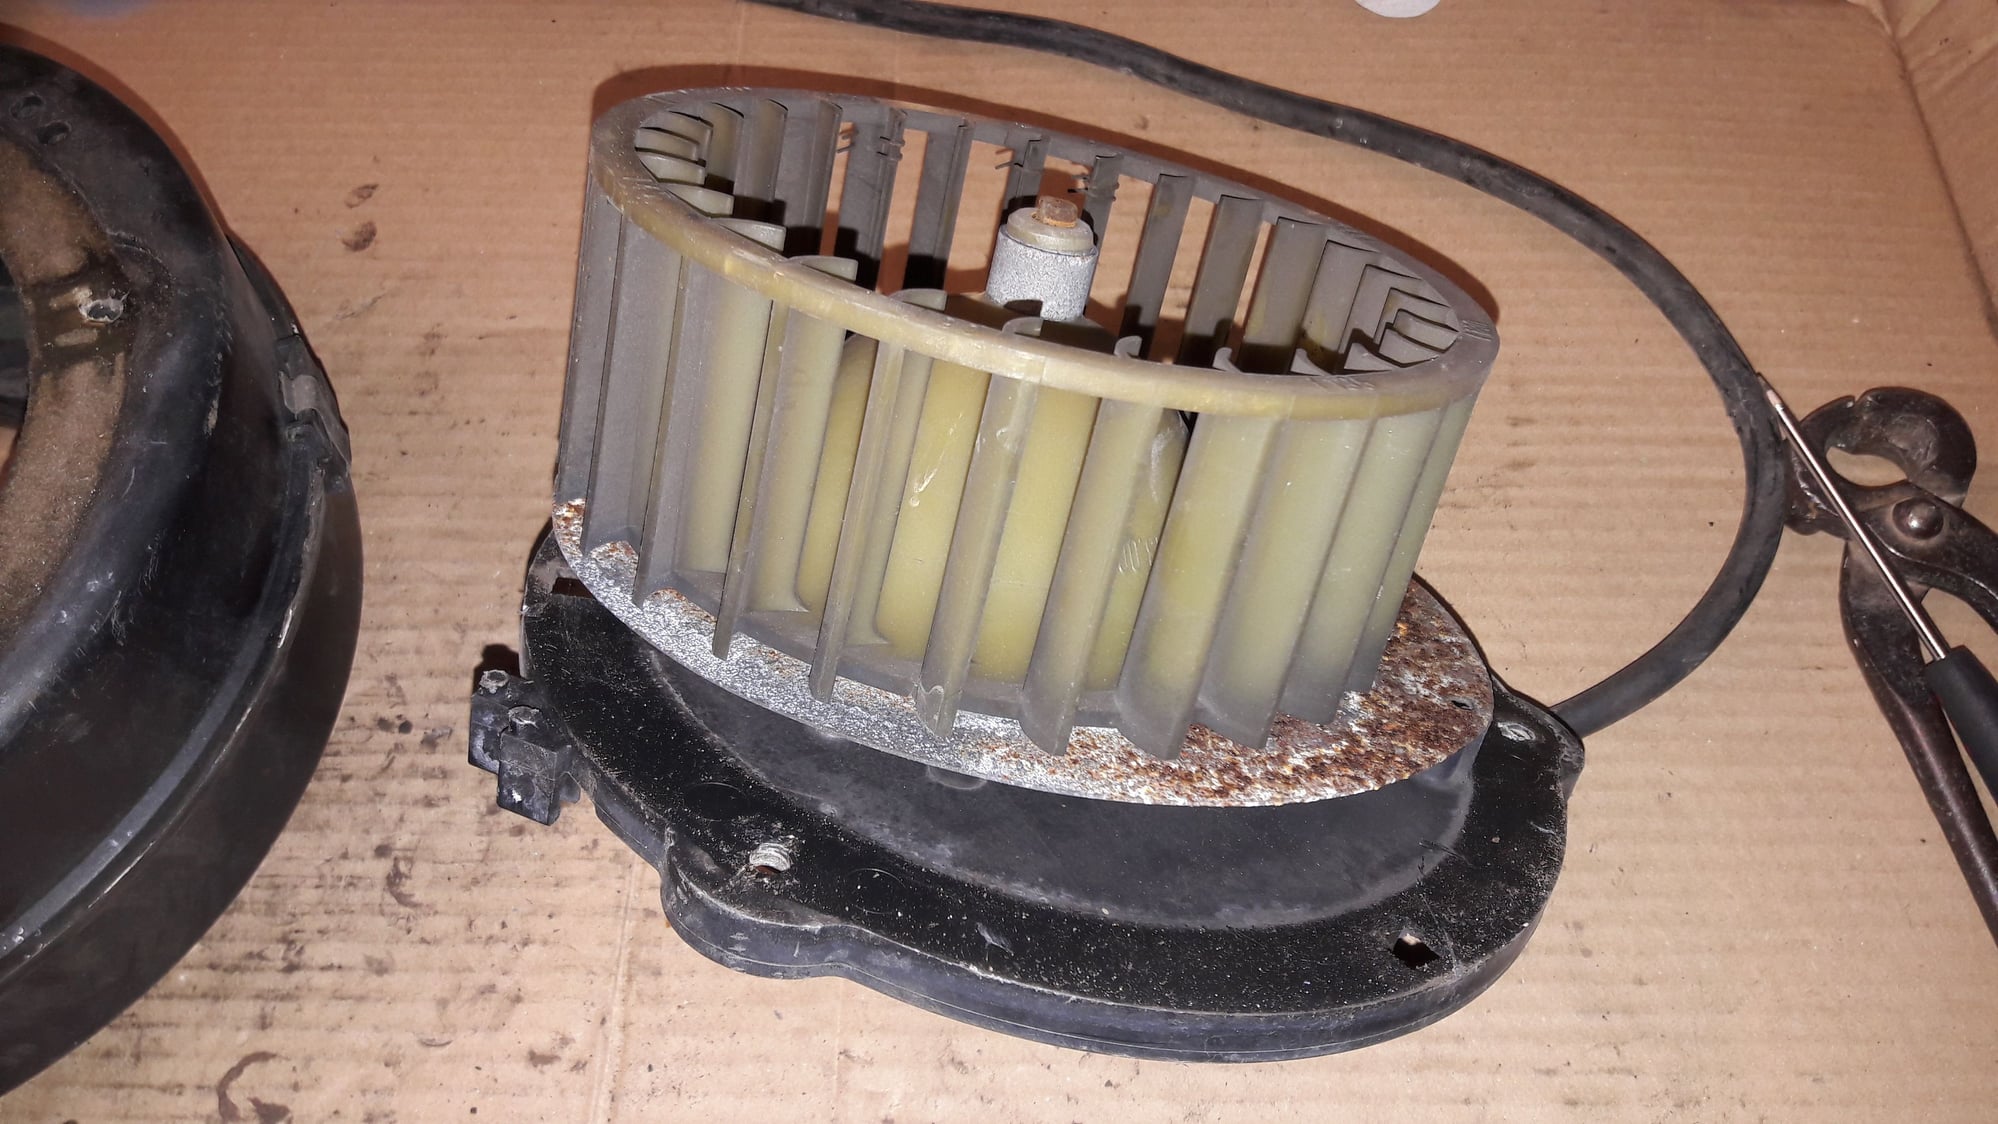
Motor pulls out of top housing after releasing 2 screws
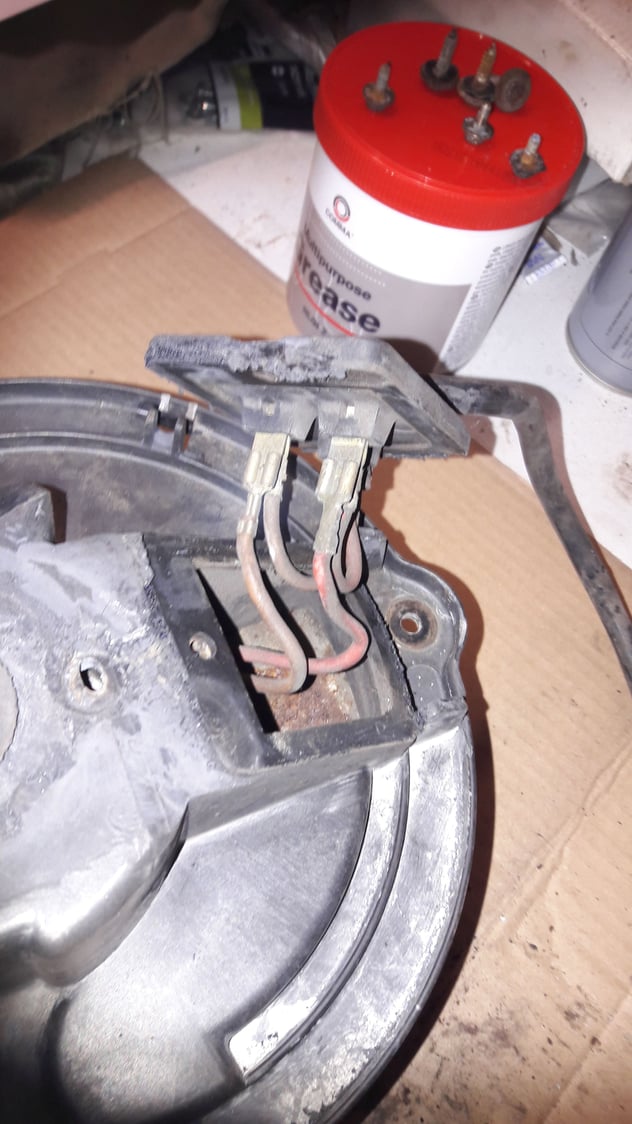
Detach wiring to release motor fully
Yuck, pass the vinegar...
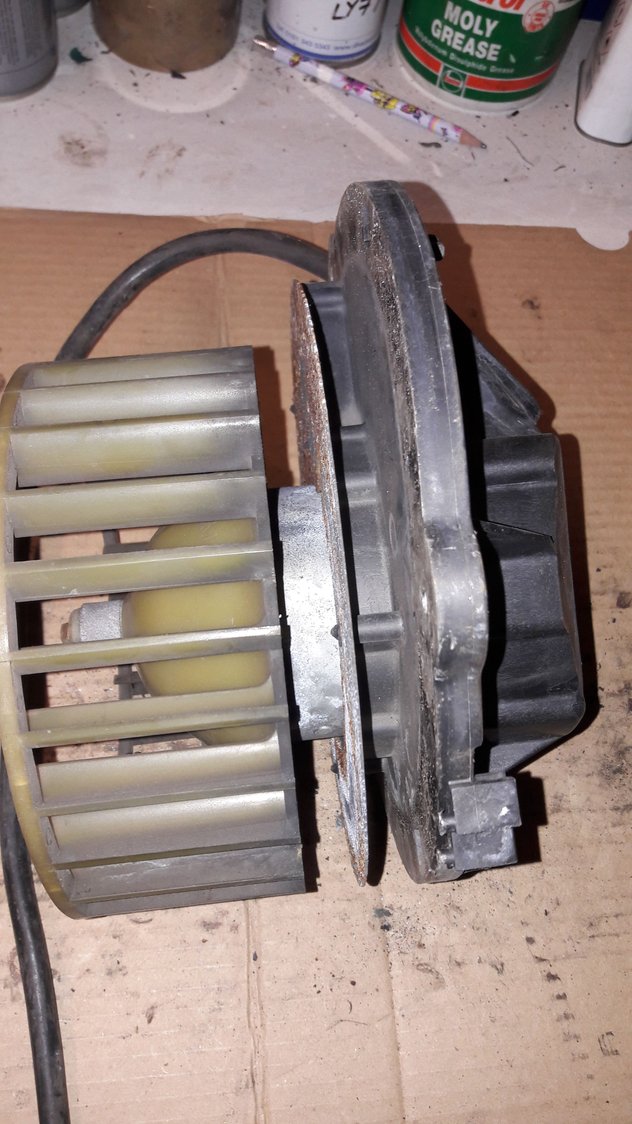
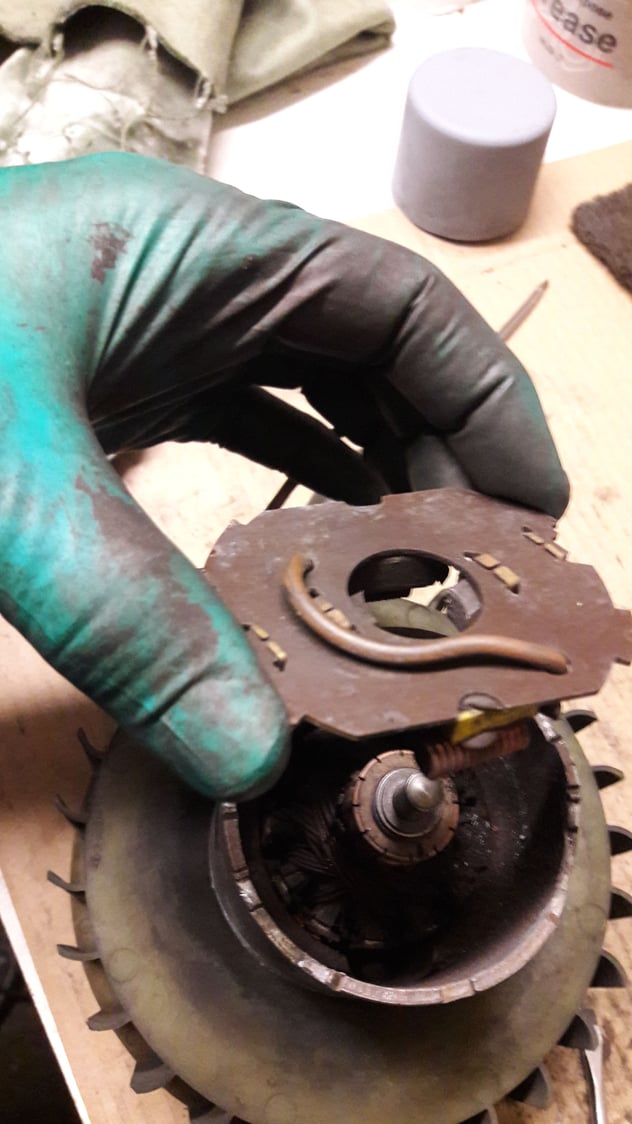
Lever off the motor shaft top bearing plate. I used a screwdriver, a watch opening tool would be better
It's from an '85. I will try to see if it can be made to work as I am just about to spend ��� on callipers for the same car and replacement shortblock for my other '85 - yep don't know why I need 2 identical 928s either
I'll tell you why: You can work on one while driving the other. That way, your interest in the cars is always picqued. It is no fun working on a 928 and not ever having an opportunity to drive one.
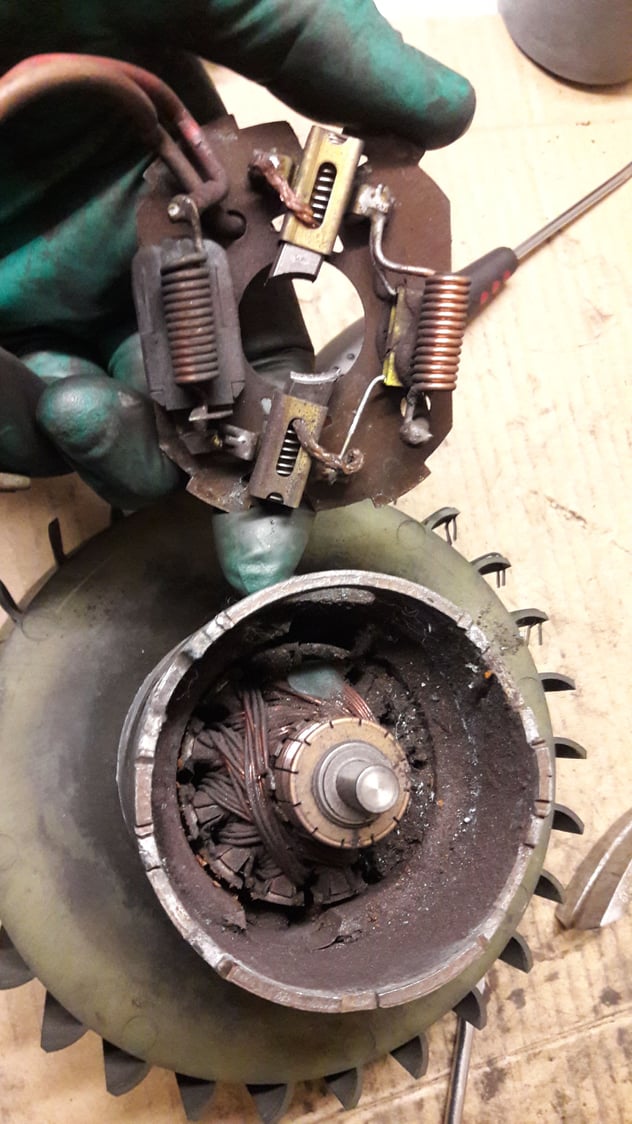
Your brushes are completely perished. Note the copper conductor hard up against the long square housing with slot where the spring pushes the brush against the commutator. It won't run for long without new brushes as the spring pressure will only push the brush on just a bit longer. Compare the current brush to a new one. You should find a motor repair shop and see if they can replace your brushes while you have it apart.
Will require a bit of careful soldering on the brush plate. Also, your new brushes will not be perfectly rectangular, they will be angled or chamfered on the contact end.
docmirror - yes I thought so too. Will take a look at options or it shot then VW Passat route might beckon.
soontobered84 - "I'll tell you why: You can work on one while driving the other. That way, your interest in the cars is always picqued. It is no fun working on a 928 and not ever having an opportunity to drive one"
Haha, gone one better and bought a 944 which actuals works, damn now that will break down too...
Ectually, I just took another look at the brush plate in place on the motor housing, and the brushes while they are quite worn, are likely good for a while yet. The hole in the brush plate is just slightly larger than the commutator, and the brushes stick into the hole a fair amount. Might be able to get a few years out of that set of brushes for now. It was premature to condemn them without looking carefully at the commutator size comparison.
If you can solve the seizure with new, or clean/lubed bearings, it will live again!
The bushings on the housing have you sourced them. I have a motor that runs fine but the housing bushings are worn. A parts list would be very helpful to rebuild an NLA part.


 03-02-2017, 03:37 PM