When you click on links to various merchants on this site and make a purchase, this can result in this site earning a commission. Affiliate programs and affiliations include, but are not limited to, the eBay Partner Network.
Thanks for all the great feedback on the cluster kit - Ricardo, Speedtoys and others. Bryan has incorporated the relevant updates/tweaks into the design for all to benefit.
The "Stop" light issue seems to be on the car side relative to the use of an LED and Bryan is adding the resistor as standard on new kits.
__________________
Does it have the "Do It Yourself" manual transmission, or the superior "Fully Equipped by Porsche" Automatic Transmission? George Layton March 2014
928 Owners are ".....a secret sect of quietly assured Porsche pragmatists who in near anonymity appreciate the prodigious, easy going prowess of the 928."
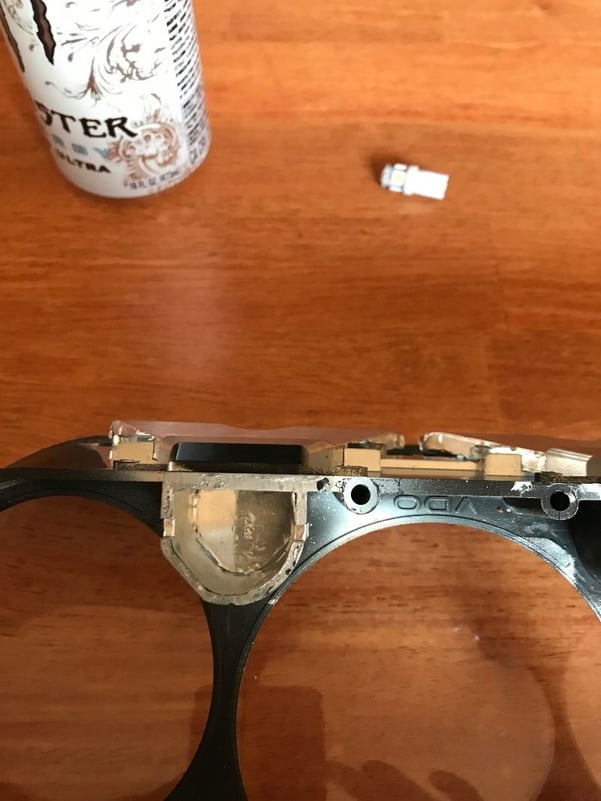
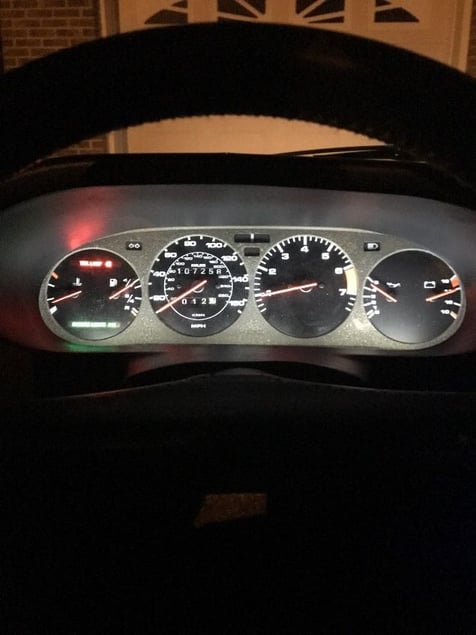
Just want to post my experience with this kit on my 83 928S. As usual dealing with Roger is easy so I opted to try out the kit because I was having speedo issues and realized the crimp connections were the cause regardless of my efforts to solder the connections. Here is the kit installed, which took a few hours taking my time.
After the initial installation everything was fine, but I was not satisfied with the gauge brightness despite the addition of the LED bulbs. To me it was as bright as the stock bulbs so after discussing with Roger I decided to coat the bulb area with reflective foil as shown below. I had already added to the foil to the prisms.
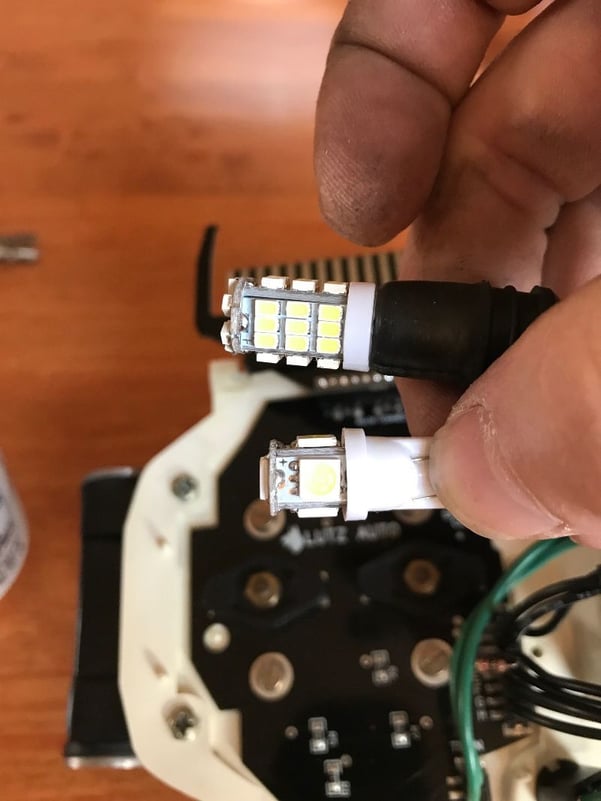
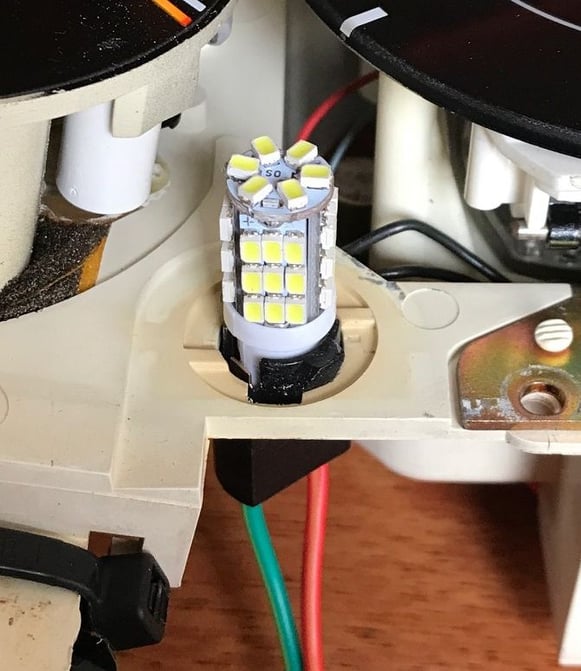
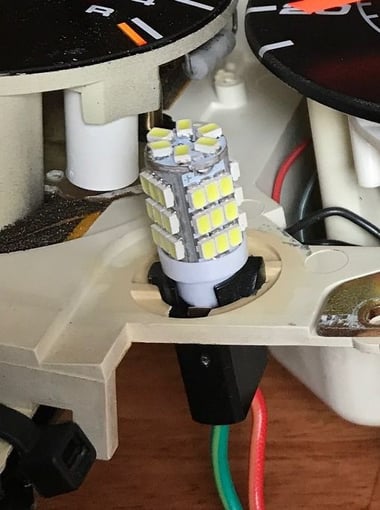
Adding the foil to the bulb area indeed helped, but it was still not as bright as I wanted. So I set out to find a replacement bulb and located these on Amazon, which was a pack of 20 for $16.99 shipped. These bulbs are listed as 350 lumin vs 95 lumin for the bulbs provided.
These LEDs are clearly longer vs the LEDs provided, but have significantly more LED's on them. The rubber connectors that pass through the back of the board don't provide much security so I decided to use some zip ties to secure. After pulling the pod apart I attached a zip tie overlapping both the connector and LED.
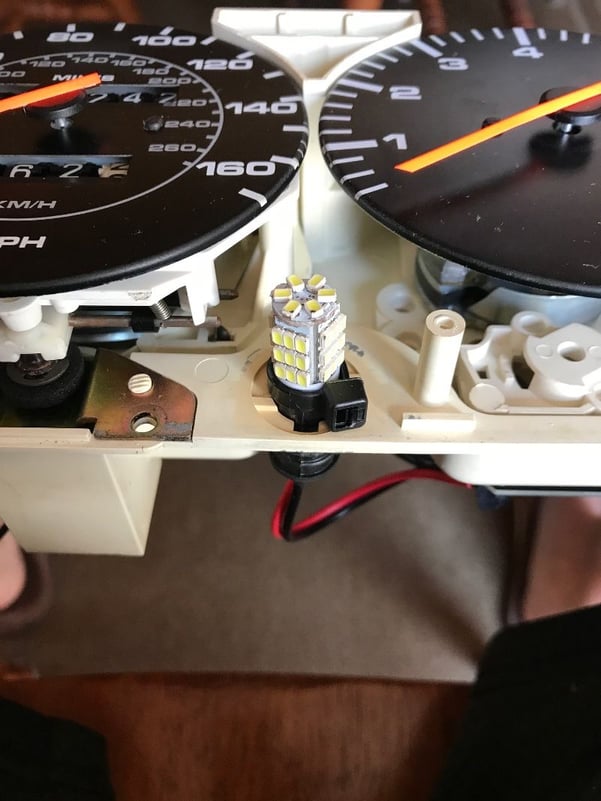
I then pulled the LED out until it was stopped by the zip tie and applied a zip tie to the outside.
After reinstalling the gauge pod I can tell you the dash is significantly brighter and will definitely meet my needs. I will update the post this evening once the sun goes down so I can take a picture of the dash lights at night. I built my own dimmer after the factory one took a dump and it seems to dim the LED about 30% from full brightness so I should be good.
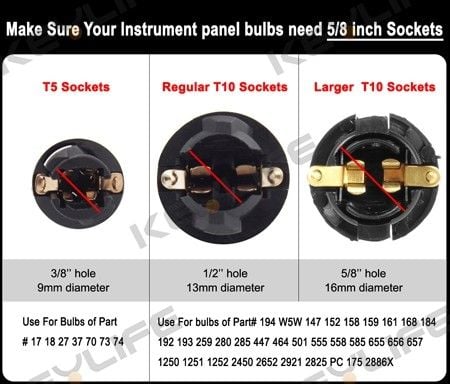
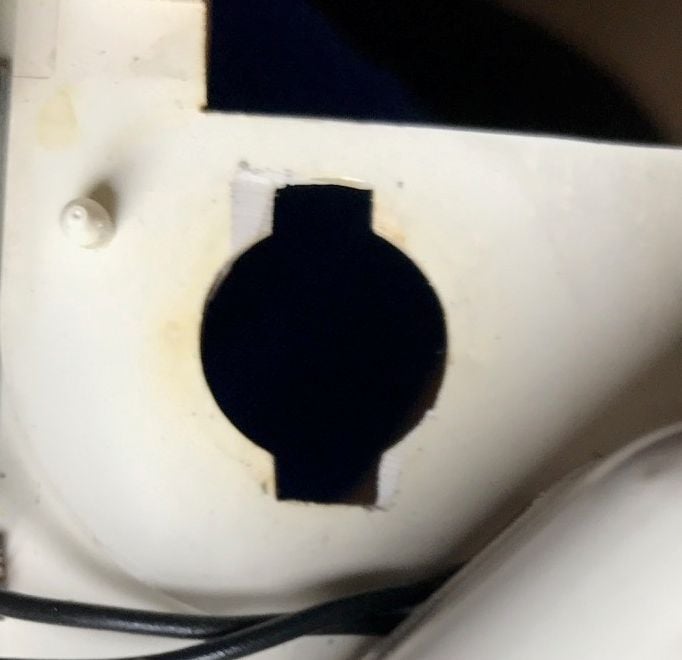
The new LED bulbs did the trick and the dashpod has more than enough light for my taste. I ordered some different T10 socket connectors to get a connector that actually fits the OEM hole so I can ditch the zip ties. If I get something to work, which I think I will, I will post the results. The dashpod hole is ~1/2" so it is actually the same size as a standard T10 socket connector, but the trick is to get the right prongs so you can twist into place.
IMHO, theres more to be said about fatigue when there's that much light, thats wayyyy too much. But sure, you can solve that problem by complicating the solution with more parts.
IMHO, theres more to be said about fatigue when there's that much light, thats wayyyy too much. But sure, you can solve that problem by complicating the solution with more parts.
Late night troll strikes again. For sure I am the first person on Rennlist to post on how to improve the brightness of the dashpod using LED's. If you bothered to read instead of going full troll then you would see the LED's are on a dimmer. Please keep inspiring me with your wisdom.
I personally like the idea of dimmable illumination that is too bright at night. The issue I have on my '84 with stock illumination is not at night but rather at twighlight where the ambient light isn't enough to clearly see the gauges and not dark enough to provide contrast. During this time more brightness is needed. Then when it gets darker just dial it down.
4pm is not late night...maybe that's our first sign of trouble here.
Maybe this isn't the kids-table forum you're looking for.
Rather think Roger's speced out the proper lighting, as is.
8000+ posts from Speedtoys and your response registers at 3am...troll. The kit is manufactured by Lutz Auto so Roger didn't spec the lights, but please keep posting so the forum can benefit from your knowledge.
I found that most customers wanted to emulate the stock lighting which by current LED standards is not so bright. Hence the kit matches that specification.
We have now added additional info to the instructions to enable those that want Bright LED to do so.
Thanks for the input.
I was able to source some lock type connectors to replace the rubber connectors provided with the kit. The rubber connectors work just fine, but when I went to the longer bulb I cannot push in the connector far enough to lock in place before it bottoms out. The rubber connectors have ribs so you need to push past the first rib to lock the connector in place. See the picture below comparing the rubber connector with short bulb (right) vs the modified connector with long bulb (left).
The actual hole in the dashpod is ~0.5", which is the standard size for the smaller T10 connectors available. The trick is to find one that has the correct width tabs (to fit factory tab width) as well as having the ability to rotate 90deg once inserted so that it can lock in place.
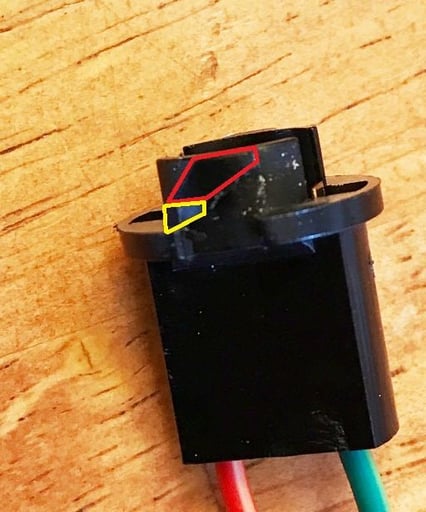
I sourced the following connectors from Amazon, but they do require modification.
Two issues with these connectors when purchased as is..
The tab is wider than the tab on the dashpod so you have to use a file to make the tab hole wider
The tab only allows for minor rotation before it locks so it you want to rotate 90 deg you have to remove some material first.
In the picture below I widened the two tab slots using a file along with having to put a slight angle on the tab slots
In the picture below I had to remove the material highlighted in yellow to allow the connector to rotate 90 deg. This isn't necessary as it actually locked into place, but I wanted it to rotate 90deg so I used a dremel with a cutoff wheel to remove the material highlighted in yellow. The area highlighted in red is tab used to hold the connector to the gauge pod.
I am quite confident that an actual connector exists that requires no modification to the connector or dashpod, but I didn't find it just yet. Now that I know what I'm looking for I should be able to find something that is plug and play.
The pic below shows how the connector locks in place prior to cutting out the portion I previously highlighted in yellow. It seems to secure just fine so not necessary to remove the extra material so that it can rotate 90deg. However, it took less than 10 minutes to modify to allow me to rotate 90 deg.
And the picture after I removed the material previously highlighted in yellow, which then allows it to rotate 90deg.
I found that most customers wanted to emulate the stock lighting which by current LED standards is not so bright. Hence the kit matches that specification.
We have now added additional info to the instructions to enable those that want Bright LED to do so.
Thanks for the input.
Hey Roger. do you have any of these kits available? Also do the instructions for LED bulbs include bulb recommendations?


 12-05-2017, 10:57 AM

 George Layton March 2014