When you click on links to various merchants on this site and make a purchase, this can result in this site earning a commission. Affiliate programs and affiliations include, but are not limited to, the eBay Partner Network.
I've read this thread with much interest as the owner of a 944 S2 and maker of lenses for many different vehicle applications. I think you'll find they're actually cast from polyurethane resin, perhaps Roger could clarify?
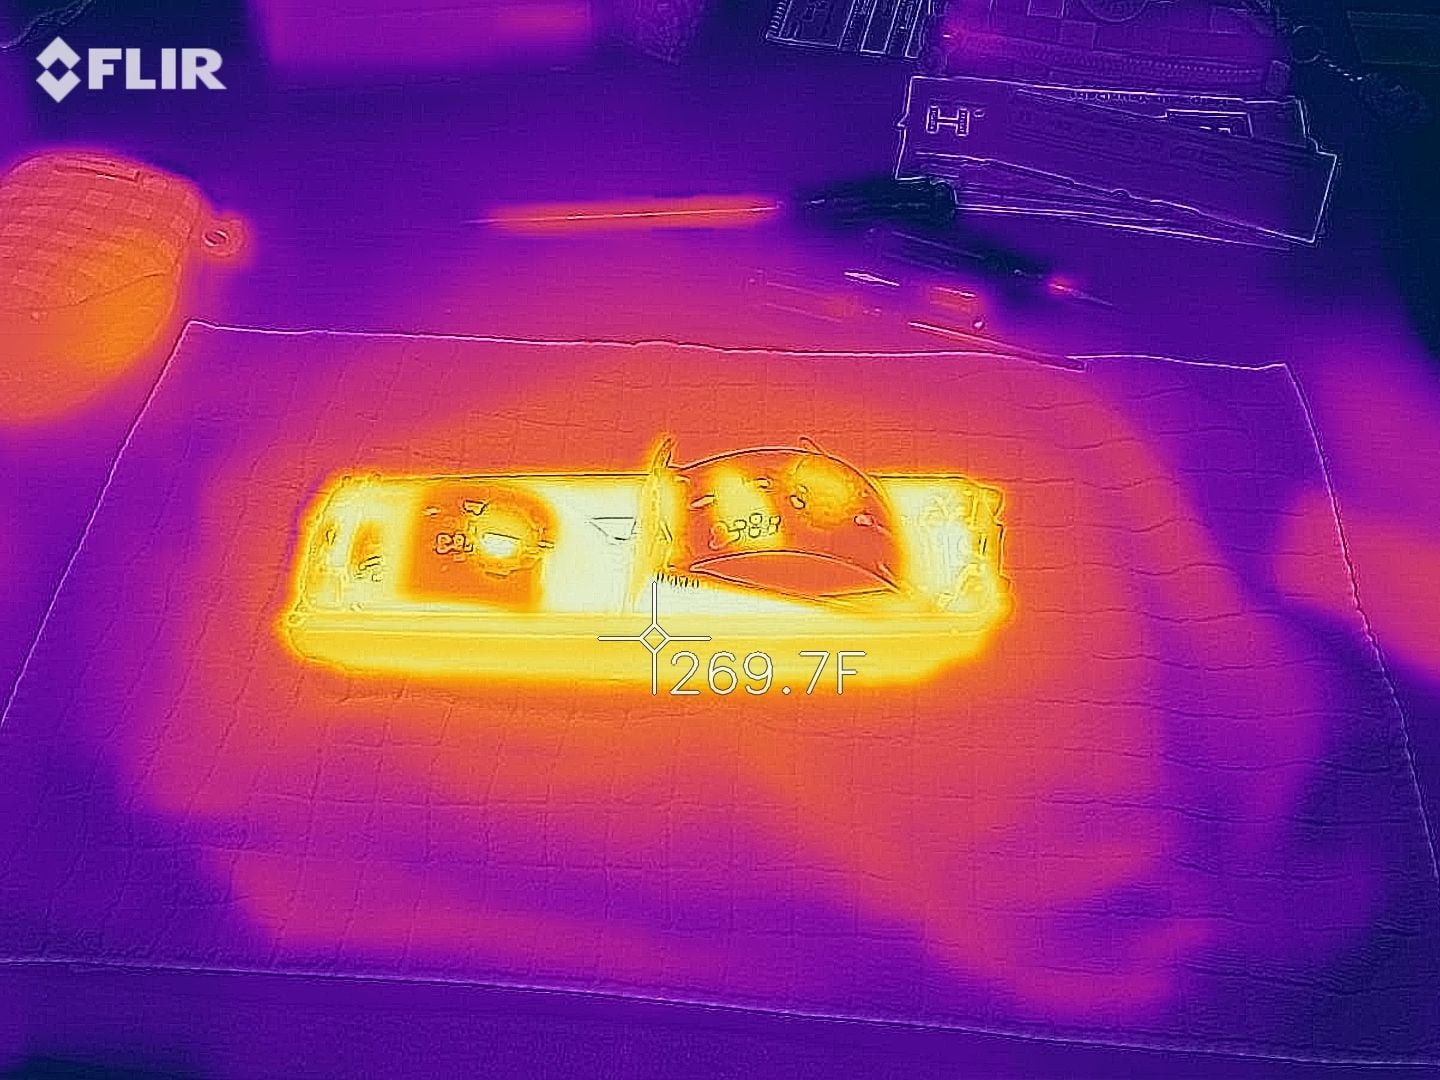
1 down one to go... Going to leave the second one in for about 35minutes... Vs 25 with this one.
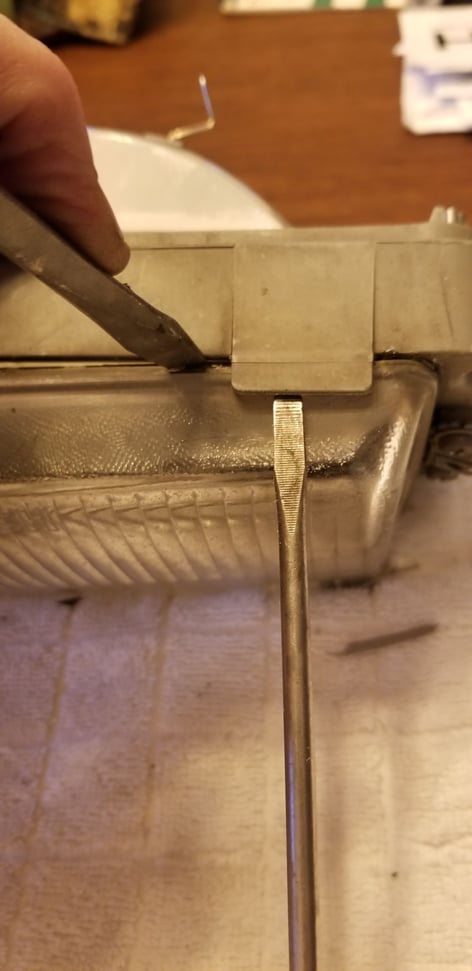
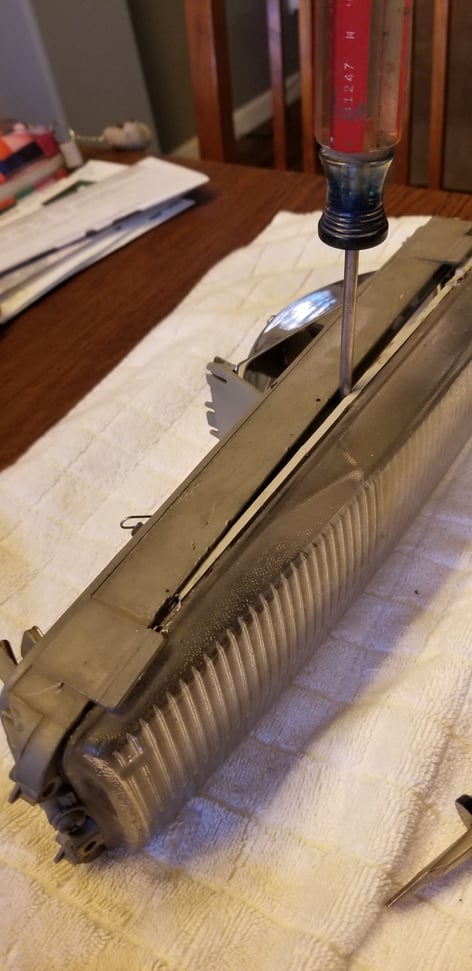
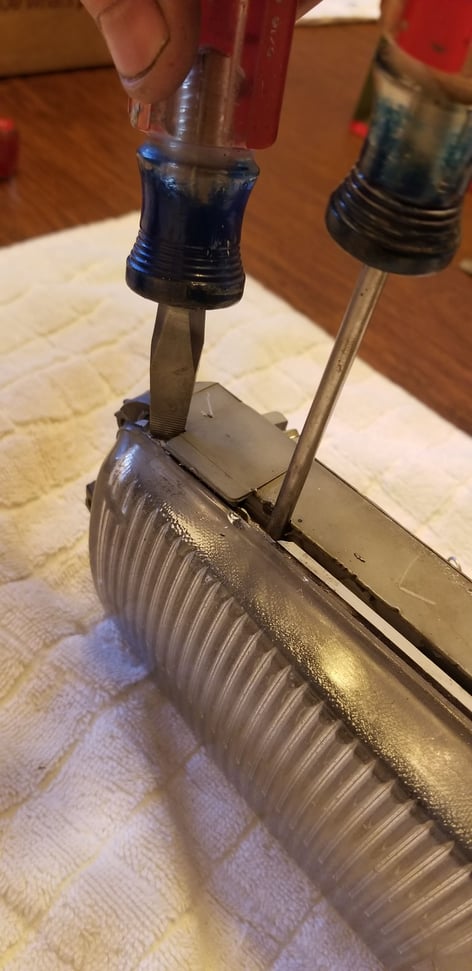
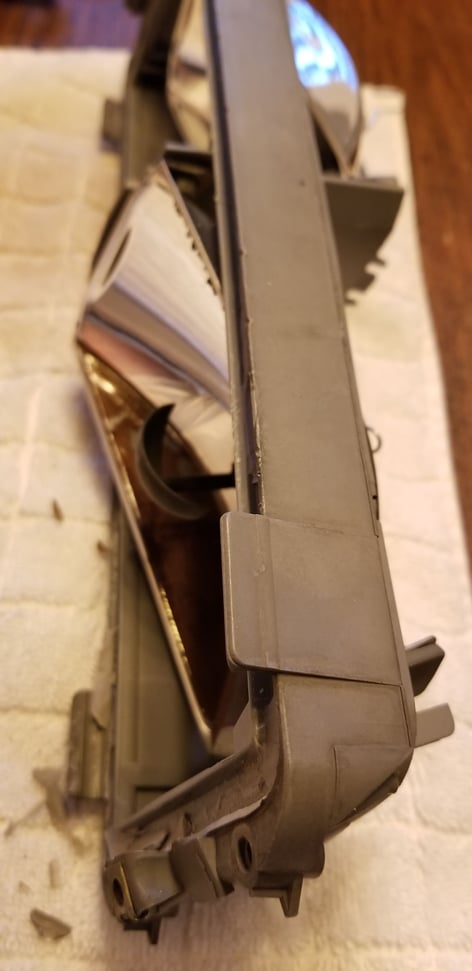
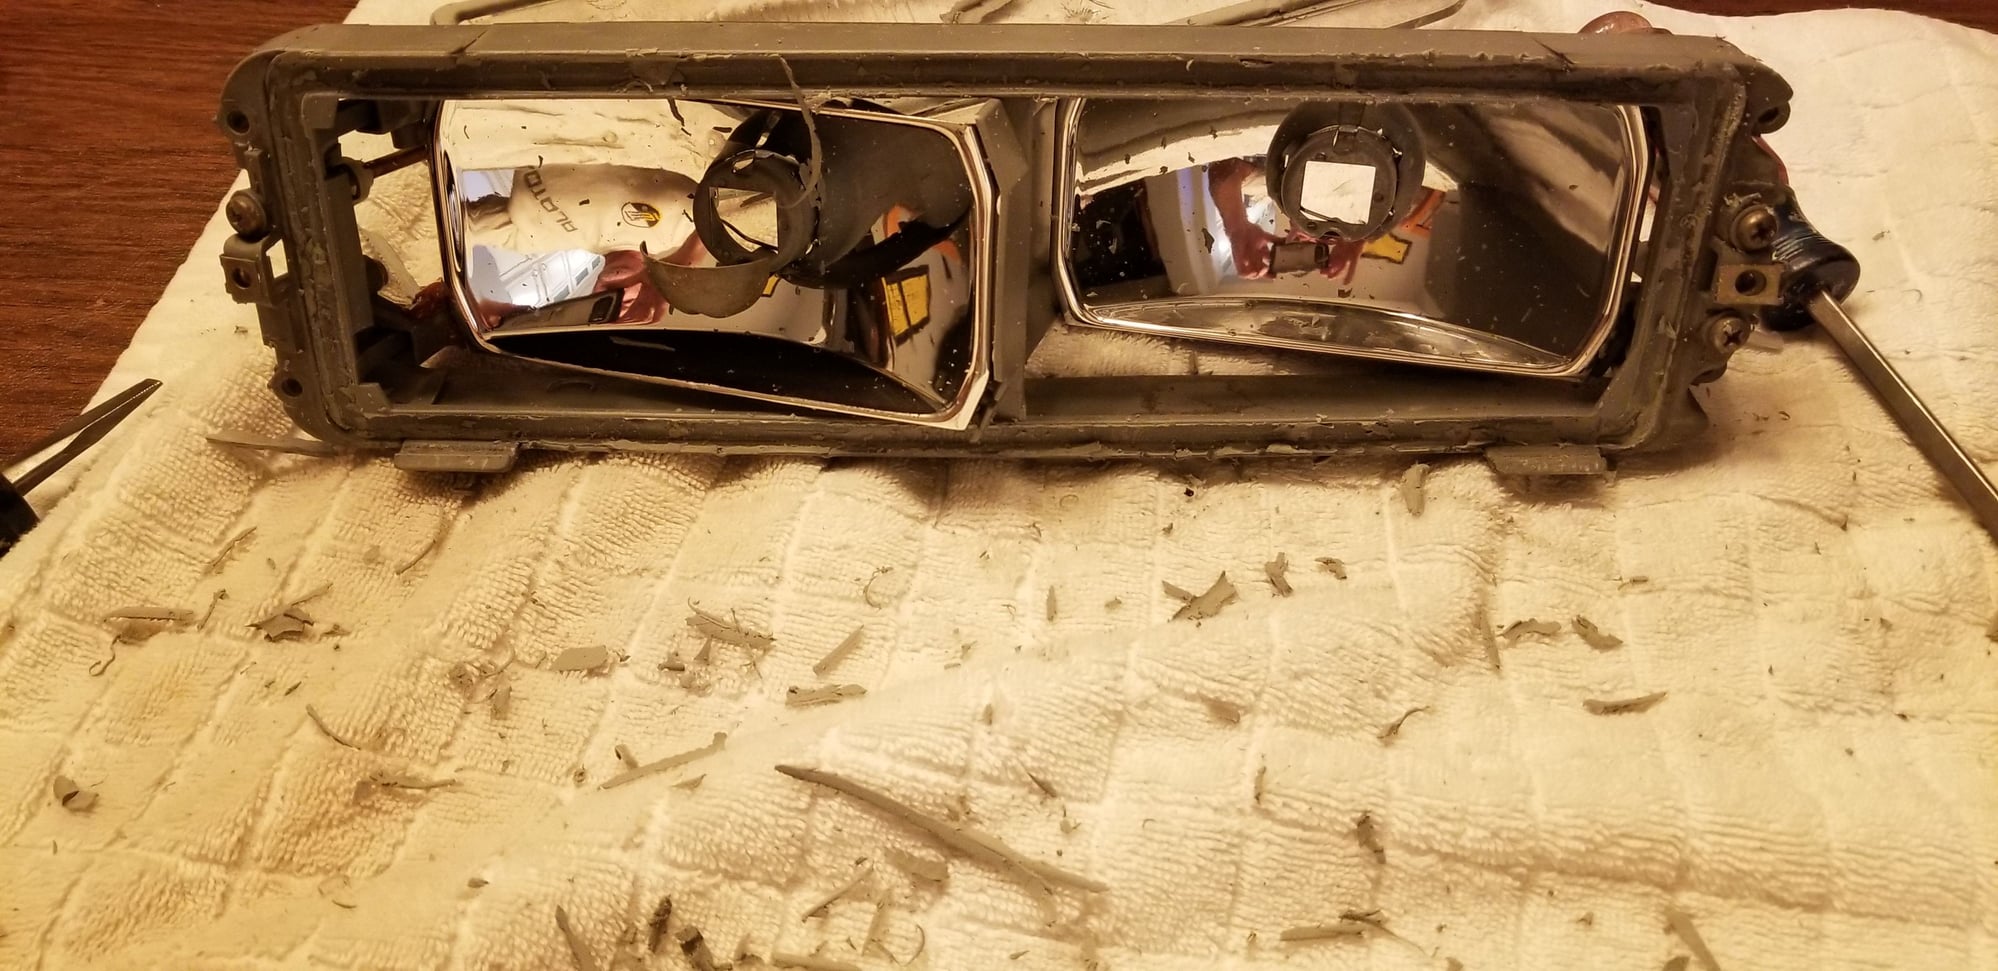
Start in the corner just to the outside of a tab. Gently pry up on the tab just ever so slightly while at the same Time twisting a screw driver between the plastic shroud and glass. You will see that the glass/glue will eventually release and will be free of the tab holding it.
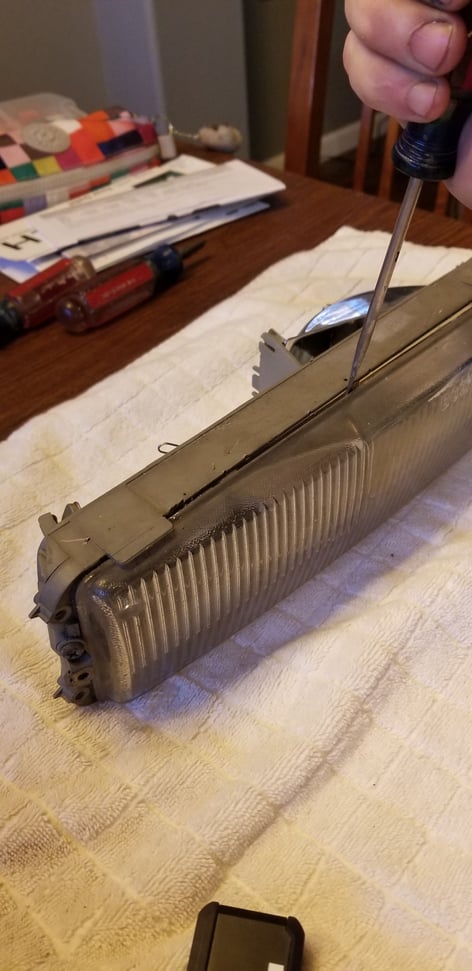
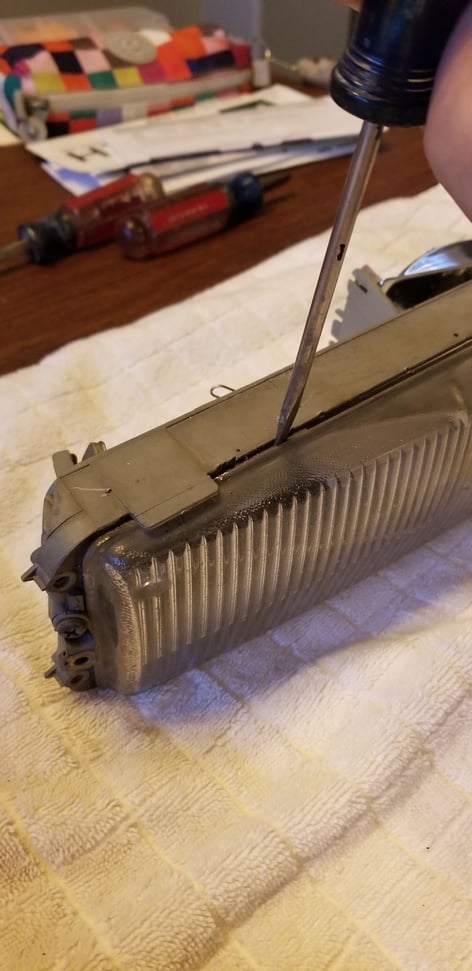
Now just work your way down the edge with the screw driver in the small gap. Twist the screw driver as you go...this prys the glass away. It takes a bit of pressure and I did have 2..3 very small sections of glass chip away. You will leave some marks in the housing also.. It is soft and you are prying against it. Once you get near another tab, pry it up slightly again and insert the screw driver in the gap you have been forming... Twist the screw driver ... Repeat all the way around.. Sitting on hot pad on the dining room table...
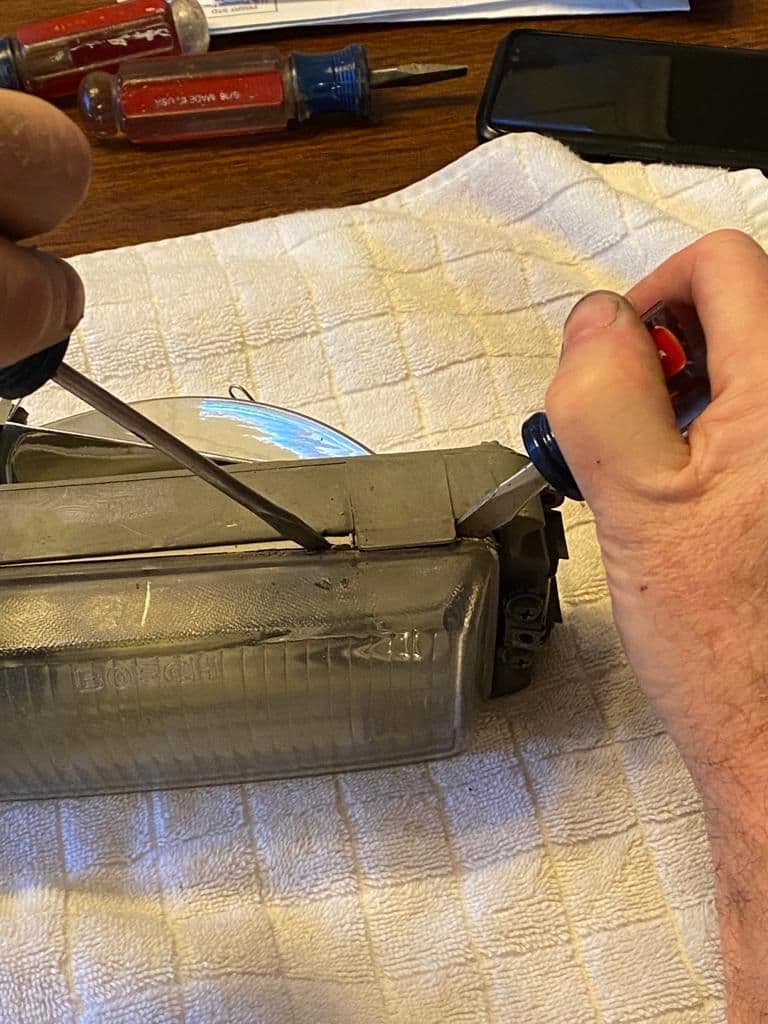
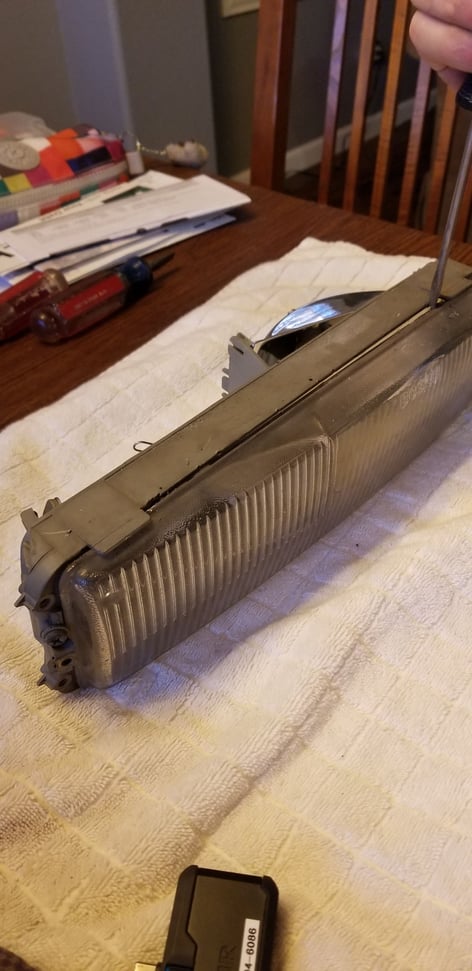
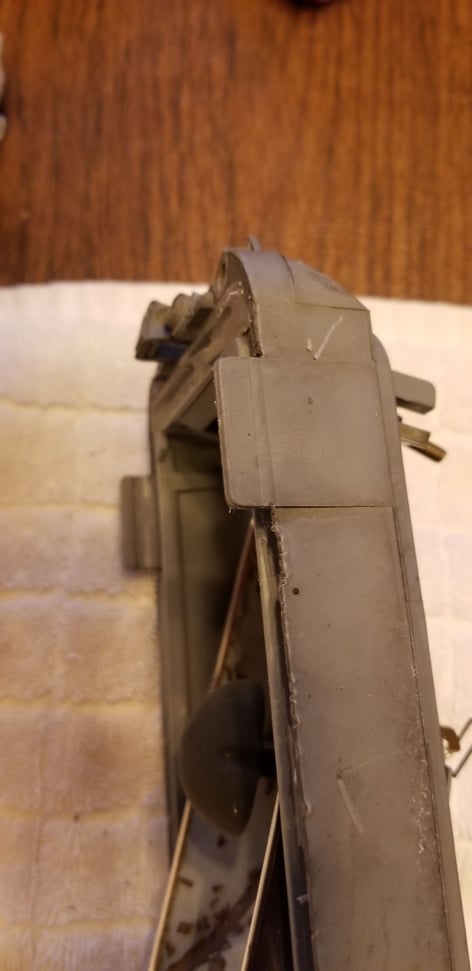
Getting the old glue out of the housing is a PITA. The longer time (35 minutes) seemed to help a little. The 300 F temp works fine. No issues. Used the same process.. Still managed to chip a few little sections along the edge. ( its being replaced anyway right!!?!) The key is, once you get the glass far enough away from the housing use a skinnier screwdriver to get farther in the gap and then pry against the back of the glass lens rather than the edge/lip. It will prevent further chipping.
Tony, and others playing along at home - Consider using a blade-style scraper and a couple painter's spatulas instead of the screwdrivers, and avoid the damage.
And also Dr. Bob, on an additional side note, the 3d printing of the adjusters for these fog lights as project has not been abandoned. In another thread (3D Printing - Rennlist - Porsche Discussion Forums) GT6ixer posted that the lack of space in his current living quarters kept him from going forward with this project, but that he is close to resolving that issue. Good news for us all, I think.
Without knowing any better, I carefully harvested all the little bits including reflectors way back when I first replaced my fog light lenses. IIRC the whole thing minus the bucket was around $125/side, so you know it's been a while. Knowing what we do now, of course it would be nice to have the rest of those assemblies so I could put plastic lenses on with shatter guards of some sort. Or Gorilla-proof glass maybe. There's a whole set of new in the spares pile, and as luck would have it one on the car has a crack, so I may get to try the plastic lenses for driving duty, and save the new boxed bits to put our kids through cat college.

 02-15-2018, 03:34 AM


 There's a whole set of new in the spares pile, and as luck would have it one on the car has a crack, so I may get to try the plastic lenses for driving duty, and save the new boxed bits to put our kids through cat college.