When you click on links to various merchants on this site and make a purchase, this can result in this site earning a commission. Affiliate programs and affiliations include, but are not limited to, the eBay Partner Network.
Fred - Your method worked exactly as described. But...it seems impossible to get a torque wrench in the cramped space to slide the socket on to the nut.
Jon,
Indeed I know of no way one can directly get a torque wrench in there. I used an open ended wrench and my elbow sensors. Given it is locked by the taper joint and the nut itself it should be OK but I feel a tad uncomfortable without knowing for sure that I got it right- especially on a critical joint. I did contemplate trying to use a spring balance at a given radius but figured the accuracy would be little better than what I was doing given the nut size is "user friendly". As measure of limited control I find a nut of the same size, torque it to the specified value and then put my open ender on the same nut and pull on it to "get a feel" for how tight it is. Then apply the "same amount" of elbow grease on the ball joint nut. Not perfect of course but better than nothing.
In this regard I recently purchased a set of Draper Crow's foot wrench's - whether or not they will do the trick remains to be seen but it is a better approach. I will sure enough find out when I have my front suspension apart in a few weeks time.
Hopefully one of our more experienced bretheren may be kind enough to chime in as to how they quality assure tightening of these joints?
Fred - Hmmm...I think your spring scale idea would work pretty well. but that would have to be a very beefy spring scale. I'm a little concerned I may have over tightened it. When I remove the other side I'll mark the nut position and just break the nut free, then try to pull it back into position and see what effort is required (similar to your elbow calibration method).
I envy the creator of the video I used as a reference (earlier post). He has an intermediate sized digital torque wrench and what looks to be a shallow 19 mm socket. He has no trouble at all torquing the nut. I don't recognize the tool brand, but they appear to be high end quality.
IIRC a long extension and universal joint between the torque wrench and socket was the best I could do with the control arms bolted to the car and all the other bits in the way. Someday I'll have a torque wrench with interchangeable heads and a select assortment of correctly sized box ends to do just this kind of work.
Mike
Mike - I have seen the multi-head wrenches, and was wishing I had one. I have a good assortment of extensions and universals. I was able to get the socket on as you described. I didn't feel confident in the output torque (too much flex/twist and possibly geometry such that the output torque is less than the input.).
With your response and Fred's I feel I've done all I can do with the tools I have. Thanks!
During this boot replacement process whatever remaining crumbling outer casing fell off the ABS harness. So removal and repair is the next task. I have the self-vulcanizing tape ready (I saw this coming).
Last edited by Captain_Slow; 12-29-2016 at 12:56 PM.
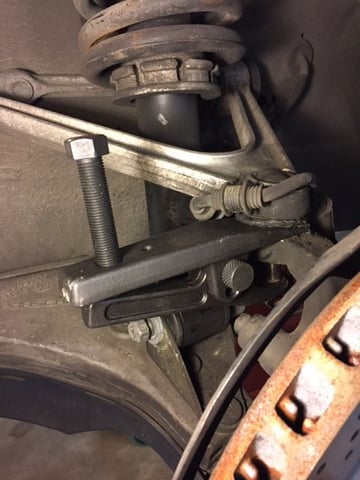
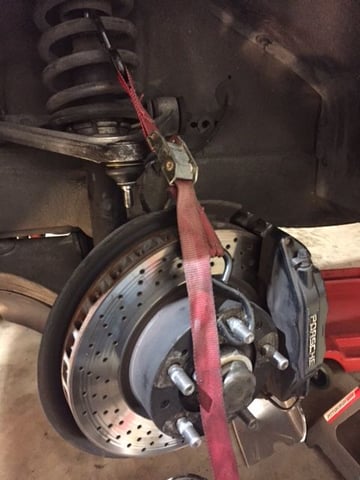
Finished the remaining side in half the time of the first attempt. Familiarity and lessons learned helped. One surprise was how easily the ball joint stud separated from the hub carrier (not sure what it's called). Just inserting the ball joint separator tool seemed to do it. Turning the bolt to act on the lever against the threaded stud never produced resistance -- eventually I realized it was already loose. Kind of worrisome -- it's not supposed to be like that. Removing the nut required a good bit of effort, but maybe the stud wasn't seated fully into the tapered joint. I've tightened to the original number of threads showing and effort to remove... but don't want to tighten further until I buy or borrow a box end torque wrench. Using the strap to retain the hub/rotor/caliper in place made the job much easier and quicker.
If the taper was not formed correctly then I doubt you would have been able to get the nut off. No idea what other folk's experience is but having undone ine a few times I find disengagement of the joint a somewhat inconsistent trype of thing. Sometimes you have to wind the joint splitter in tight and then give it a smack with a rubber mallet to get the joint to pop. On another occasion I have seen the joint split with seemingly little tension on the splitter. Whether this is reflective of poor torque control I do not know but I reinstated the same joint seemingly without issue.
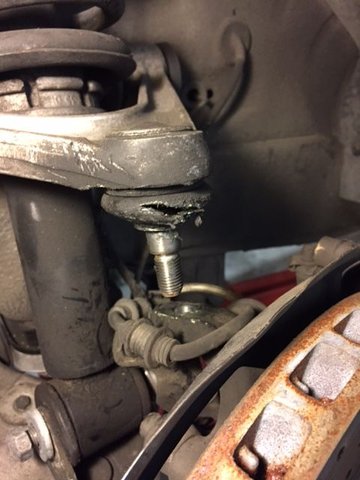
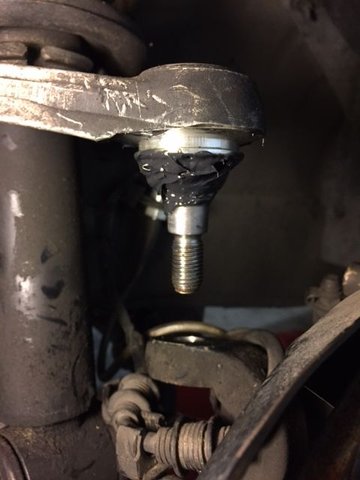
Fred - Your experience makes me feel better. I forgot to mention the left side had a plastic cup (a semi cup with a hole in the center for the ball joint stud) that seemed to have a protective purpose. The right side did not have it. I don't think either side has been replaced previously. My S4 is an early 88. Everything on my car that has a date visible says 87. I have the larger exhaust resonators, too. Wondering if there was a ball joint design change circa 87-88 and I got one older and one newer design.
Fred - Your experience makes me feel better. I forgot to mention the left side had a plastic cup (a semi cup with a hole in the center for the ball joint stud) that seemed to have a protective purpose. The right side did not have it. I don't think either side has been replaced previously. My S4 is an early 88. Everything on my car that has a date visible says 87. I have the larger exhaust resonators, too. Wondering if there was a ball joint design change circa 87-88 and I got one older and one newer design.
Hello Jon, and hope you had a great Christmas and new years ? Here is a late Merry Christmas and a happy new year to you and your family.
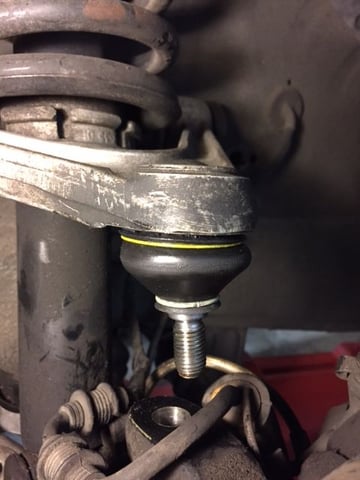
Your post could not have come at a better time (Bertrand made me aware of it.) I am replacing my shocks and I will adjust the ride height after and while I was inspecting the upper ball joints, one side the boot is starting to tear a wee bit, so time to change it. the other side is fine, but I will replace the boot also and then both will be done. I will have to get an extractor also I am sure. I have see the video you have posted already and yes it's pretty good. I also saw a video by Kenny Weisz which replaced the shocks on his 86, which is just like my 85. I will also find some other posts, since none of them show how to remove the long pin holding the rear shocks at the bottom. It's great having my newly built 24 x 24 garage to work in, now I can do winter projects !
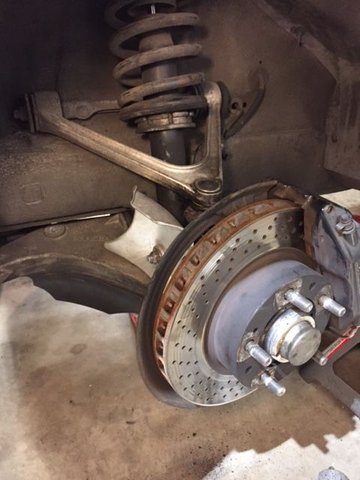
As you can see from my dirty parts, you can see it starting to tear on the right side.


 12-29-2016, 01:43 AM