When you click on links to various merchants on this site and make a purchase, this can result in this site earning a commission. Affiliate programs and affiliations include, but are not limited to, the eBay Partner Network.
Blunt right up front question: are early and late 928 fuel tanks the same?
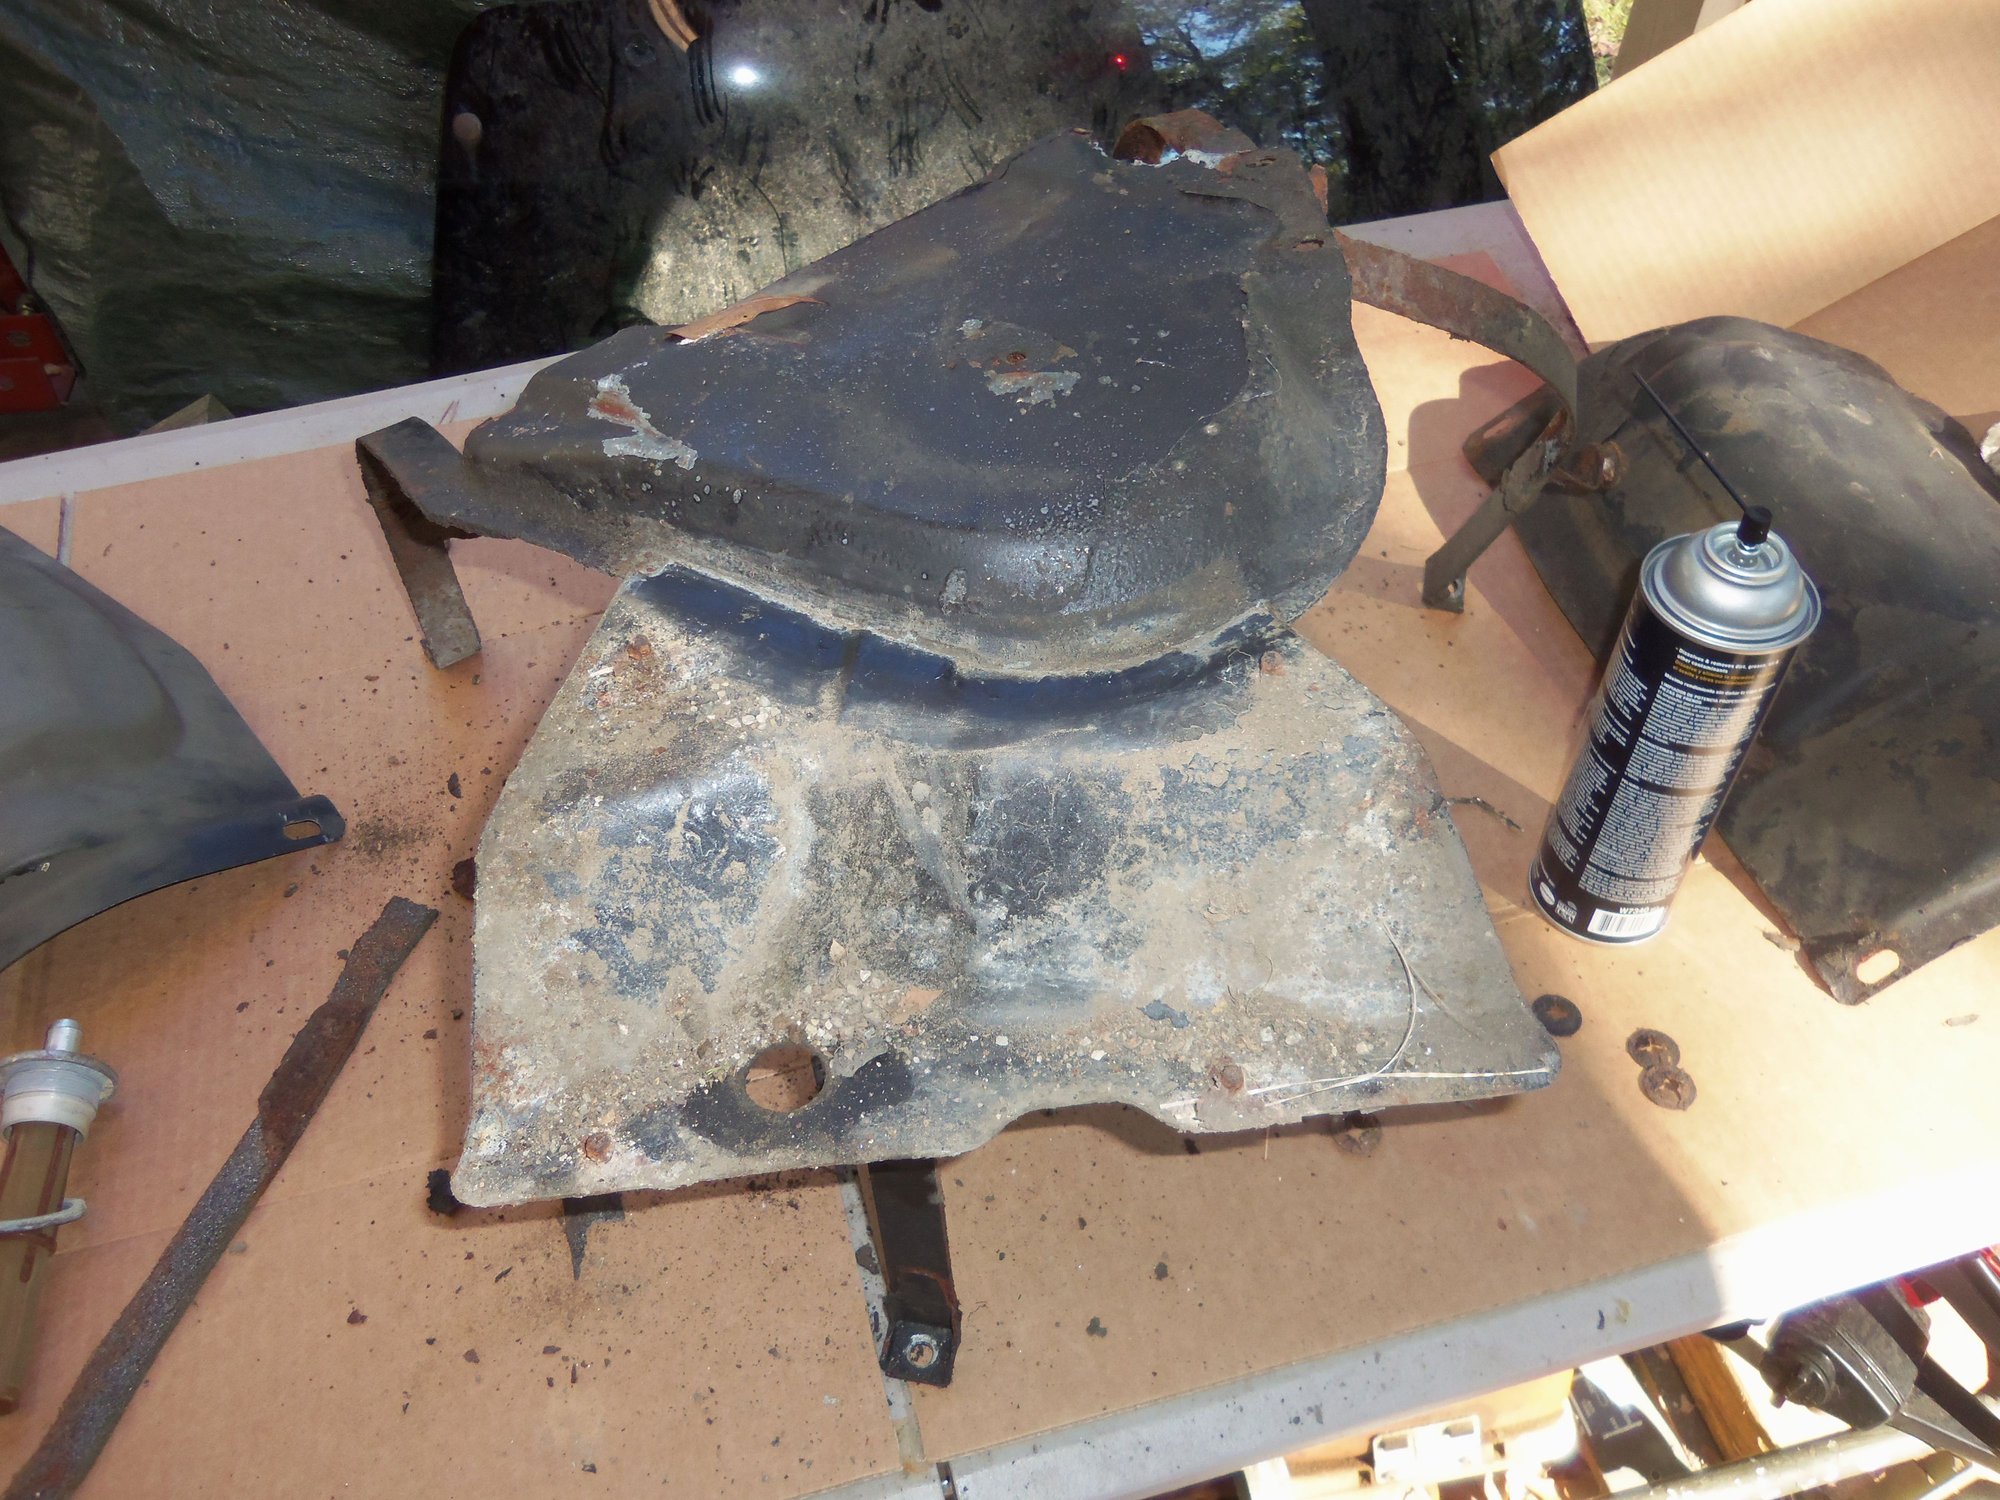
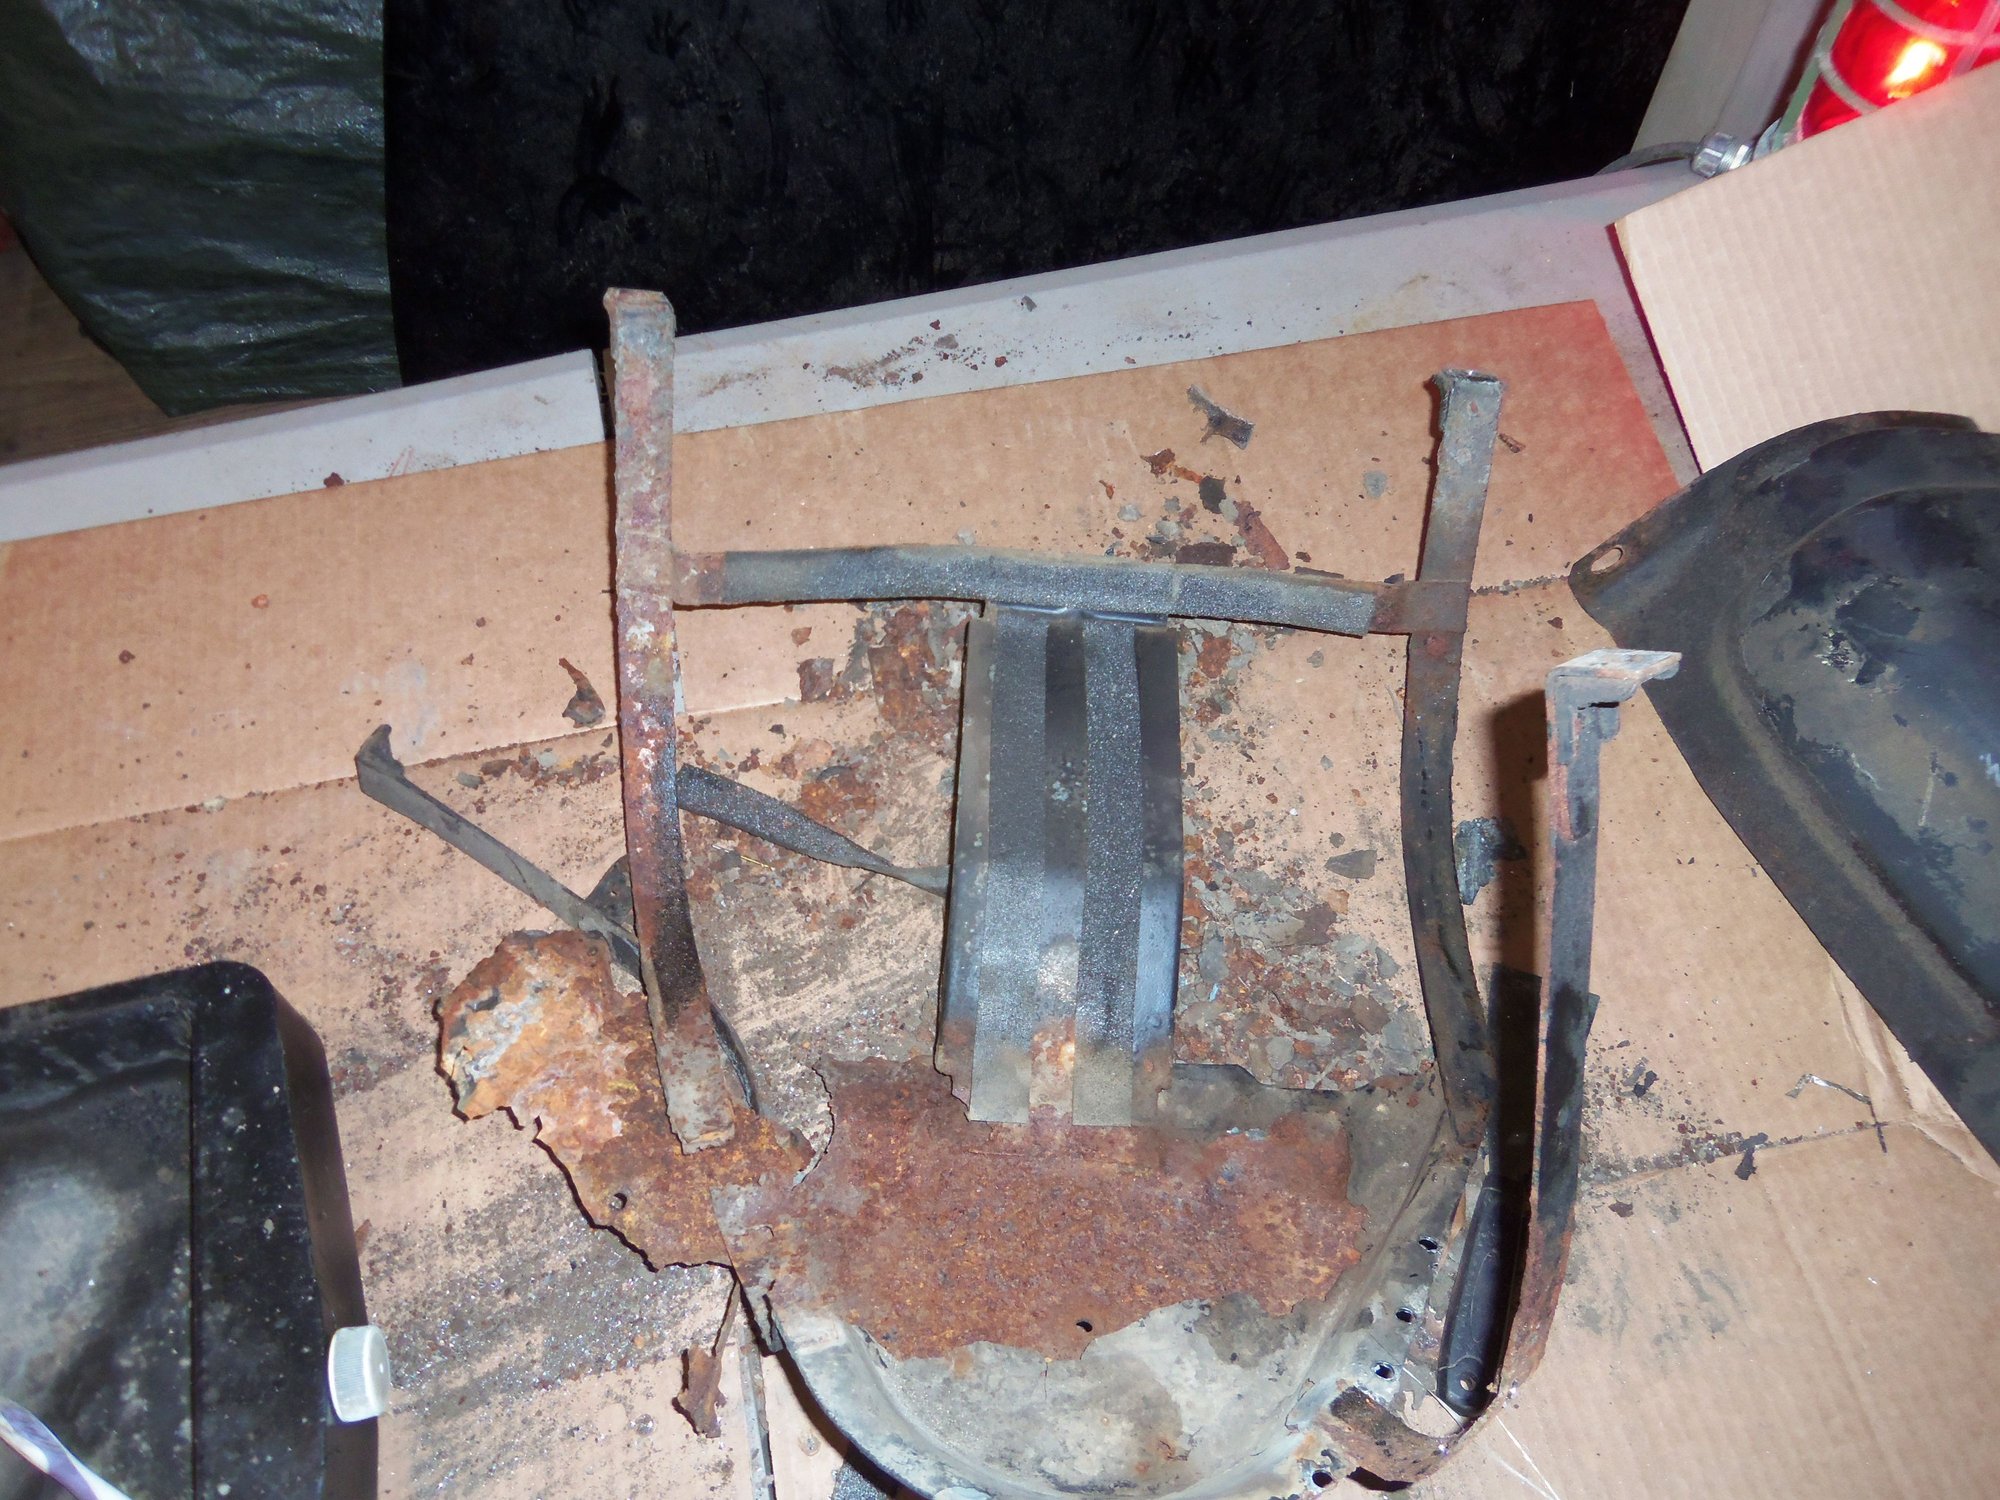
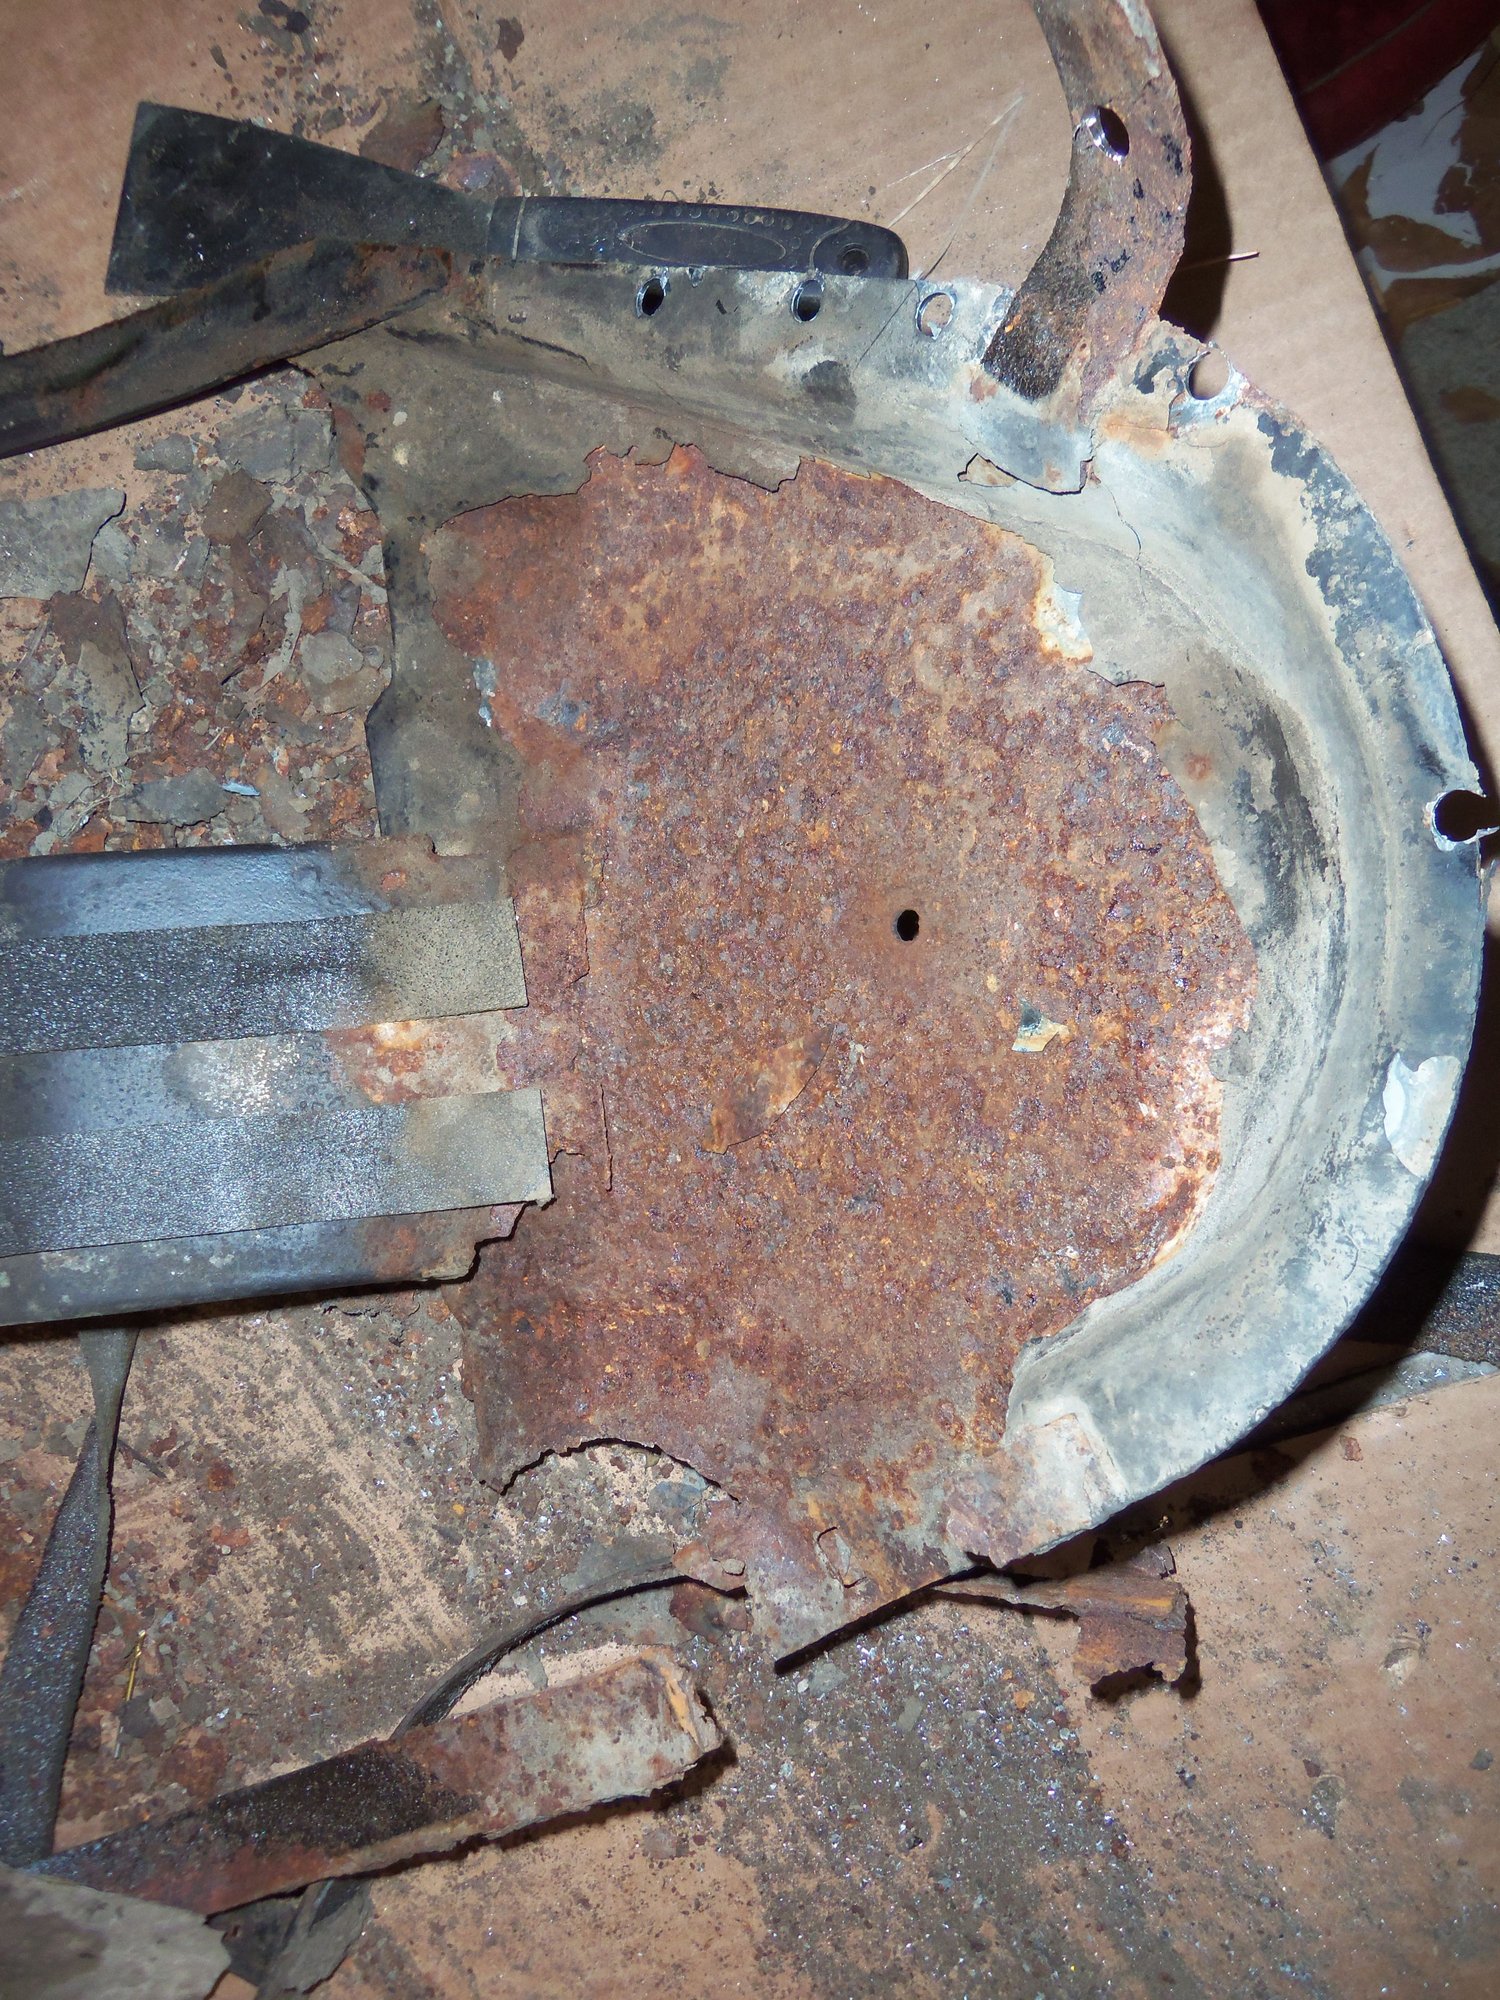
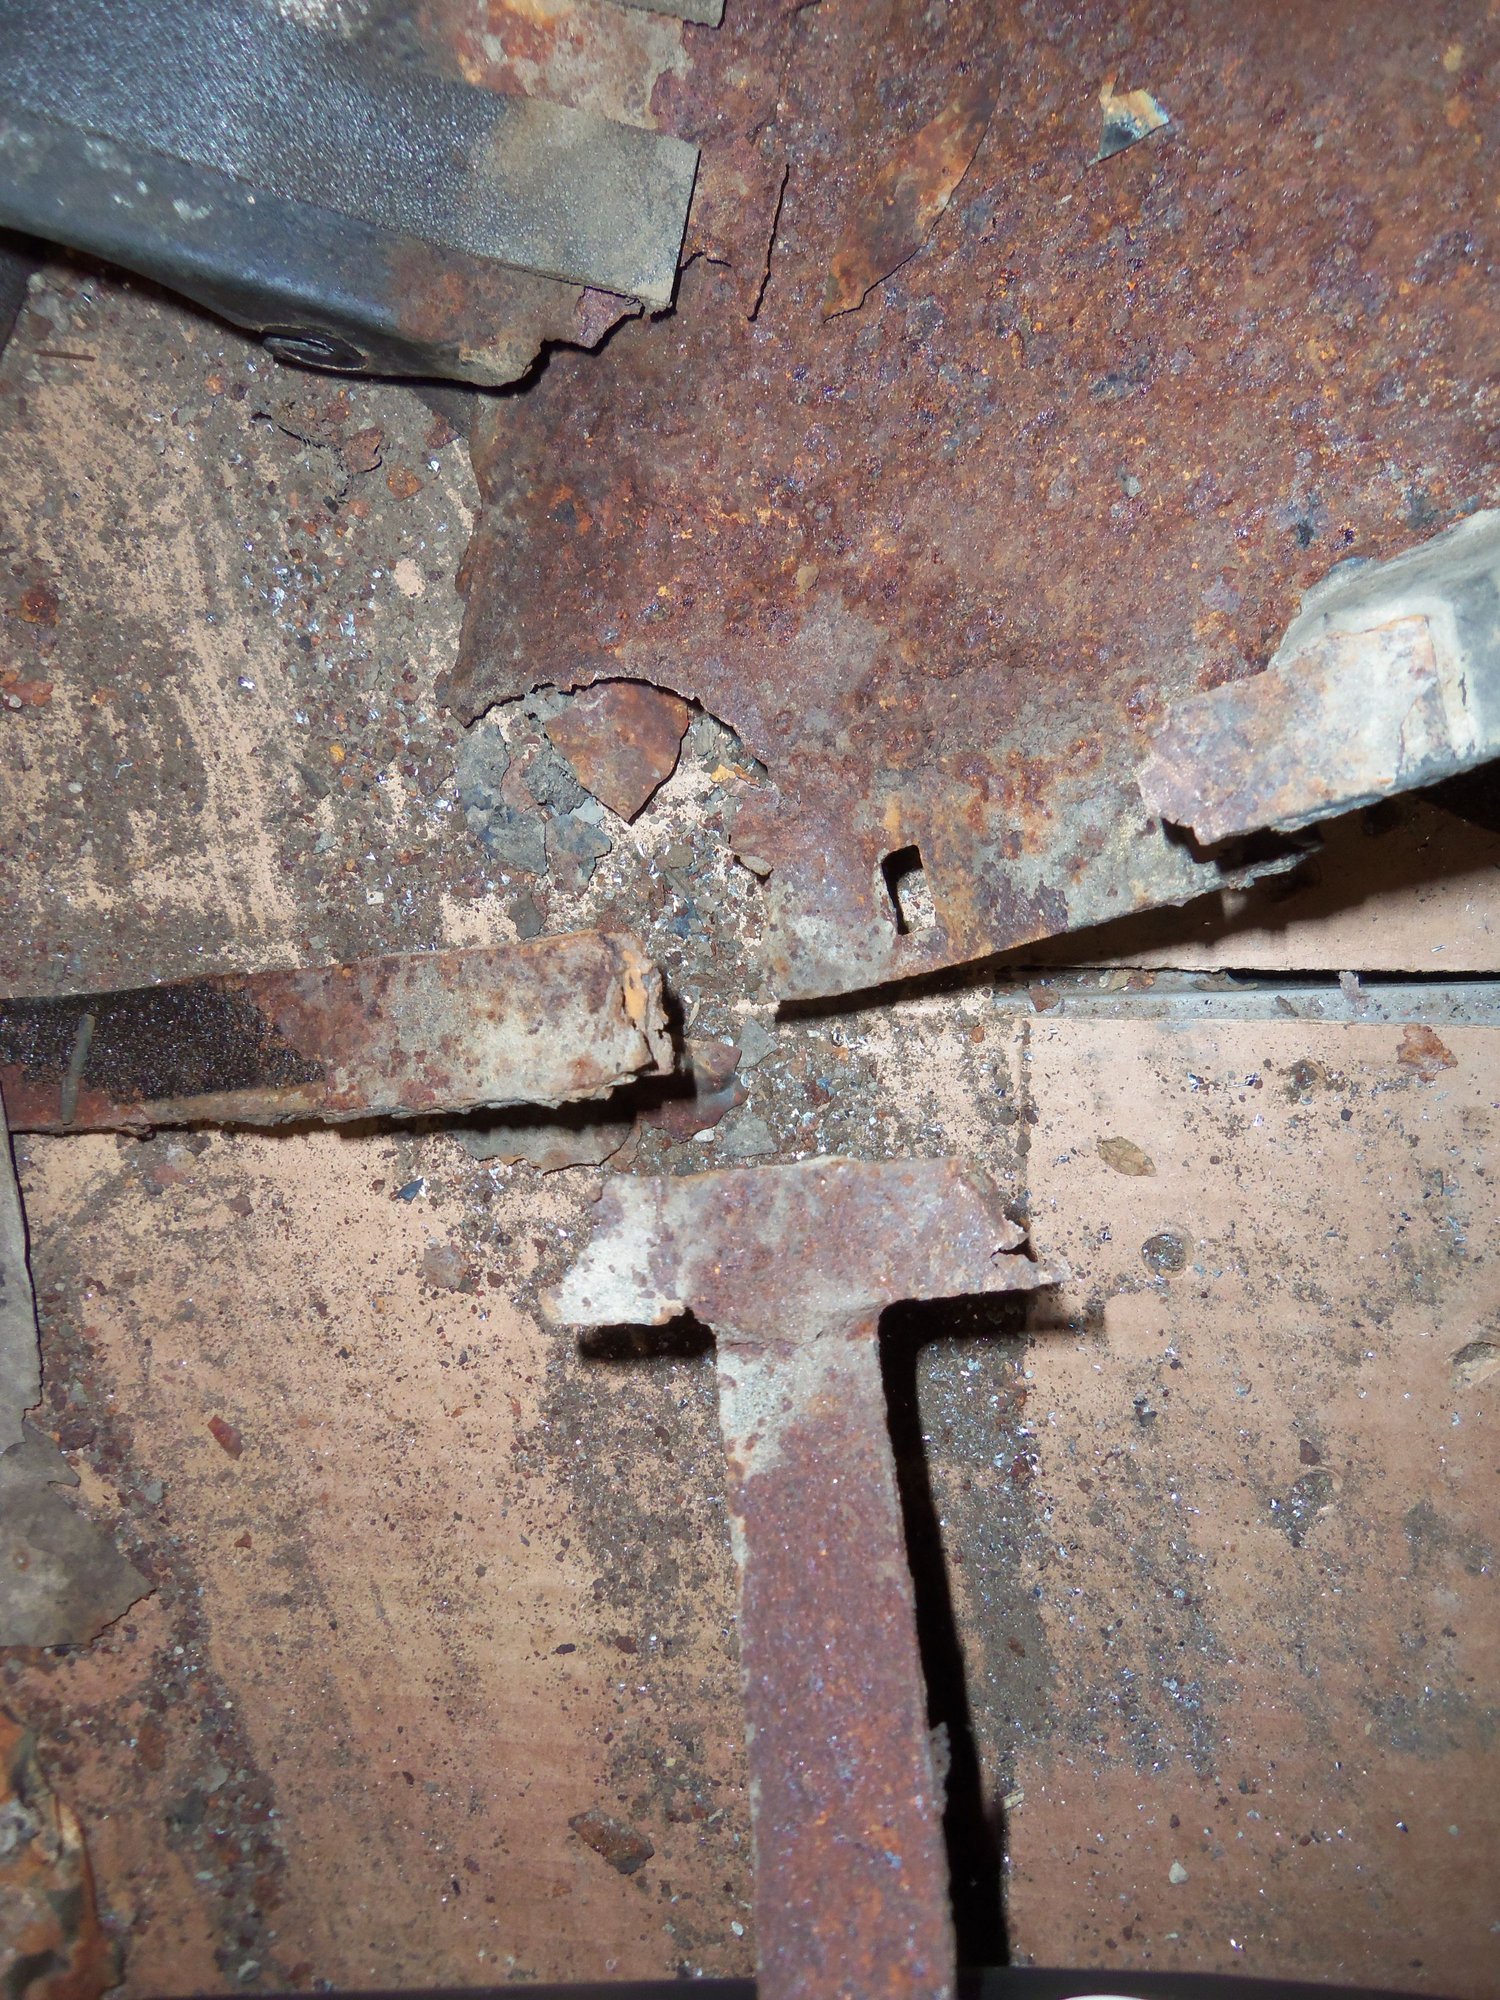
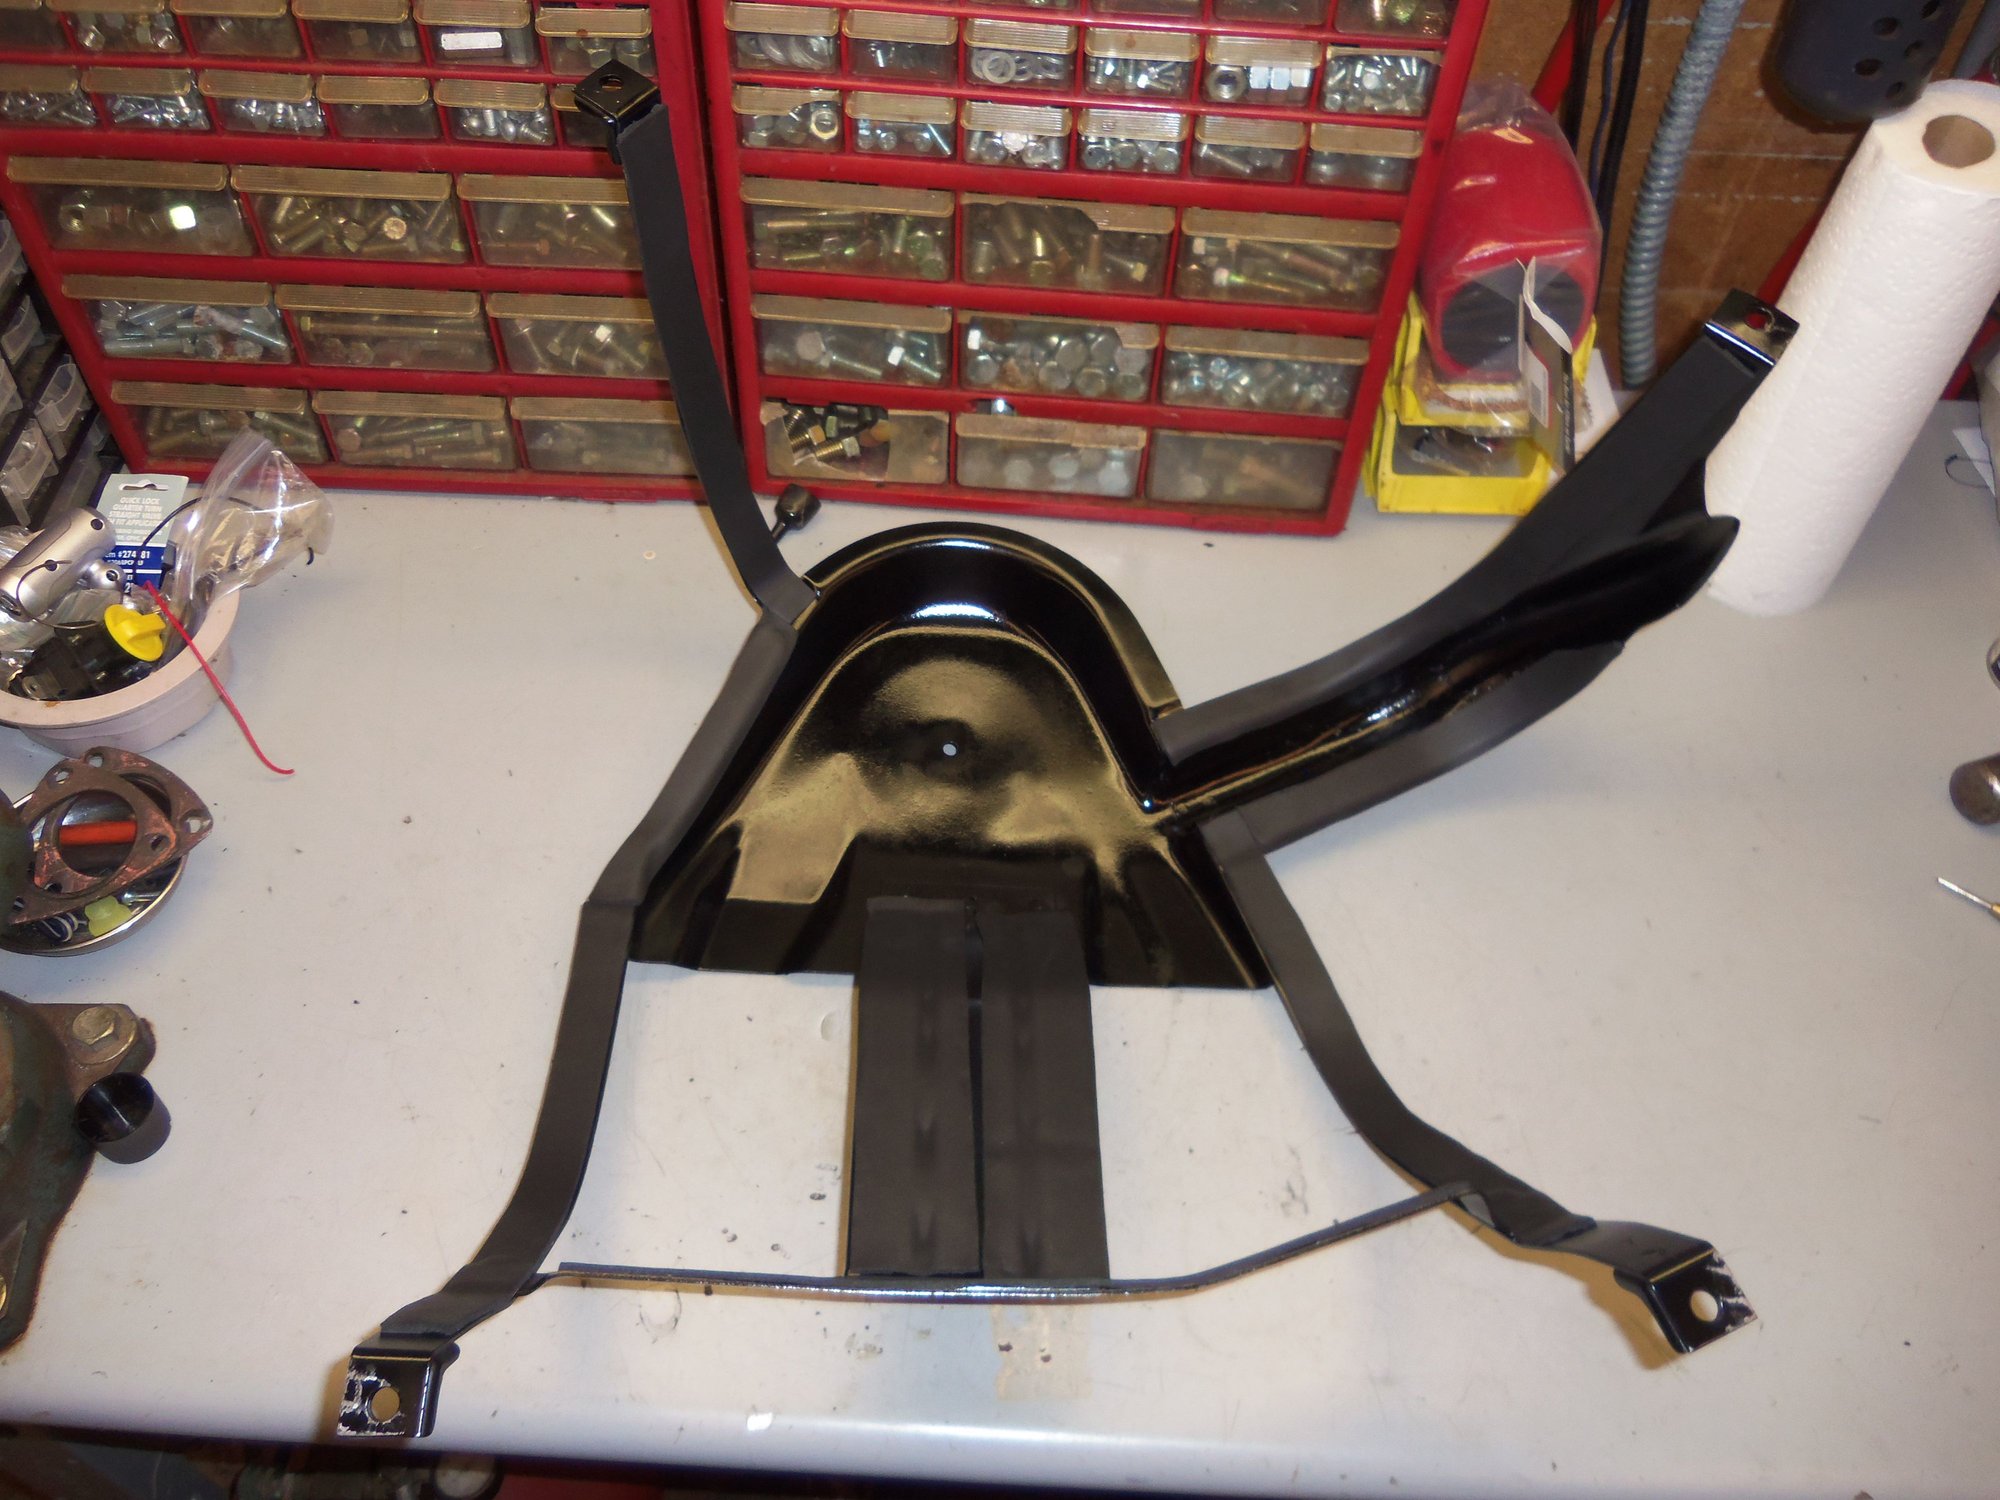
The fuel tank cradle on the Red Witch was found to be rusty during the PPI. I purchased a useable cradle from 928 Intl a couple of months ago. I have bead blasted and painted it. Yesterday, I removed the fuel tank cradle from the Witch. It was rustier than I thought, and pretty much unuseable.
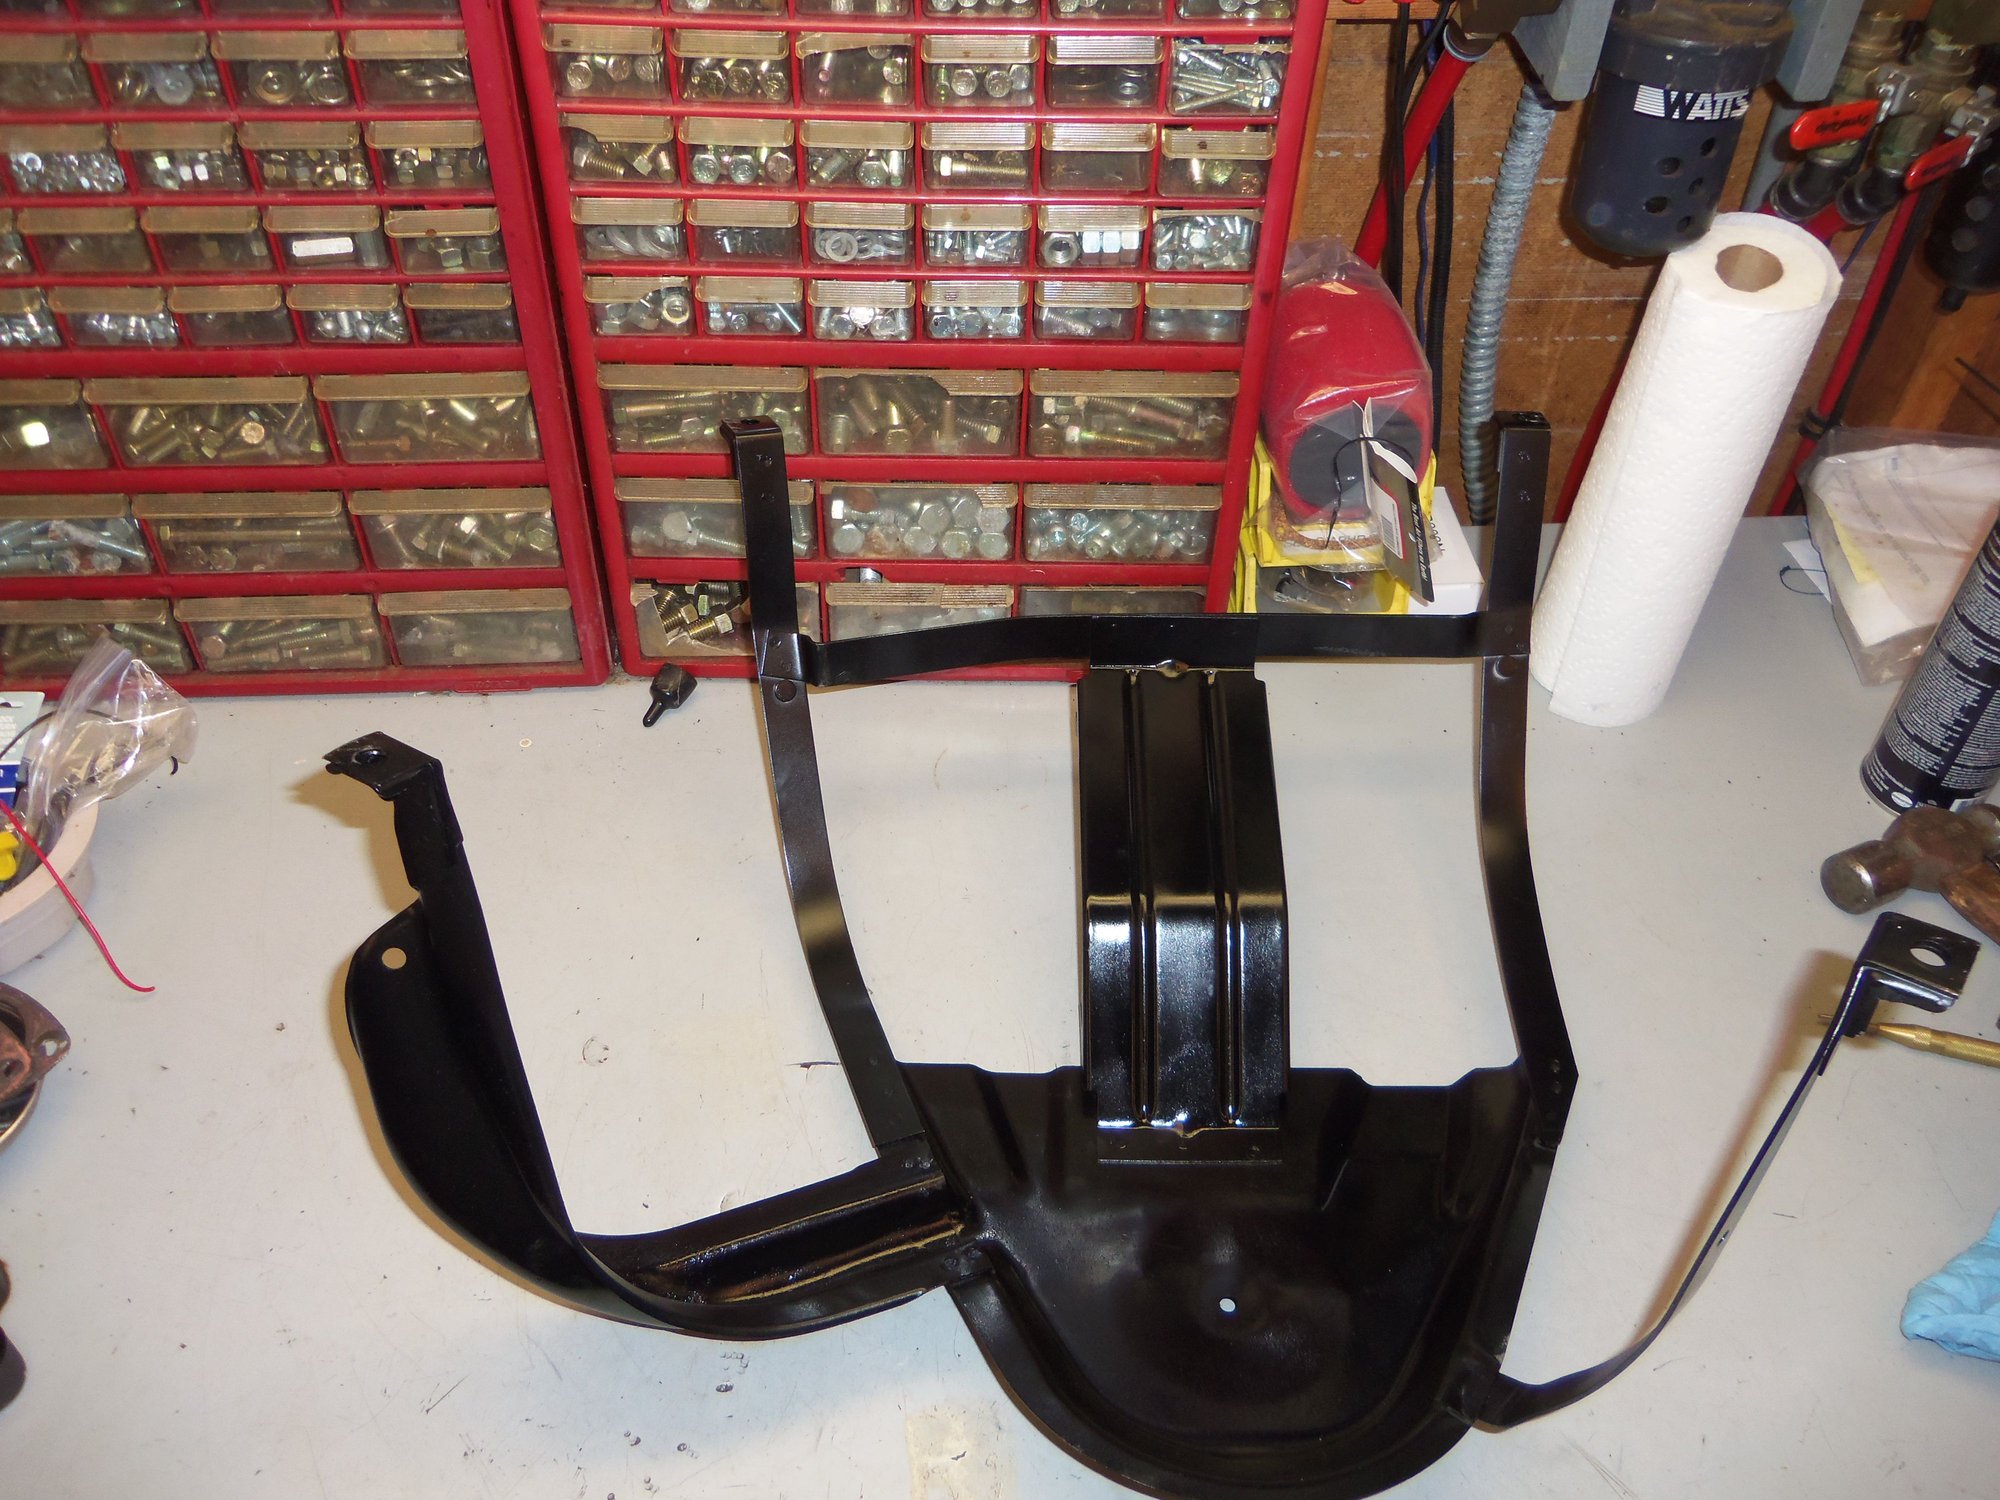
And different from the cradle I got from 928 Intl.
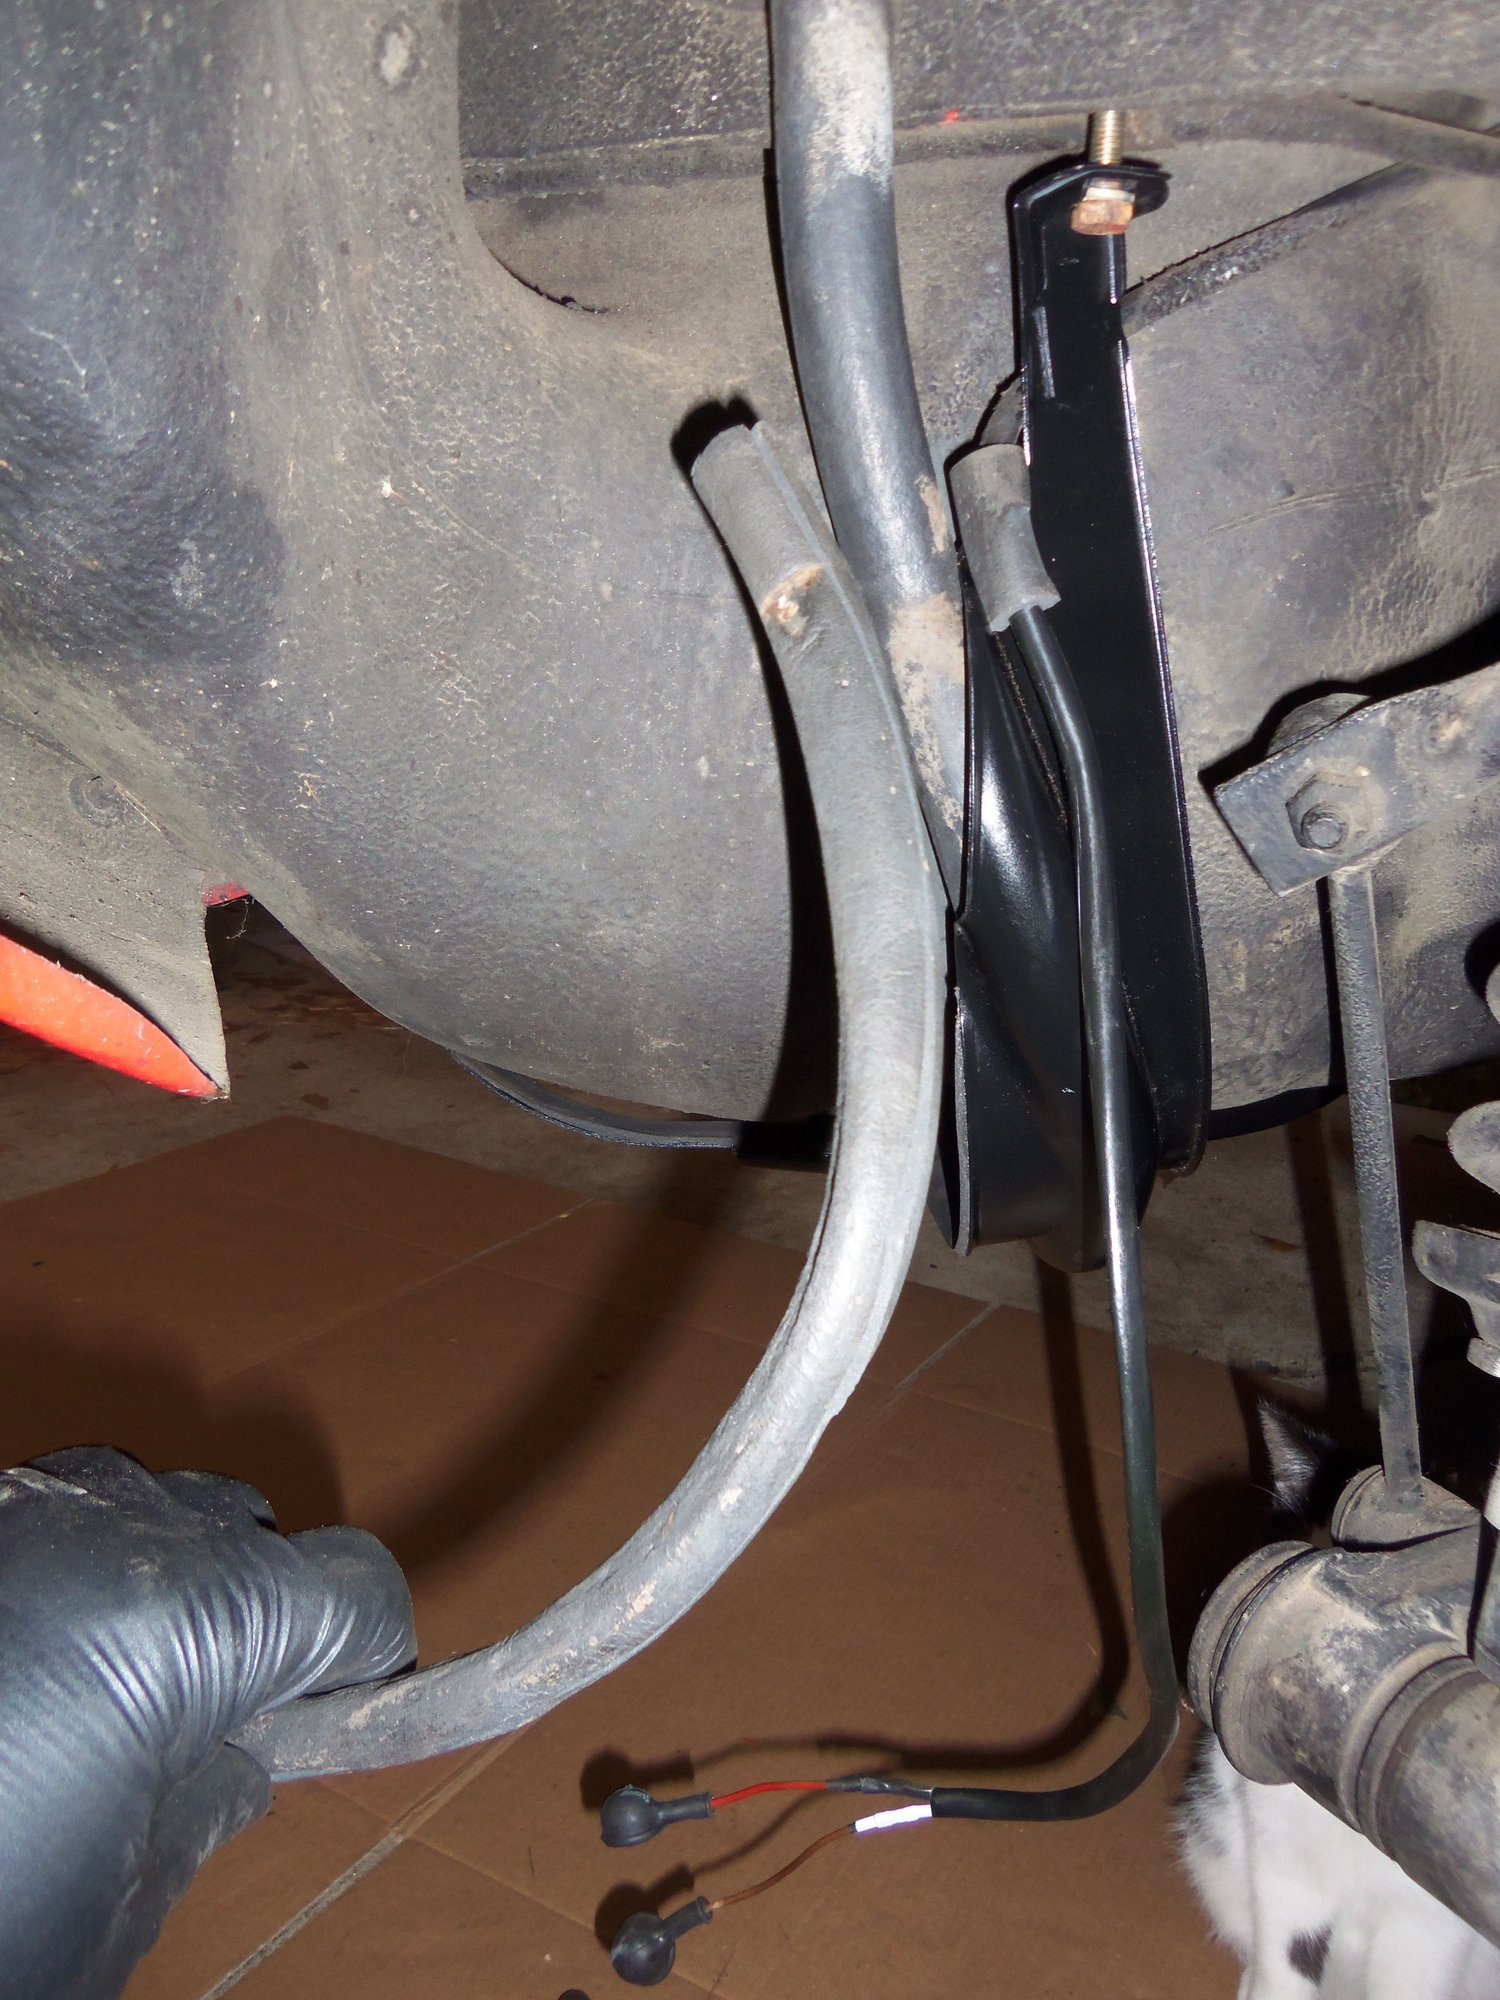
Biggest problem is the side that the fuel line and electrical wiring go down. On mine, 1986.5, is is just a strap bracket, with a wide plastic cover. On the replacement I got, it is a much wider metal bracket, that is relieved with a half pipe for the fuel line and wiring.
The WSM shows the strap/plastic cover type back to at least 1984. I have seen a photo of the cradle from a 1980 Euro, and it looks just like the one I bought.
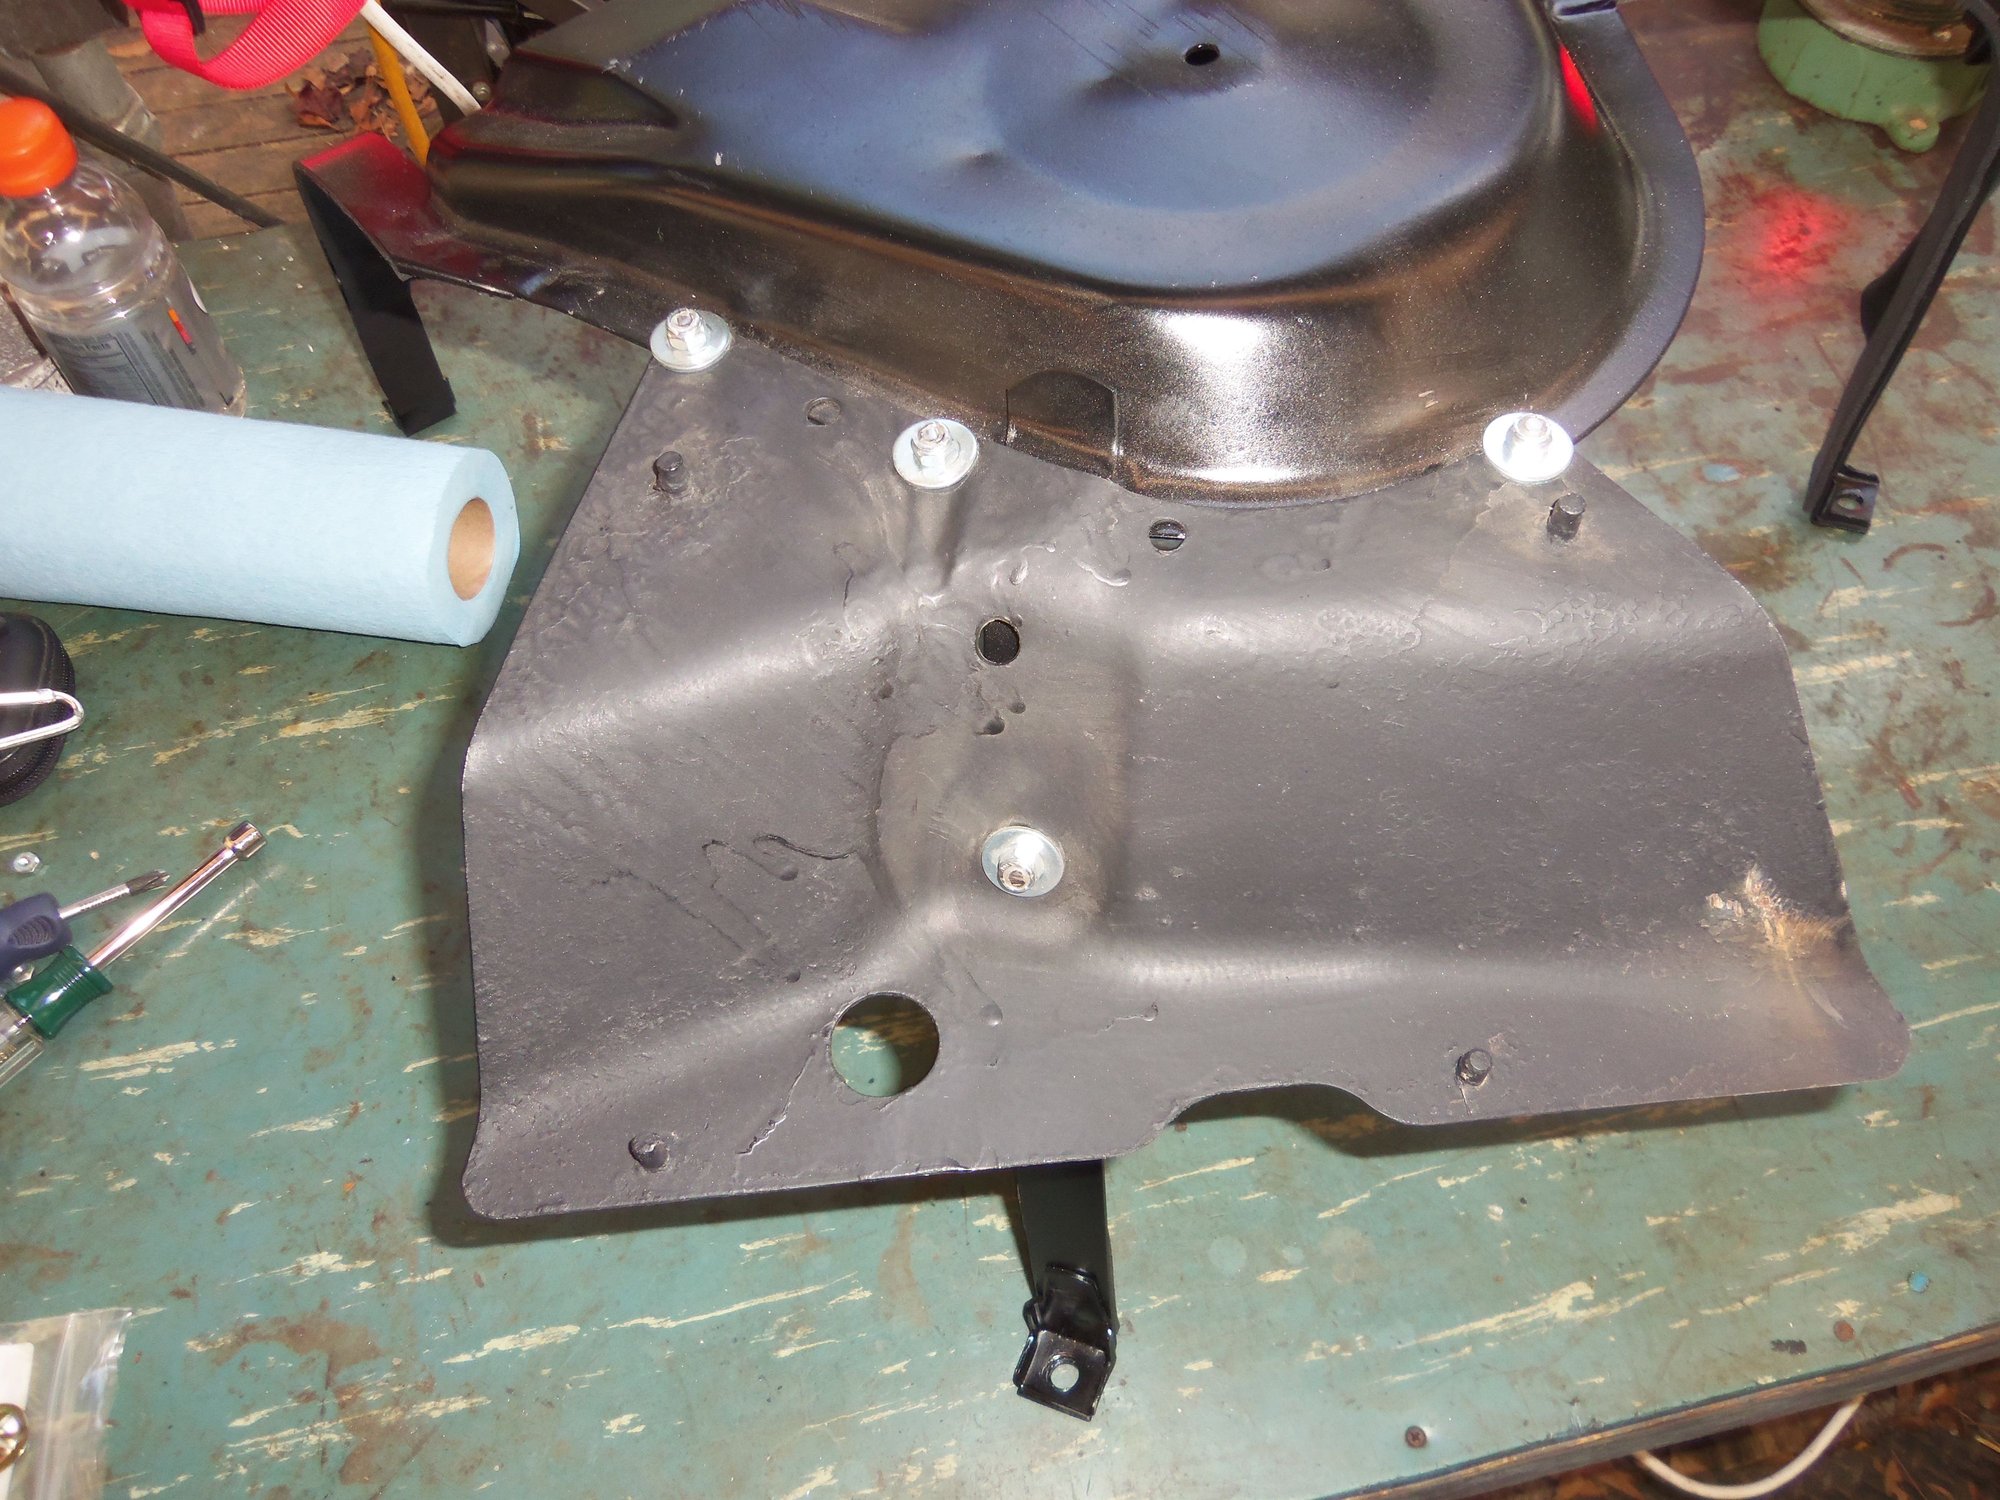
After drilling out the spot welds on the heat shield bracket on the rusted cradle, I attached it to the cleaned/painted cradle with small screws. Heat shield is not optional on 1986.5 due to proximity of exhaust pipe to fuel tank.
I installed the cradle gently, as it felt quite tight. The old cradle came down easily, though that may be from the rust weakened structure. I pushed, pulled, wiggled, and jimmied on the fuel tank and cradle to make sure they lined up with each other as I drew the bolts up. I was able to tighten down all four mounting bolts, but it feels awfully tight. My concern is stressing the plastic fuel tank.
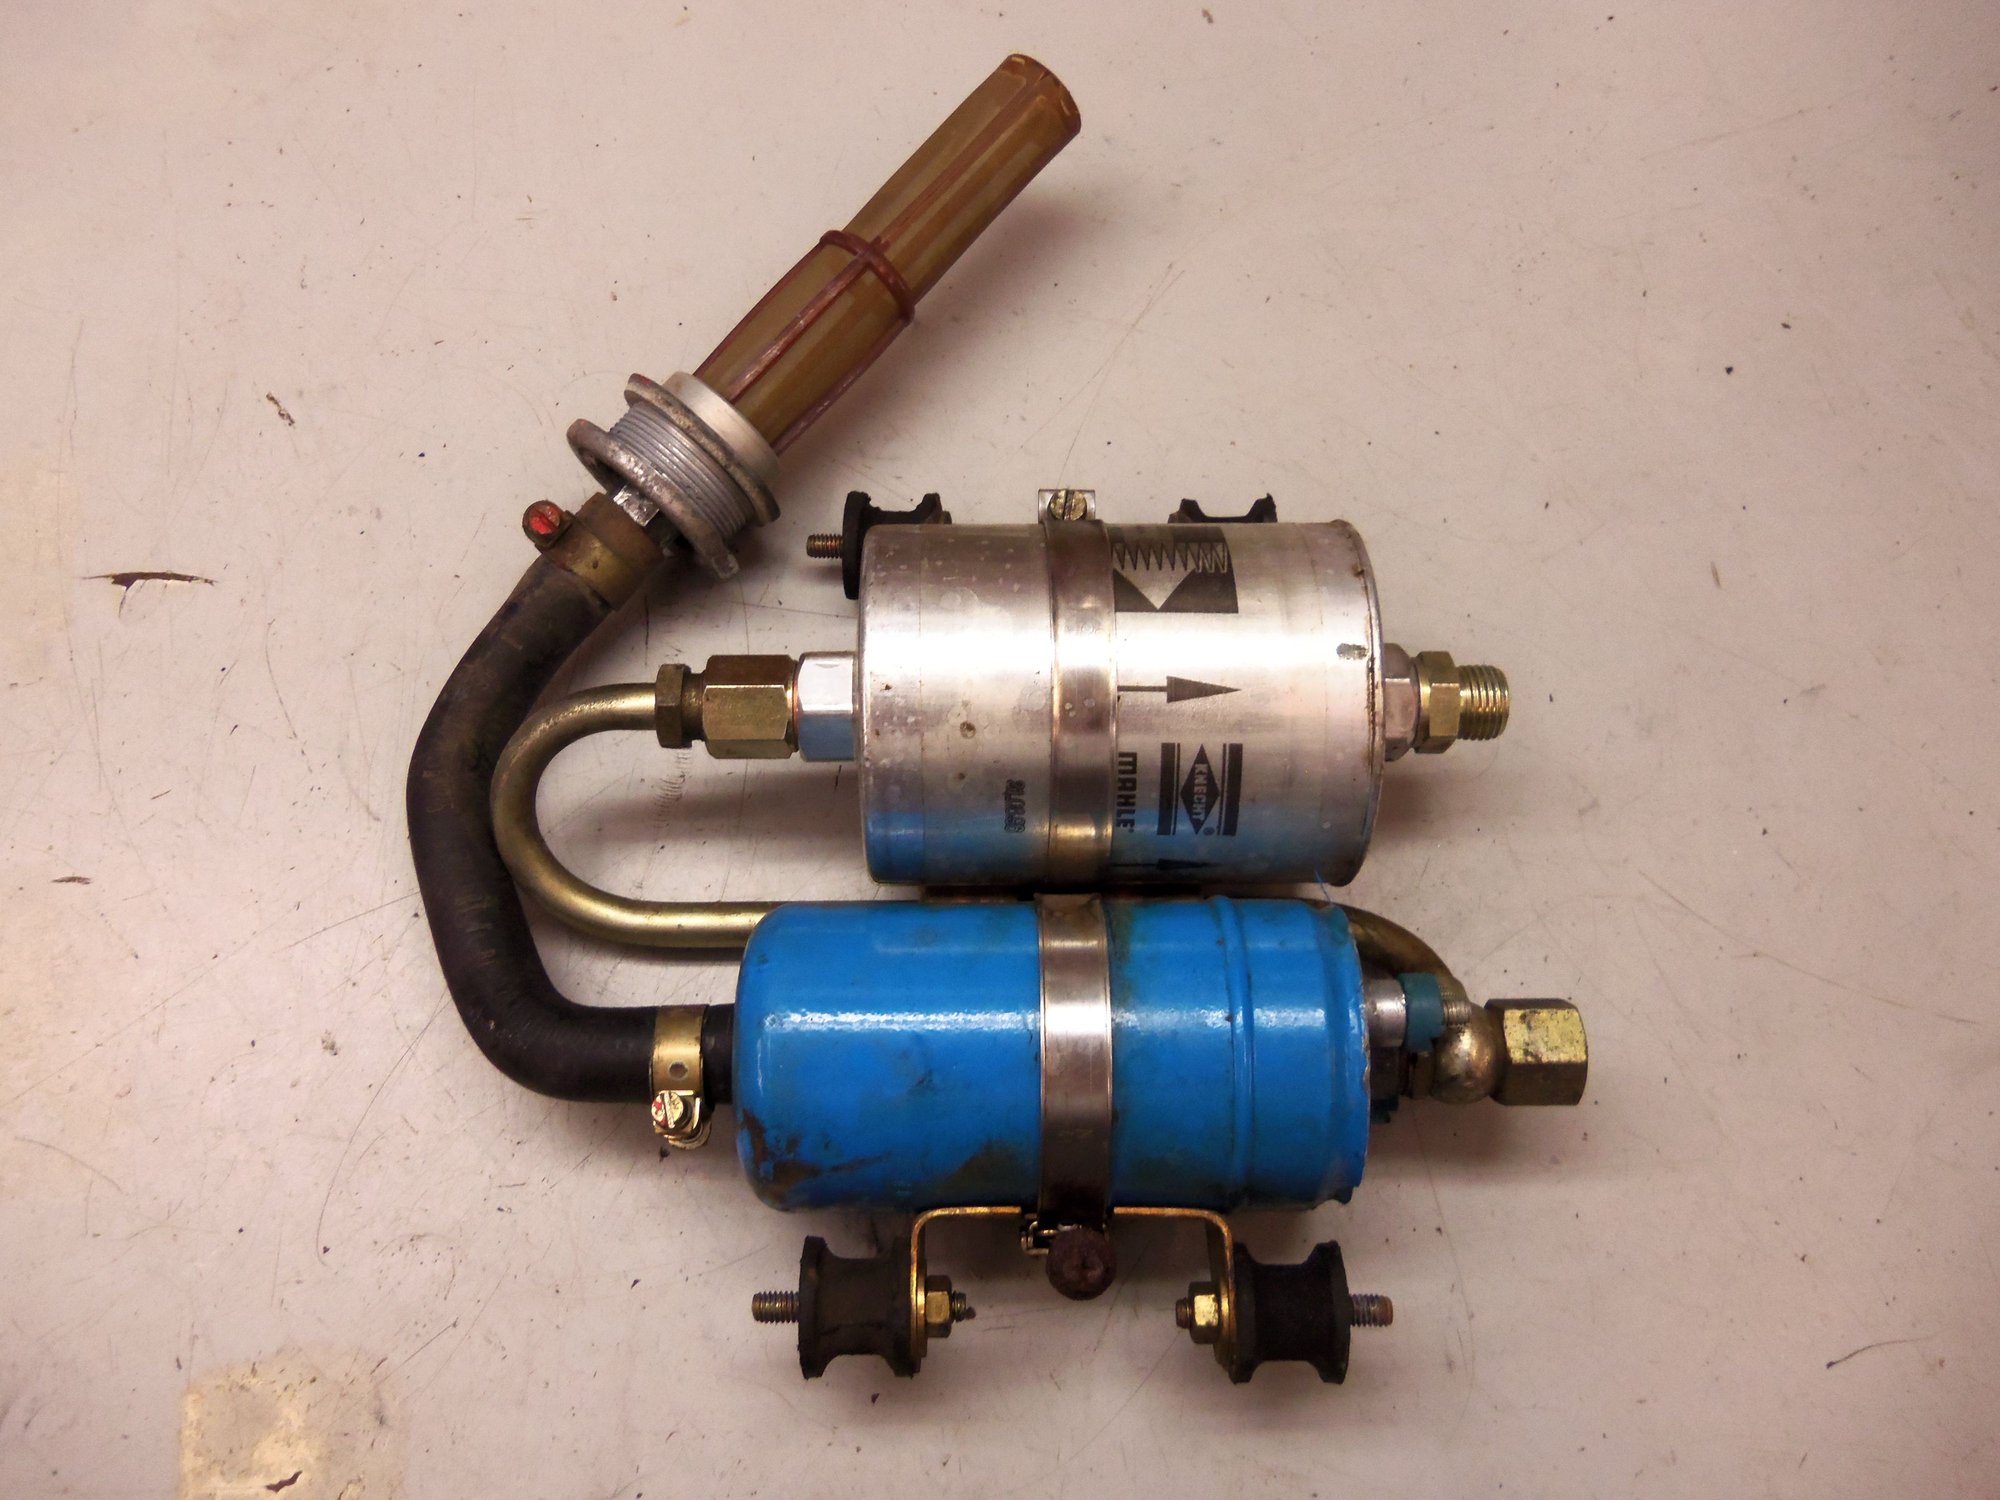
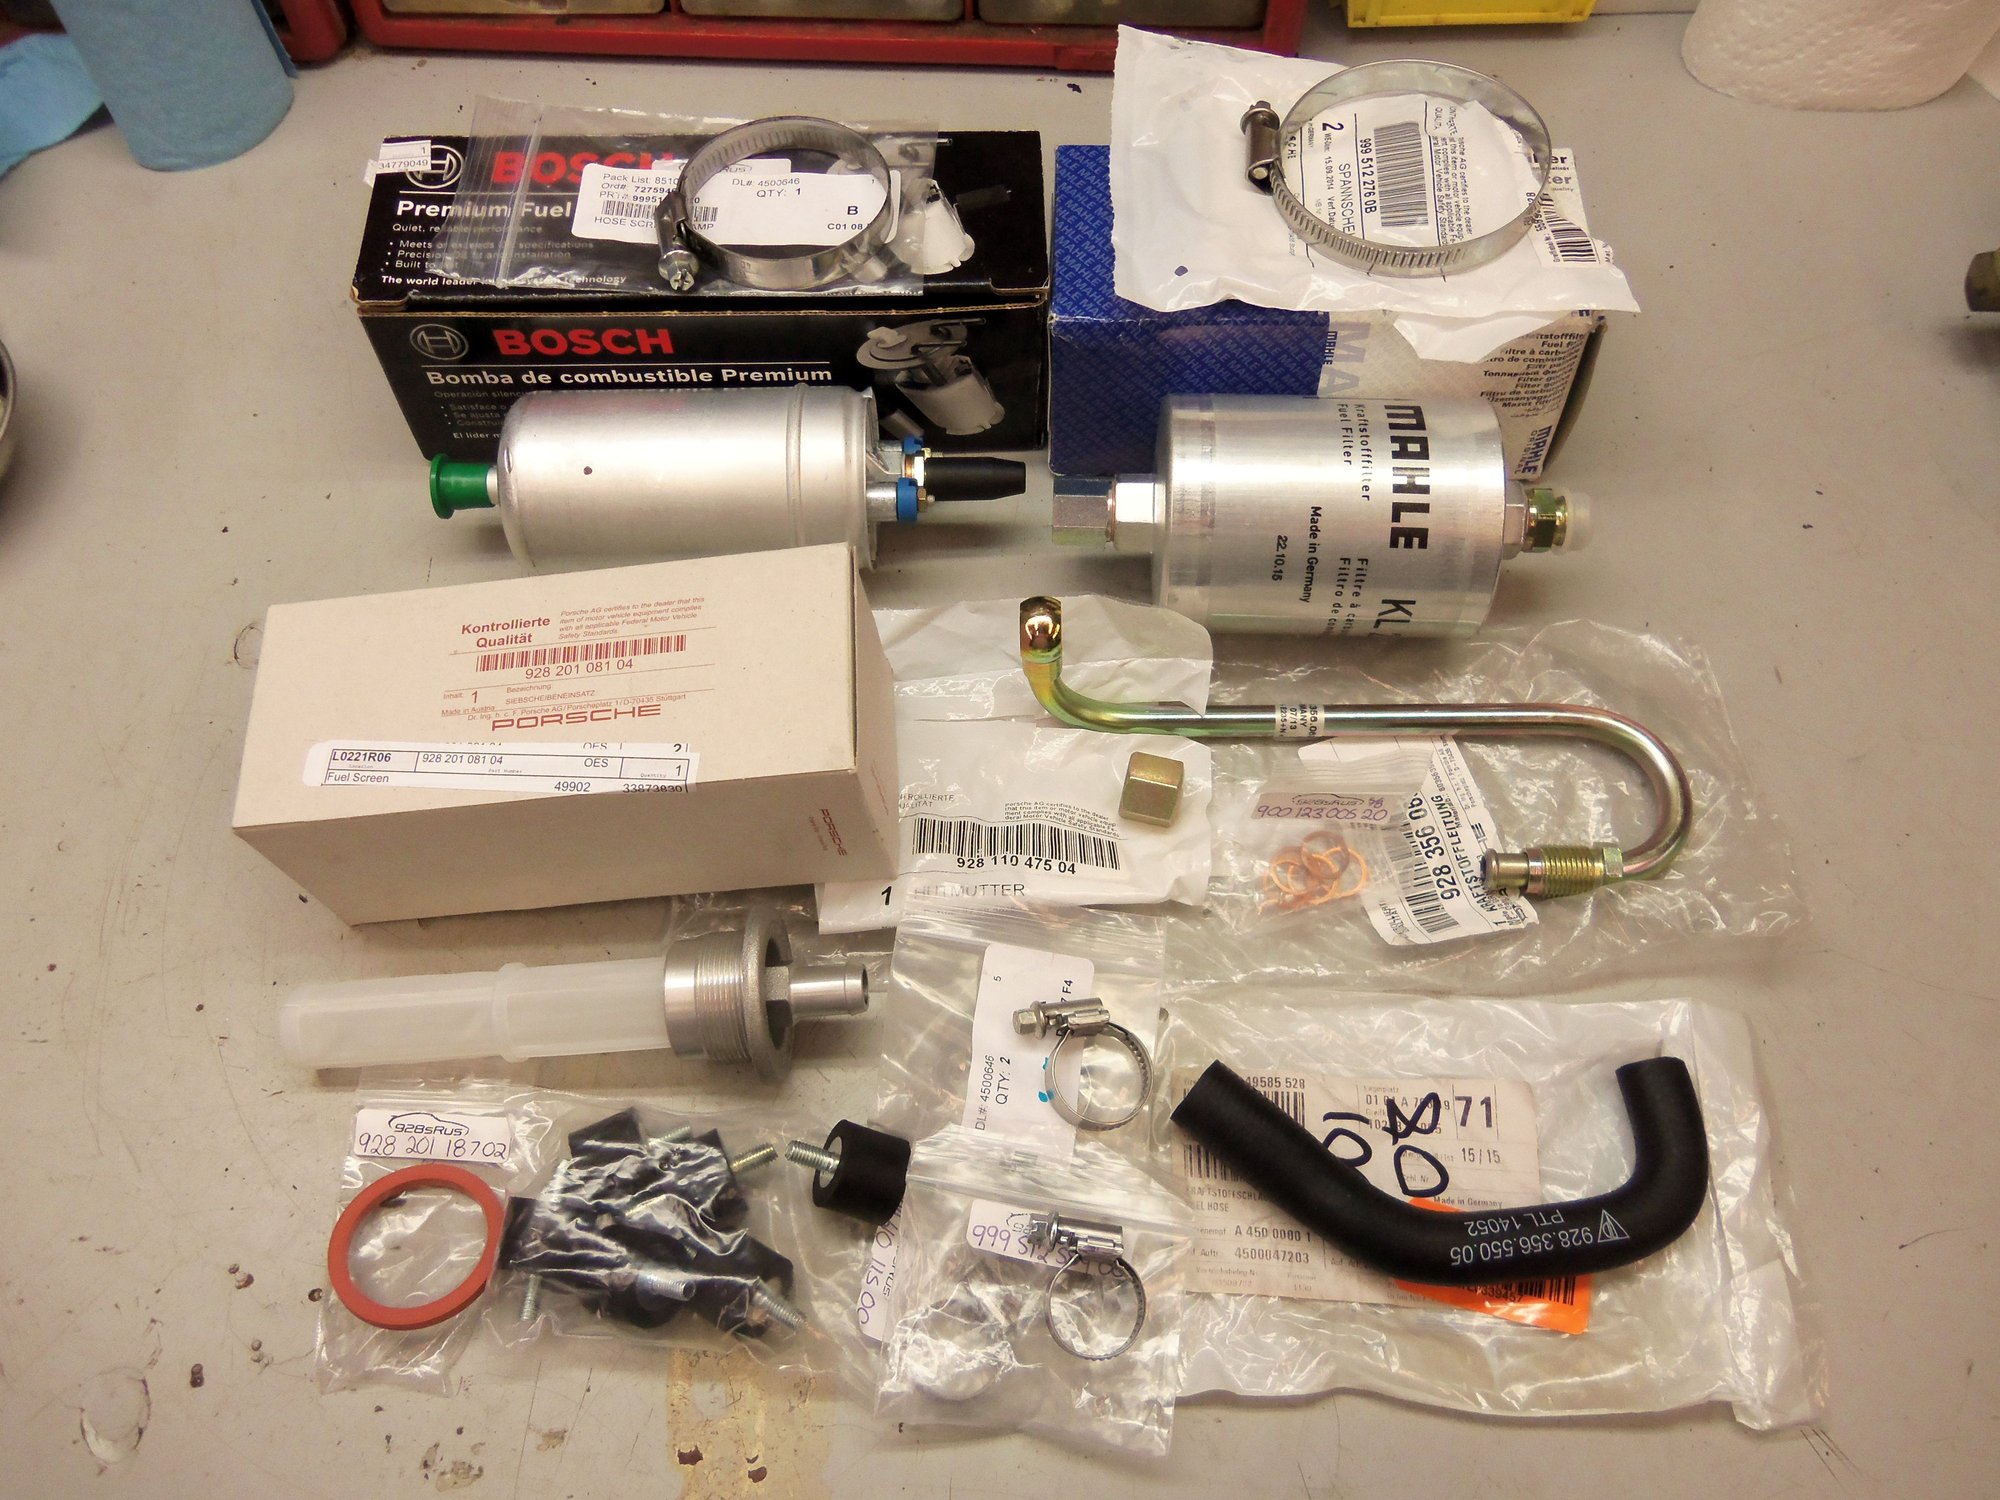
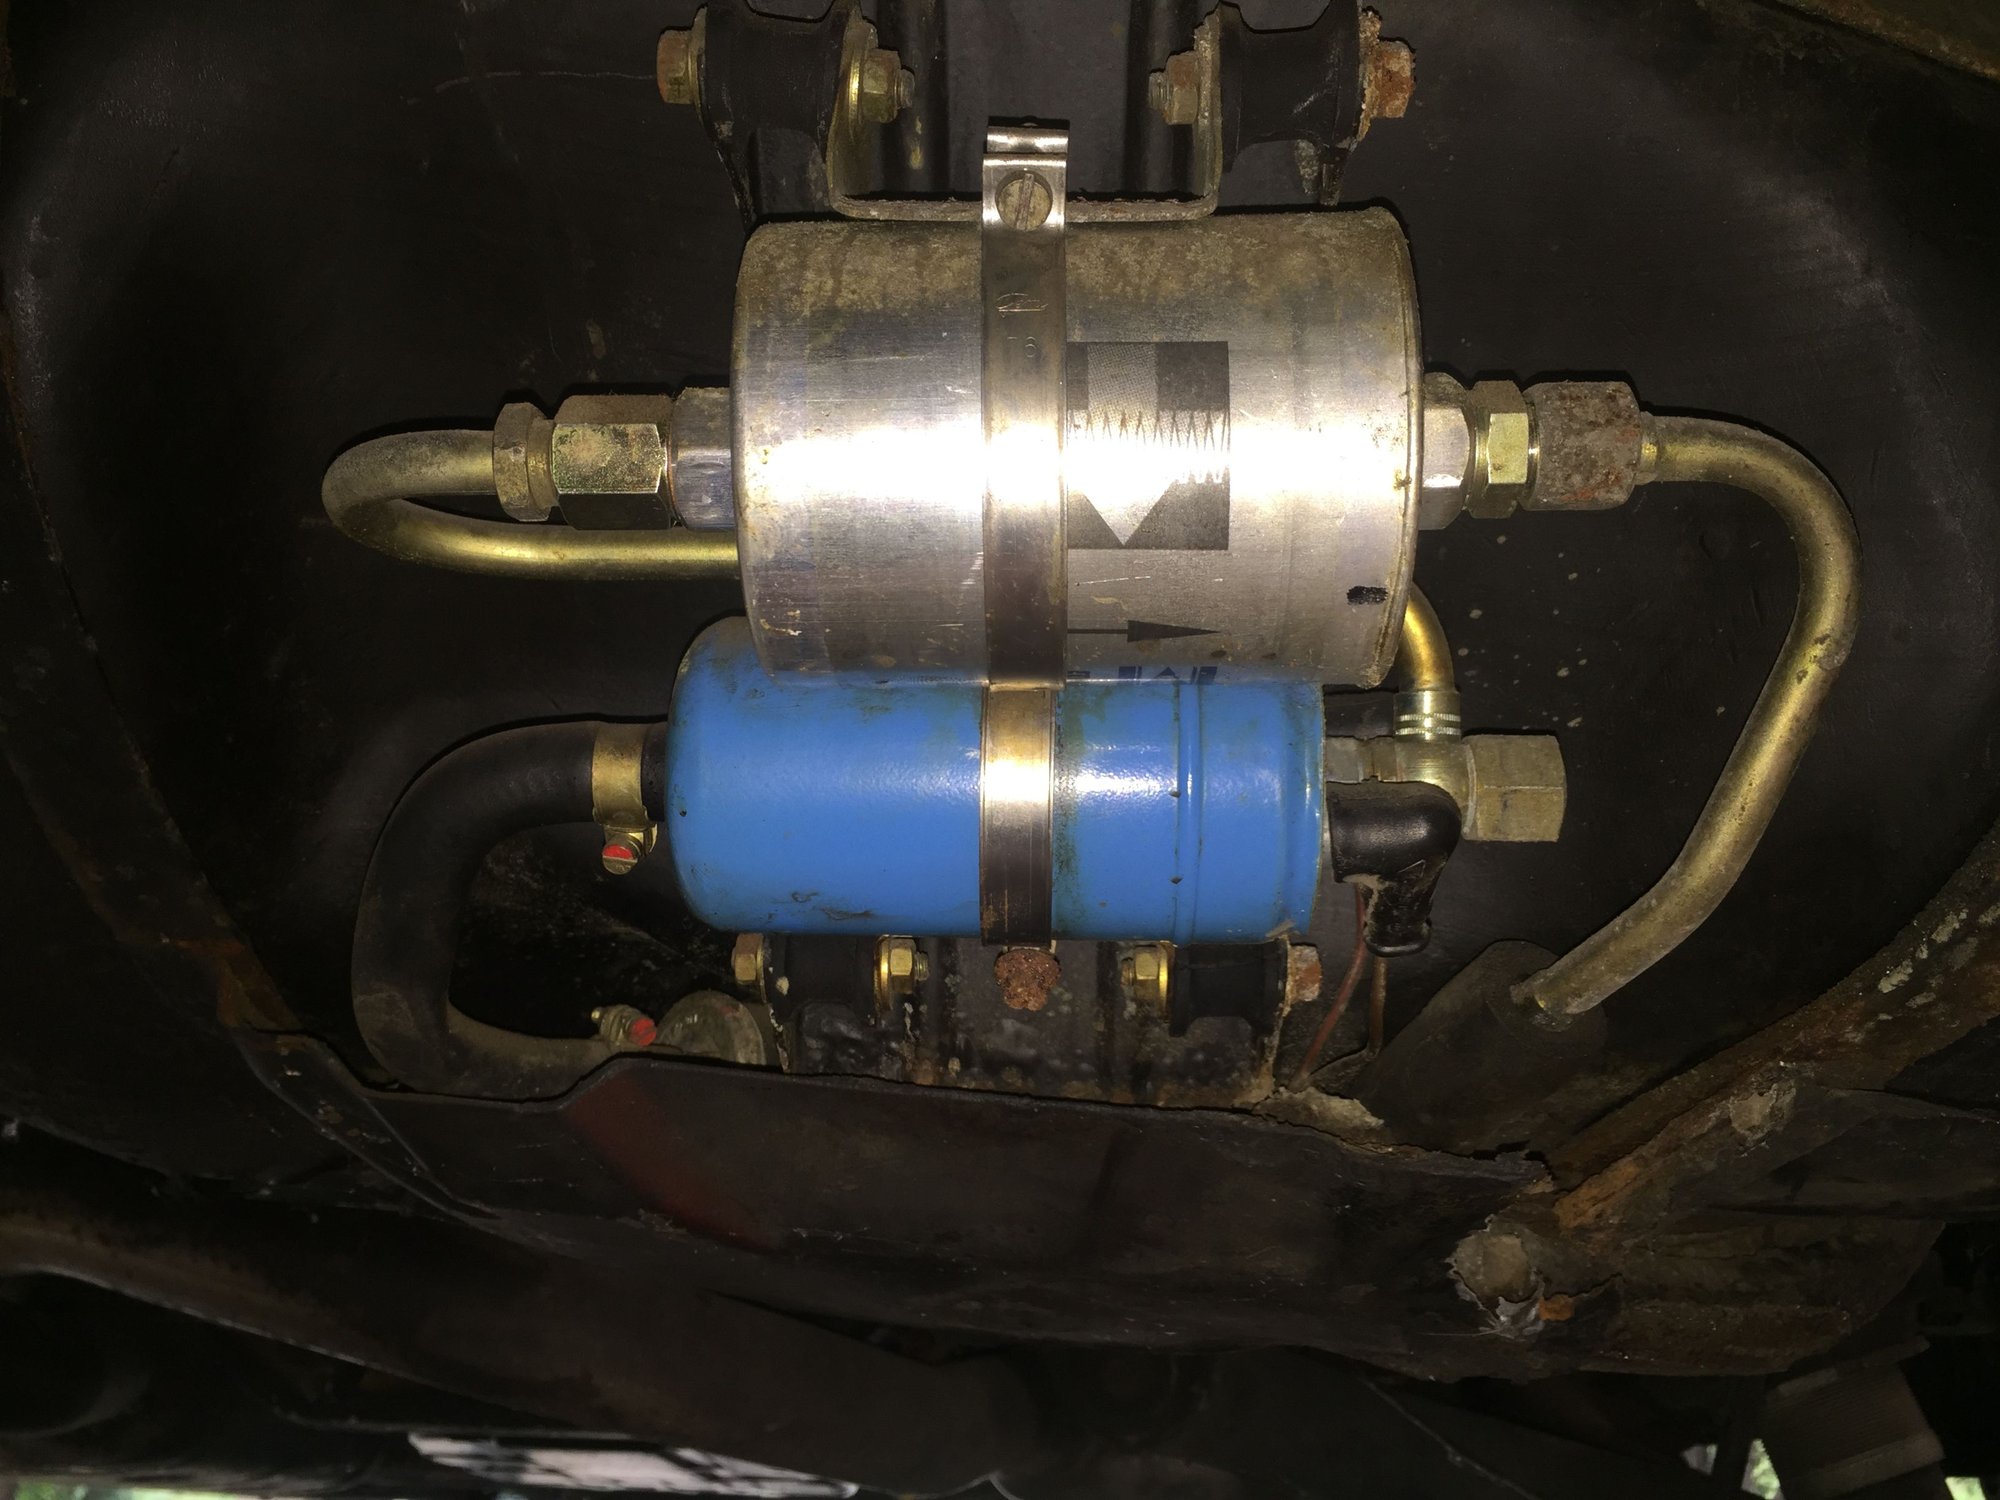
I completed replacement of:
-strainer and seal
-hose and clamps
-fuel pump
-metal S-pipe and cap nut
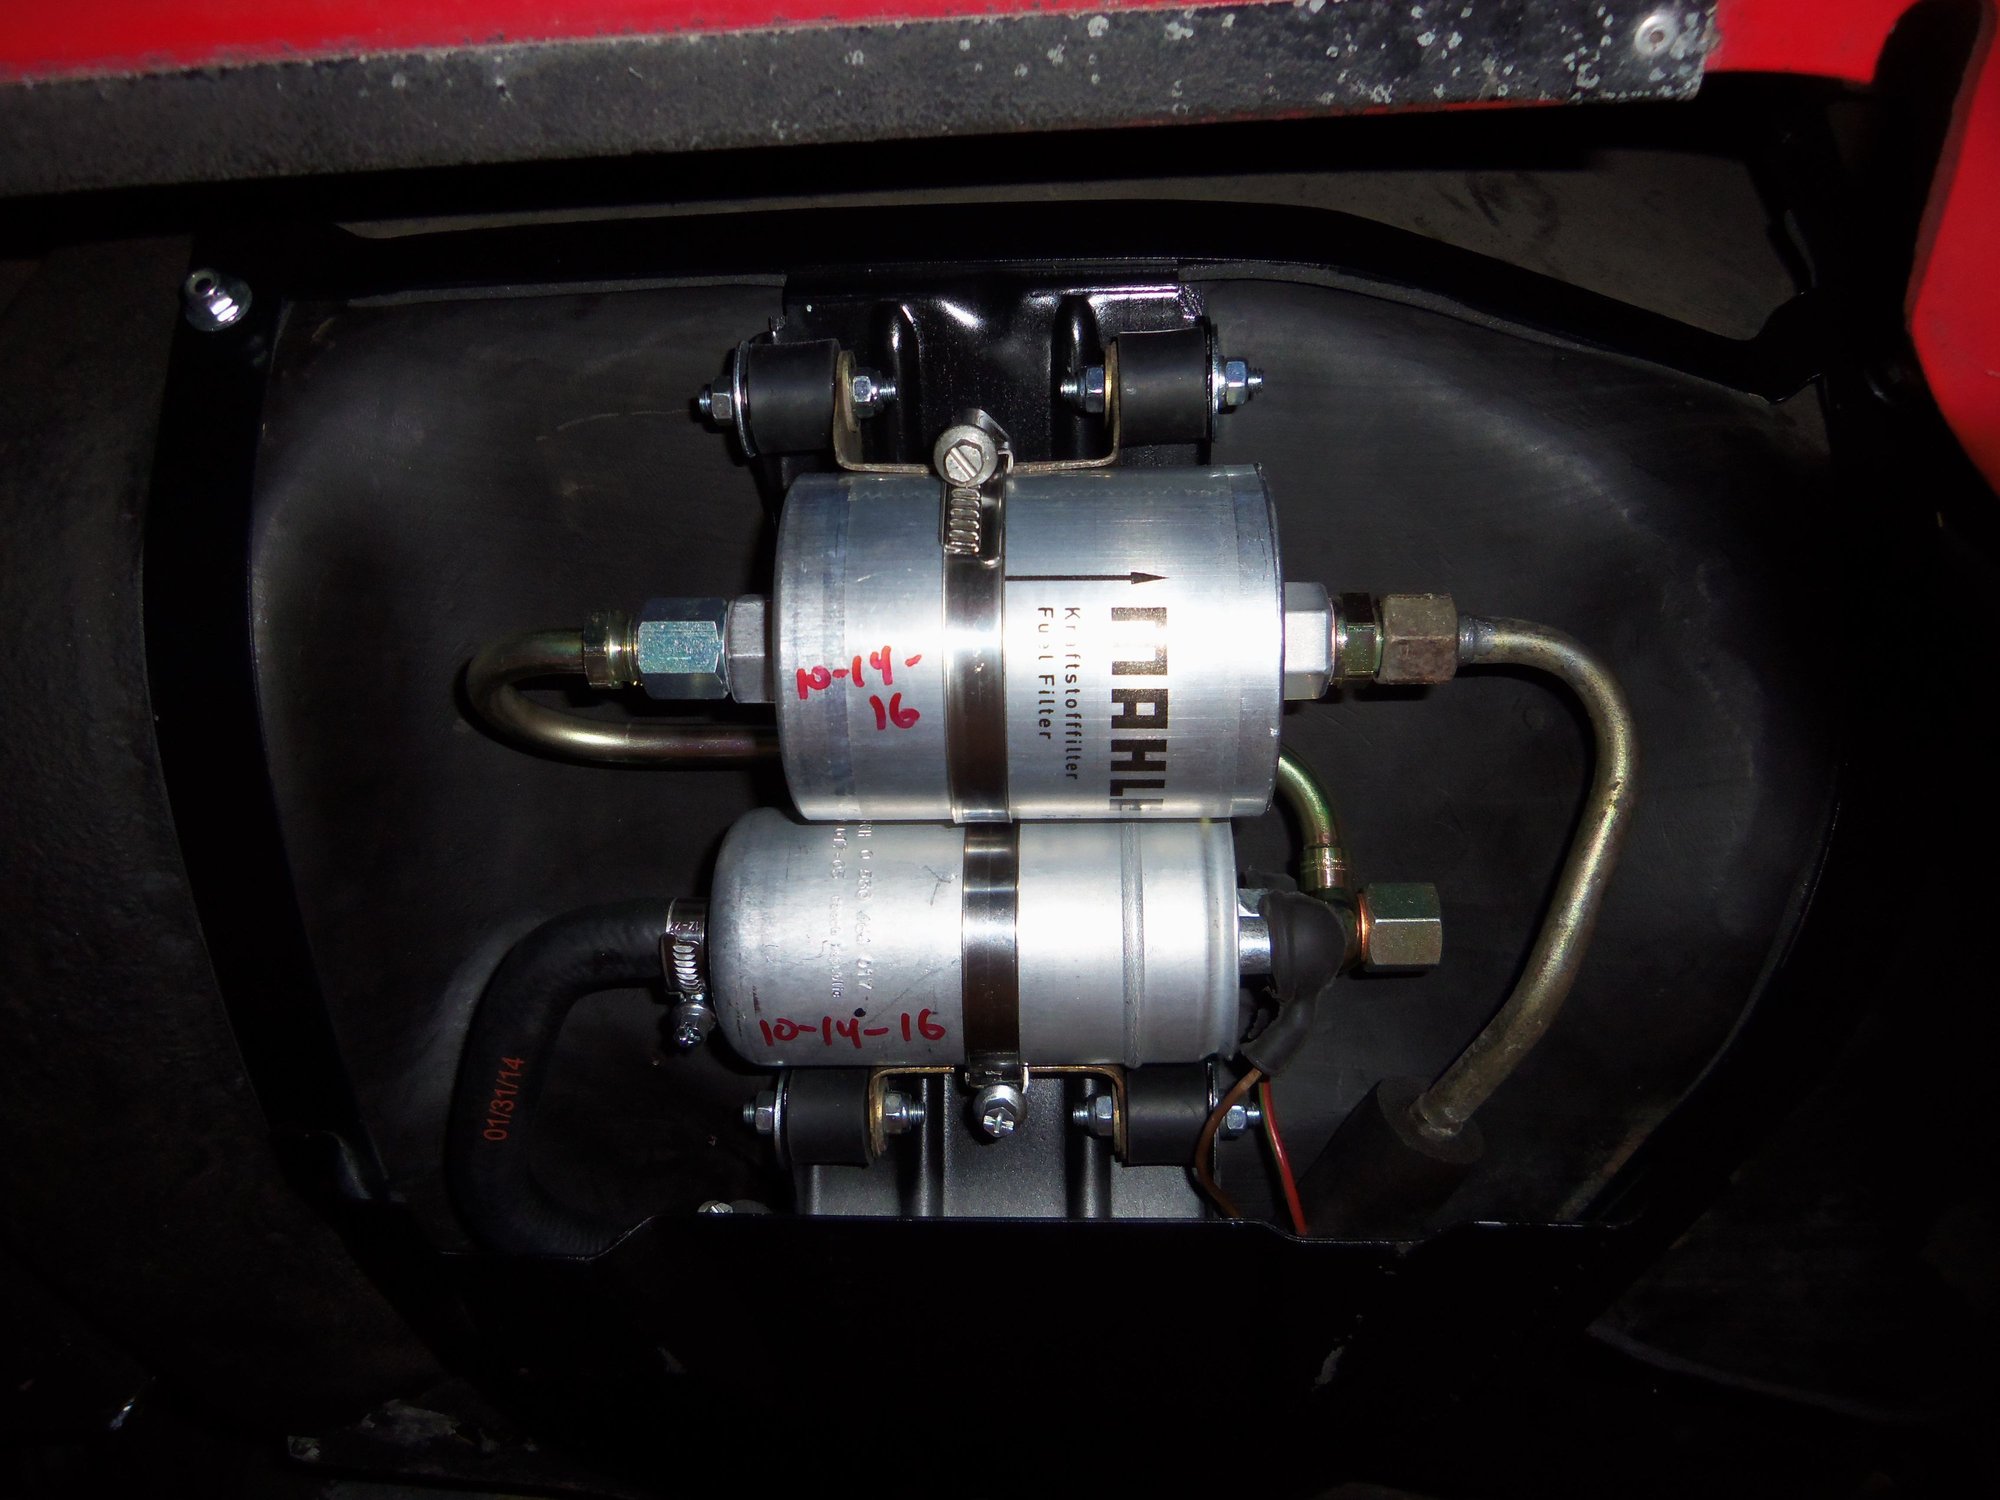
-fuel filter
-pump and filter mounting clamps
-pump wiring terminal boots
-pump/filter mounting bracket rubber isolators
In due time, I plan on getting the correct fuel tank cradle from 928 Intl. For now, will this one work, or have I just set up my fuel tank to fracture from an incorrectly fitting cradle?
Photos:
Heat shield bracket to be removed from old cradle.
Old cradle
Ummm...yeah.
Replacement cradle
Note the relieved bracket/leg on the right.
Heat shield bracket transferred to the replacement cradle.
Yes, I know its butch and I should be ashamed. It is what I could come up with on short notice...
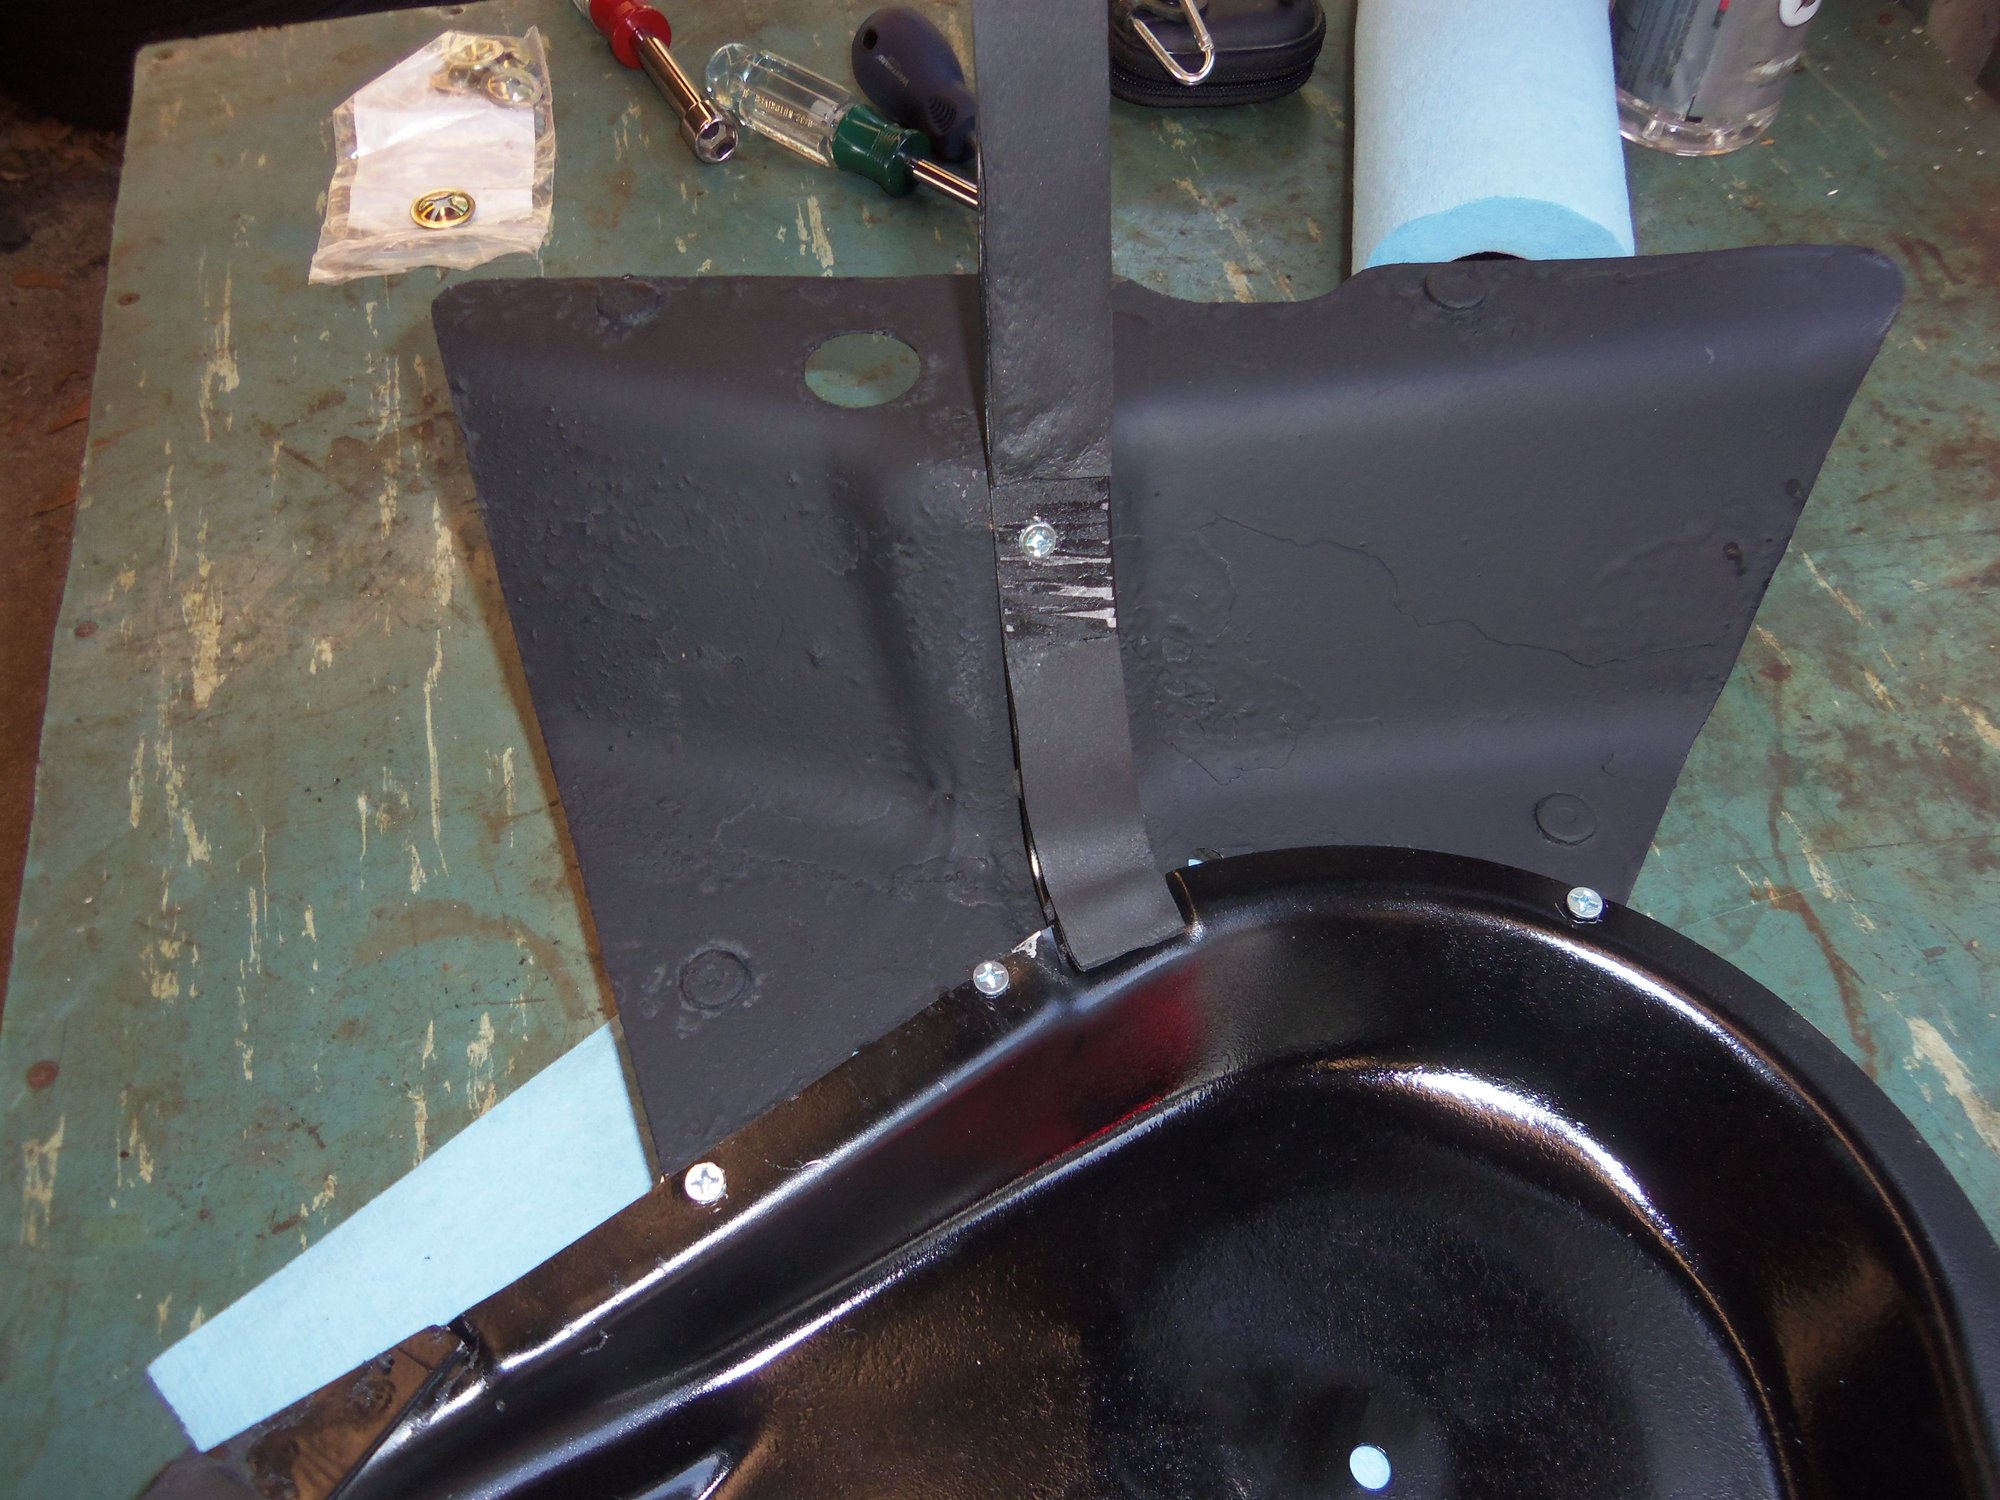
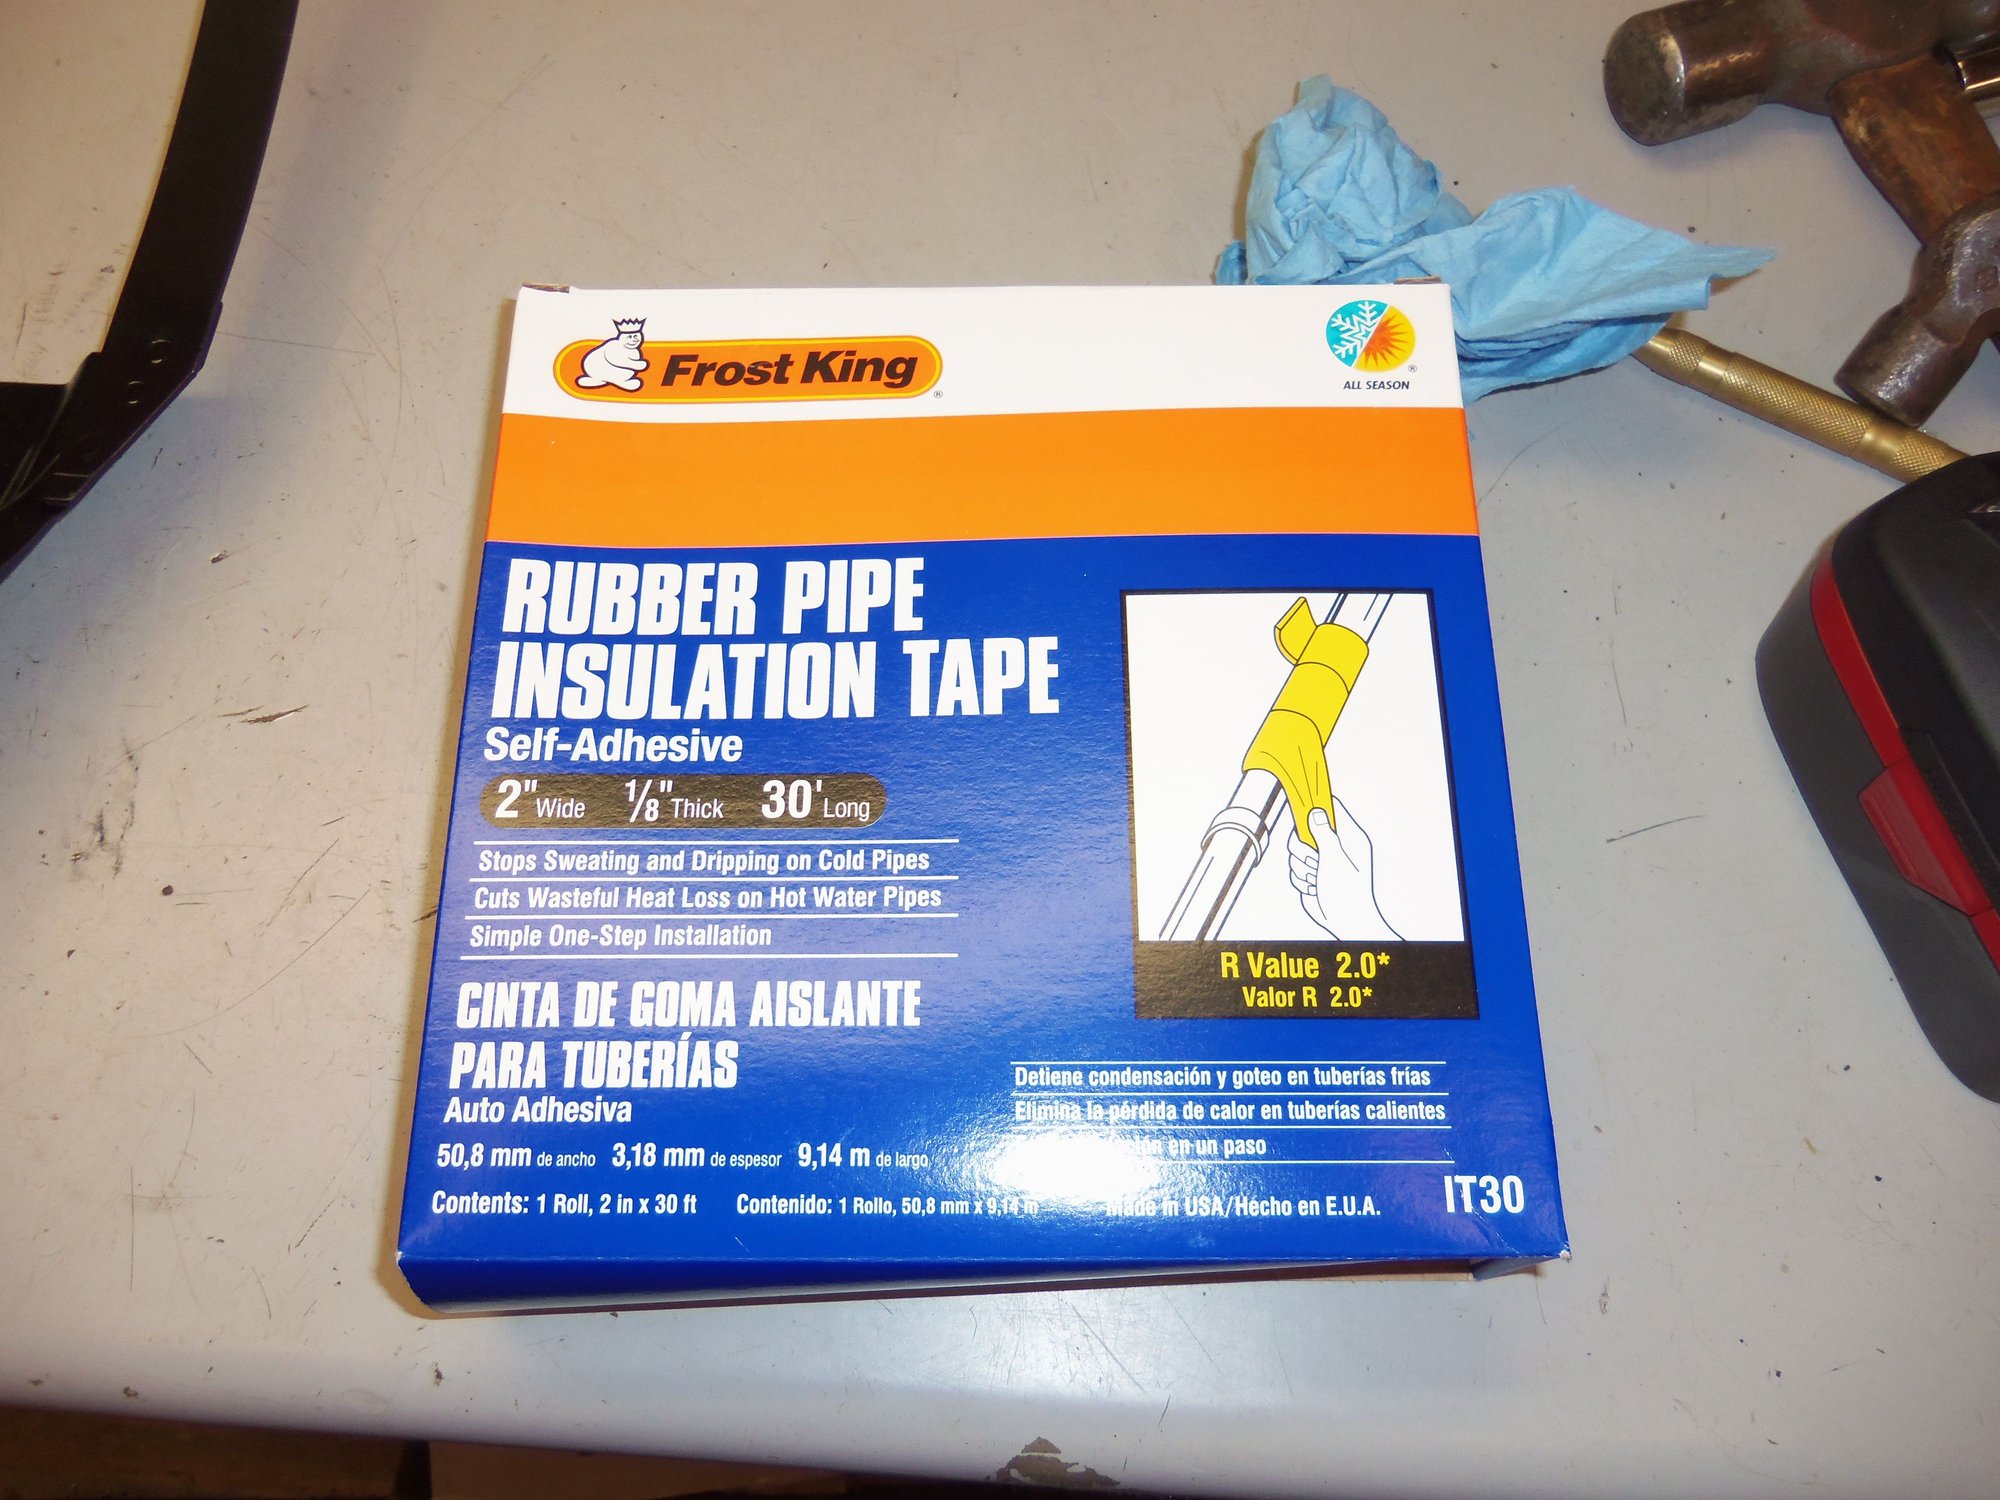
The fuel line fits OK in the relieved section of the leg, but the foam covered electrical conduit would not. I ended up cutting the foam insulation off to get the conduit to fit. I will reinstall the foam when I get the correct fuel tank cradle.
Fits OK for now. The electrical conduit is not under a great deal of compression, so I am not very concerned with it chaffing at the metal leg.
Great work. Yes, 78-79 cradles are different. The early ones are quite in demand but that doesn't appear to be what you received. Every late cradle I have seen from 80 and up appear like the replacement you got from 928 Intl.
They do fit tightly without any wiggle room so I would not have concern there. Looks like a great improvision
Thank you, Guy! I was concerned I was creating a problem. Good to know that they are tight. The improv was a little bit of sideways thinking and some minor fab work.
Thanks, Itoolio! This is the first big project off my list that I have completed. I have gotten alot of work done on alot of other things, but none are complete.
Go ahead and do it! Not as big a deal as you would think.
Pointers:
-spray penetrating oil on the threads of the bolt for the leg at the front of the fuel tank. It protrudes above the weldnut and corrodes. Mine was a bear to get out. Use a mirror to see what I mean. All the rest thread into something, less corrosion
-beware of the 'rubber' boots over the fuel pump wiring terminals. Mine were rock hard, hence 'rubber'. I replaced the boots, but had to cut and splice the wires to install them
The foam came from my local Lowe's. I tried to find some mastic tape, as in Dwayne's write up. All I found was this pipe insulation. Around $9 a box of 30'. Worked fantastically. However, the paper backing is a pain to get off, and the adhesive is demonic. Once its on, its on...
Stunning Porsche 356A Super GT Speedster Auction Fails to Meet Reserve
Slideshow: One of the rarest Porsche 356 Speedsters ever built has resurfaced, offering a glimpse into a little-known chapter of the model's competition history.
Theon Goes Full Carbon Fiber With Stunning New Build
Slideshow: Built around a carbon-bodied 964 and a naturally aspirated 4.0-liter flat-six, this bespoke commission highlights how far the restomod formula has evolved.
Tuner Is Converting Porsche 911s Into Shooting Brakes
Slideshow: A Polish Porsche specialist is moving ahead with one of the most unusual 911 conversions in recent memory: a shooting brake version of the 991-generation sports car.
This Coachbuilt Creation Is A Modern Take on the Legendary Porsche 917
Slideshow: A Porsche Carrera GT has been transformed into a one-off coachbuilt machine that blends analog supercar engineering with styling inspired by the legendary 917 race cars.
Is This Convertible Cayenne A Steal, Or A Returnless Investment?
Slideshow: A heavily modified Porsche Cayenne convertible with faux wood trim and a long list of flaws recently sold at auction for surprisingly little money.