When you click on links to various merchants on this site and make a purchase, this can result in this site earning a commission. Affiliate programs and affiliations include, but are not limited to, the eBay Partner Network.
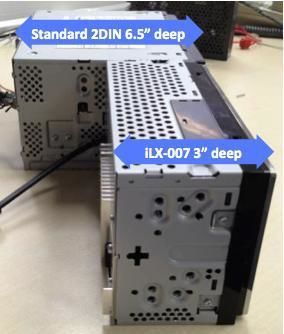
A few people have noticed and asked me about the double DIN conversion I did on my car. So I figured I would do a little write up on how it was done and some opinions on the end result. There have been a lot of double DIN conversions documented and those were all good inspirations for my own. You can do some searching to see the various options, but they fall into two groups. Put the double DIN at the a top and move the HVAC or put the double DIN at the bottom. Both require deleting and or moving the ashtray (most common) or Clock/Rear HVAC controls. Most of the conversions done thus far need to create a flush mount faceplate that is flush to the console trim because of the standard depth of the head unit interferes with the HVAC solenoid controls airbox. My conversion was different in that I used a shallow depth head unit, the Alpine iXL-007 is only about 3inches deep.
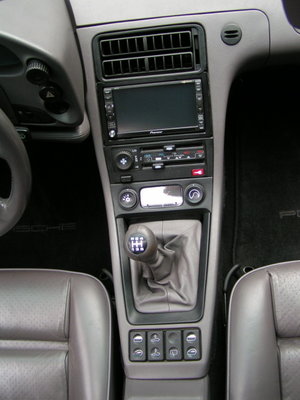
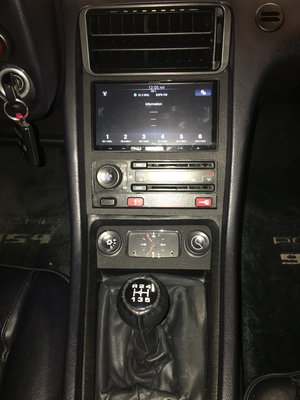
This offered a lot of flexibility on the use and allowed me to mount the unit and maintain the stock recessed installation, which I tend to prefer. The Alpine unit is shallow enough to mount in either the top or bottom location and still maintain the stock recess. I decided to mount it in the top location because it meant less cutting of the console and I seemed more of a natural "heads-up position" (see opinion section below).
Both horizontal supports needed to be removed to the unit to be installed in the upper position. Mounting the double DIN in the lower position would have required trimming the ashtray mounting tabs.
Here are a couple fine examples in installations that I used as part of my inspiration. My installation is the third photo. Notice the variations of clock/ashtray areas.
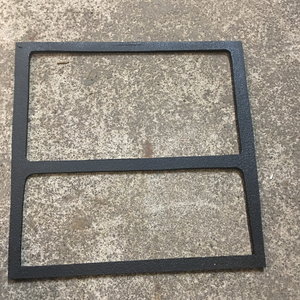
I created a faceplate using 3mm ABS plastics from TAP plastics. It has a texture on one side and smooth on the back side. It was inexpensive and easy enough to work with.
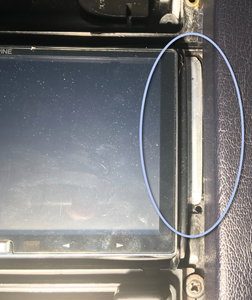
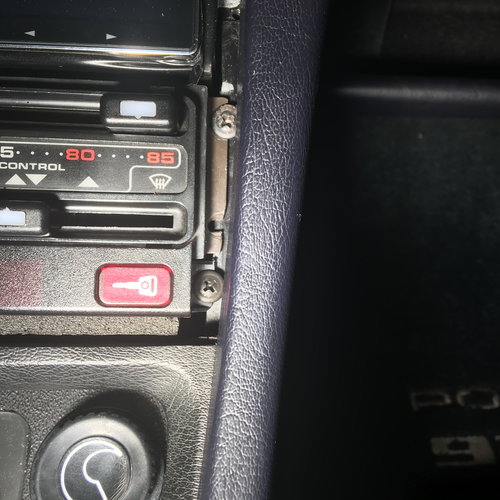
Here is the recommended mounting of the head unit. It uses side plates screwed into the side of the head unit. The screws were included but not the mounting plates. I created my own mounting plates using thin HVAC sheet metal from home depot. I cut metal squares about the size of each side of the head unit and bent 90-degree wings (flanges) to hold the unit in the console. Because of width issues I had to use counter sunk screws instead of the button heads. These worked perfectly in deforming the metal and the side of the head unit were flush and were a nice tight fit into the console.
It is mounted by two wings that essentially press fit into the mounting recesses of the console on the original HVAV location. I was going to run screws into the plastic, but found the press fit to be more than secure.
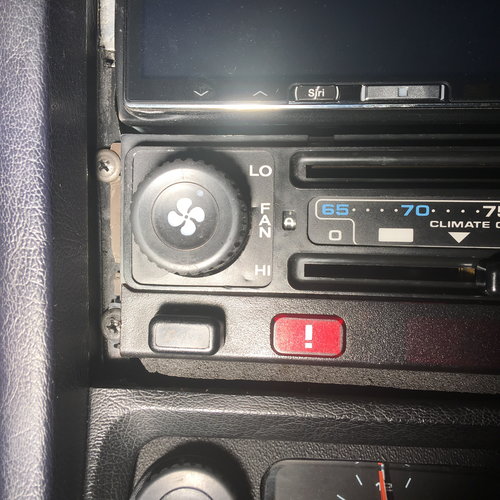
The HVAC unit was mounted by drilling mounting holes and tapping screws on the remaining edges of the console. I did some un-ncessary trimming of the mounting tabs when was experimenting with different mounting locations. I would say this was the most ghetto part of my install. It looks like hell but it's covered by the faceplate. But it still bothers me.
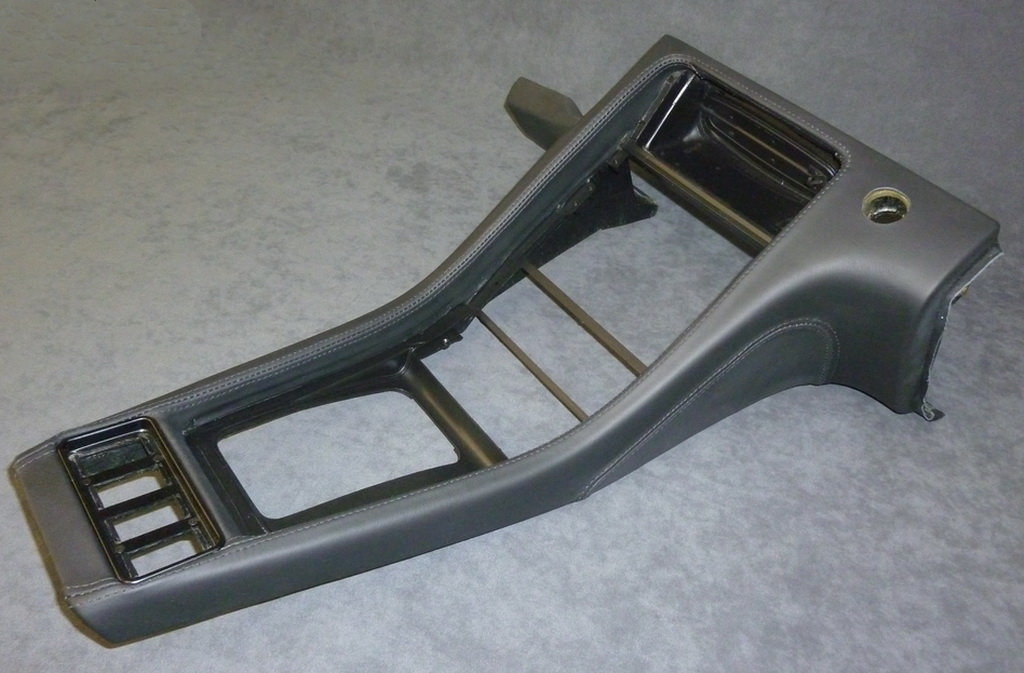
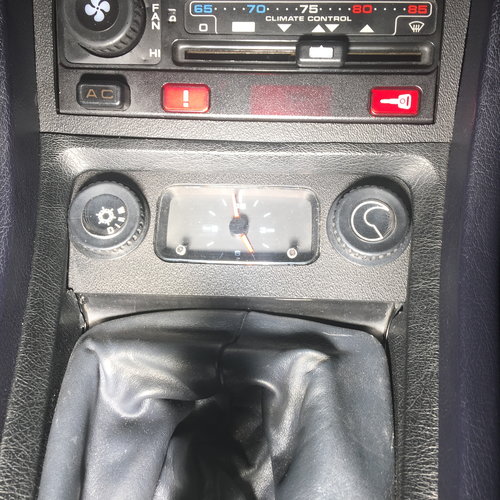
Here is a close up of the clock and rear HVAC controls. I trimmed the shifter surround to the bottom lip of the original clock location and moved the controls to the ashtray on a flat piece of ABS. it took a few tries to get the clock surround perfect. In hind sight I should have made this cutout before trimming the piece to size. It does not have enough overhang into the shift location. I would have liked to make a 90degree bend down. Also it HVAC controls are a very tight fit in the recess.
-------
Opinions:
1. I don't like the upper position of the head unit. I think I would prefer the lower position for a variety of reasons. The first is that the unit is slightly out of reach given the driving position. Moving it to the lower position would have made the faceplate template a little easier too. I could have used the stock surround for HVAC and center vent and made a plate for only the head unit. Cutting the surrounds was tricky to get right and I feel i still need to improve it.
2. As I said above, I am not happy with the finish work on the faceplate. I need to make a new one that curves around the center vent to fill the corners. The cutouts for the head unit and HVAC are not perfect and need to be better. Not sure how to do it by hand, and get the corners correctly. I may take it to TAP plastics and have them make a new template with their CNC machine. The template could also use a 90-degree bend and 1cm lip at the bottom to give it some depth much like the stock trim pieces.
3. I generally miss the stock look and I am considering converting back. I still have the original console and Reno head unit. I have done some testing with the new amp/speaker and it does sound pretty good. Although the Alpine unit has some very good sound controls and an mobile app interface that allows you to get the sound perfect - which it currently is. Undecided at this point.
Thanks for sharing both the details of your install and your opinions about it. Many of us desire the functionality of Bluetooth and in-dash navigation, but want to maintain a "928 look". A double din conversion seems to address those objectives, as long as it's done right. Your post provides a lot of useful information. I wouldn't have thought about how difficult it would be to use the touchscreen with the head-unit in the top location.
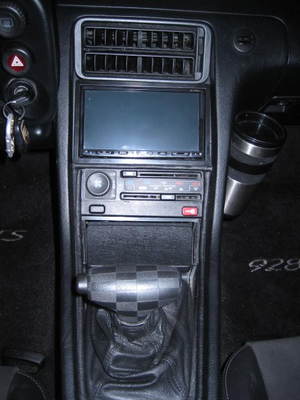
Looks great Mike. Wish the shallow mount head units were available back when I did mine. Few more pics T
These pics look familiar. I purchased this fine machine from Tony last year. At the time, the amps were turning on and off randomly when the car was shut off. I was convinced it was the head unit and even purchased a replacement from Pioneer. I found the Pioneer units have less depth at the top of the unit and this is were the head unit interferes with the HVAC solenoid controls airbox. I forgot to measure the depth at the top and I never installed the Pioneer head unit as this was not the problem. If you go look at pics on line they are all made the same in the back. I'm less then a 1/4" off from fitting in the space with the JVC head unit that is installed now. I know the Pioneer's would fit better.
Very sorry to necro an old thread here - Great work on your conversion! Did you hook up a reverse camera? If so how did you connect the reverse lead going into the head unit?
Very sorry to necro an old thread here - Great work on your conversion! Did you hook up a reverse camera? If so how did you connect the reverse lead going into the head unit?
I never did end up connecting the rear camera, didn't feel I needed to given the good visibility out the back and sides. I have since removed this double DIN and went back to the single DIN setup because I feel the original design of the center console is one of the more beautiful dash designs in the world.

 10-04-2016, 03:31 PM


 T
T

