When you click on links to various merchants on this site and make a purchase, this can result in this site earning a commission. Affiliate programs and affiliations include, but are not limited to, the eBay Partner Network.
Alright, I'm going to interrupt this long winded narrative with a moment of real time info.
I just finished follow up testing of the modulator pressure. Read - burning the **** outta myself on the hot transmission until I learned exactly where to put my hand to manipulate the modulator adjusting key. And one good elbow burn on the exhaust system for good measure.
I PM'd Greg Brown with my problem of high modulator pressure. It is never a good thing when he says he has NEVER seen modulator pressure that high before. He gave me a short list of things to check, then recommended I unscrew the modulator adjustment 6 turns. Then check modulator pressure again.
Because I didn't know any better, I put the rear wheels back on and torqued them down. This made zero difference in modulator pressure, but I didn't know. I let the engine warm up, then ran the trans in 'D' for around 10 minutes to warm it up. Then, down to testing.
Modulator pressure was still between 115 and 120 PSI. First problem, I couldn't get the adjusting key out. I tried to lever it out with tiny screwdrivers, cursed at it, etc... Finally, I was able to lever it out with a super narrow pick at the inside corner of the 'T'.
It took several tries (see burns above) to figure out how to get my hand in there to turn the adjusting key. I was able to start unscrewing it. Sure enough, pressure started to drop.
After the recommended 6 turns unscrewed, modulator pressure was 79 PSI (5.45 bar.) So, I continued on. My target was 64 PSI (4.41 bar.) As I continued to unscrew the adjuster, modulator pressure continued to drop. Then it stopped at 66 PSI (4.55 bar). Further unscrewing of the modulator resulted in no change of the modulator pressure.
I looked at the modulator and realized the adjusting screw was actually starting to back out of the modulator body.
This tells me the new modulator is not at fault, and I have screwed something up. As soon as the transmission cools enough for me to work with it, I am going to remove the new modulator, thrust pin, and plunger for a close inspection.
I found no damage or anomalies in the new modulator, thrust pin, or plunger. I again compared them to the parts removed. Identical in all but color.
A thunderstorm is blowing in, so I am done for the night. I am going to spend a couple of hours surfing the net for 'Mercedes 722.3 high modulator pressure' and searches to that extent.
For giggles, in the morning, I will reinstall all the old modulator parts. Just to see if there is a difference.
My understanding is the Modulator pressure is checked at 50Km/h. Not sure if the resistance of the tires on the road makes a difference or if simple wheel speed of 50Km/h is sufficient for checking the pressure. When I replaced my modulator I road tested to set the pressure. Also, the vacuum hose must be disconnected for the test.
Have you checked the Control Pressure to see if it is in spec?
Hi ammonman!
For the most part, I agree with you. The WSM calls for a road test at 140kph, and recommends 50kph if 140kph is not practical.
General consensus I have seen here on Rennlist in the 928 forum is that doing the test with the car off the ground, wheels free, and transmission in 'D' will get you close enough. Then you tune to your tastes.
I have not as yet checked control pressure. That is a very good point. I don't know if this is significant, but I am reading modulator pressure as soon as the engine is running. It doesn't matter if the transmission is in 'P', 'N', or 'D', I still see the pressure on the gauge. I don't know if this is correct or not.
I have sifted through pages of modulator info from Mercedes enthusiast sites. I have hit a glimmer of info. A gentleman with a 722.1 automatic had very high modulator pressure. It turned out he had a stuck valve in the valve body.
Hmmm...I did have the valve body off. So, going with the methodology of 'what did you mess with last?', tomorrow morning, I am pulling the valve body again. I will clean and inspect it in accordance with the WSM. I am hoping to find a stuck valve that I can gently free up.
Since this transmission worked before I messed with it, it has to be something I have done.
Just to let you know, I am not mechanically inclined; the biggest thing I ever did on my 928 was to remove the computers and change the EZK chip. That made me anxious. But this thread has me mesmerized. I am working on the transmission right with you, in spirit. Trust me, you wouldn't want me there in body.
I love your write ups and enthusiasm Seth, but hope you are learning from this one. A fluid and filter change and a small tweak on the modulator valve was probably all your transmission needed. This coming from a guy that has learned some hard lessons himself!
I don't have an auto but can appreciate the trend of near impossible to reach bolts and out of nowhere thunderstorms. Keep at it. I like to think of it this way, if you keep throwing time, effort, and often times money at a problem and trying different things, statistically it is not possible that you will not find the fix.
safulop: Thanks for the support! I understand the sentiment, I tell my computer friends the same thing when they build me new PC's. I let them do their thing because I am NOT the person you want setting up your PC.
Cosmo Kramer: Thank you! I am enthusiastic because this is what I WANT! I love the 928. But, deep down, I LOVE to tinker. I love to make things right, the way they are supposed to be. I get a deep sense of satisfaction out of returning something back to its proper working condition.
And I screw things up.
I am enthusiastic, confident, and believe in my abilities. However, I am not so full of myself that I can't admit I make mistakes. And I have made one.
Trick now is to figure out what I have done wrong.
At the same time, I can't be afraid of any of this. I have to be willing to learn and do. And minimize the number of mistakes.
I agree. Full fluid change, filter replacement, new rubber cap on the old modulator and new vacuum hose, adjustment of all cables and modulator would have probably made all this right.
I didn't have to pull the valve body to do the K1 spring update, either.
Eh...live and learn.
Majestic Moose: Yeah, its a game of attrition. I do this at work with equipment. Keep banging your head against it, sooner or later you will figure something out.
Thanks!
Drained the reservoir and pan, removed same. Pulled the valve body. Let it drip drain while I made a supply run.
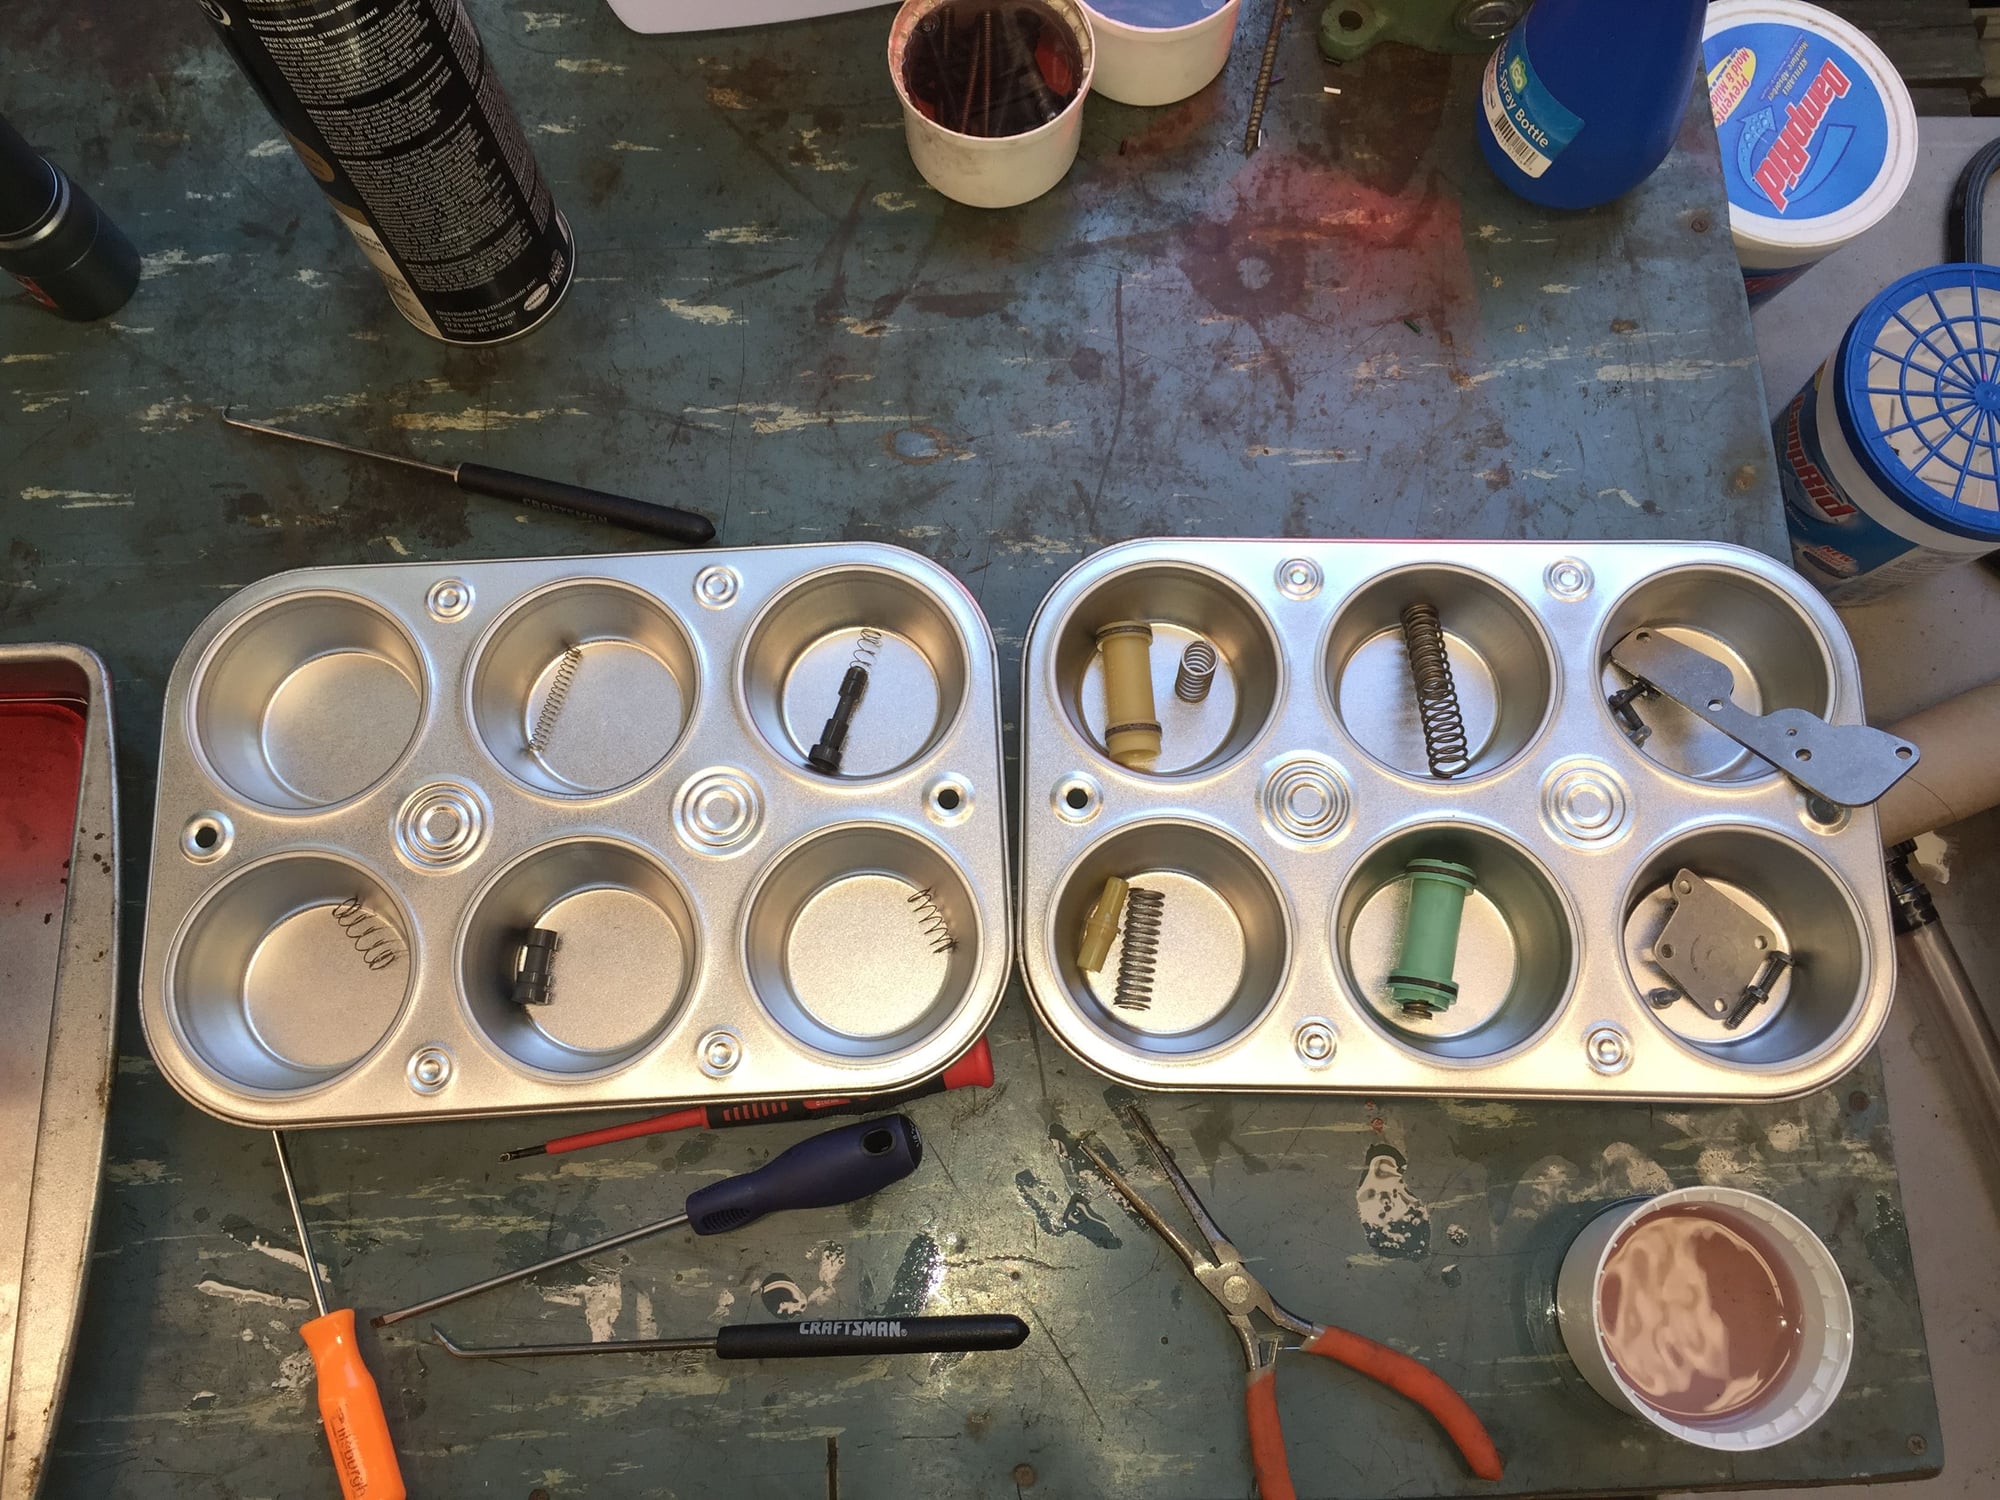
I returned with mineral spirits, gun patches, two muffin pans, and two turkey roasting aluminum pans.
Then, I had a change of heart. Rather than blow the valve body apart, I was going to treat it like an onion.
Thoroughly inspect the passages on the backside.
Remove valves from the ends for cleaning and inspection.
Split the valve body. Thoroughly inspect.
Doing more research, I found reference to a 'modulating pressure valve' in the WSM, Volume 3, Section 38, page 38-129. I also found this called the 'modulator pressure relief valve' in a Mercedes document.
Hmmm...if a relief valve is sticking, pressure could be high.
In a Mitchell manual for the 722.3 transmission, I found a troubleshooting string that implied incorrect modulator pressure could be caused by a dirty or sticking modulator pressure valve or a dirty or sticking working pressure control valve.
I started by removing and inspecting the K2 accumulator and spring, and the rest of the valves on that side of the valve body, under the single cover. I carefully removed each item from each bore, photographed the specific arrangement/alignment of the items, then cleaned them in mineral spirits. This is where the muffin pans came in handy. I put the parts in the muffin holes in the same arrangement as in the valve body.
All were very clean. The only debris I found was on the inside of the retaining cover plates. The last plunger on the left would not come out. It was not stuck, I was able to move it back and forth. It just didn't want to come out. I didn't want to force it. We called it a draw.
I lubricated all pieces in clean ATF and reinstalled them in the same order.
Noting how clean all the valves had been, I decided to separate the valve body next and look at the 'modulating pressure valve'.
Splitting the valve body was a no-sh*tter. Remove the screws, carefully flip the entire thing over. Gently remove the top section from the separator plate. Gently start to slide the separator plate off. Feel the separator plate pop up as a couple of spring loaded things free up.
There is a check ball that compresses a spring when the separator plate is installed, check ball #5, WSM, Volume 3, Section 38, page 38-125. This ball likes to pop off its spring. Luckily it falls into the cavity next to it.
Next you notice a little metal pin fall off the underside of the separator plate...uh-oh.
10 minutes of searching the WSM, Mercedes documents, and pictures of separated valve bodies on Rennlist finally let me figure out that it was an orifice, item #23, WSM, Volume 3, Section 38, pages 38-126 and 35-127. I quickly put it back where it belonged.
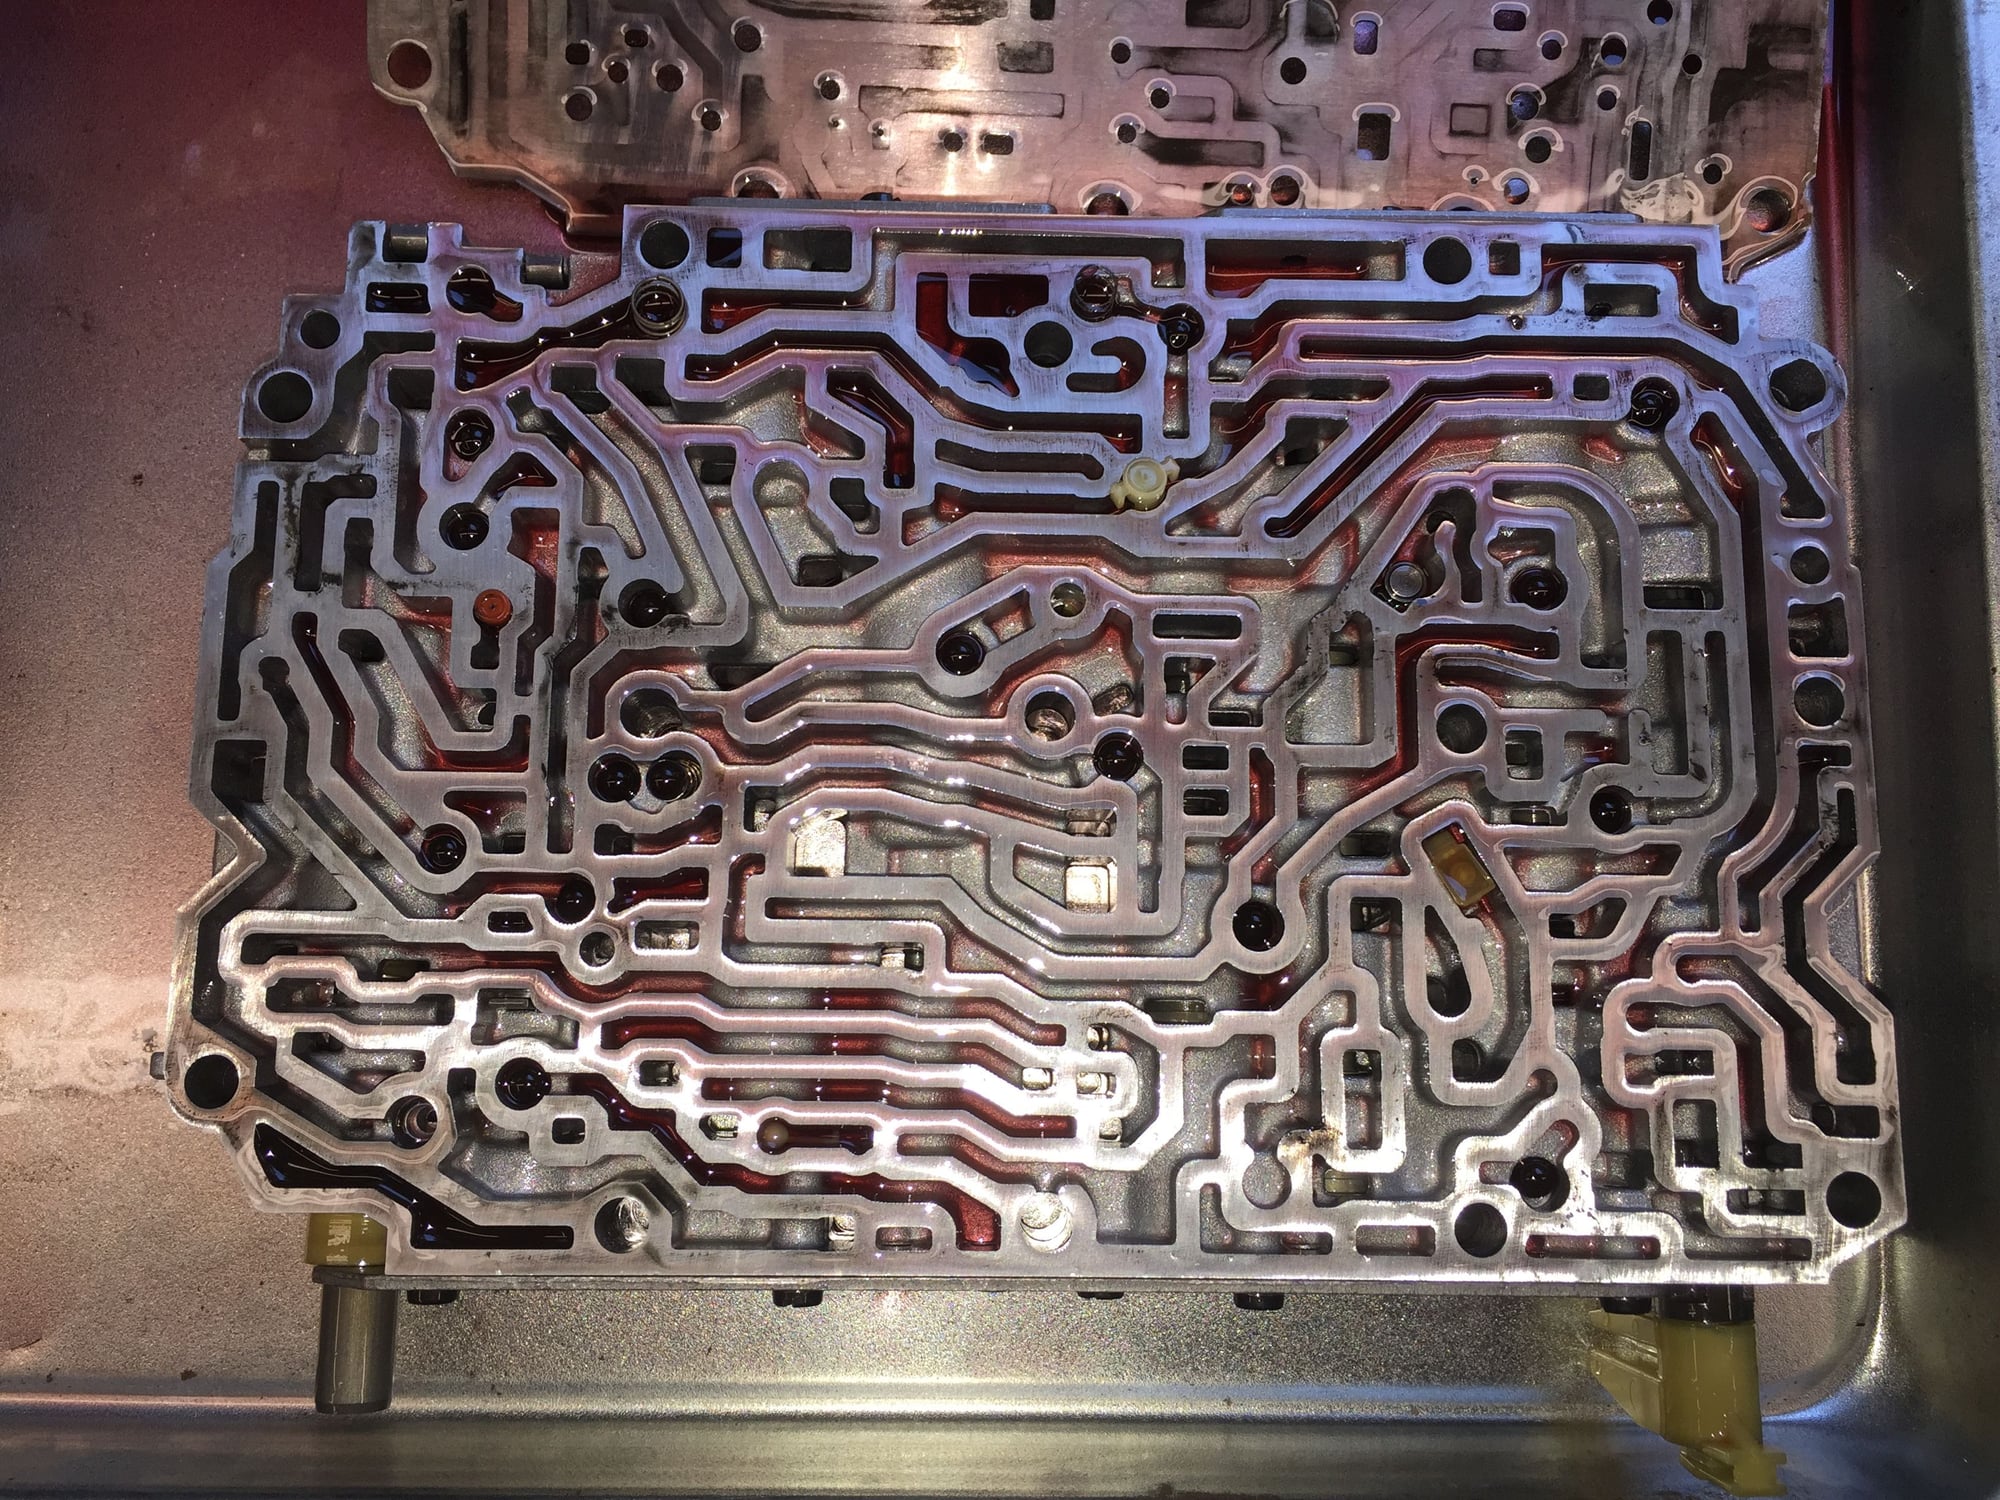
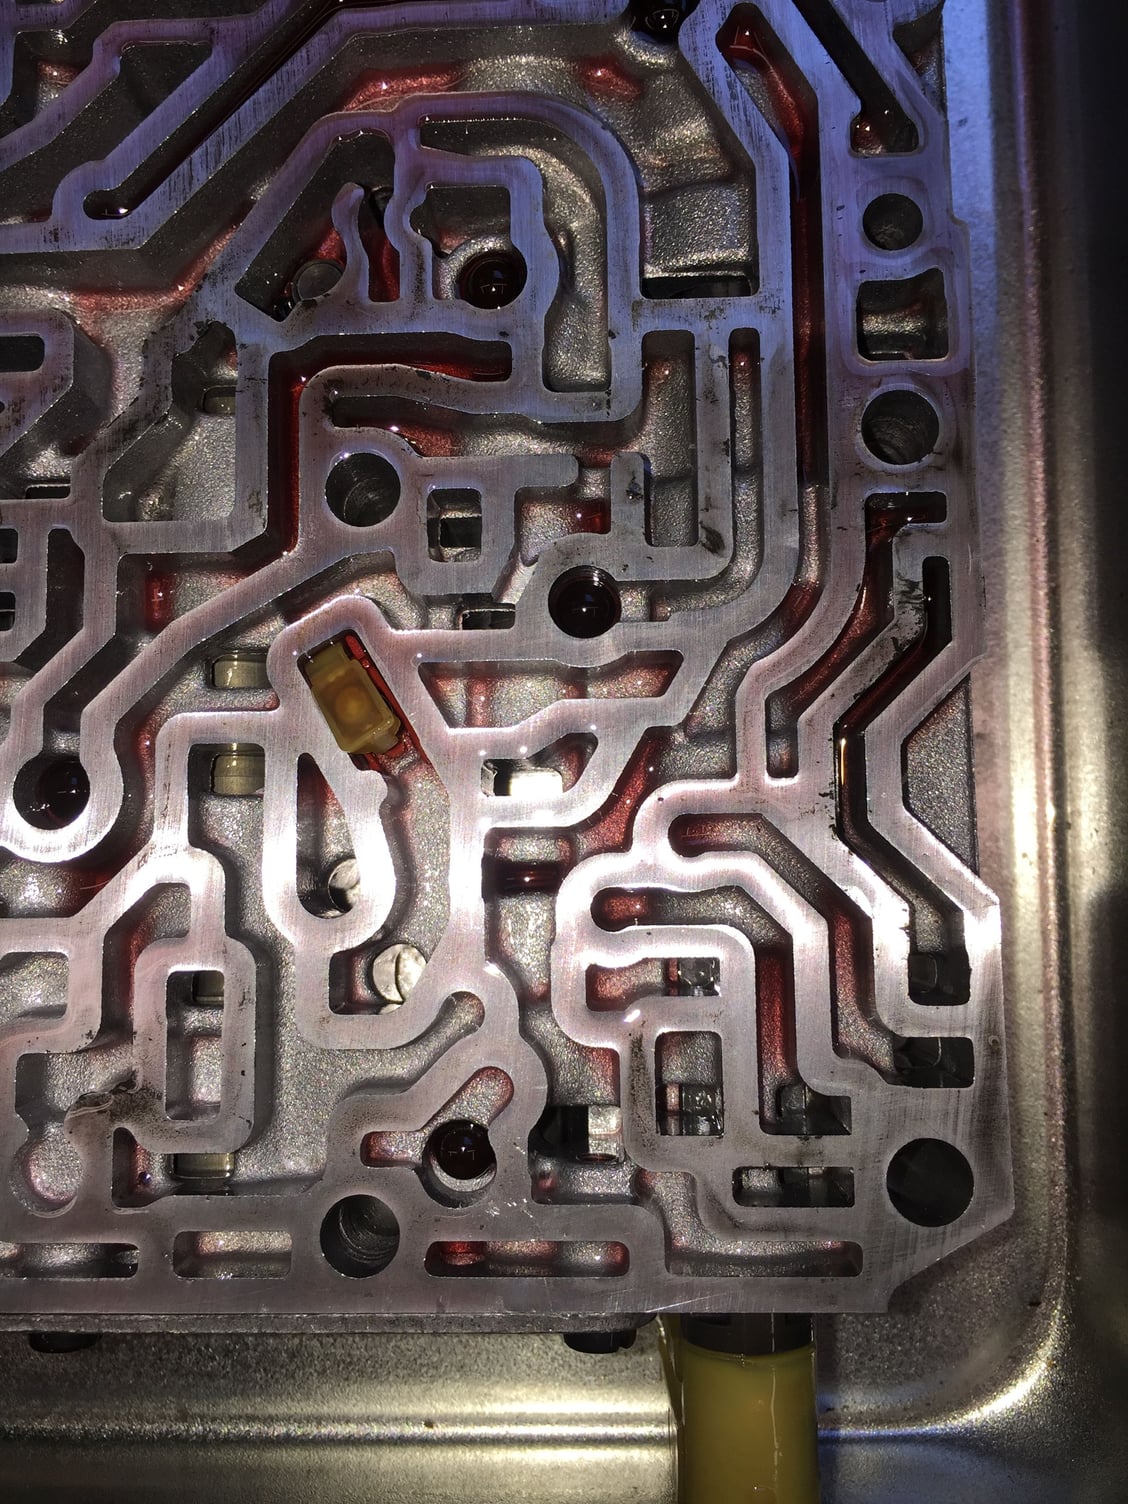
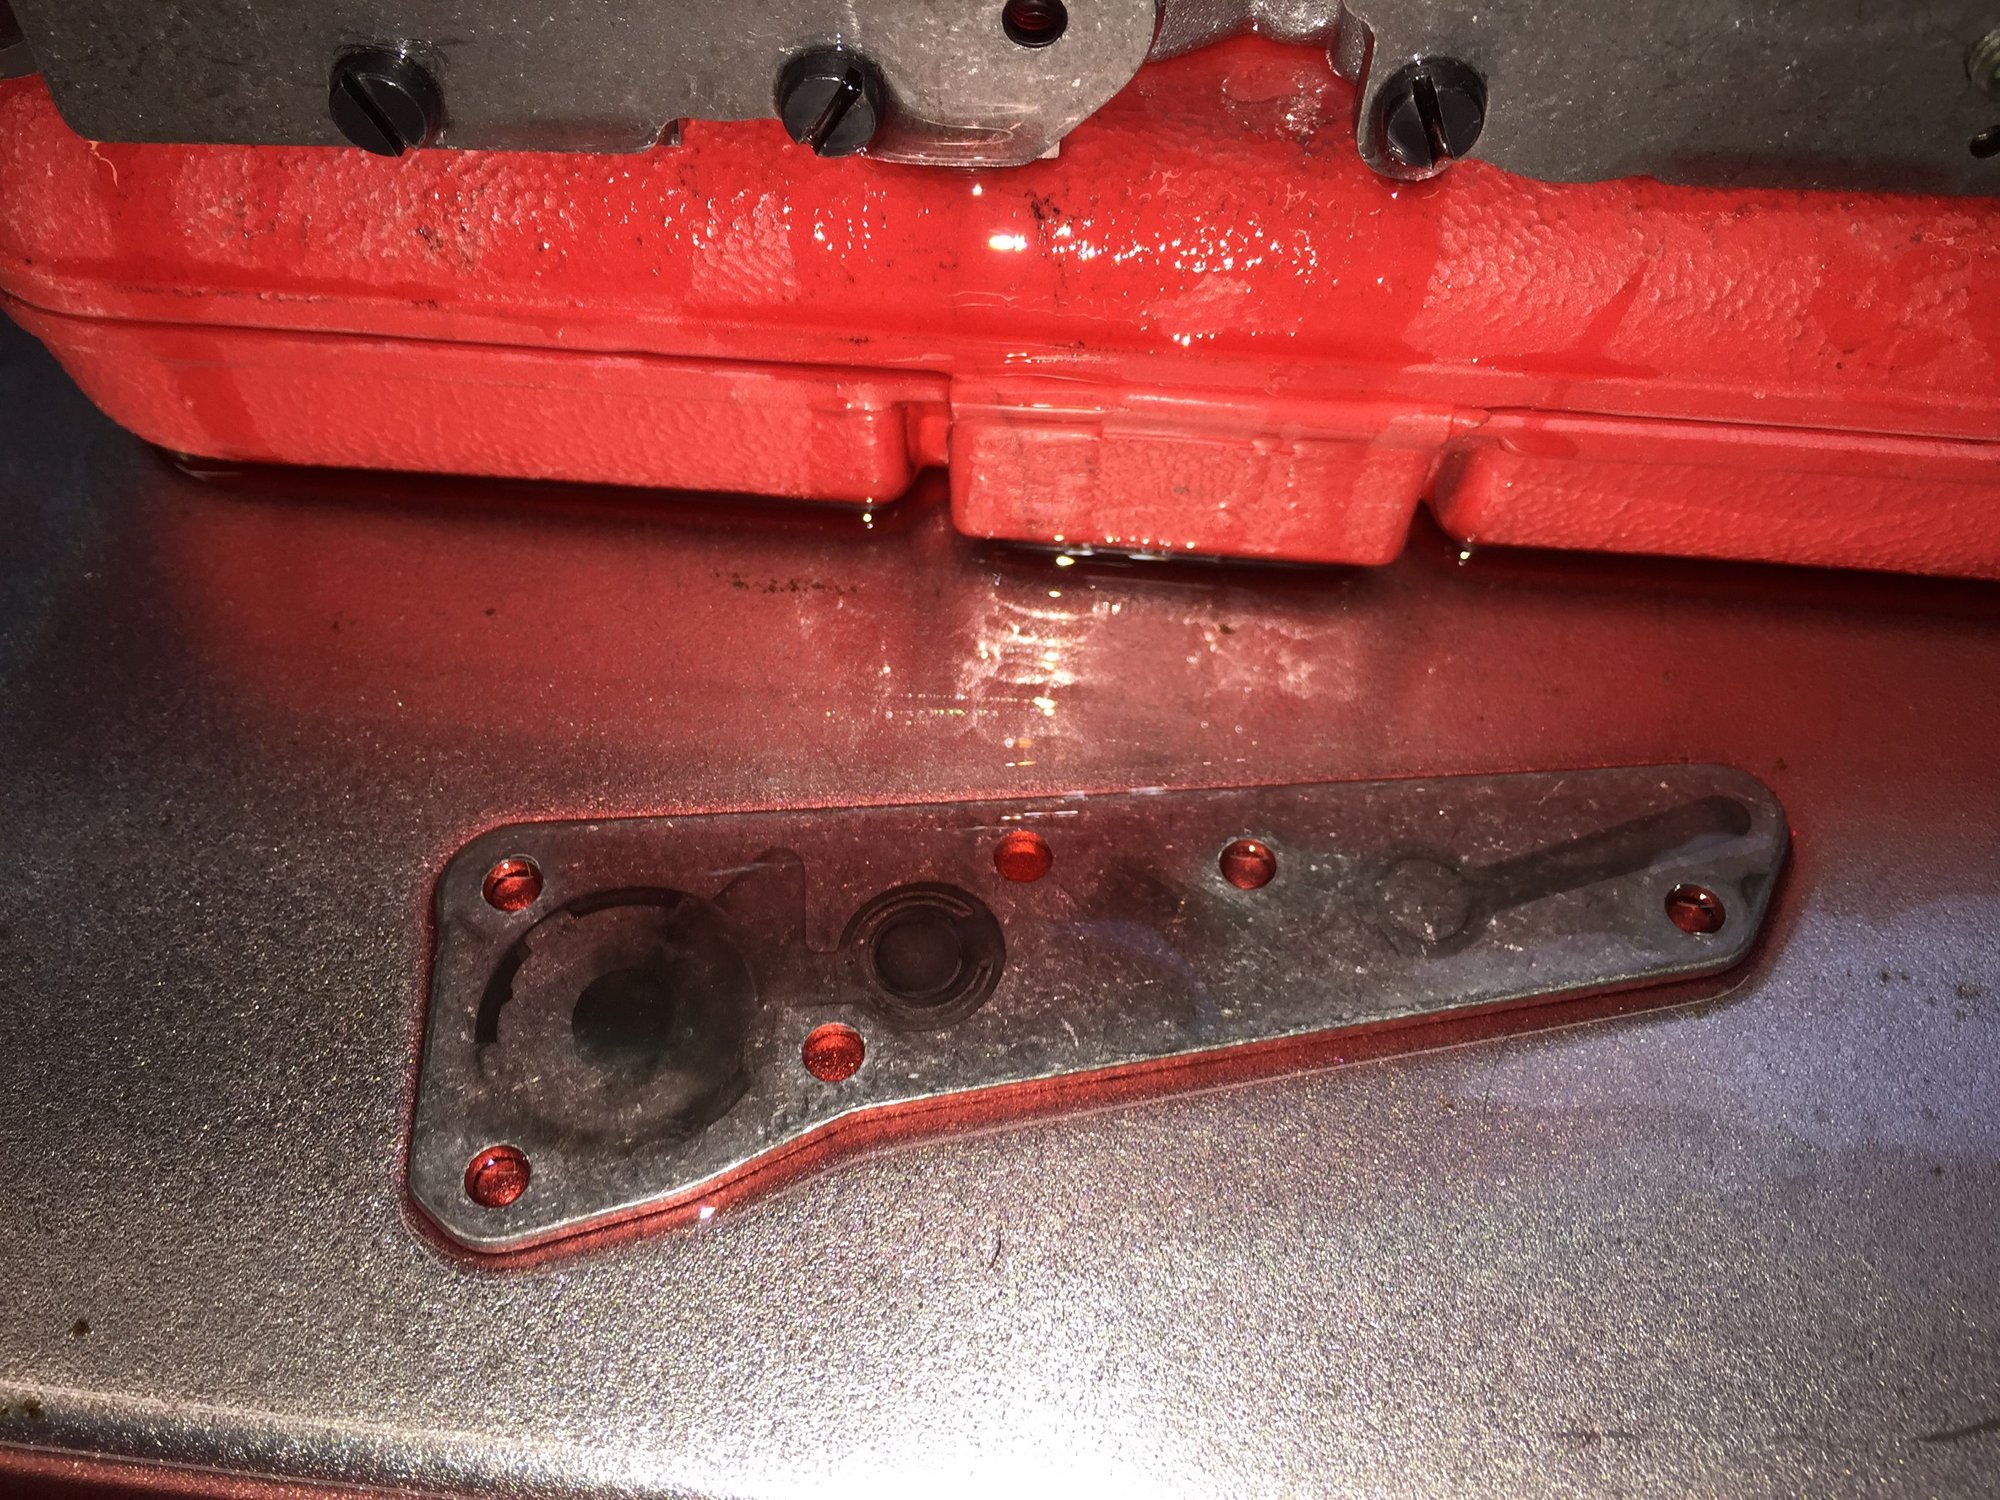
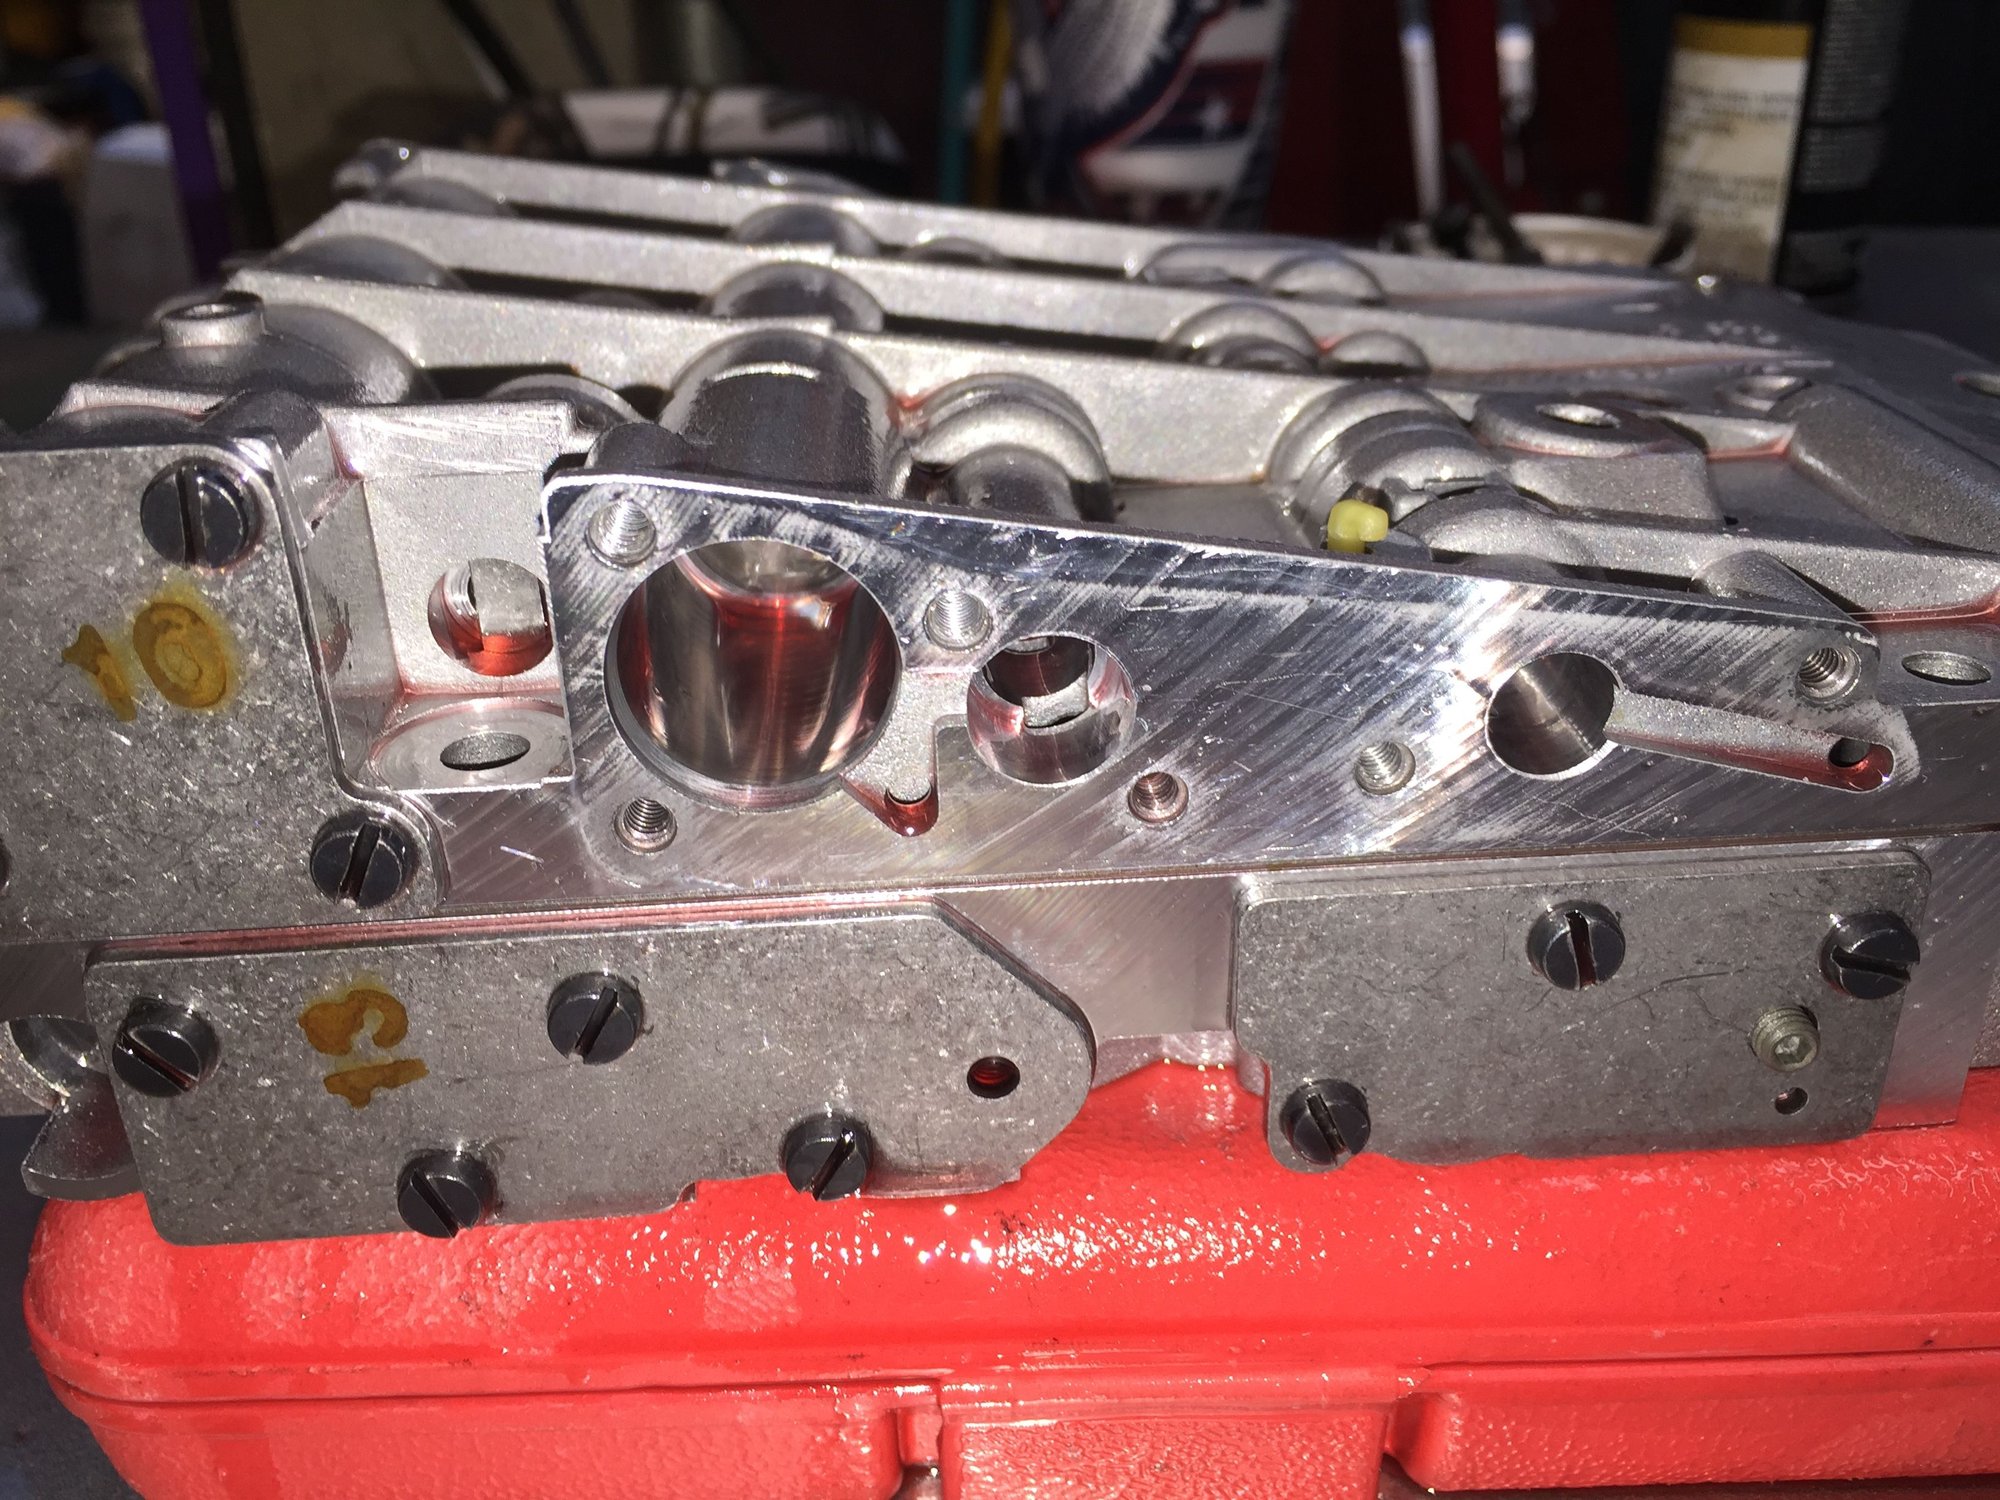
I then took some detailed photos of the lower valve body section, showing the location of the check *****, valves, etc...
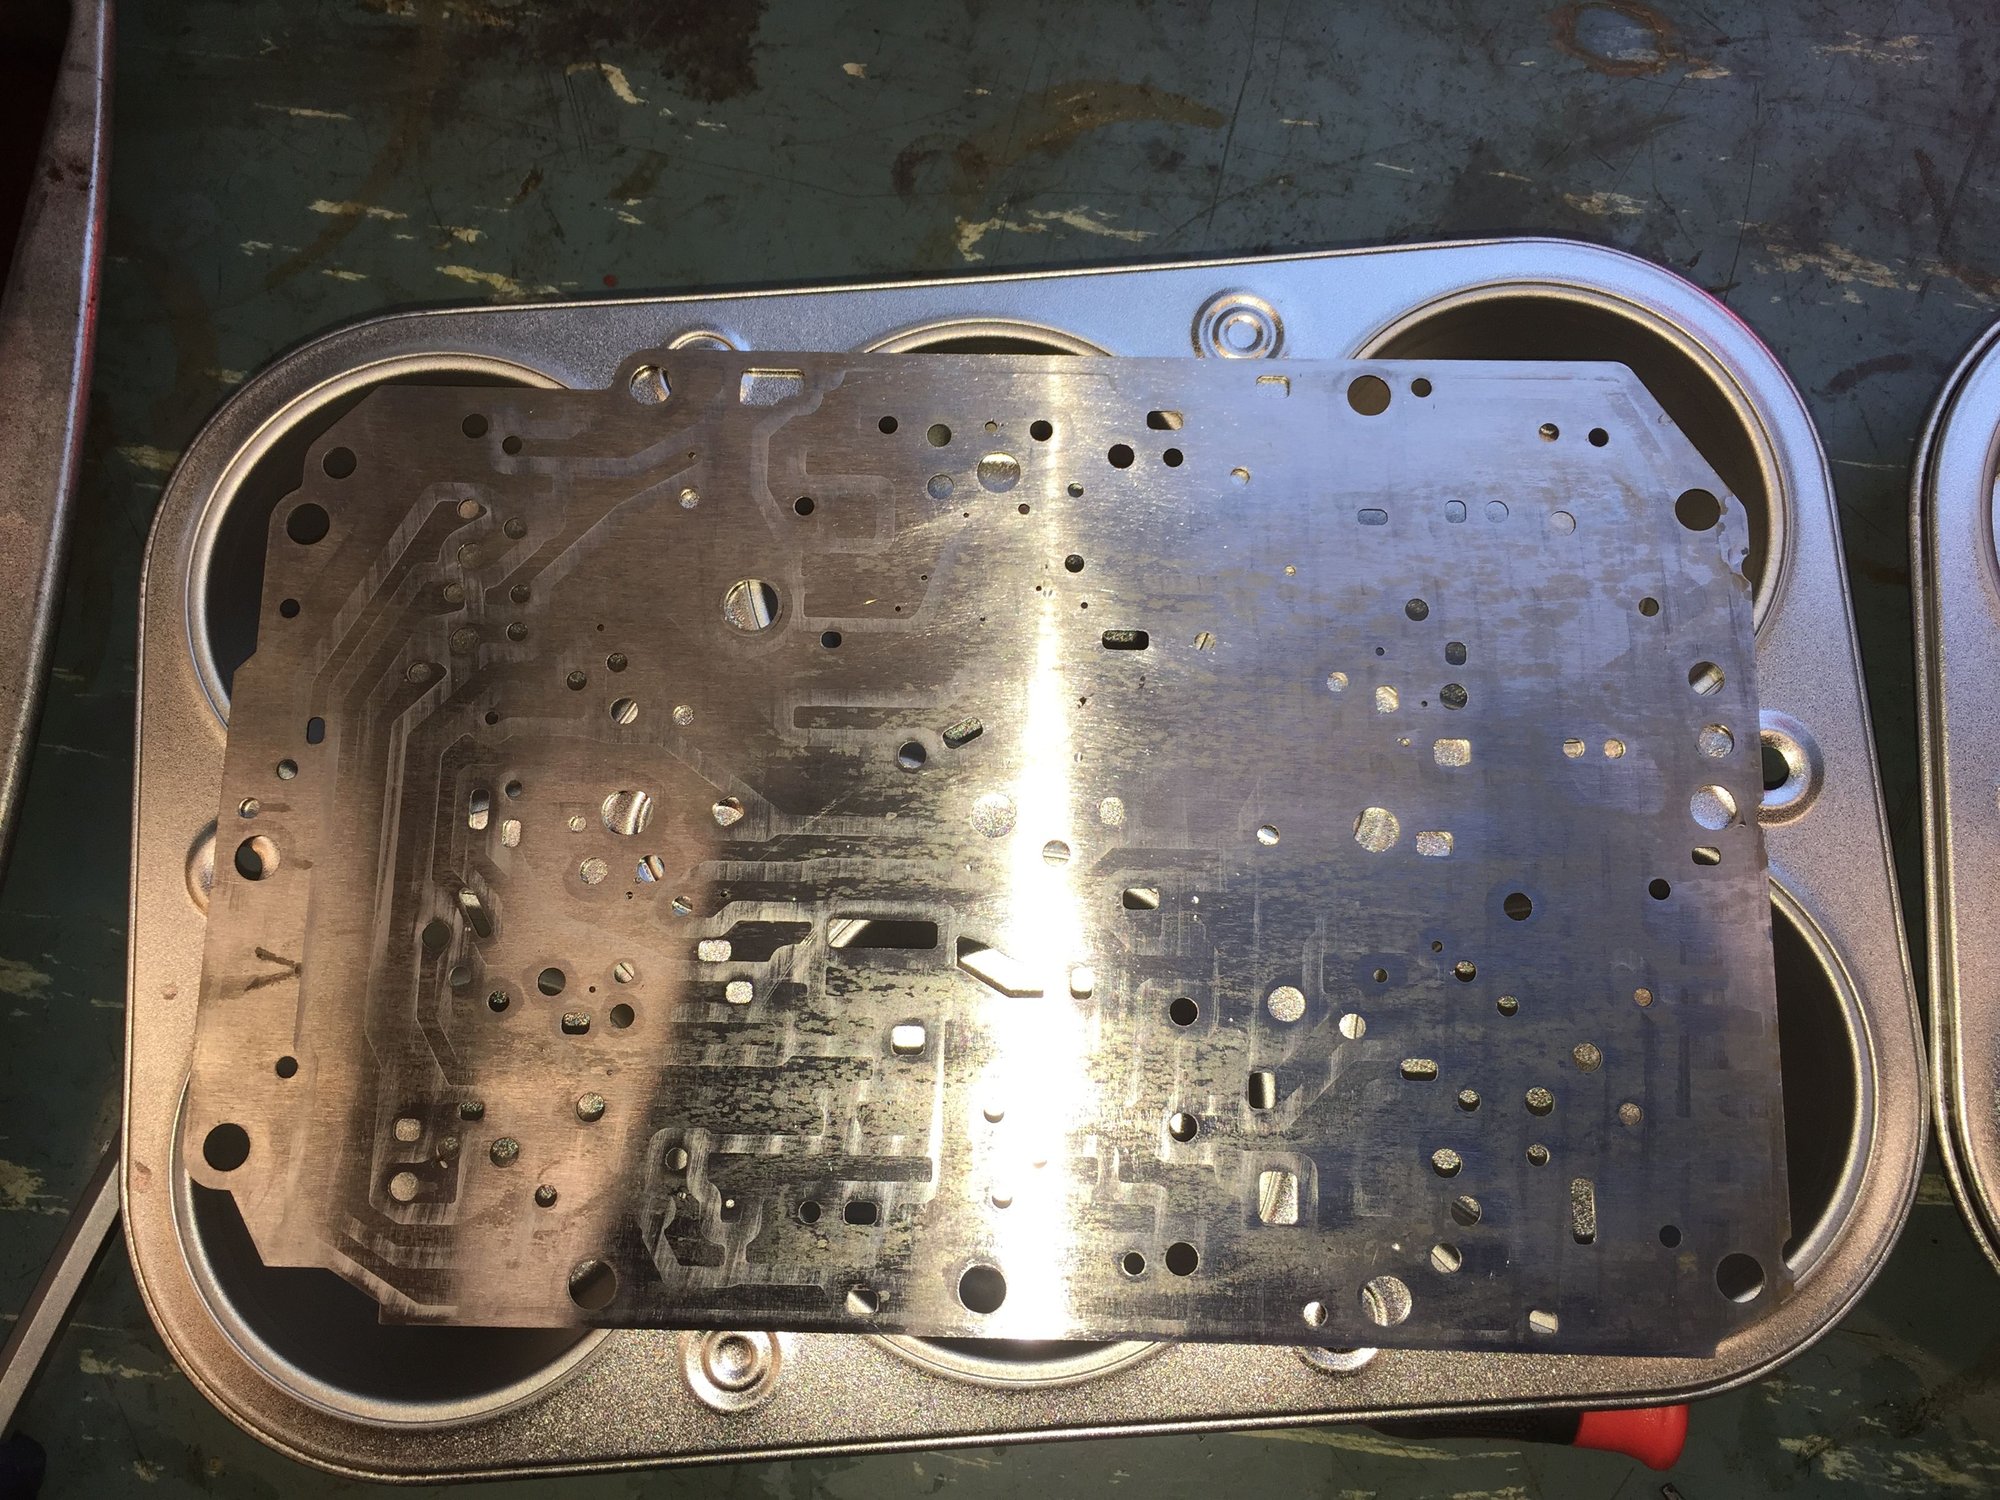
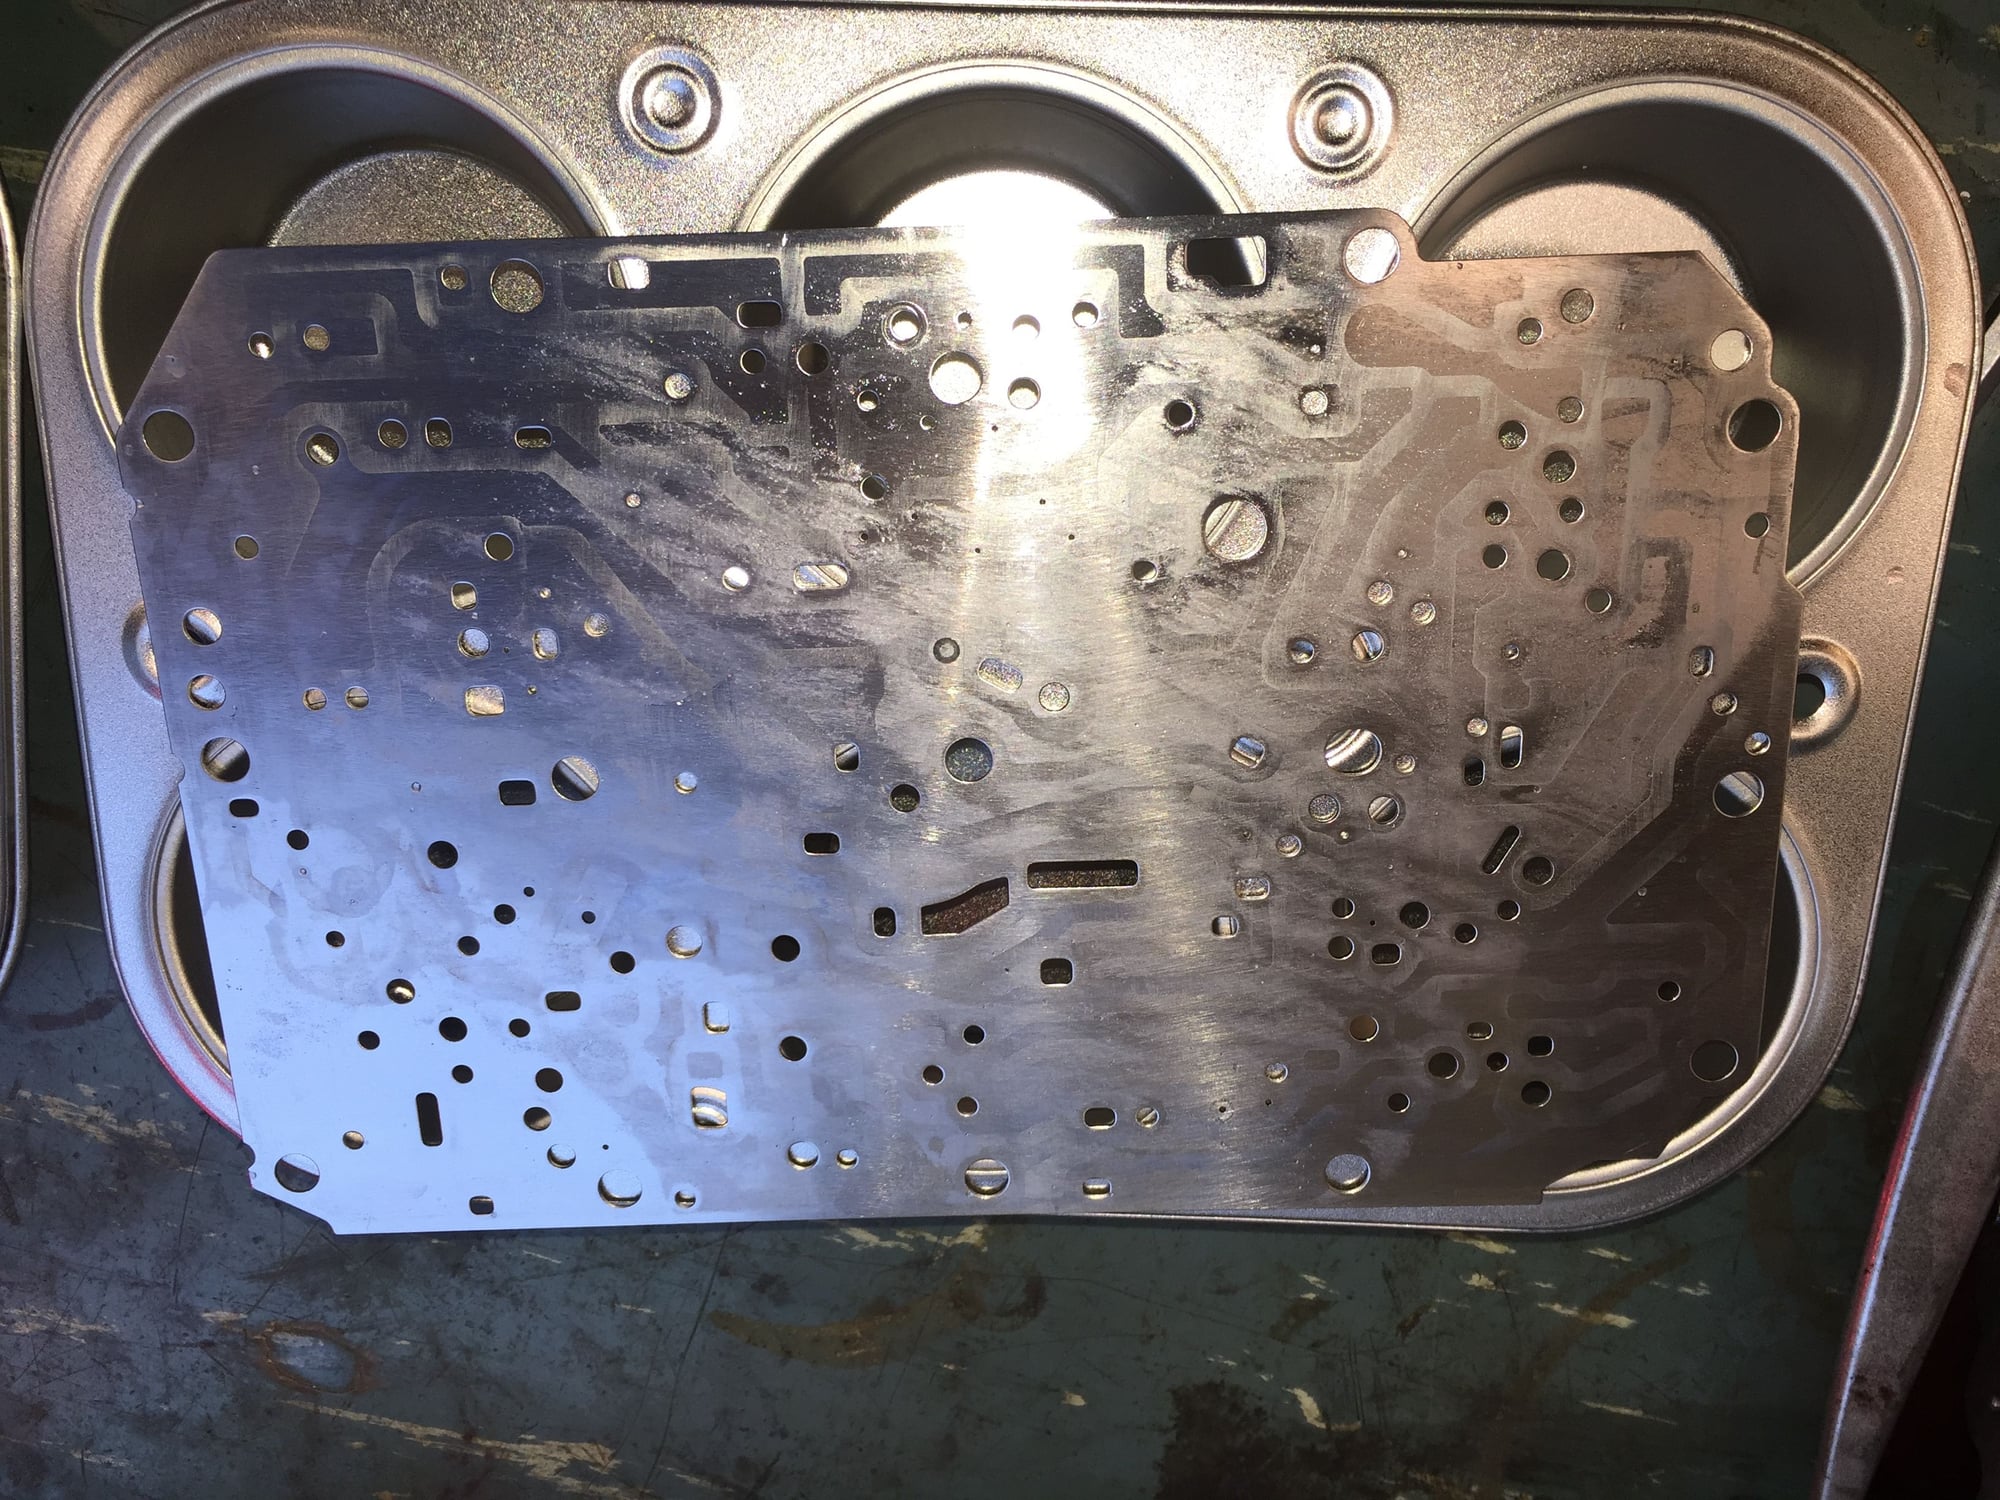
Inspection of the passages and channels in the valve body found surprisingly little debris. There was some on the separator plate and on the edges of the channels where the plate sat. I noted a tiny bit of debris in the deep corners of a couple of areas. Not enough to justify completely taking apart the valve body for a soaking.
Both sides of the separator plate after cleaning:
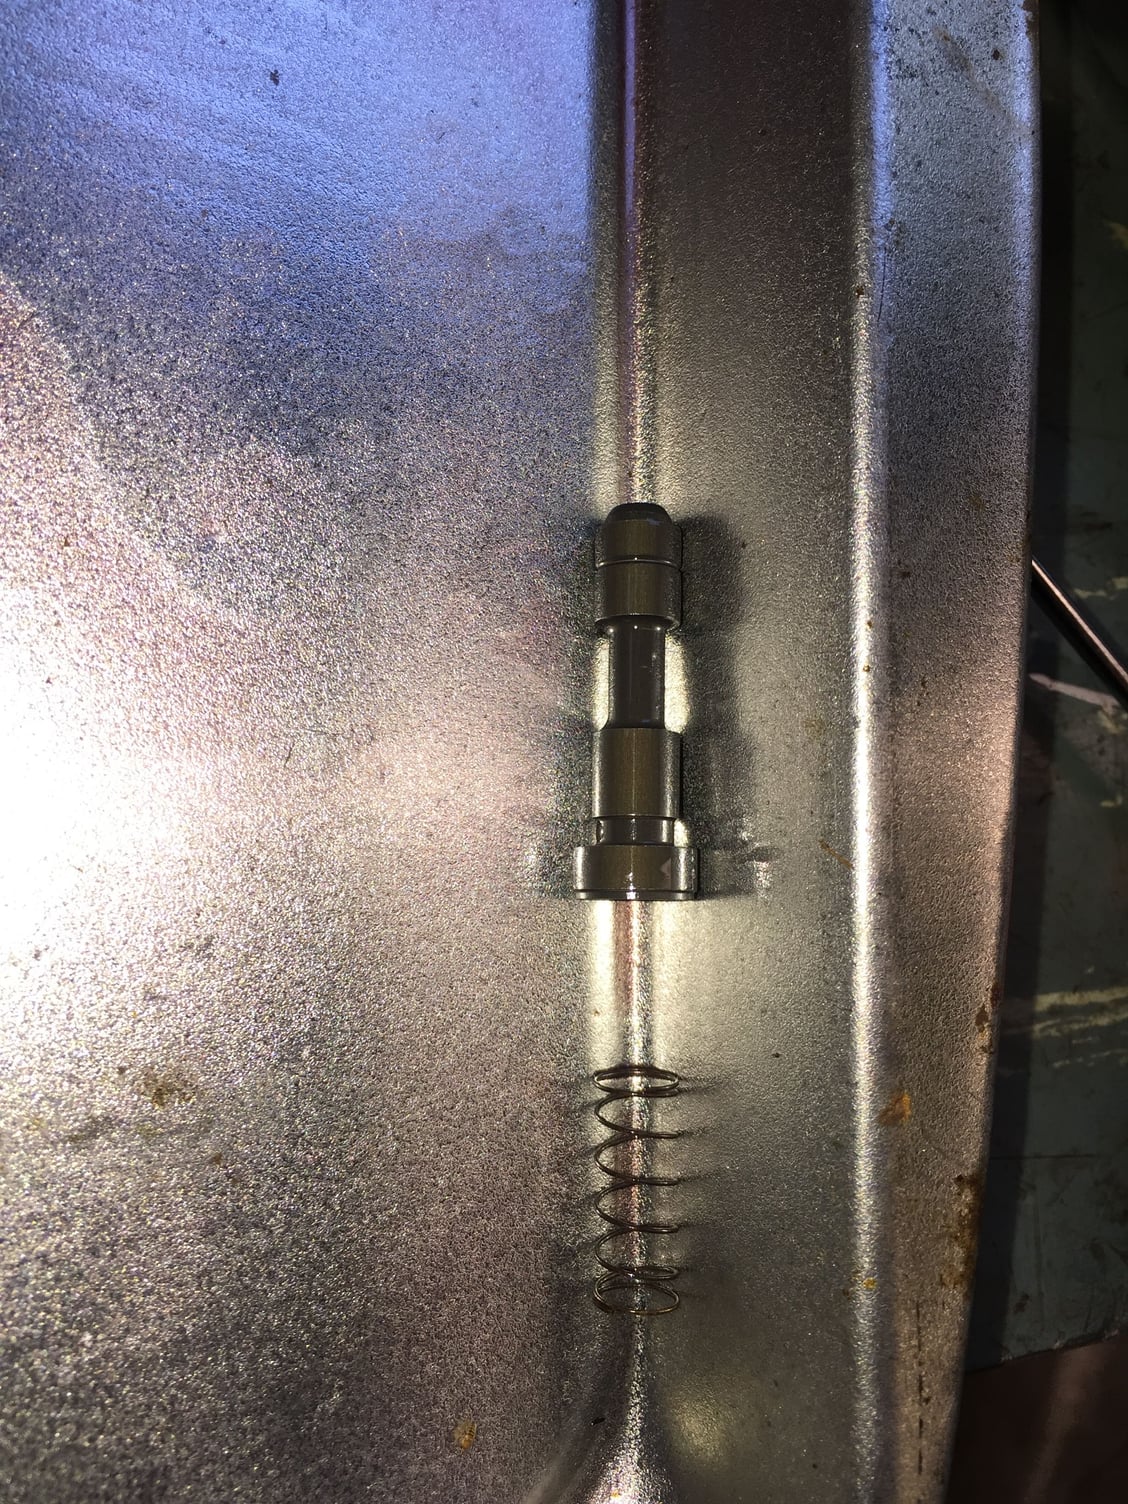
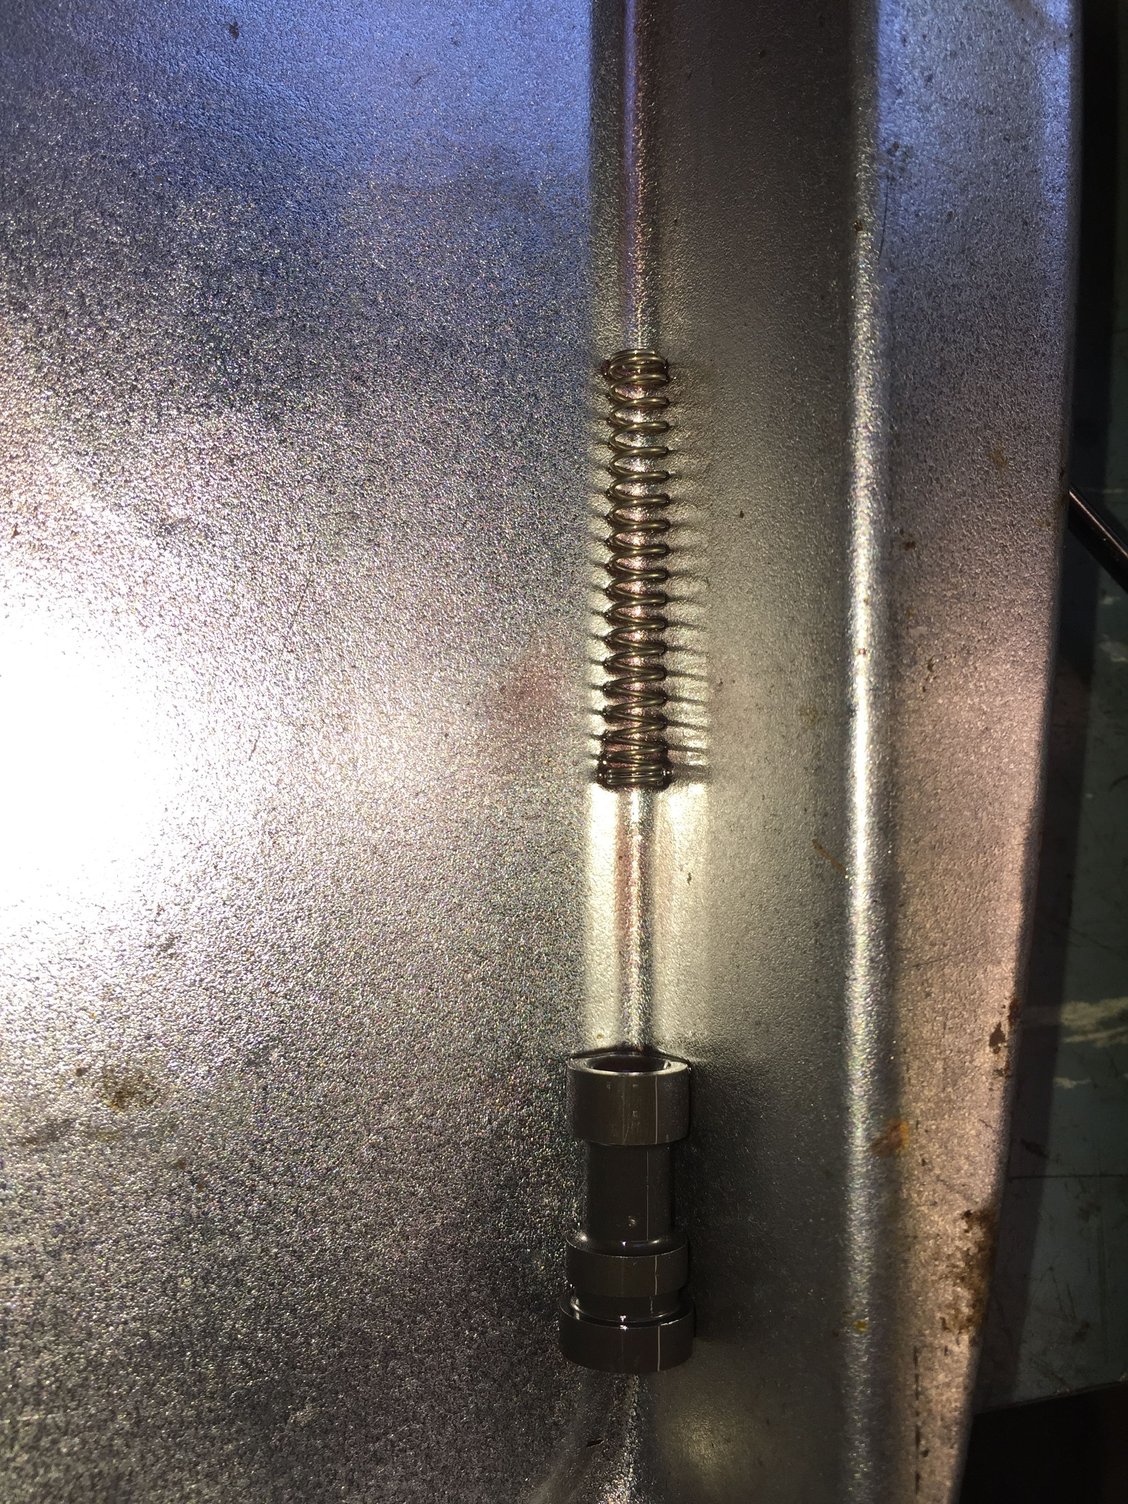
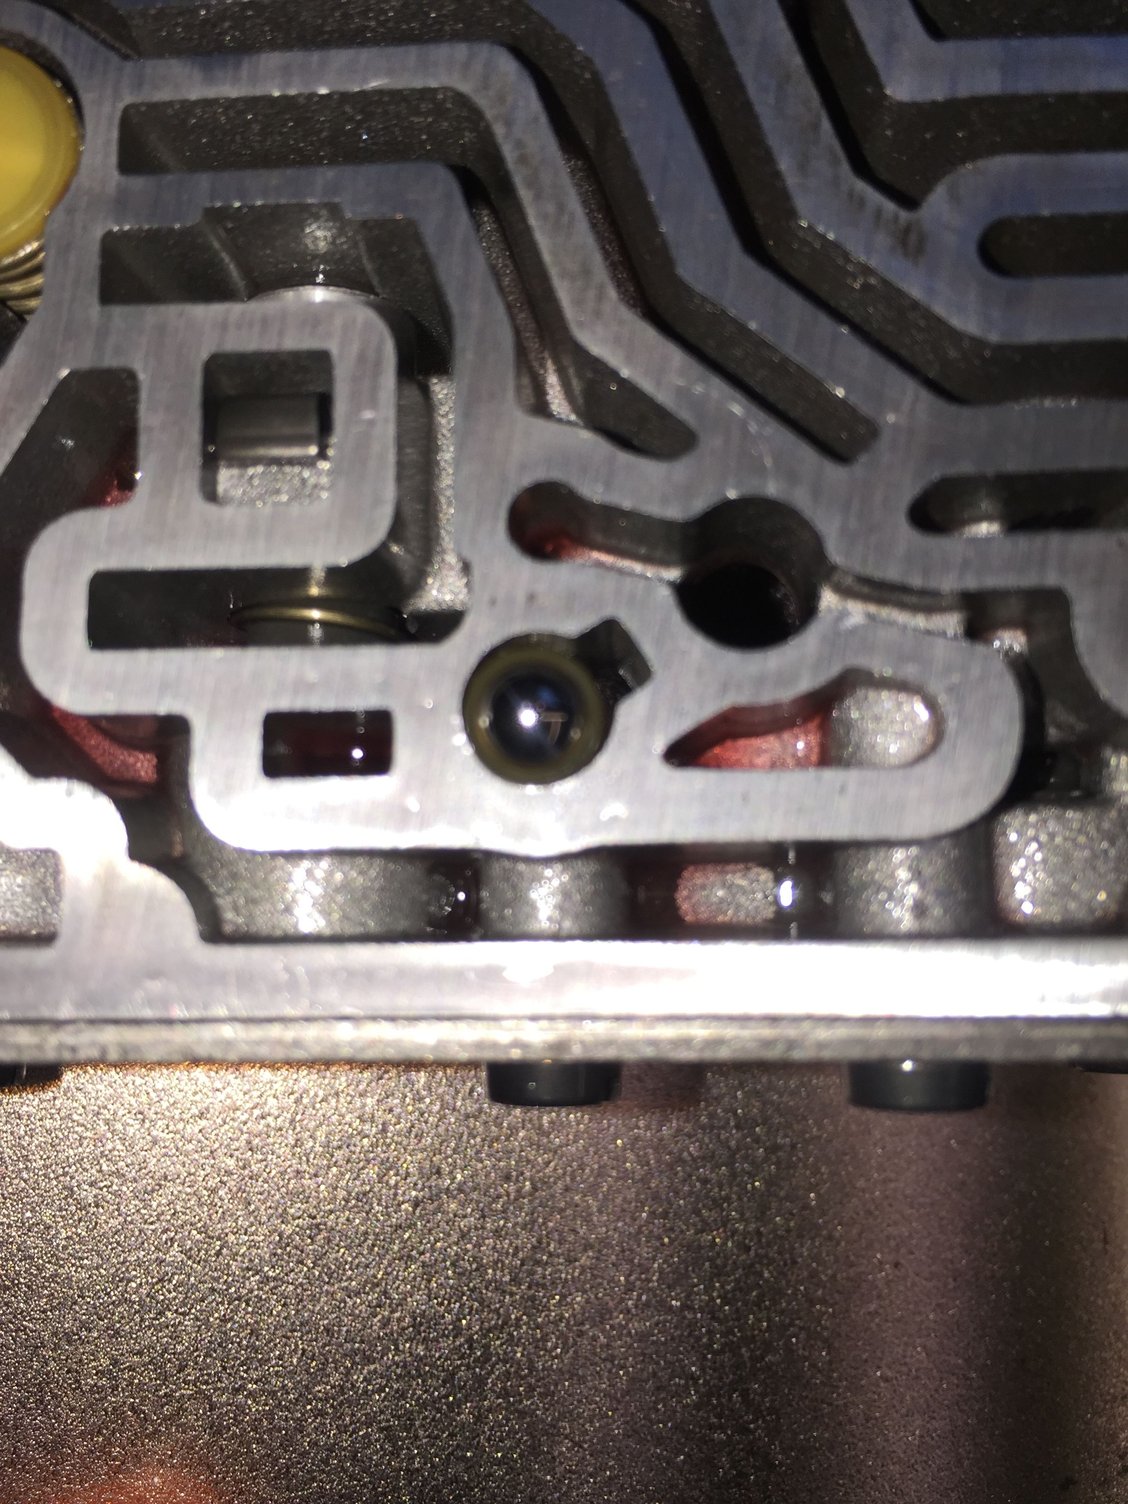
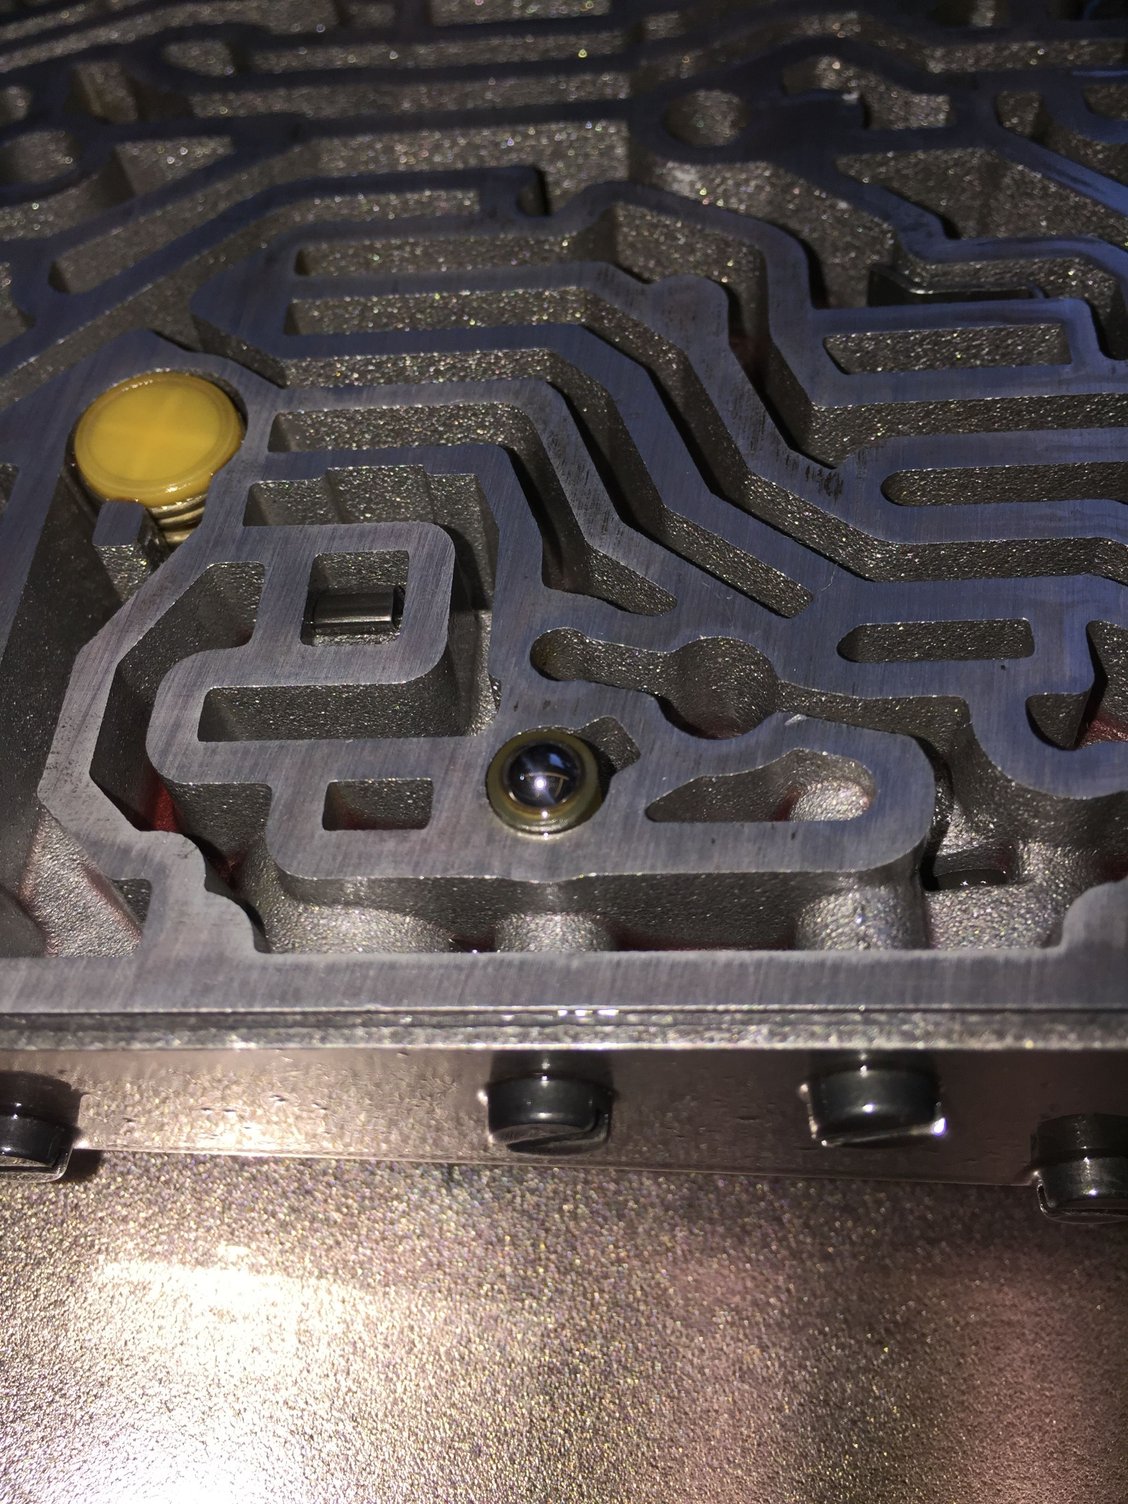
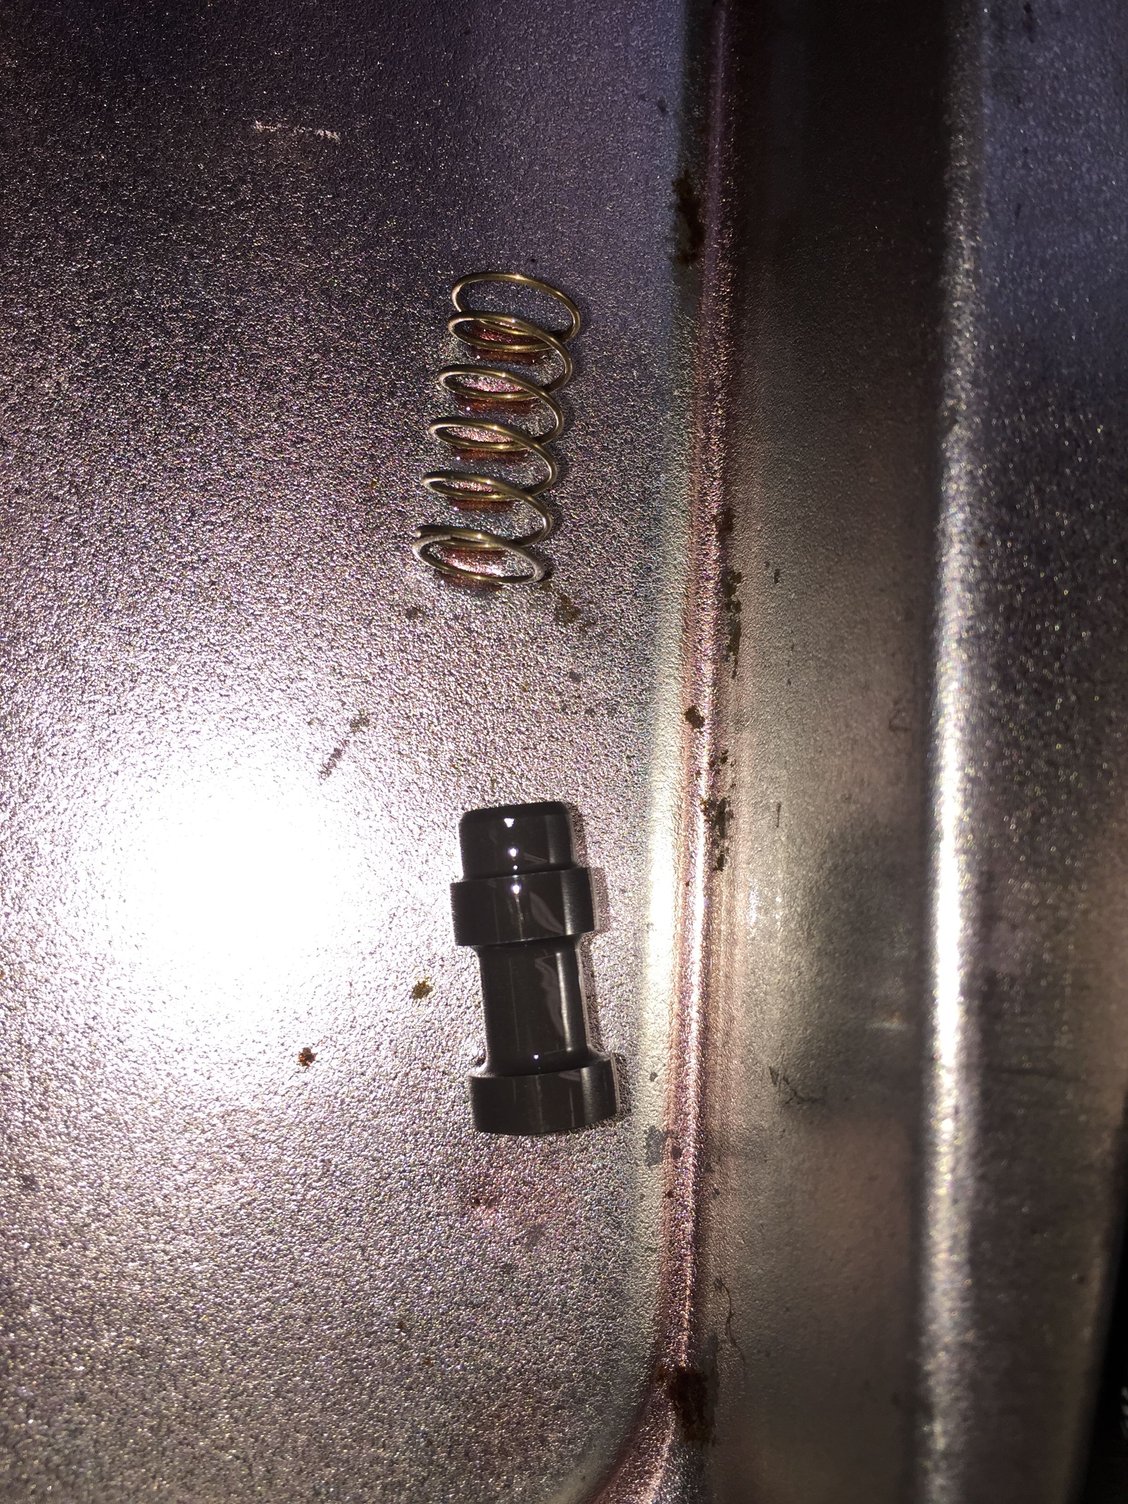
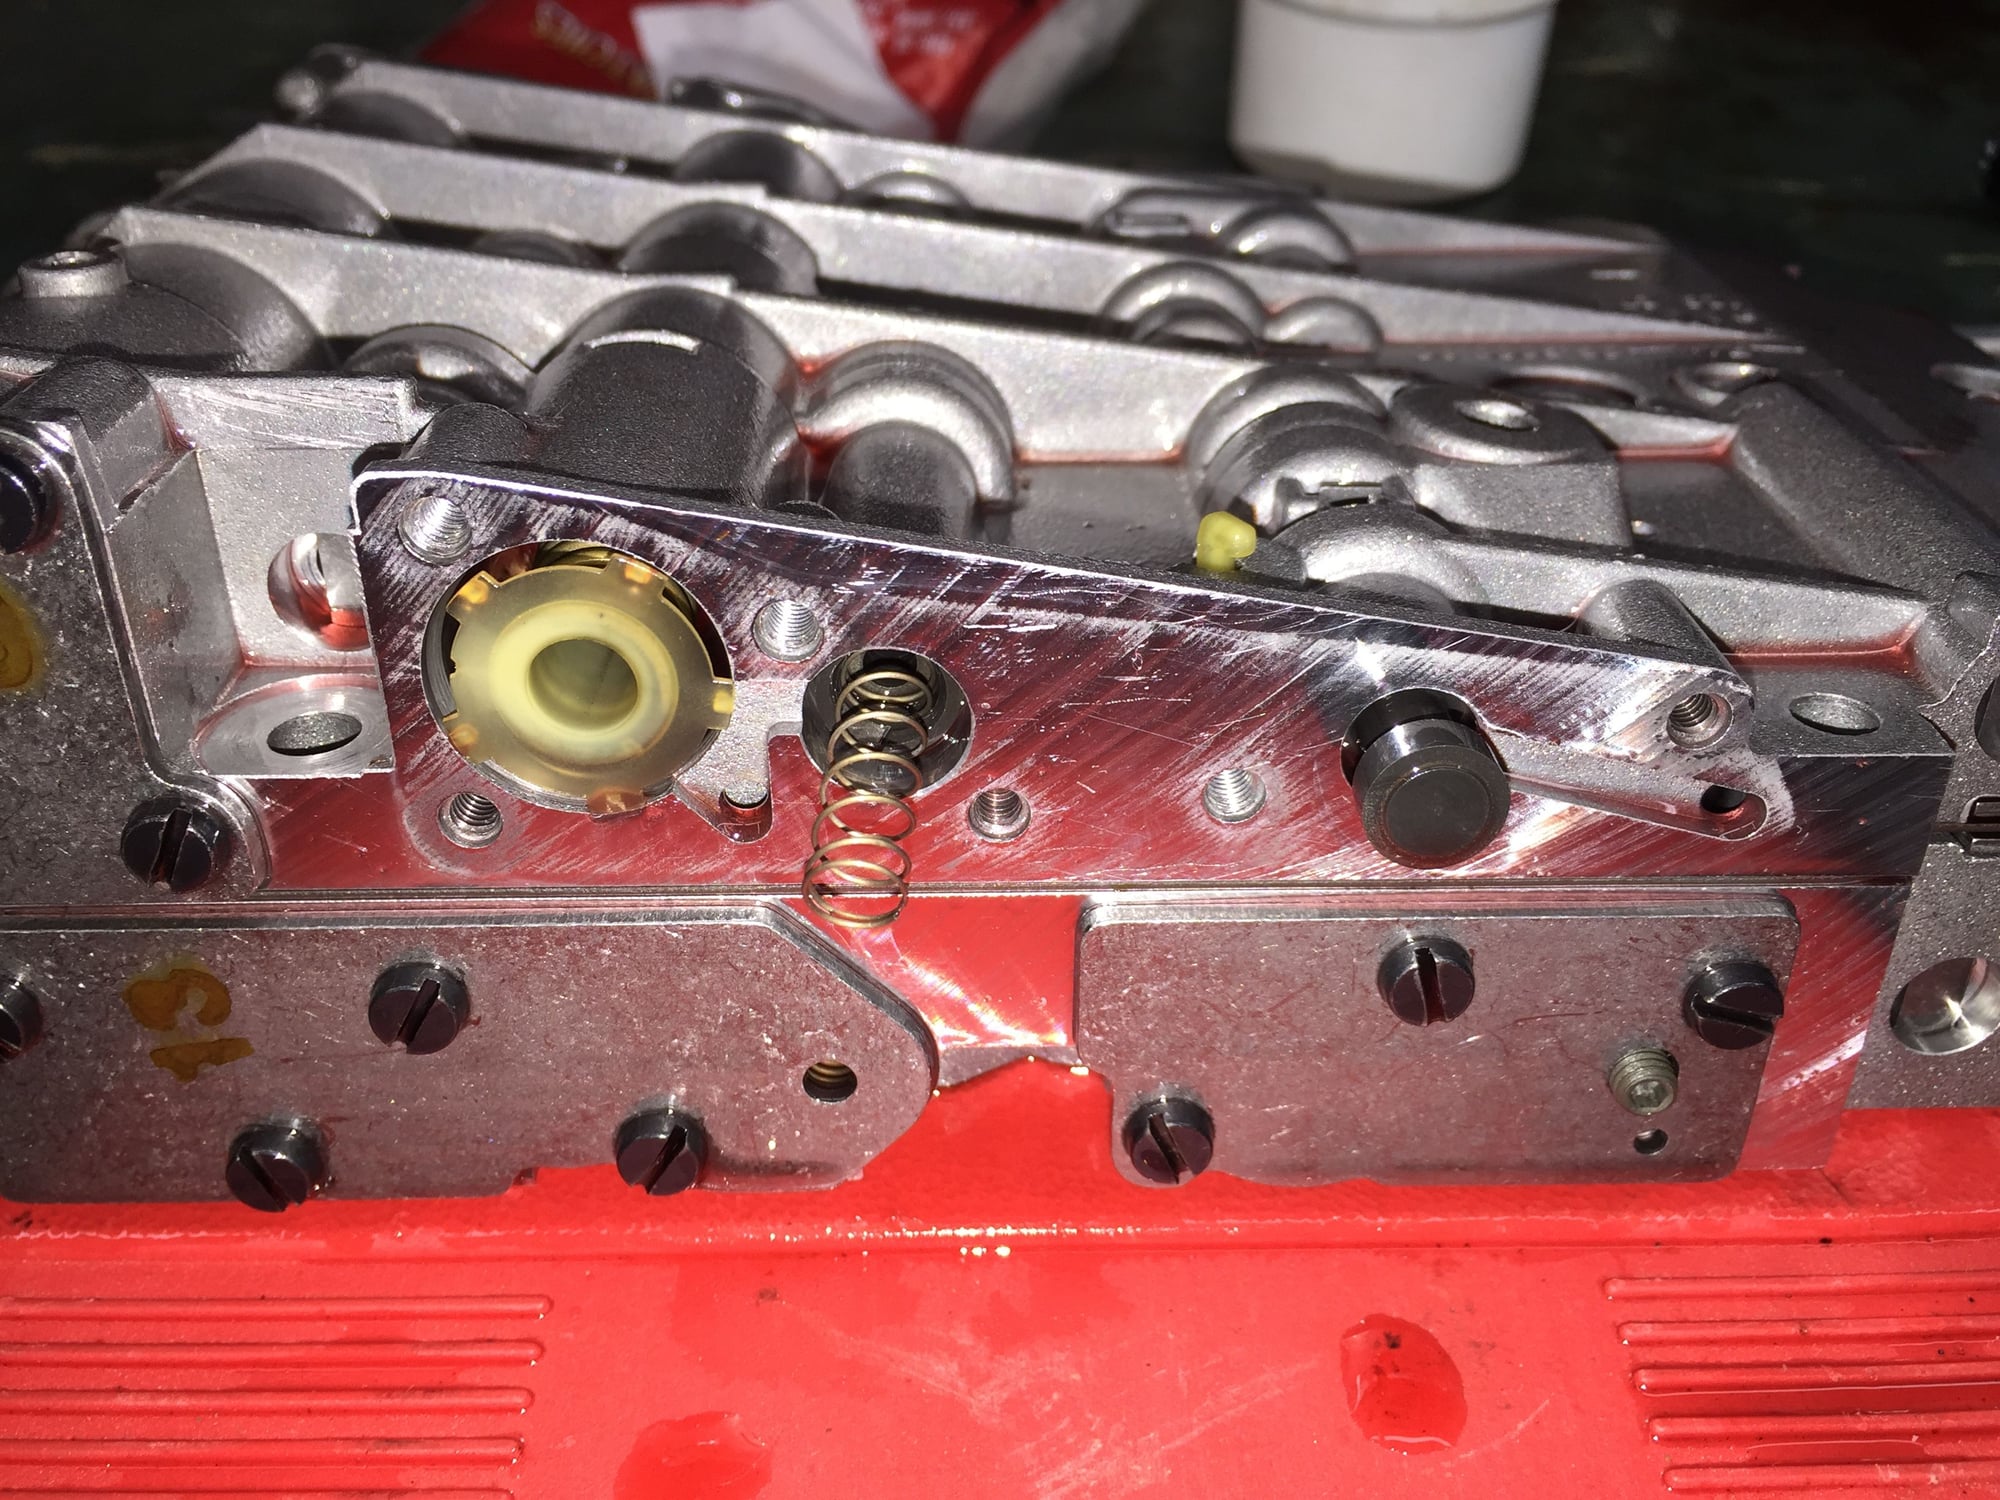
I found the 'modulating pressure valve' in the removed upper valve body half. At first glance, it looks like a large metal check ball that is about to fall out. It is not, it is a ball ended spring loaded relief valve. It was free and clean.
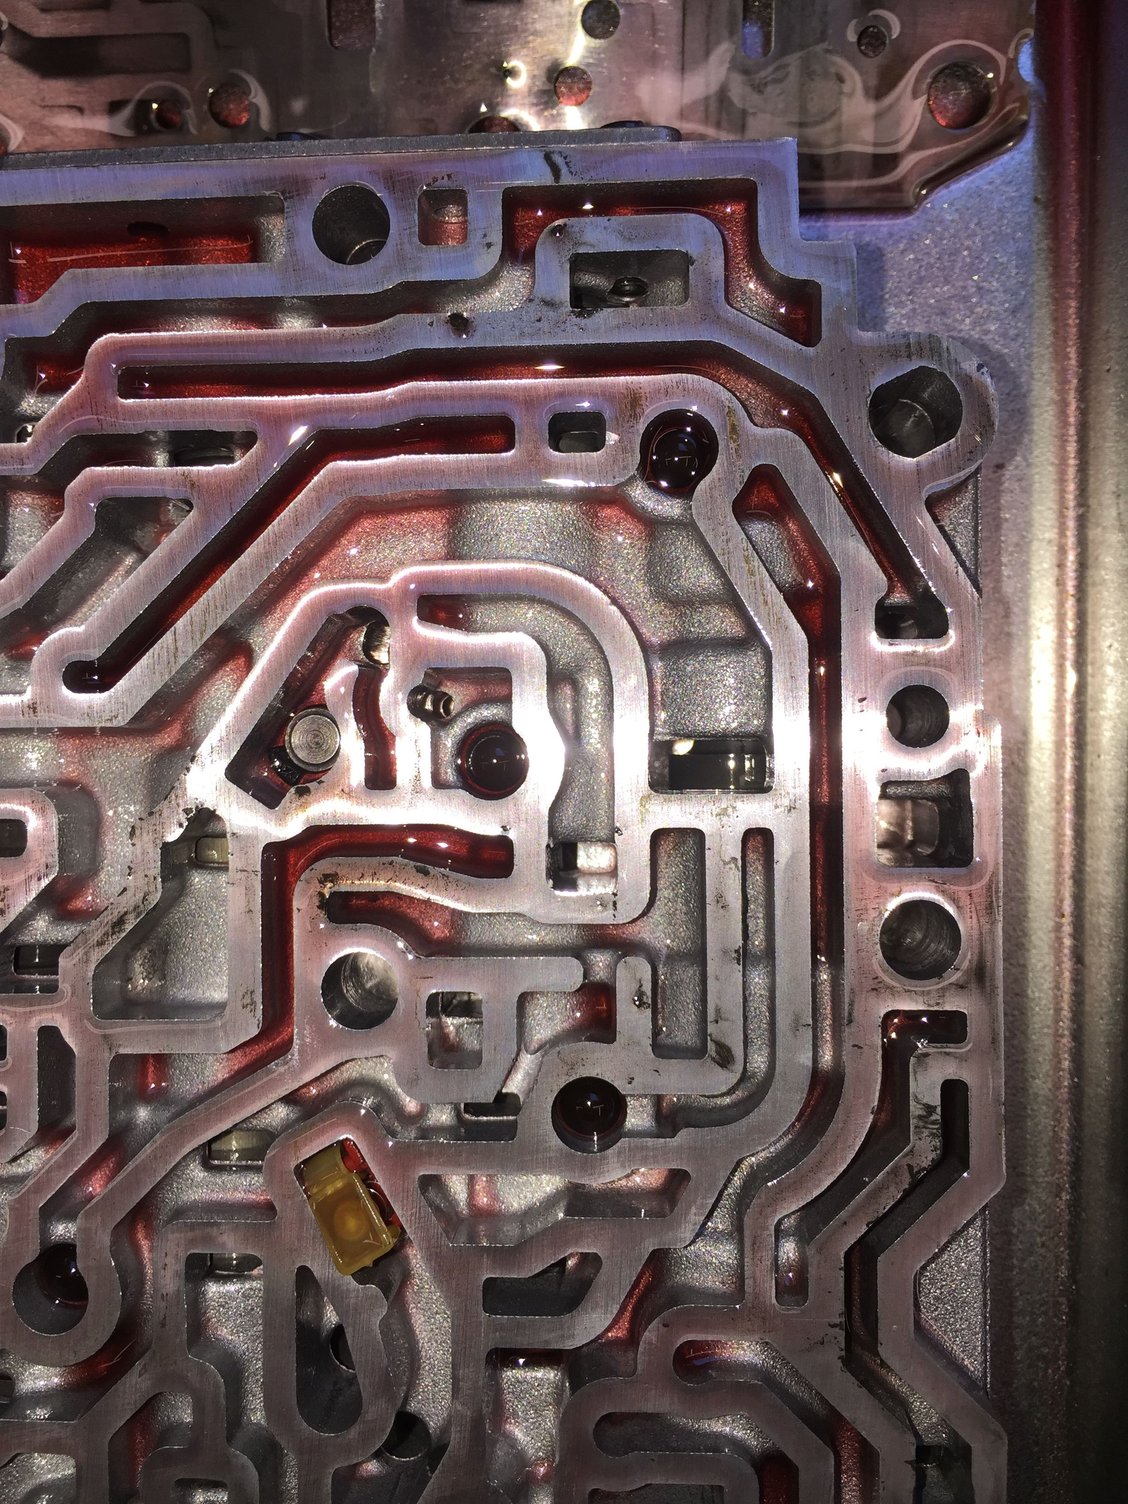
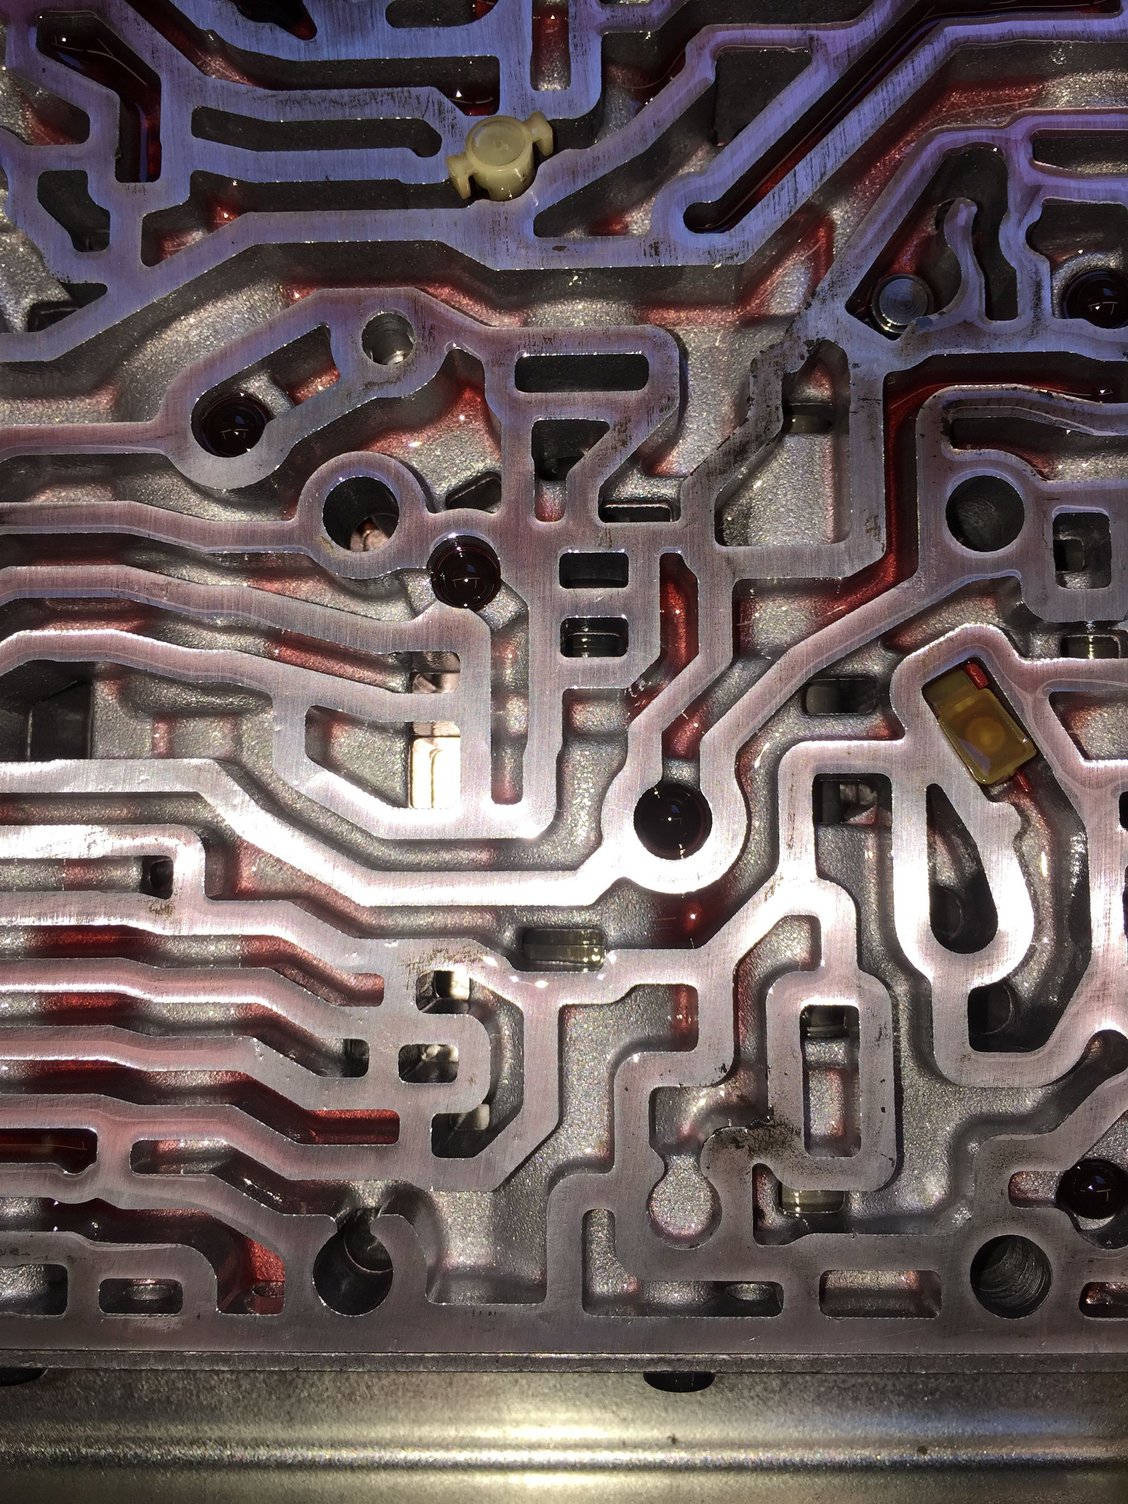
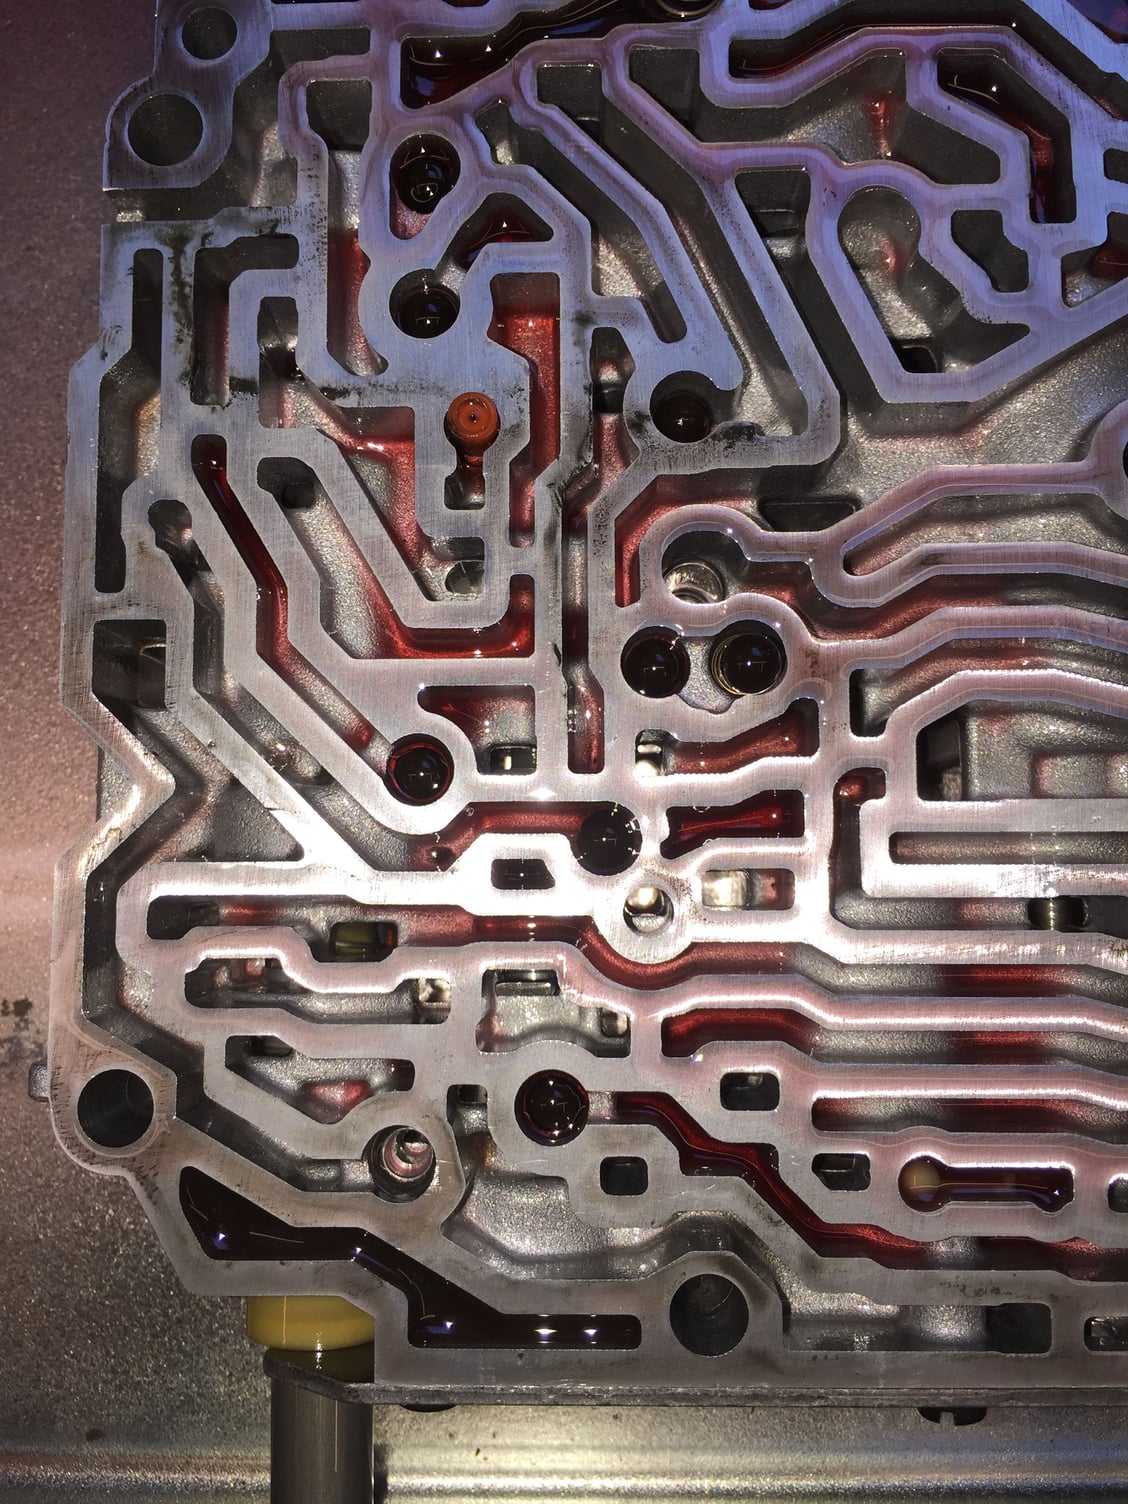
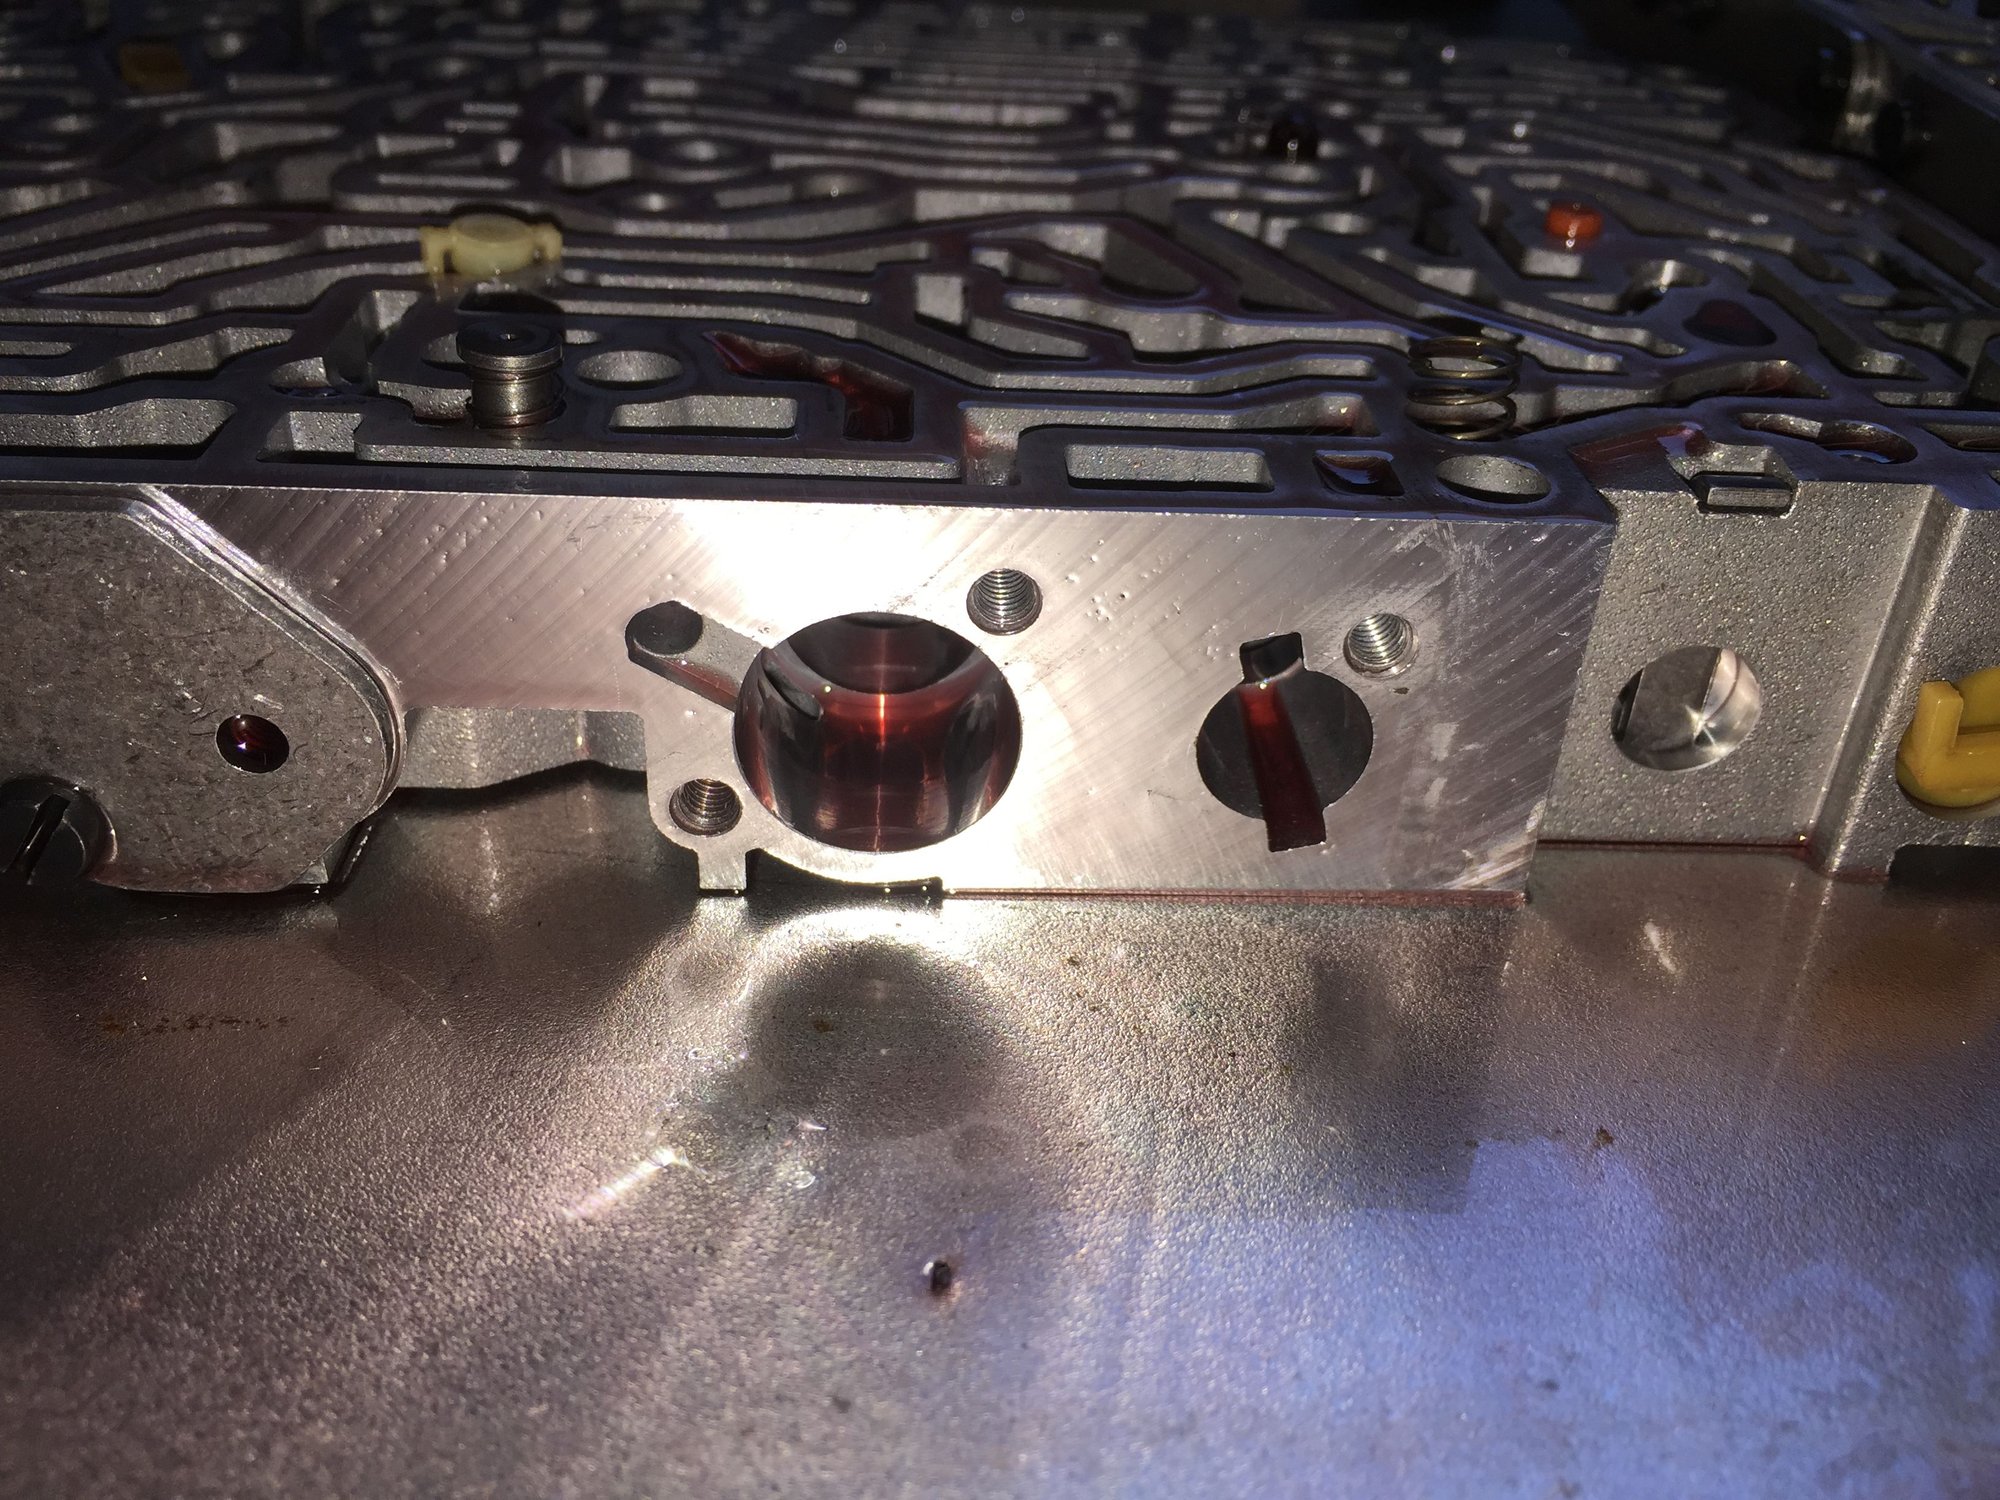
The 'modulating pressure valve' seats up against the separator plate. So, I found the corresponding hole that it seats against, and then figured out what that hole covered in the lower half of the valve body. I found a cavity, with a passage that eventually led to the 'working pressure control valve' bore.
The depression at the bottom of this cavity is the passage to the 'working pressure control valve' bore.
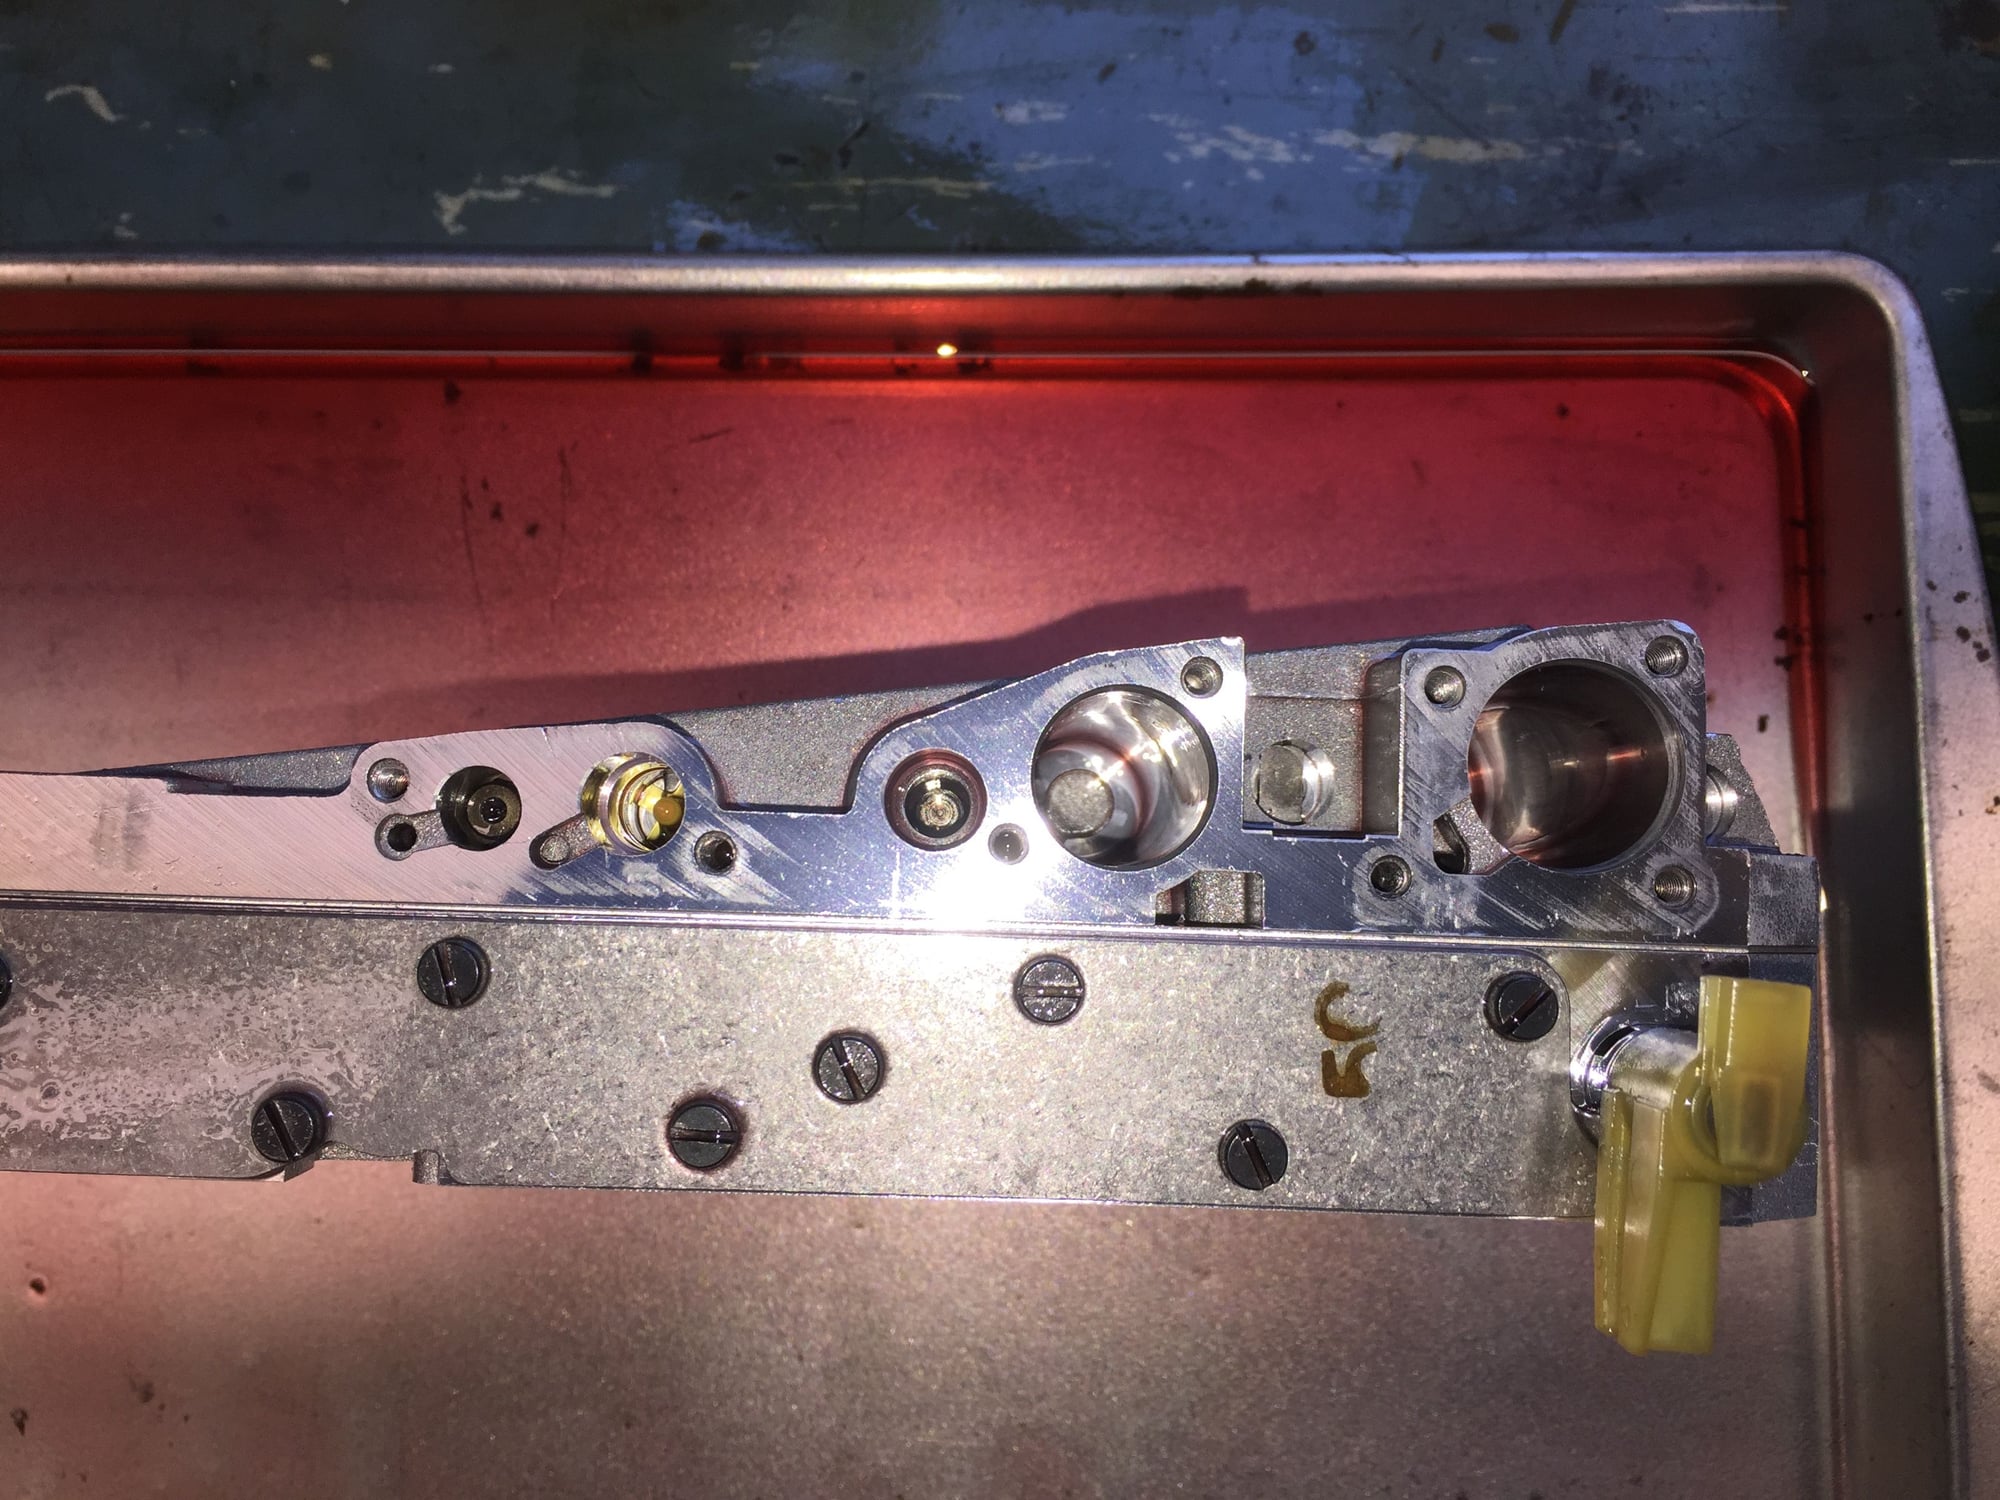
The left bore is for the 'working pressure control valve'. The passage to the left of that leads to the cavity for the 'modulating pressure valve.'
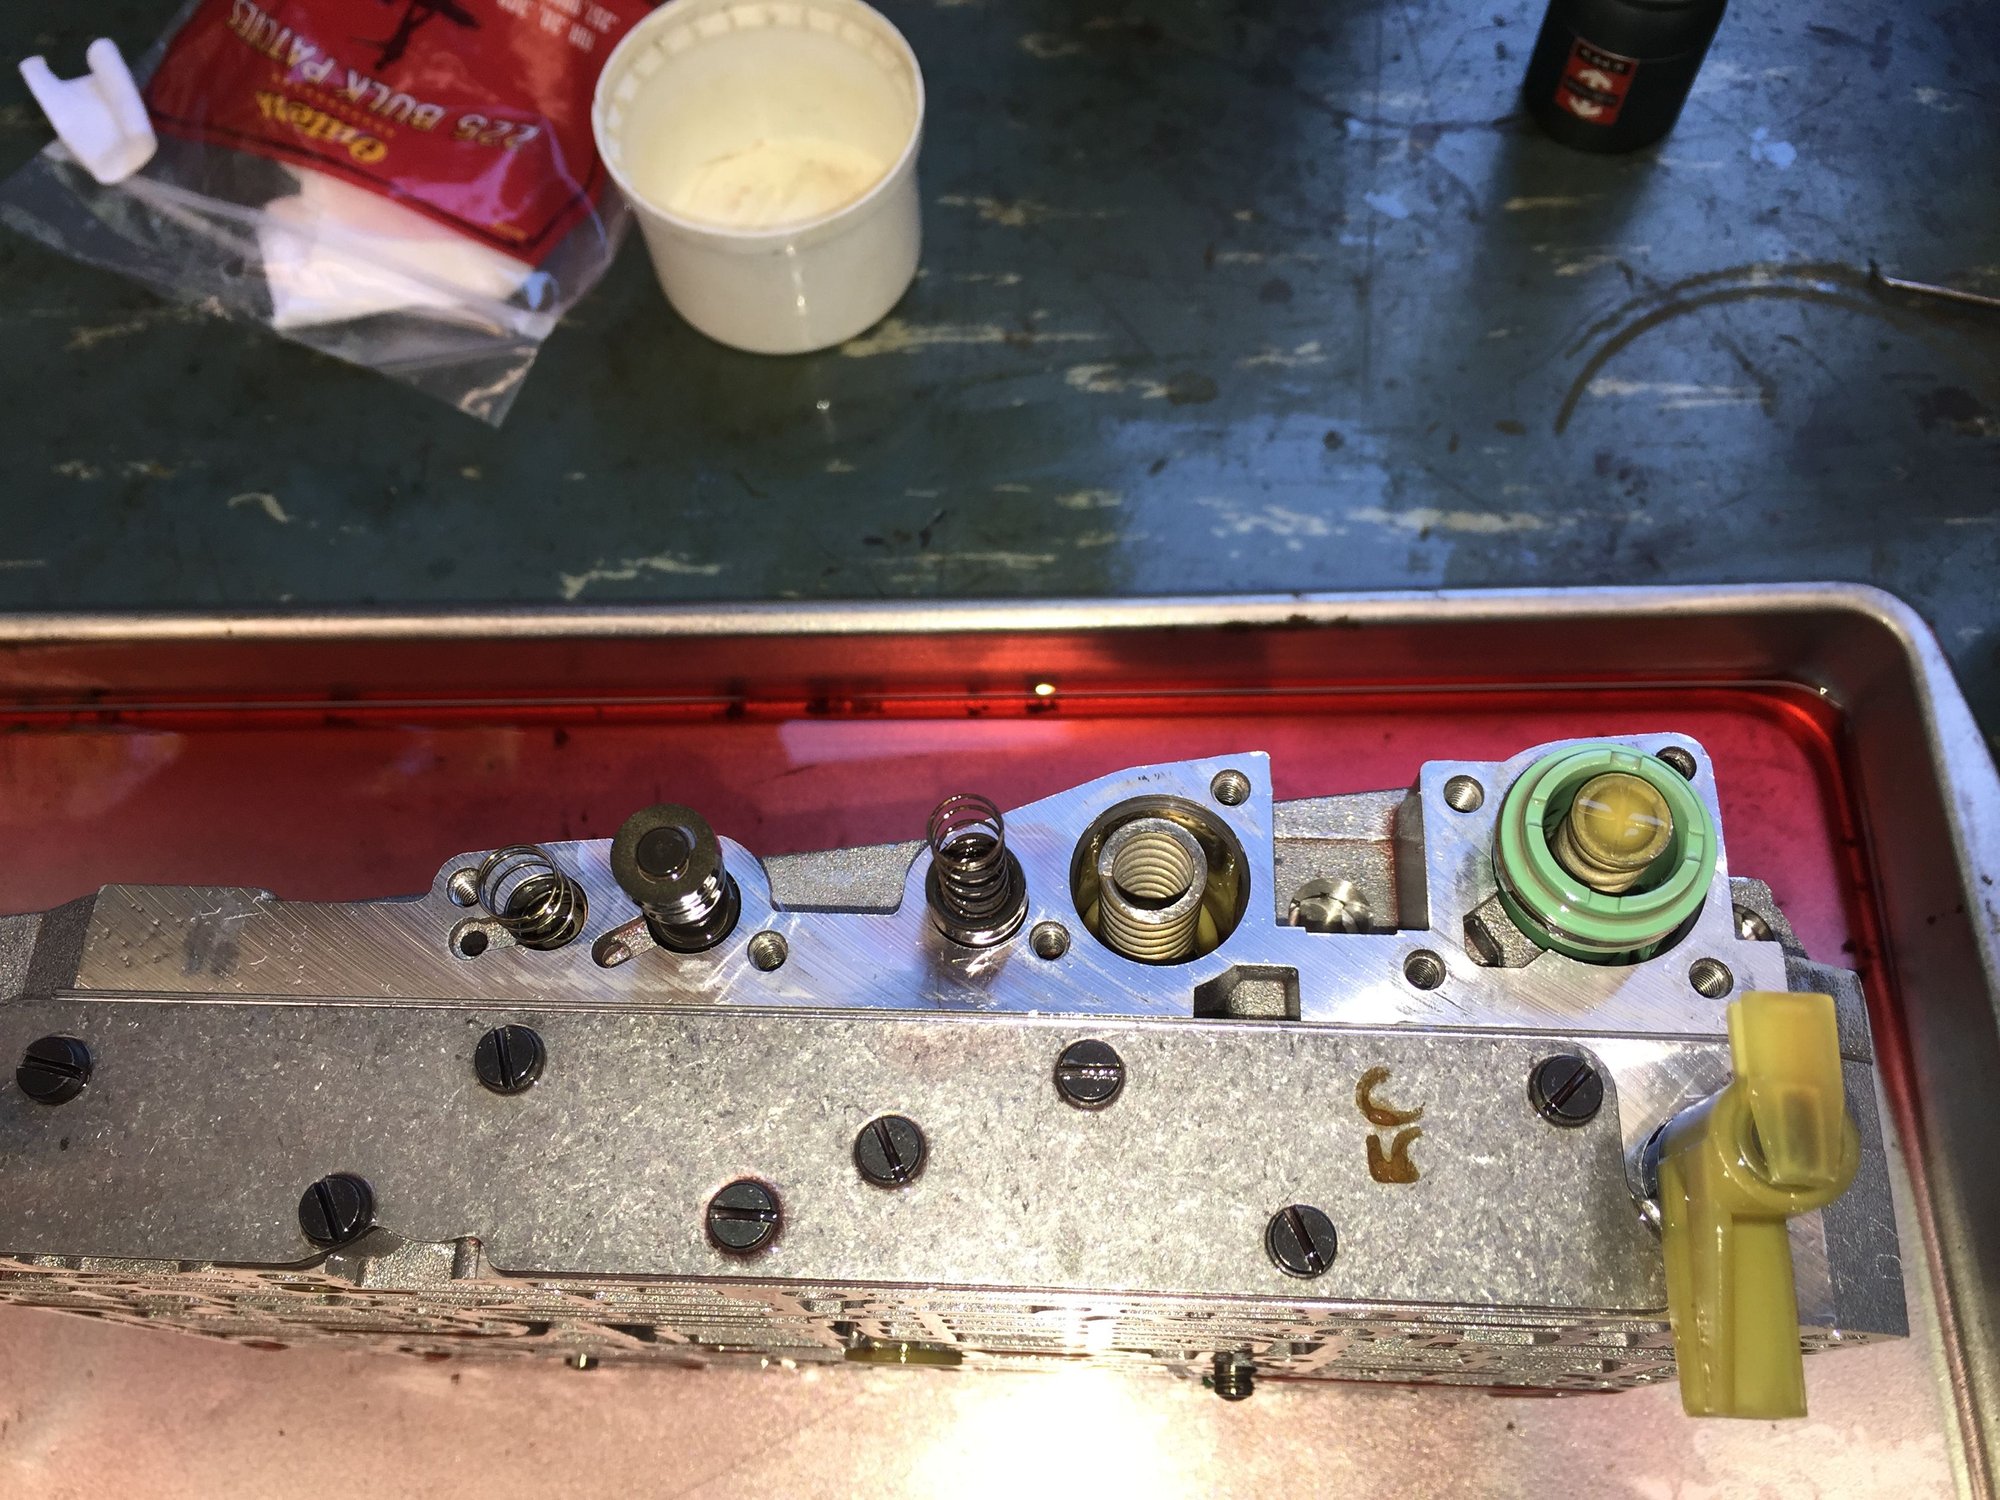
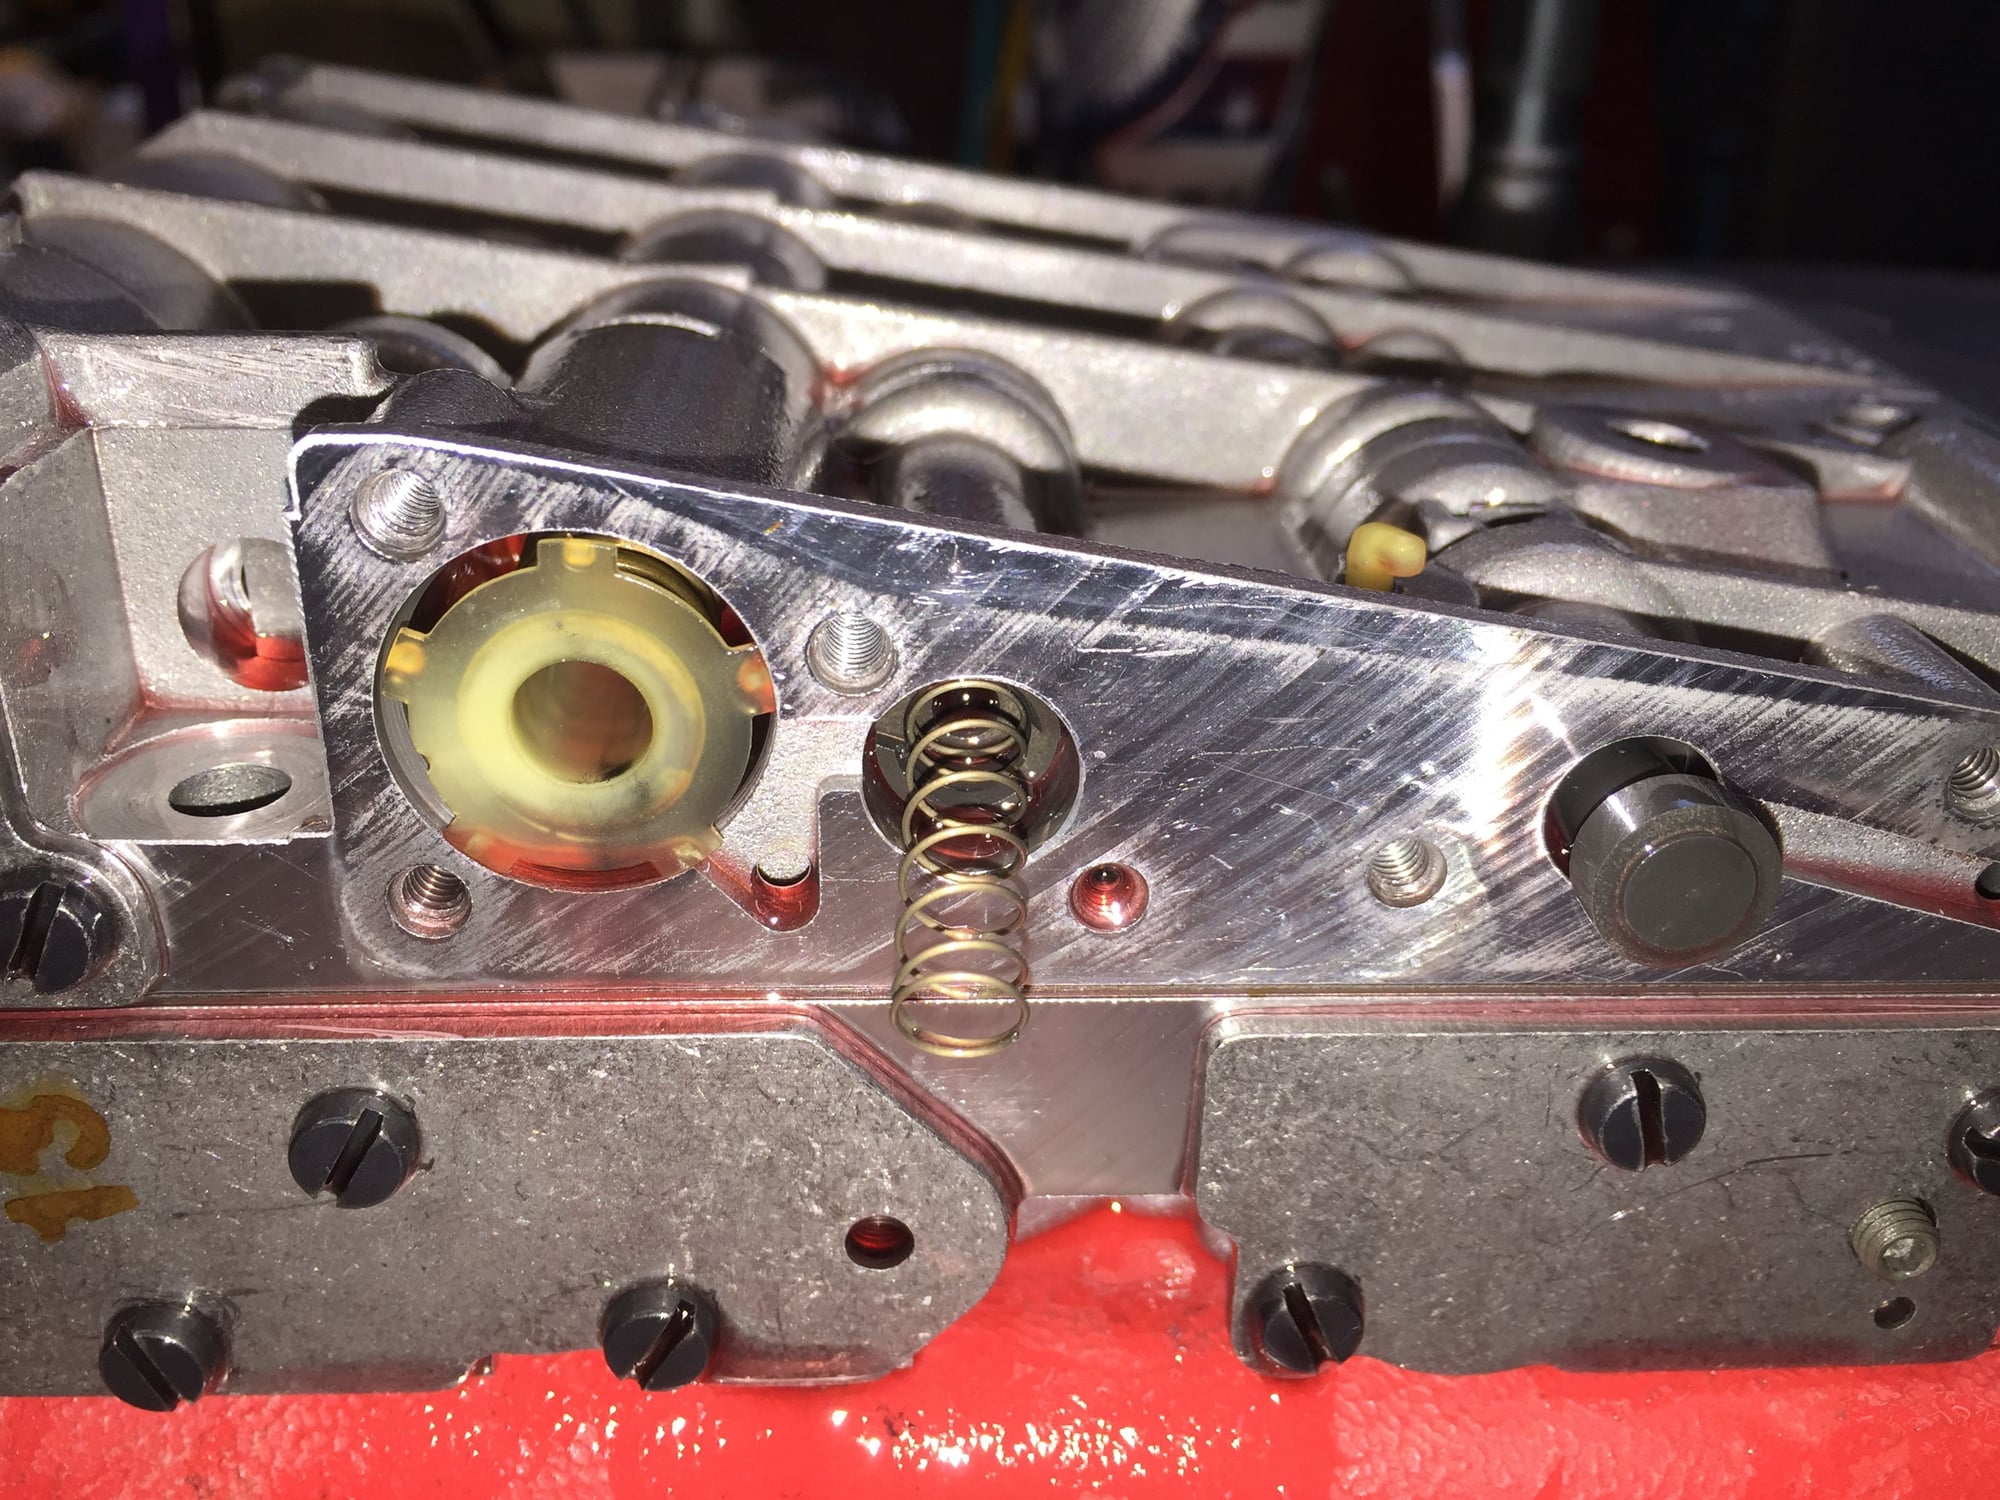
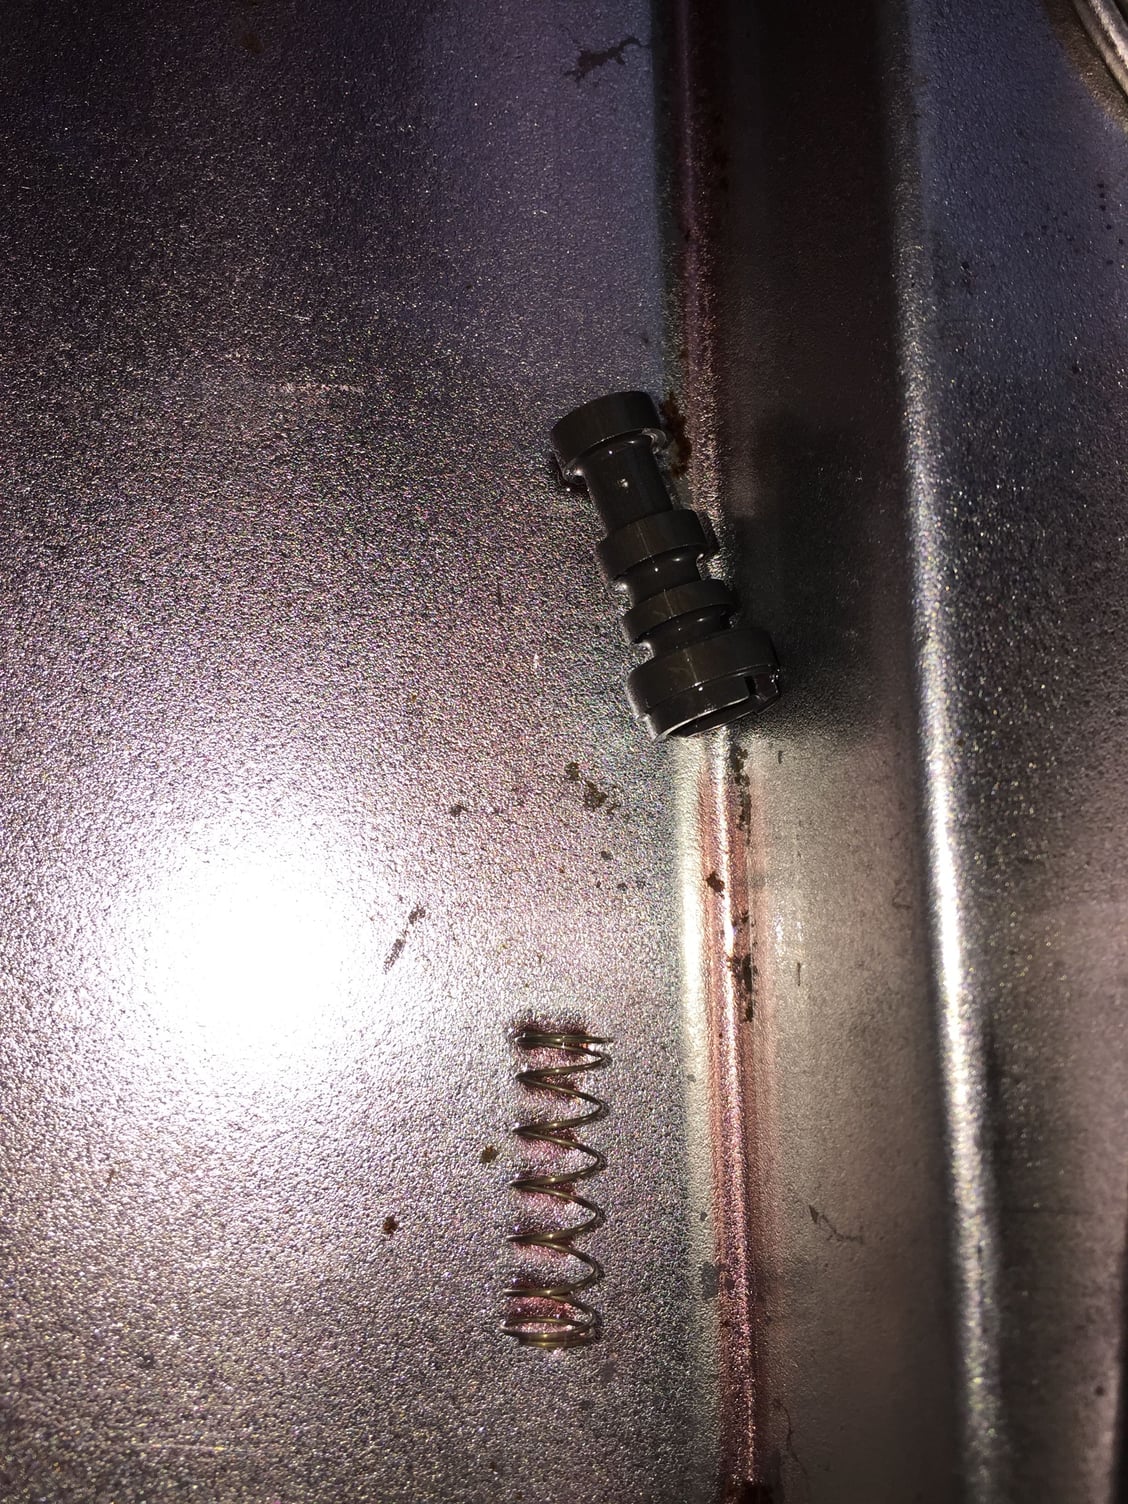
I removed the cover for the valves in this area, which also included the 'throttle control valve.' These were some stiffly sprung mothers...
One by one I removed each element, photographed it, cleaned it in mineral spirits, and laid it to dry in the muffin pan. Again, all the valves and bores were very clean, with a little debris on the retainer cover plate. All the pieces were lubricated with clean ATF and reassembled to their bores. I did NOT change the adjustment of the throttle control valve screw on the side of the valve body.
Working pressure control valve and throttle pressure control valve bores were clean. Note the slight amount of debris on the valve side of the retainer cover plate.
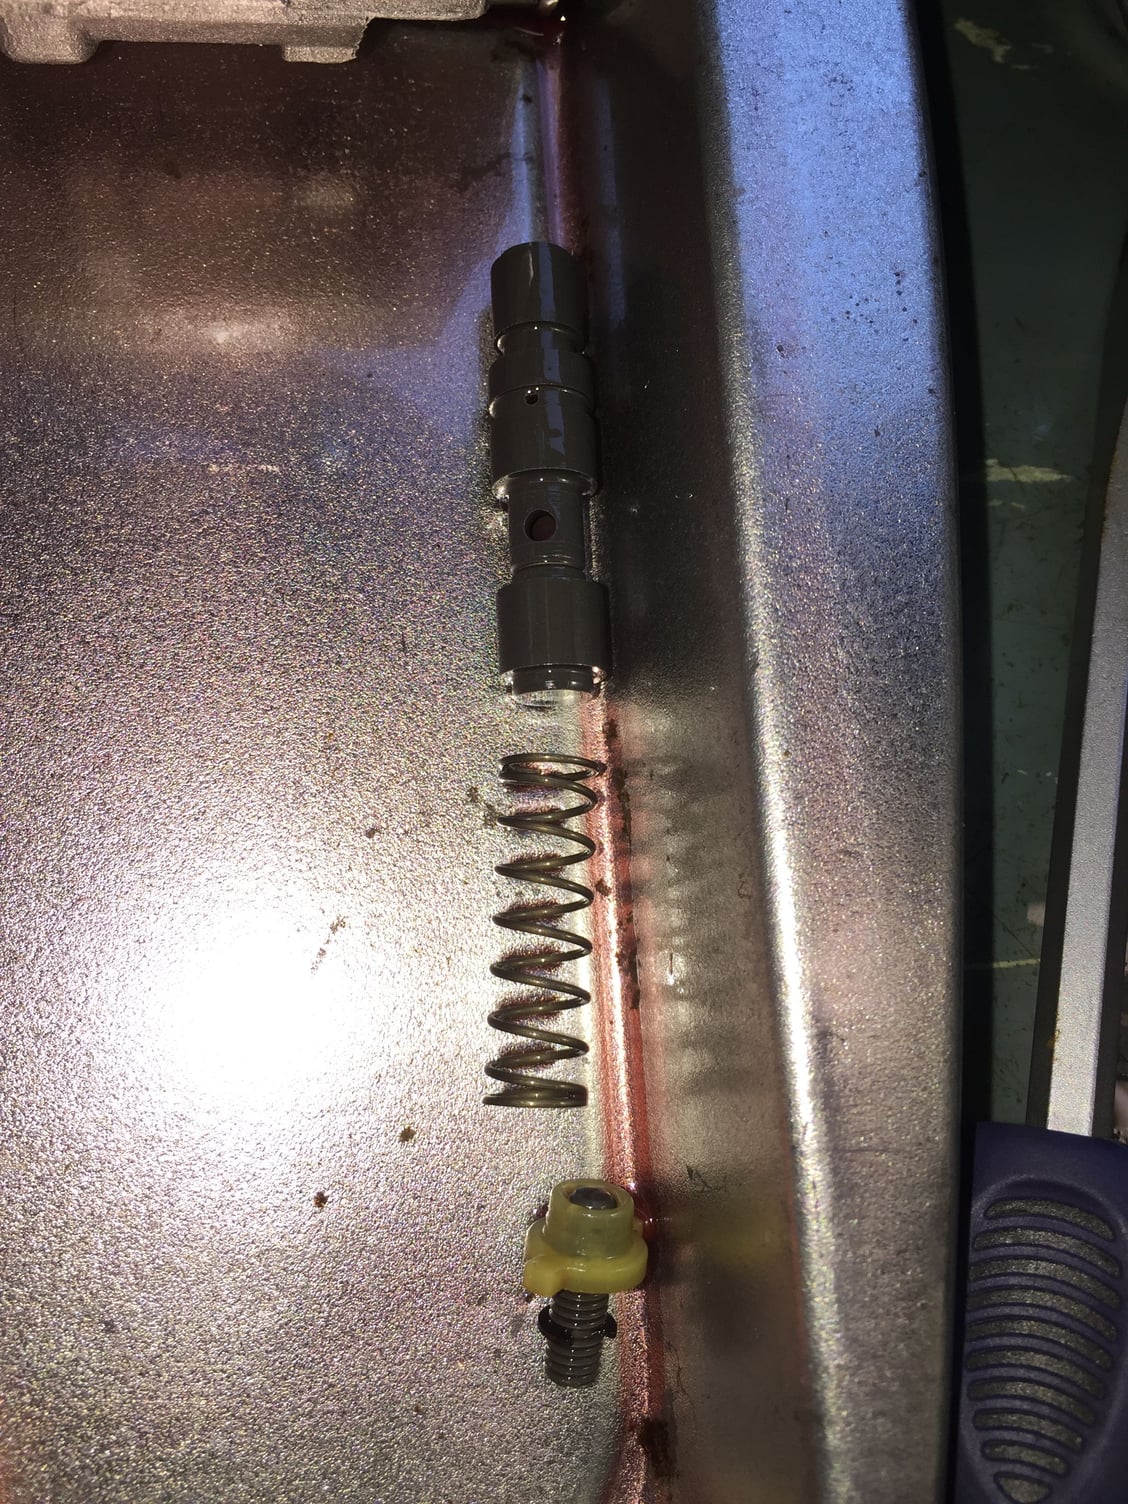
Throttle control valve and adjuster.
Working pressure control valve.
Clean and organized.
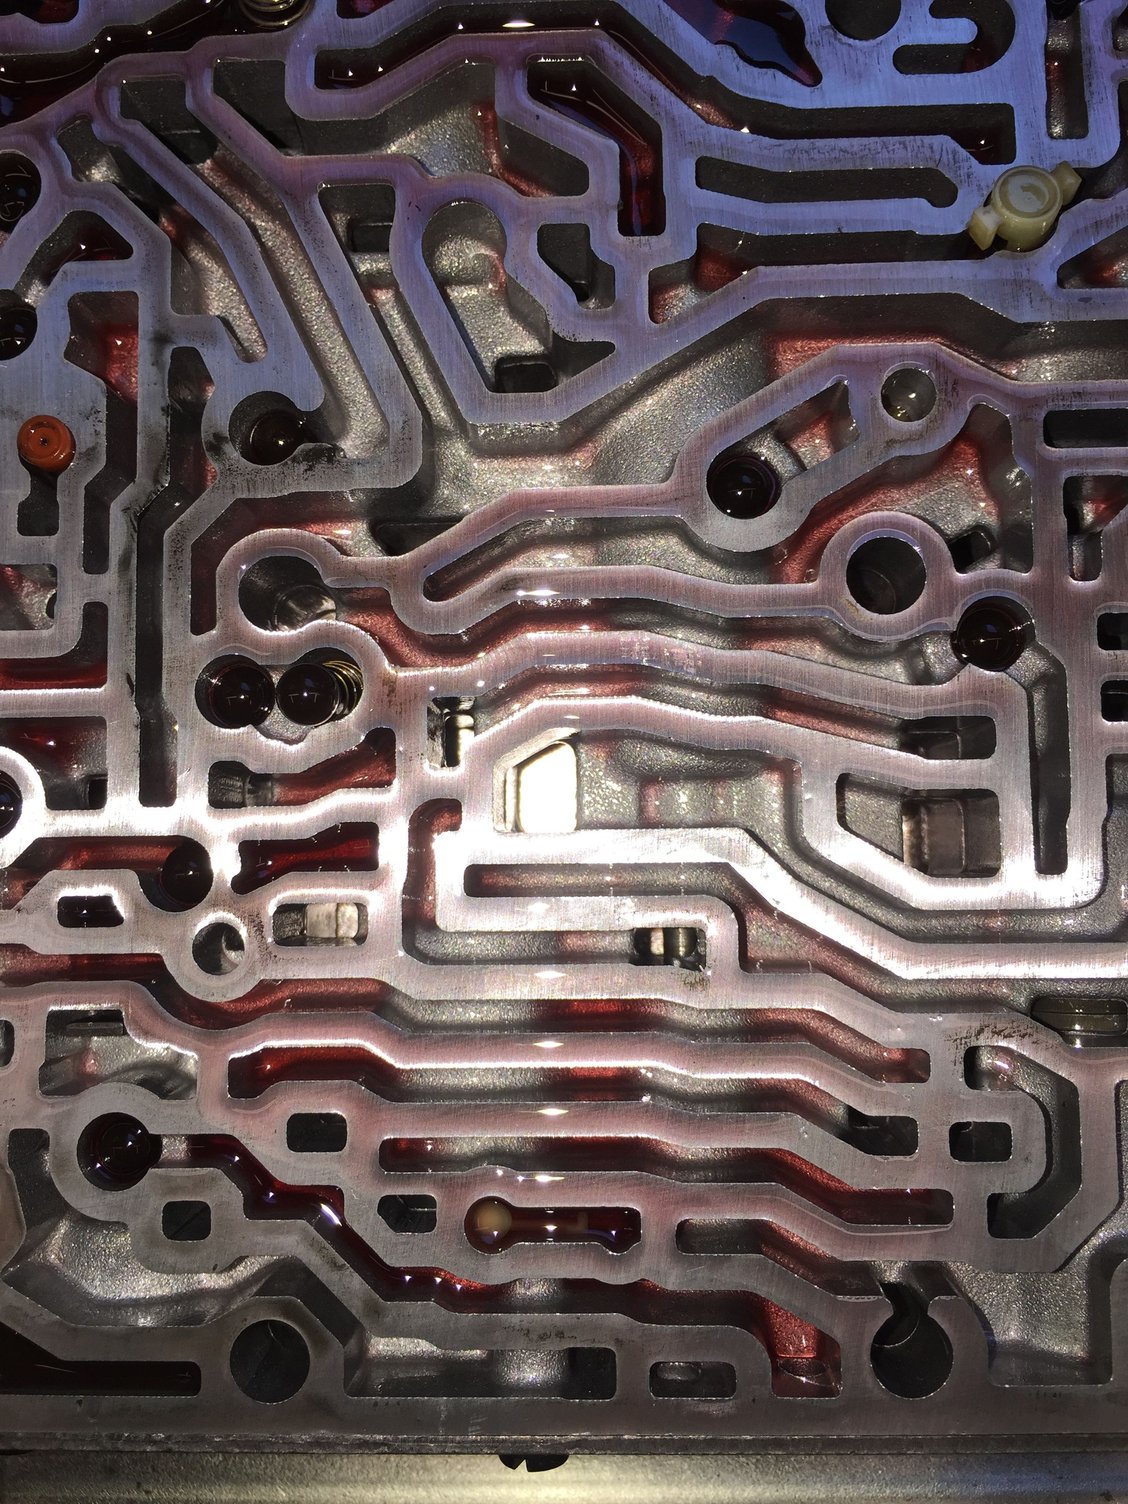
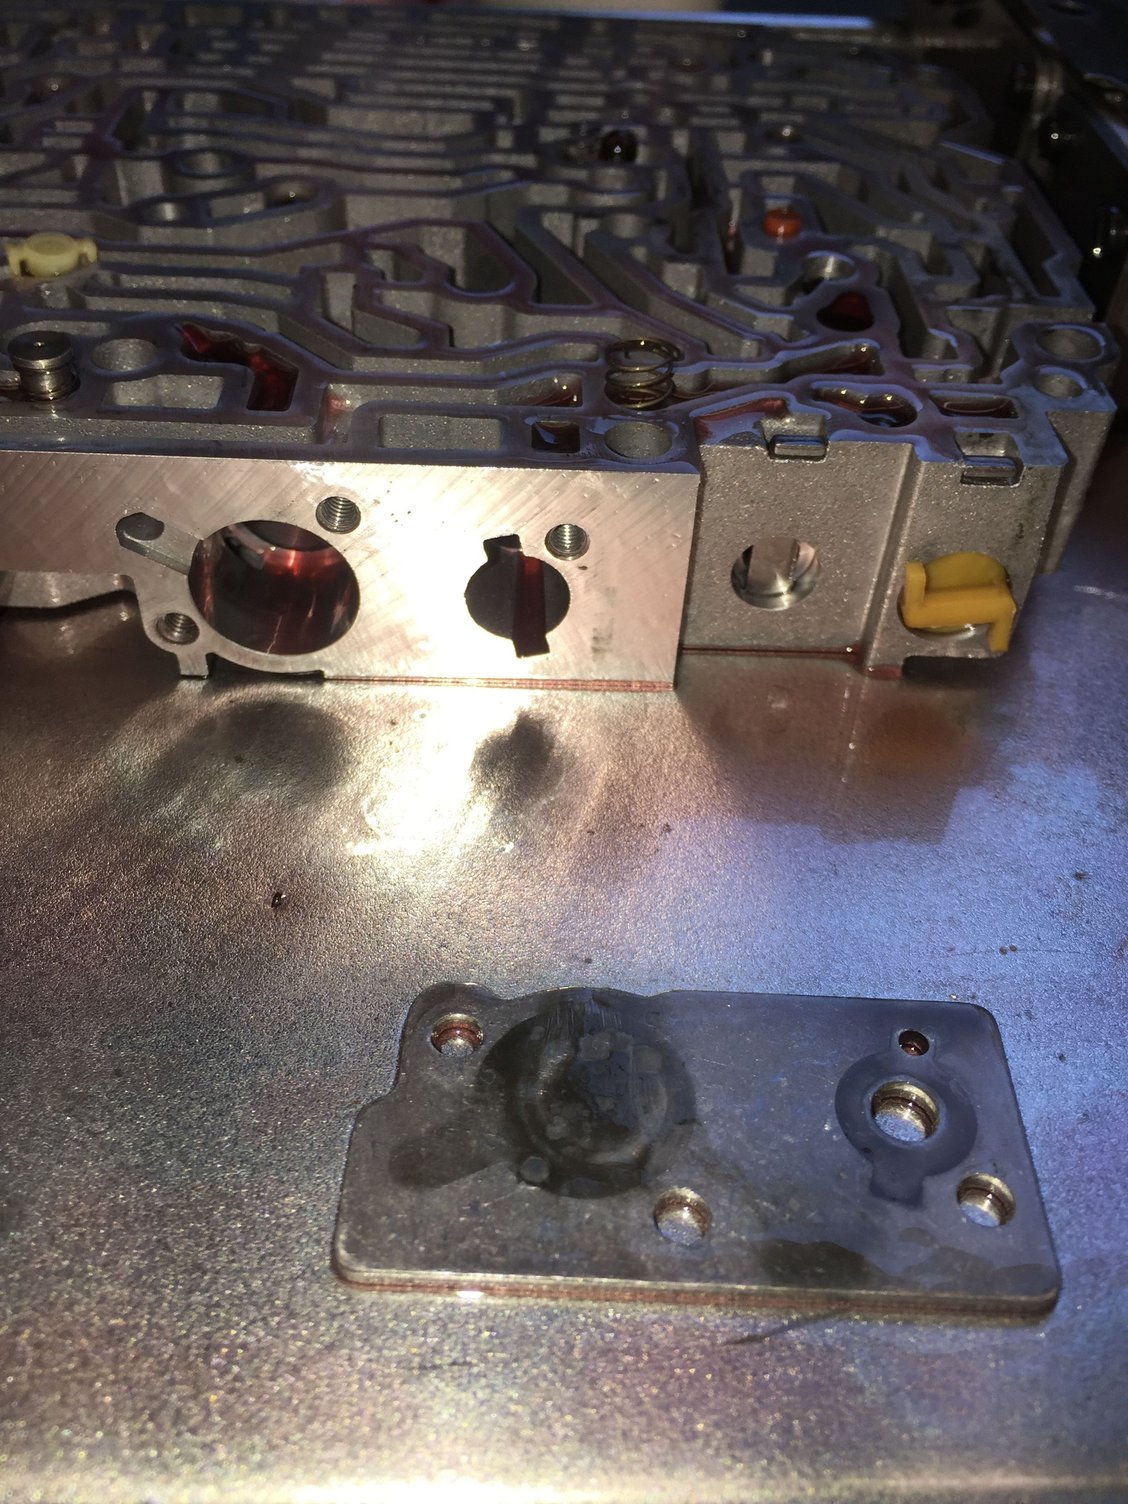
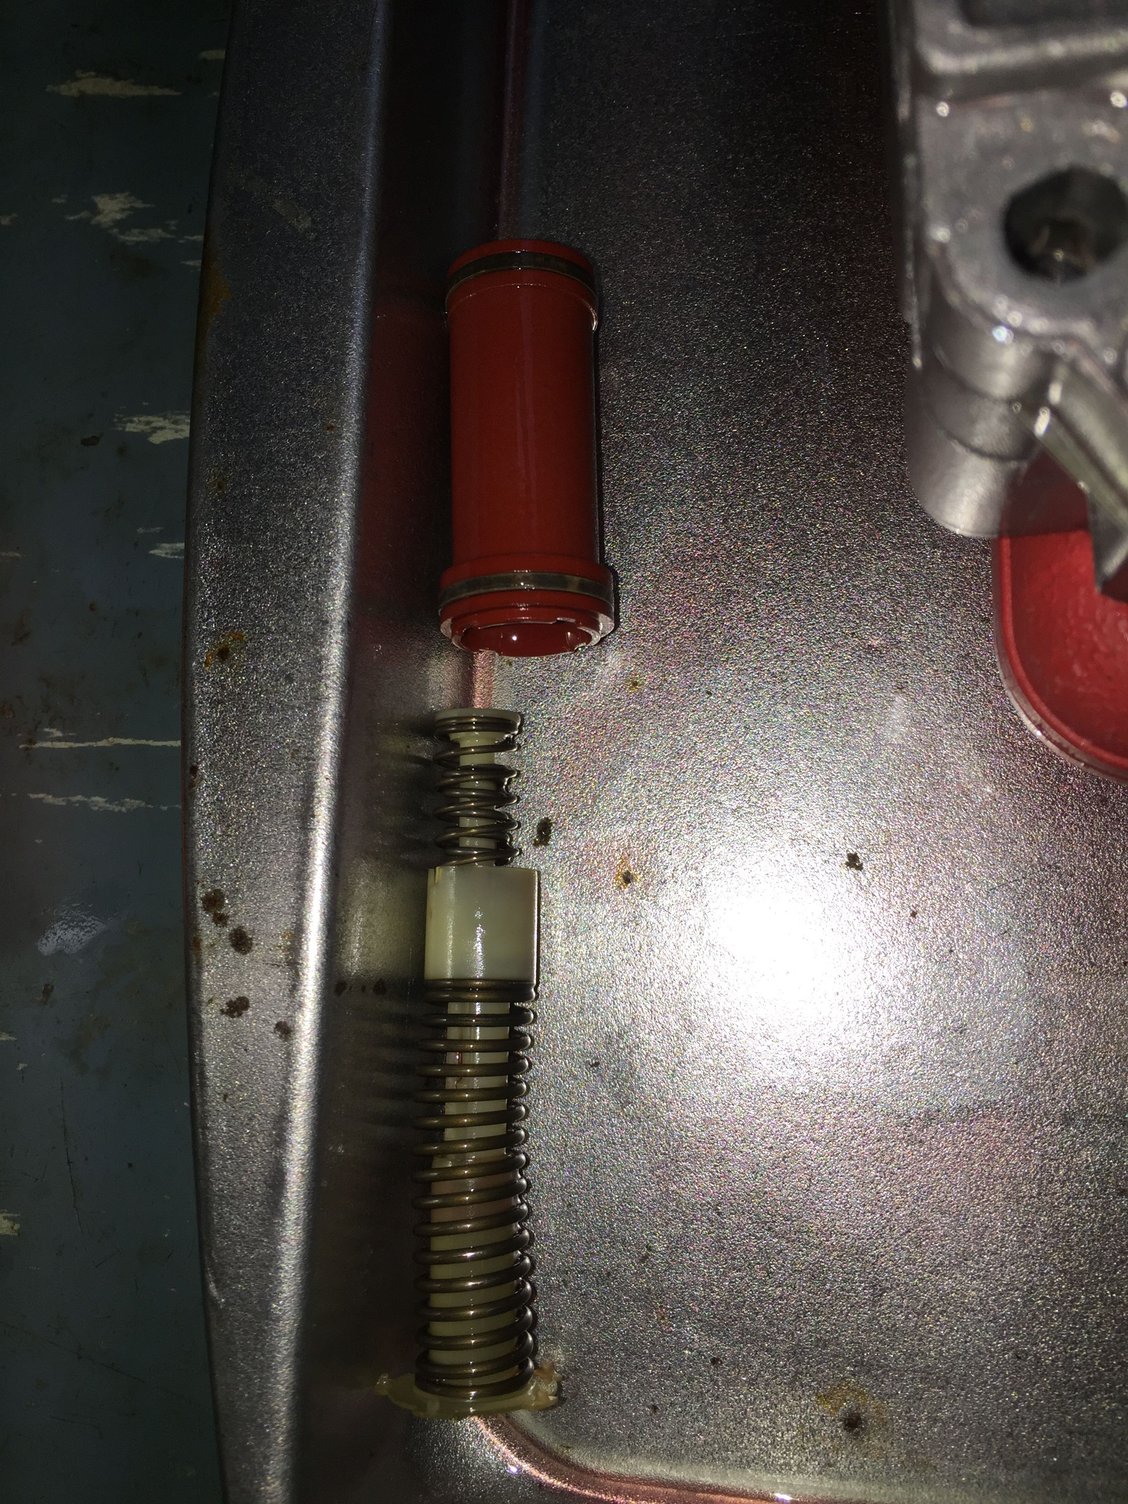
Having checked the supply end of the circuit for the 'modulating pressure valve', I next wanted to check where that valve exhausted to. In the upper half of the valve body, there is a passage from the 'modulating pressure valve' to the bore for the 'brake shift shut off valve'. So, I pulled the cover plate for the 'B1 accumulator and other valves. I removed all the elements one by one, photographed them for orientation, cleaned them in mineral spirits, and laid them in the muffin tins to dry. I verified the passage from the 'modulating pressure valve' to the 'brake shift shut off valve' bore was clear. All pieces were lubricated with clean ATF then reassembled back to their respective bores.
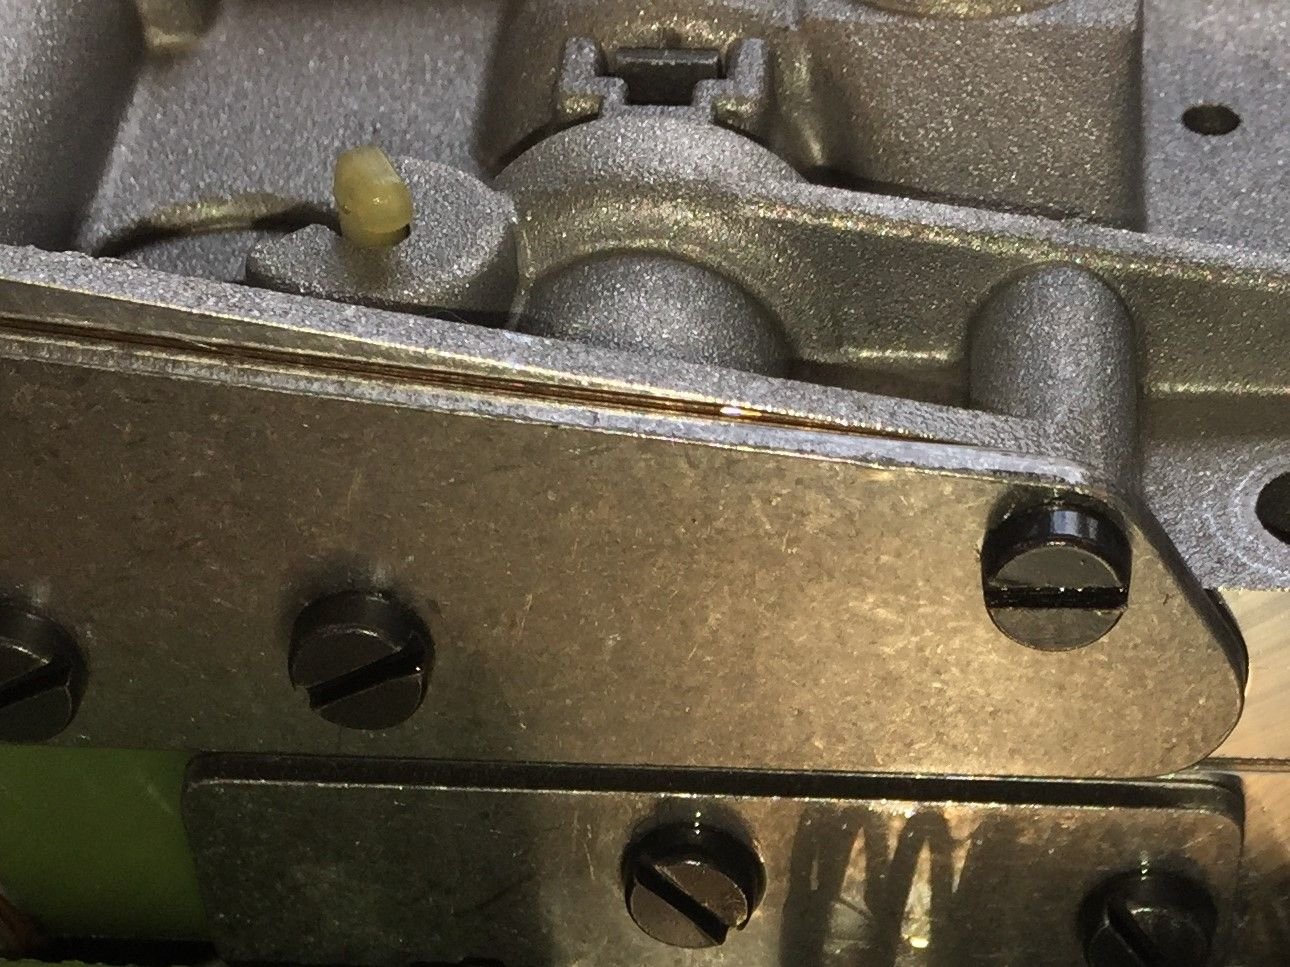
B1 accumulator is on the left, brake shift shut off valve is on the right.
The whitish/yellow plastic piece is the underside of the 'modulating pressure valve.' Note where the raised casting it sits in intersects the raised casting of the brake shift shut off valve bore to the right. This is where the passage is.
After this, I deemed it done and reinstalled the valve body, again torquing the bolts to 8 Nm (6 ft/lbs) with a 1/4" drive in/lbs torque wrench. I cleaned the pan, gasket, and reservoir again. Reinstalled the pan and reservoir, torqued pan again to 8 Nm (6 ft/lbs) with the above torque wrench.
Tighten the reservoir coupling nut, add a drain screw and new crush ring with a layer of teflon paste to both sides, torque to 14 Nm (12 ft/lbs) and called it a night.
I will reinstall the old modulator, thrust pin, and plunger in the morning. I want to go back to a known working configuration. Then, refill the transmission, warm it up, and again test modulator pressure in 'D'.
Hi Bertrand! Thanks for the words of encouragement!
I learned years ago to document what I was doing. That way, if and when it goes south, I have a reference.
Plus, as you said, this is good for others to see as a 'do this/don't do this' type of thing.
I am by no means an expert, but I am relatively comfortable with intricate machinery. Am I still nervous? H*ll yes!!!
I do want to apologize to the forum for the lousy quality of the last round of photos. The flash was not a good idea with the reflective surfaces of the baking sheet and muffin tins.
This morning, I cleaned, lubricated, and reinstalled the old modulator, thrust pin, and plunger. I did not change the adjustment.
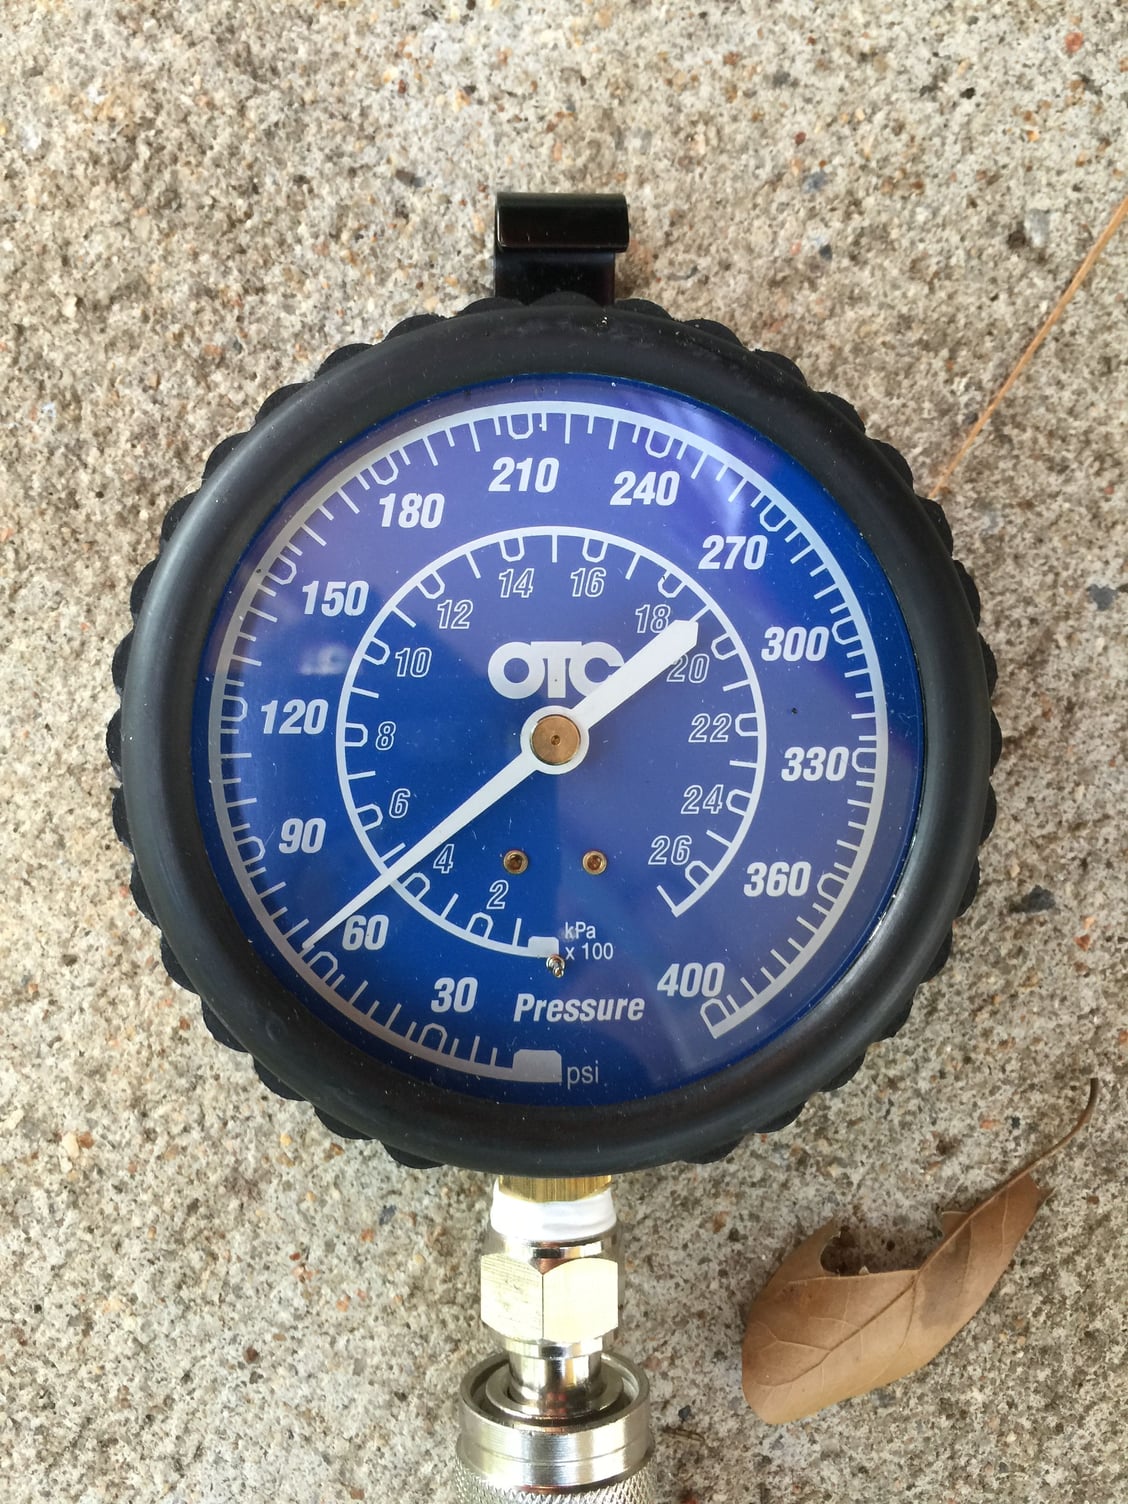
Then, I reinstalled the 0-400 PSI gauge from the OTC kit to the modulator pressure port.
I filled the transmission pan and reservoir up to above 'MAX', then ran the engine for 20 seconds.
I took a glance at the modulator pressure gauge: 73 PSI.
Yay!!!
Since the transmission was still cold, I went ahead and reswapped modulators. I cleaned, lubricated, and reinstalled the new modulator, thrust pin, and plunger. I did screw the adjuster back in 8 full turns, to account for the 6 turns out Greg recommended and for the rest of the turning I did.
Filled the transmission and reservoir back up to 'MAX', ran the engine for 20 seconds.
Again glanced at the modulator pressure gauge: 126 PSI.
WTF?!?!?!
I took that moment as time to walk in the house to cool off and get a drink.
Back outside, I again cleaned, lubricated, and re-reinstalled the old modulator, thrust pin, and plunger. I don't know which of the three new parts is the problem, so out they all came.
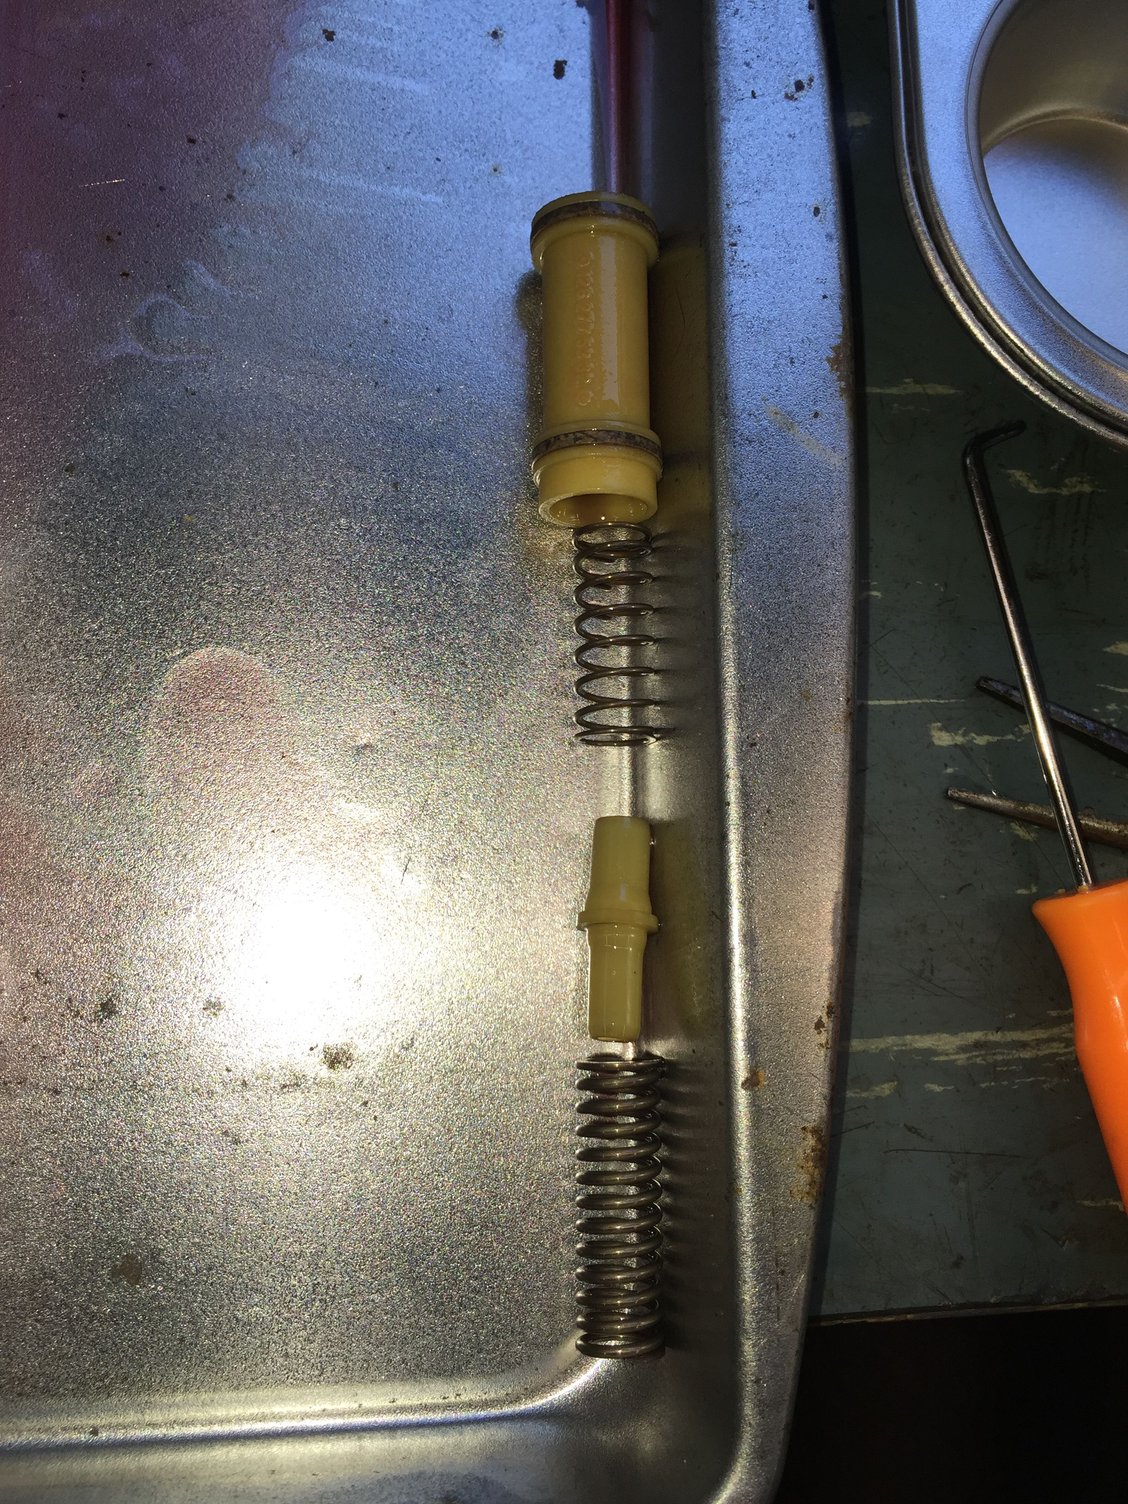
I don't understand this failure. I am guessing that all the work I did in the valve body was completely unnecessary to this problem. I have closely compared the new parts to the old parts. The plungers look identical. The thrust pins are a different color, and the tip of the new one is more squared off where the old one was more rounded. Other than that, the thrust pins are identical. The old modulator cap is red, the new one is green. Both adjusting plungers felt free. Though, the green one might have felt like it had more spring tension. Hmmm...
Either way, I can't explain why the new modulator parts caused excessively high modulator pressure.
At this point, I finished filling the transmission and reservoir so that the level was midway between 'MIN' and 'MAX' with the transmission warm.
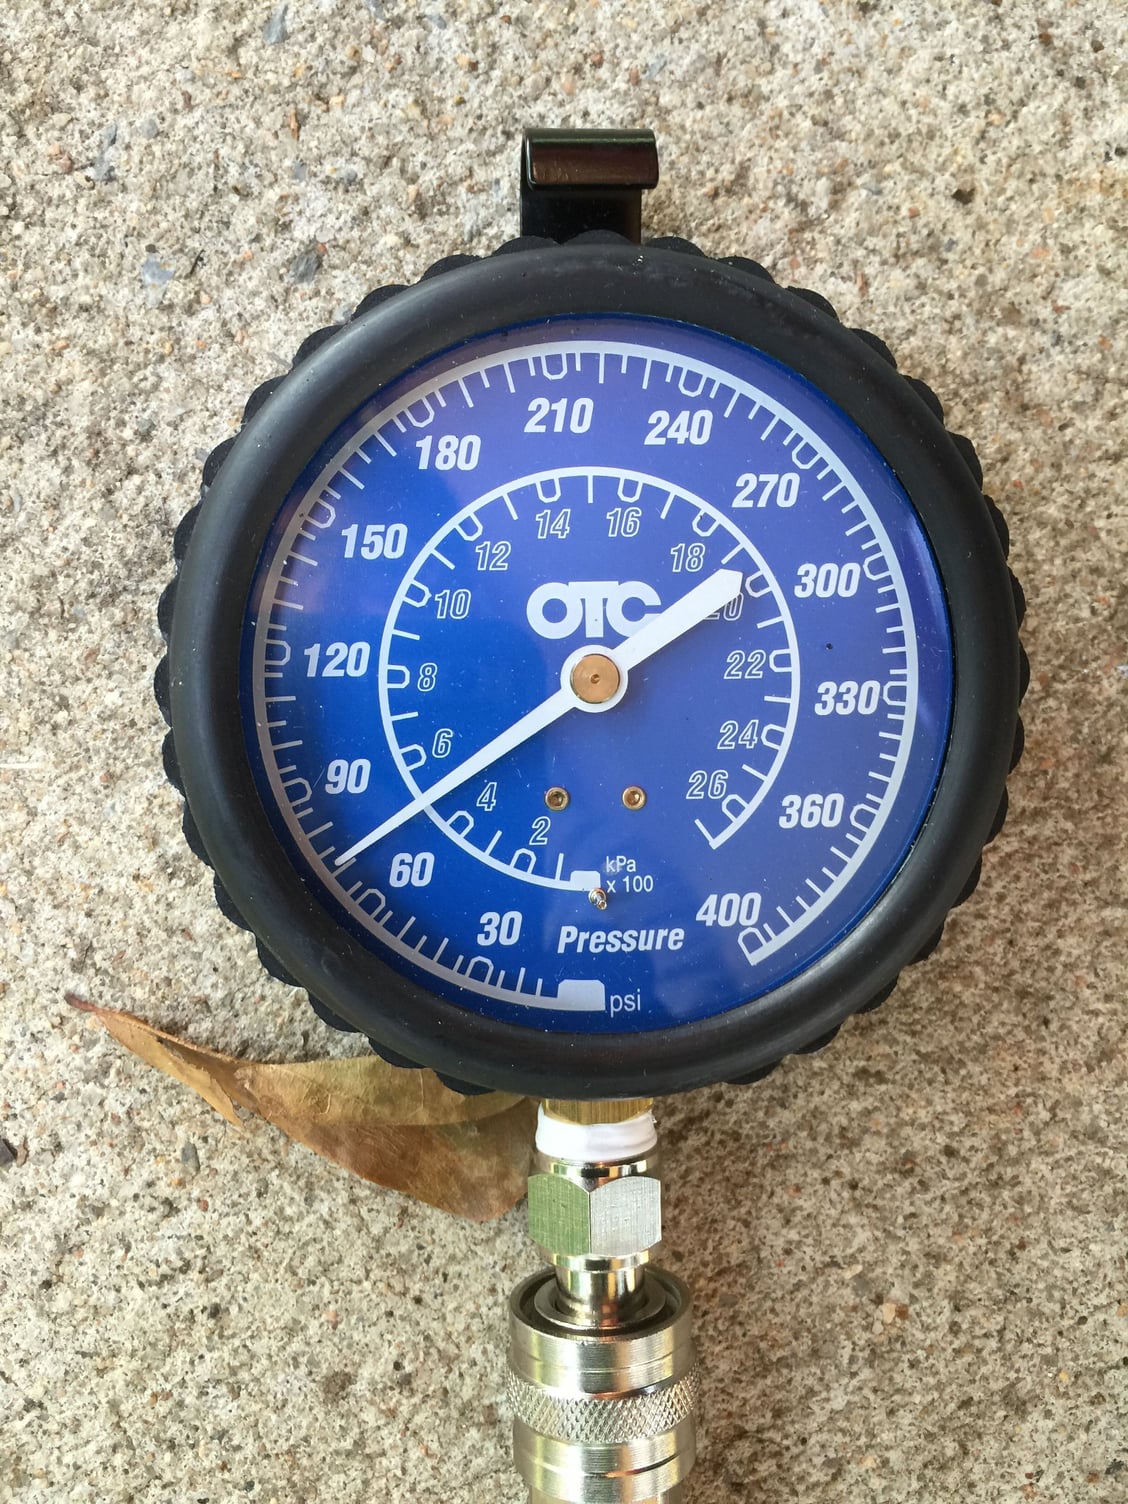
With the transmission warm and in 'D', modulator pressure was approximately 71 PSI (4.9 bar). I walked this down to 66 PSI (4.5 bar) and called it good. The modulator pressure responded instantly to adjustment. I know book spec is 4.4 bar, so mine is a little high. I had planned on tweaking it down the road a little anyway.
Approximately 72 PSI before tweaking.
Approximately 66 PSI after tweaking.
With that out of the way, I can move onto the following:
-finish cleaning and reinstalling the rear wheel spacers
-adjust the E-brakes
-install new VDO vacuum and transmission temperature gauges
-install new 2 gauge (+) battery cable
-finally get around to setting up the new Pioneer head unit
-road test the Red Witch and make final adjustments to the bowden cable and modulator to my tastes

 07-08-2016, 08:15 PM