

1983 928S
 04-16-2017, 01:27 PM
#136
Burning Brakes
Thread Starter
Ah that must be it. I don't have this unit or the alarm controller that should be on the left of the console. It looks like 61 and A are bridged.
 04-22-2017, 08:44 PM
#137
Burning Brakes
Thread Starter
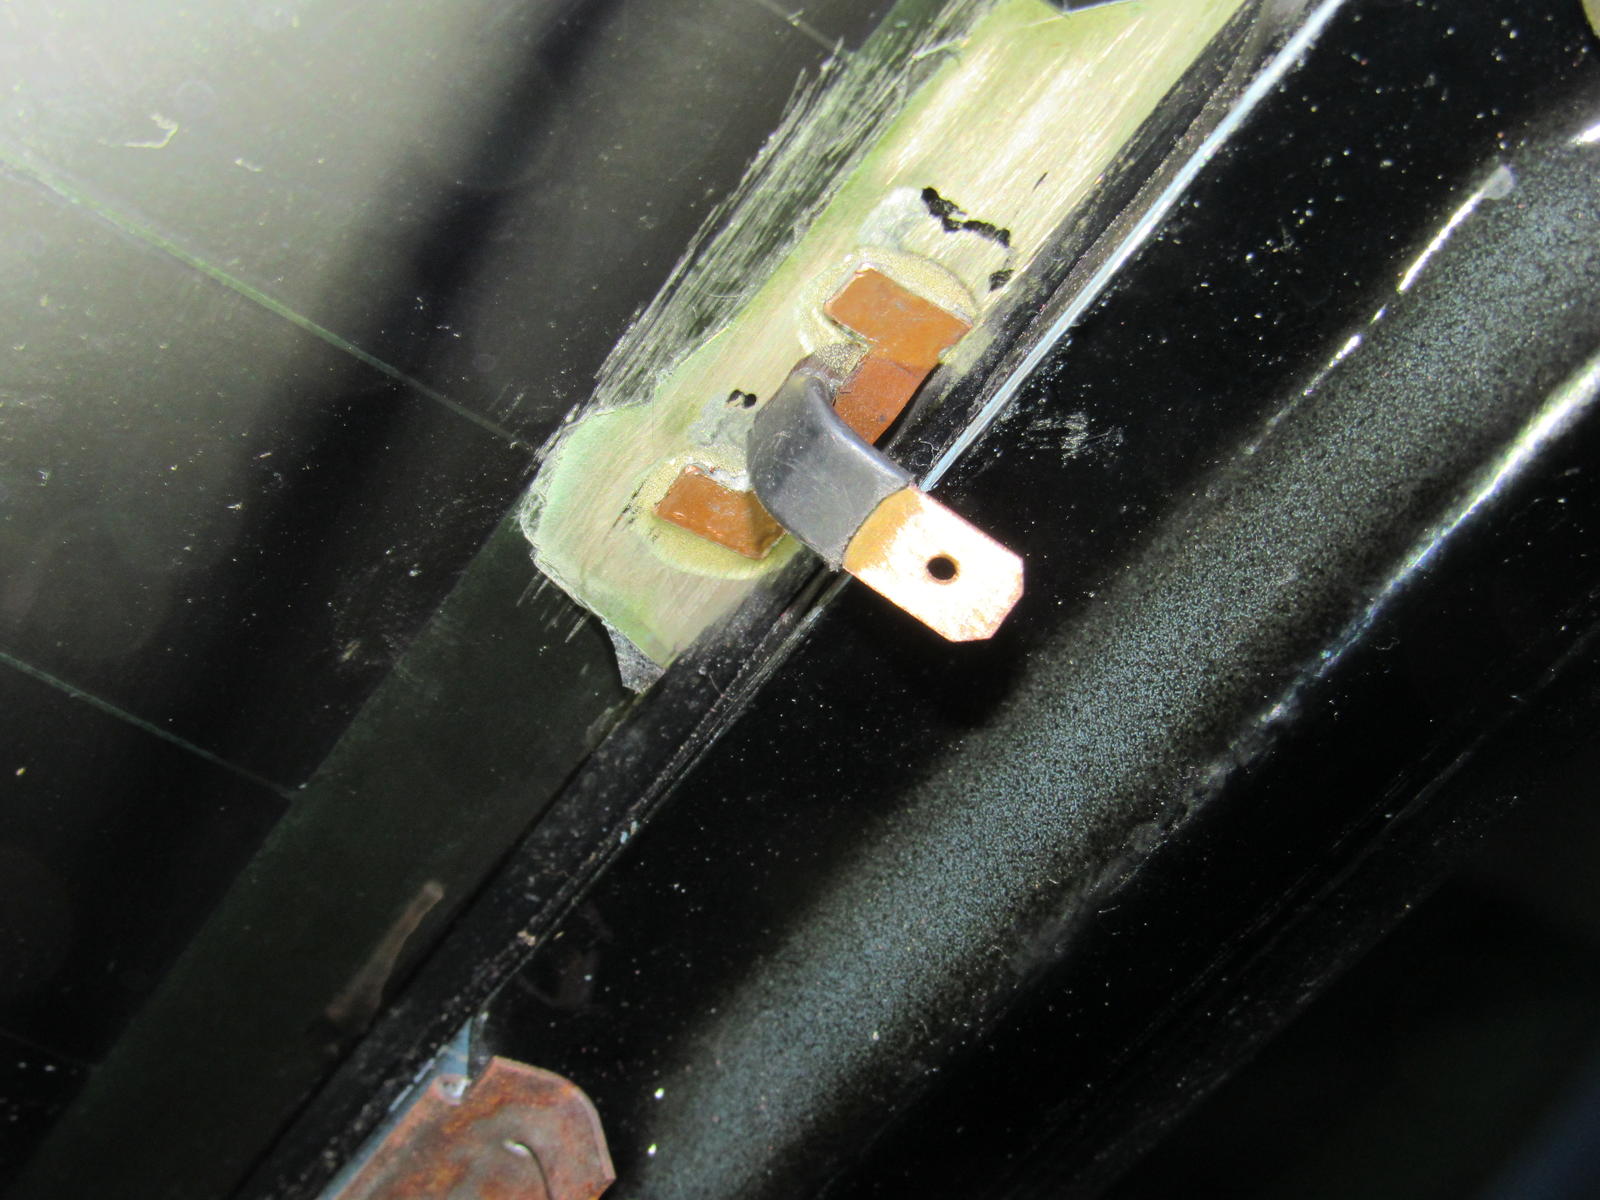
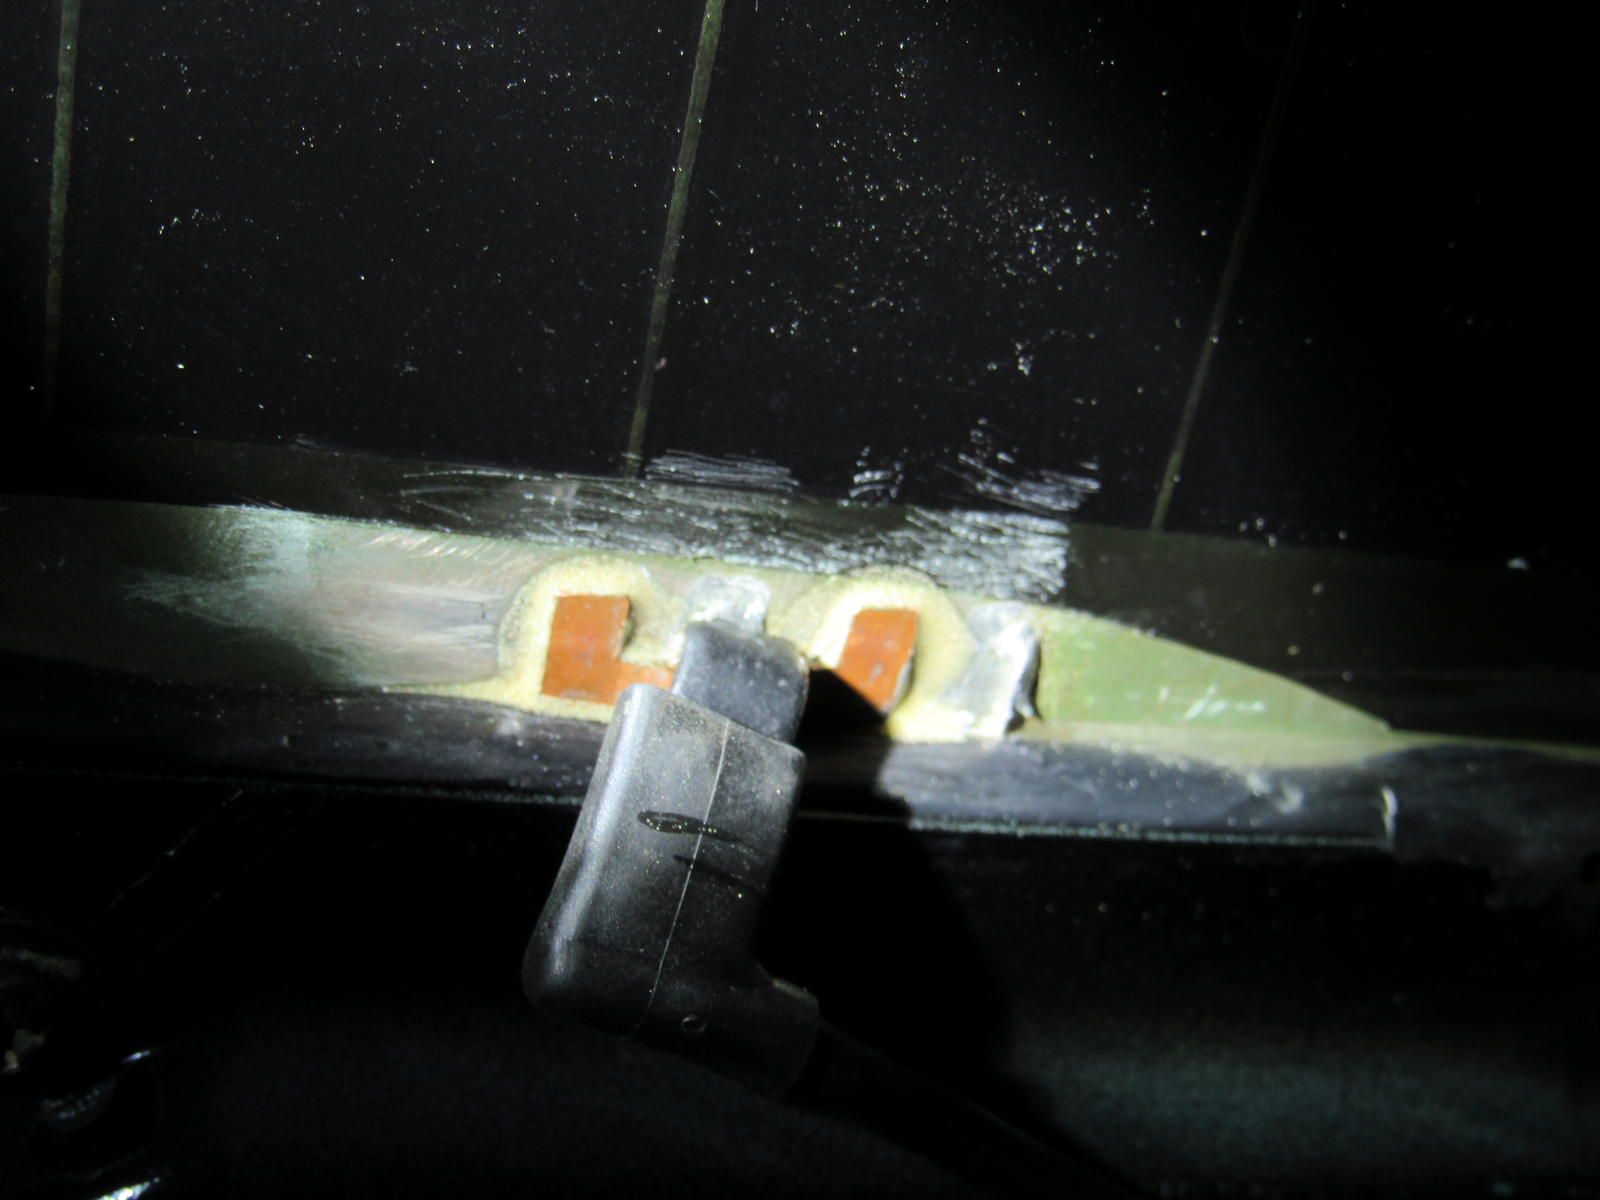
I repaired my defrost tabs today. Special thanks to soontobered84 for finding and sending me two tabs I was missing. The product has to cure 24 hours before I can try it but I feel confident and was impressed that it bonded within 15 seconds.
Permatex product I used.
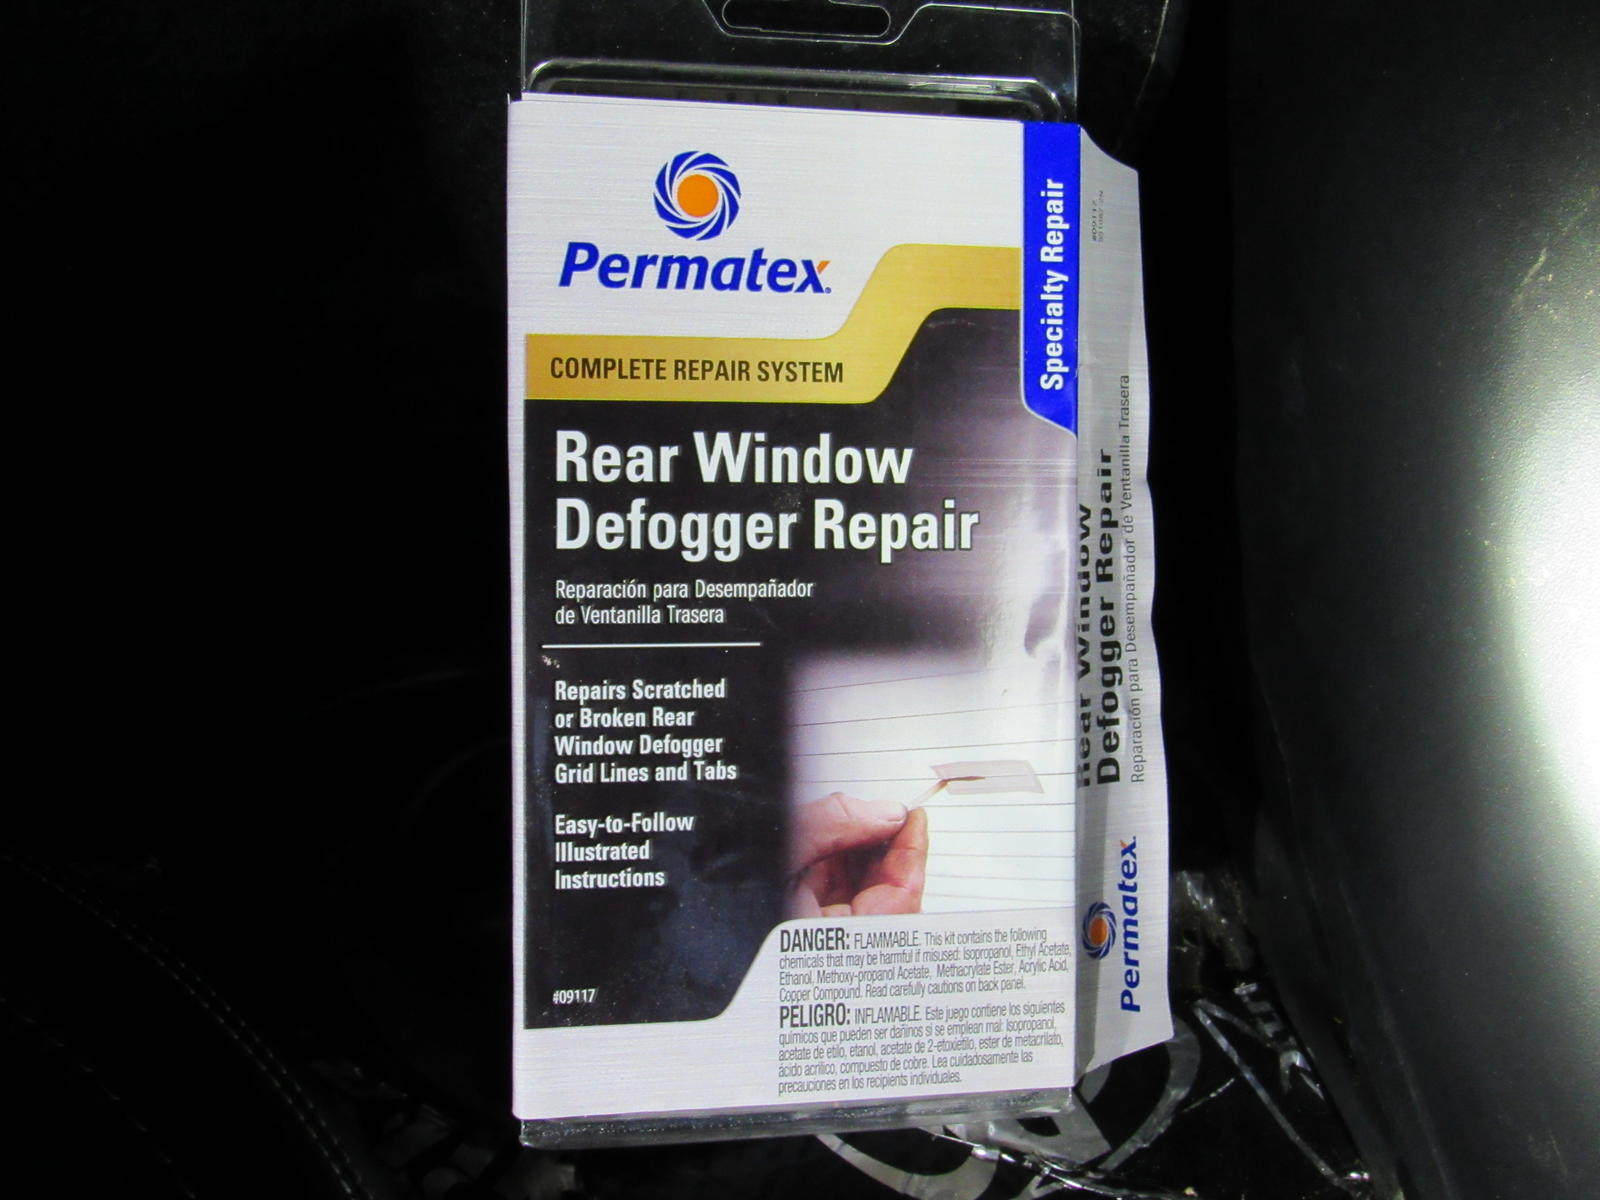
Permatex product I used.
04-29-2017, 06:44 PM
#139
Burning Brakes
Thread Starter
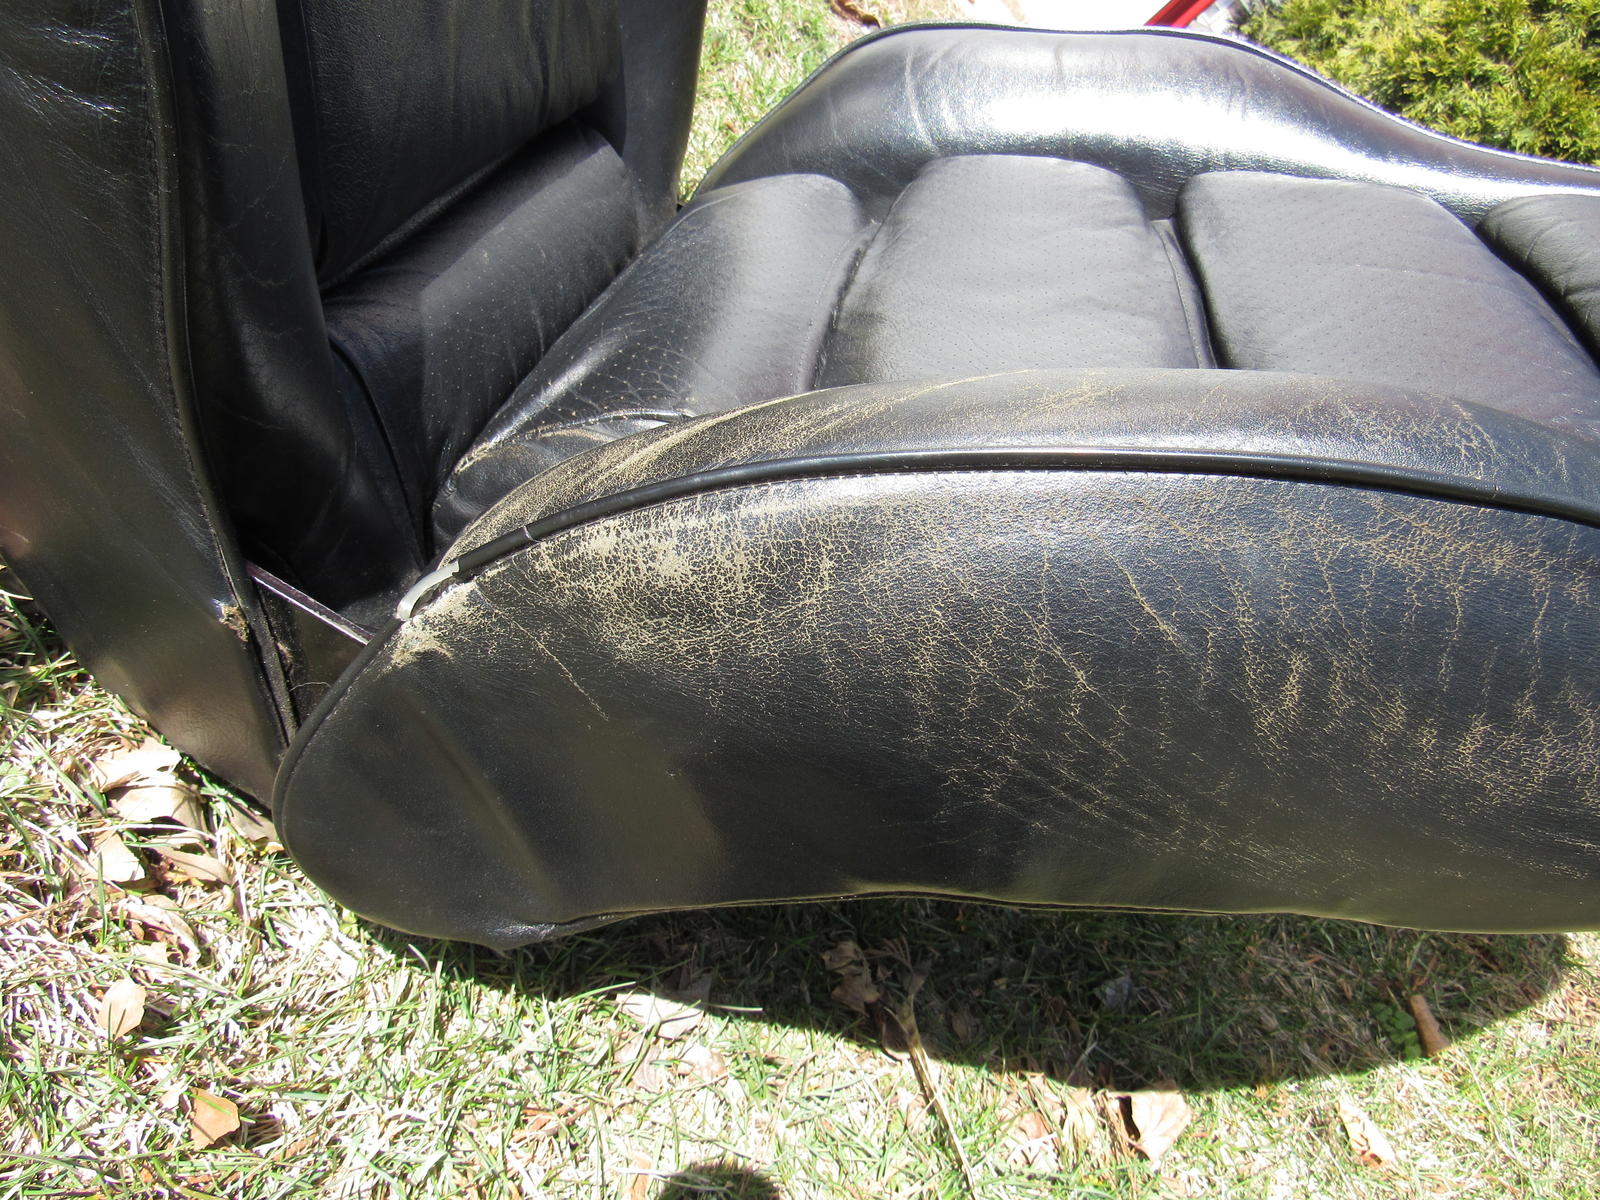
I got my stuff back from Fibrenew and I am very pleased. Be warned, I have a lot of photos.
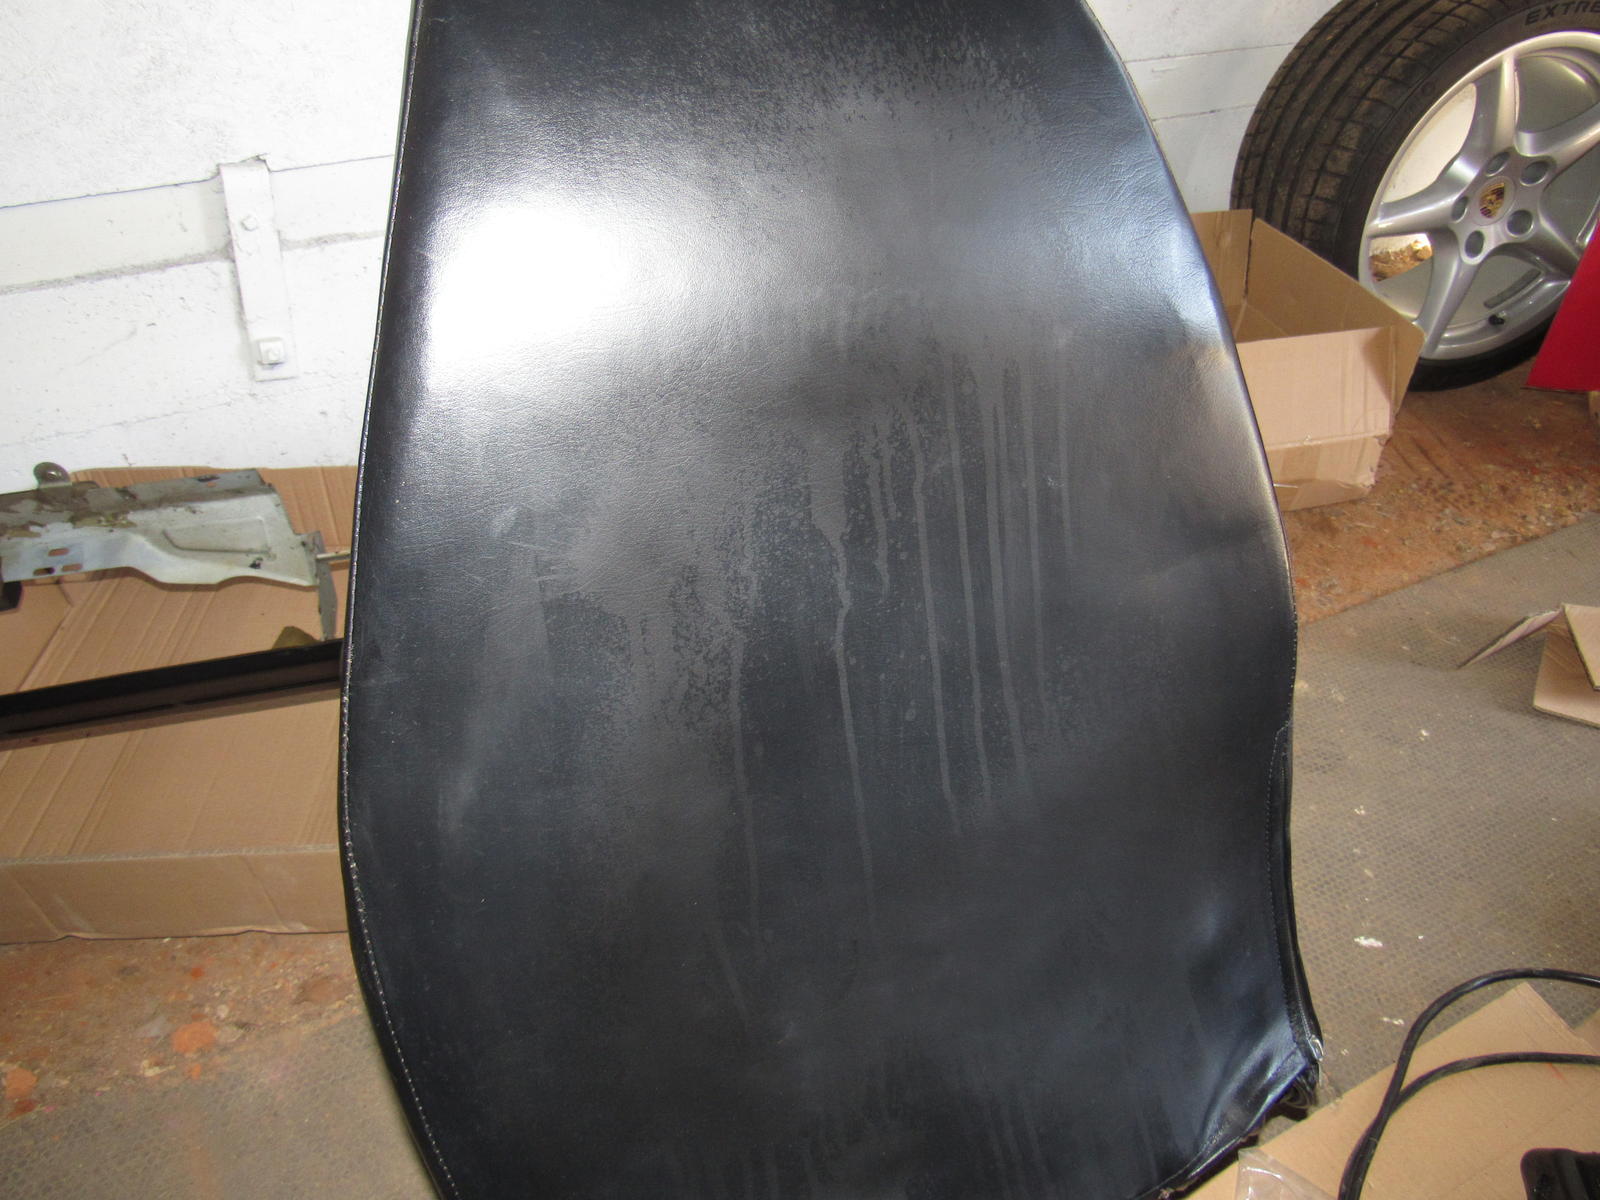
Before:
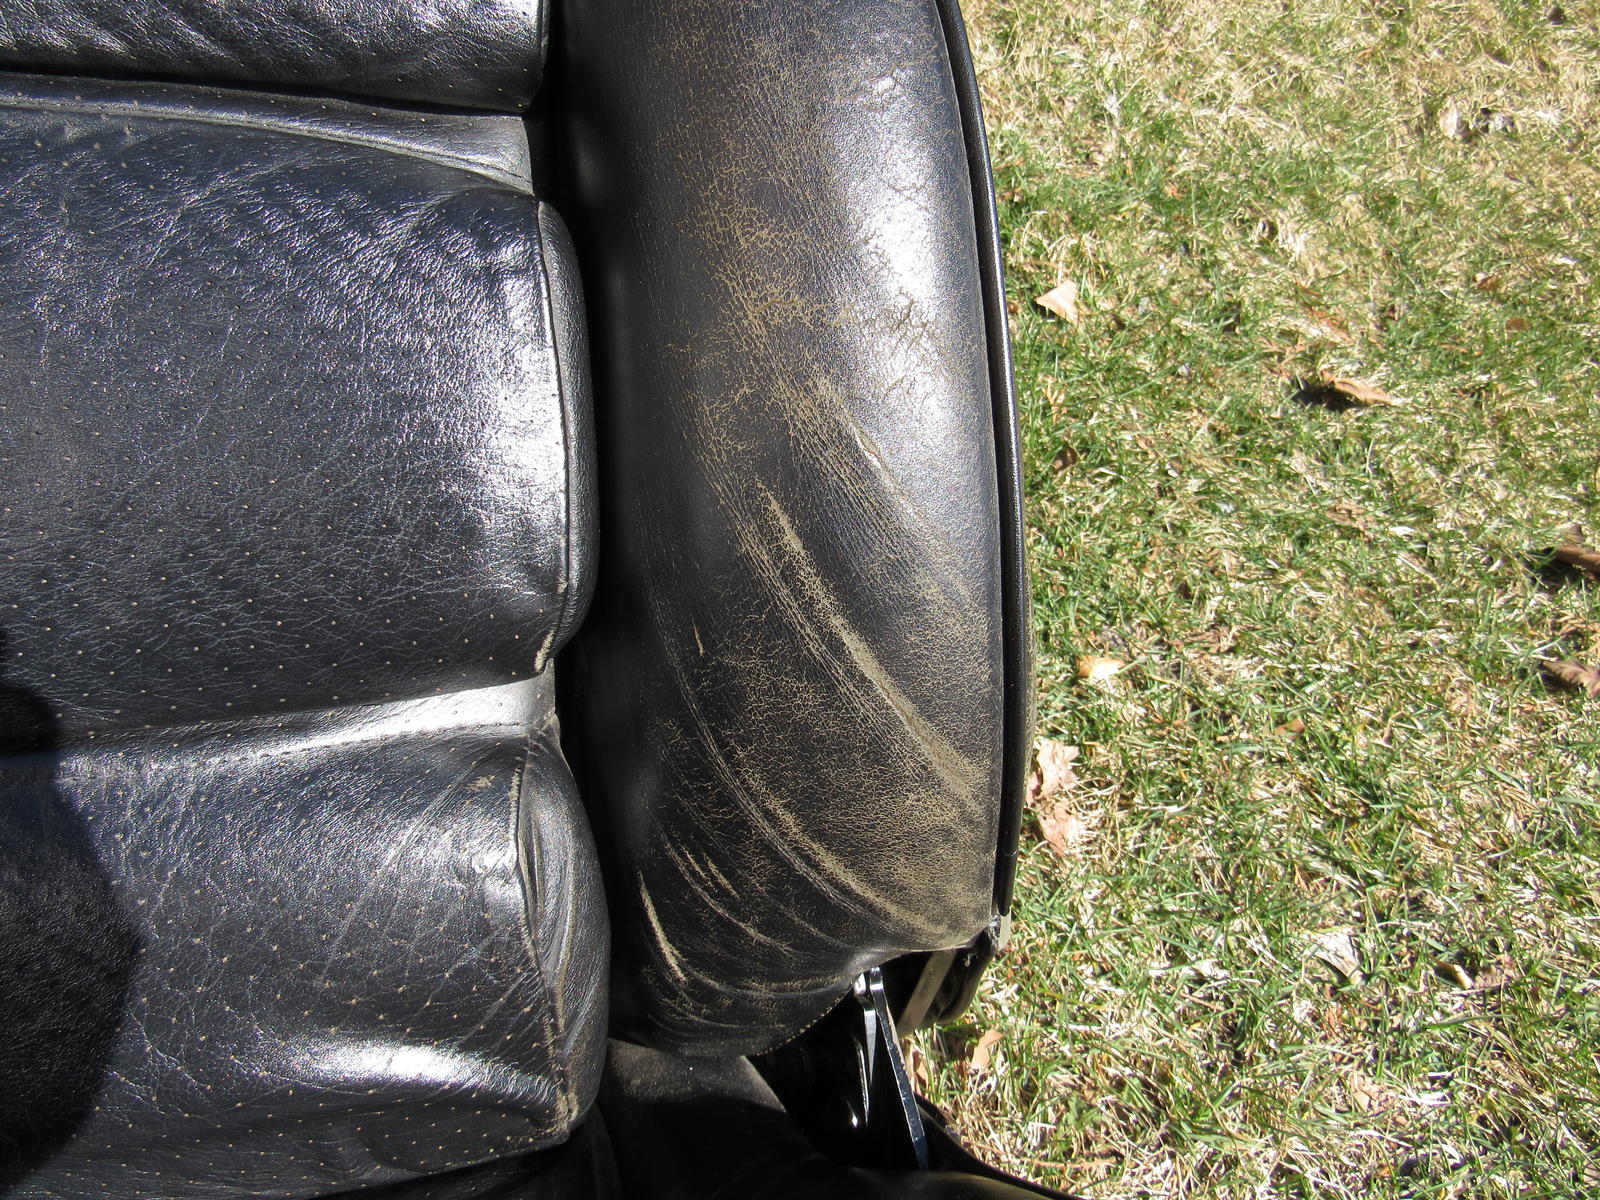
After:
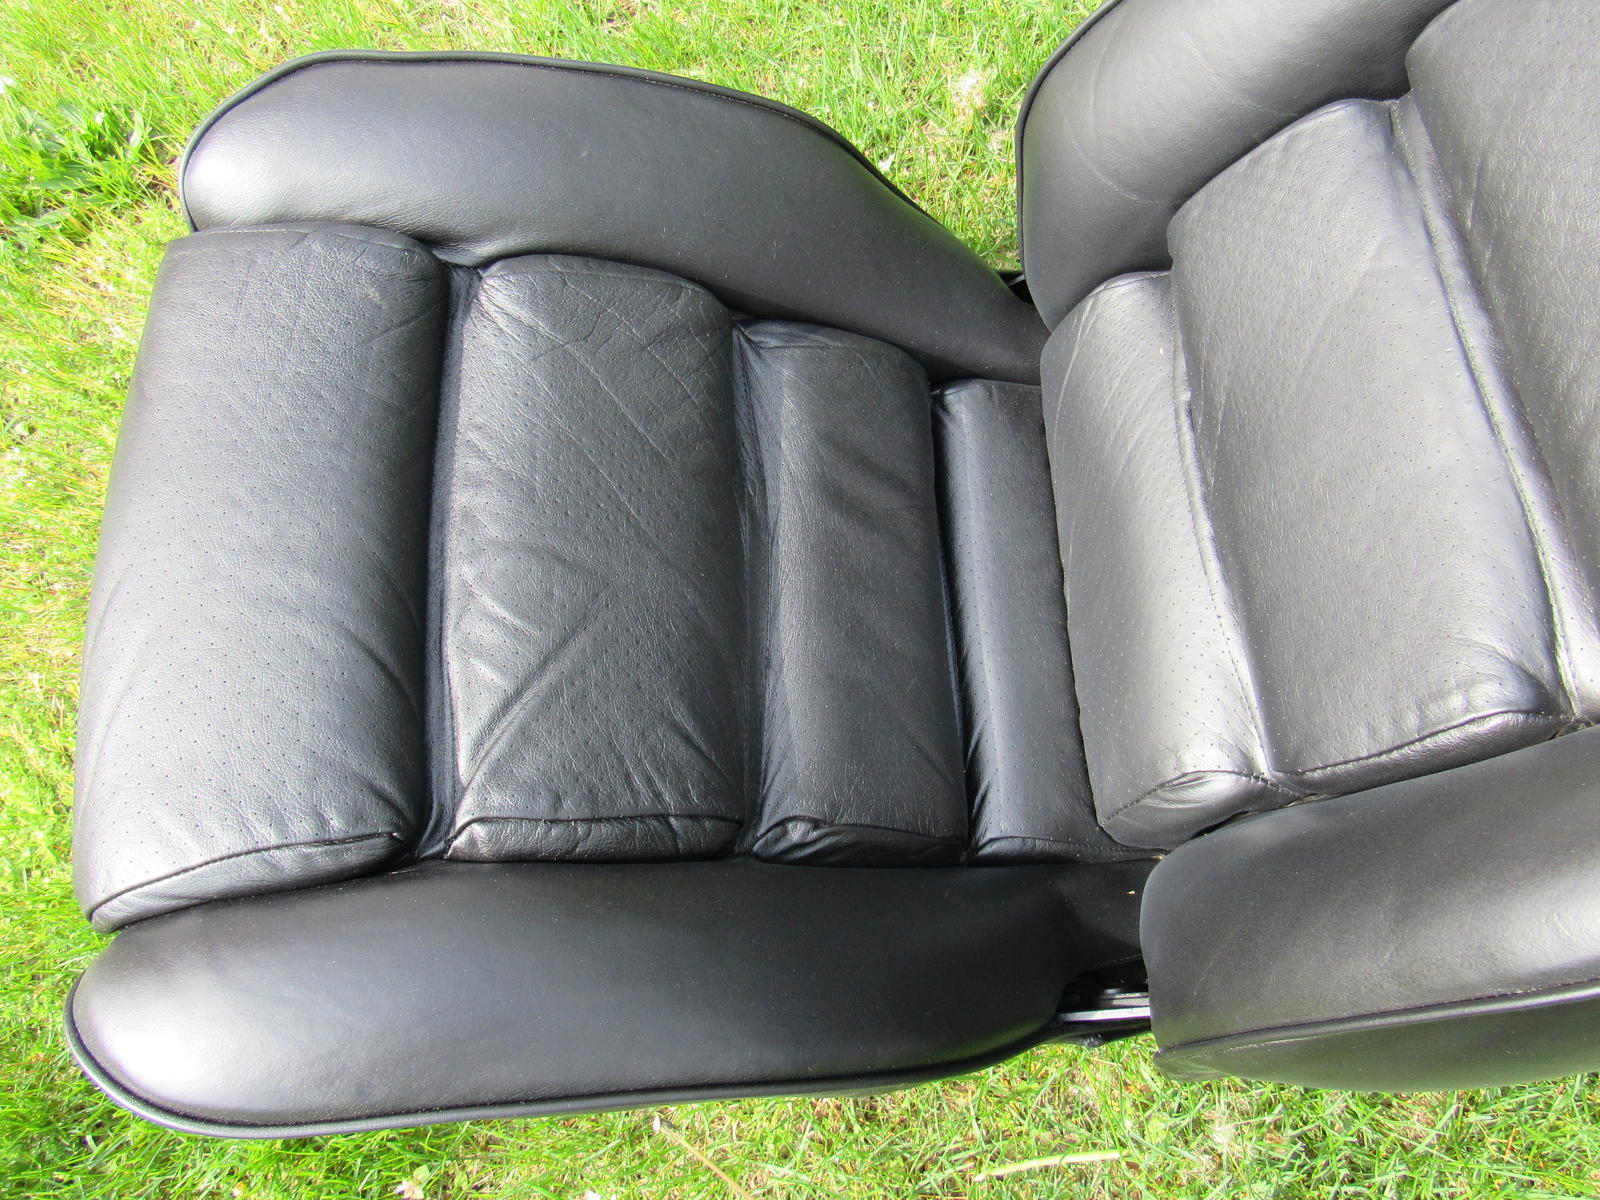
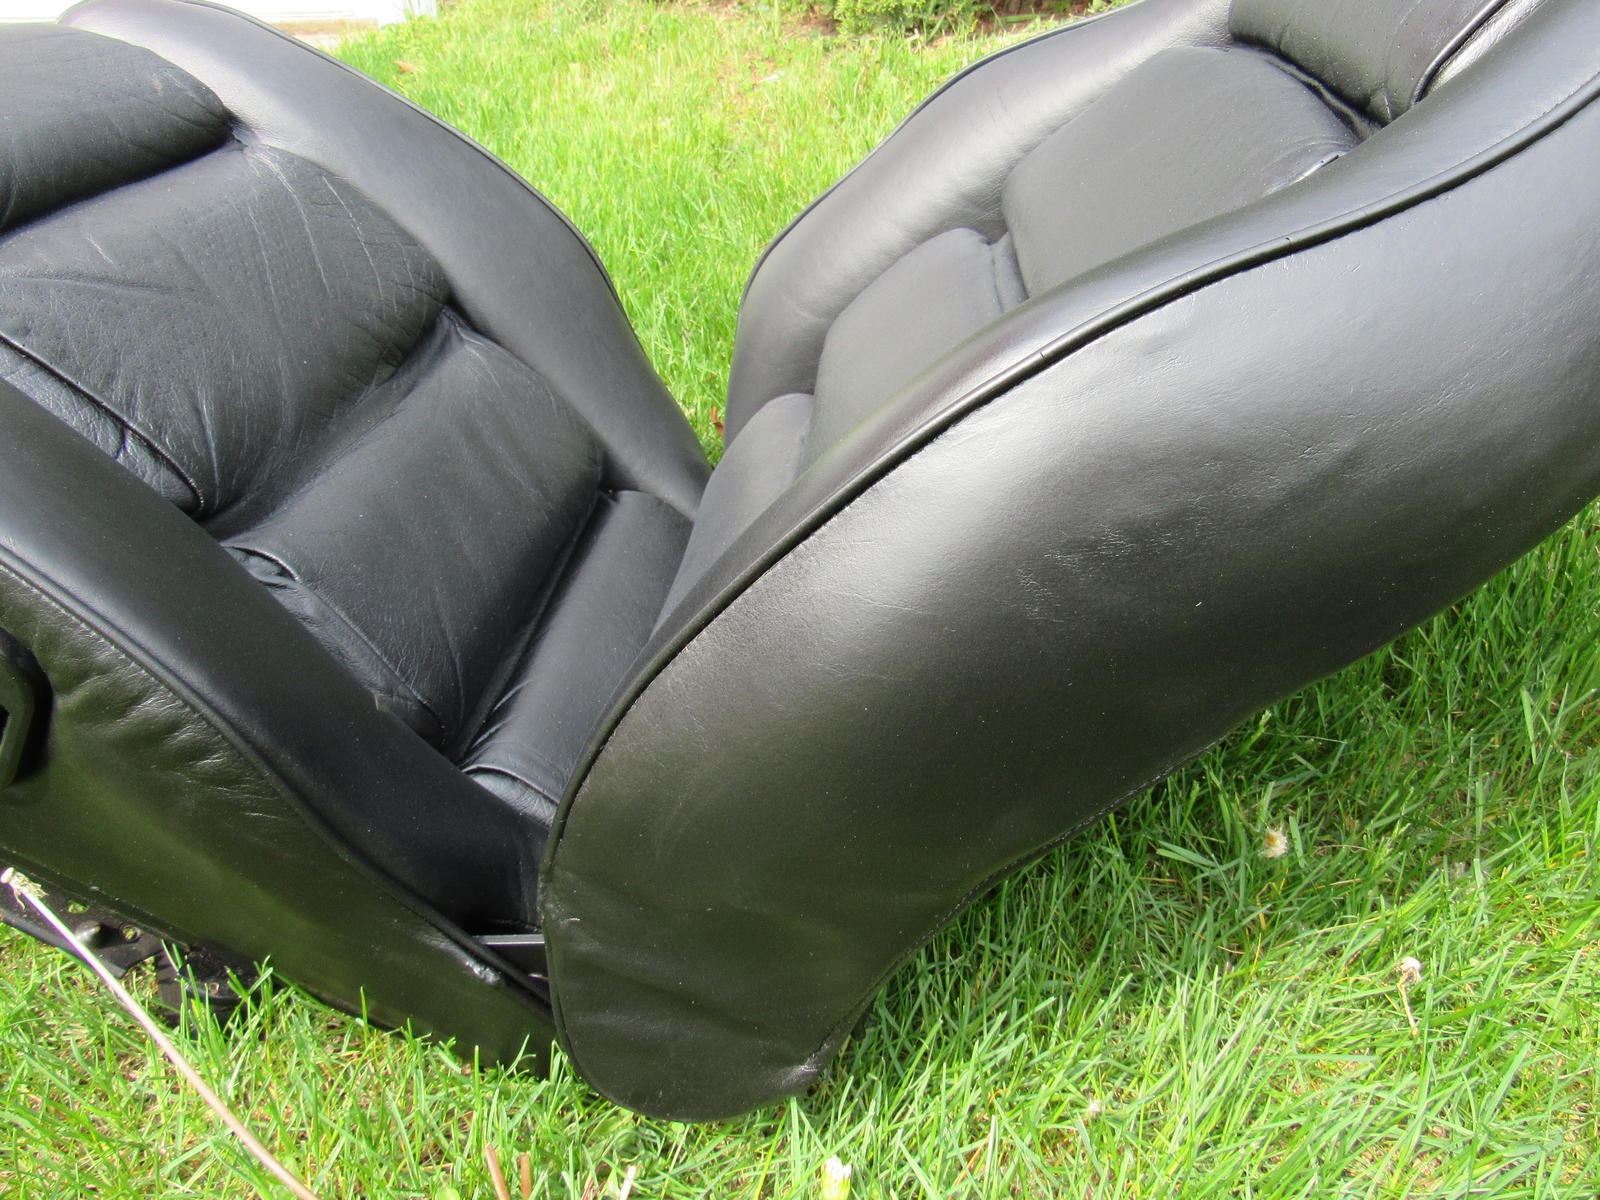
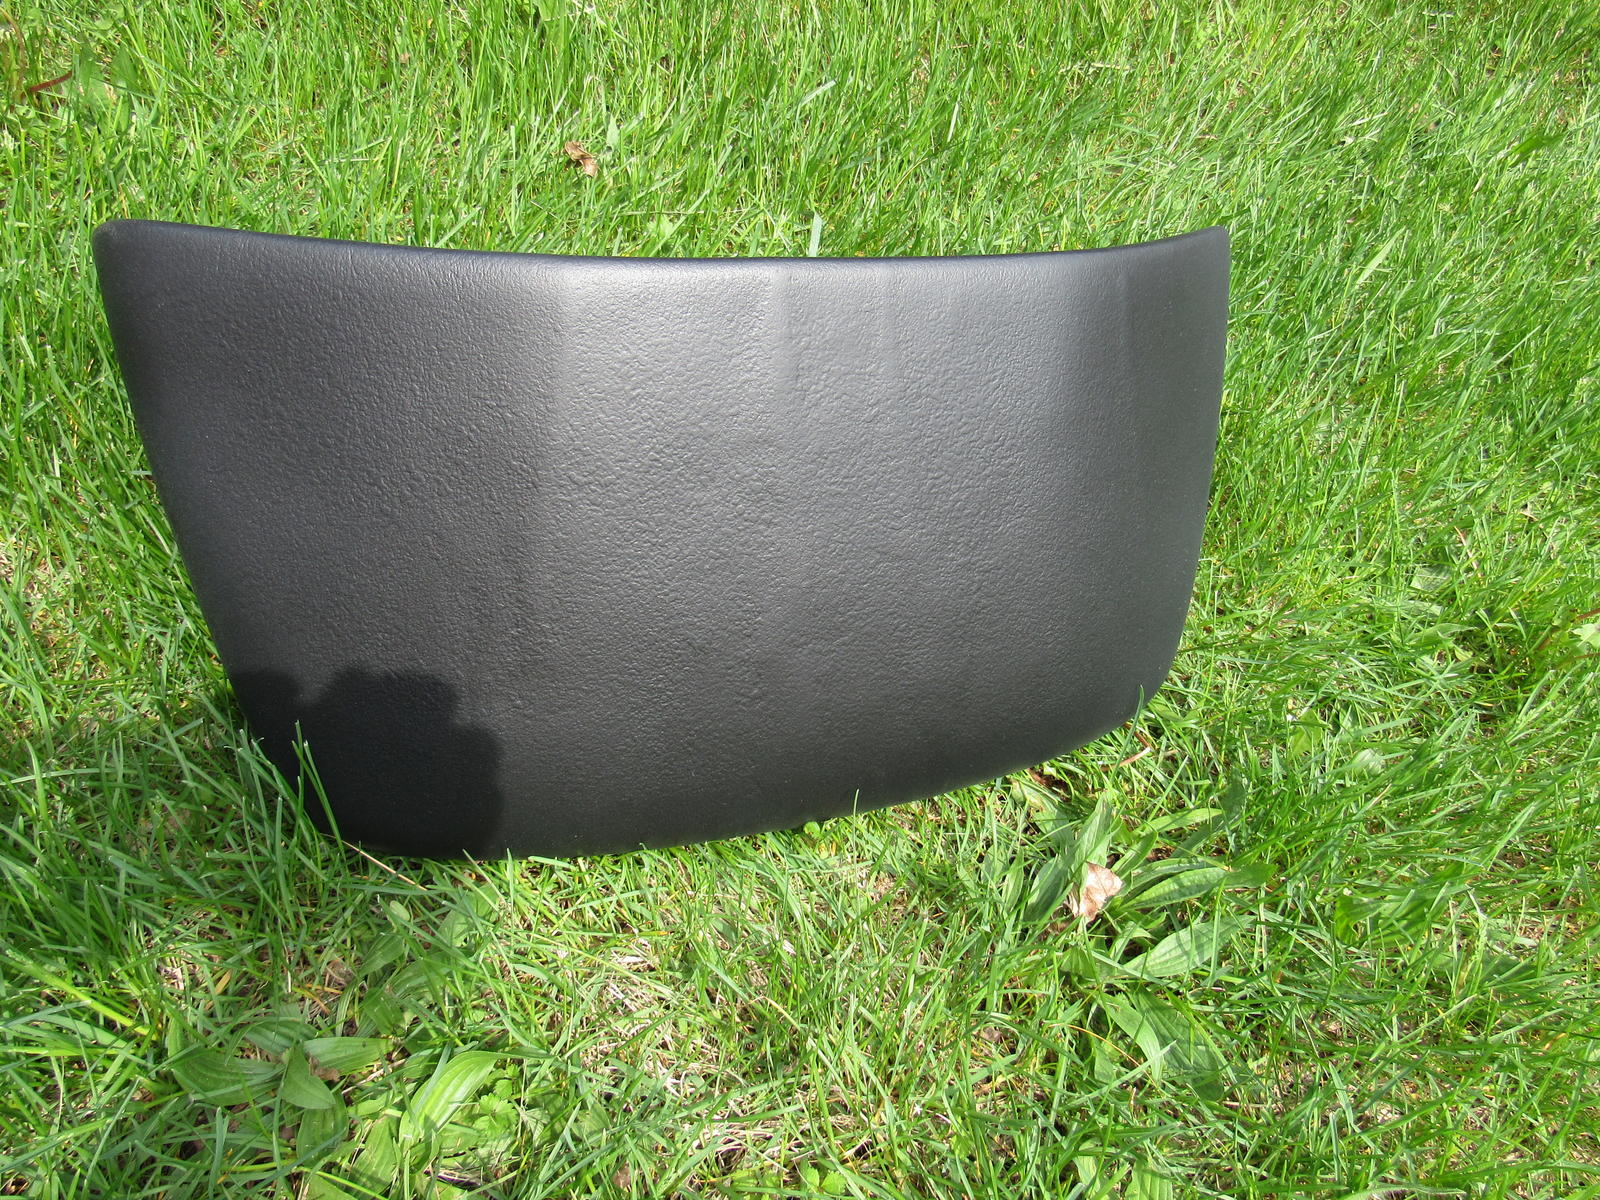
One of the seatbacks was sprayed with something harsh and now is like new.
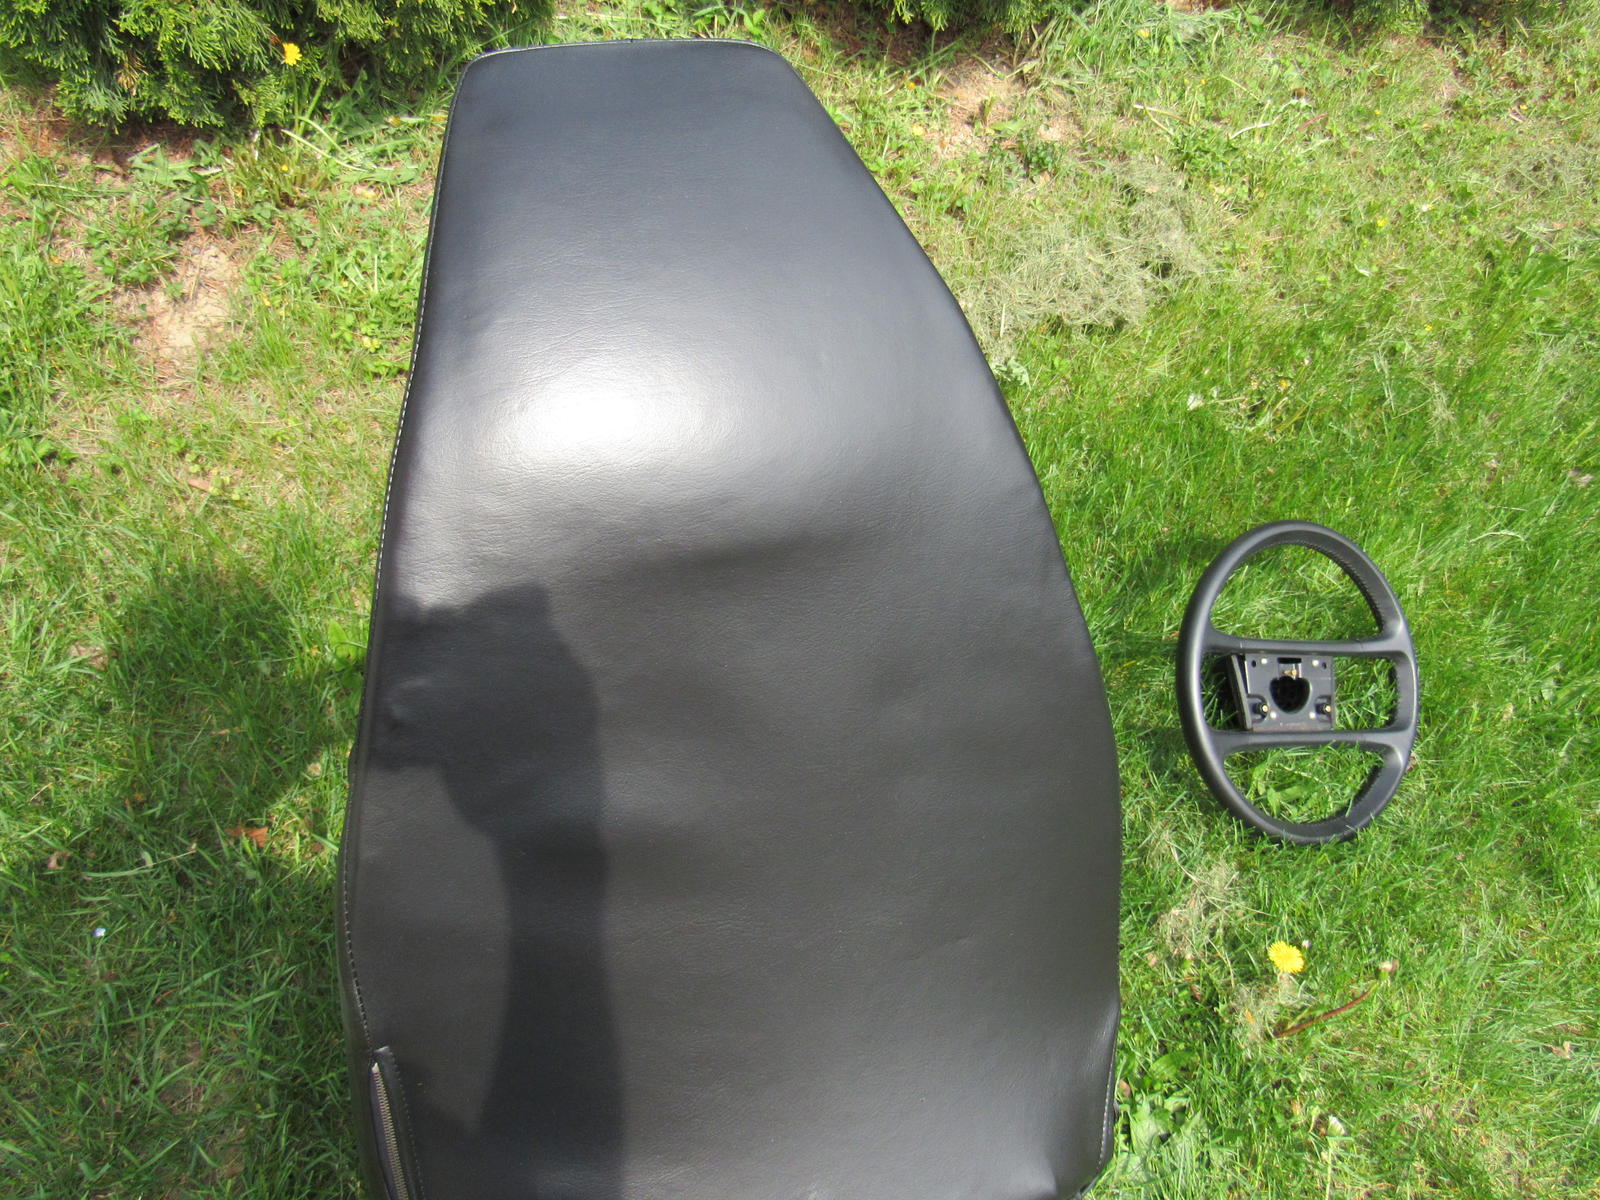
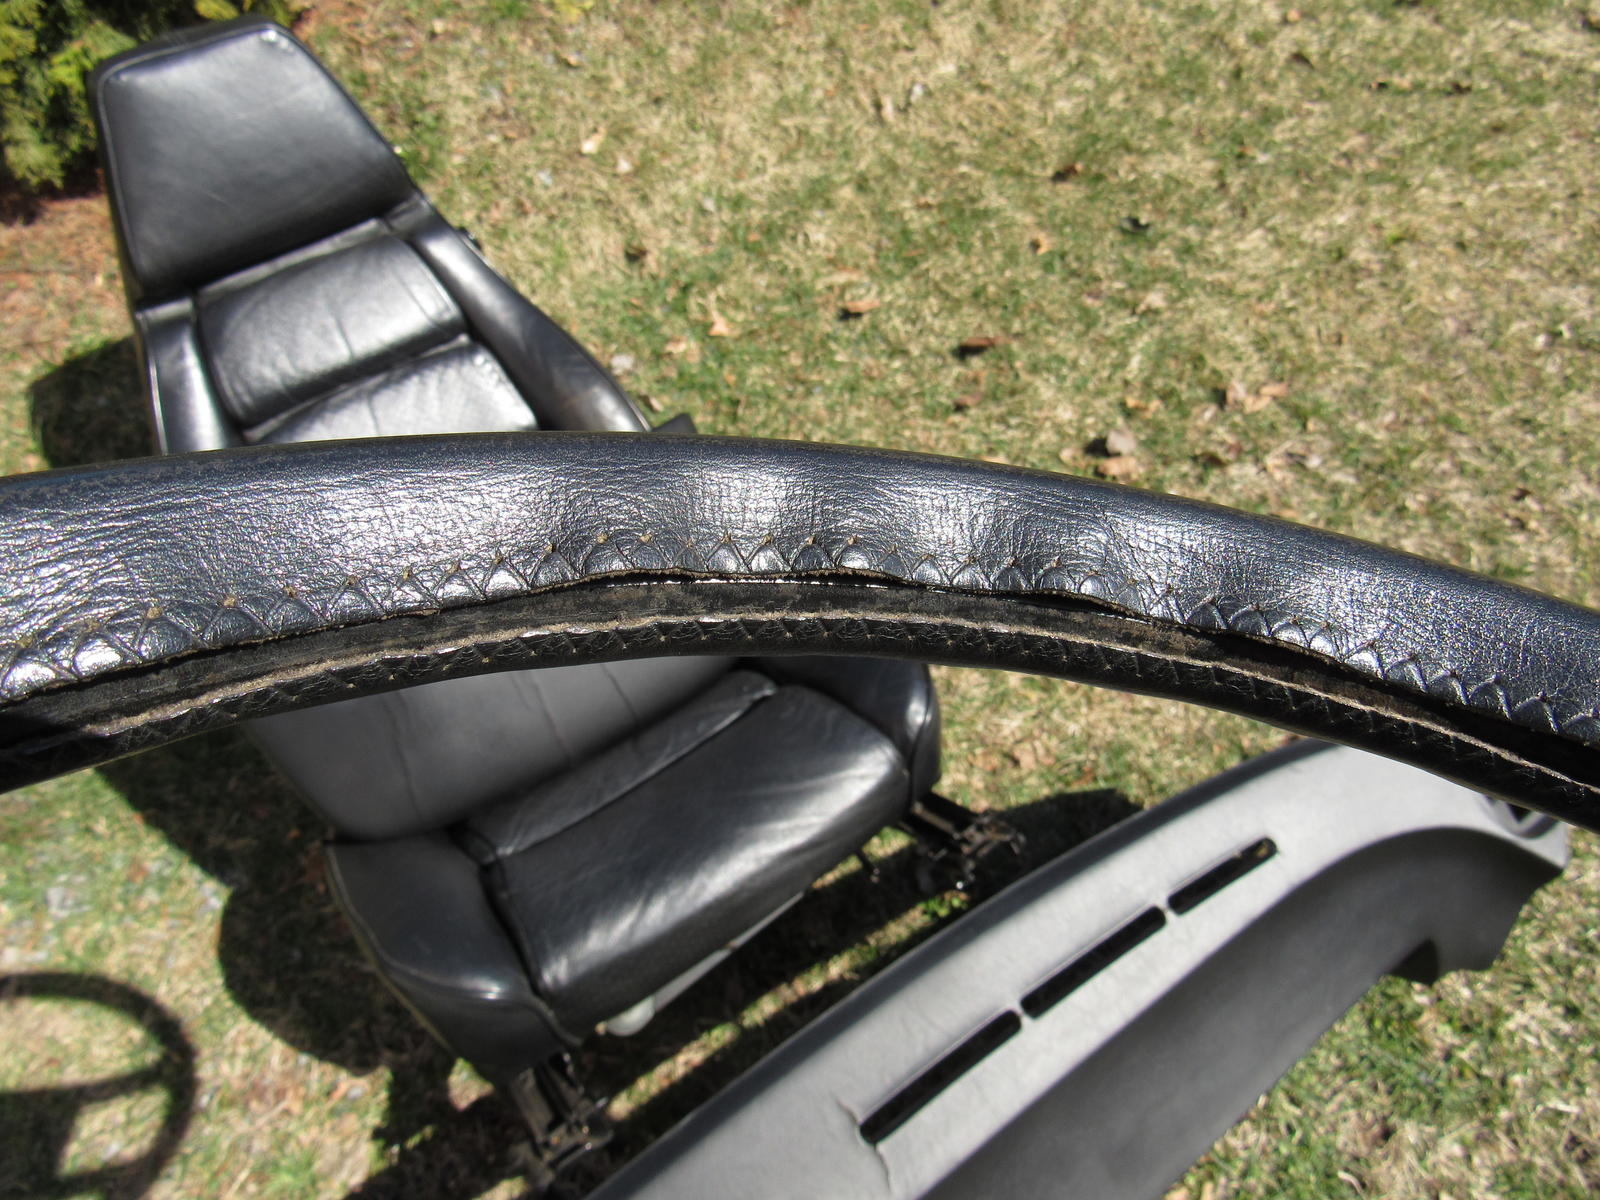
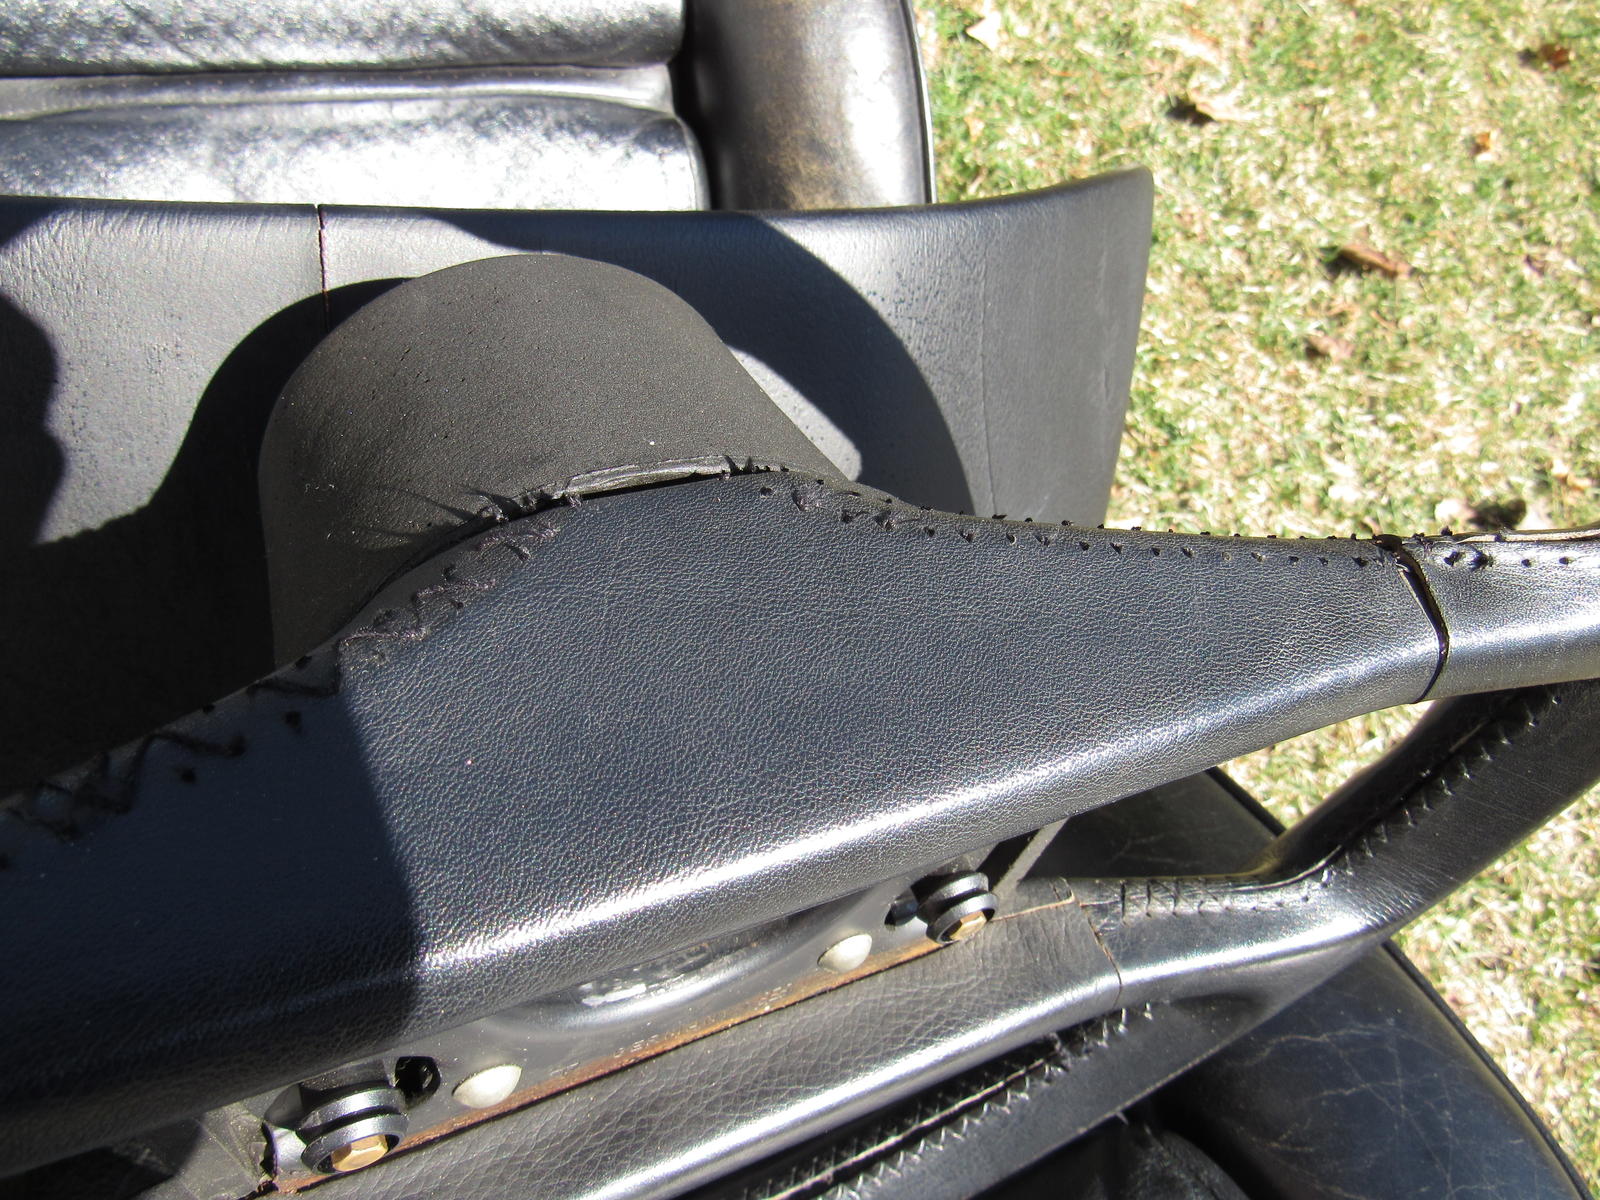
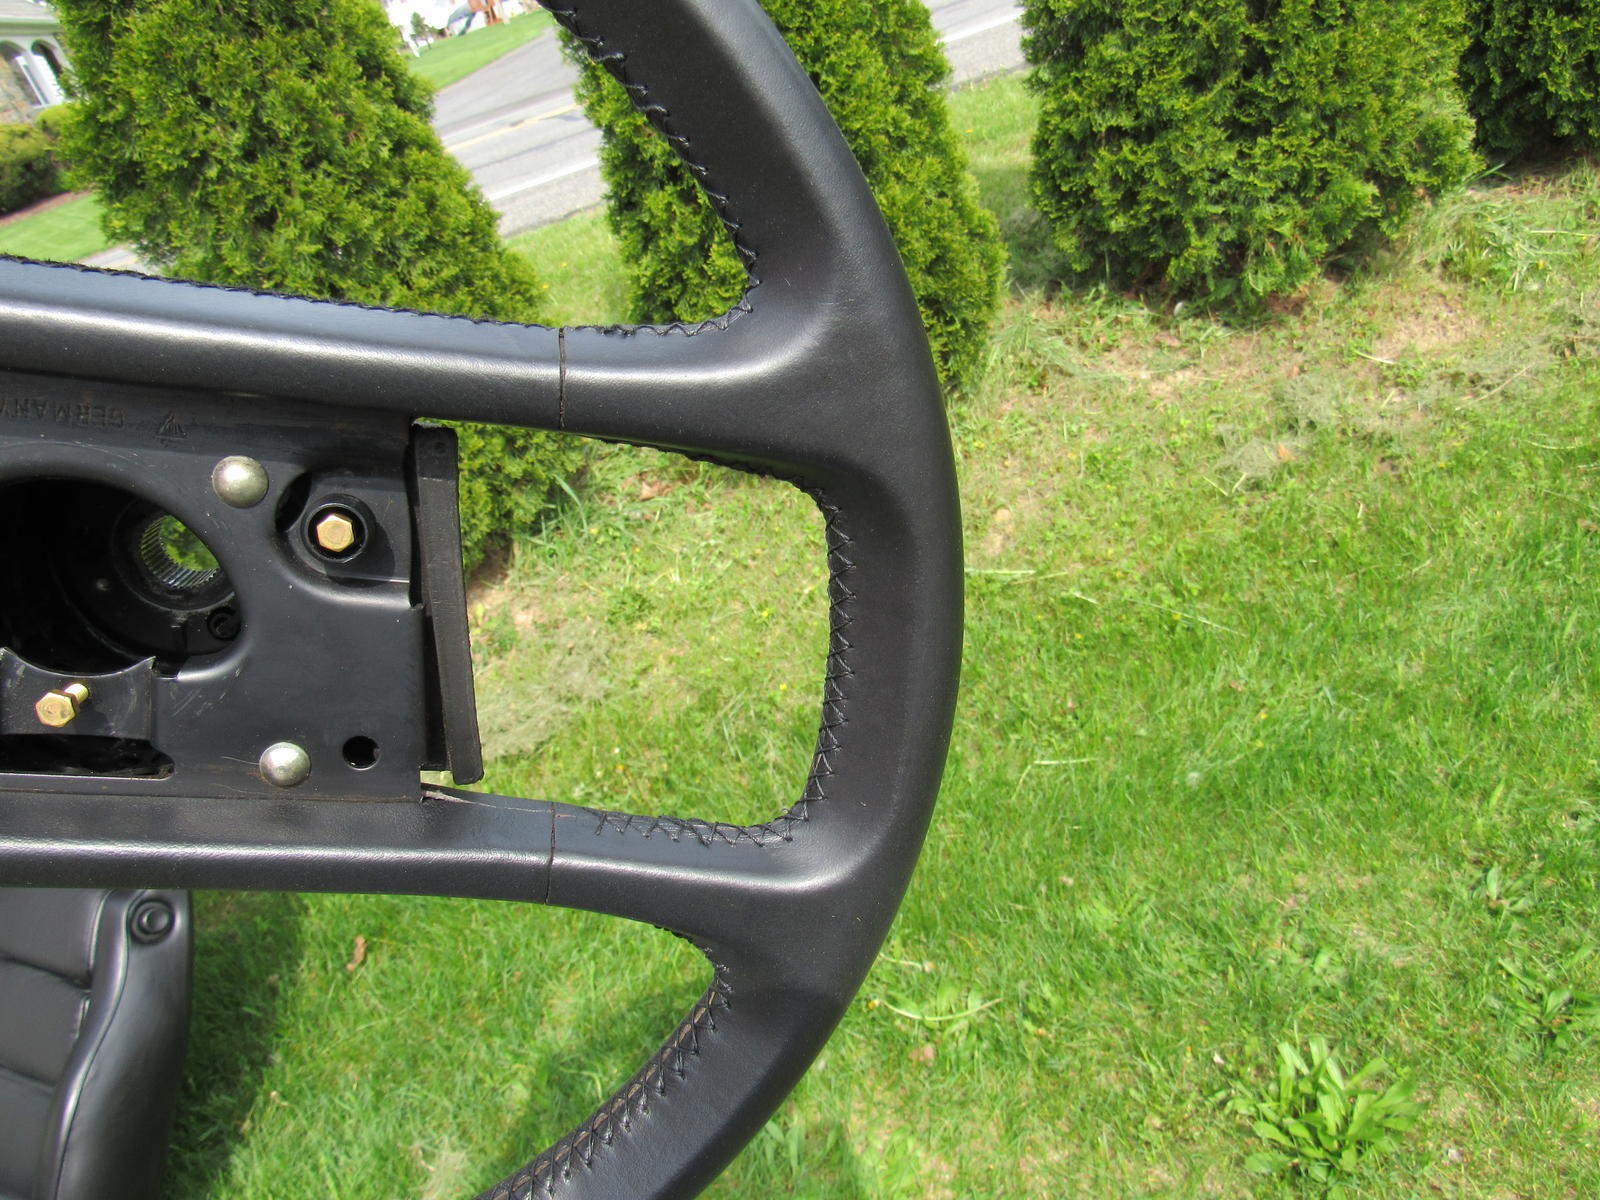
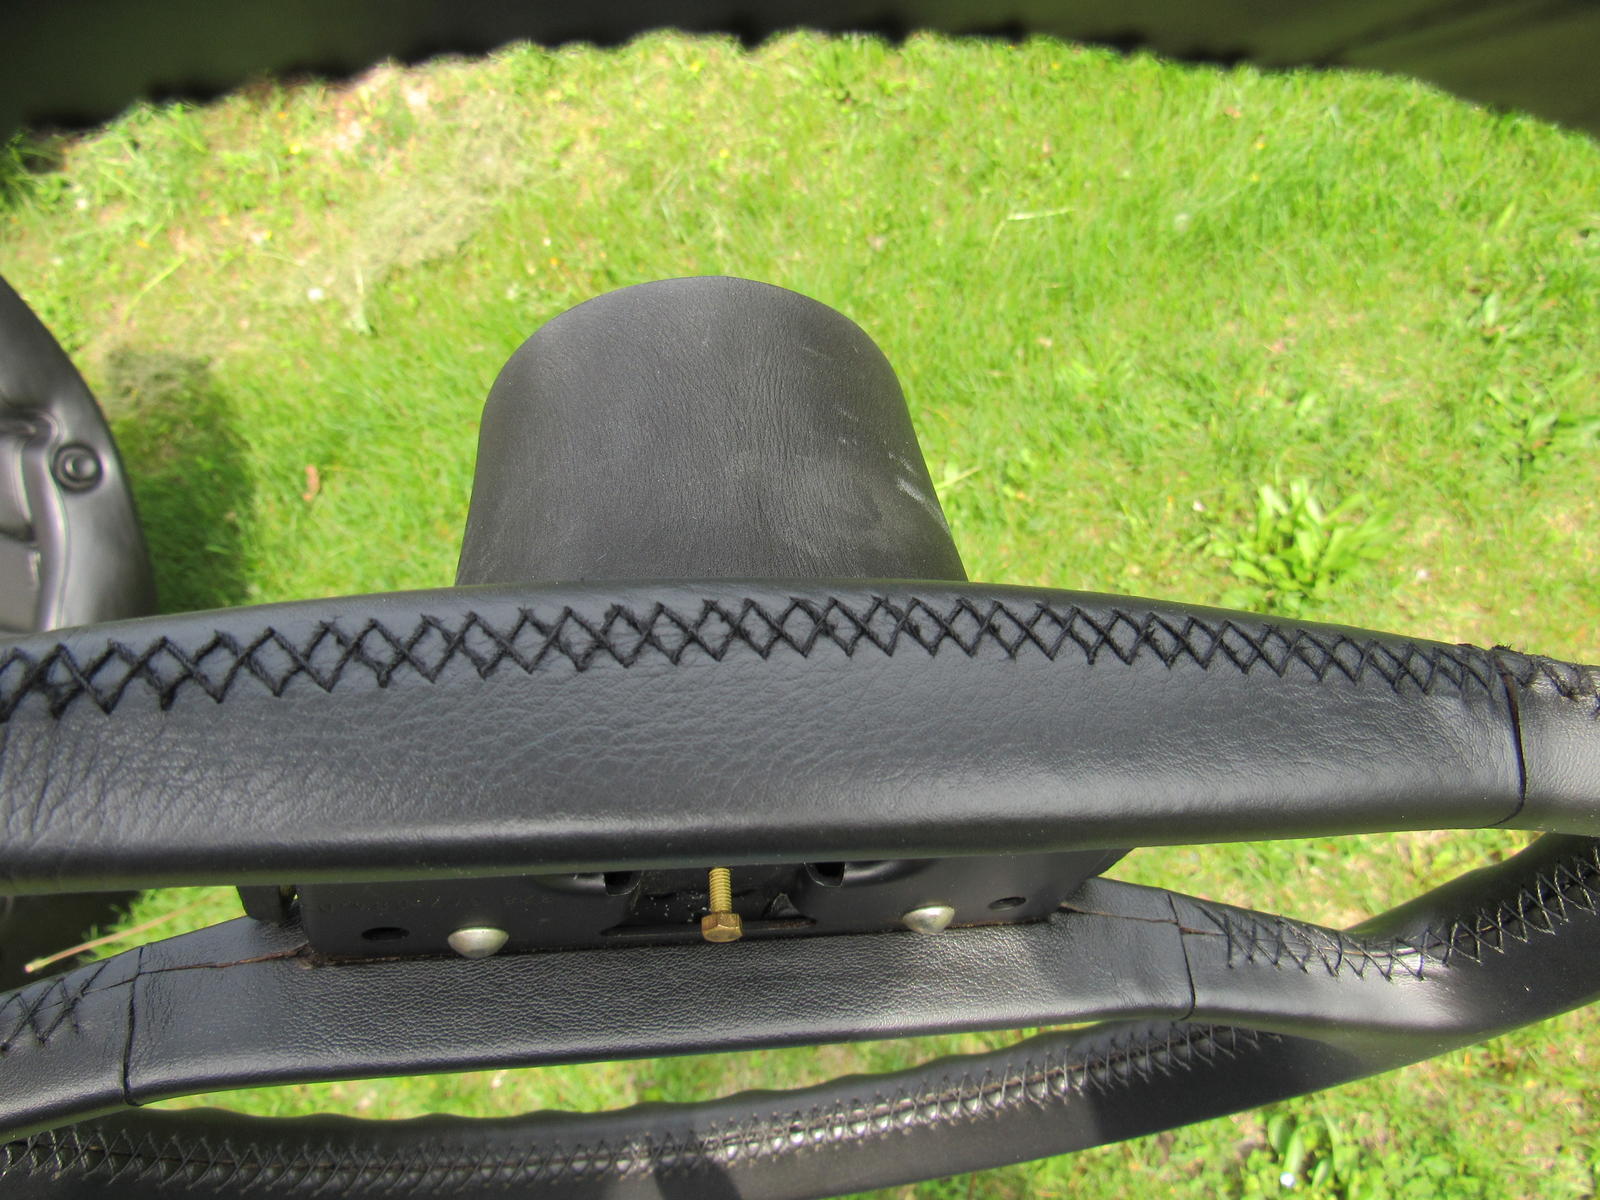
The stitching was all pulled out of the steering wheel and there was some wear.
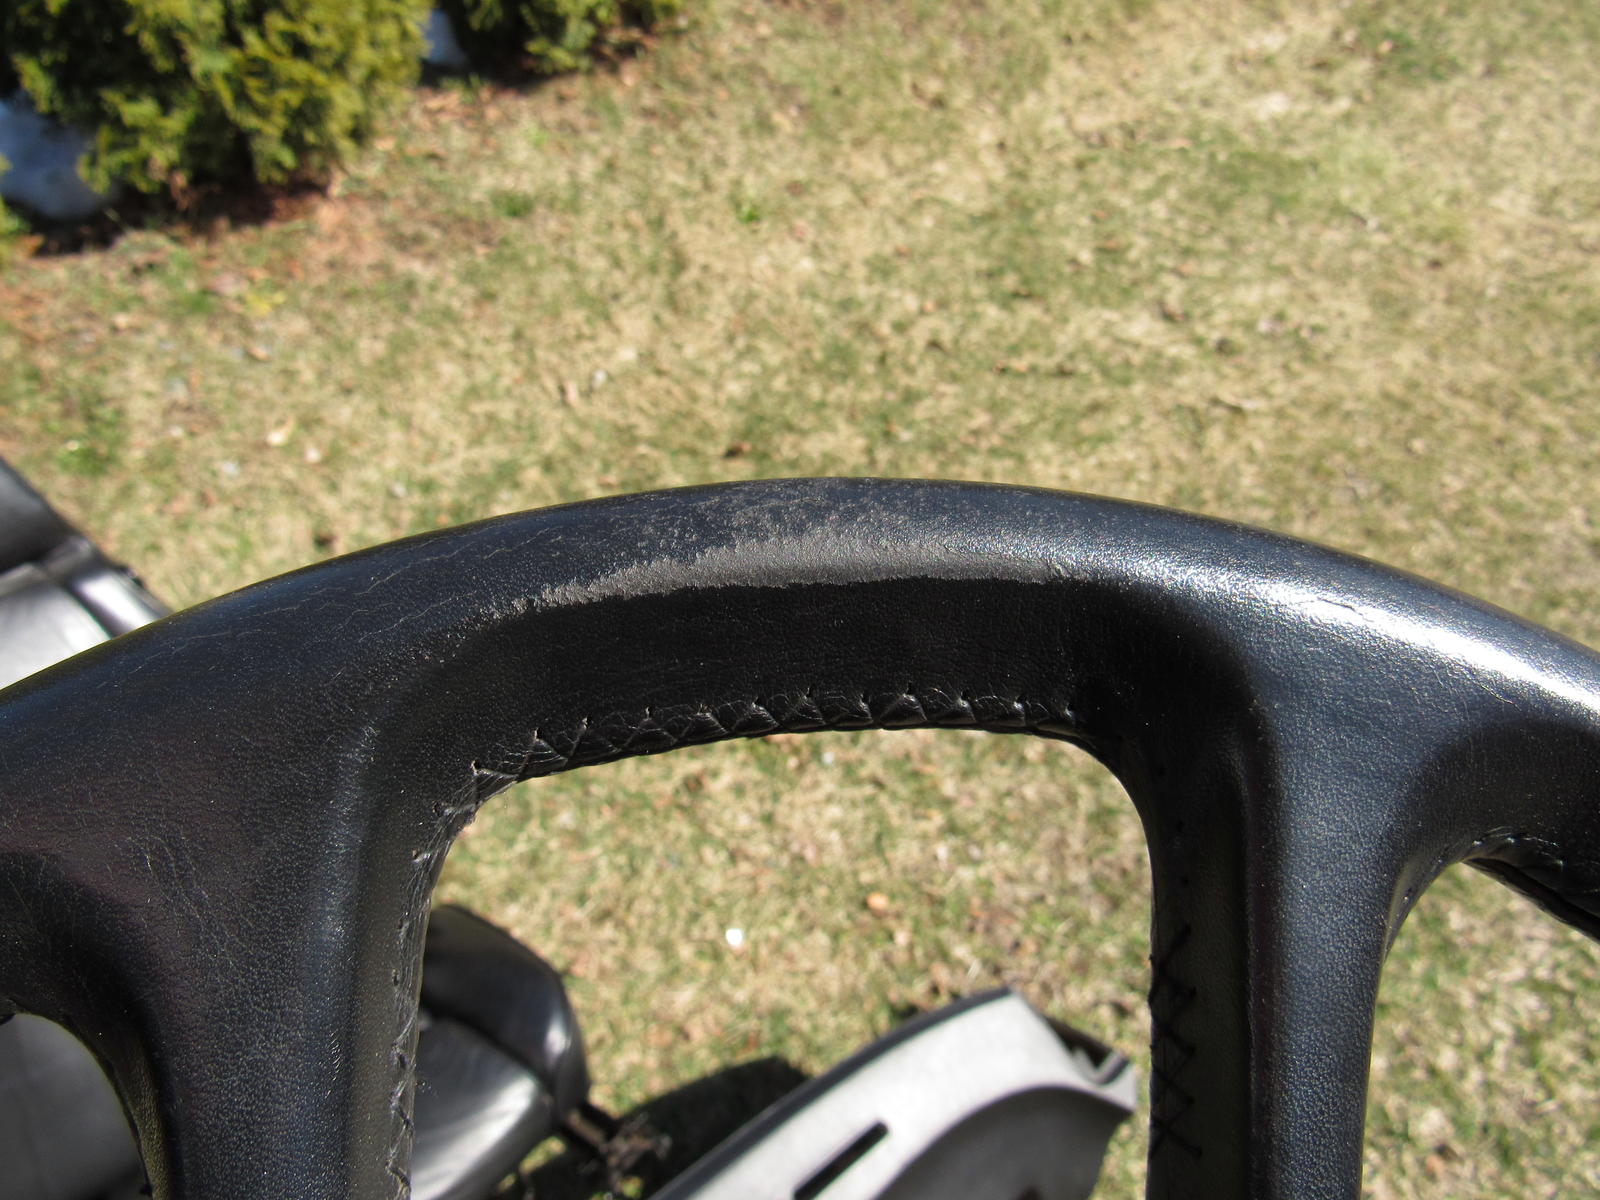
Like new:
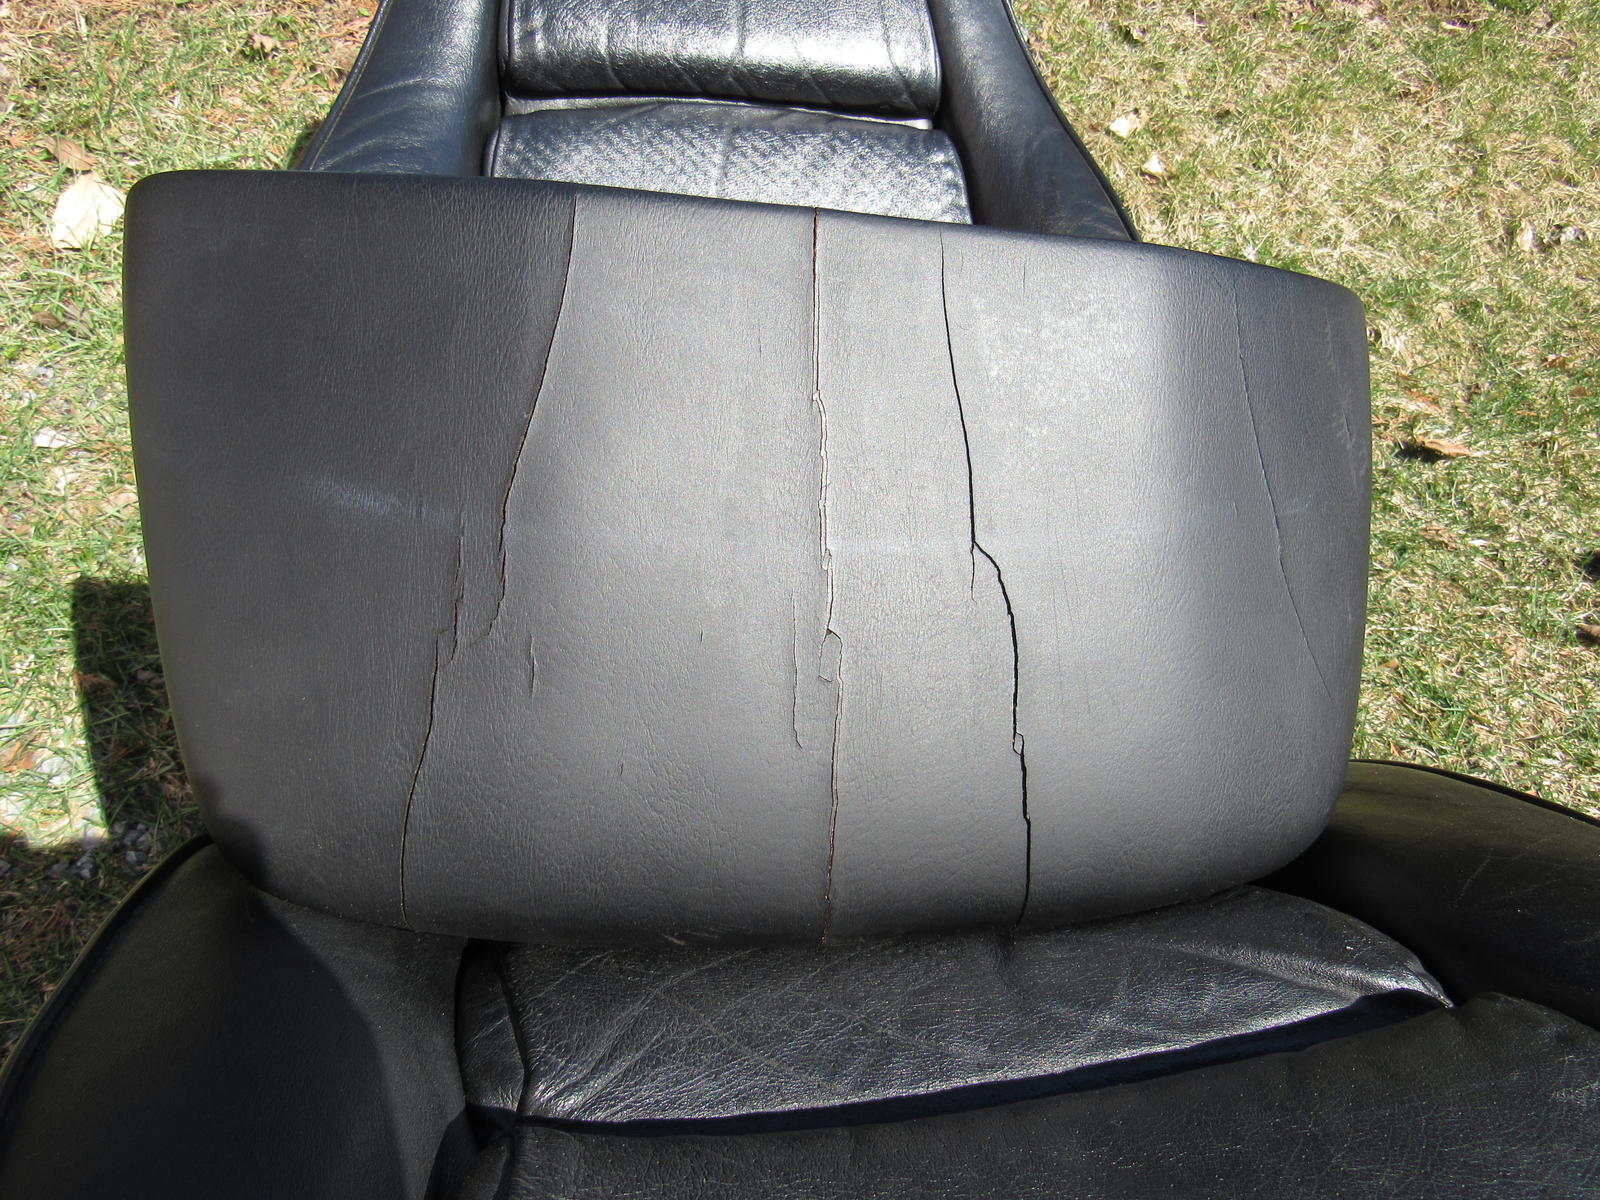
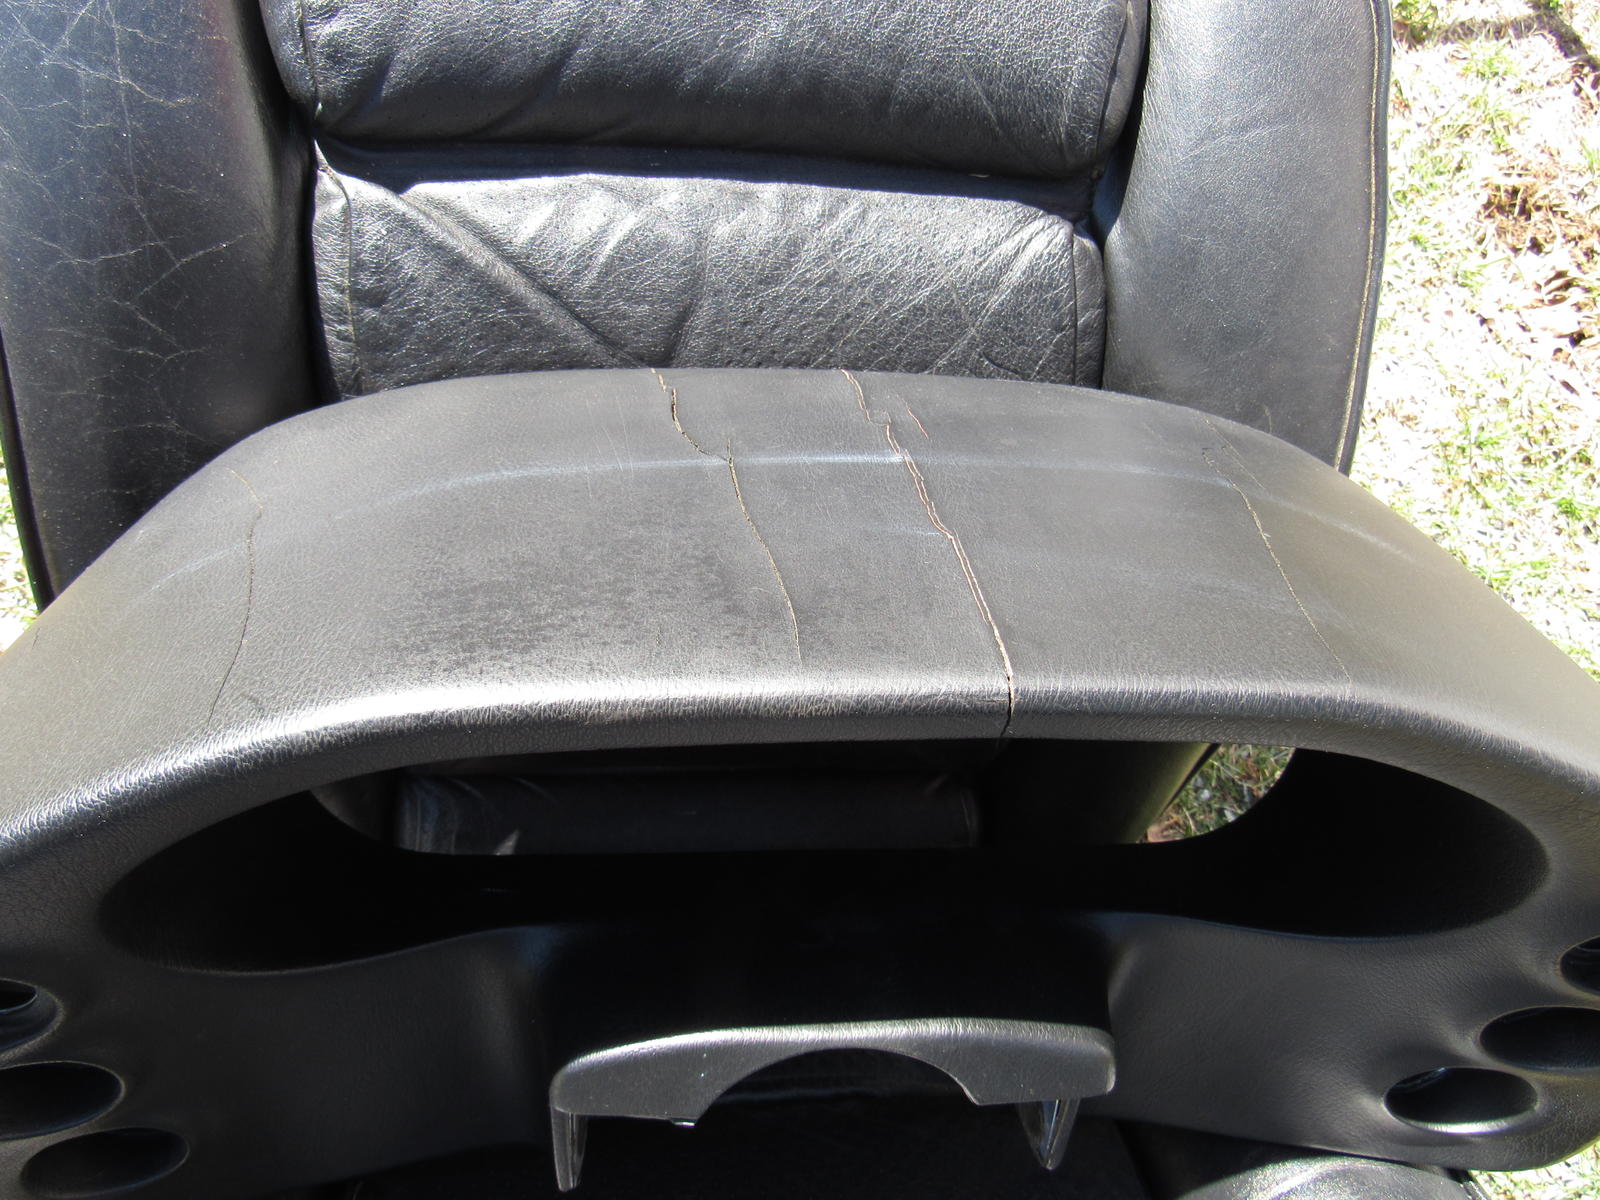
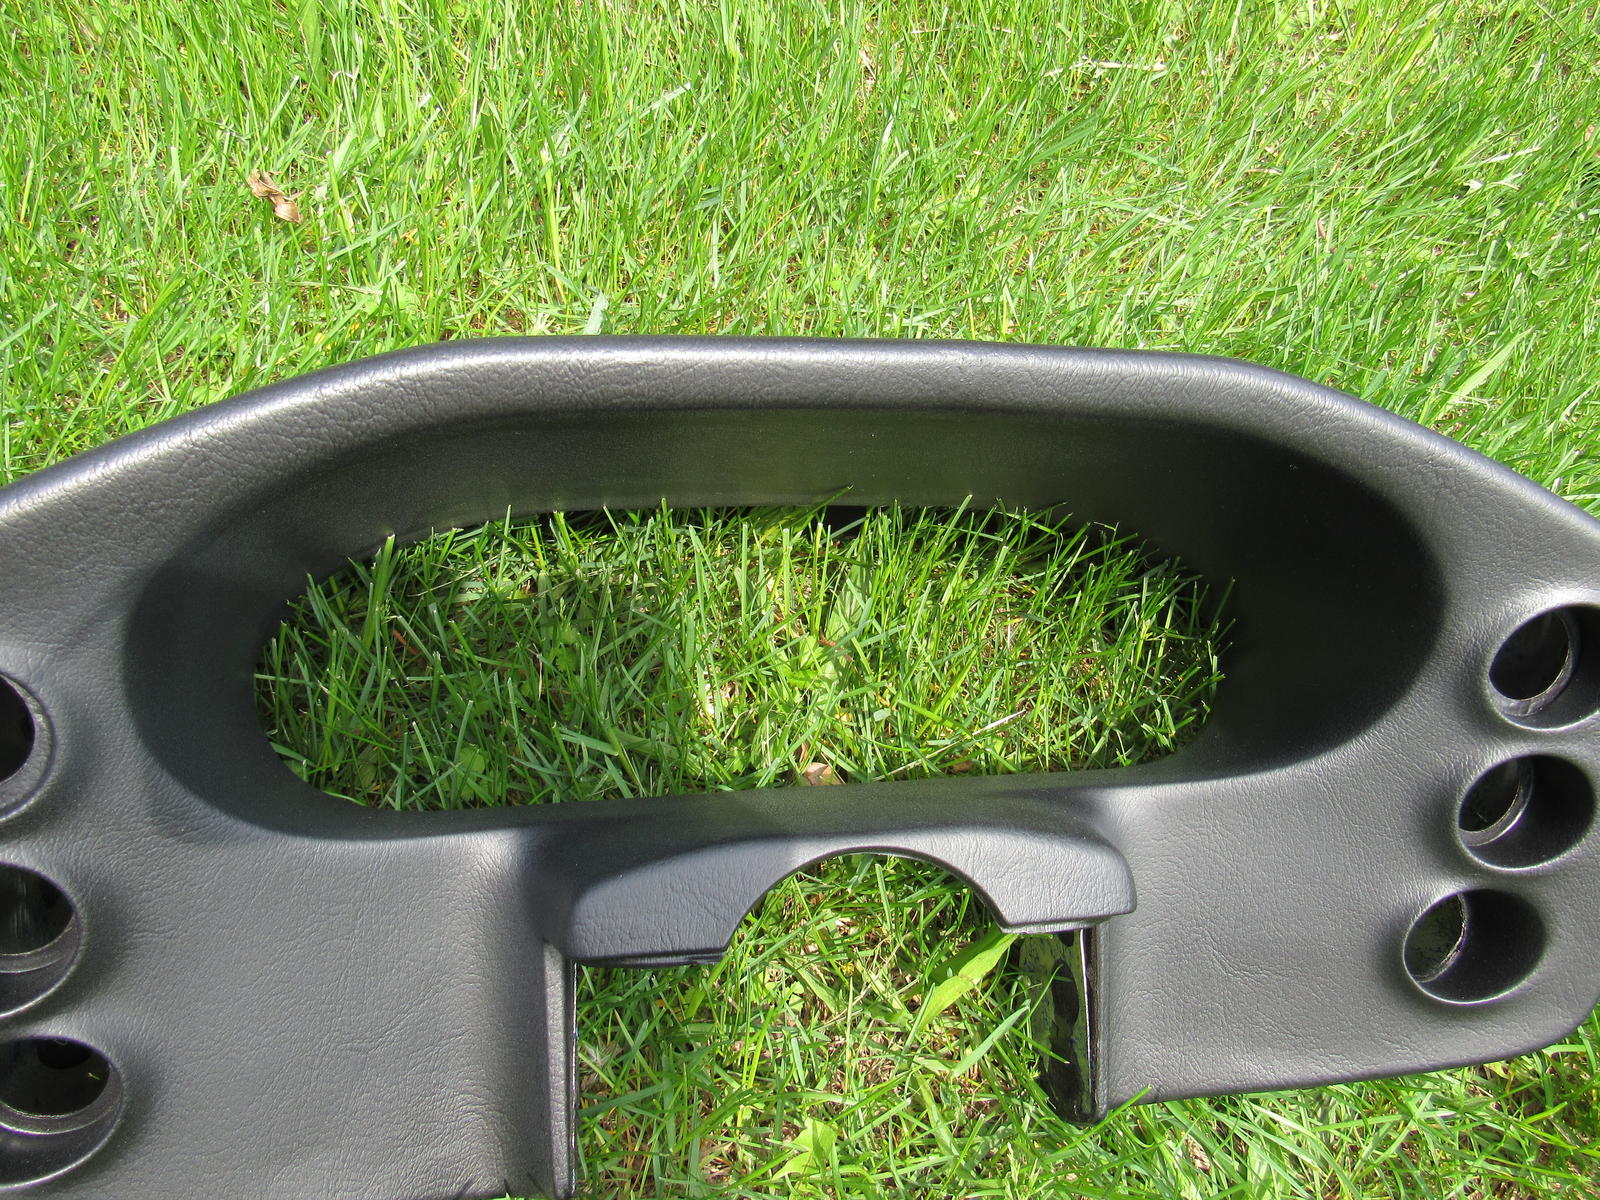
My pod was pretty badly cracked.
Much better.
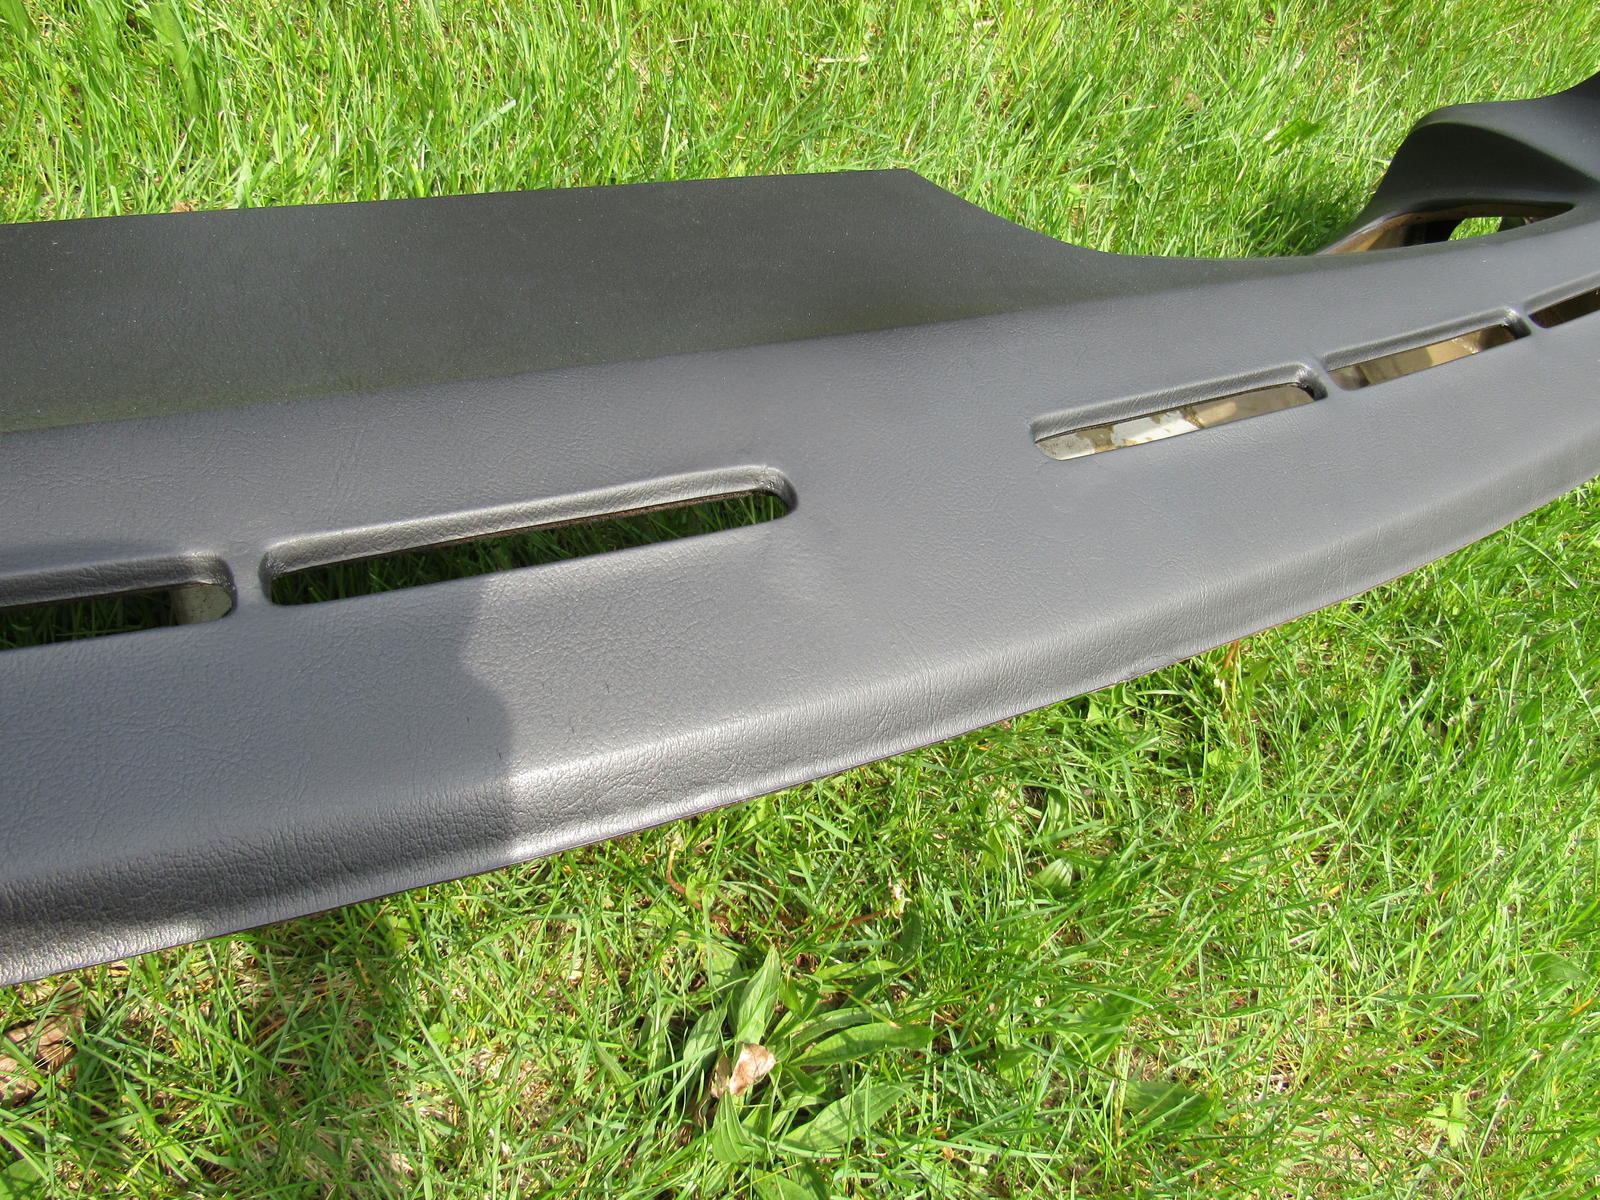
Dash had one big crack and a few between the vents.
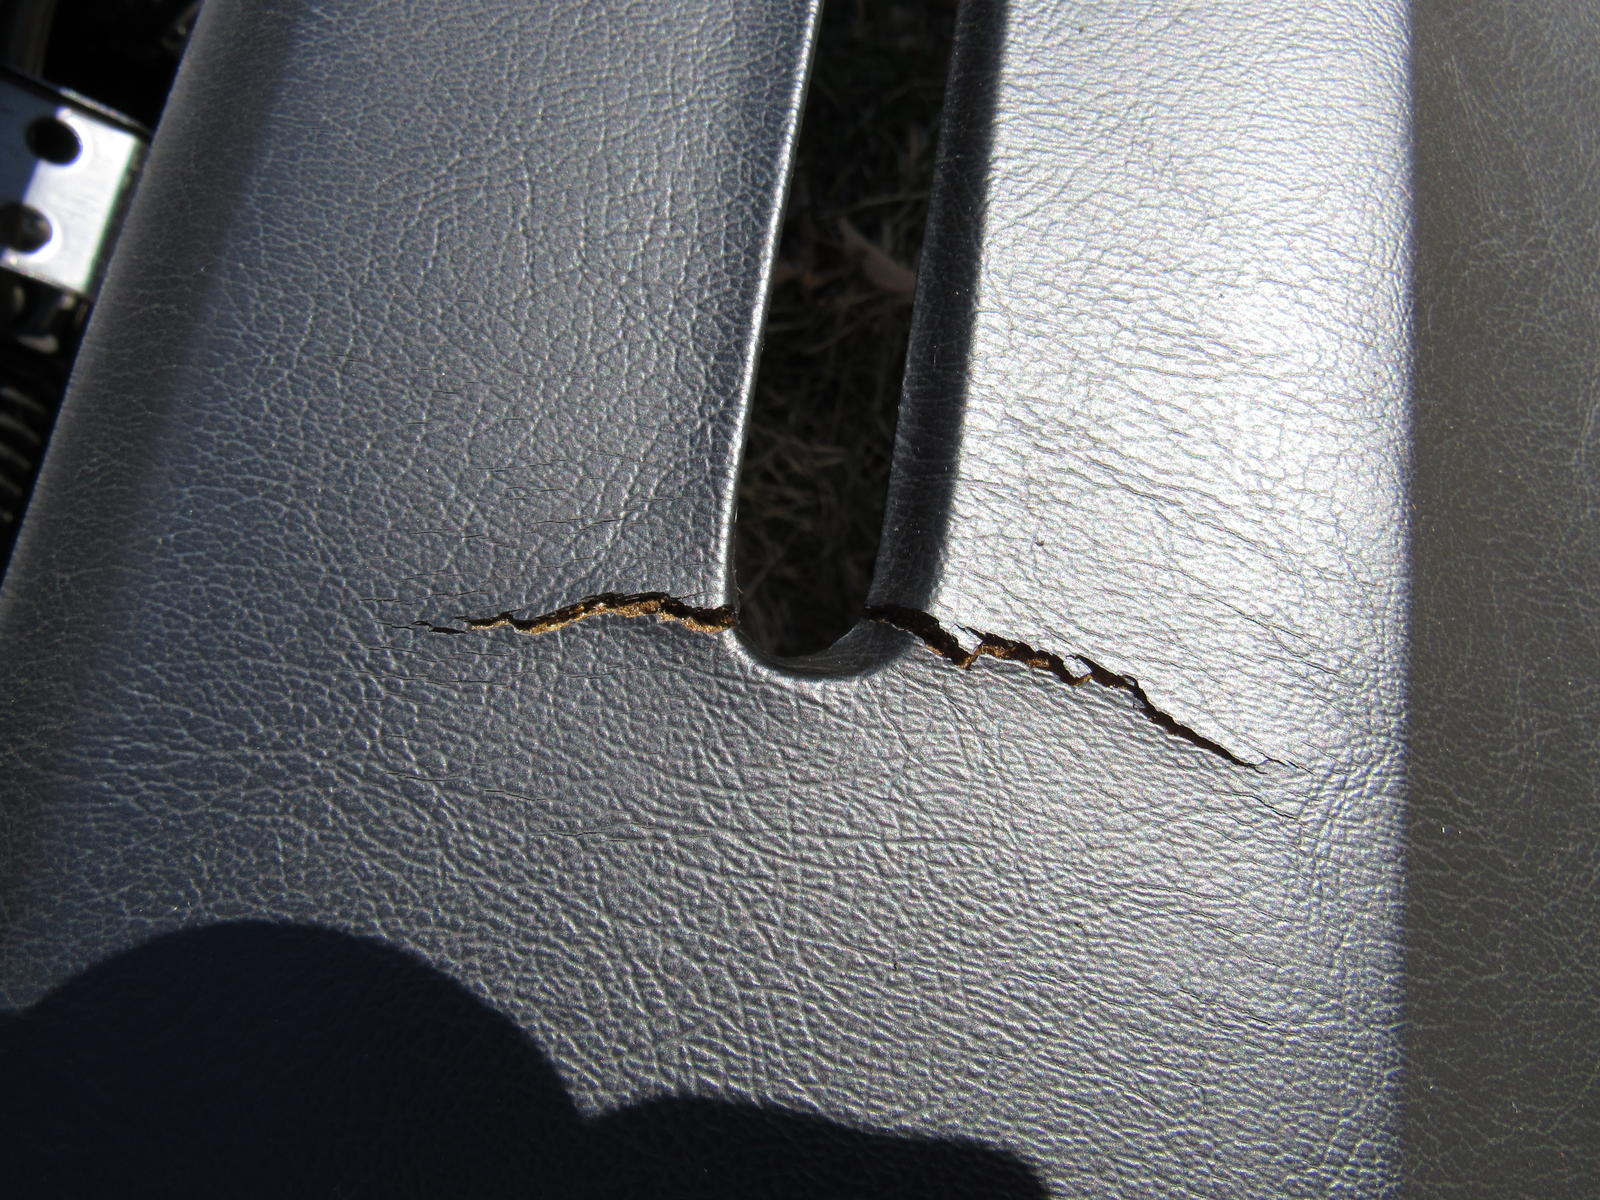
Really cannot tell where it was.
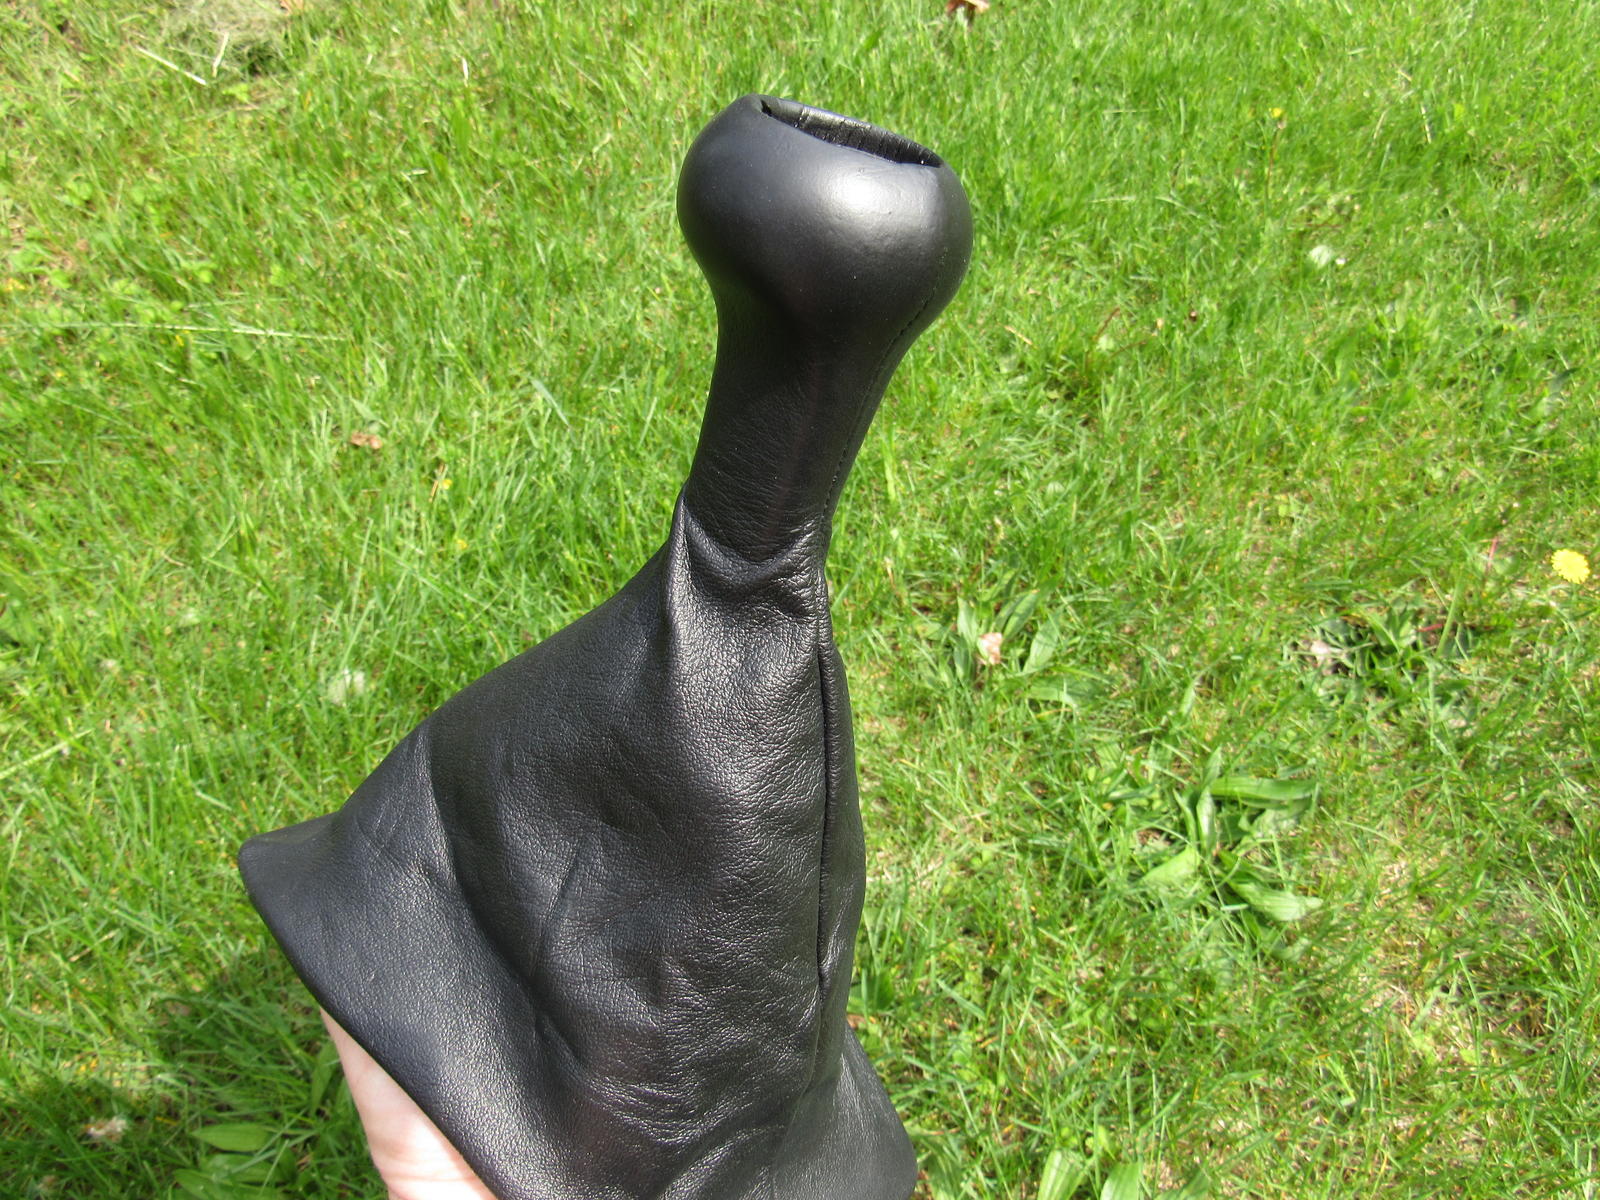
I had the shift boot cleaned and re dyed as well.
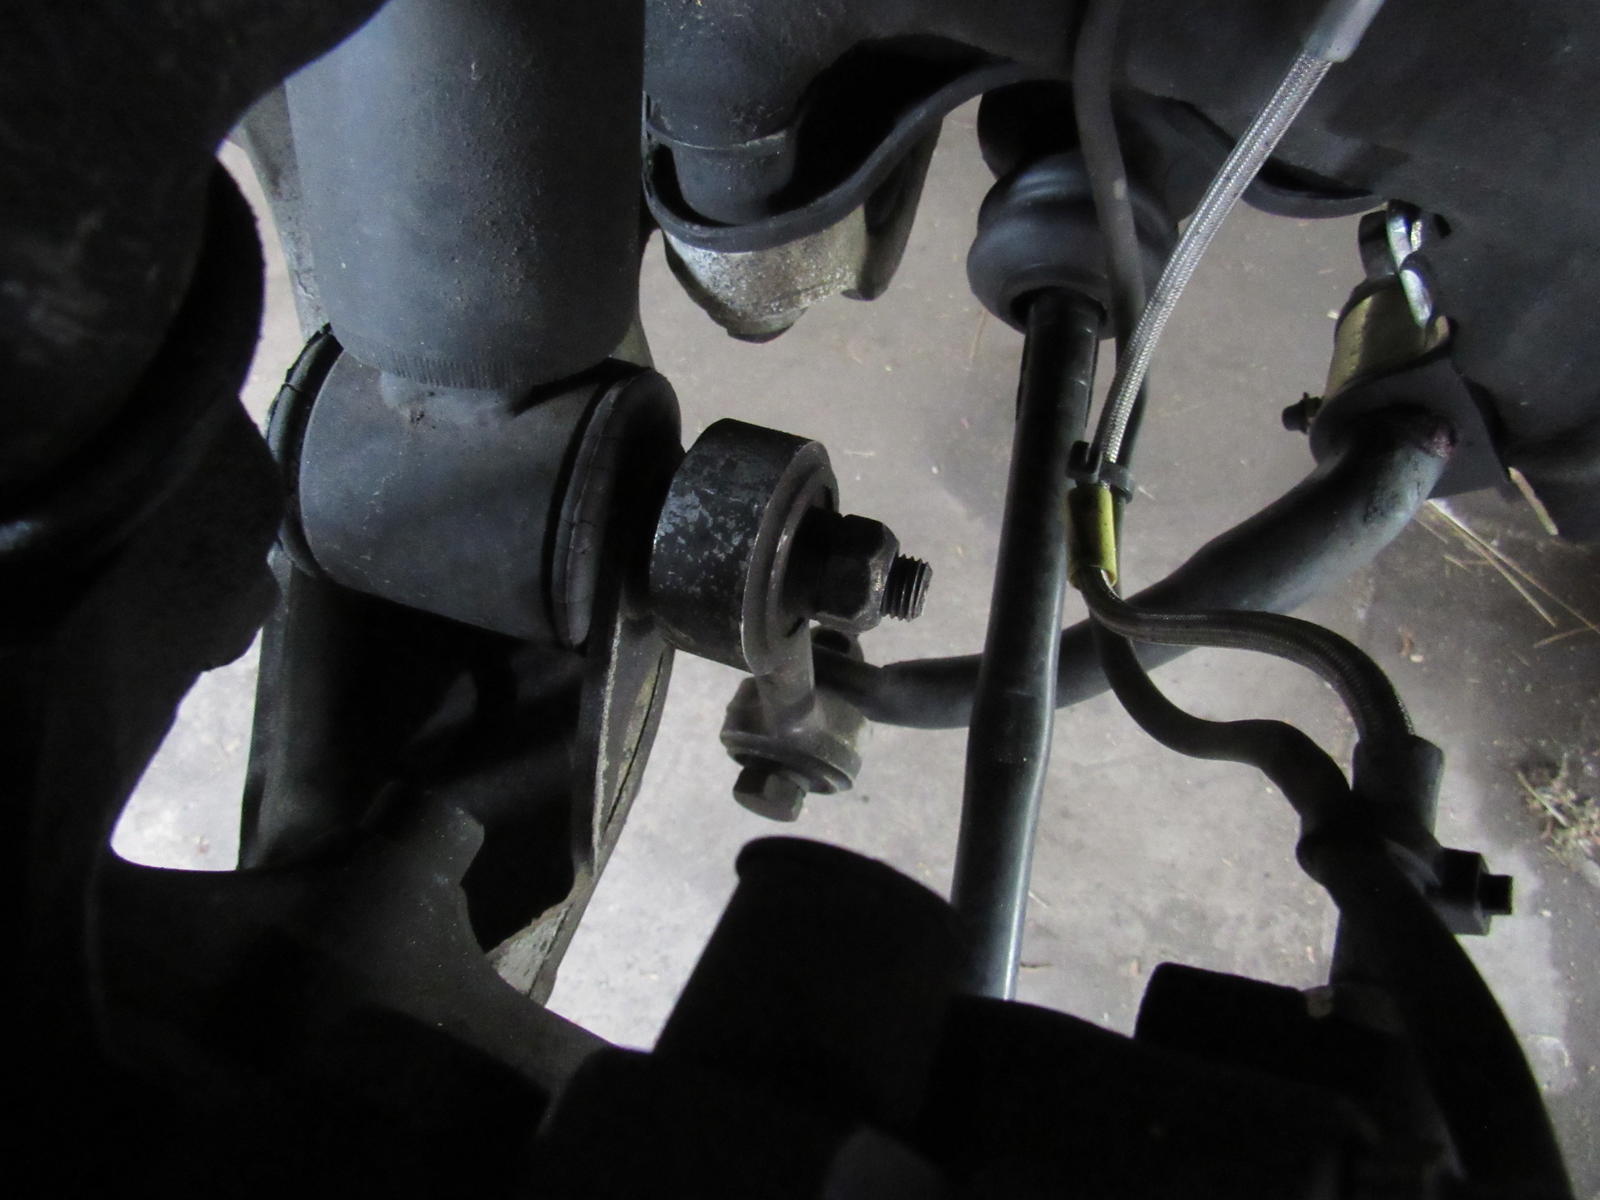
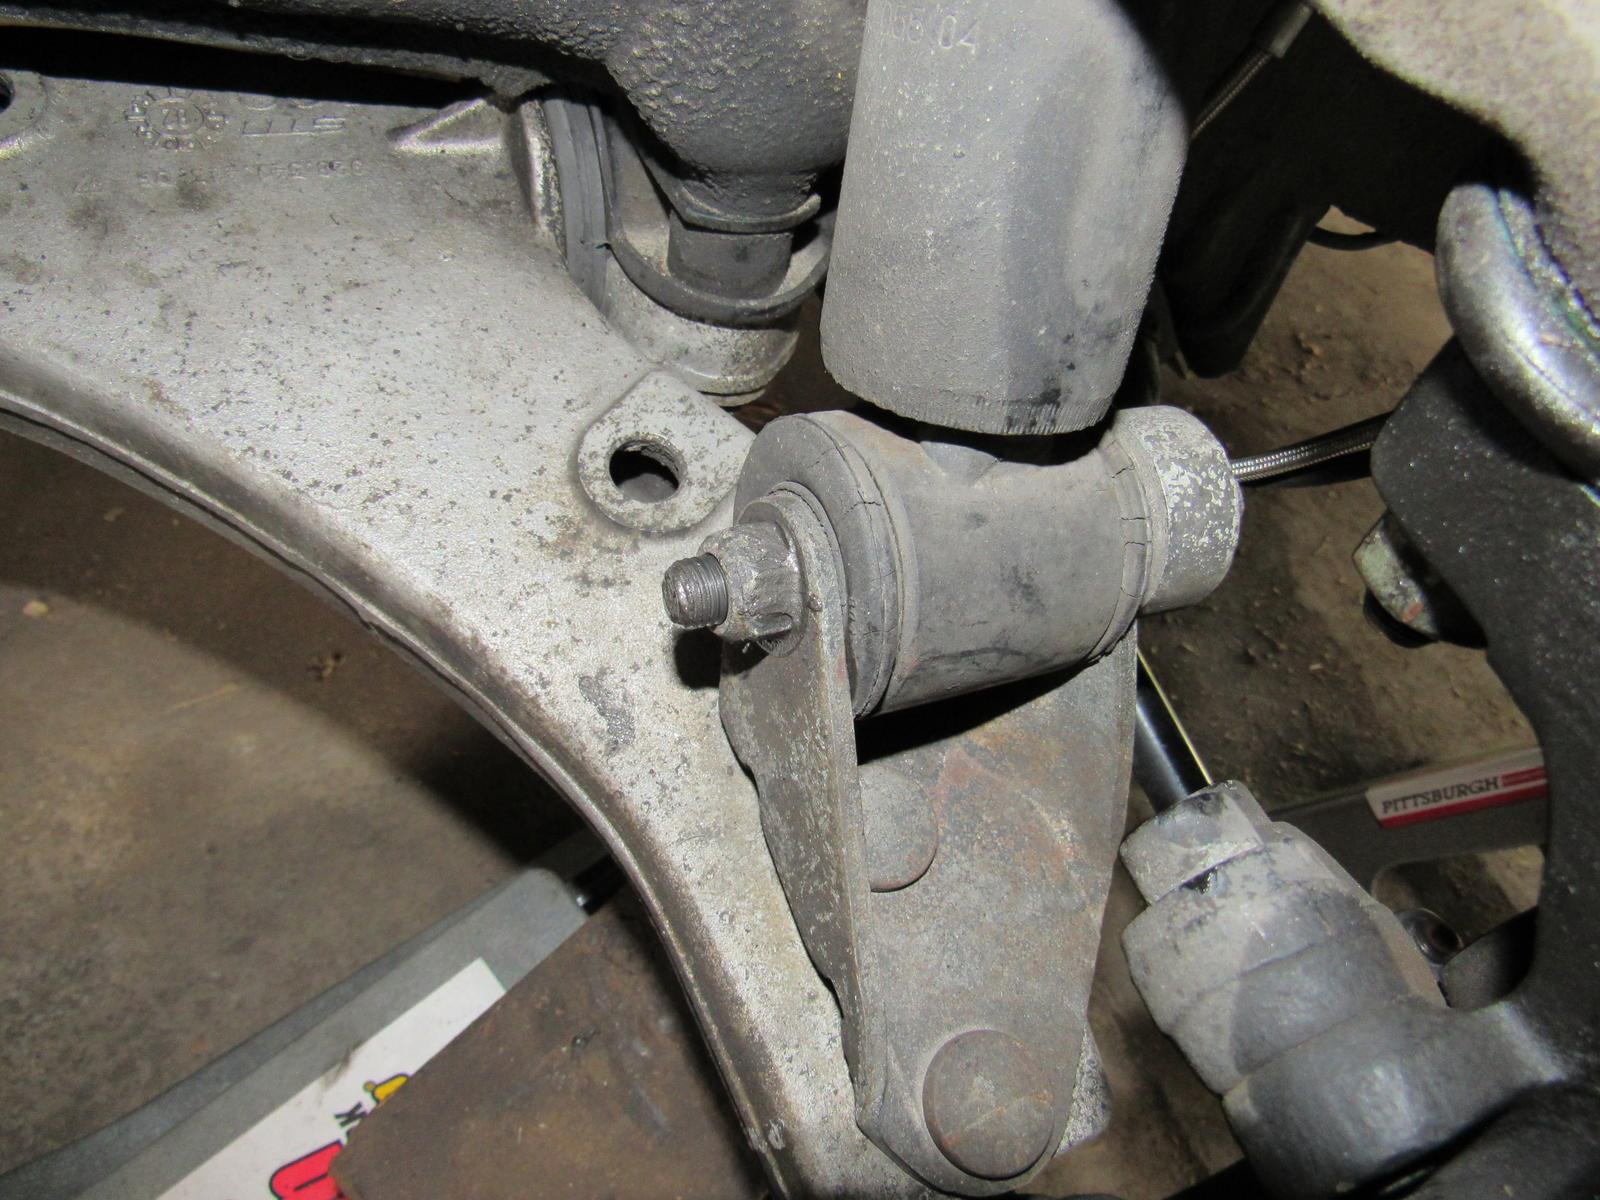
MrMerlin pointed out to me some time ago that my lower shock bolts were installed in the wrong direction. The nut should be opposite the swaybar link.
Bad:
Good:
I will end this with a question. There is such a binding in the door lock mechanism that I can only lock or unlock by using the key in conjunction with the inside **** to force it either way. This is for both doors and I don't have a central locking unit. Seems weird to me that both are affected but If I lock the car with the windows closed I am doomed.
Before:
After:
One of the seatbacks was sprayed with something harsh and now is like new.
The stitching was all pulled out of the steering wheel and there was some wear.
Like new:
My pod was pretty badly cracked.
Much better.
Dash had one big crack and a few between the vents.
Really cannot tell where it was.
I had the shift boot cleaned and re dyed as well.
MrMerlin pointed out to me some time ago that my lower shock bolts were installed in the wrong direction. The nut should be opposite the swaybar link.
Bad:
Good:
I will end this with a question. There is such a binding in the door lock mechanism that I can only lock or unlock by using the key in conjunction with the inside **** to force it either way. This is for both doors and I don't have a central locking unit. Seems weird to me that both are affected but If I lock the car with the windows closed I am doomed.
04-30-2017, 08:28 PM
#141
Burning Brakes
Thread Starter
Thanks Bob!
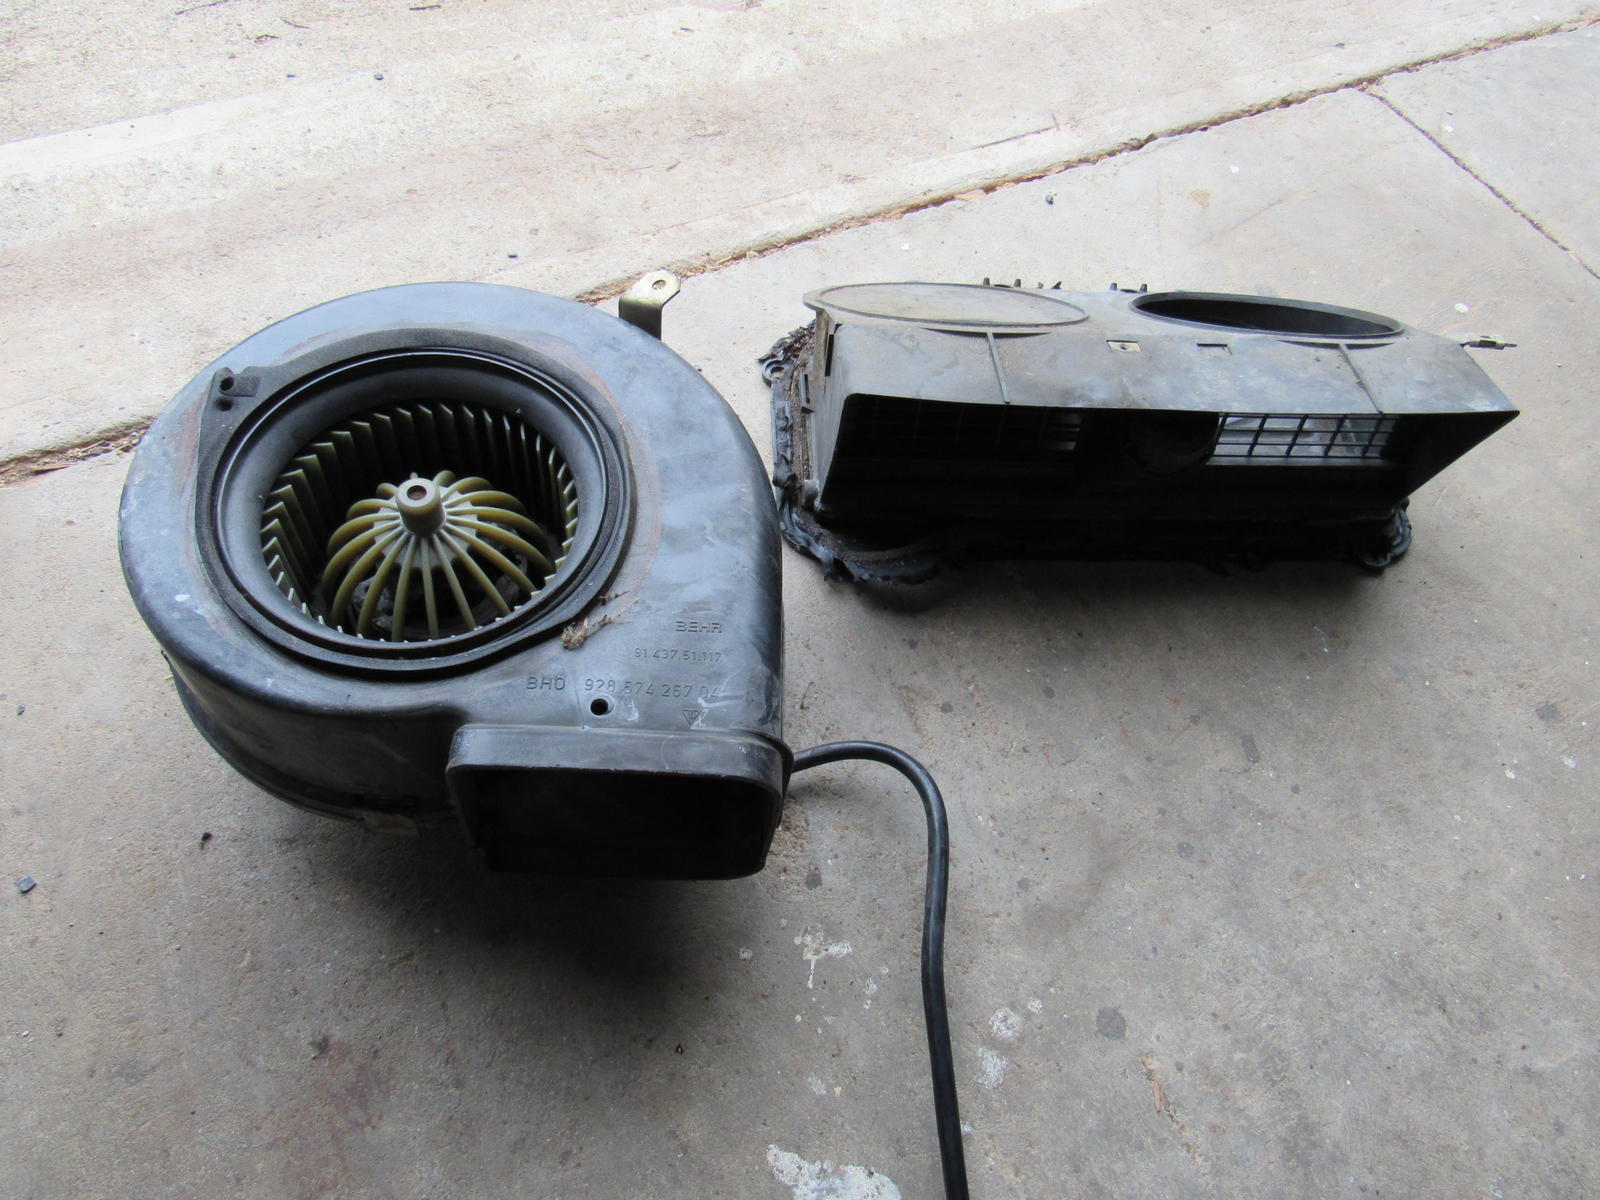
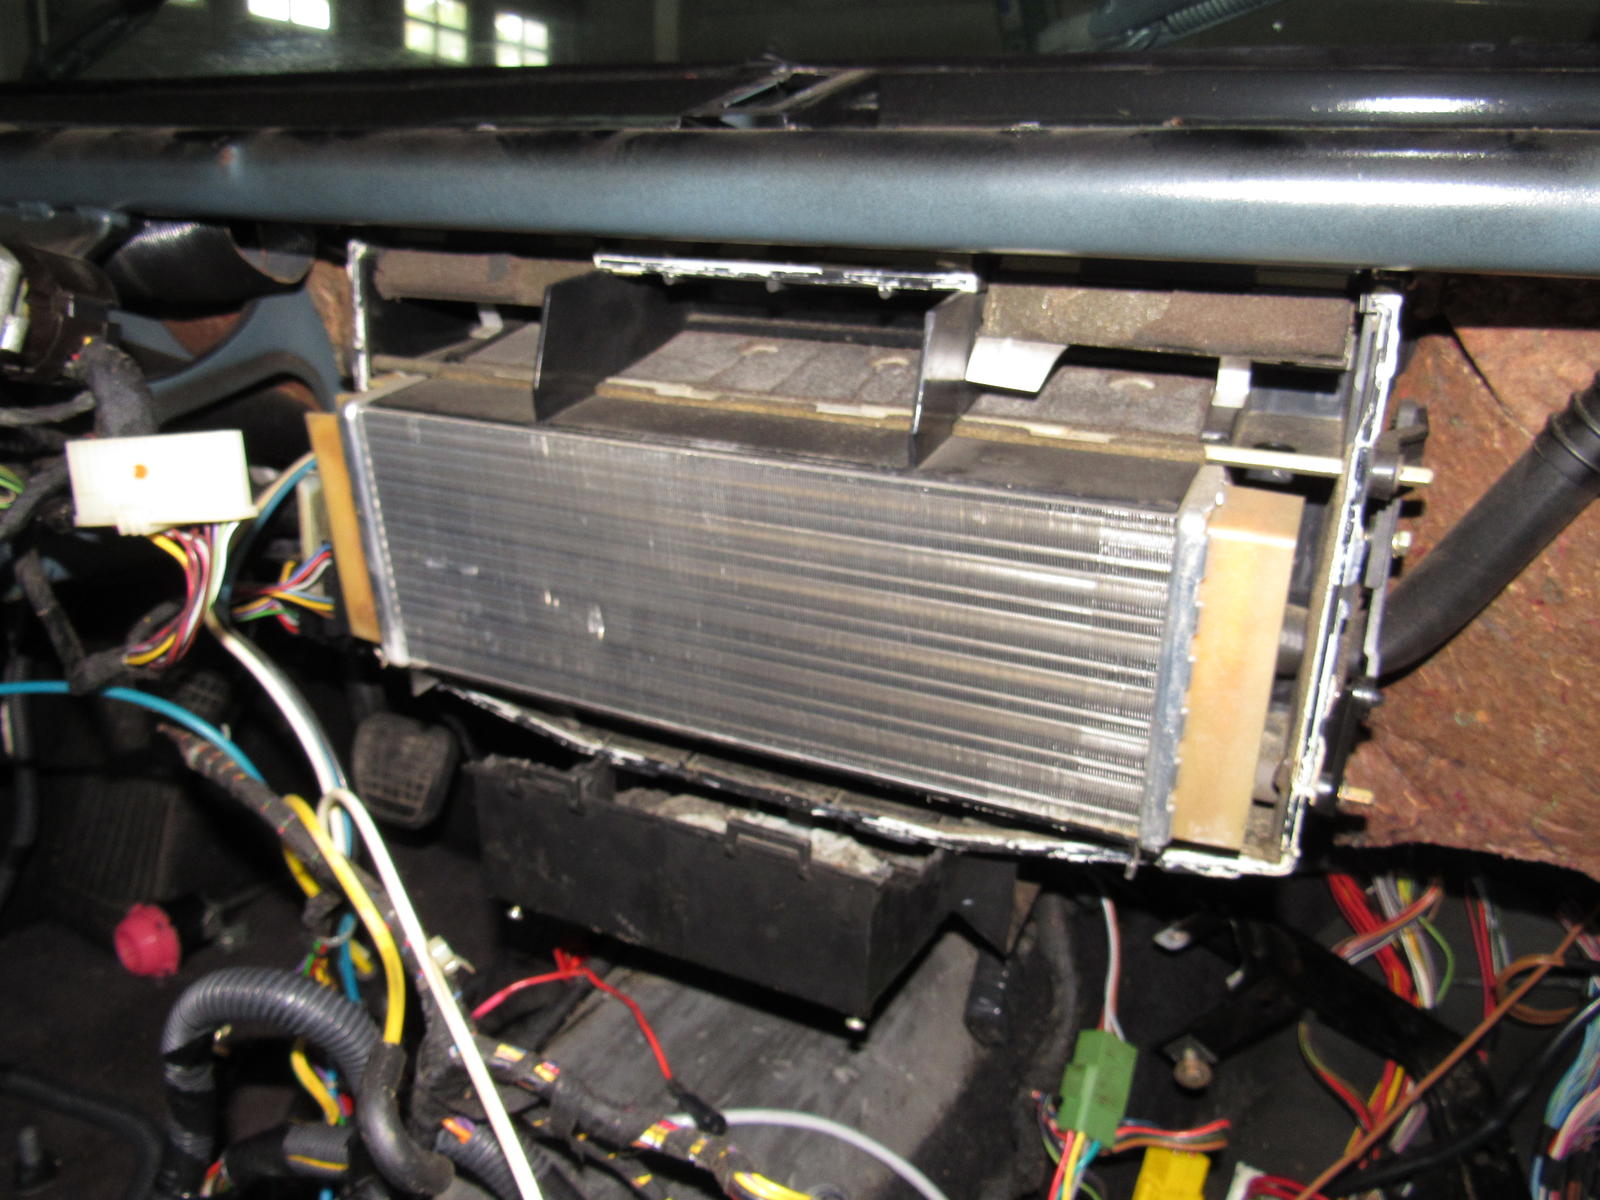
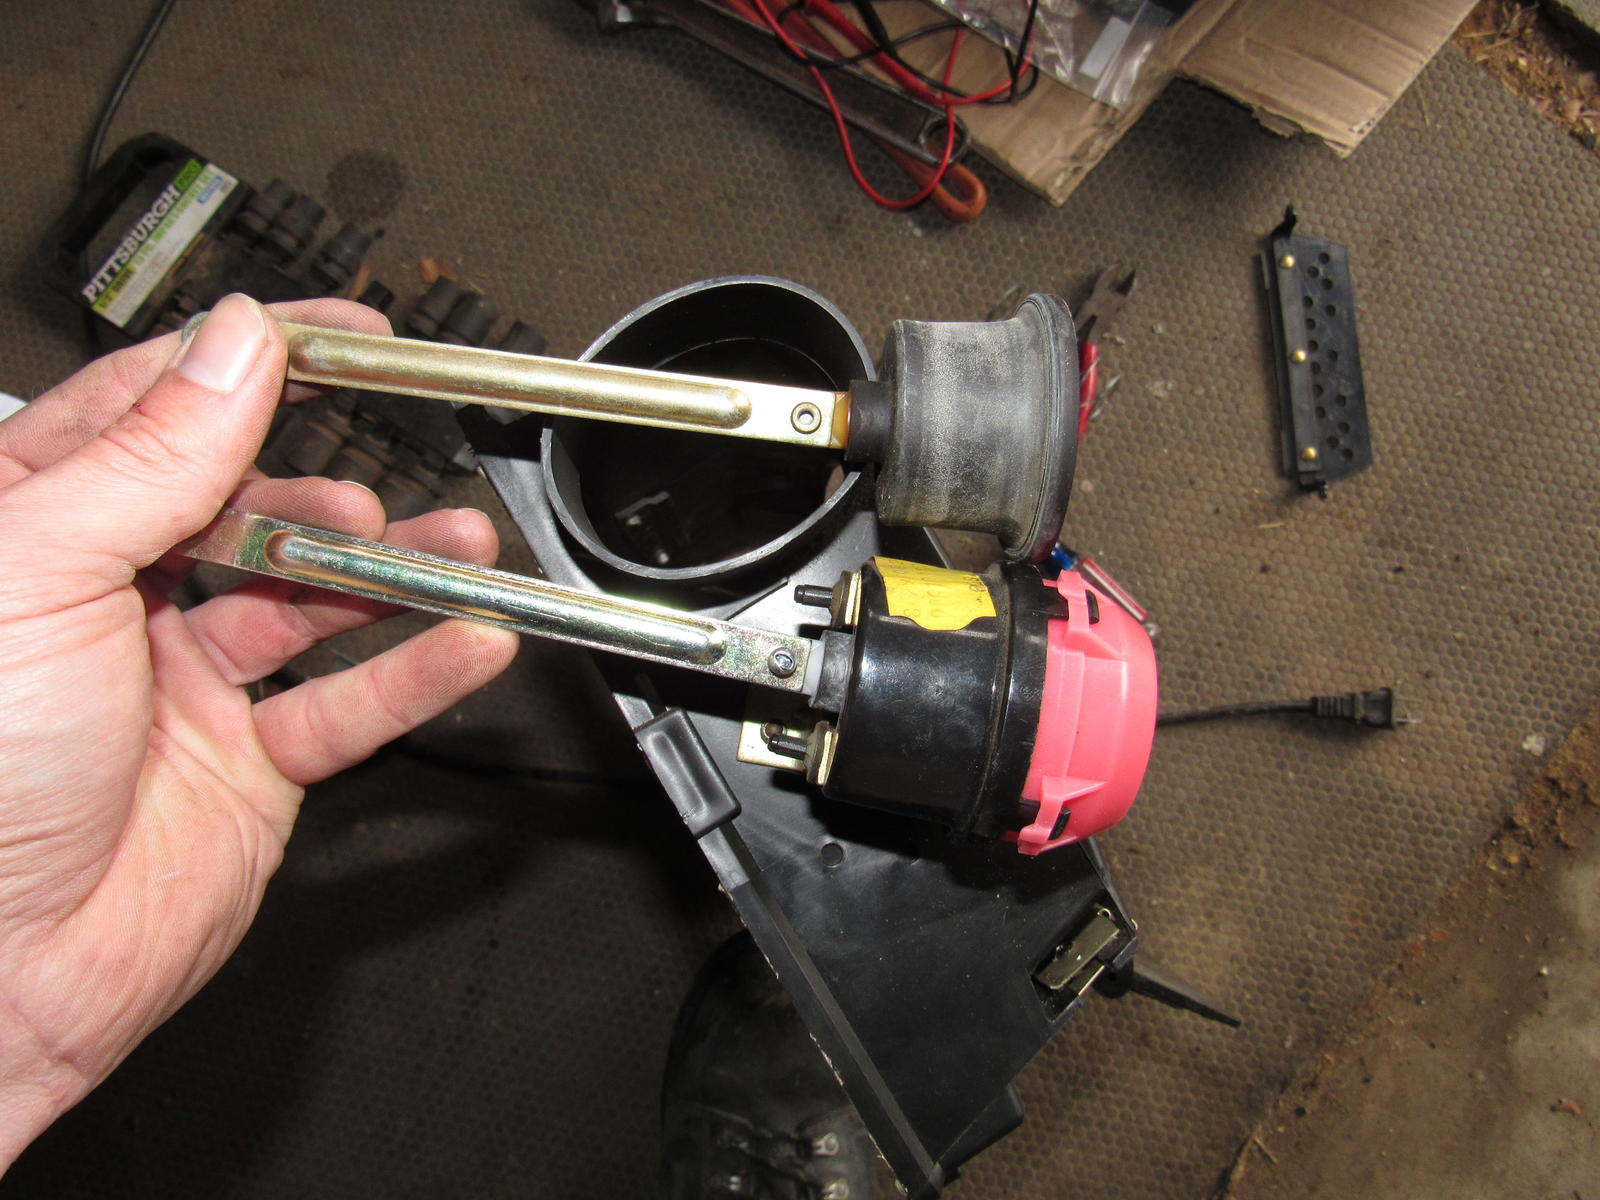
I took some time after work today to pull out the recirculation box and blower fan. The 'recirc' box is really well bonded to the chassis with black tar adhesive and it took quite some effort to pry it loose, fearing that it would crack. I removed it just fine and confirmed the recirc vacuum actuator was dead. I have no idea how I will reinstall the bolt for the blower that is inside the duct. I had a hard time getting it out and had to lay on top of the engine.
Now that I am this far I think I will pull the entire HVAC box out to clean behind the evaporator and I have to fix the center flap still.
05-02-2017, 02:30 AM
#142
Instructor
Join Date: Oct 2002
Location: New York, NY
Posts: 140
Likes: 0
Received 0 Likes
on
0 Posts
I went quiet over the weekend, that's because I got to enjoy the car! I drove about 160 miles over both days. Initially after a hard throttle it was sticking at 2000 revs due to the cruise control cable getting hung up. After multiple attempts to adjust it (and not burn myself too badly), I realized the outer sheath is supposed to be connected to the adjuster and on a hard rev the inner sheath would come out and jam against the backside of the adjuster. Hard to explain but I ended up cutting the cable for a few reasons. The mounting screws to the throttle linkage are inaccessible without dismantling a bunch of stuff, cruise control didn't work and will not because of the LED conversion, I never use it, and the cable would need replacing anyway.
With that taken care of, the engine would not idle. Turns out the cruise cable was holding the throttle back and I had turned the idle screw all the way in to compensate.
OK so how does it drive?? Very tame and quiet until you enter the fun zone at 4000 revs. It runs strong, smooth, and makes all the right sounds! 1st through 3rd gears sometimes grind. I will replace whatever oil is in the gearbox because it does leak and is undoubtedly low. I haven't looked at adjusting the pedals yet but the clutch and brake are way out compared to the accelerator, probably close to 6 inches. Heel toeing is not possible for me. While shifting gears the revs drop like a rock requiring a blip of the throttle to rev match the next gear.
I'm still trying to figure out this cold start idle problem. It is very annoying and lasts a solid 15 minutes or miles until it idles steadily. For your viewing pleasure: Cold start idle problem - YouTube
I'm glad to have finished the big stuff now I can take little bites fixing small problems while driving and enjoying the car.
I have the same exact problem with my 83. It goes away if I tick past idle or disconnect the idle microswitch.
05-02-2017, 11:28 AM
#143
Burning Brakes
Thread Starter
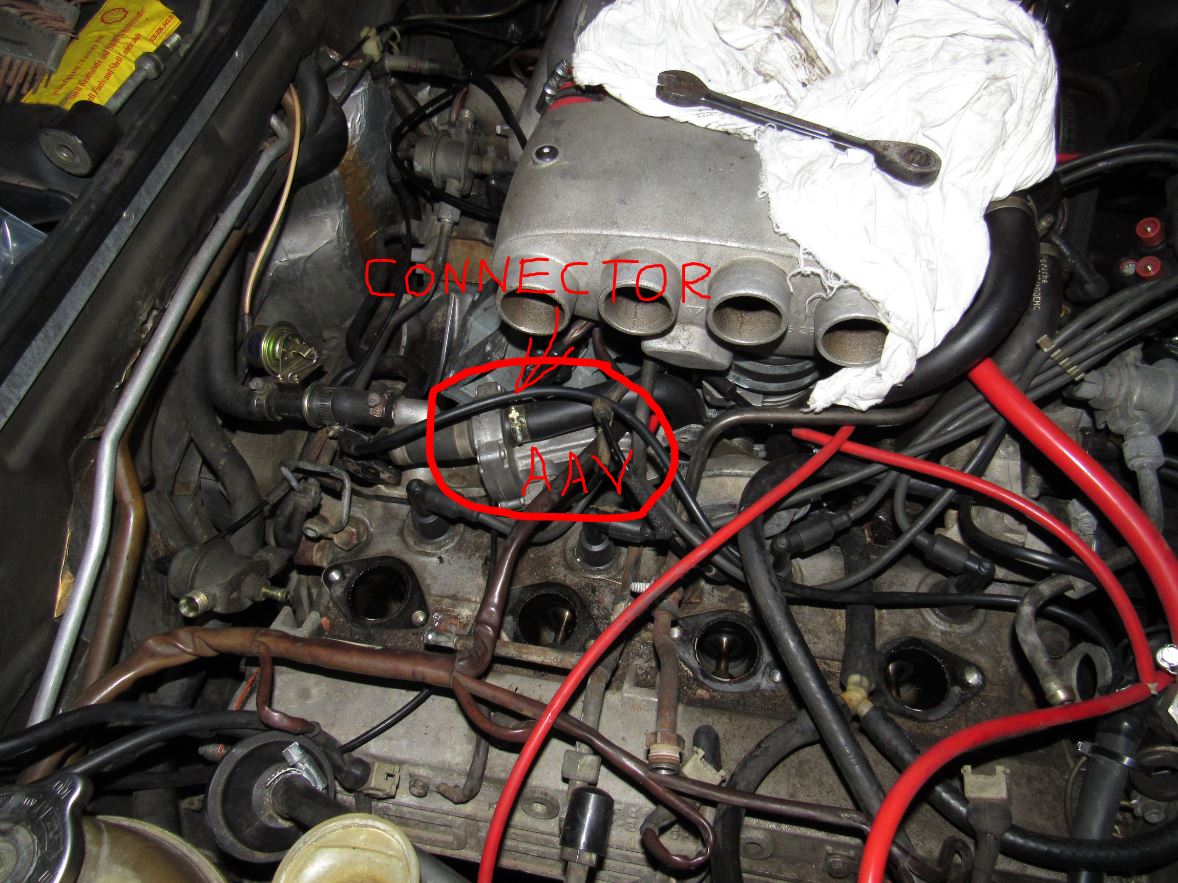
Test the two pin connector to the AAV for 12v with the engine running or better yet, pull the fuel pump relay and make a jumper between terminal 87 and 30 and switch the ignition on. Probably the best way to access the connector is by removing the air filter box and reaching from behind the intake legs but I haven't tried it.
 05-03-2017, 12:34 AM
#144
Instructor
Join Date: Oct 2002
Location: New York, NY
Posts: 140
Likes: 0
Received 0 Likes
on
0 Posts
Thanks Moose! I will trouble shoot the AAV some more. The issue goes away when I disconnect the idle microswitch. I can't seem to figure out the connection between this and the AAV idle problems though.
05-06-2017, 06:43 PM
#145
Burning Brakes
Thread Starter
I have made some good progress today but I am stuck on two things. I have reassembled my instrument cluster and when testing for function, I have no low coolant light. I have bridged the coolant sensor and still no potential at the cluster. Open circuit should be light off and closed should switch light on after 20 seconds? It is not coming on with all the other warning lights when turning on the ignition.
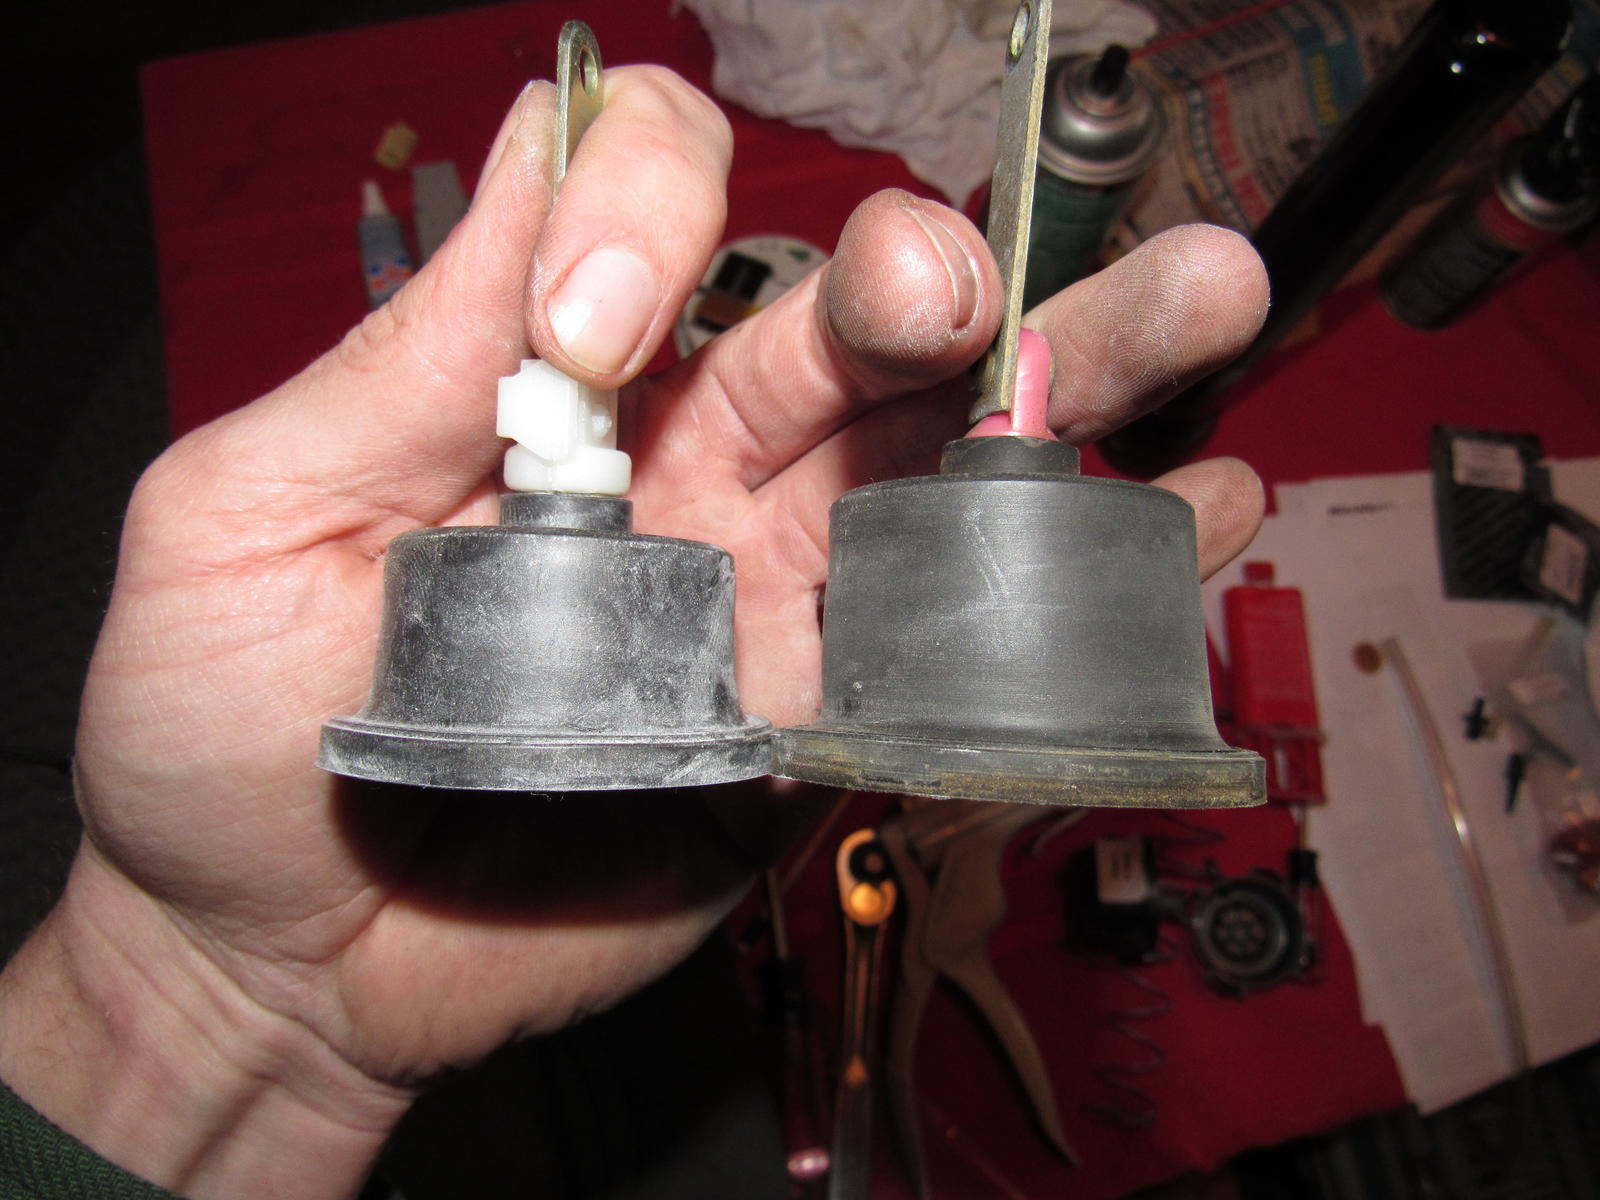
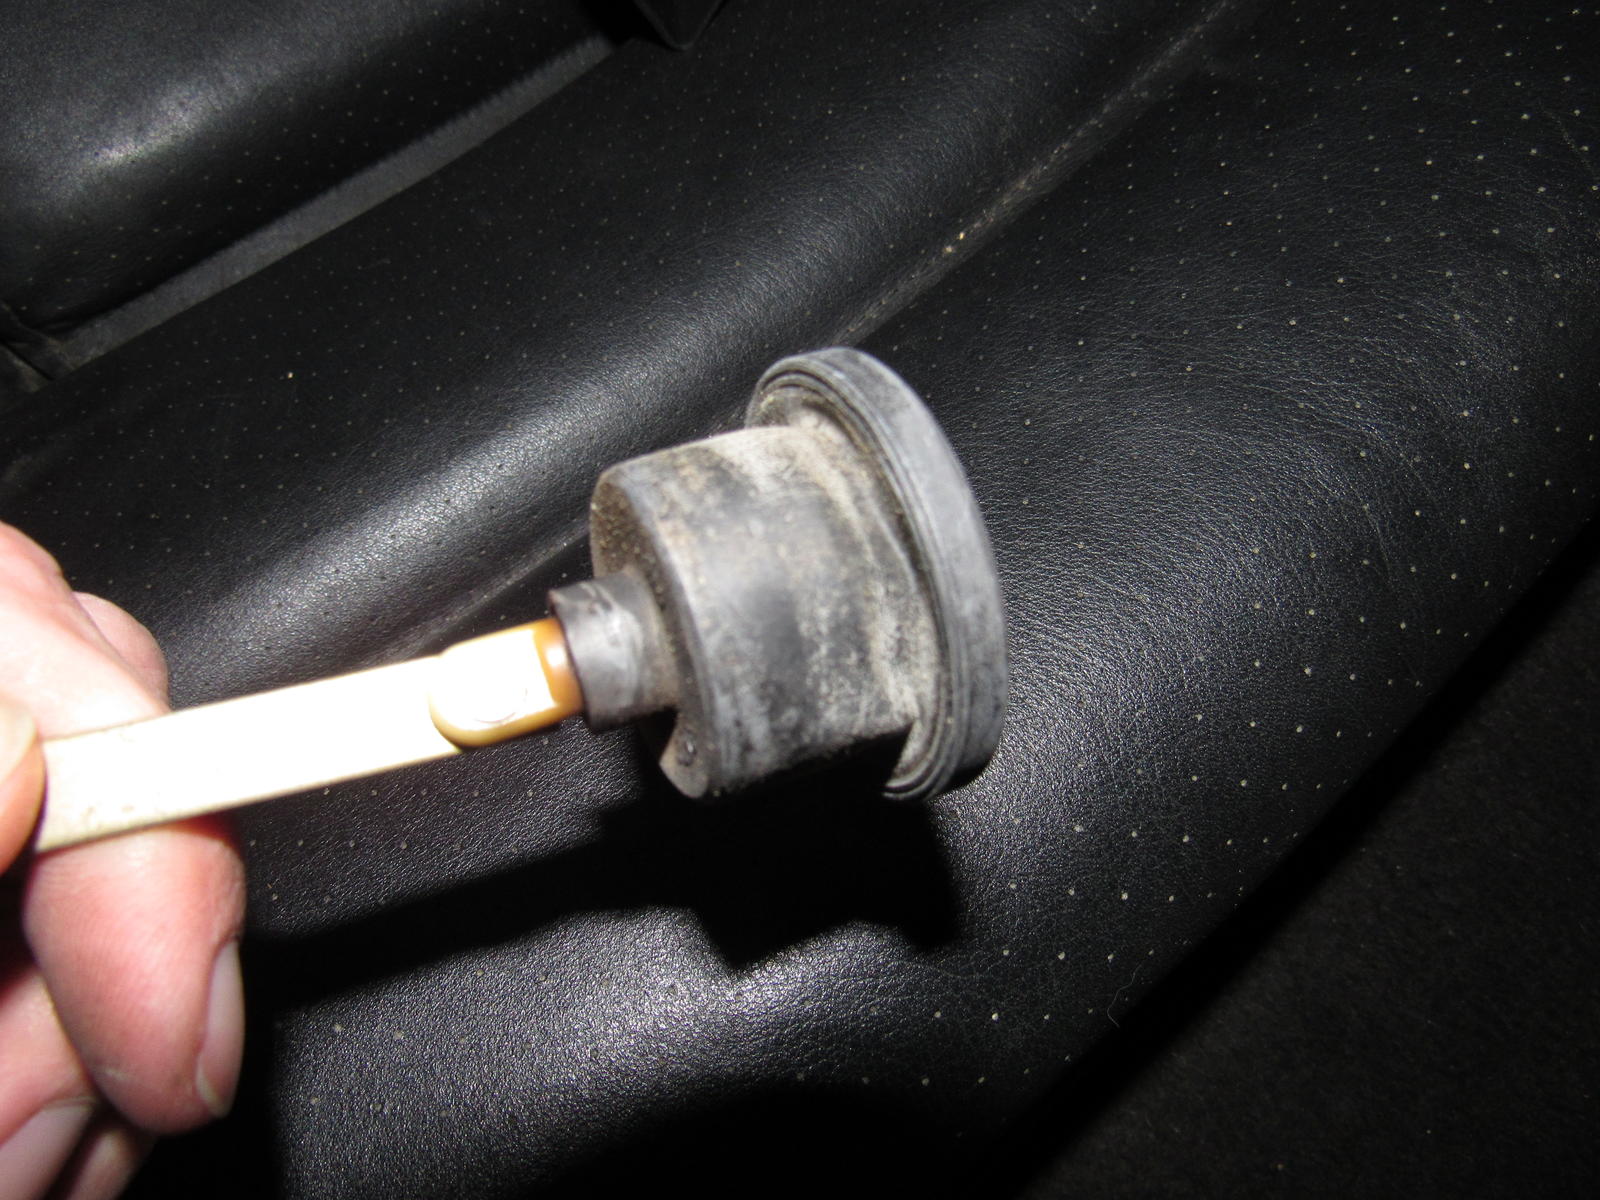
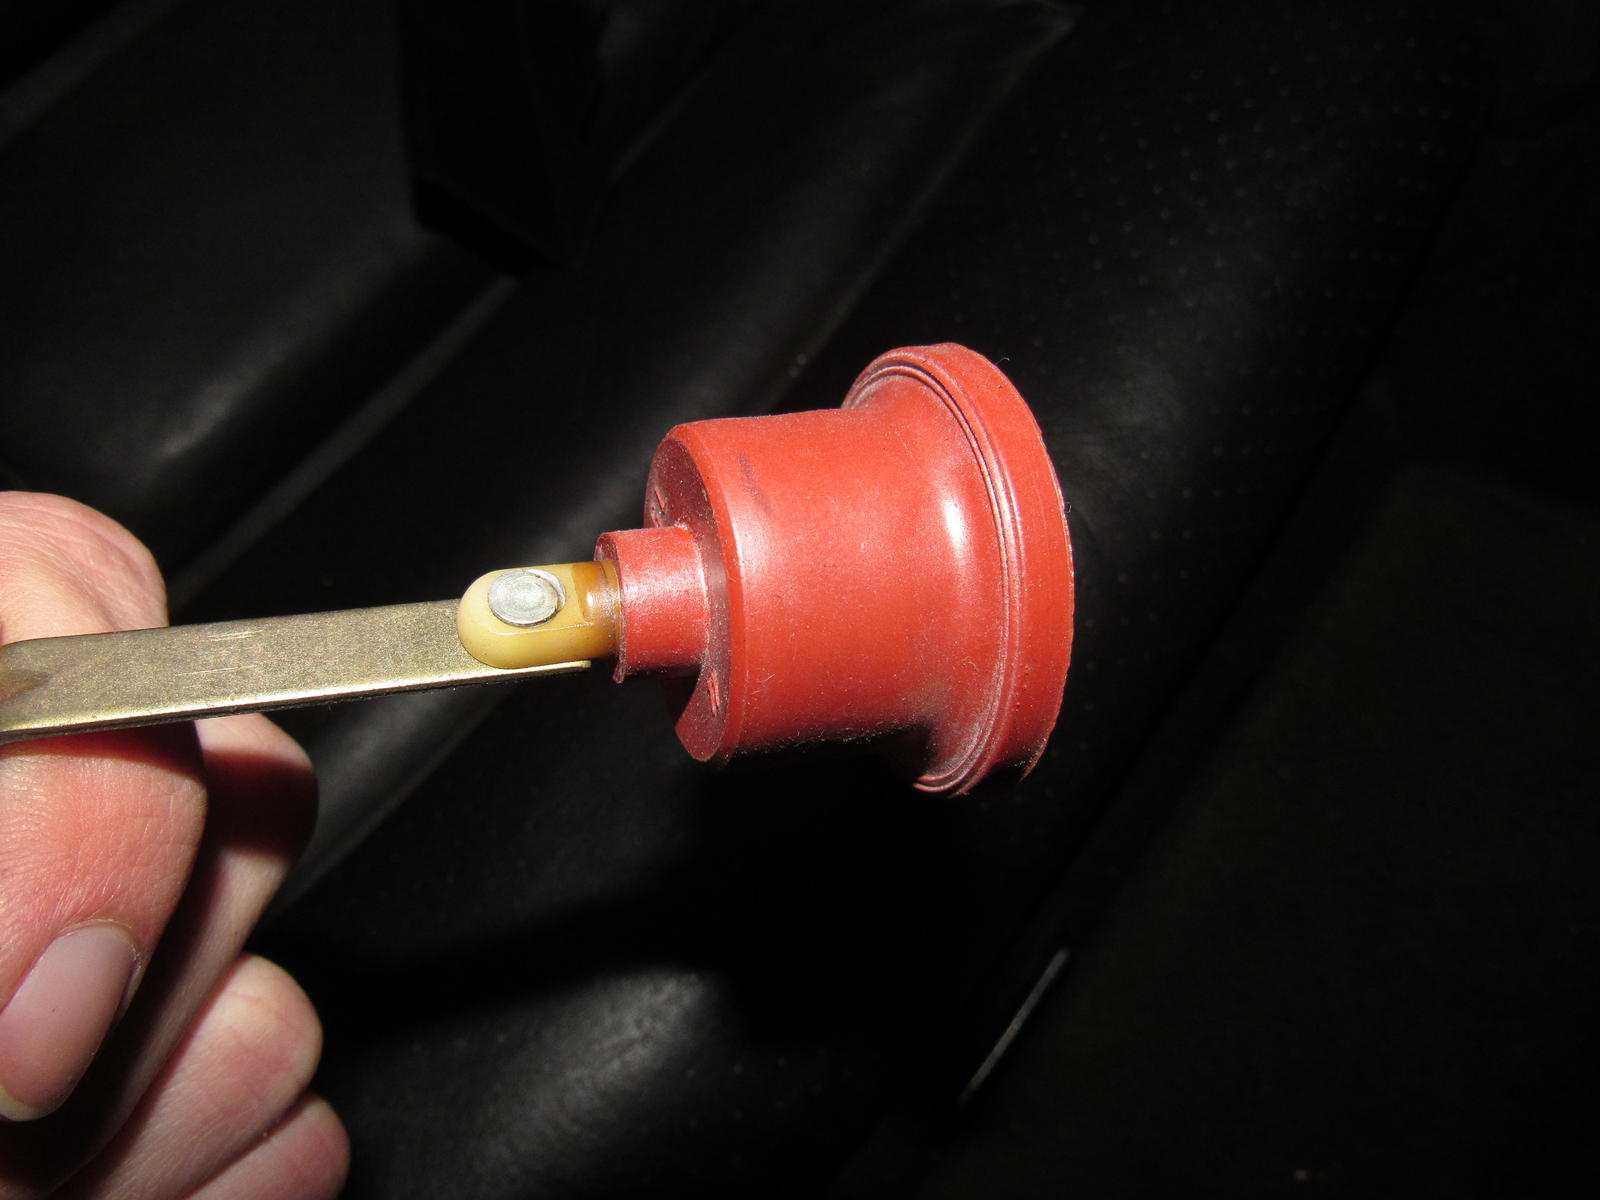
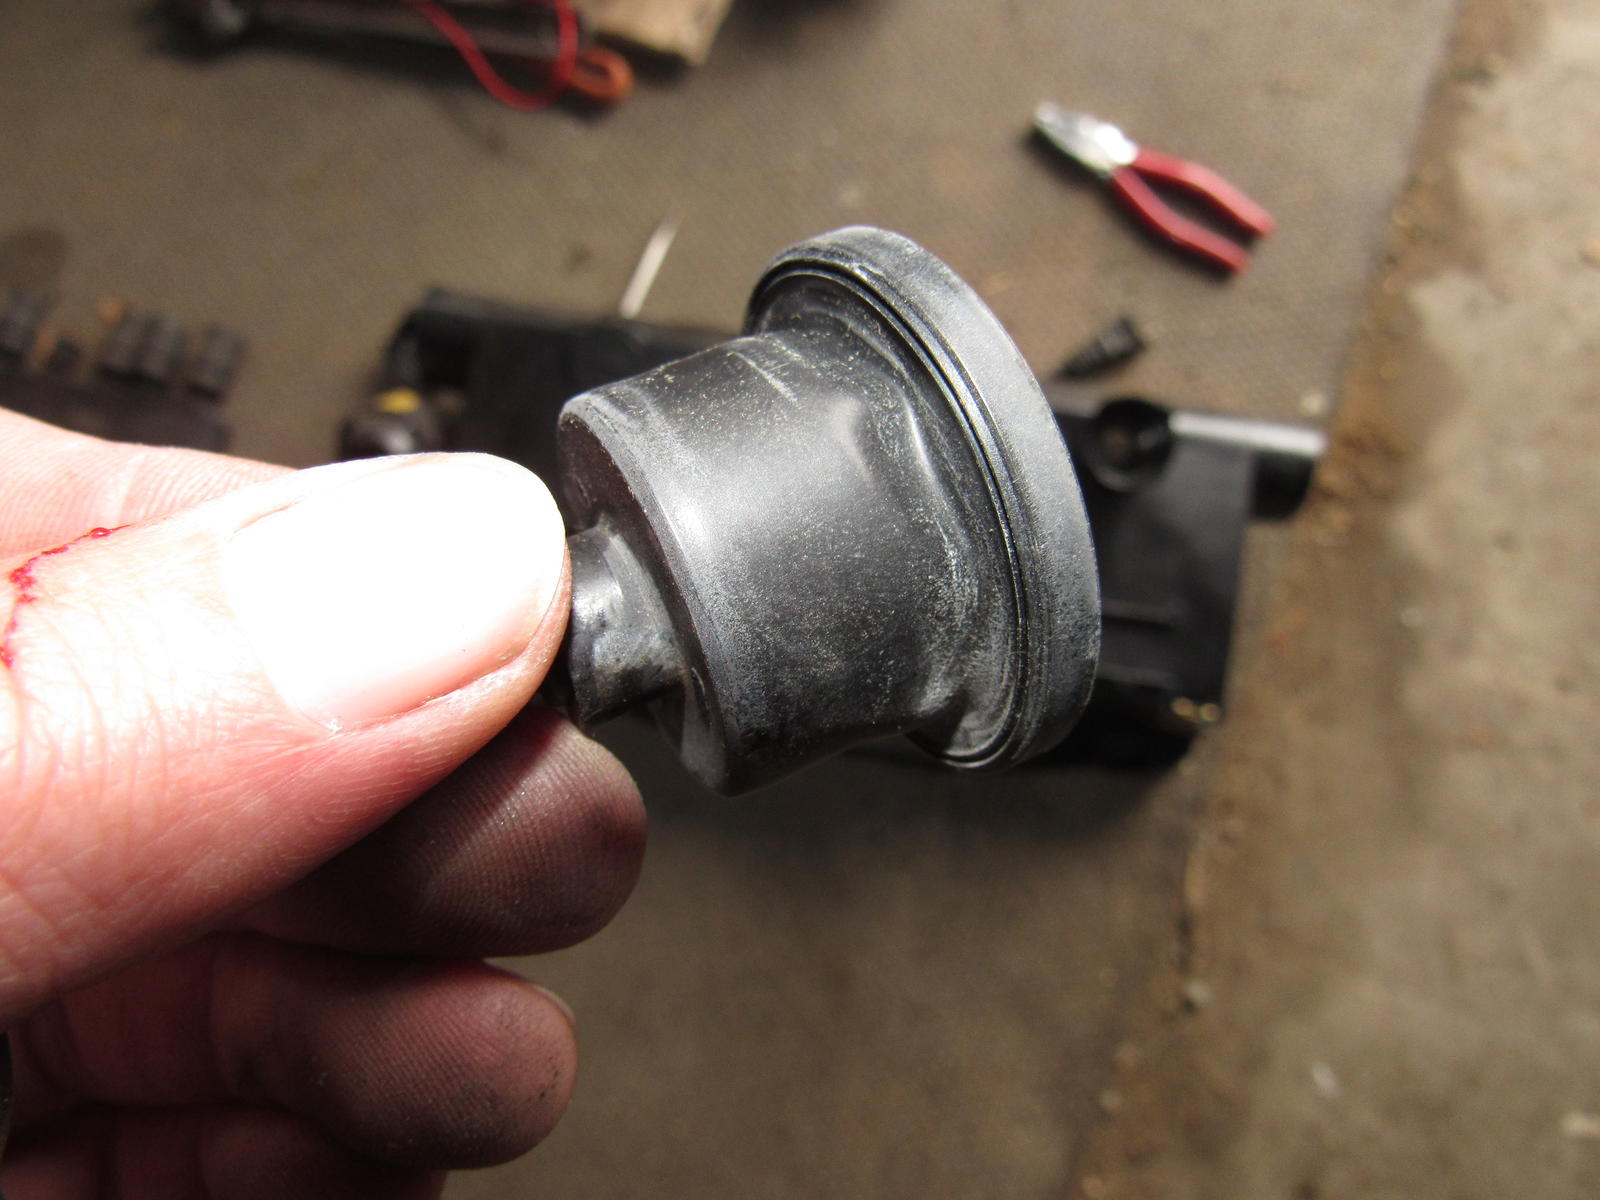
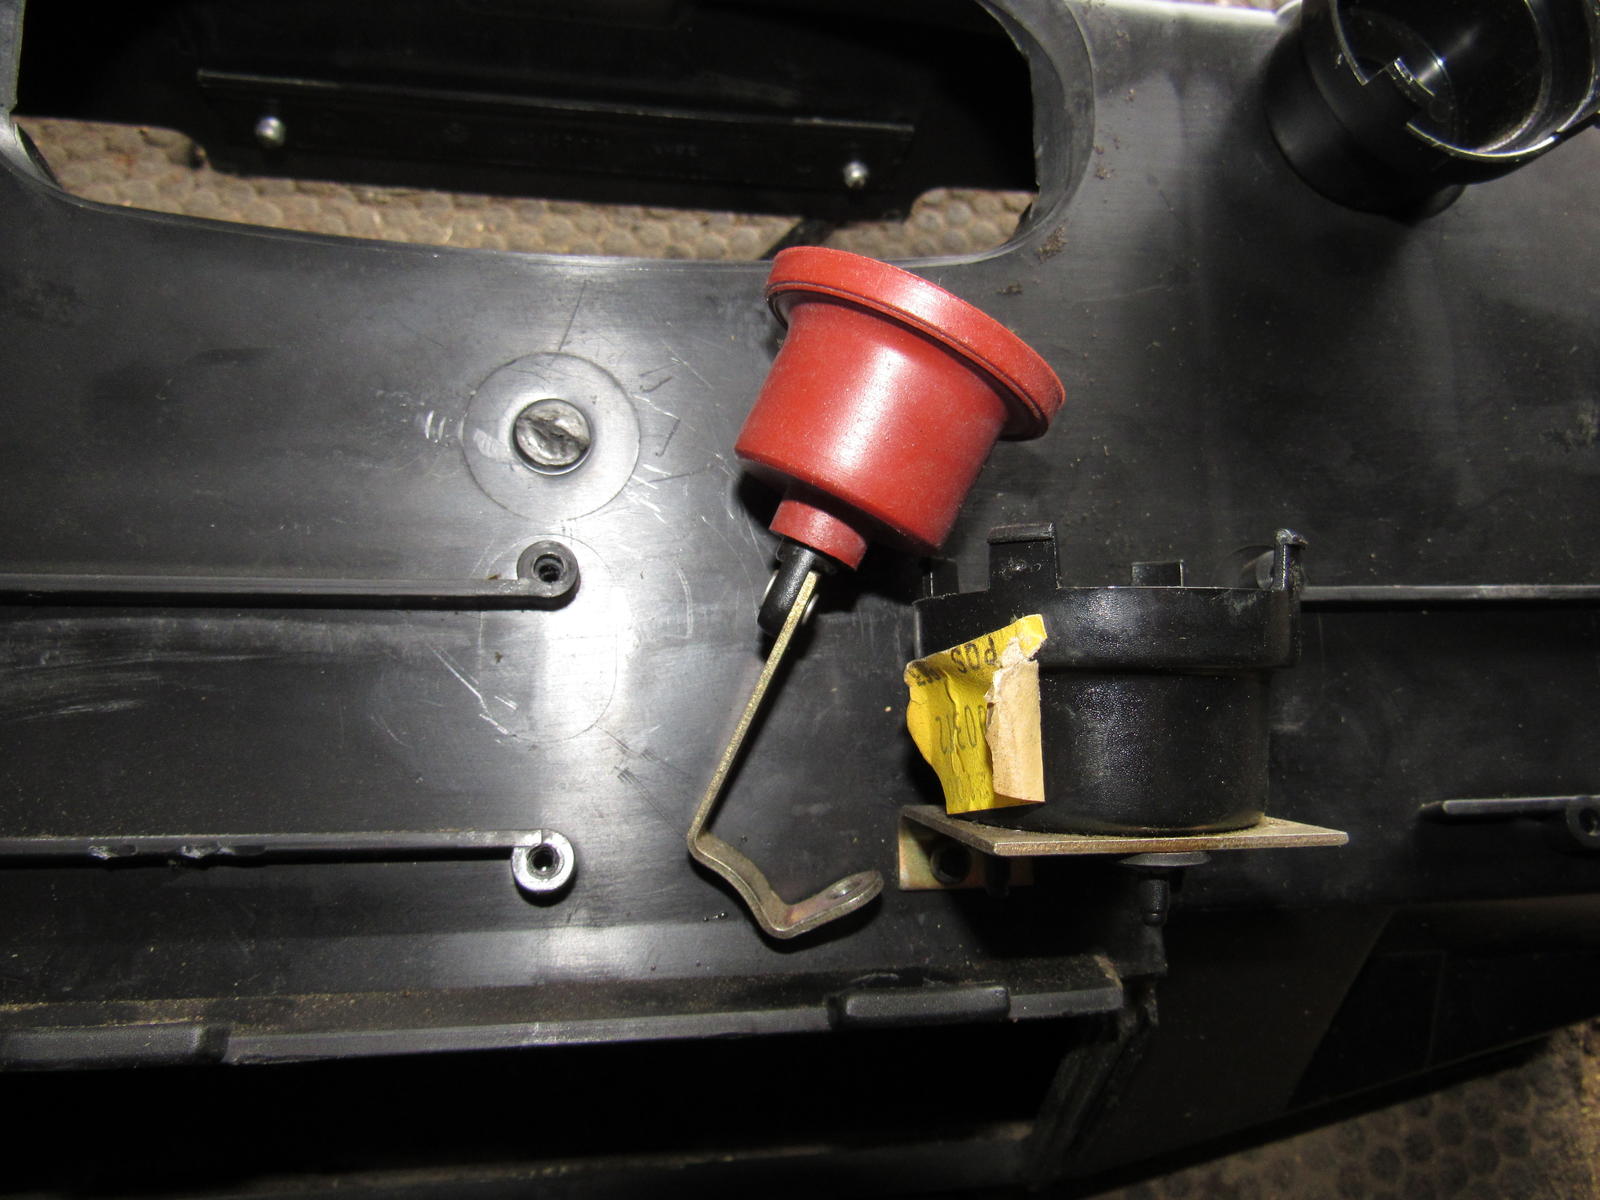
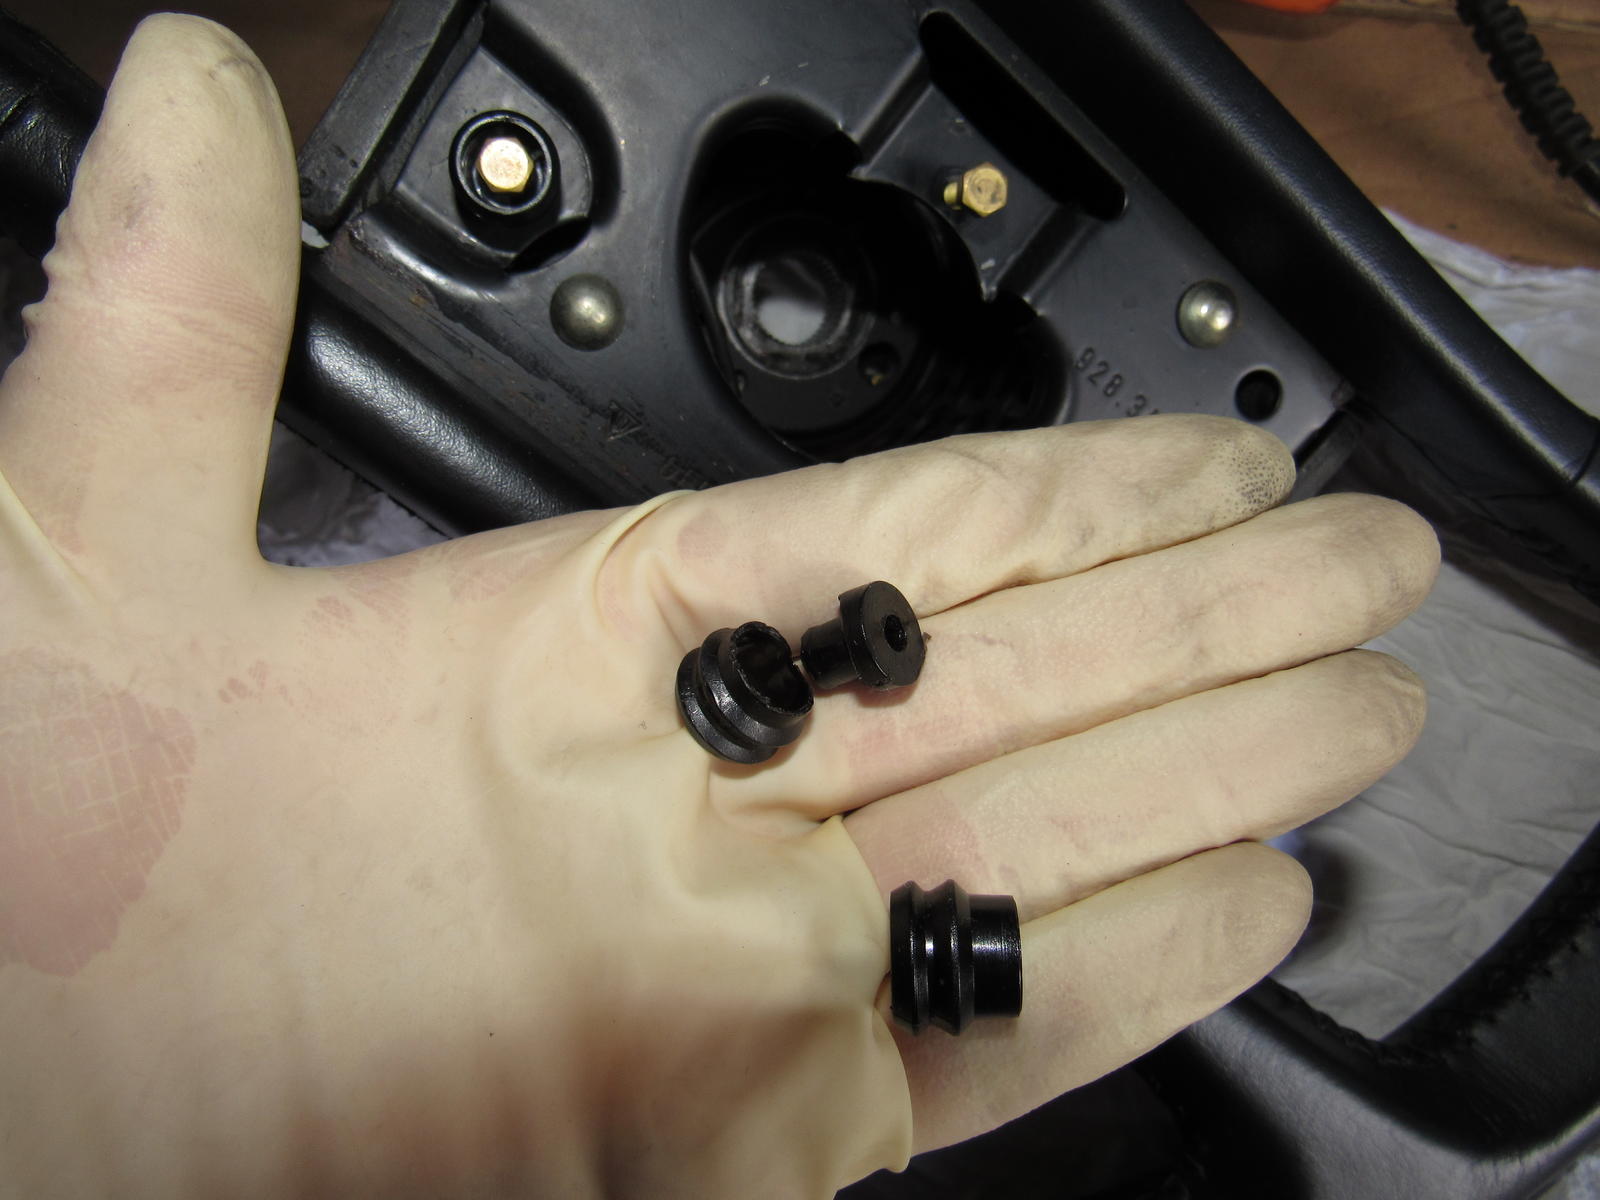
Next is the recirculation flap vacuum pod. I have a new pod but it is a different design and the rubber diaphragm is different so I cannot keep my existing housing but exchange the rubber. Searching around I think this pod is for a later model year.
Old rubber is torn.
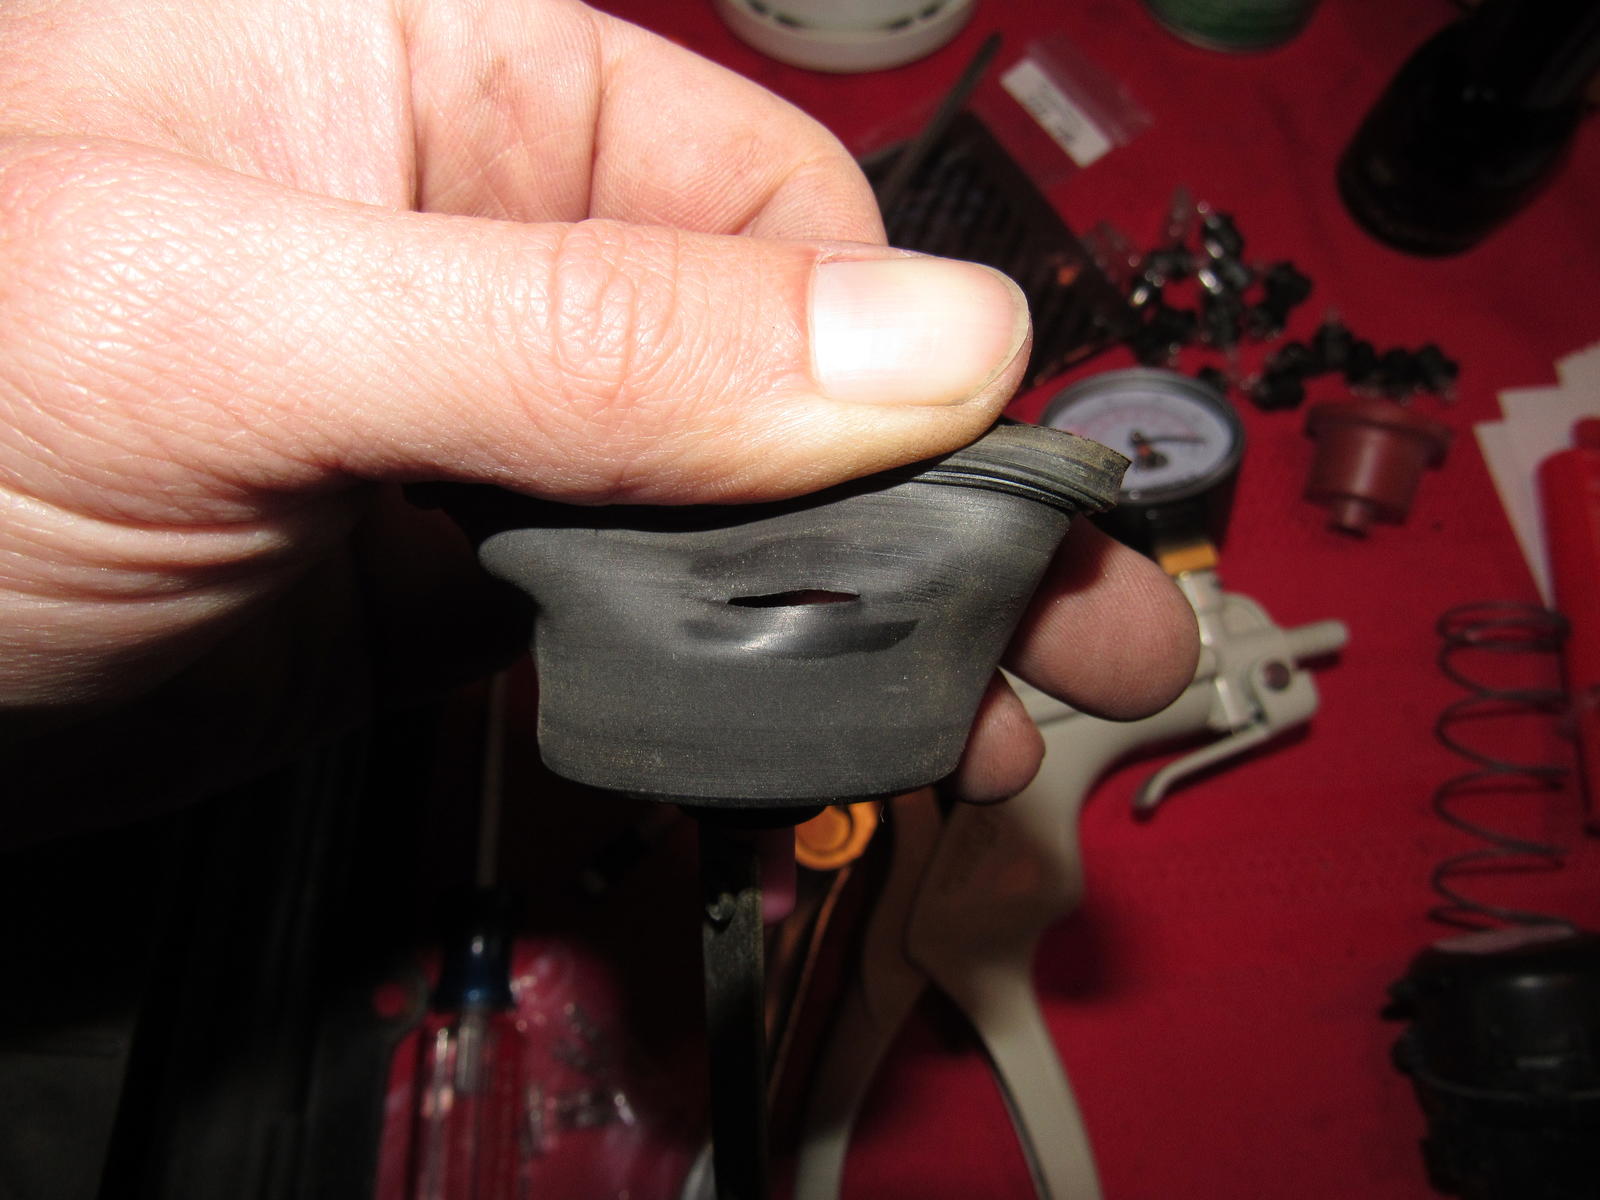
Old rubber diaphragm is deeper than new.
What happens when I put new rubber in old housing.
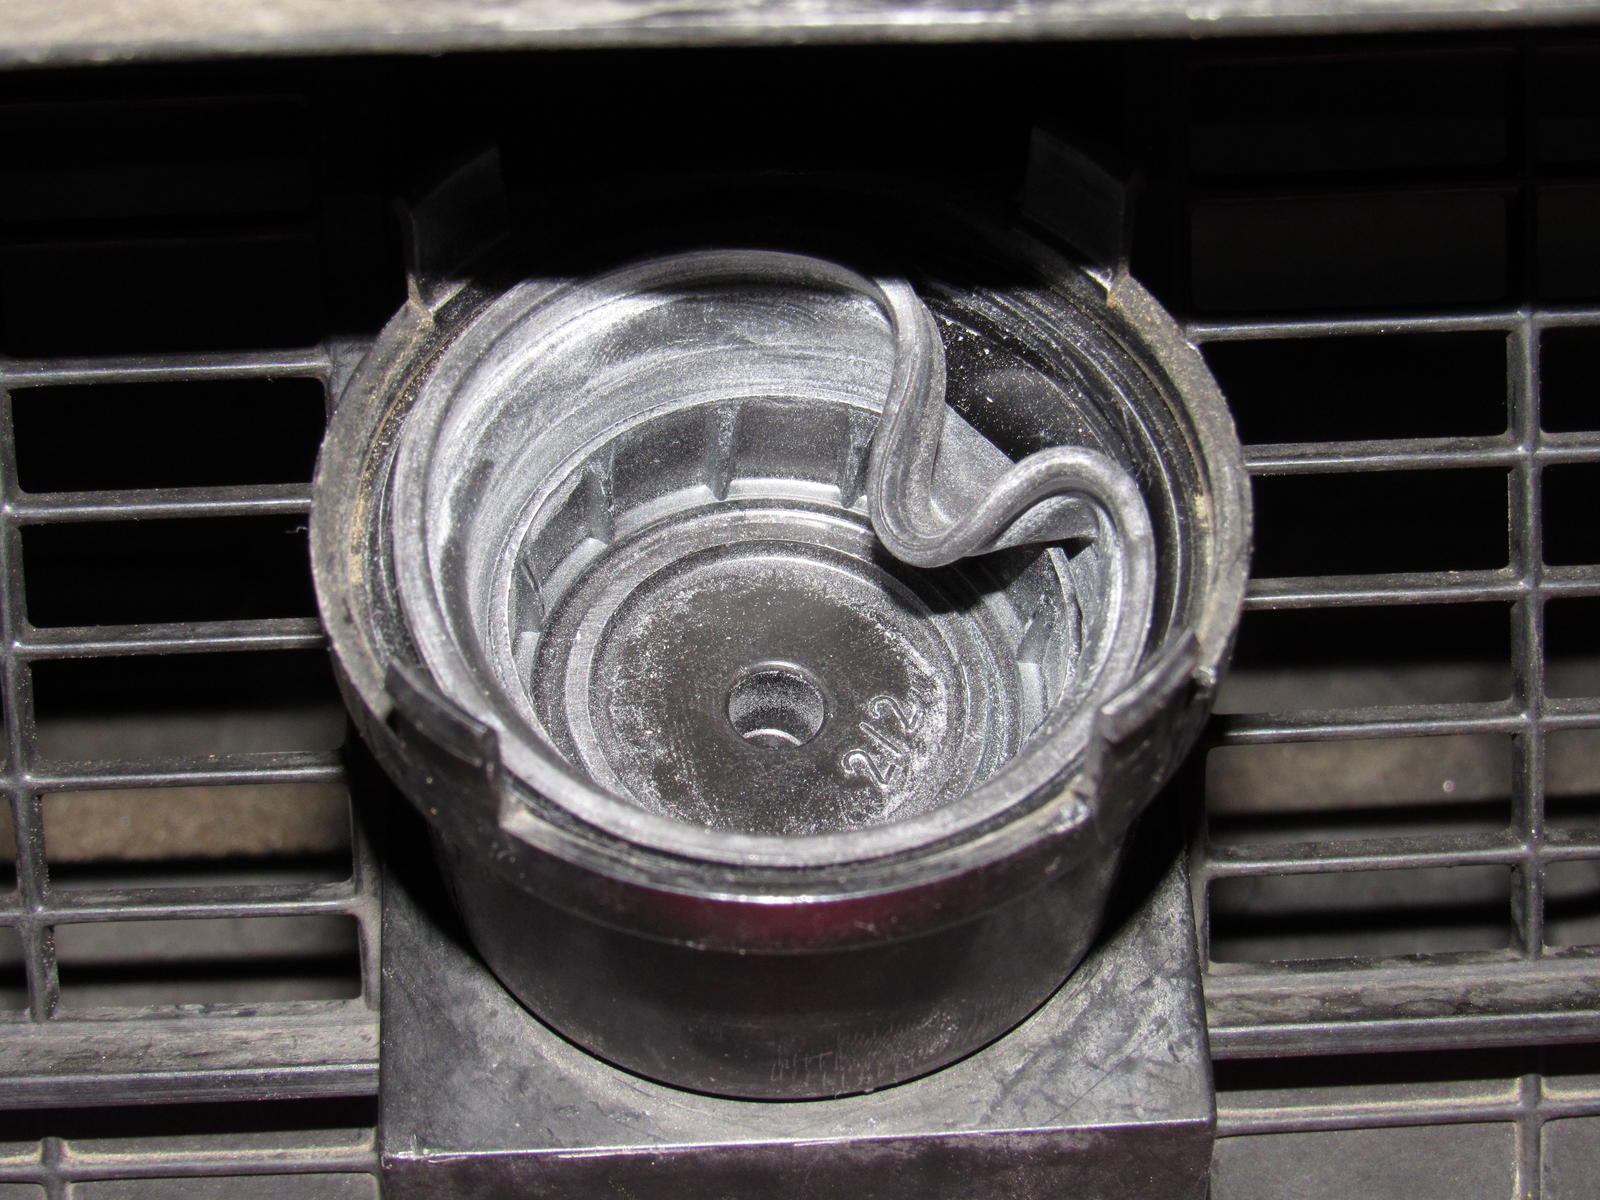
Are earlier recirc pods NLA? What are my options?
Next is the recirculation flap vacuum pod. I have a new pod but it is a different design and the rubber diaphragm is different so I cannot keep my existing housing but exchange the rubber. Searching around I think this pod is for a later model year.
Old rubber is torn.
Old rubber diaphragm is deeper than new.
What happens when I put new rubber in old housing.
Are earlier recirc pods NLA? What are my options?
05-07-2017, 08:36 PM
#146
Burning Brakes
Thread Starter
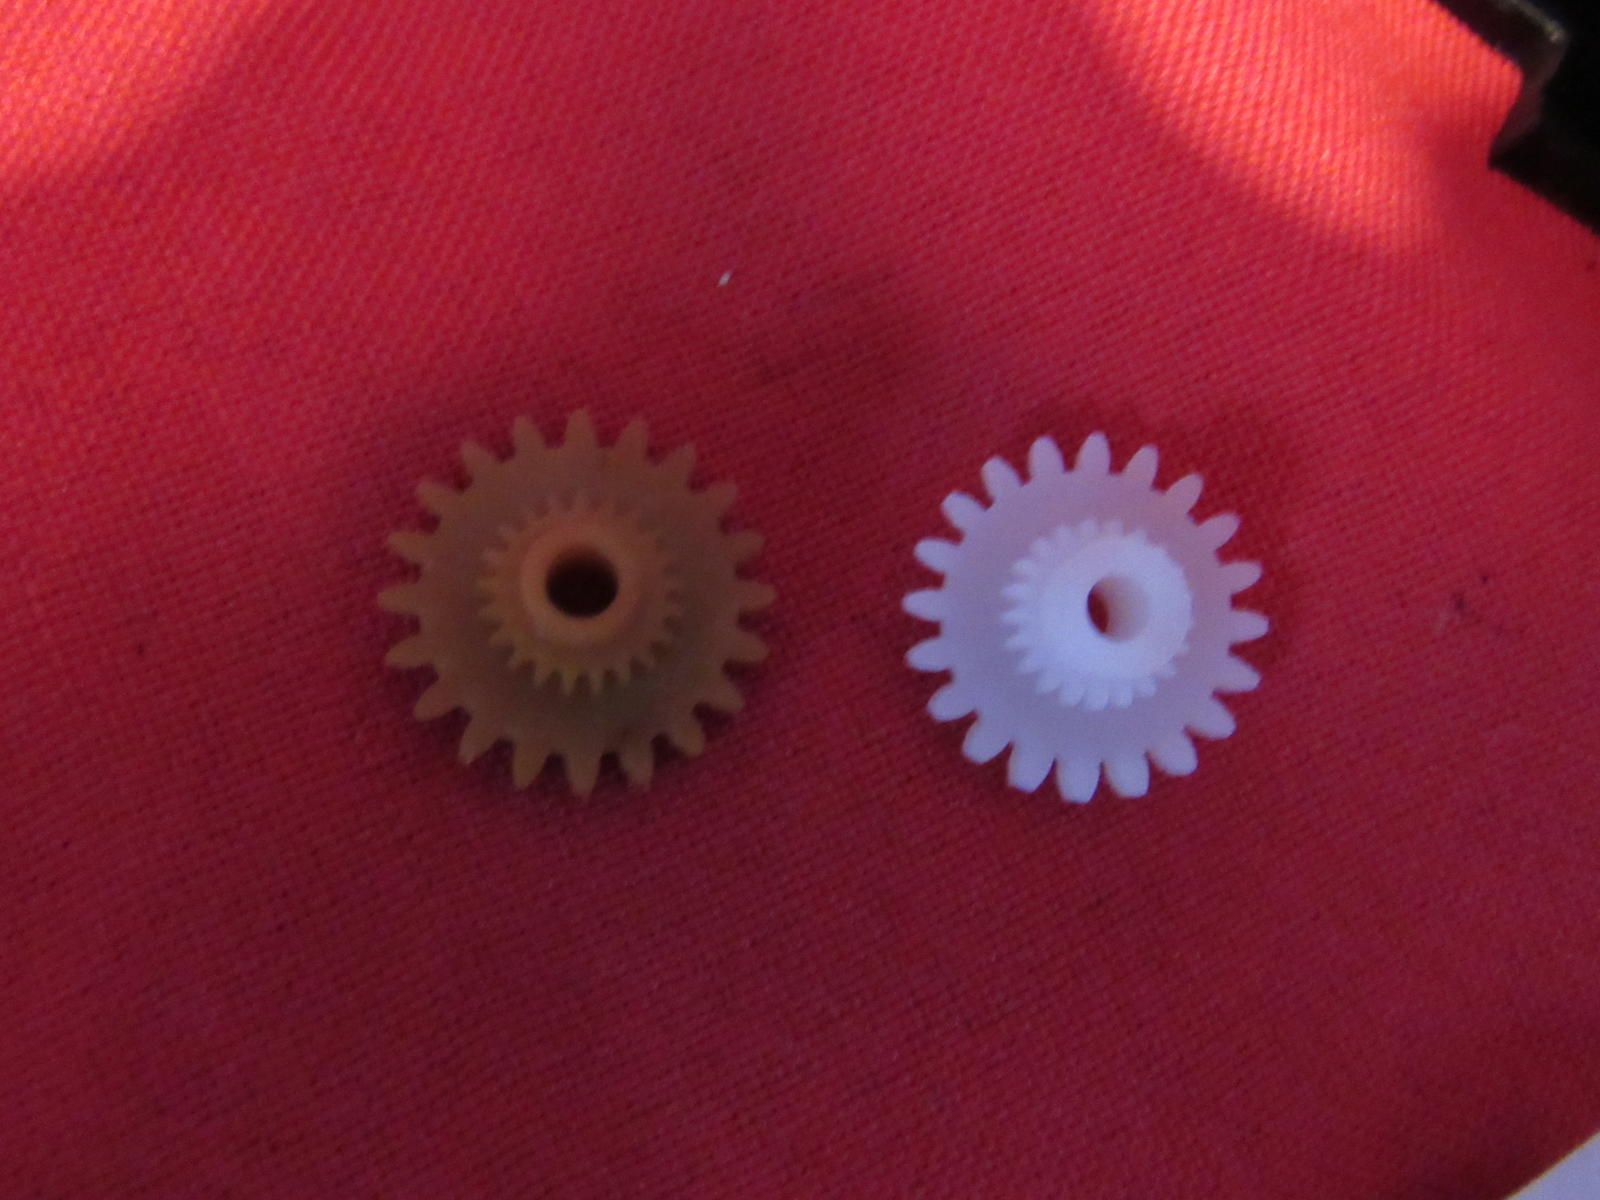
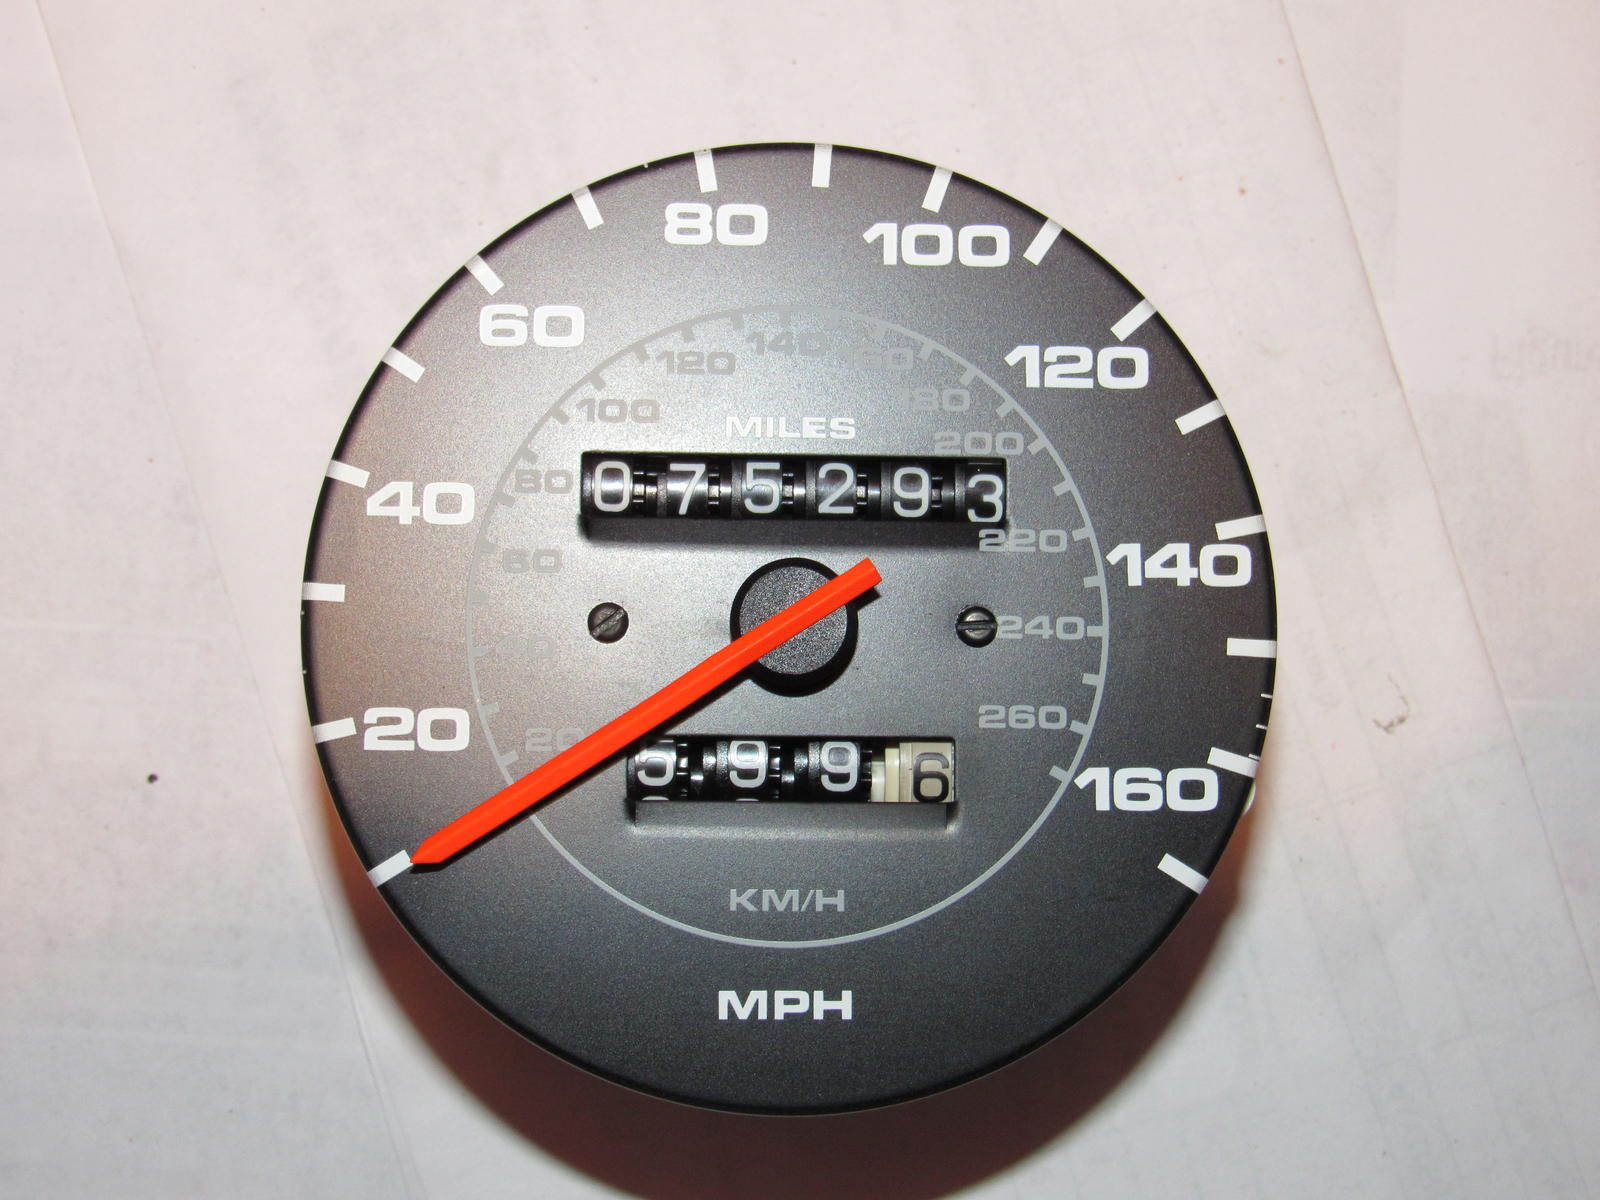
I finally had a weekend off and I have been busy! I completed my HVAC controller project. Then I replaced the odo gear and reassembled my instrument cluster. One word of caution is make sure the plunger for the trip reset fits into the hole on the cluster housing, mine was not and it jammed the odometer when I tested it. Easy fix but something to watch for.
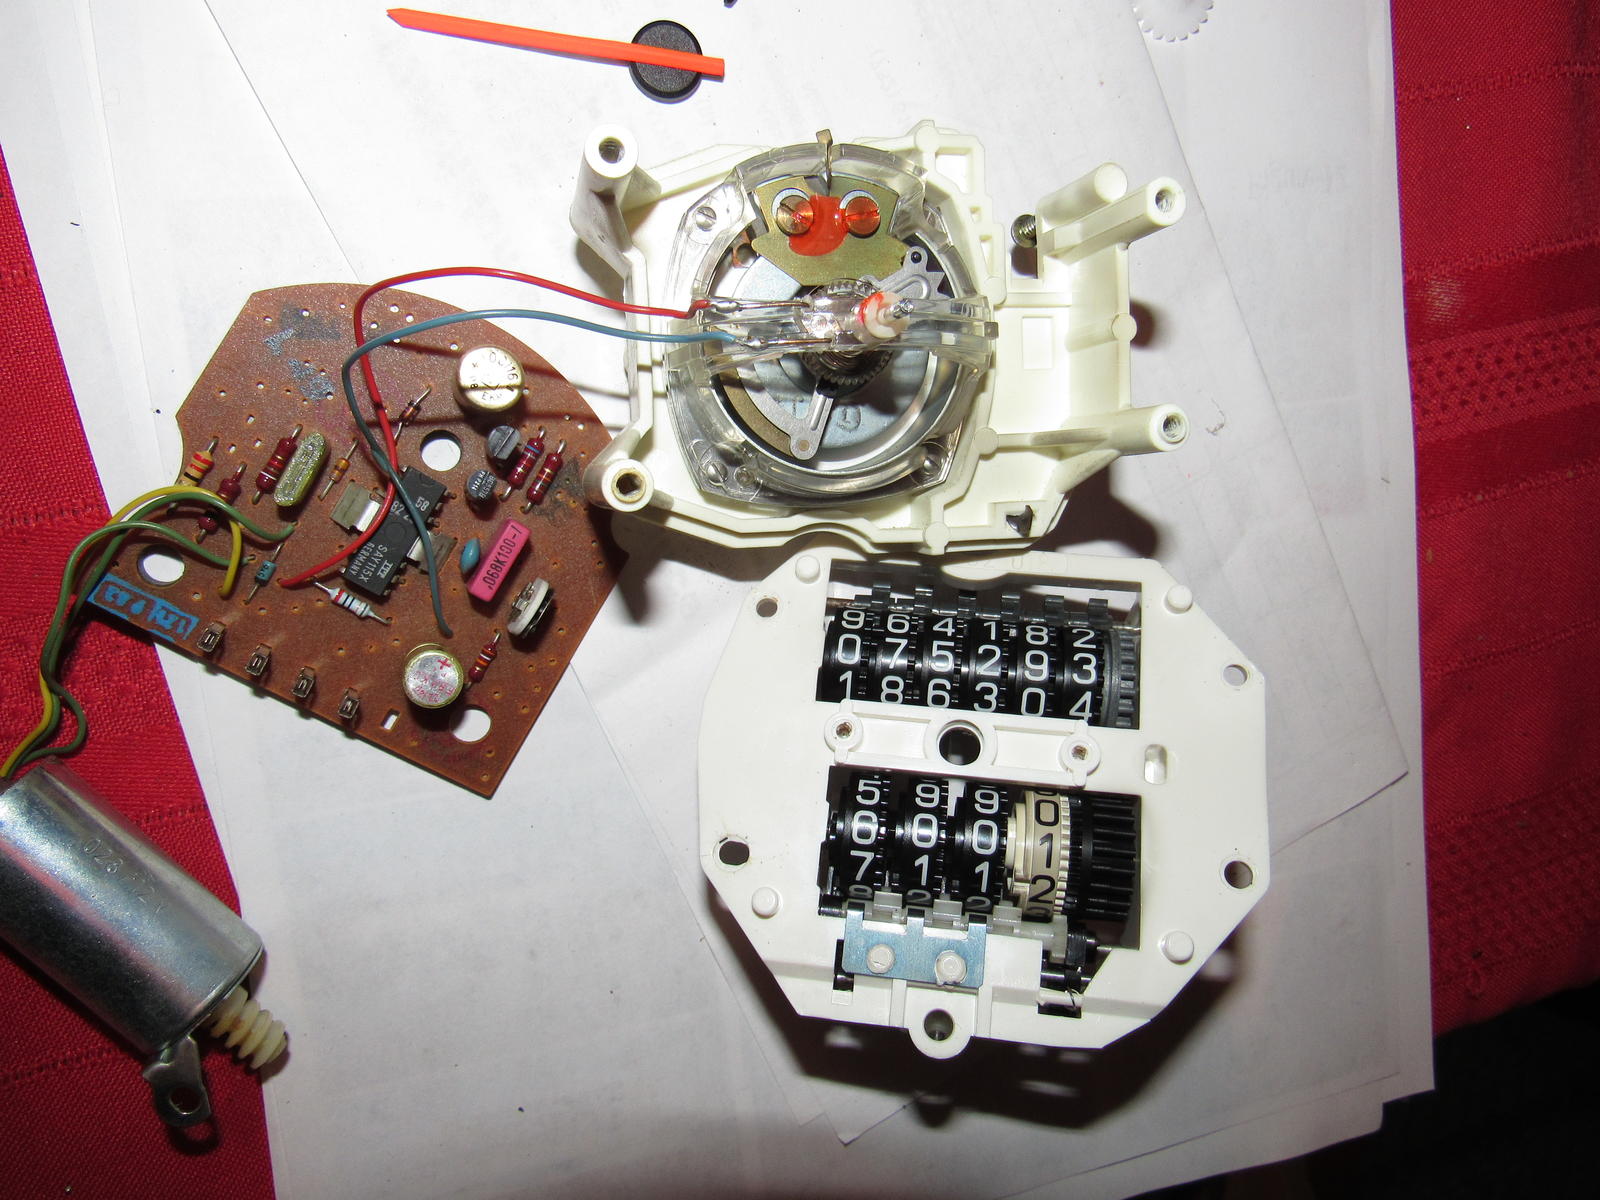
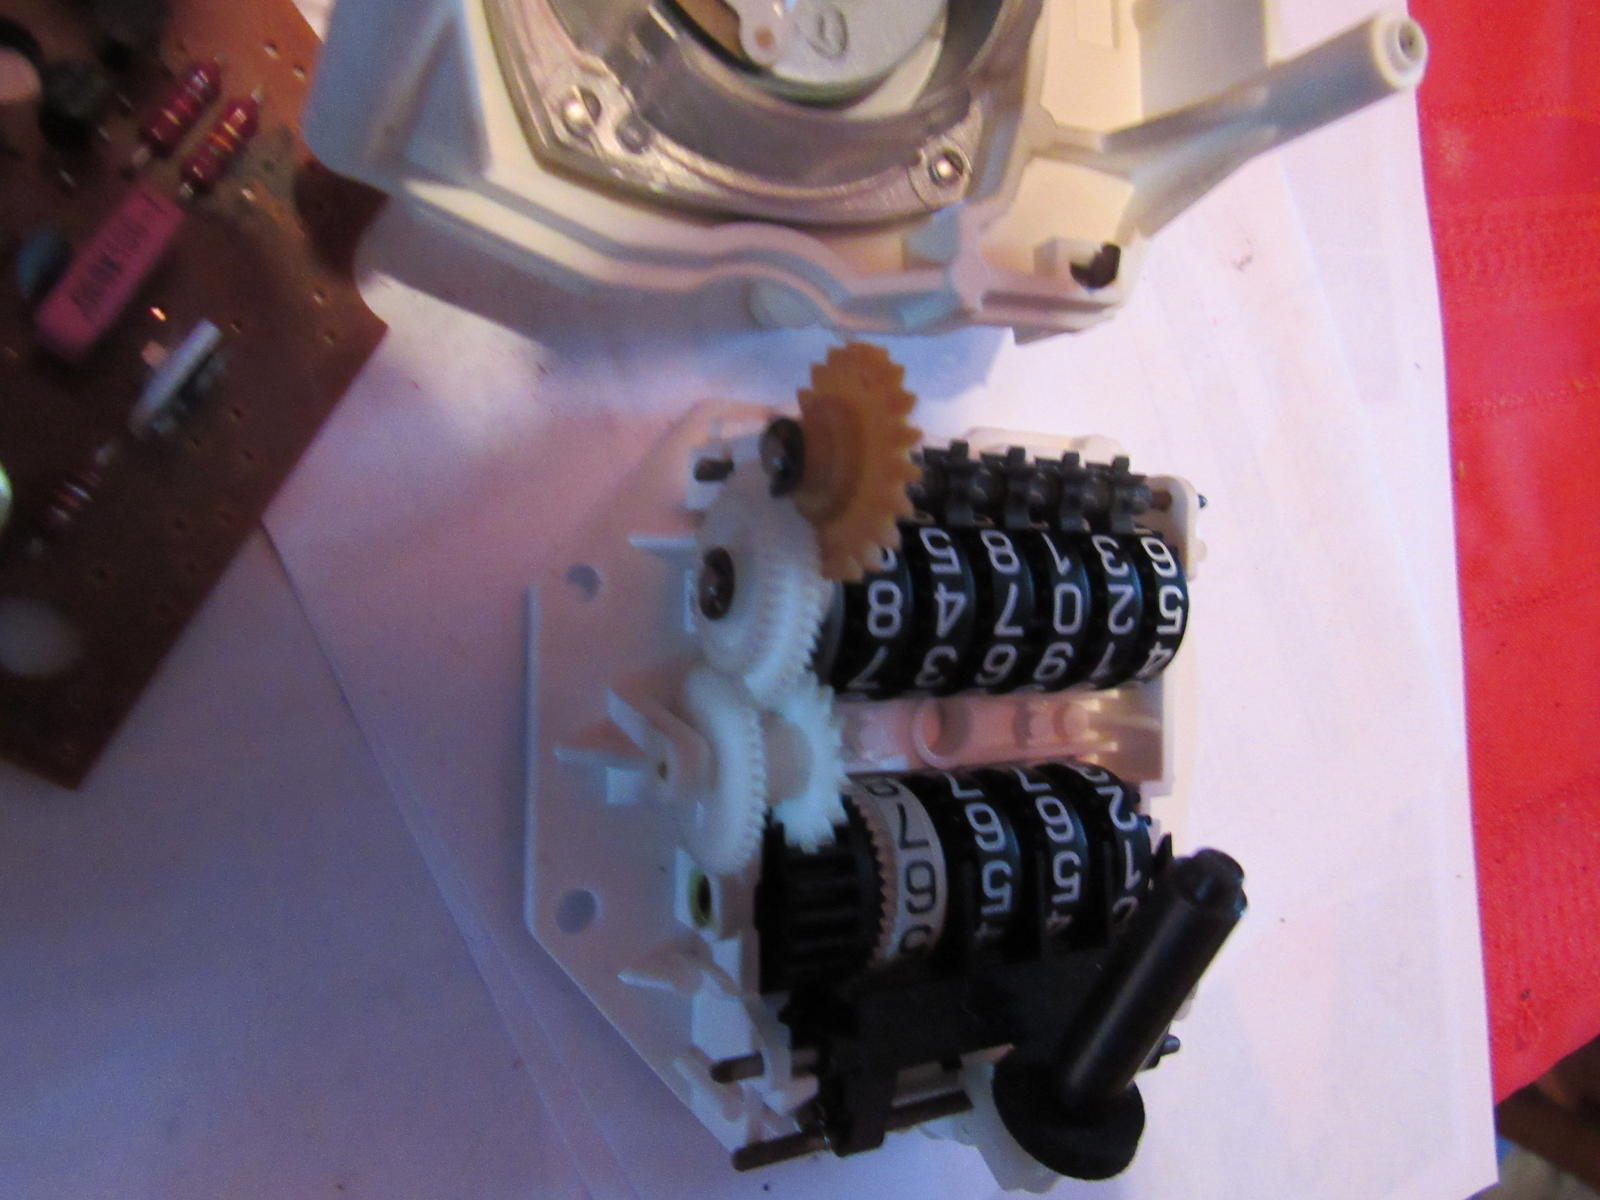
The old odo gear was fine but discolored, it is actually made from a rubbery material.
The speedo needle was perfectly centered with the 'zero' dash before, upon reinstallation I aligned with the bottom of the dash to try and calibrate it a bit more accurate. An indicated 70 was closer to 65-66 on GPS.
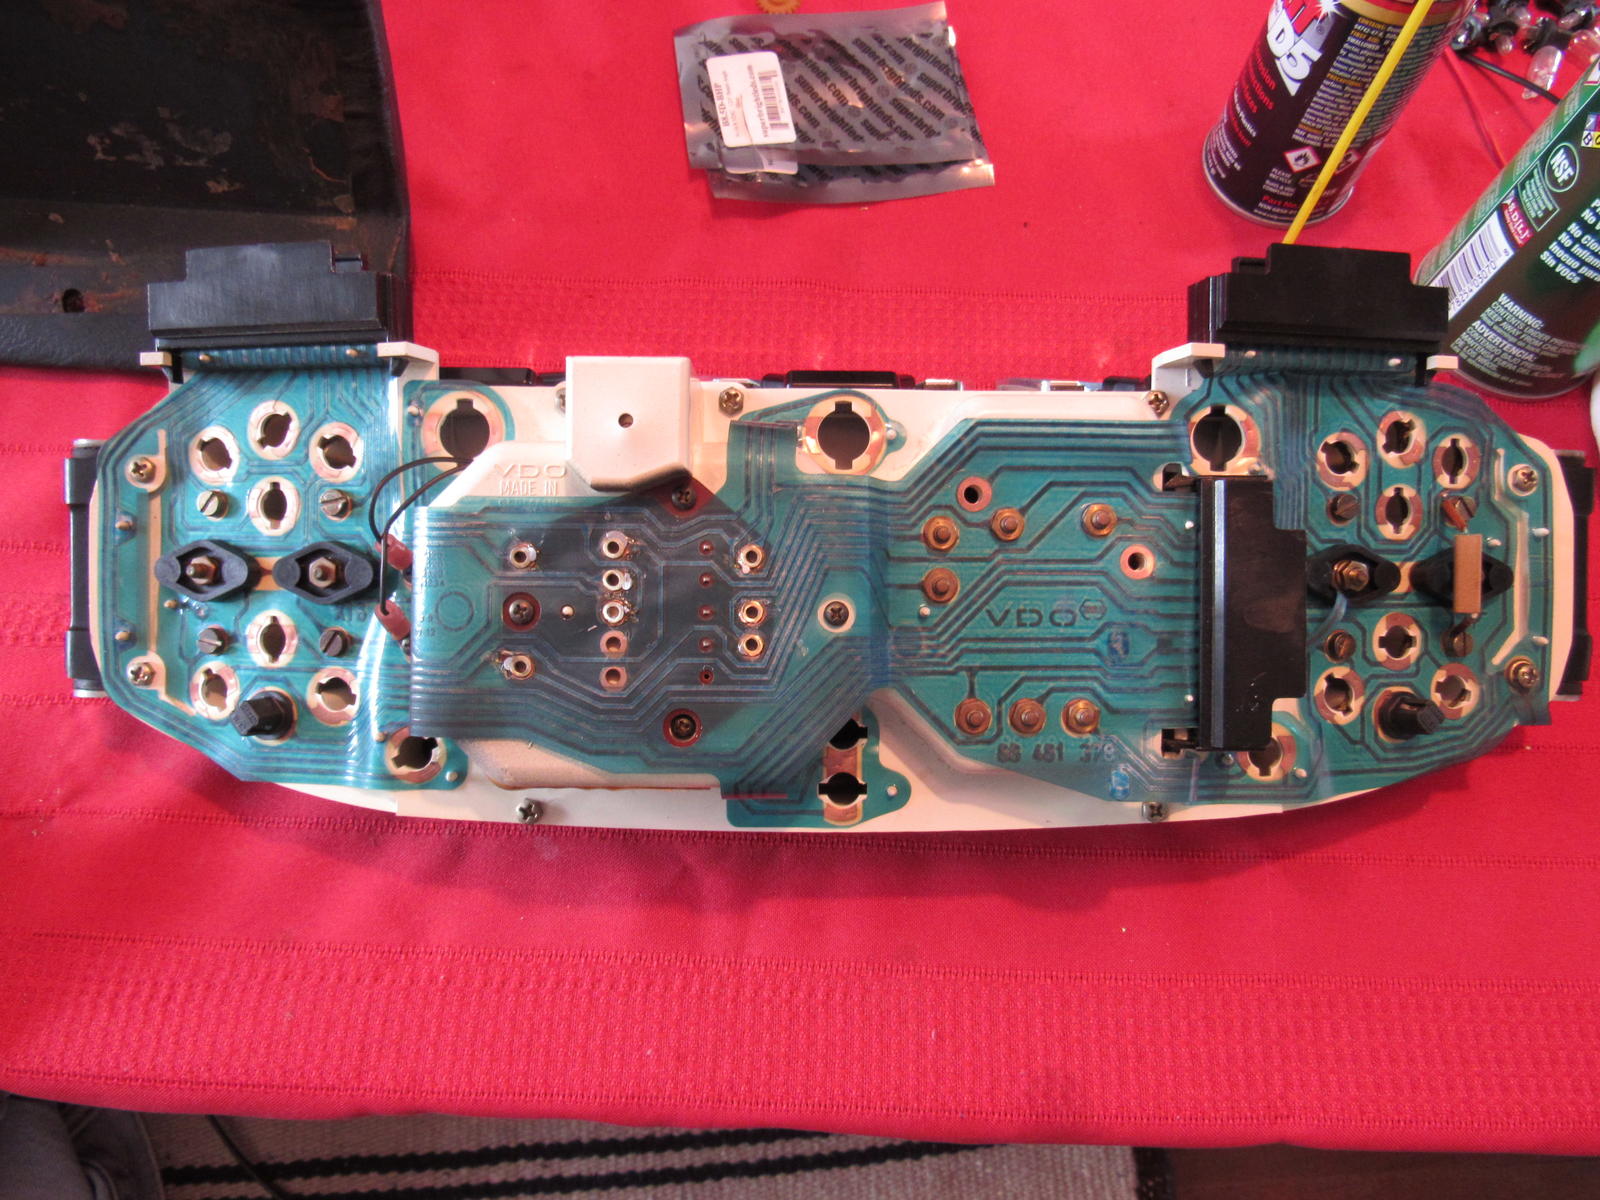
I had already soldered the 'rivets' on the hard board of the circuit foil and cleaned all the contacts.
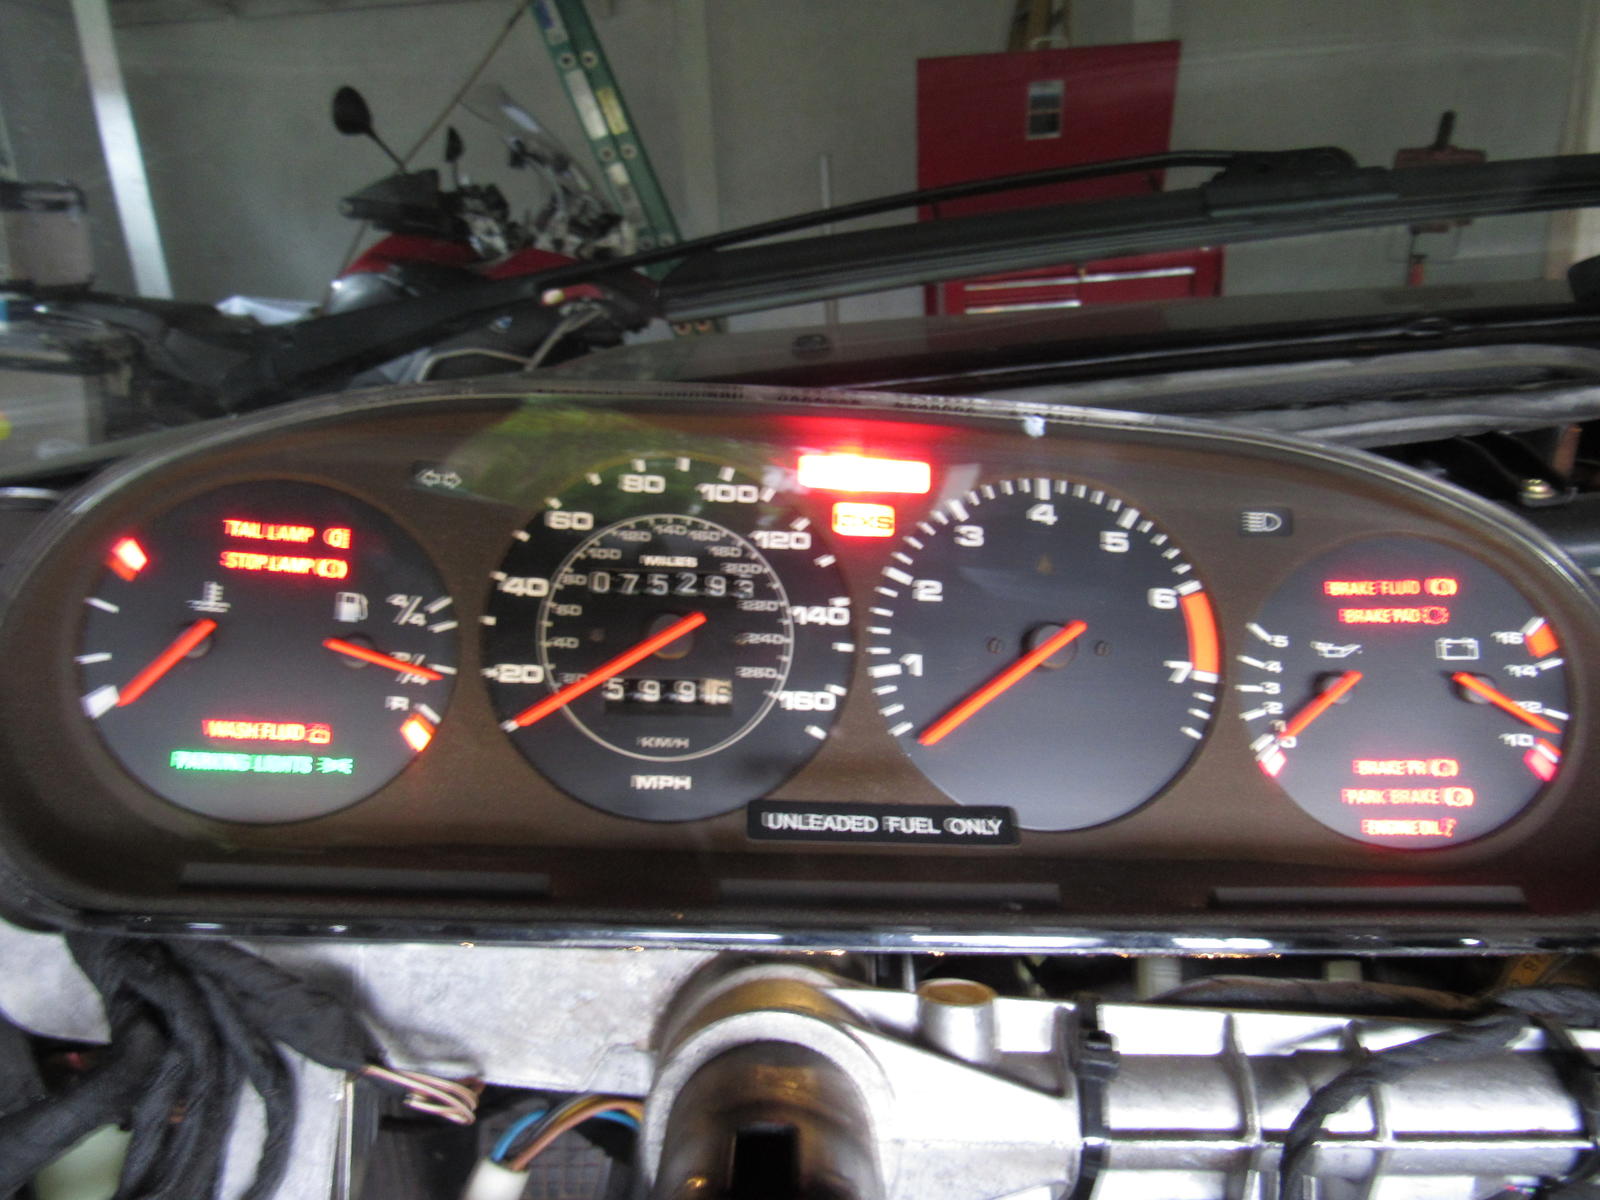
I did an LED conversion and am very happy with the results, I will create a separate thread with all the details and 'how tos'. I do have a problem of no signal for low coolant and have to figure something out for the turn signal indicator. With an LED it shines faint and constant but with an incandescent it pulses properly but very faintly. This is due to LED exterior turn signal bulbs.
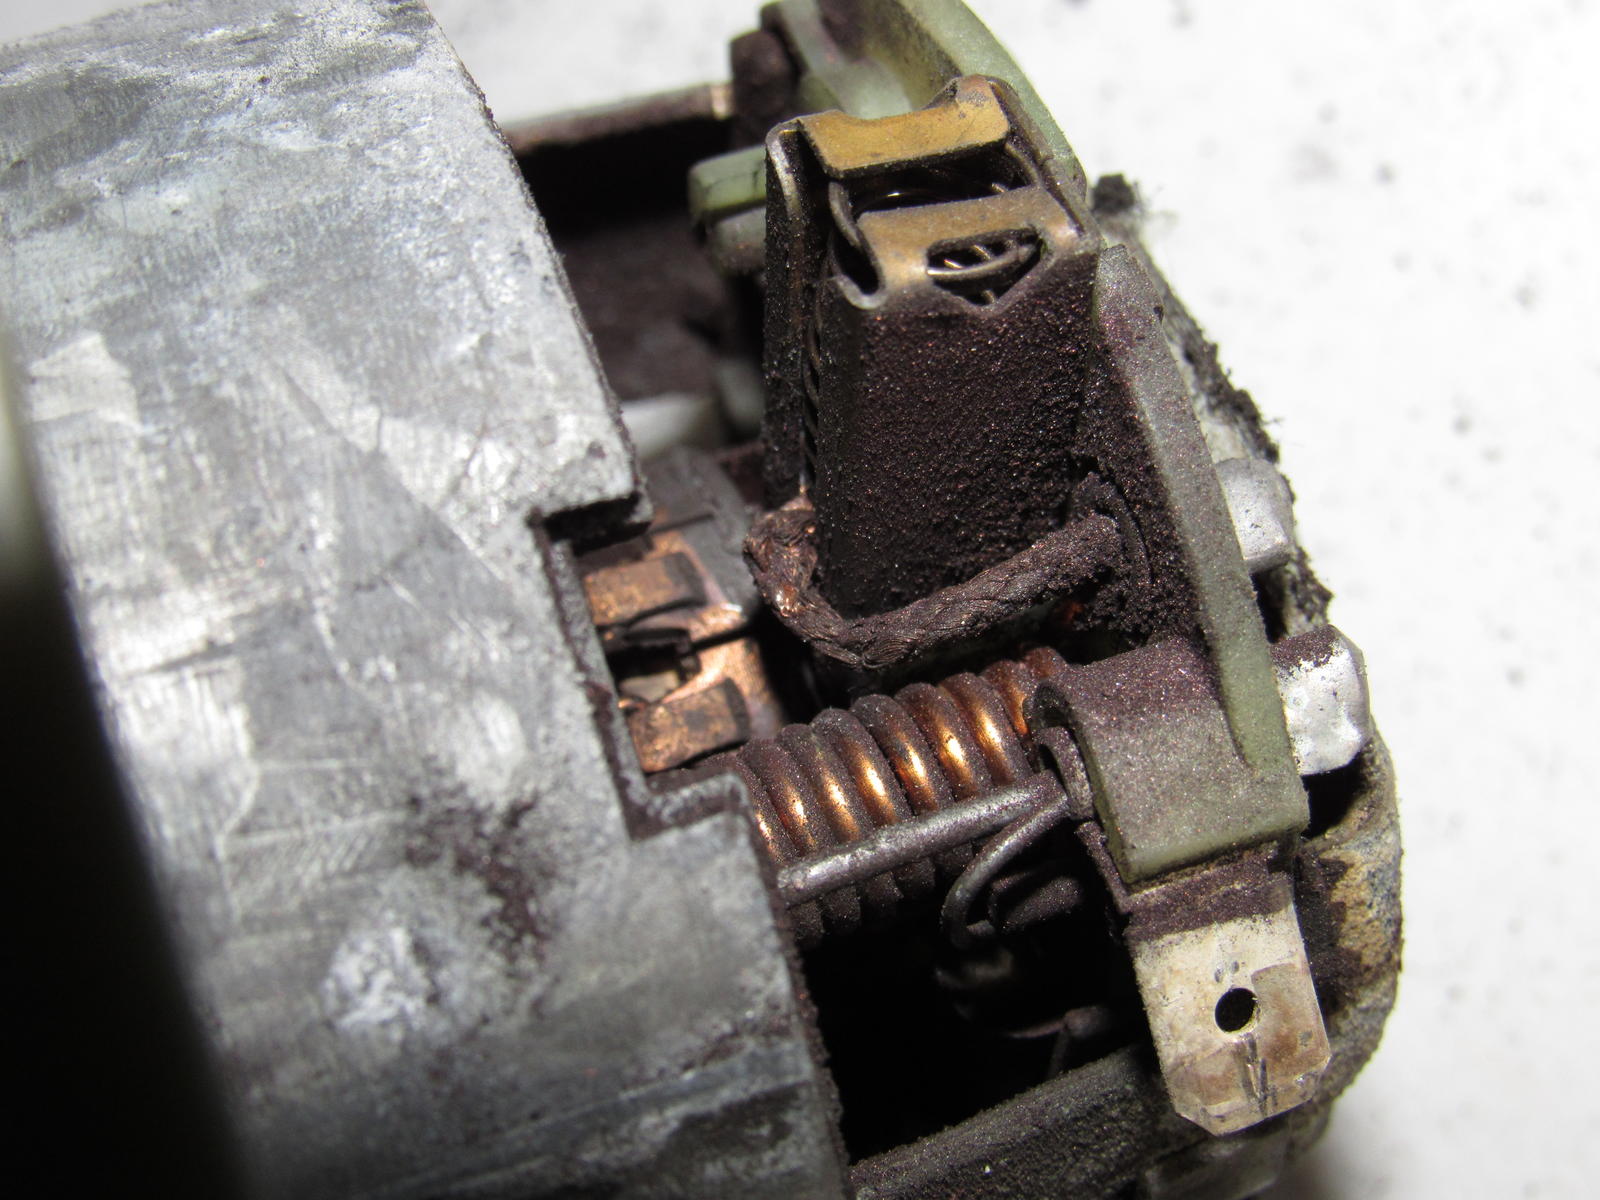
I have taken apart my blower motor and it looks like the brushes are nearing end of life, I will order a new one.
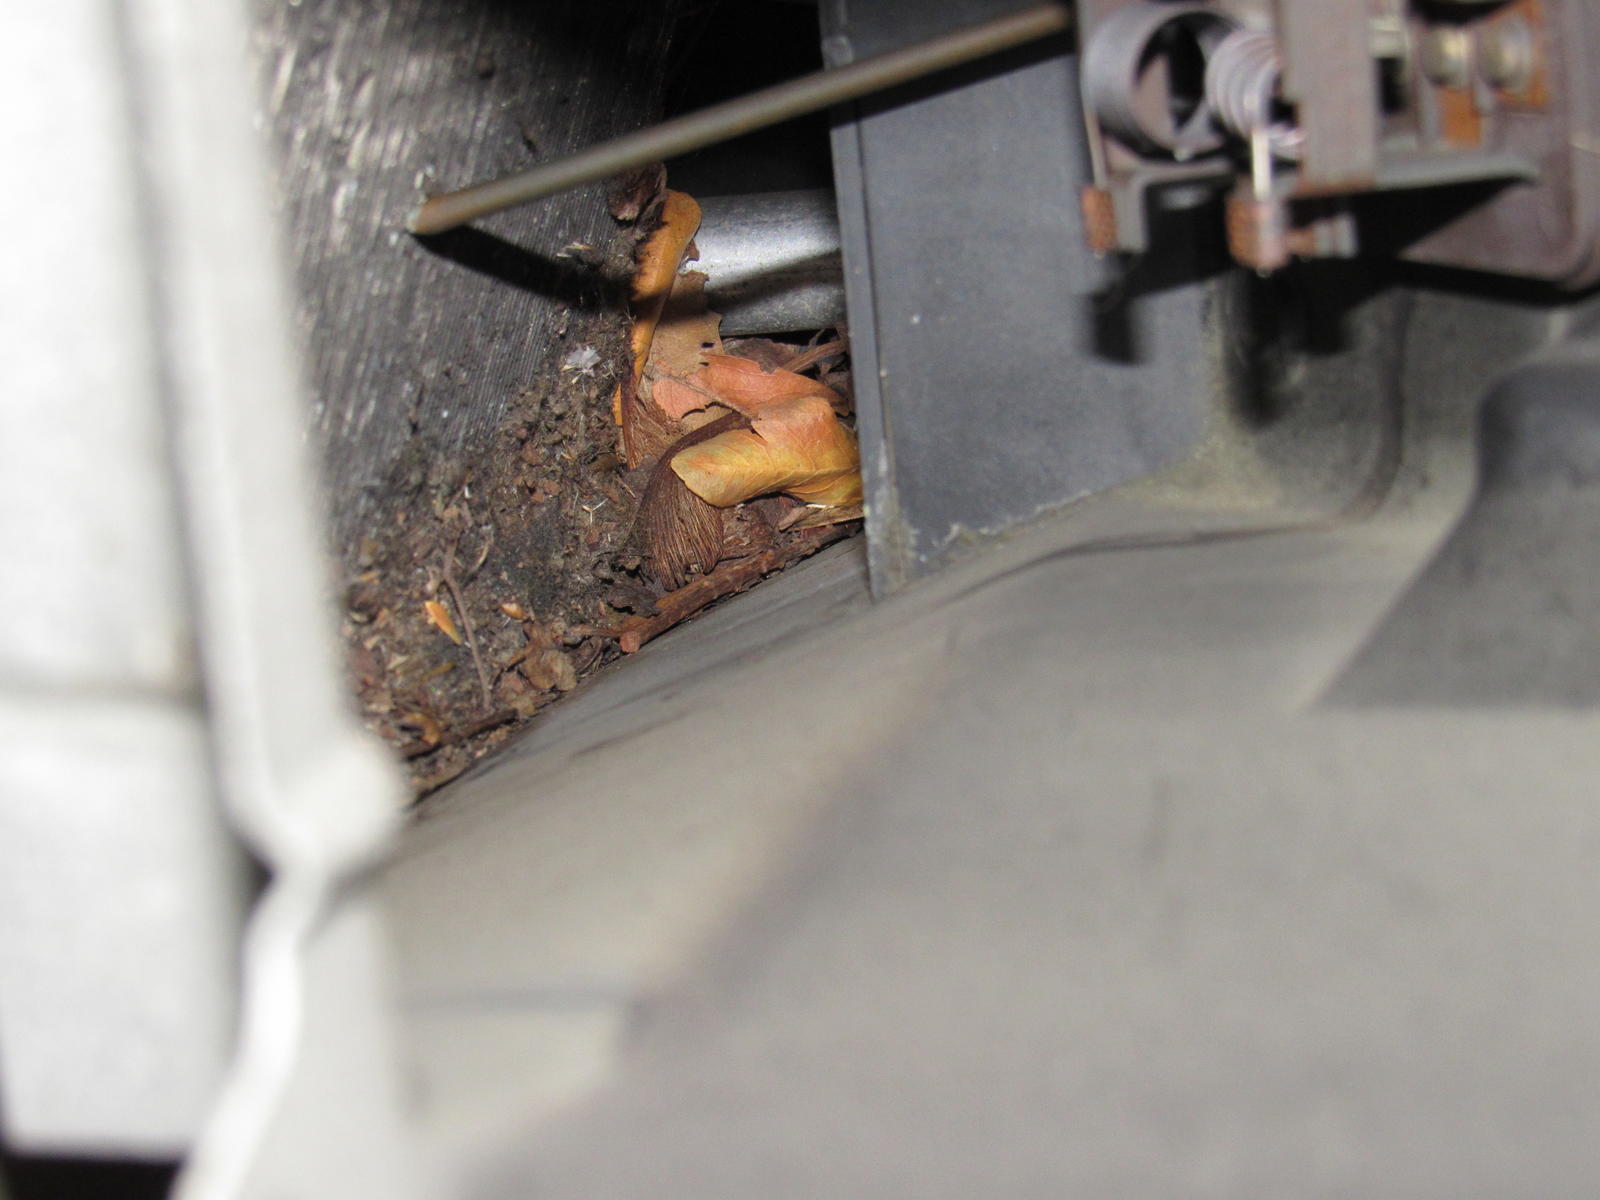
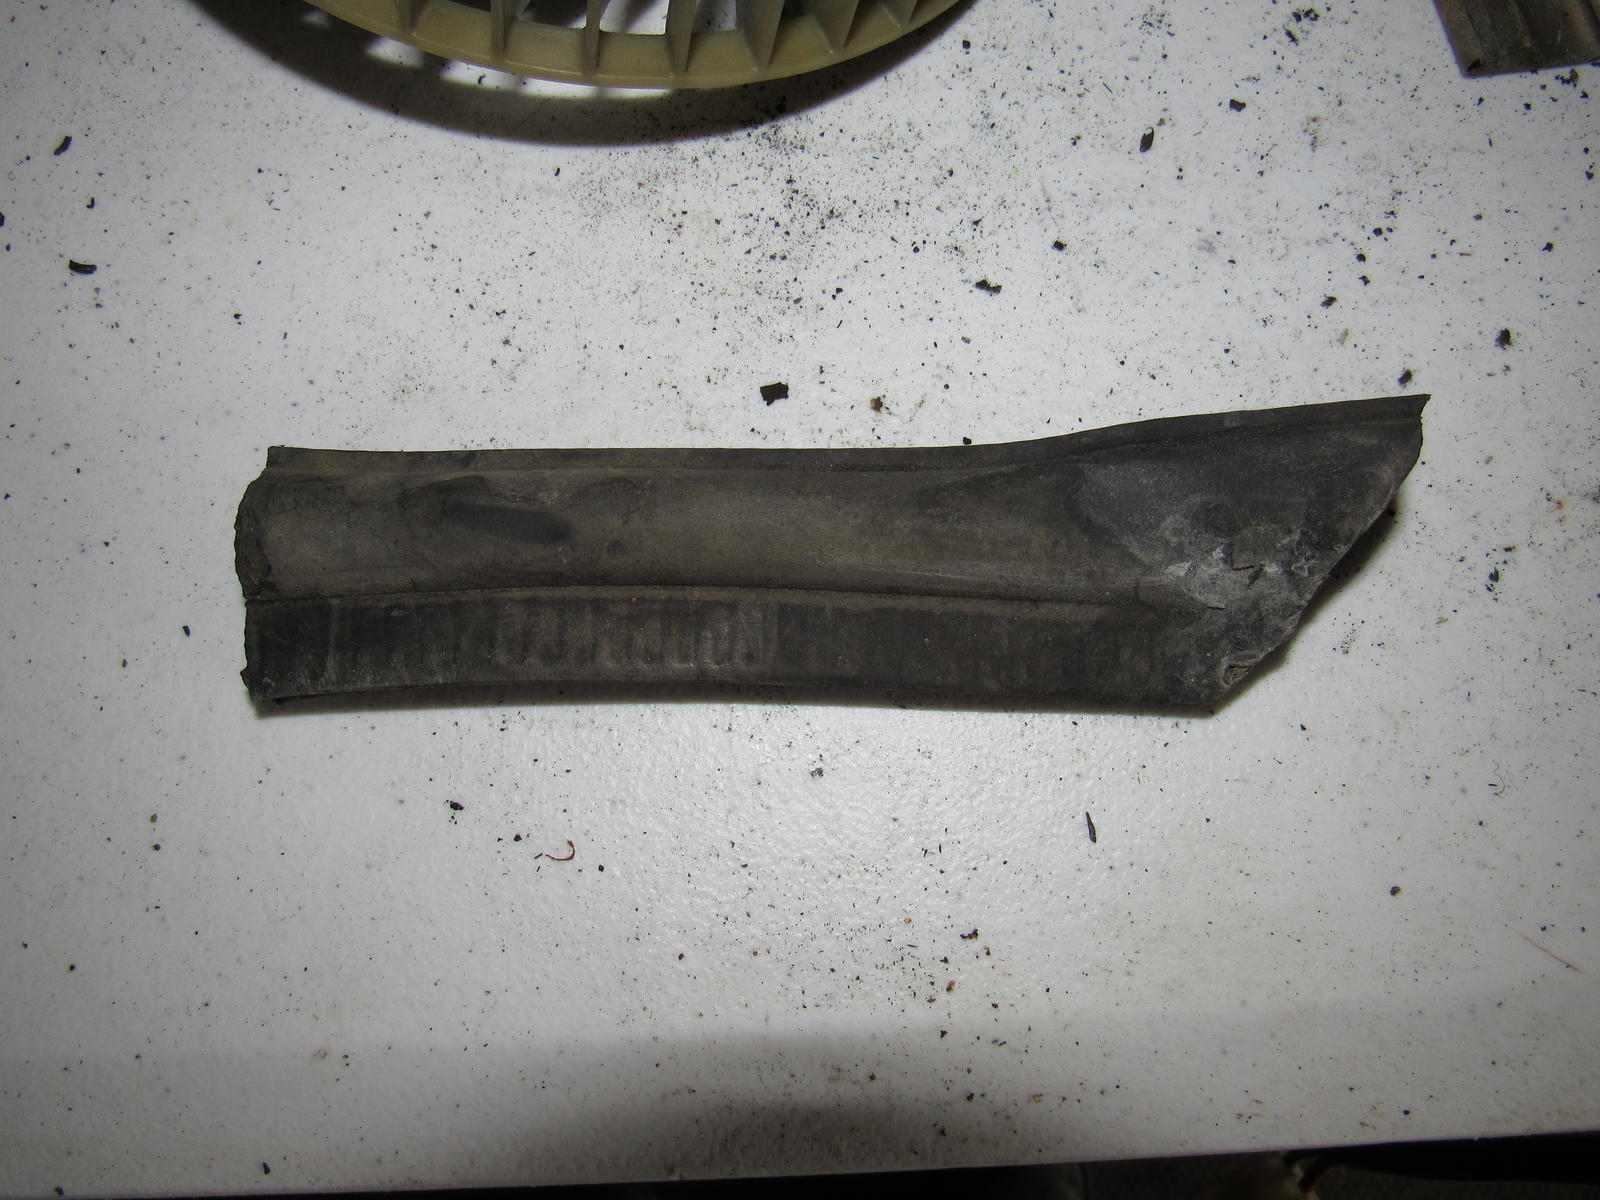
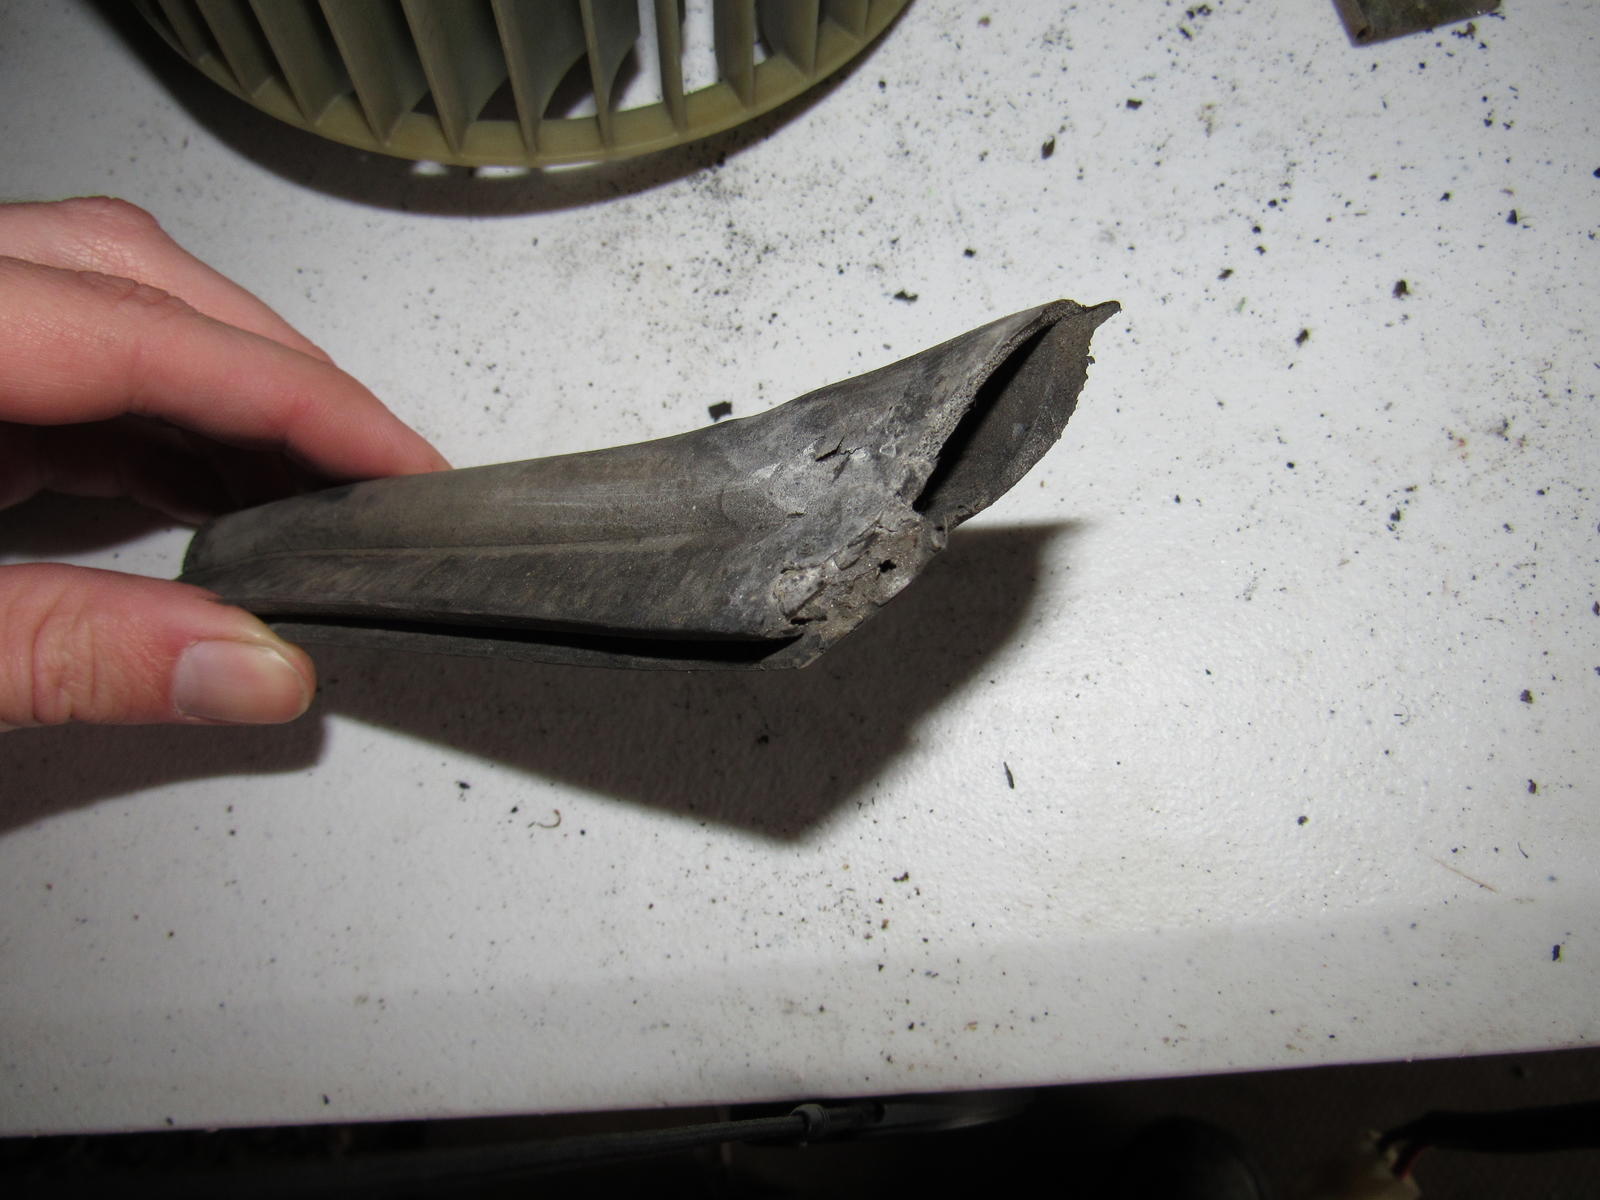
This rubber trim piece was loose in the blower compartment but can't figure out where it belongs.
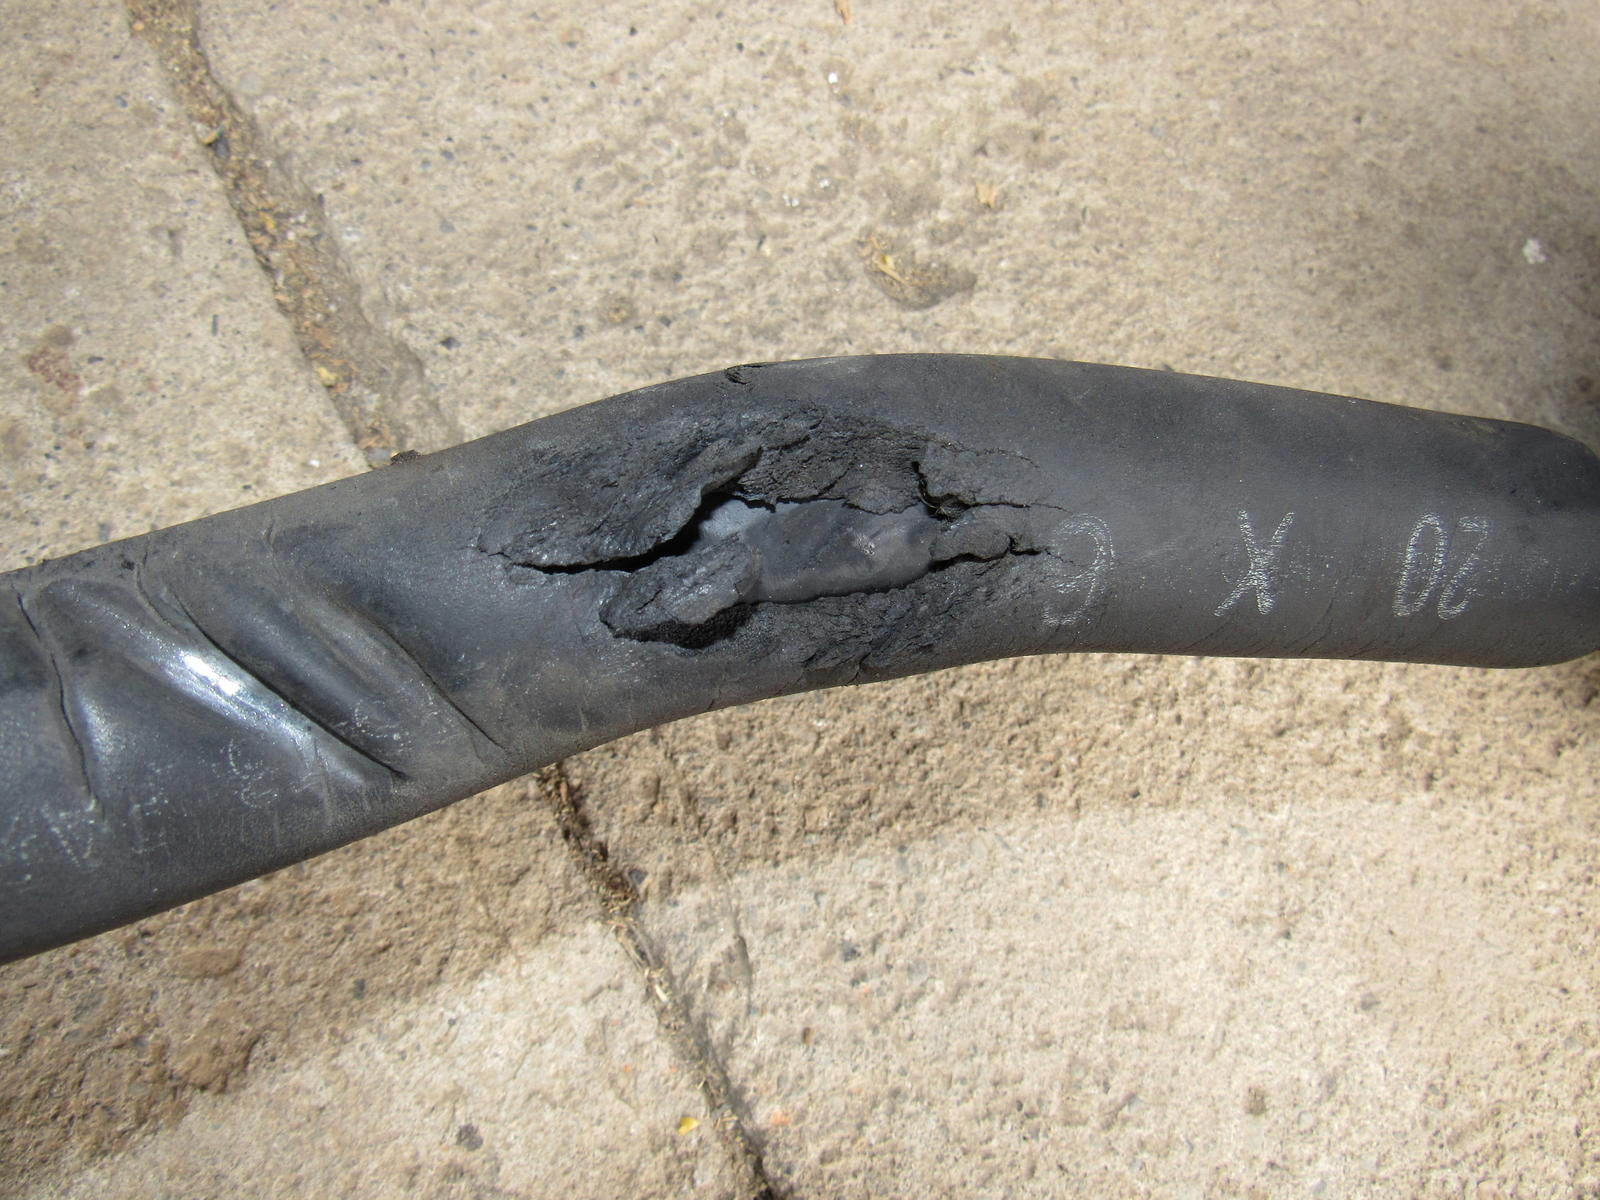
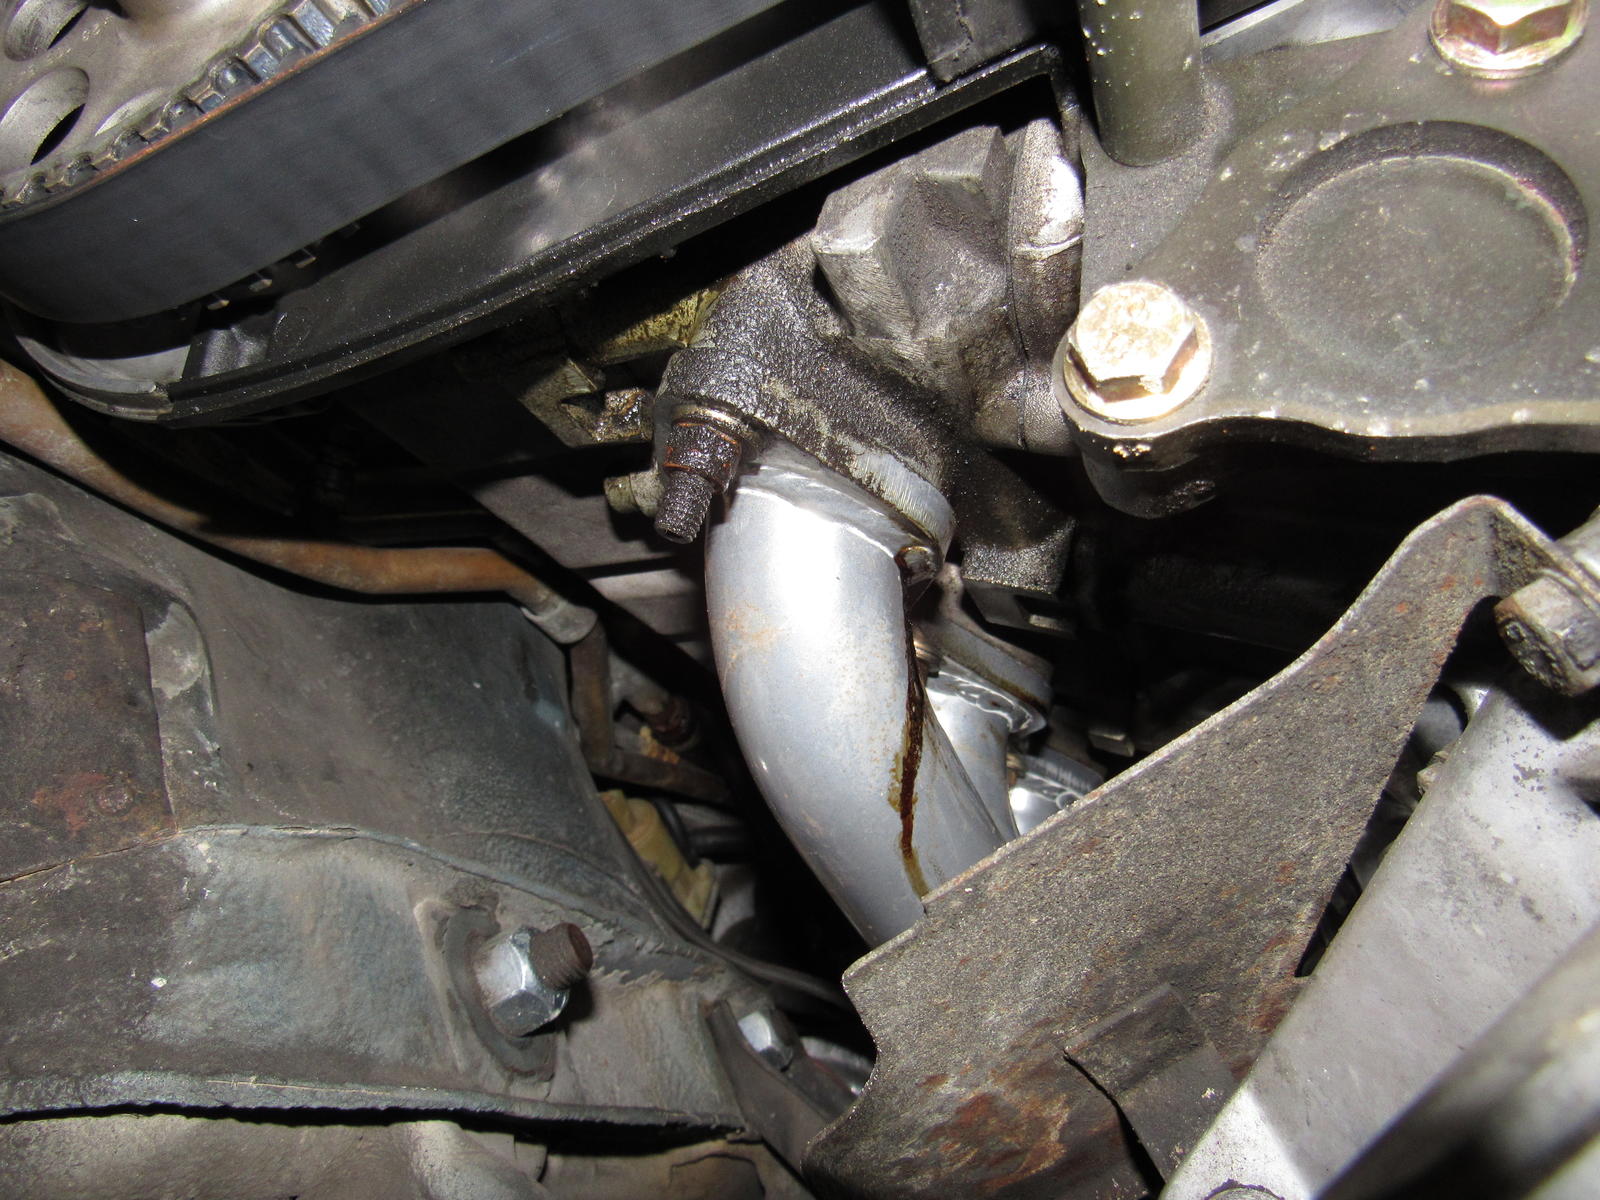
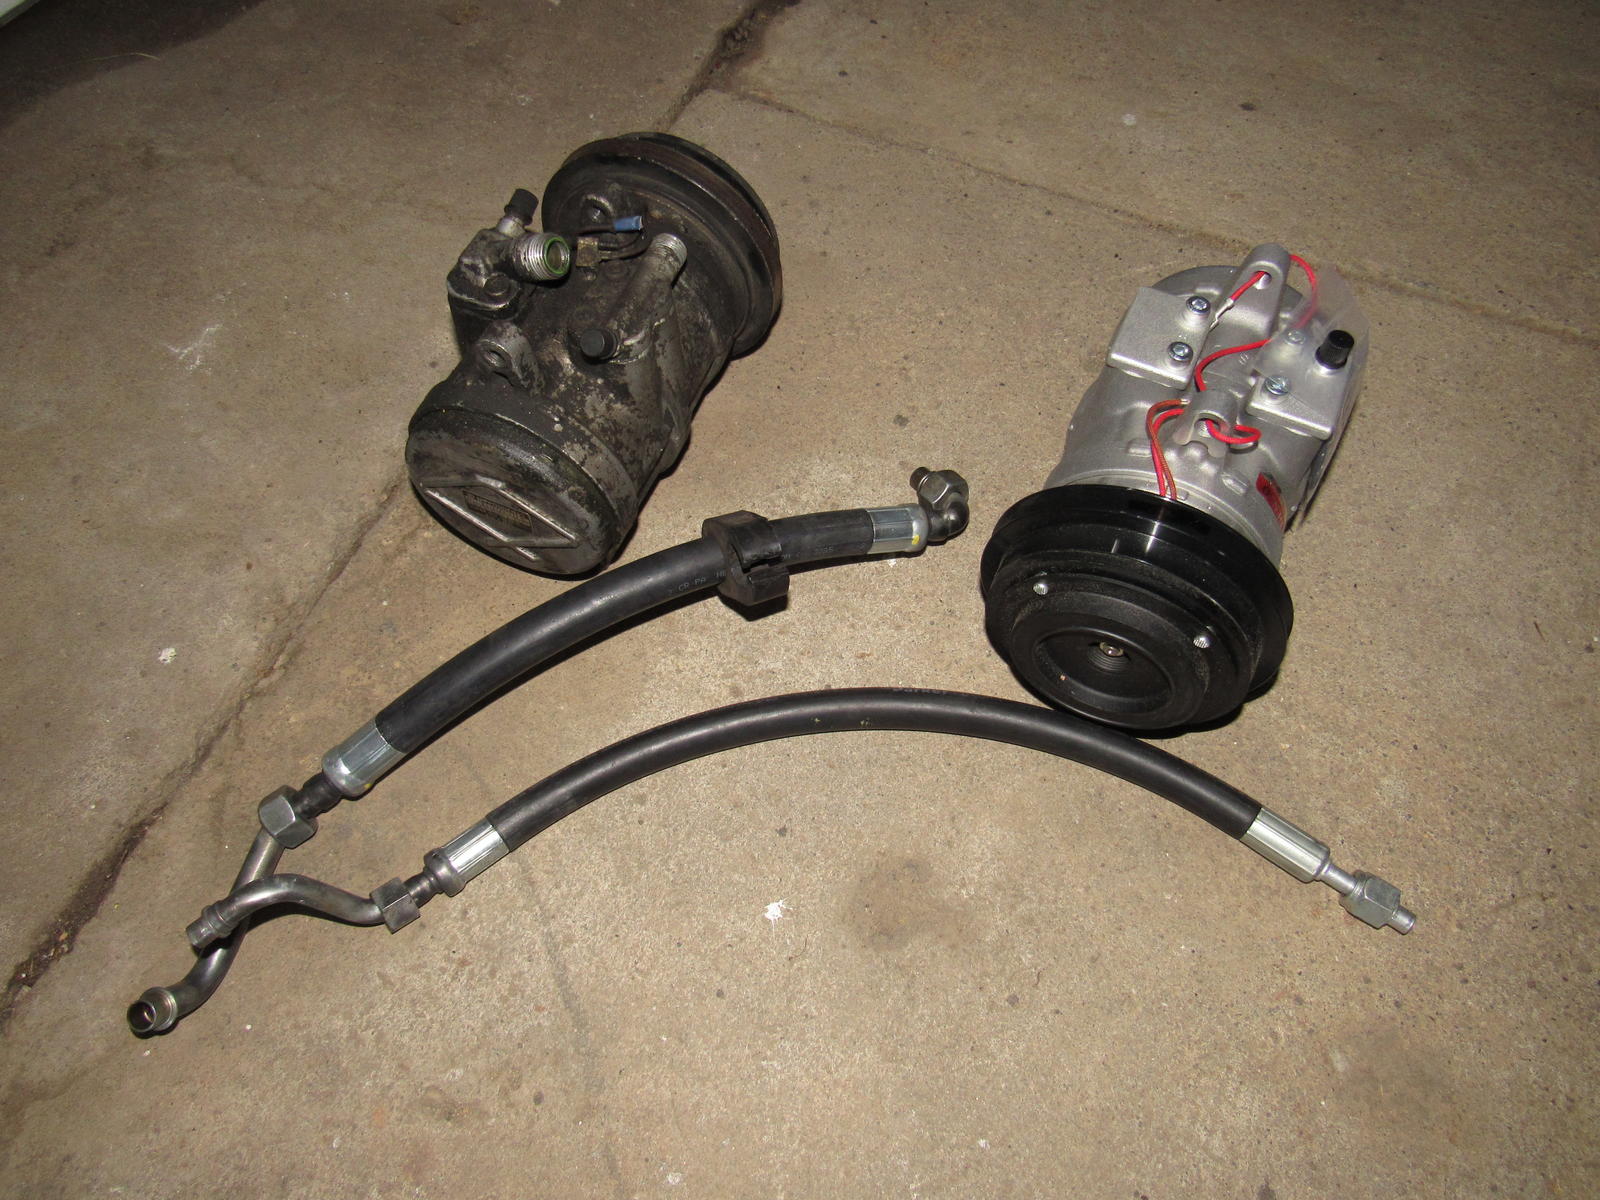
I have removed my AC compressor for replacement because it showed signs of leaking in the past (green dye around the seams). My AC system still held a good charge from August but I am replacing the two short rubber hoses and drier. Thankfully the PO replaced the long and difficult to extract line already
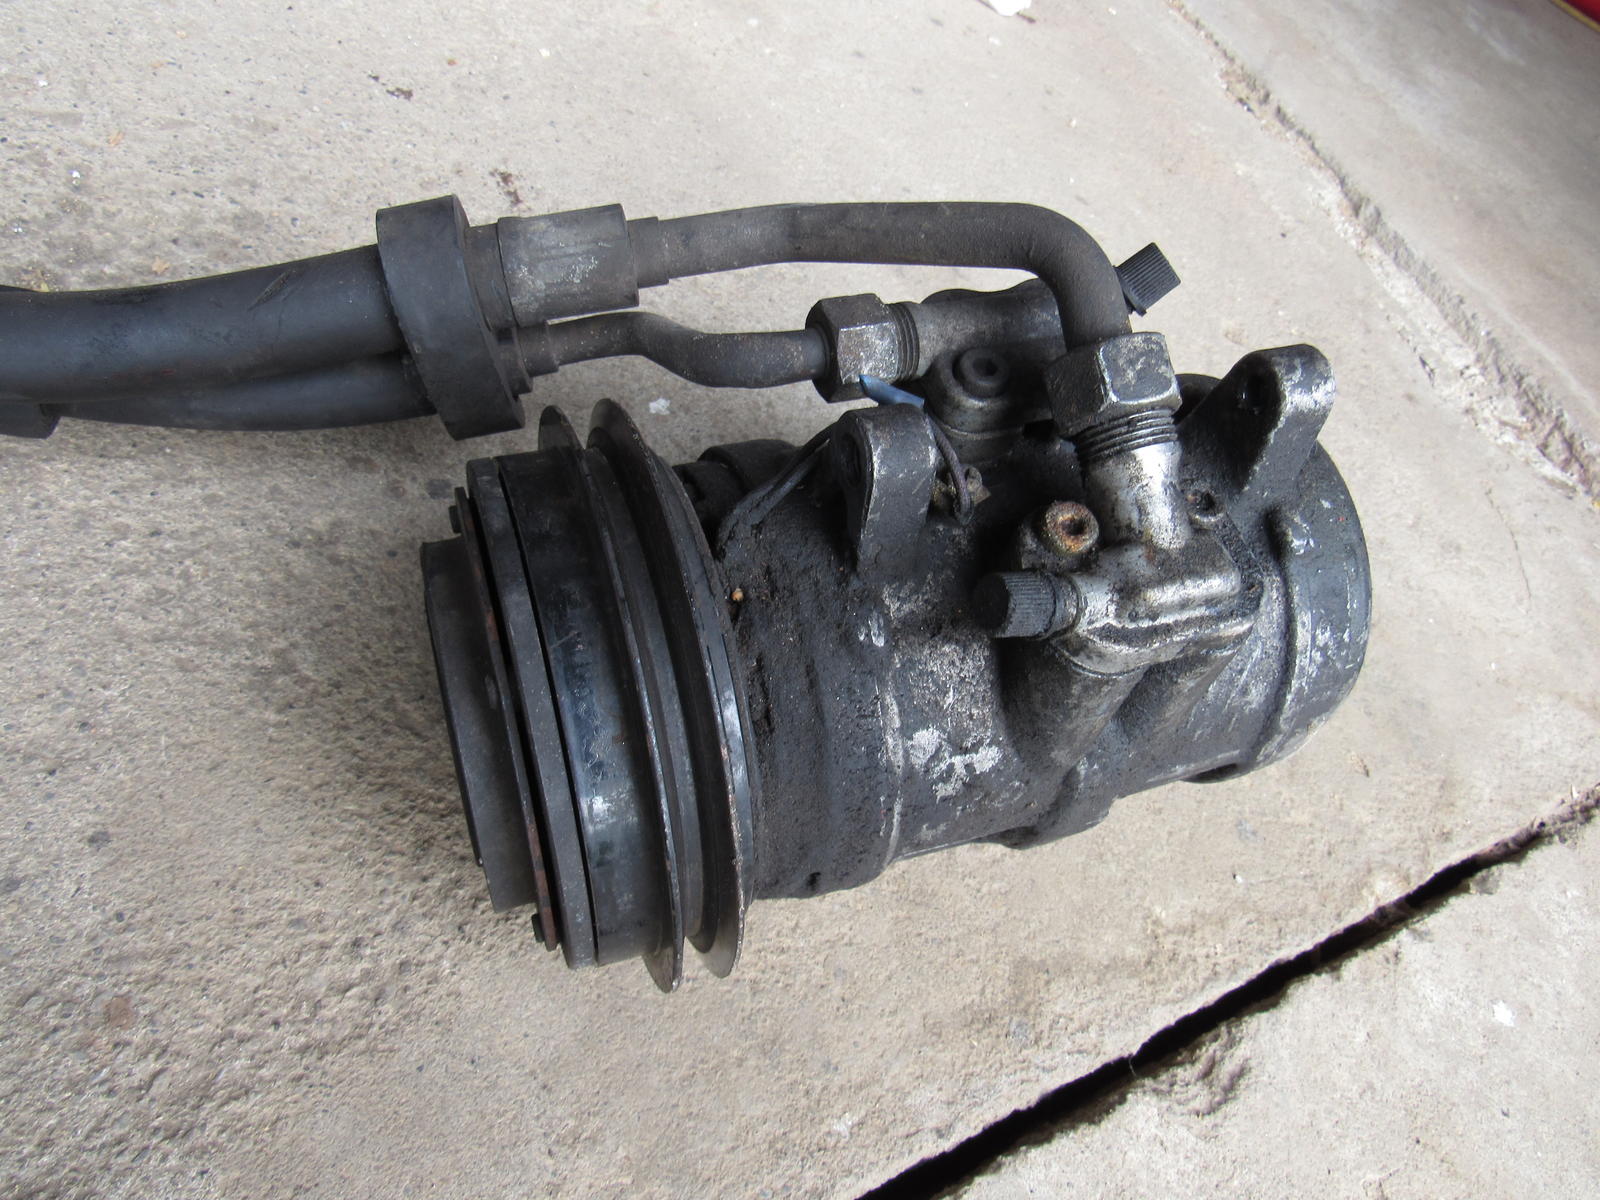
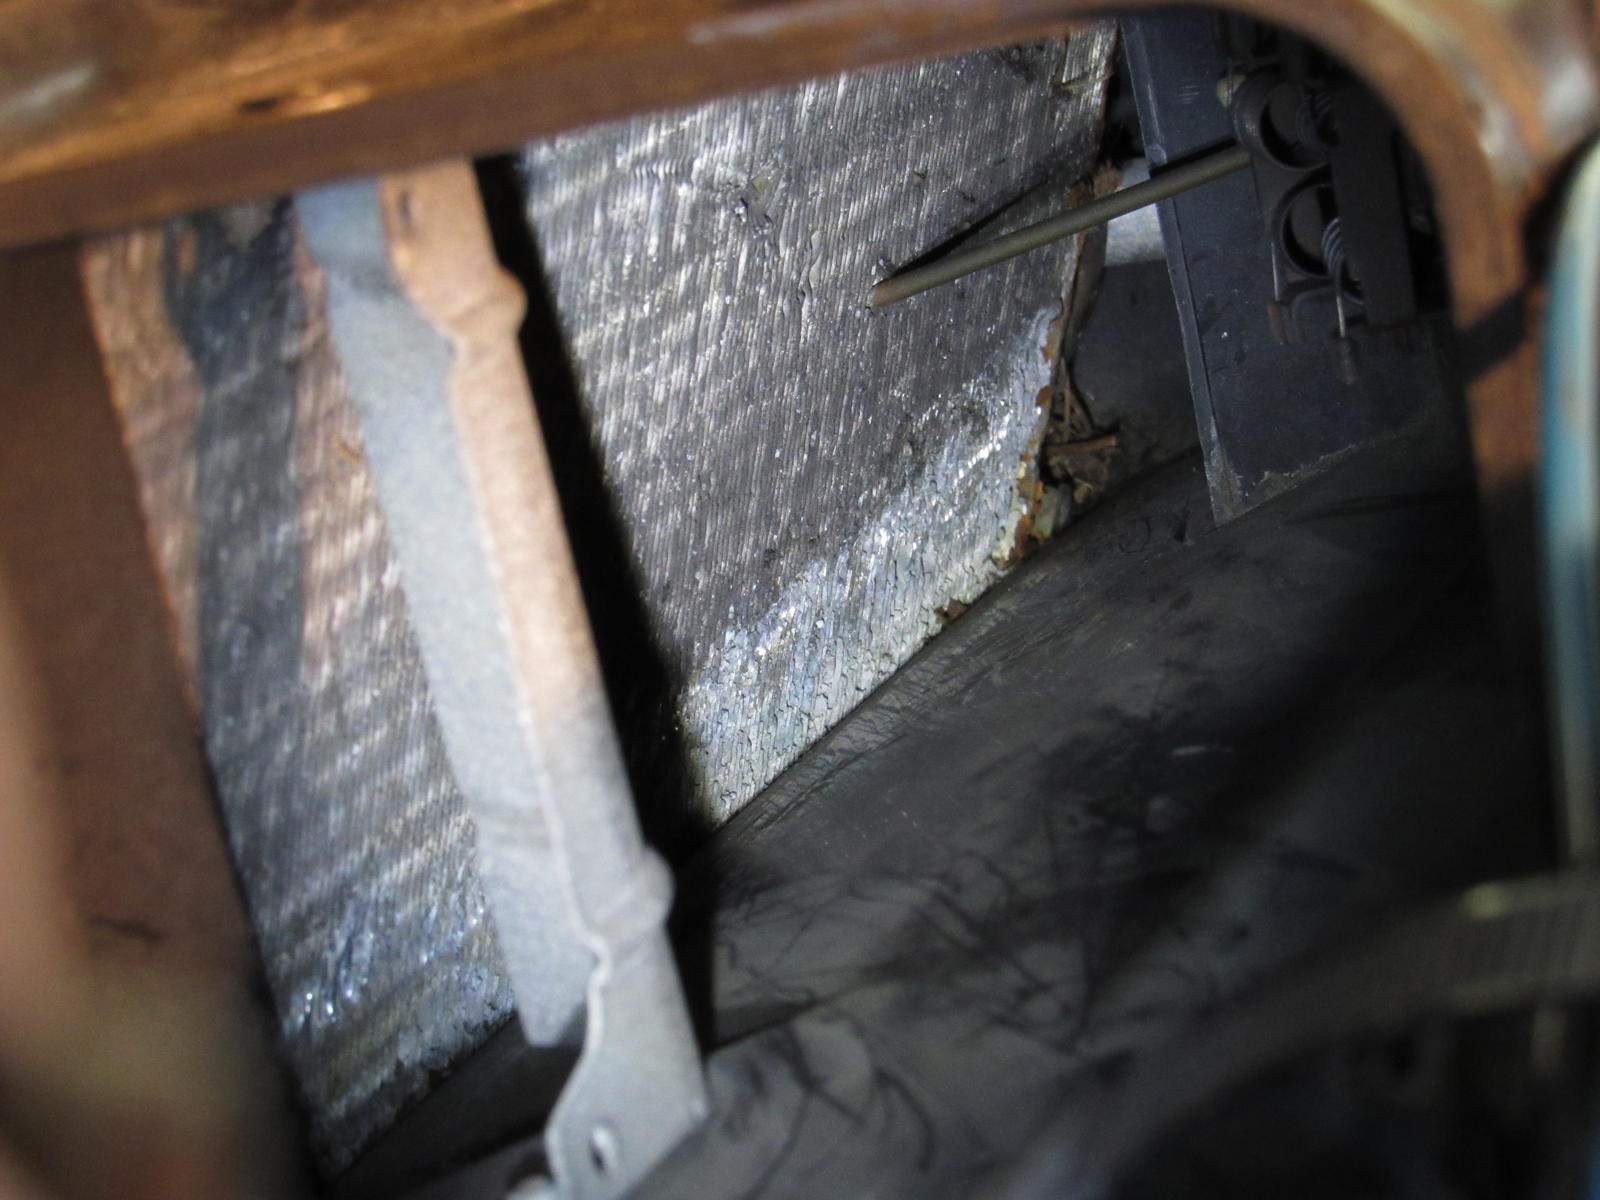
I will try to get the hoses rebuilt locally. One of them was being chafed through by the radiator. It would be a good idea for everyone to check this area and add some protection.
In my work I have found evidence of a leaking cam tower seal?
Other than that I have stripped down the front of the engine to replace my cam sprockets with these beauties.
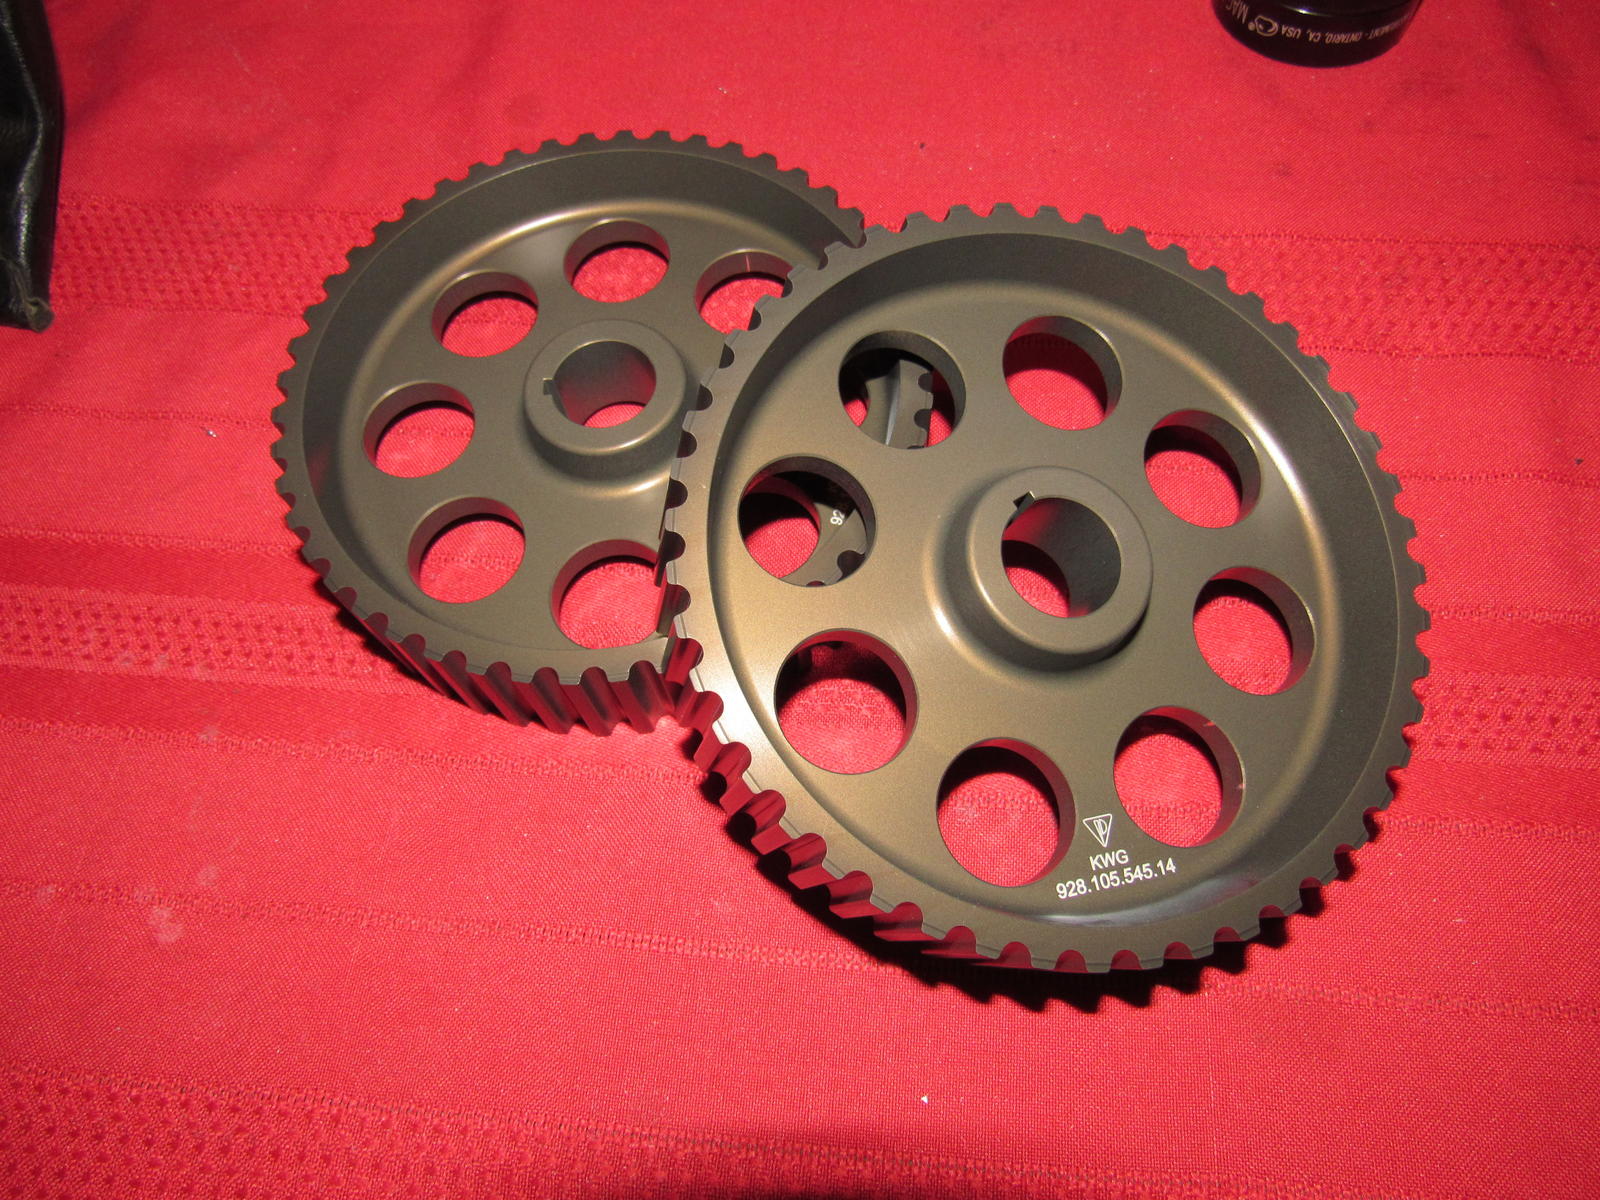
Does anybody still recoat sprockets? My oil pump sprocket has very faint wear that might be worth recoating, you know, while I'm in there. Also I am going to send my harmonic balancer to doctor damper and see what happens.
To celebrate one year of ownership I've listed everything done so far.
928 tasks completed.txt
The old odo gear was fine but discolored, it is actually made from a rubbery material.
The speedo needle was perfectly centered with the 'zero' dash before, upon reinstallation I aligned with the bottom of the dash to try and calibrate it a bit more accurate. An indicated 70 was closer to 65-66 on GPS.
I had already soldered the 'rivets' on the hard board of the circuit foil and cleaned all the contacts.
I did an LED conversion and am very happy with the results, I will create a separate thread with all the details and 'how tos'. I do have a problem of no signal for low coolant and have to figure something out for the turn signal indicator. With an LED it shines faint and constant but with an incandescent it pulses properly but very faintly. This is due to LED exterior turn signal bulbs.
I have taken apart my blower motor and it looks like the brushes are nearing end of life, I will order a new one.
This rubber trim piece was loose in the blower compartment but can't figure out where it belongs.
I have removed my AC compressor for replacement because it showed signs of leaking in the past (green dye around the seams). My AC system still held a good charge from August but I am replacing the two short rubber hoses and drier. Thankfully the PO replaced the long and difficult to extract line already
I will try to get the hoses rebuilt locally. One of them was being chafed through by the radiator. It would be a good idea for everyone to check this area and add some protection.
In my work I have found evidence of a leaking cam tower seal?
Other than that I have stripped down the front of the engine to replace my cam sprockets with these beauties.
Does anybody still recoat sprockets? My oil pump sprocket has very faint wear that might be worth recoating, you know, while I'm in there. Also I am going to send my harmonic balancer to doctor damper and see what happens.
To celebrate one year of ownership I've listed everything done so far.
928 tasks completed.txt
05-13-2017, 08:16 PM
#147
Burning Brakes
Thread Starter
I am pretty proud of myself today. I was able to split my HVAC unit apart to repair my broken center flap hinge. This is the flap behind the flap in the center console. Once all the clips are removed holding the back and front halves of the HVAC unit, the defrost vents are removed, and the defrost actuator is disconnected from the linkage, a quick tug on the front half releases from the sealant bond.
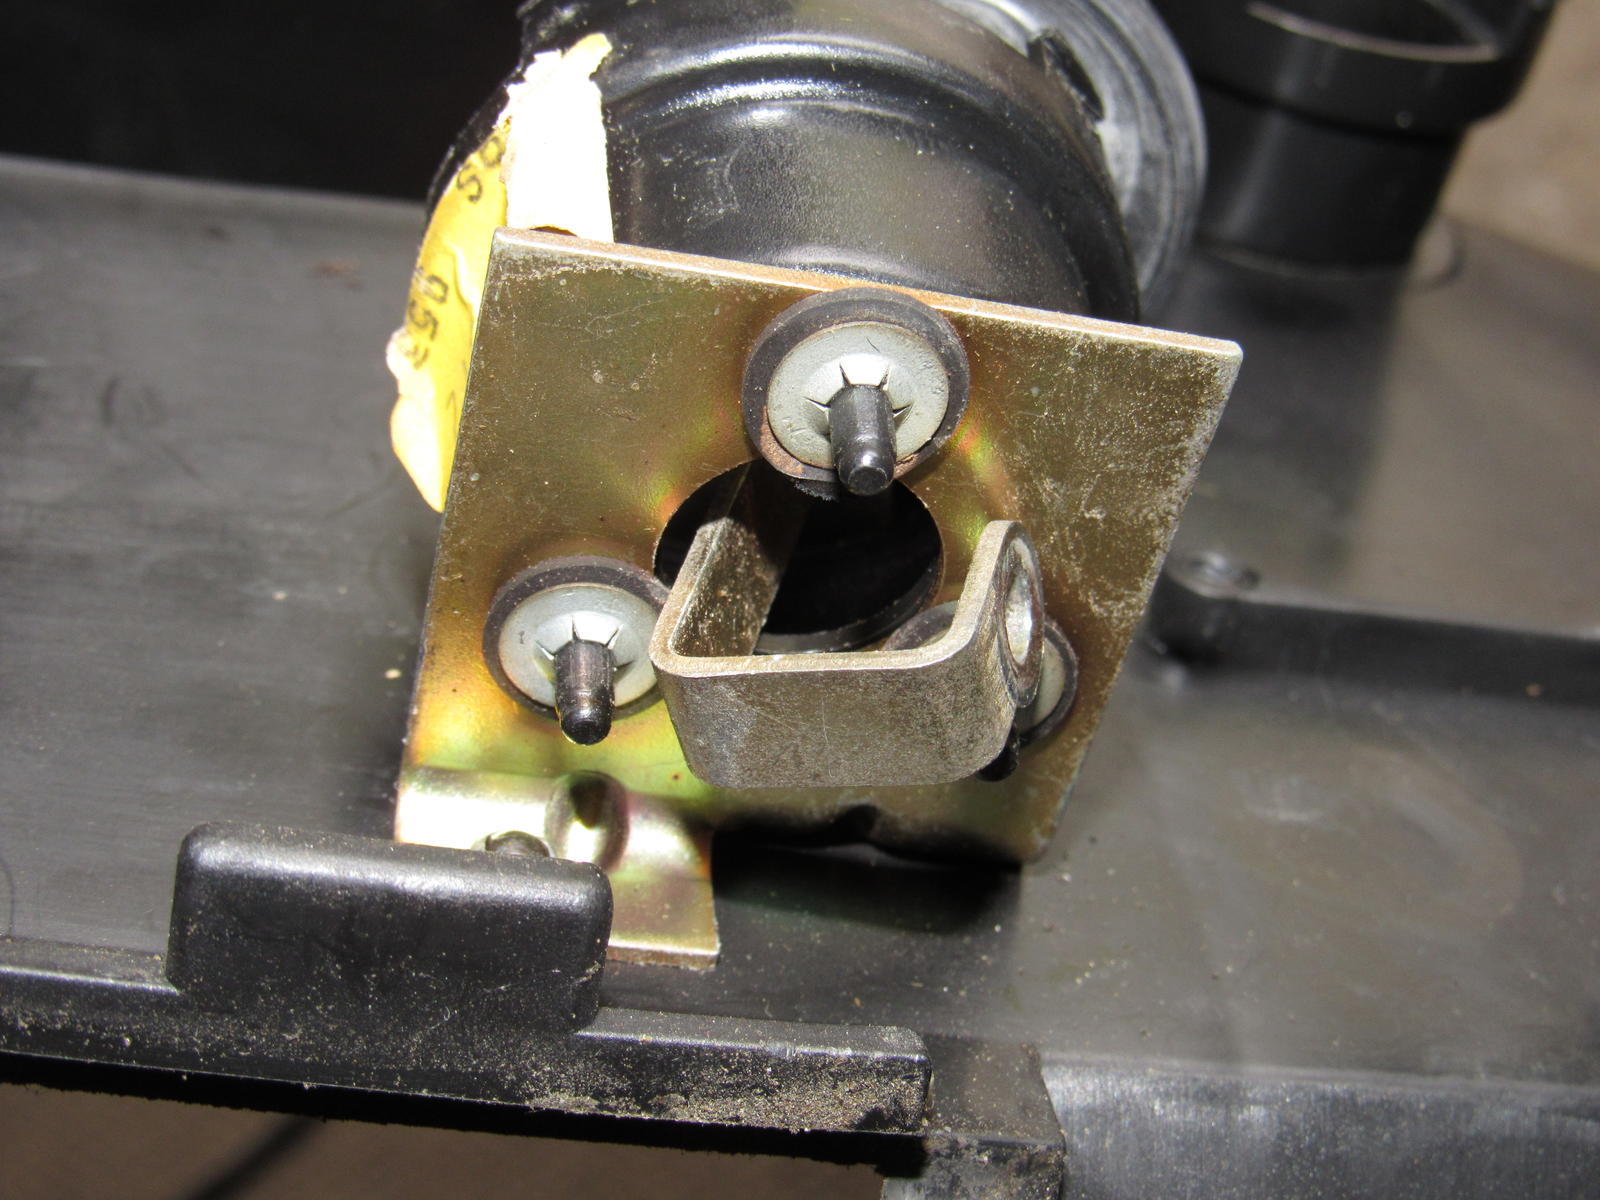
So here is the broken plastic hinge for the center flap. It has a BEHR part no 90 412 06 007 which I cannot find as a replacement but this was such a poor design I would not install a new one.
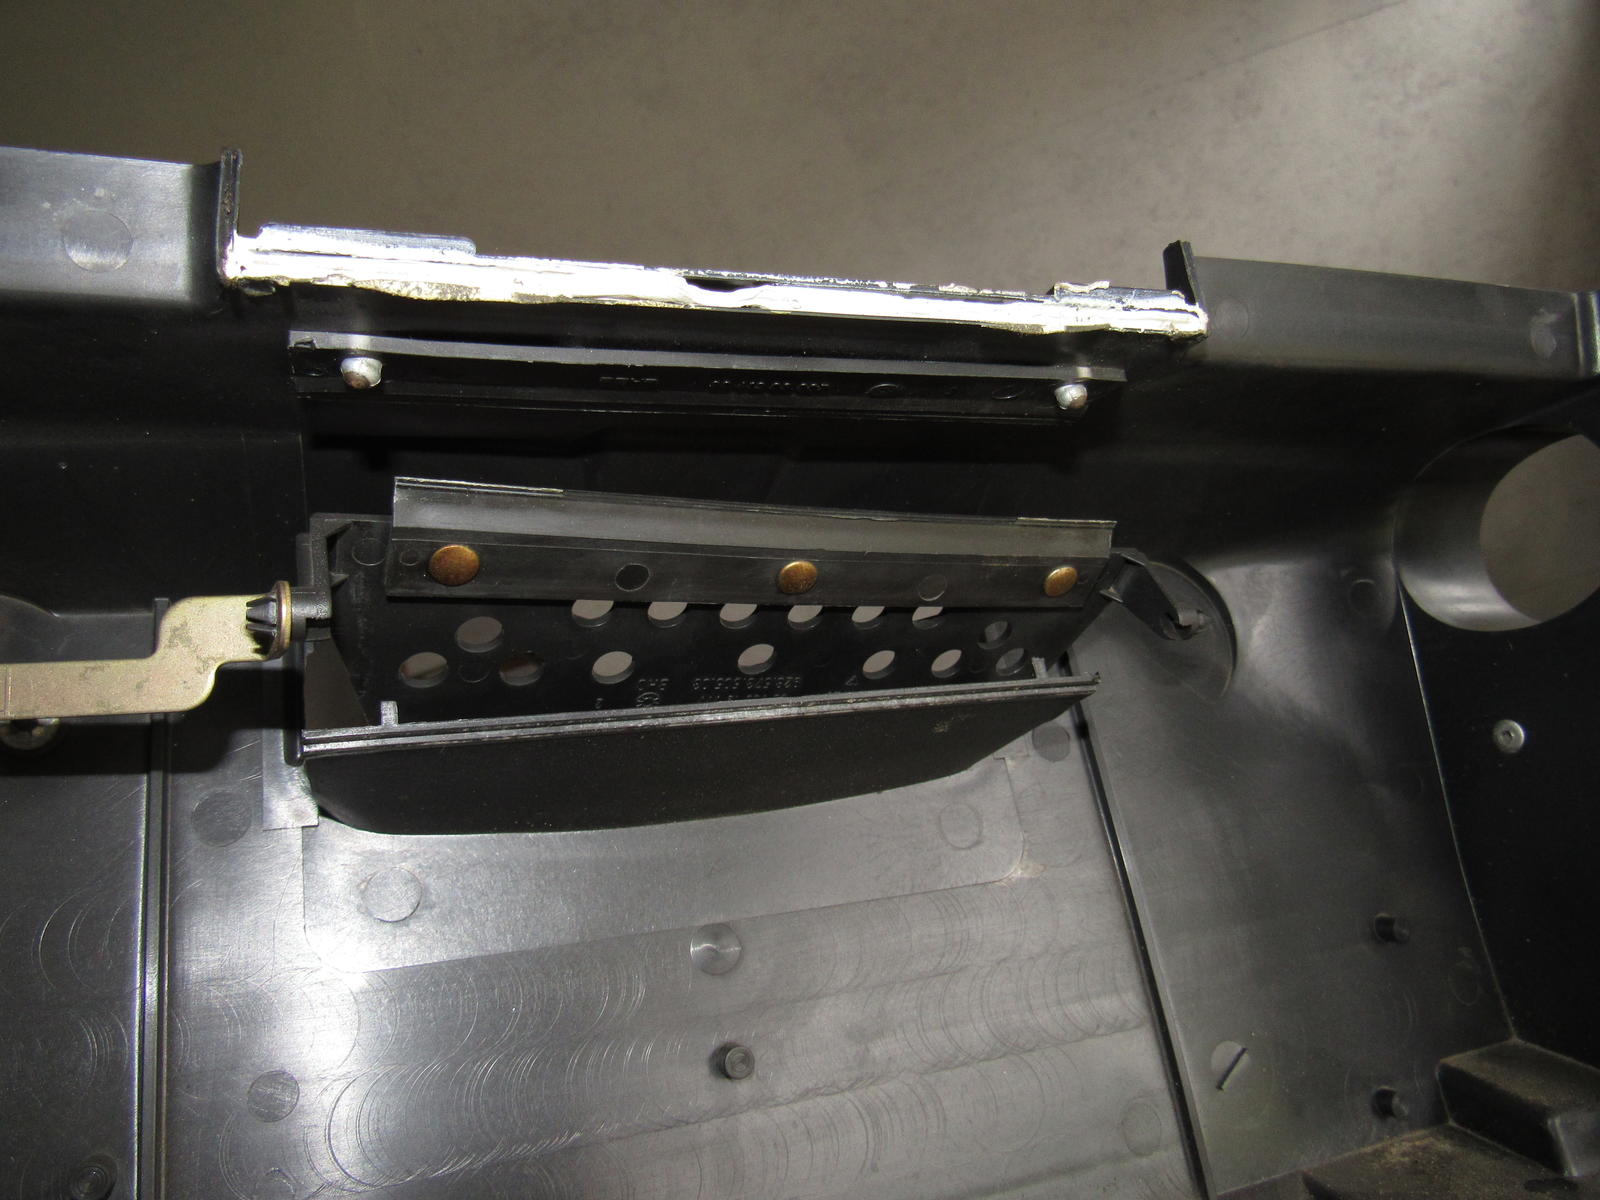
Here is my solution and one that I would recommend to anyone facing this. I purchased 2" narrow hinges with fixed pins (I don't need the pins falling out in the future) that when installed using some of the existing mounting holes, match the fulcrum point of the stock hinge perfectly.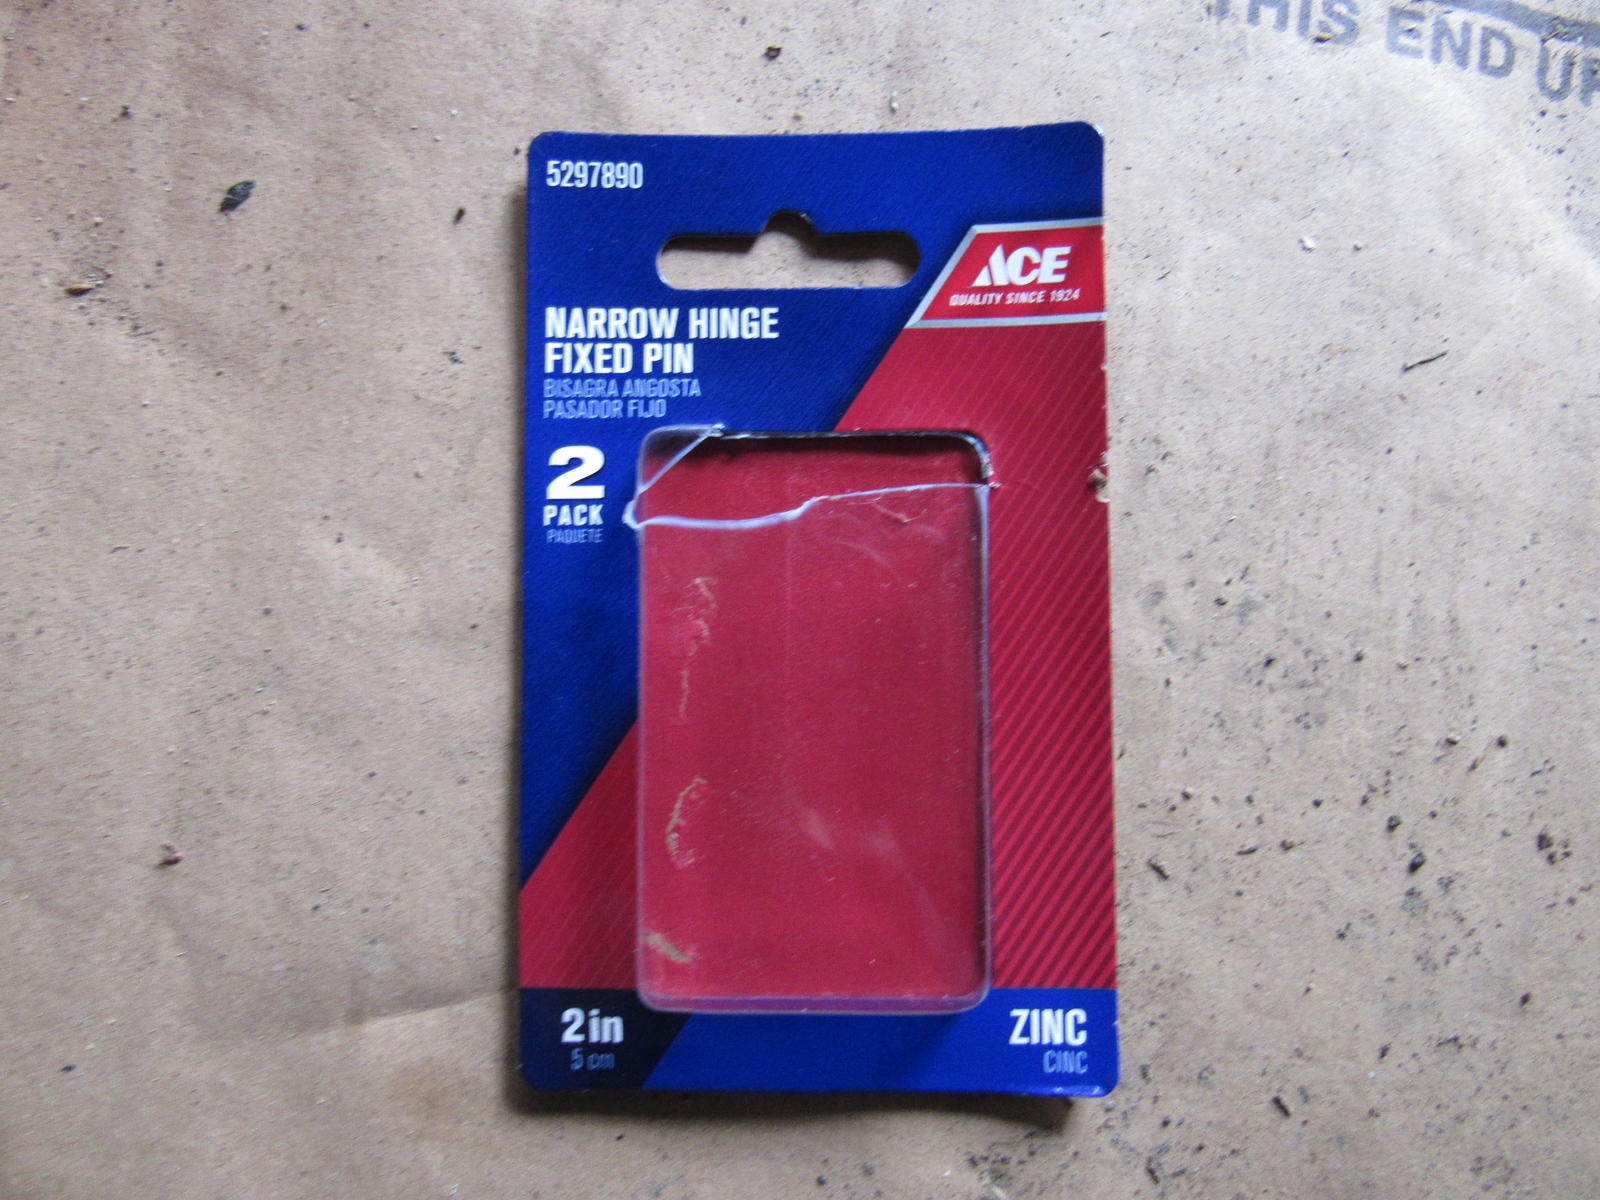
I drilled out the rivets from the old hinge to remove it and mounted the new hinges using the same outermost holes and drilling new holes for the inner. I used rivets with small washers to keep from pulling through the plastic.
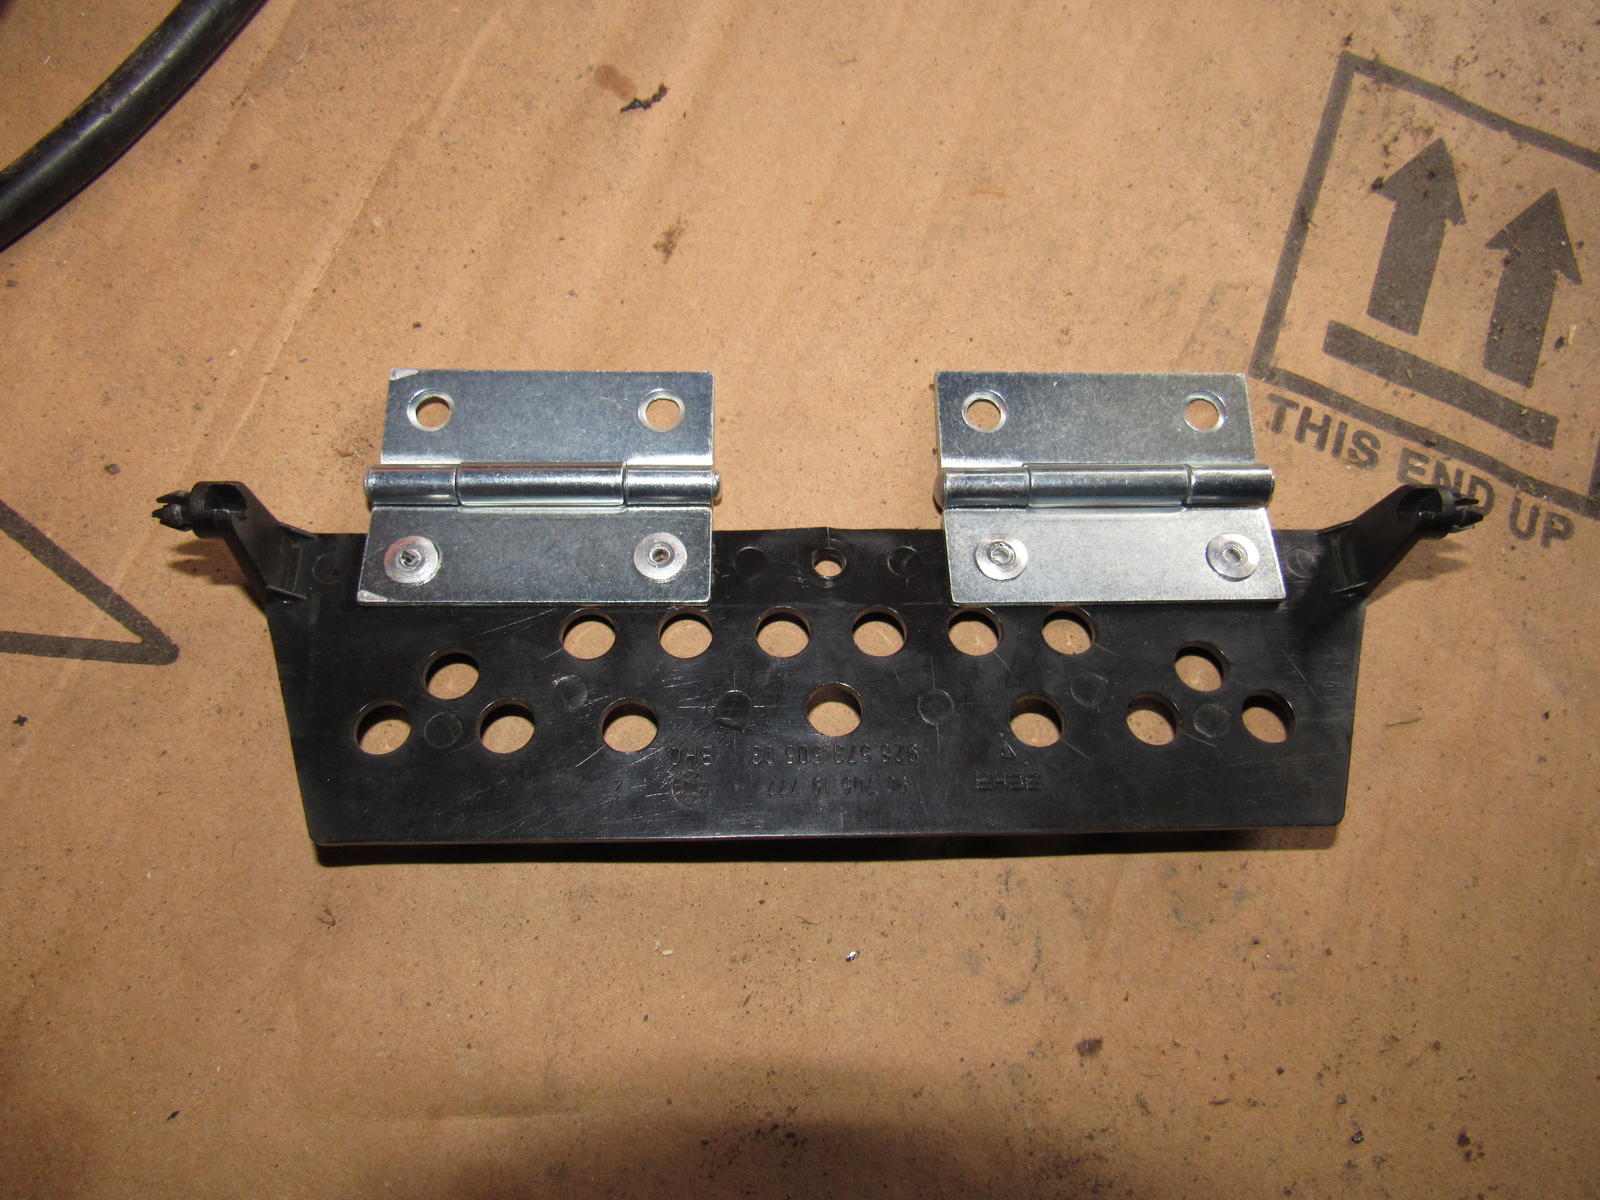
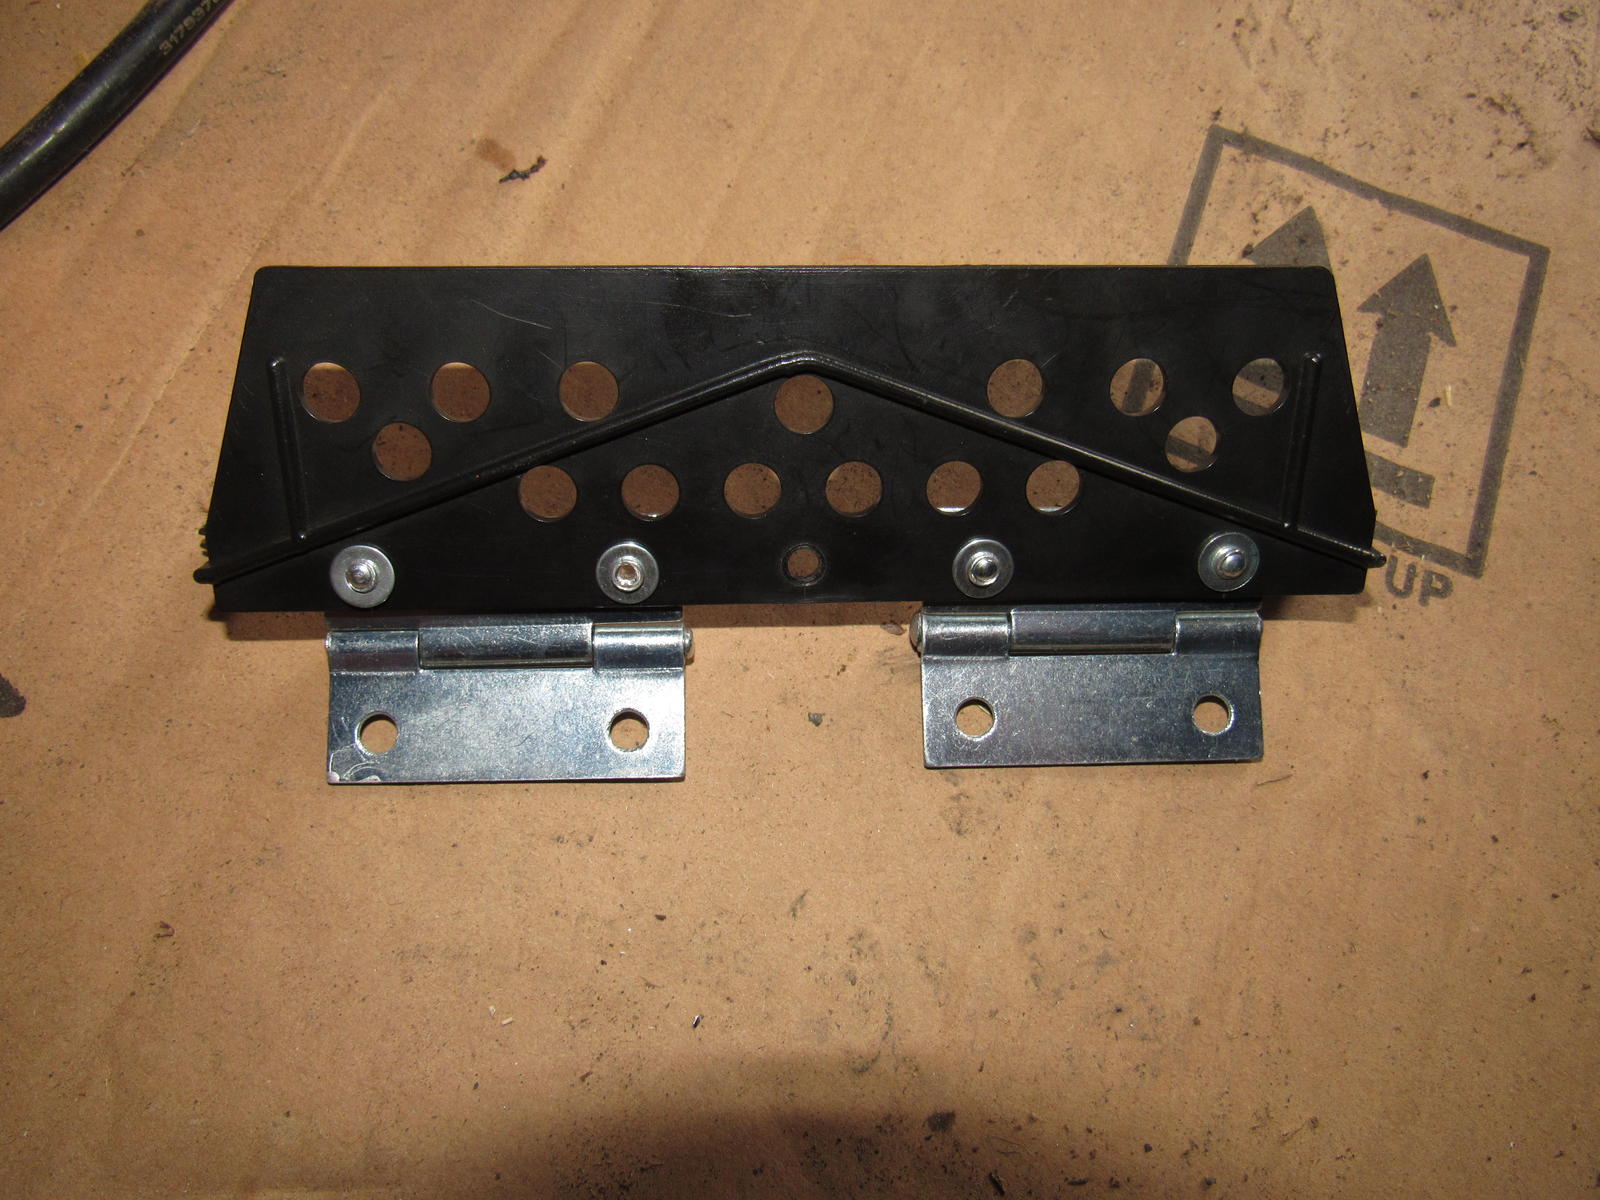
Finished product:
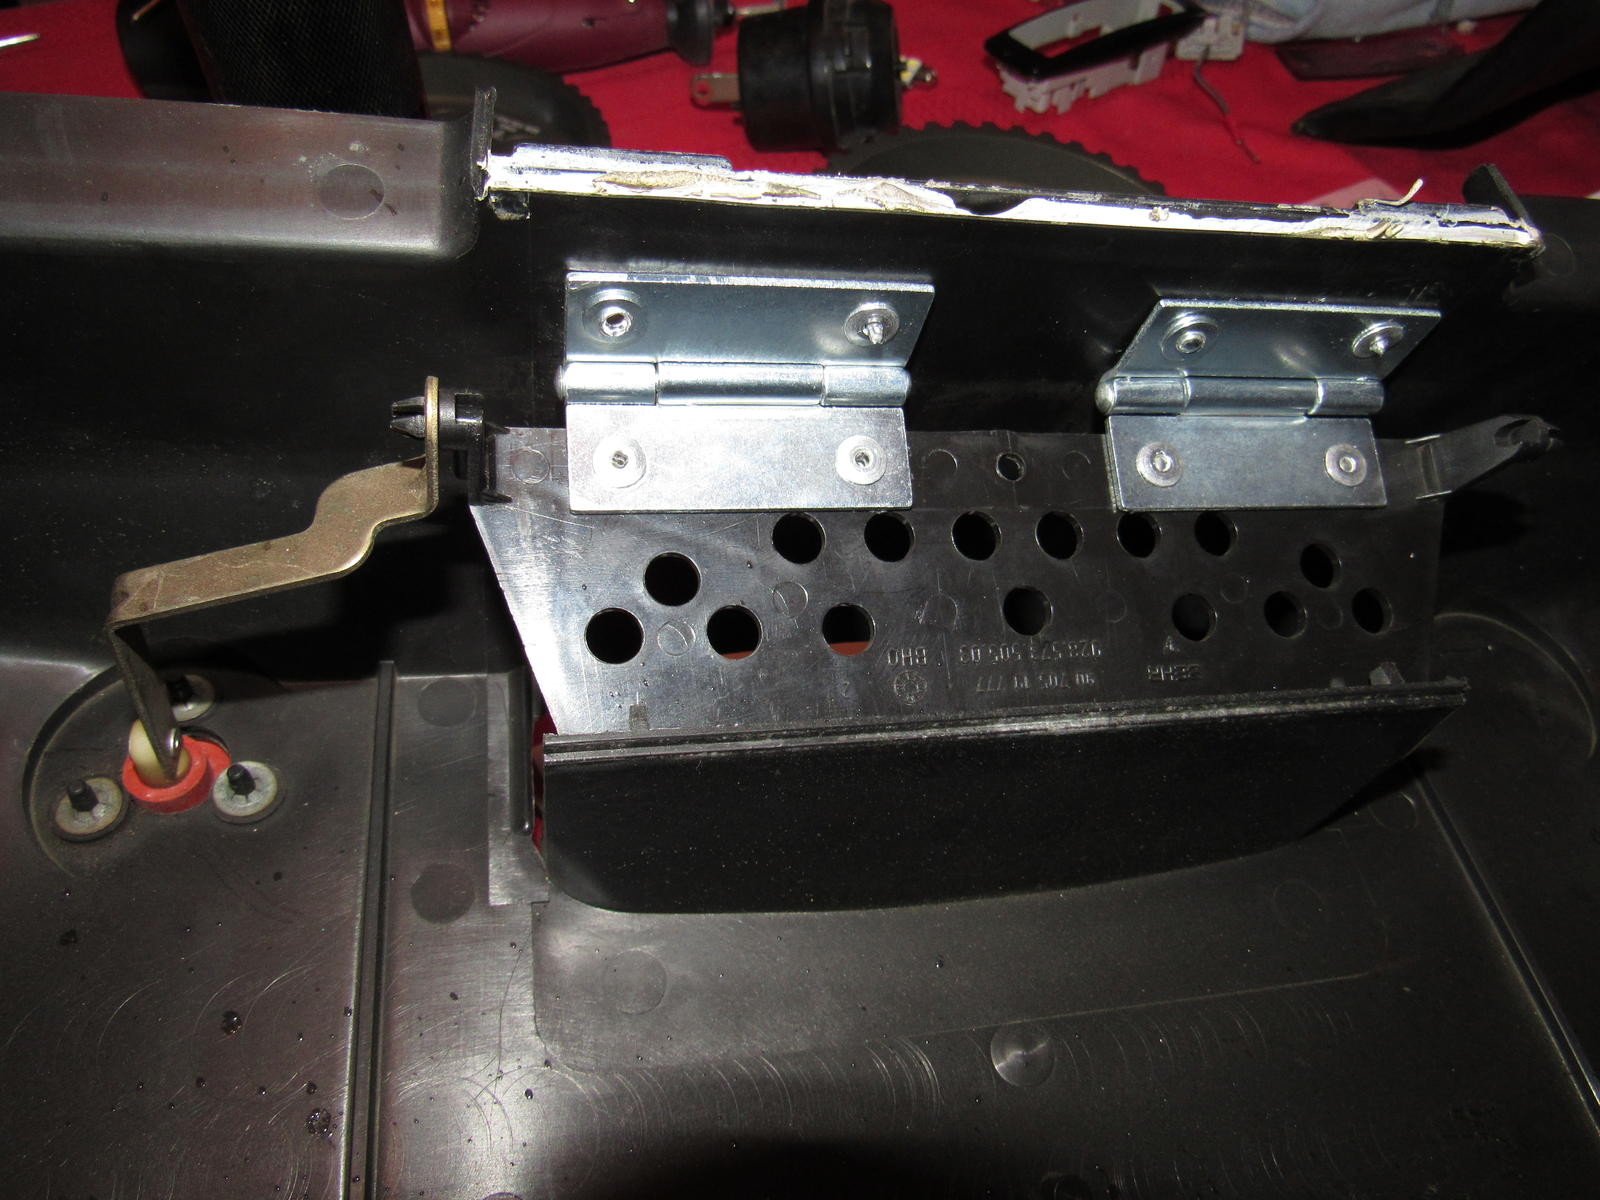
I have a video of the fix in action. It works perfectly!
Of course I replaced the rubber diaphragm of the center flap vac pod. The old was getting thin around the top:
New:
Also changed the footwell flap rubber. You have to bend the arm to get it in and out.
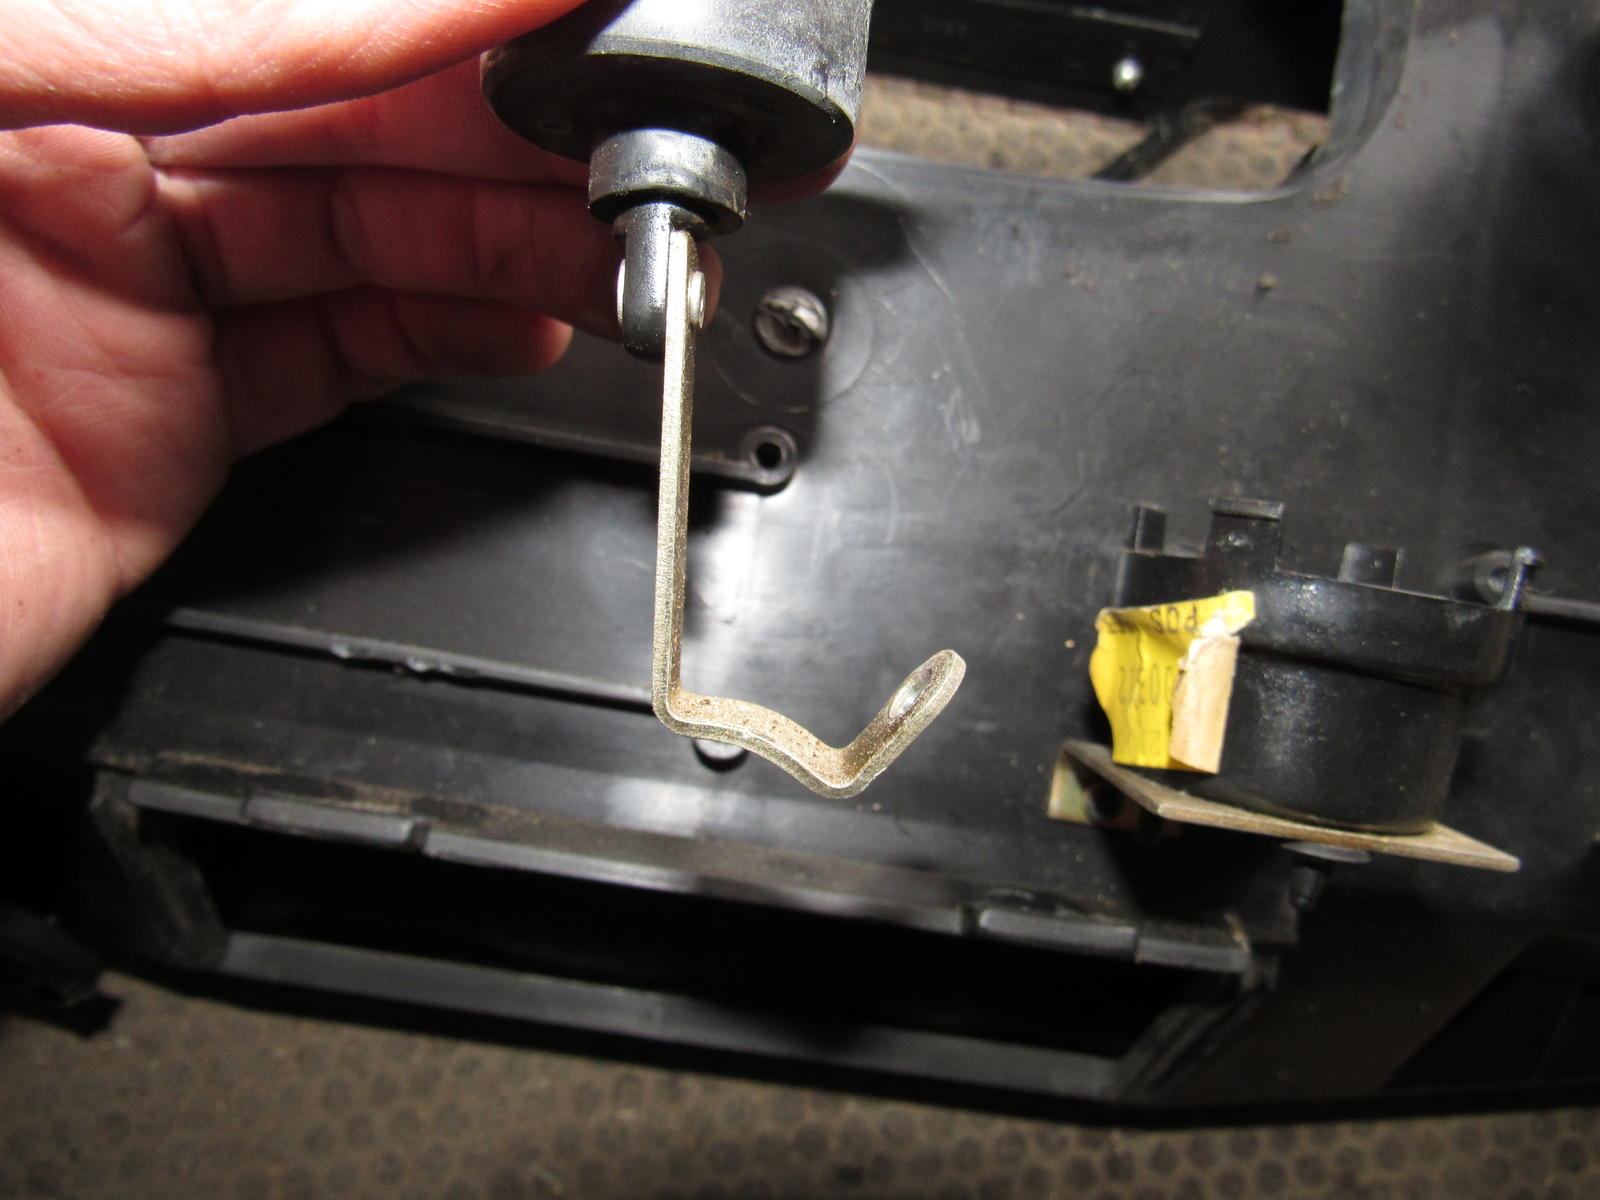
Old:
New:
Reinstalled:
I finished off by replacing the innards of the defrost vac pod.
The nice part now is I can start reinstalling parts. The HVAC unit halves were sealed with a white caulk, I think I will use strip caulk.
So here is the broken plastic hinge for the center flap. It has a BEHR part no 90 412 06 007 which I cannot find as a replacement but this was such a poor design I would not install a new one.
Here is my solution and one that I would recommend to anyone facing this. I purchased 2" narrow hinges with fixed pins (I don't need the pins falling out in the future) that when installed using some of the existing mounting holes, match the fulcrum point of the stock hinge perfectly.
I drilled out the rivets from the old hinge to remove it and mounted the new hinges using the same outermost holes and drilling new holes for the inner. I used rivets with small washers to keep from pulling through the plastic.
Finished product:
I have a video of the fix in action. It works perfectly!
Of course I replaced the rubber diaphragm of the center flap vac pod. The old was getting thin around the top:
New:
Also changed the footwell flap rubber. You have to bend the arm to get it in and out.
Old:
New:
Reinstalled:
I finished off by replacing the innards of the defrost vac pod.
The nice part now is I can start reinstalling parts. The HVAC unit halves were sealed with a white caulk, I think I will use strip caulk.
05-14-2017, 10:40 PM
#149
Burning Brakes
Thread Starter
I replaced the left side lower window outside seal. Not a bad job, you just have to take your time making sure it is properly installed as you slide it forward. The old rubber was falling apart and shrunken. When I washed the car, the door would fill with water! I did notice that my window is loose, must be the white window guides that slide up and down the tube are worn out.
Before:
After:
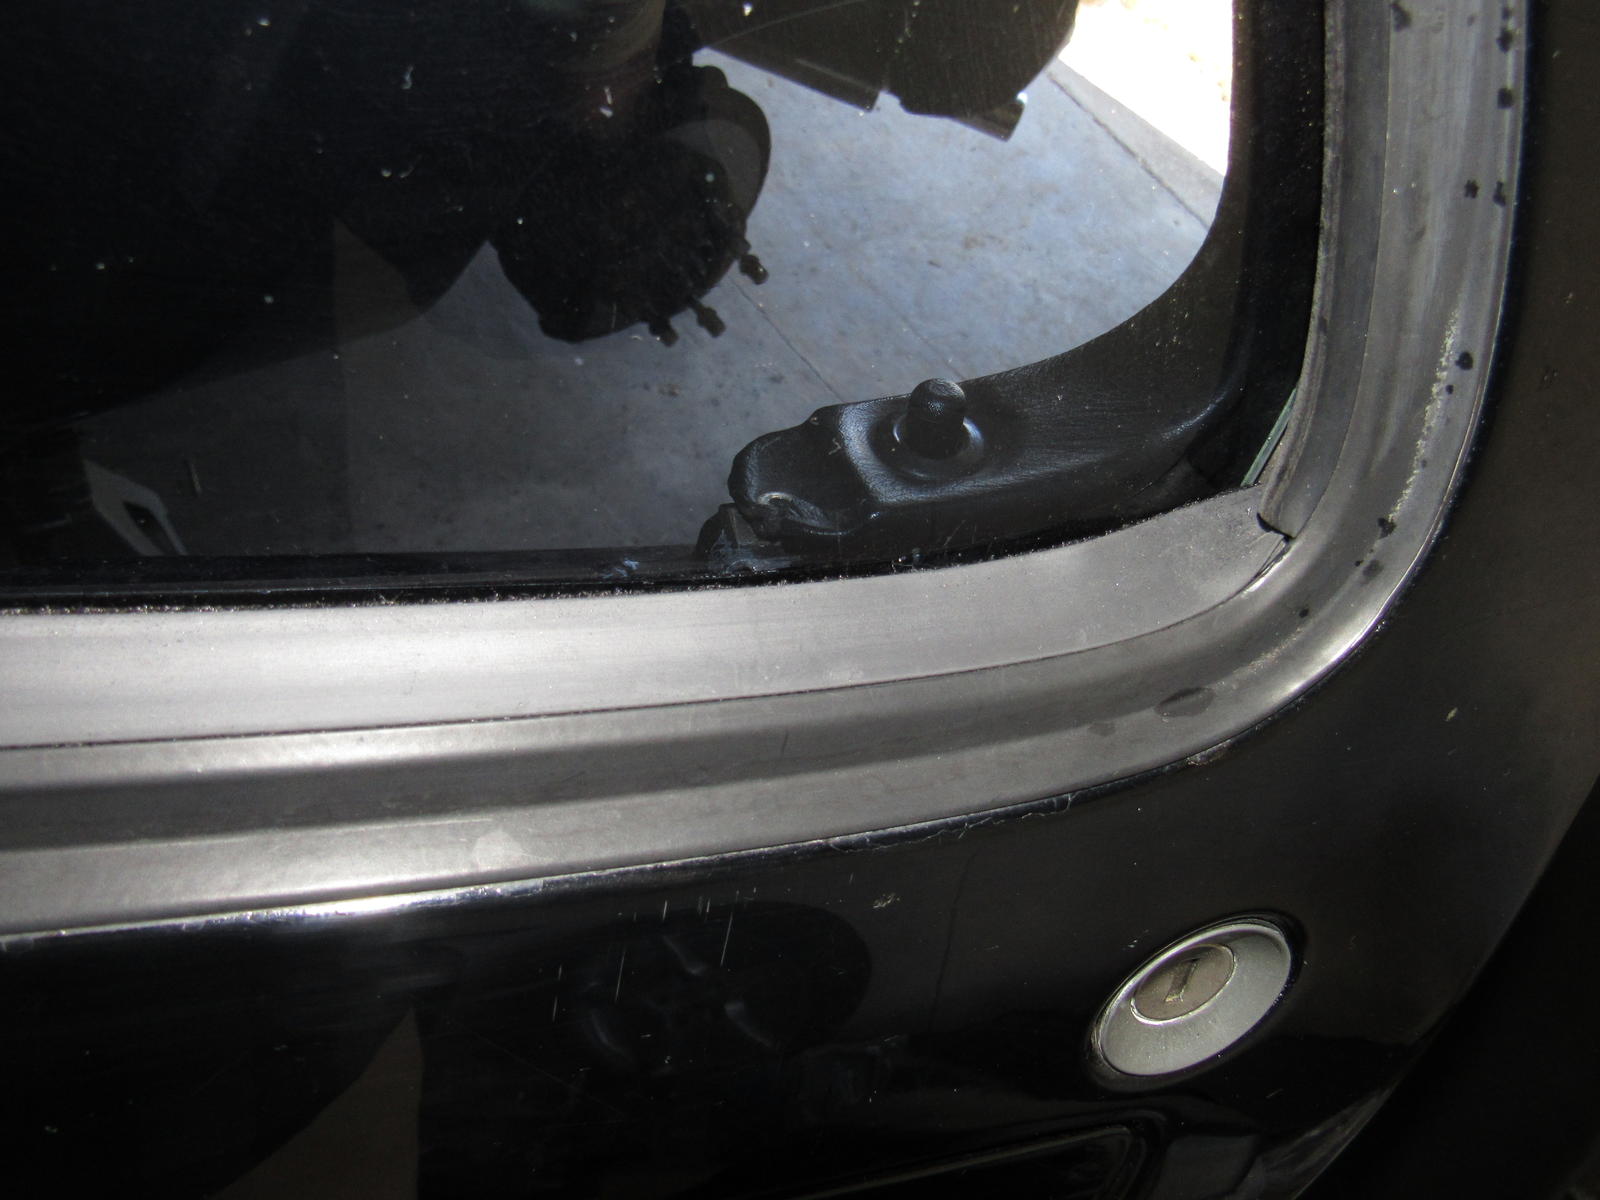
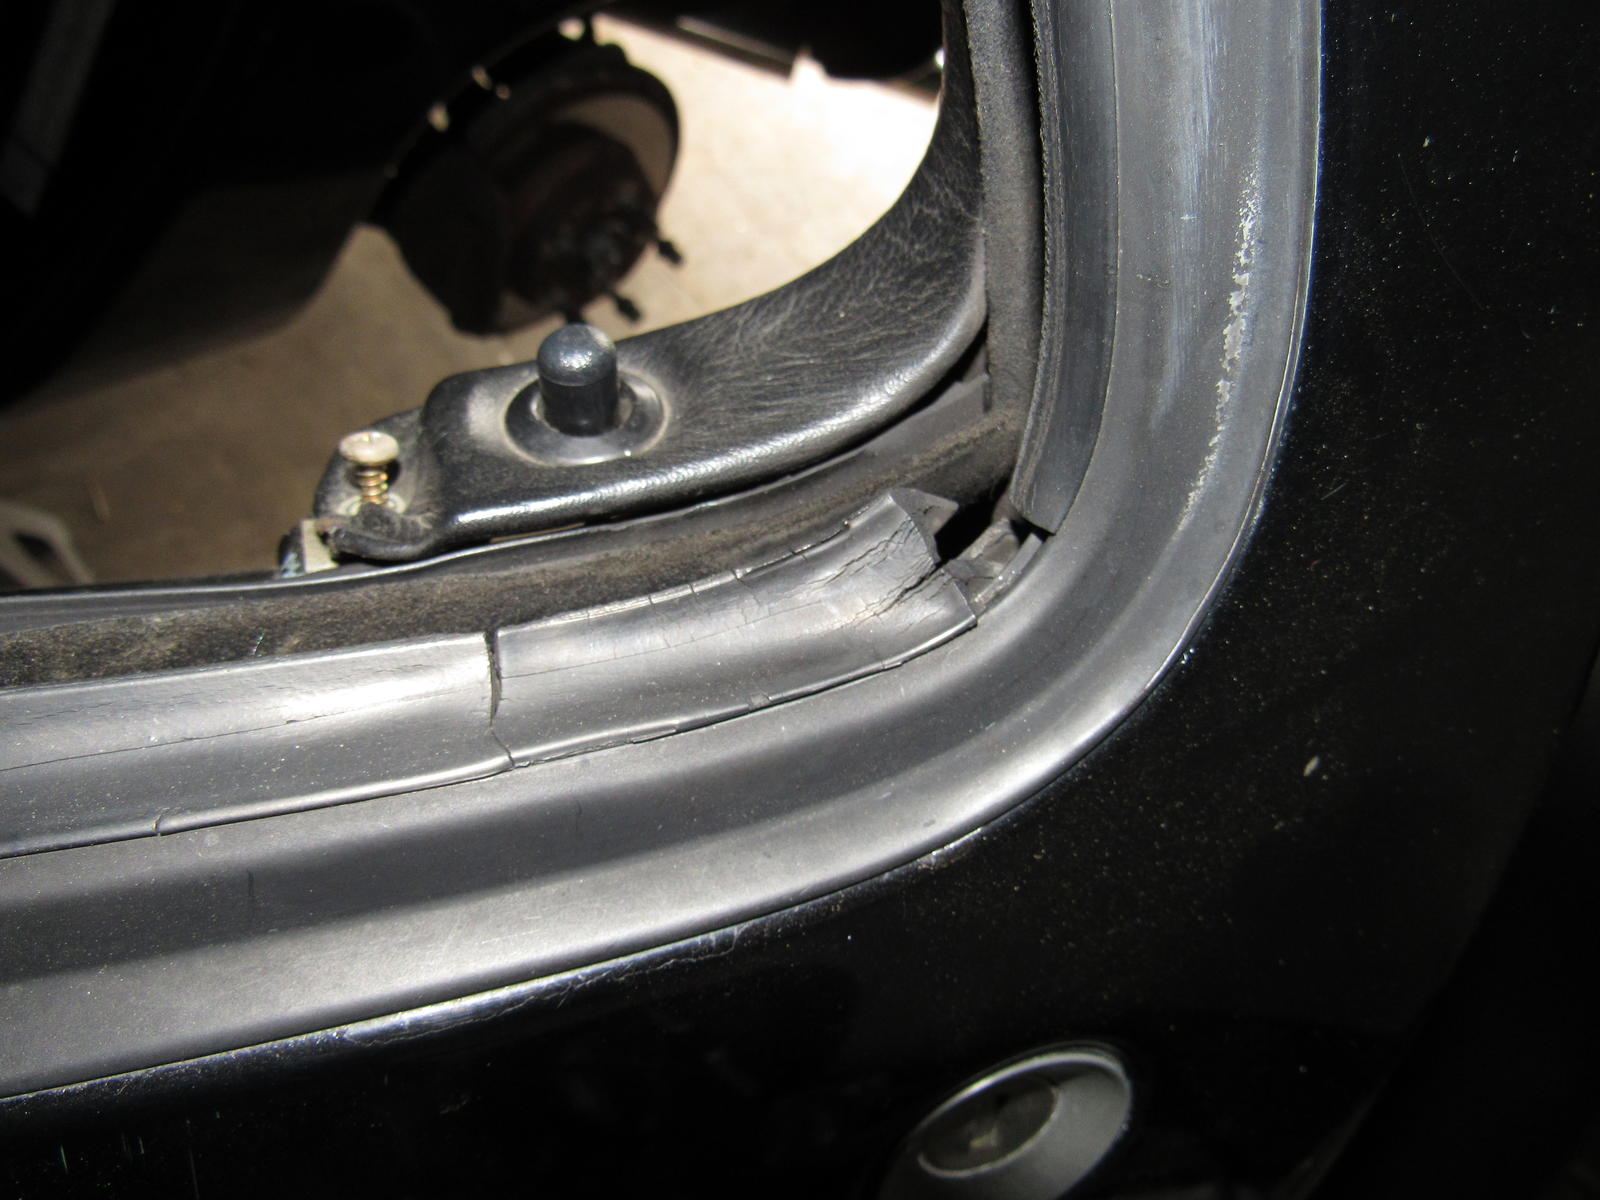
While I was at it, I looked at the upper window seal because I always had wind noise while driving. Sadly it too is falling apart and folded in on itself. It is obnoxiously expensive but I have no choice and pulled it out.
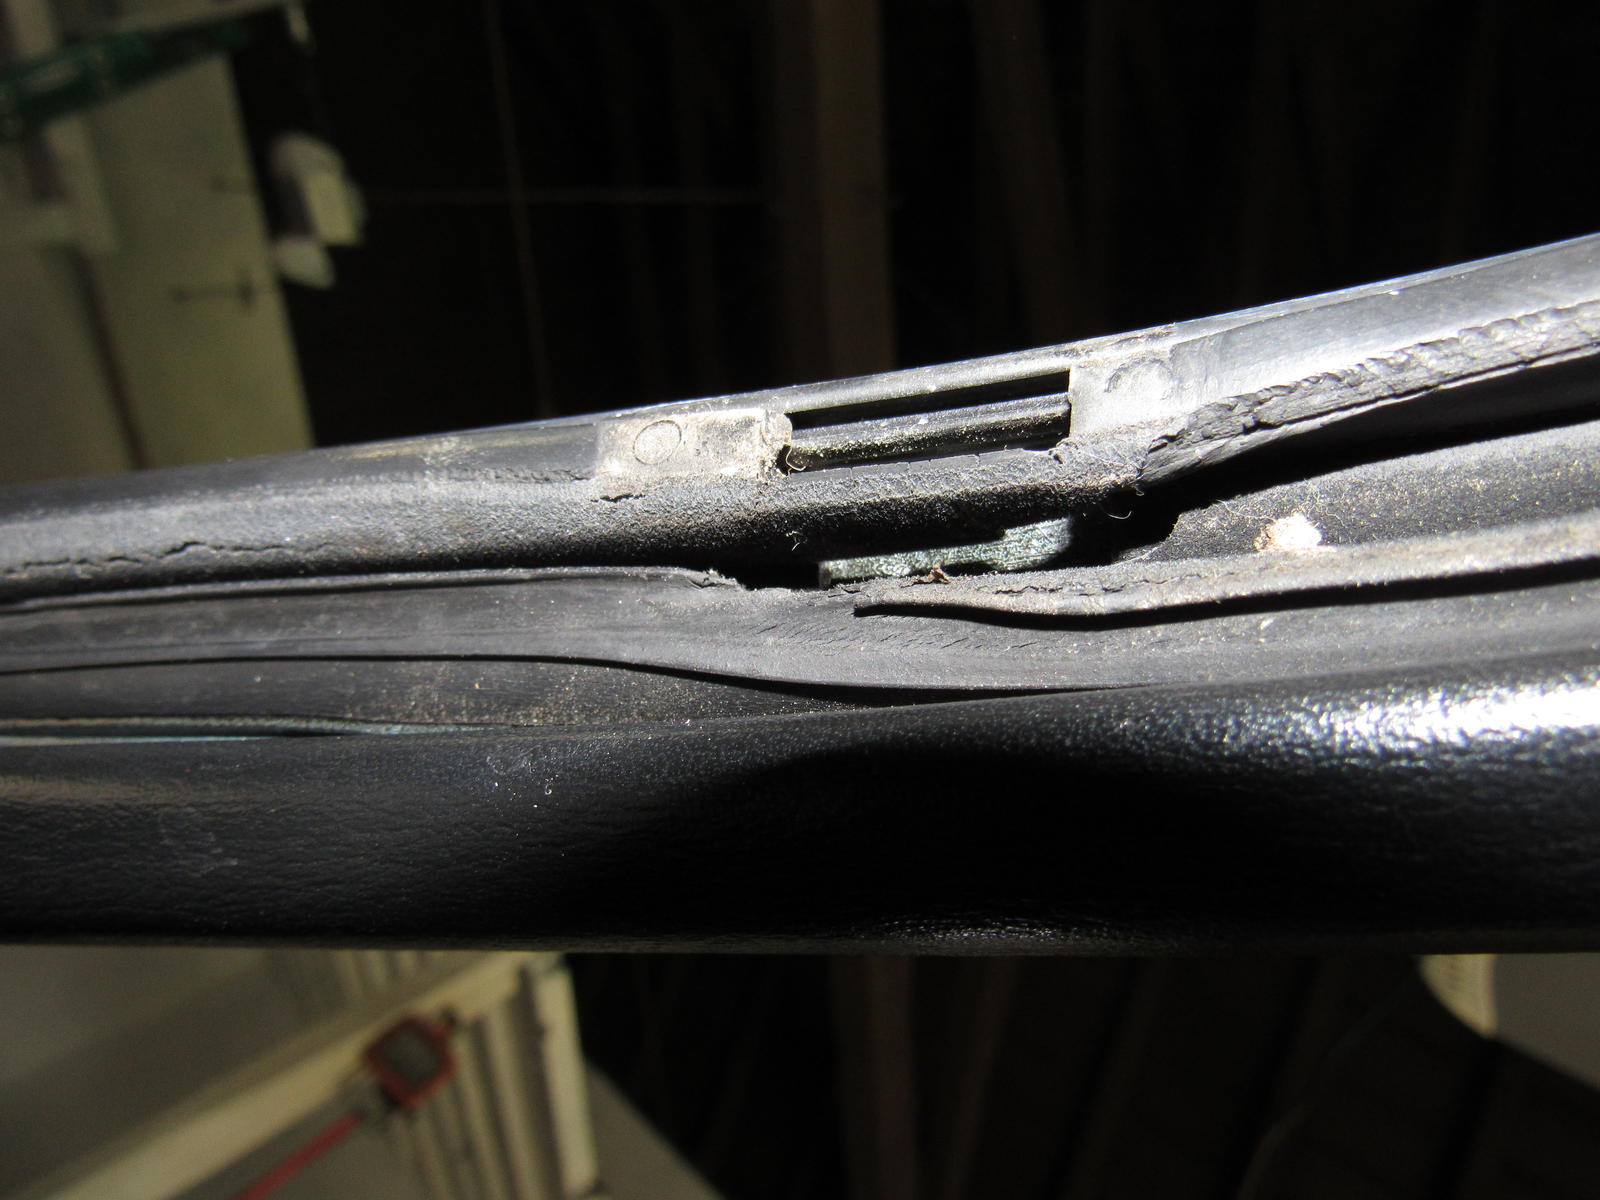
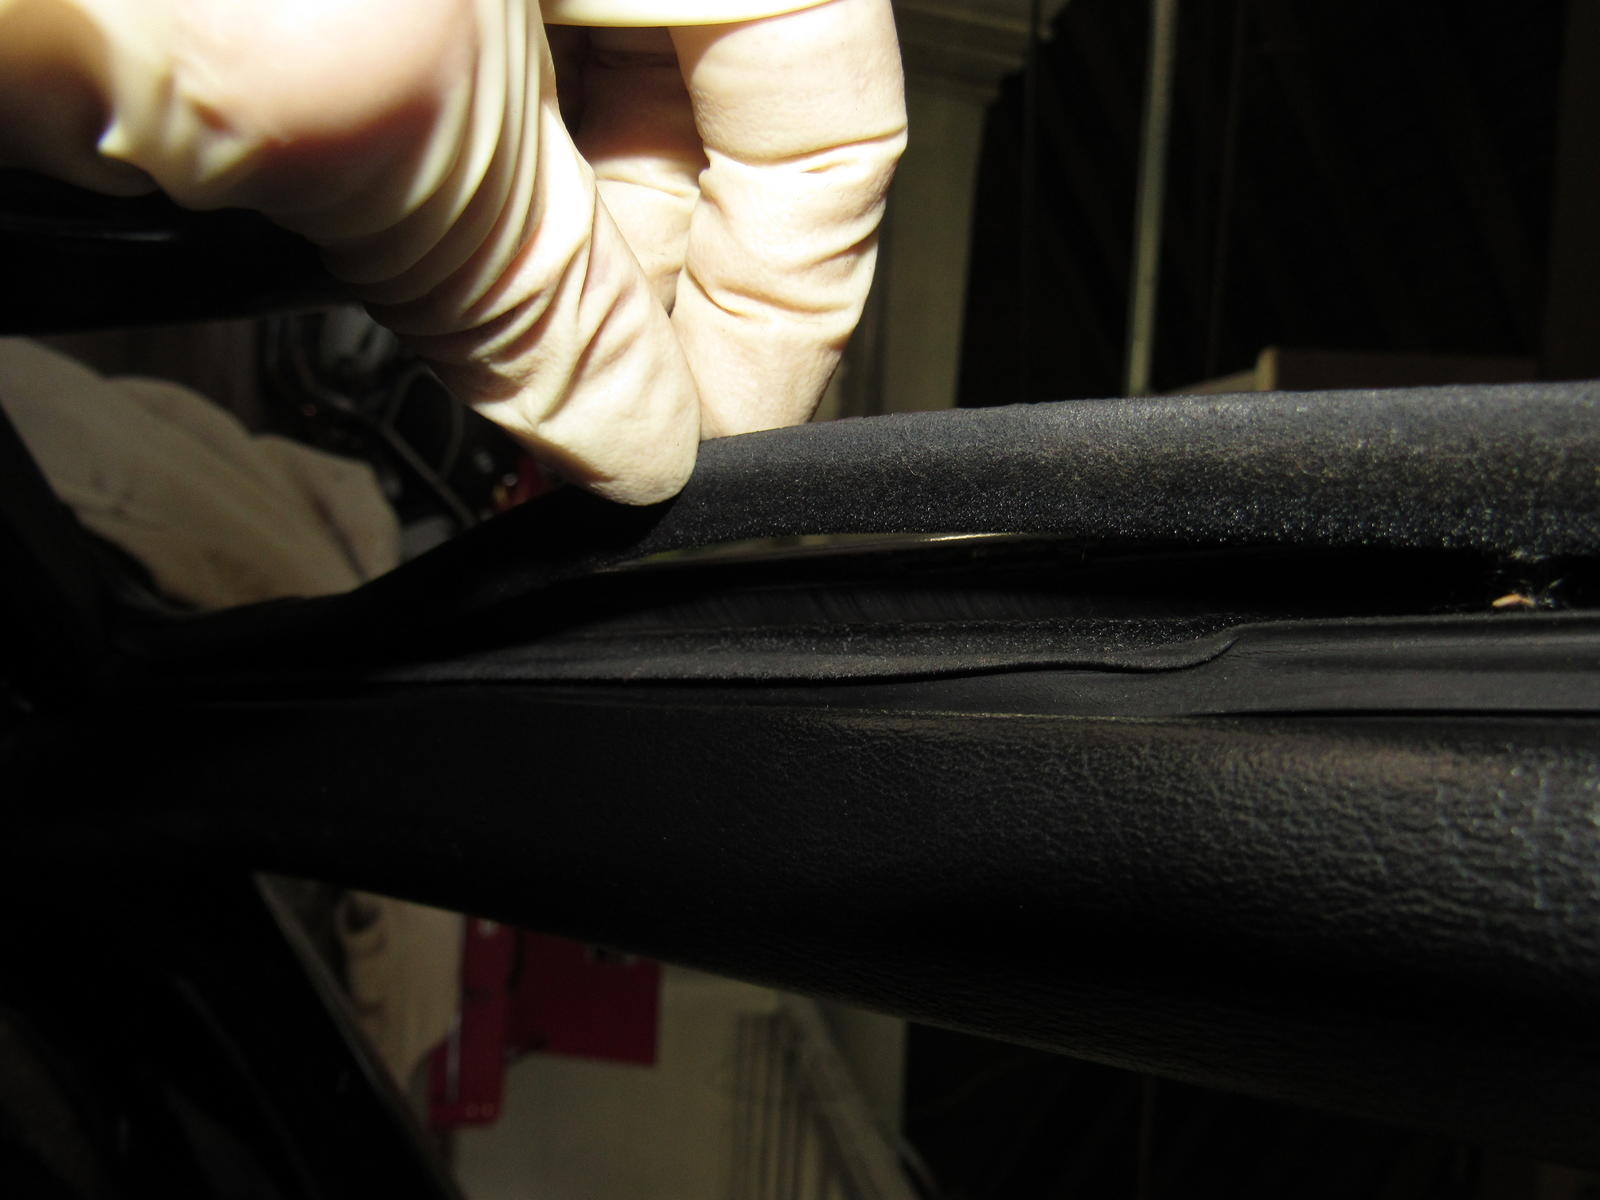
This was really tedious, removing part of the rubber that broke off in the small crevice of the outside trim.

I wanted to do something easy next. I replaced a broken plastic piece on the steering wheel that the horn pad snaps onto. It vibrated above 08 MPH
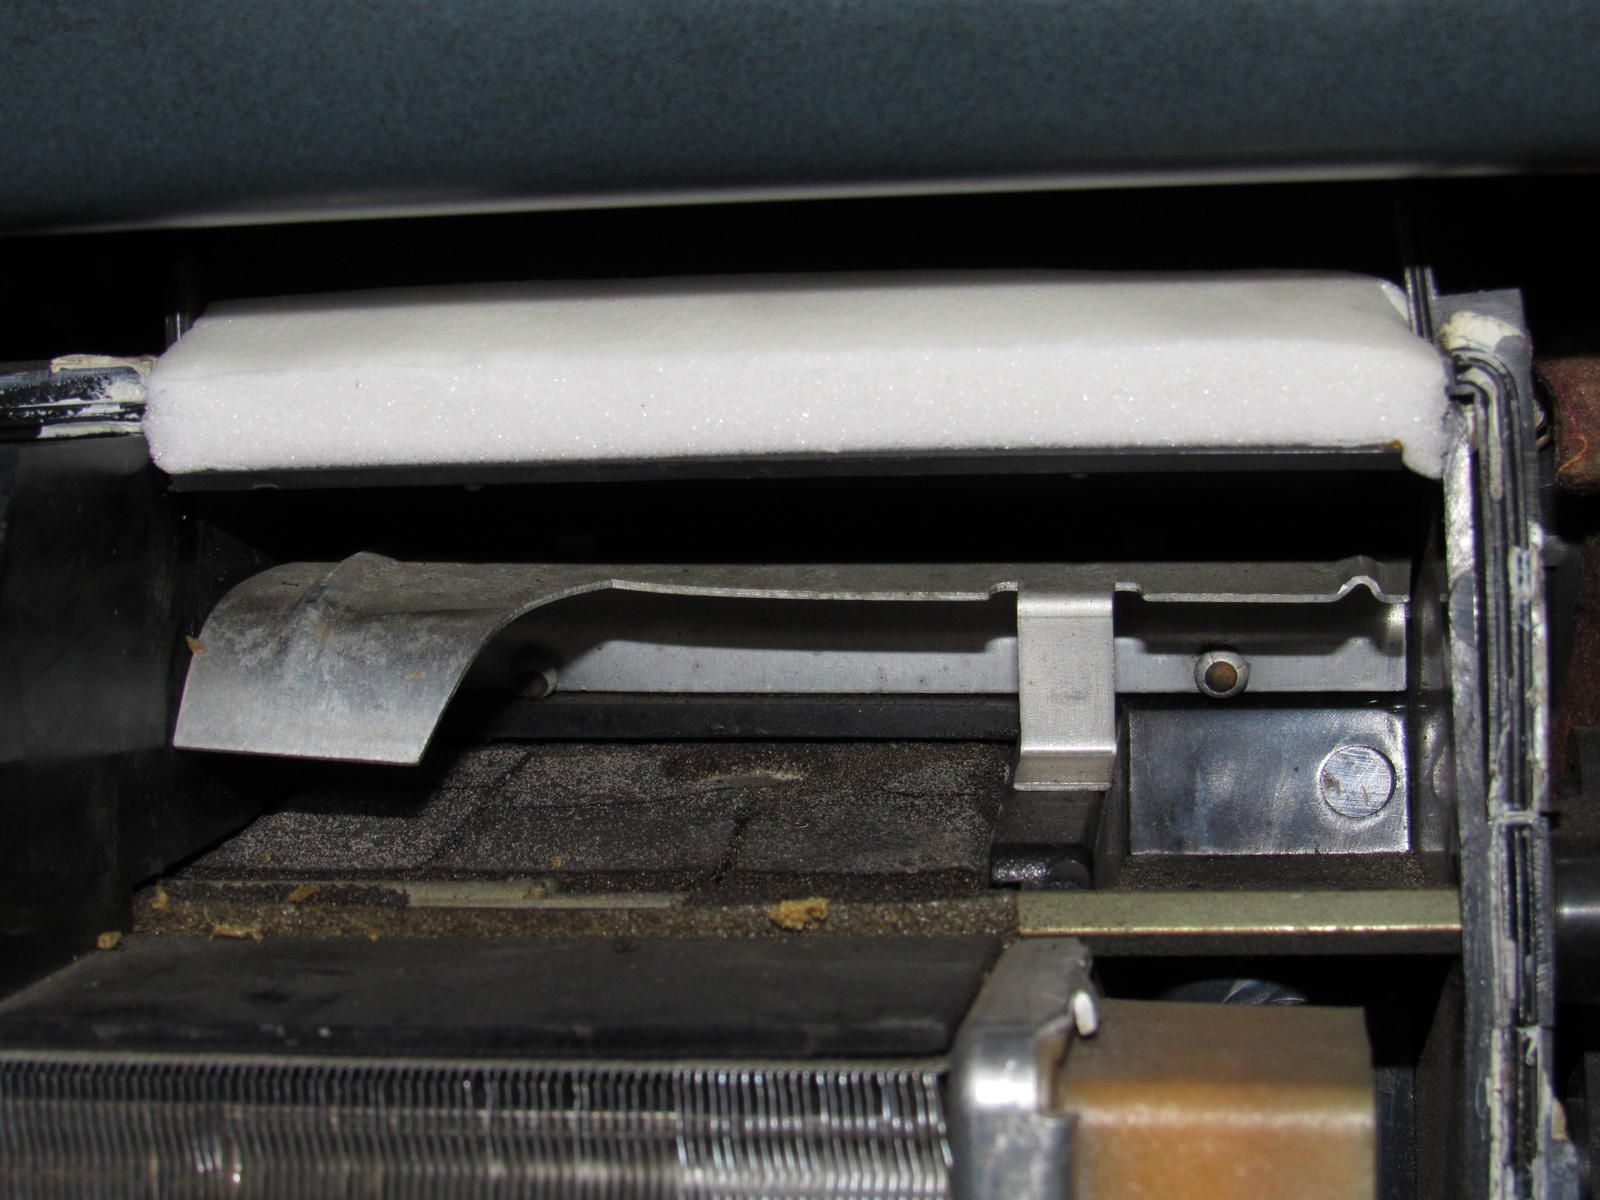
So back to the HVAC; I replaced the crumbling foam on the defrost vents and footwell flap.

I used strip caulk to reseal the HVAC halves and reinstalled, feels good to start putting things back in.

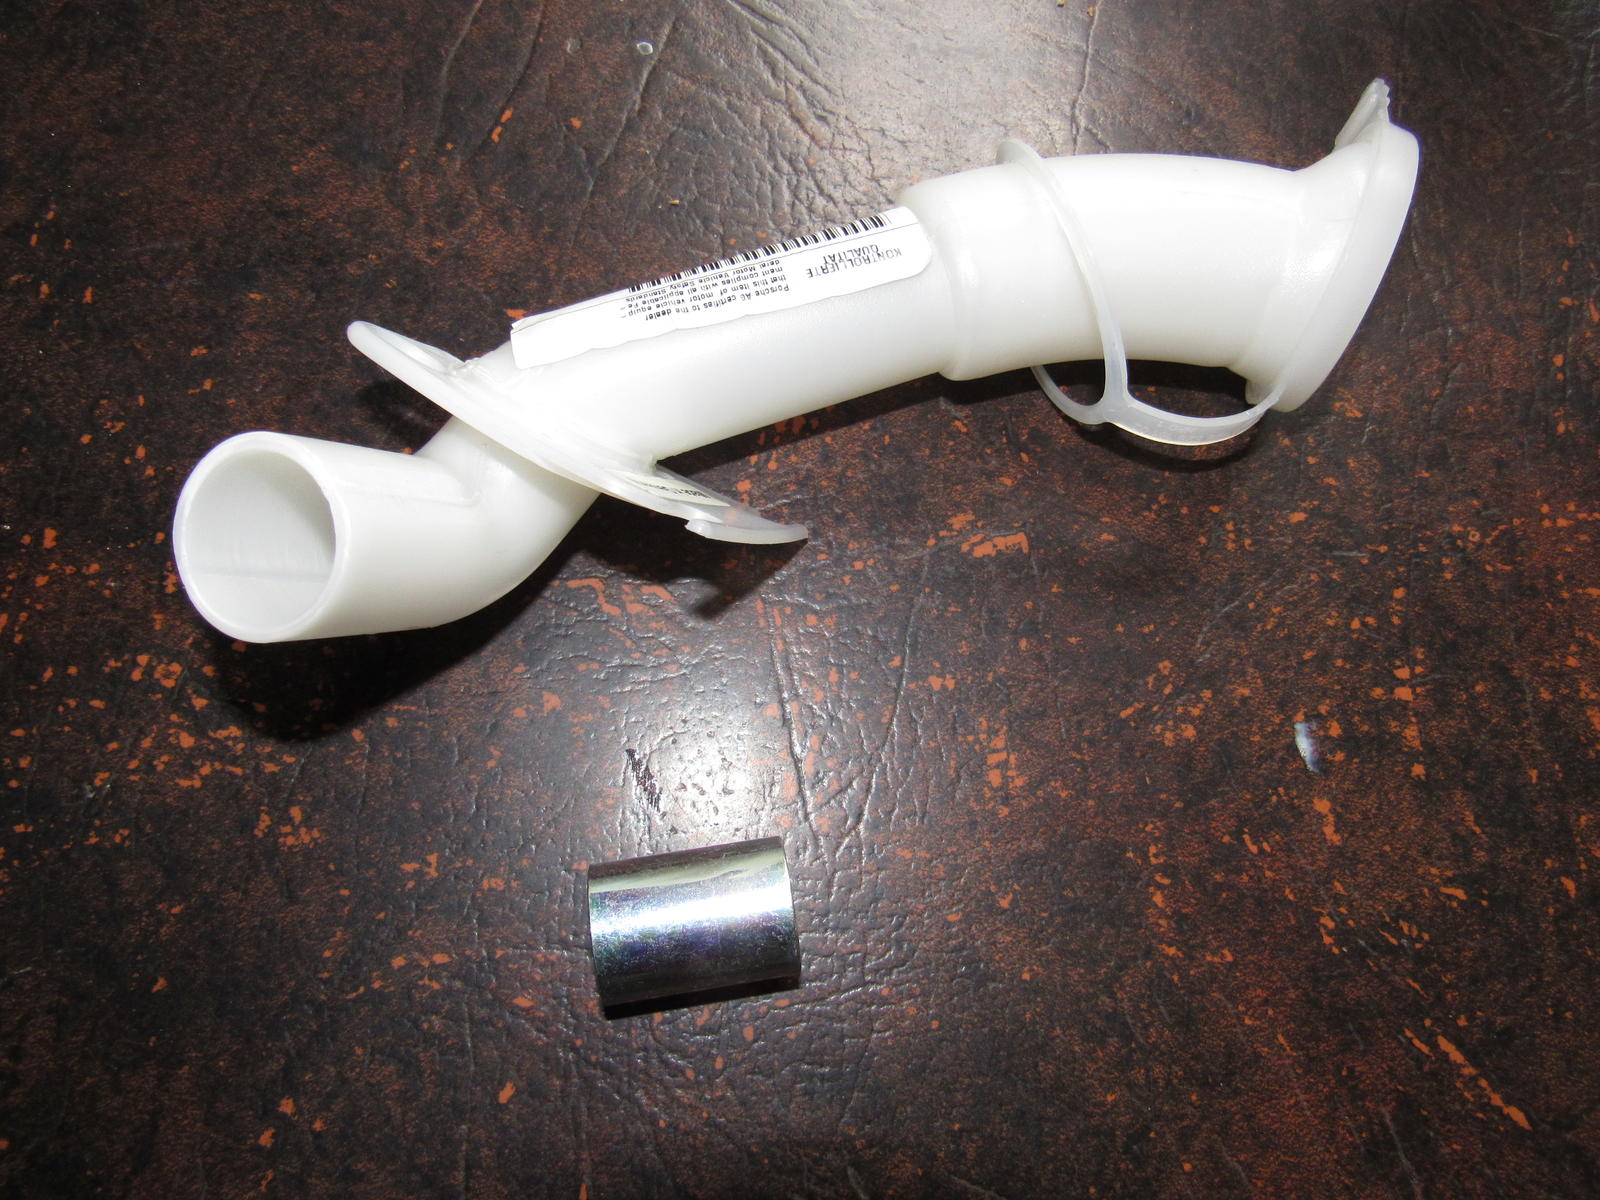
I pulled the metal collar from my new washer filler pipe and had to battle the rusted up collar in the tank but I got it.
Oh I forgot to mention I got my AC hoses rebuilt by Pirtek for $190. Not much cheaper than new but I like repairing things when possible.
Still can't figure out why I don't have a coolant warning in my instrument cluster.
Before:
After:
While I was at it, I looked at the upper window seal because I always had wind noise while driving. Sadly it too is falling apart and folded in on itself. It is obnoxiously expensive but I have no choice and pulled it out.
This was really tedious, removing part of the rubber that broke off in the small crevice of the outside trim.
I wanted to do something easy next. I replaced a broken plastic piece on the steering wheel that the horn pad snaps onto. It vibrated above 08 MPH
So back to the HVAC; I replaced the crumbling foam on the defrost vents and footwell flap.
I used strip caulk to reseal the HVAC halves and reinstalled, feels good to start putting things back in.
I pulled the metal collar from my new washer filler pipe and had to battle the rusted up collar in the tank but I got it.
Oh I forgot to mention I got my AC hoses rebuilt by Pirtek for $190. Not much cheaper than new but I like repairing things when possible.
Still can't figure out why I don't have a coolant warning in my instrument cluster.
05-27-2017, 11:46 PM
#150
Burning Brakes
Thread Starter
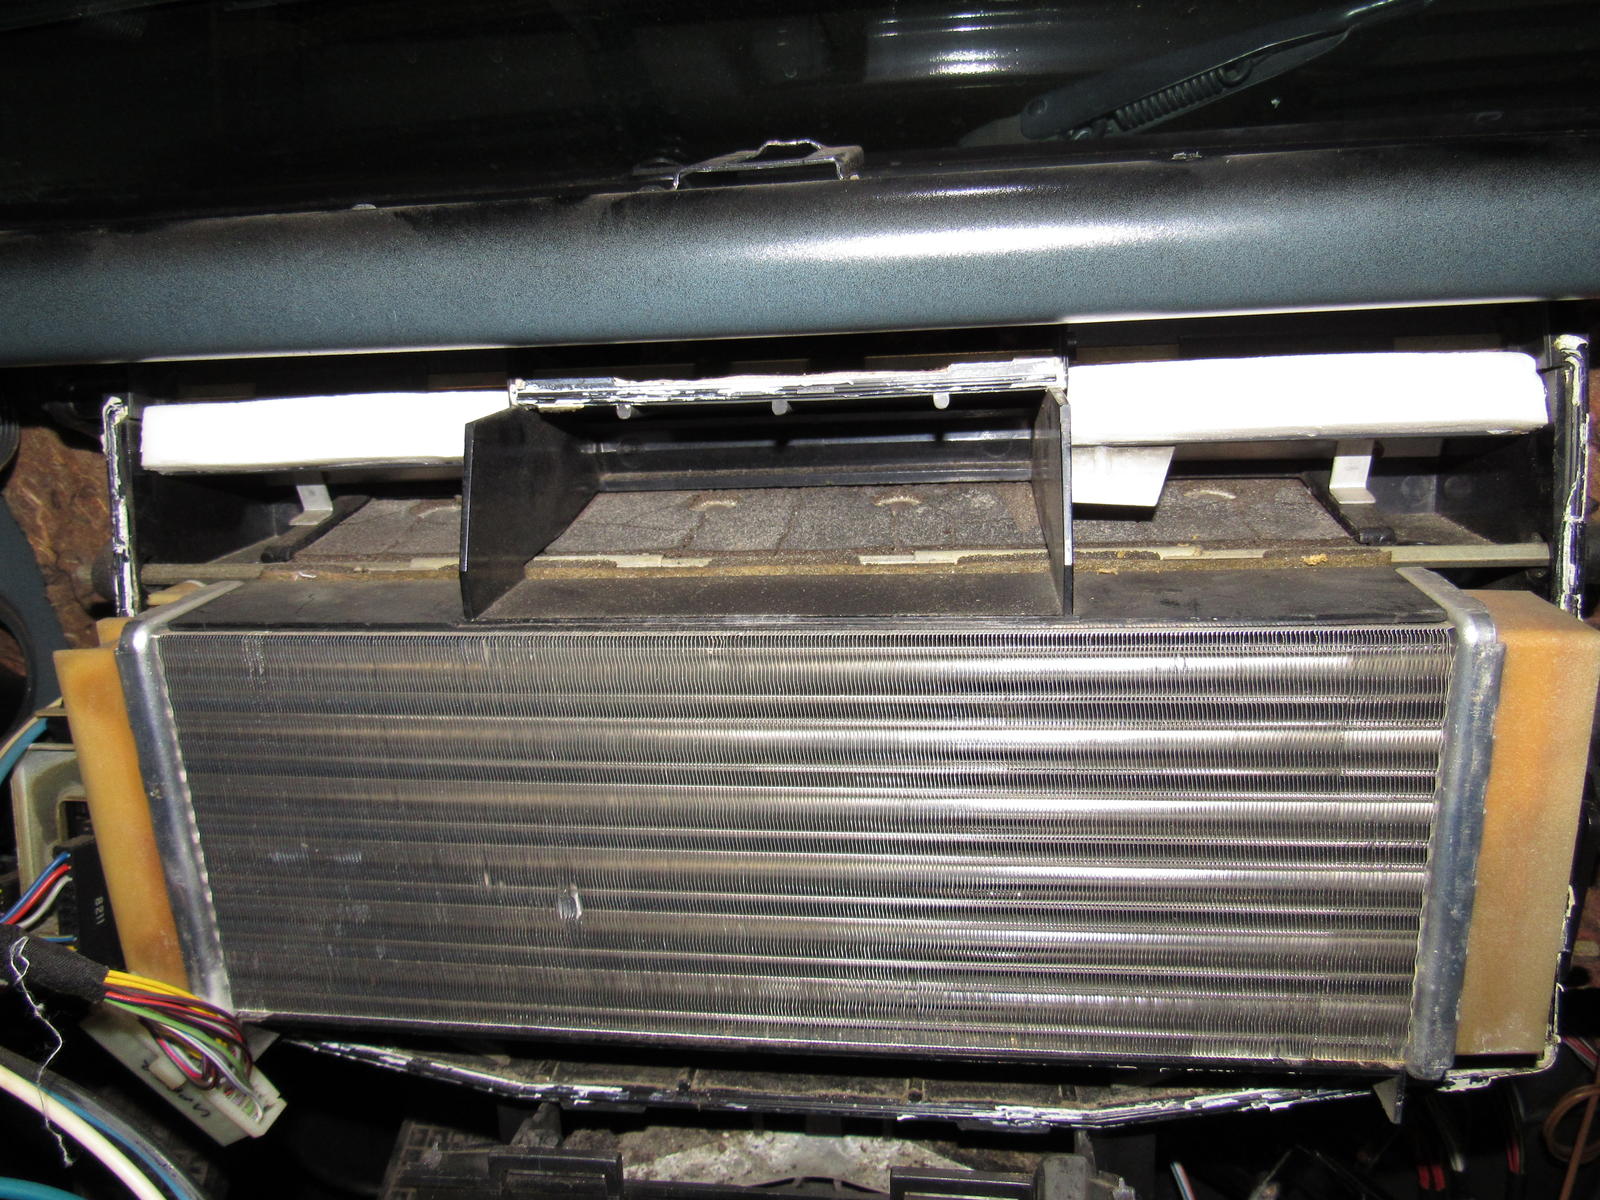
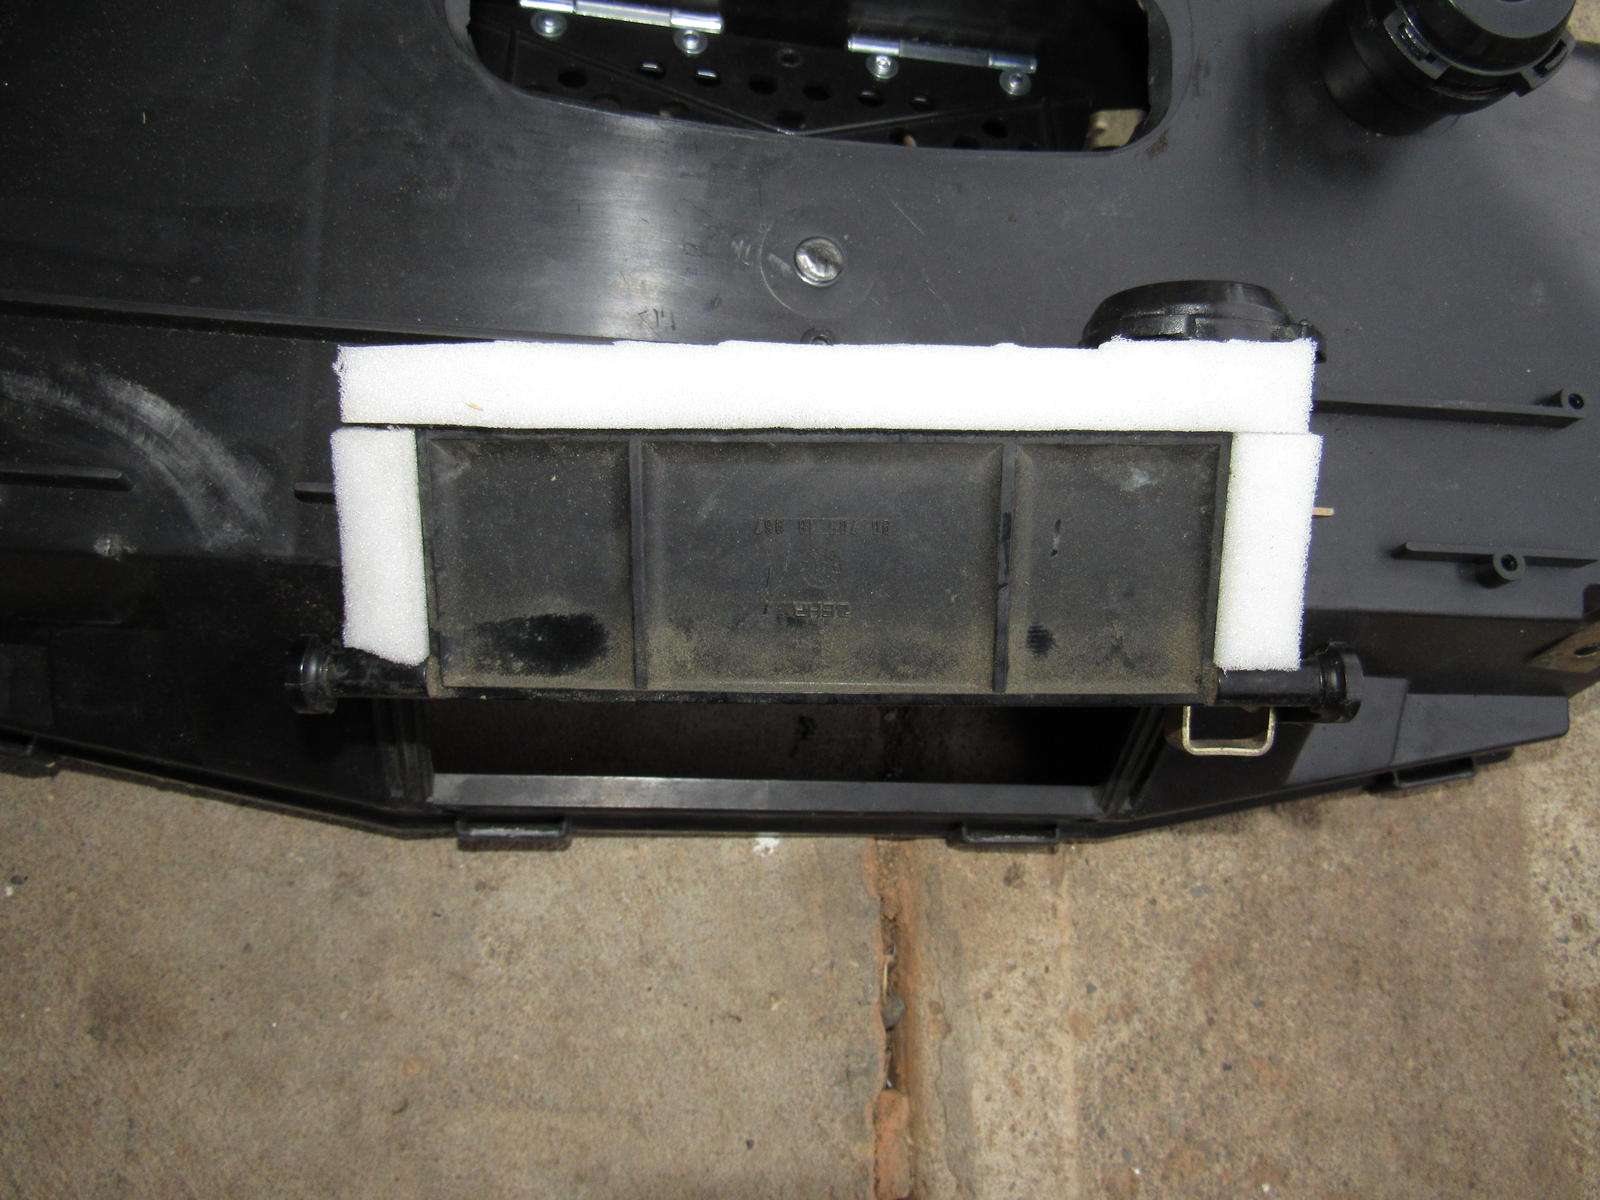
I have cleaned out the evaporator as best as I can with a vacuum and nylon bristle brush.
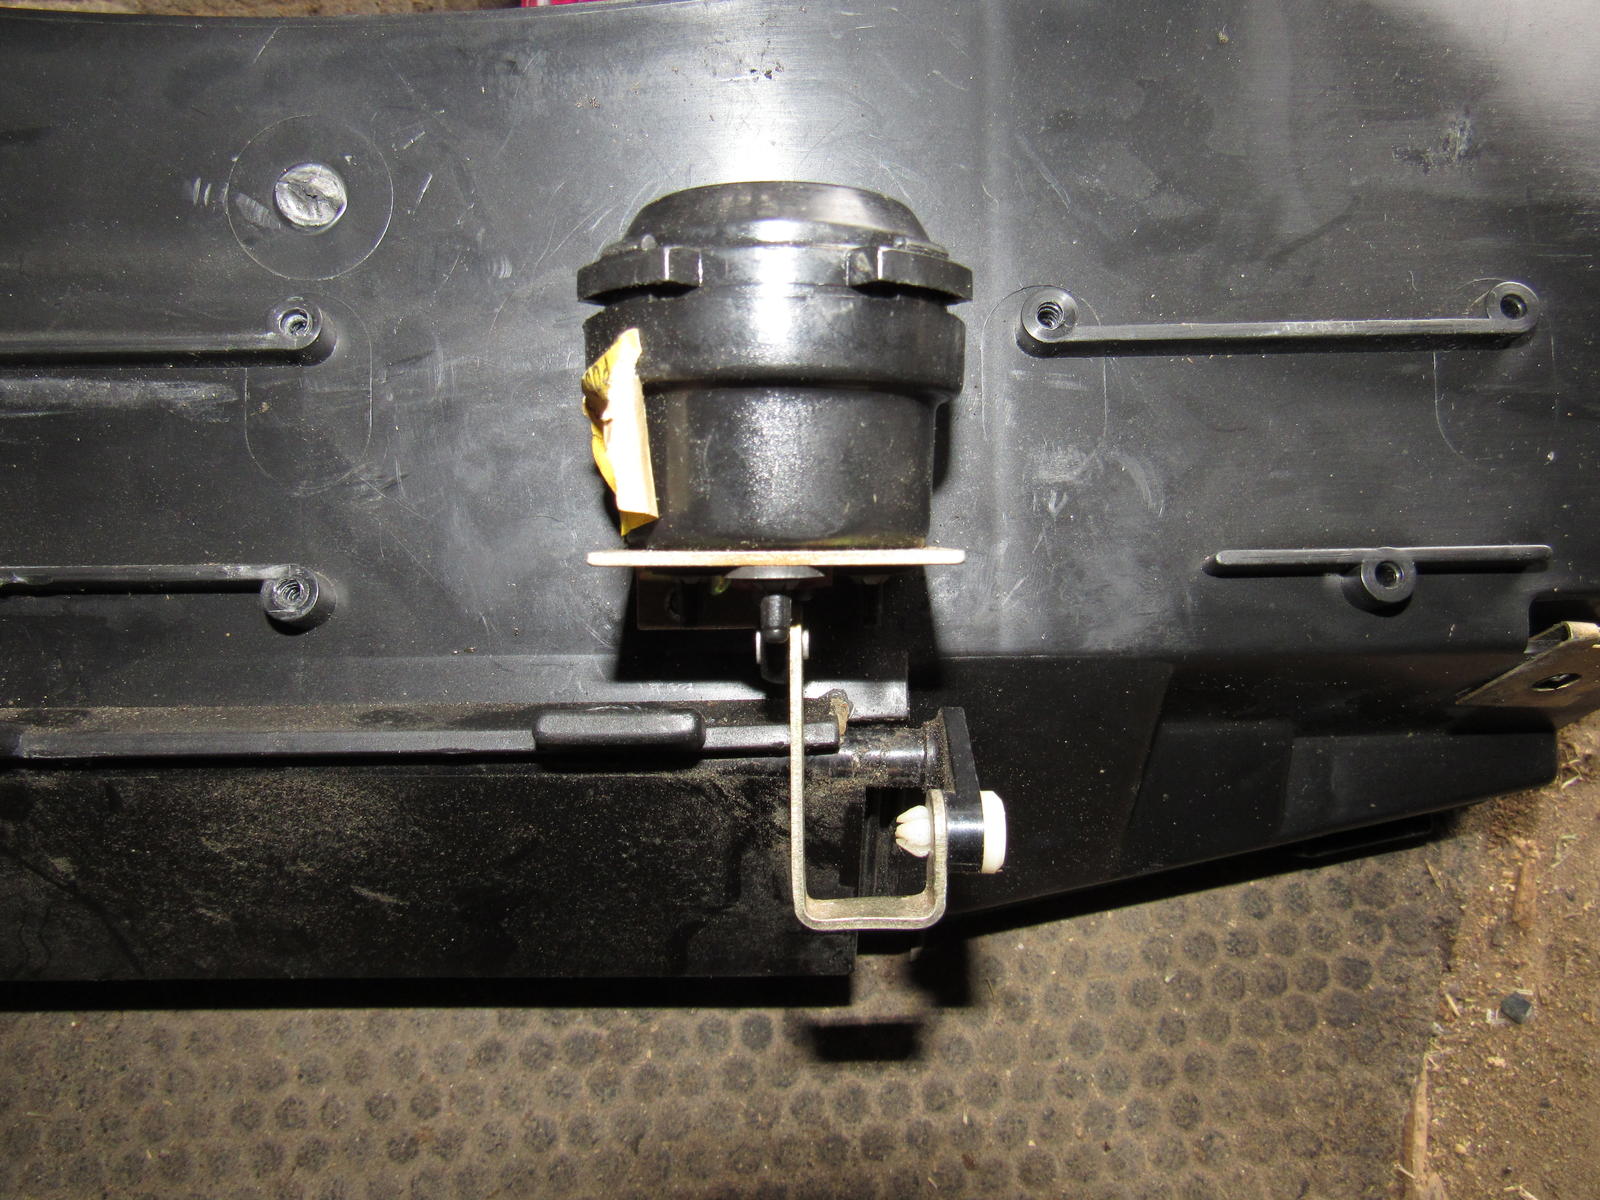
Finally I have reinstalled the recirc flap housing and CE panel. I removed the hood to replace the AC expansion valve and to have an easier time refitting the HVAC blower.
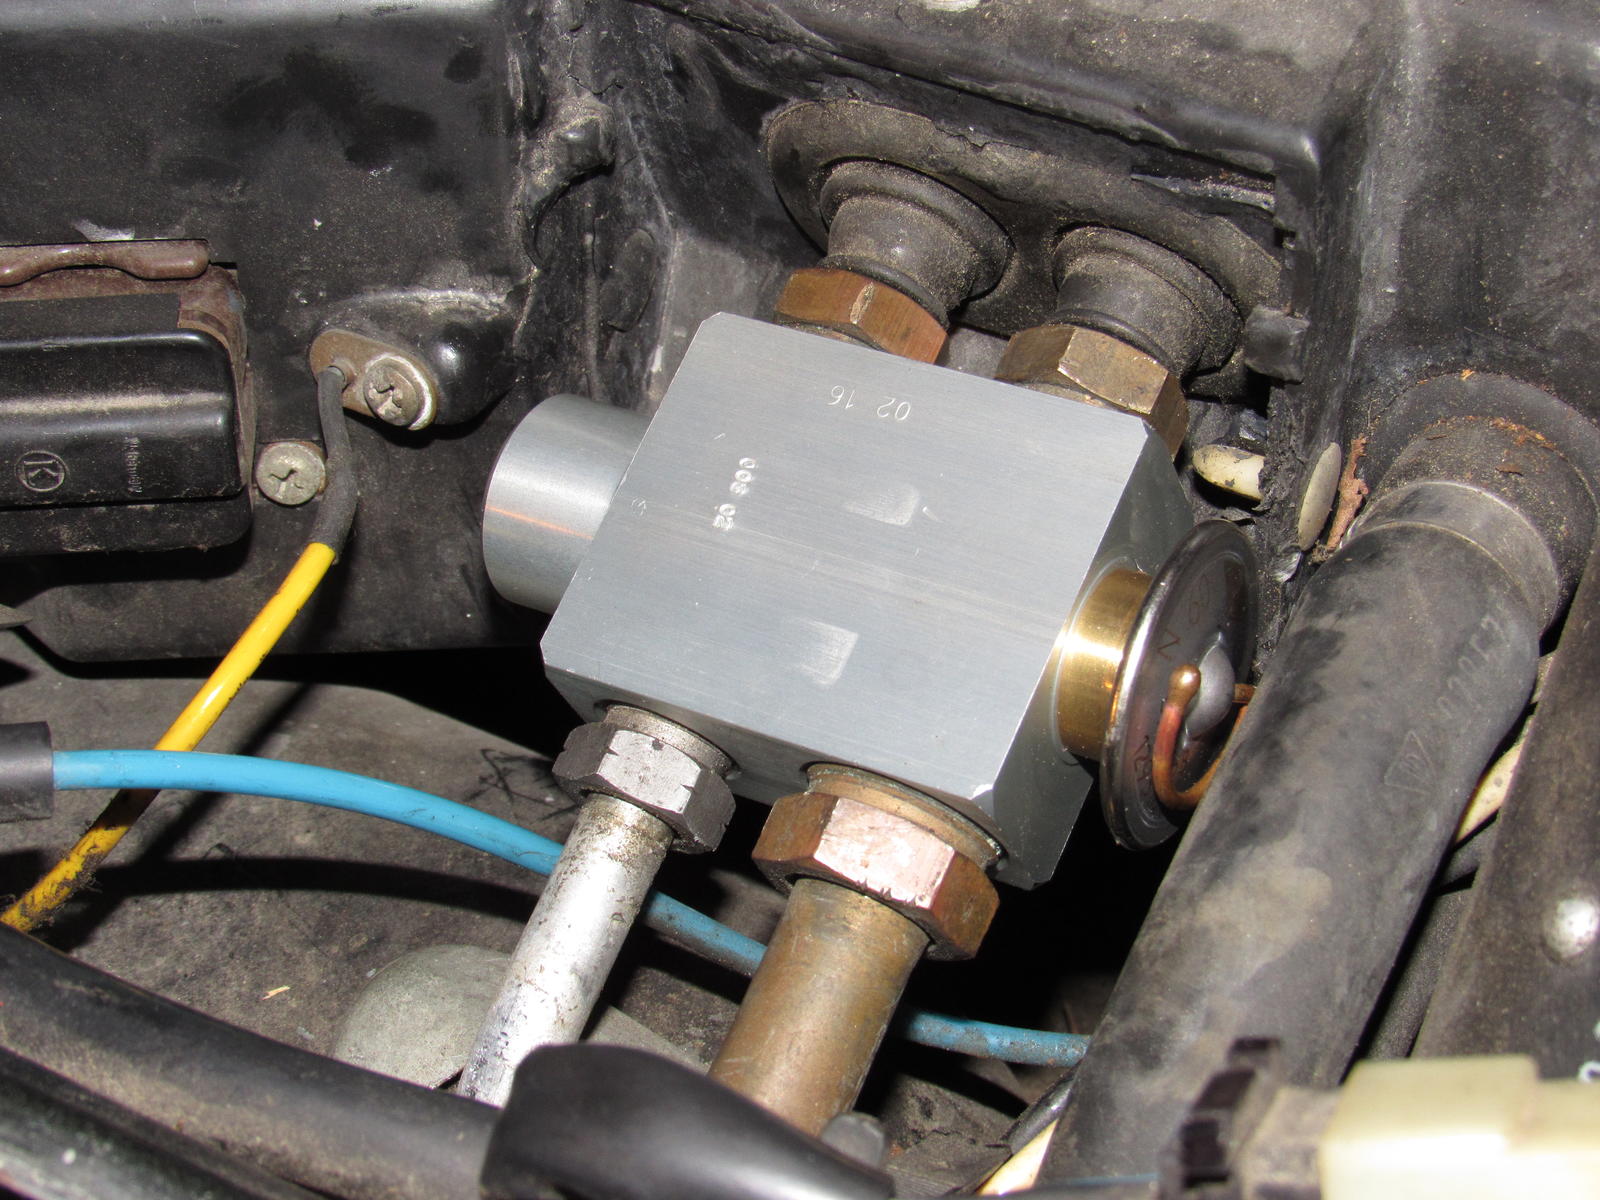
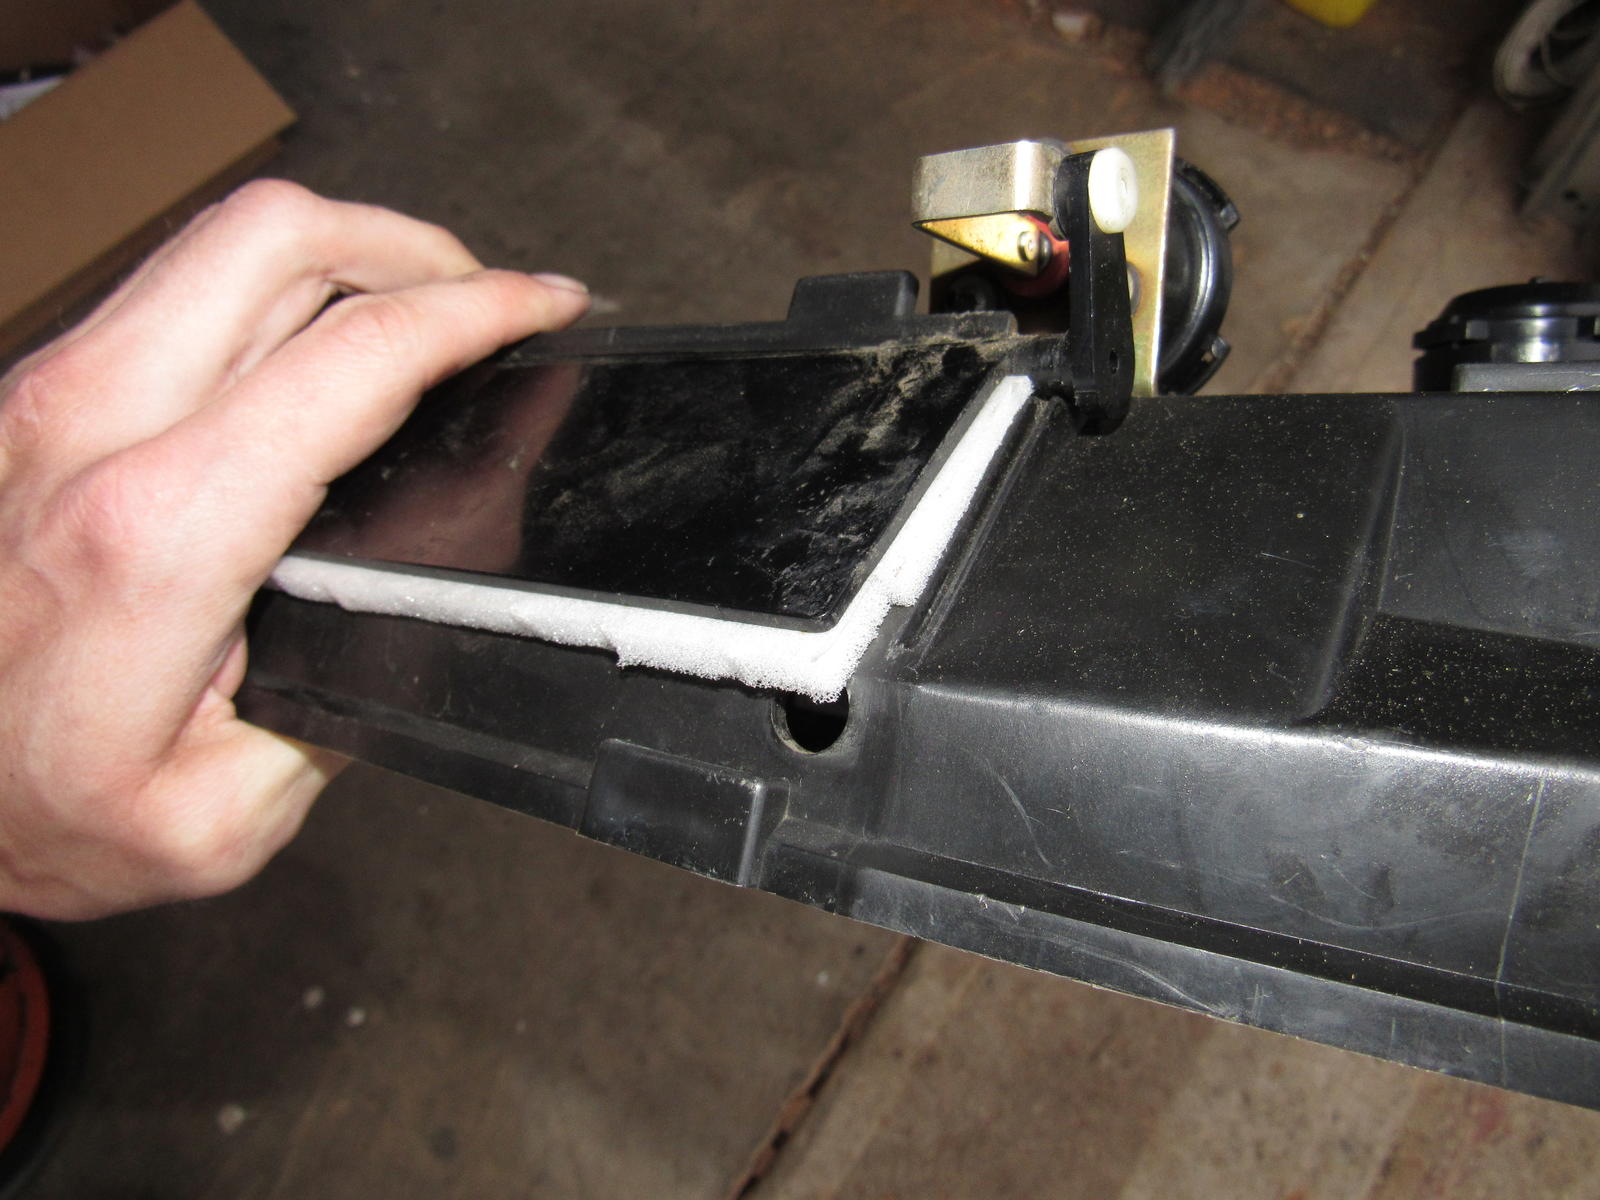
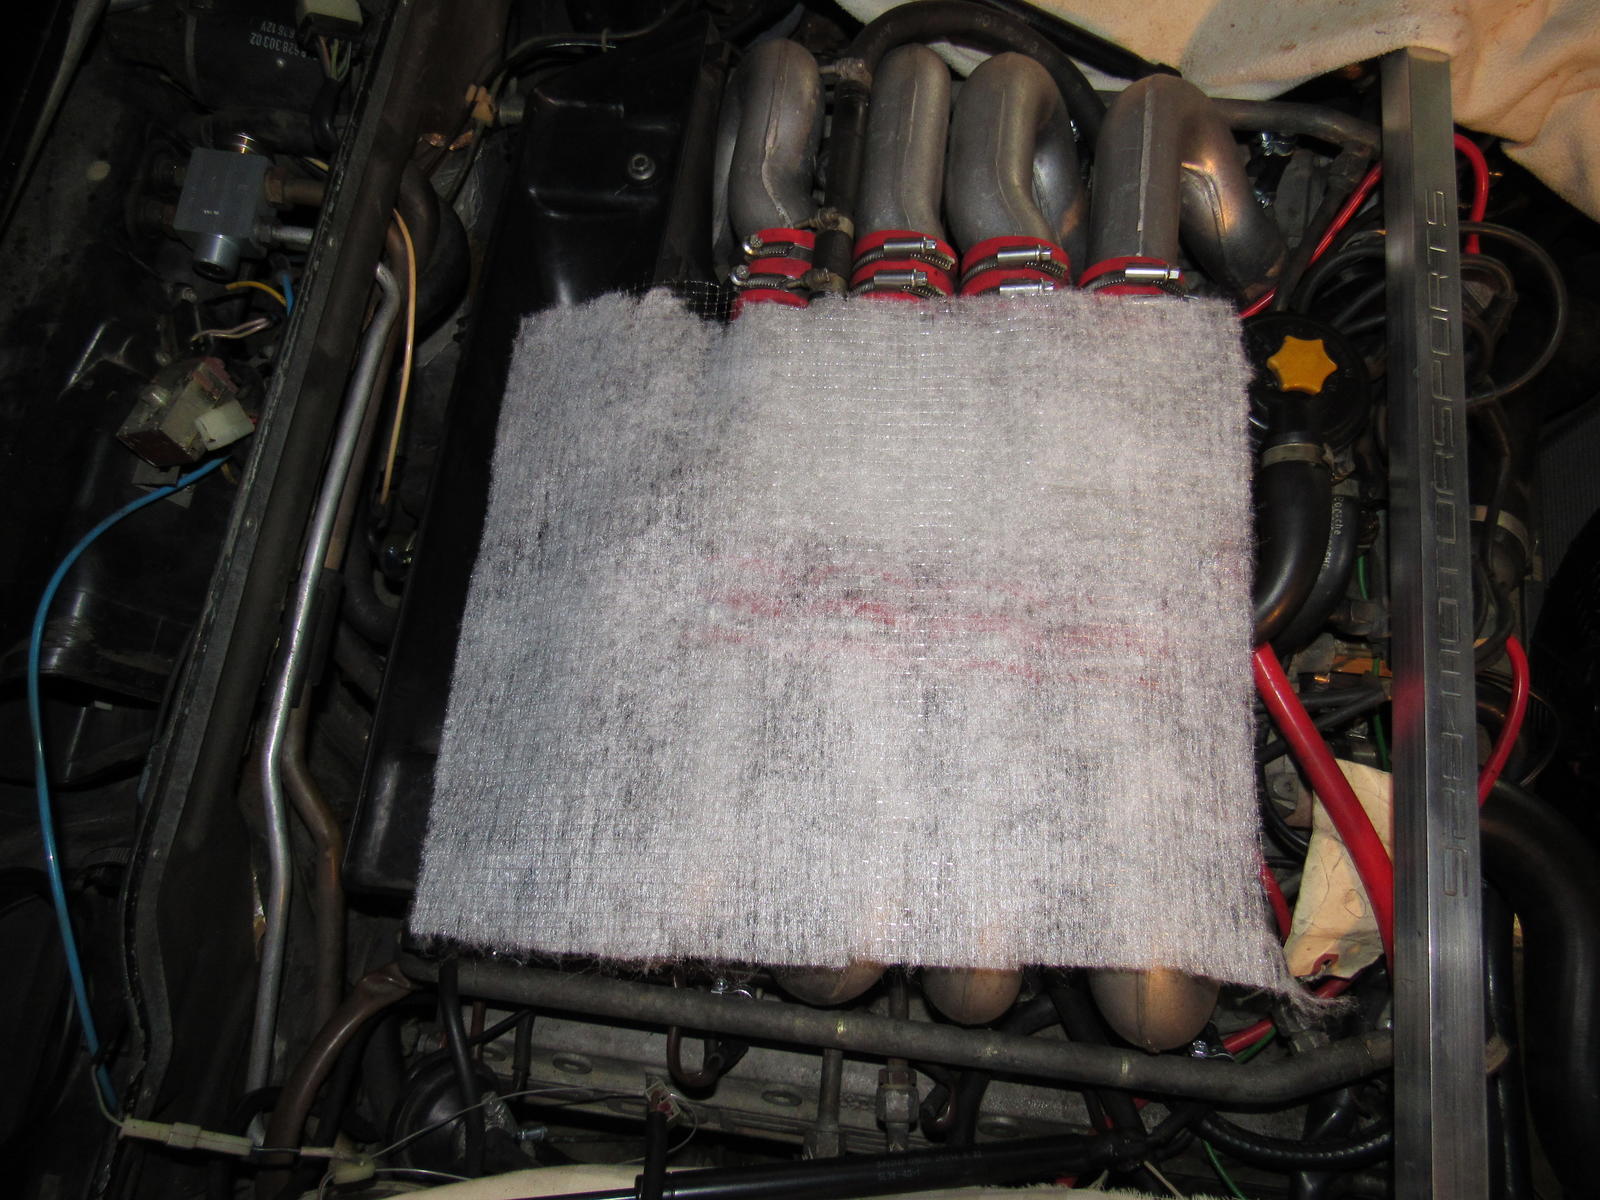
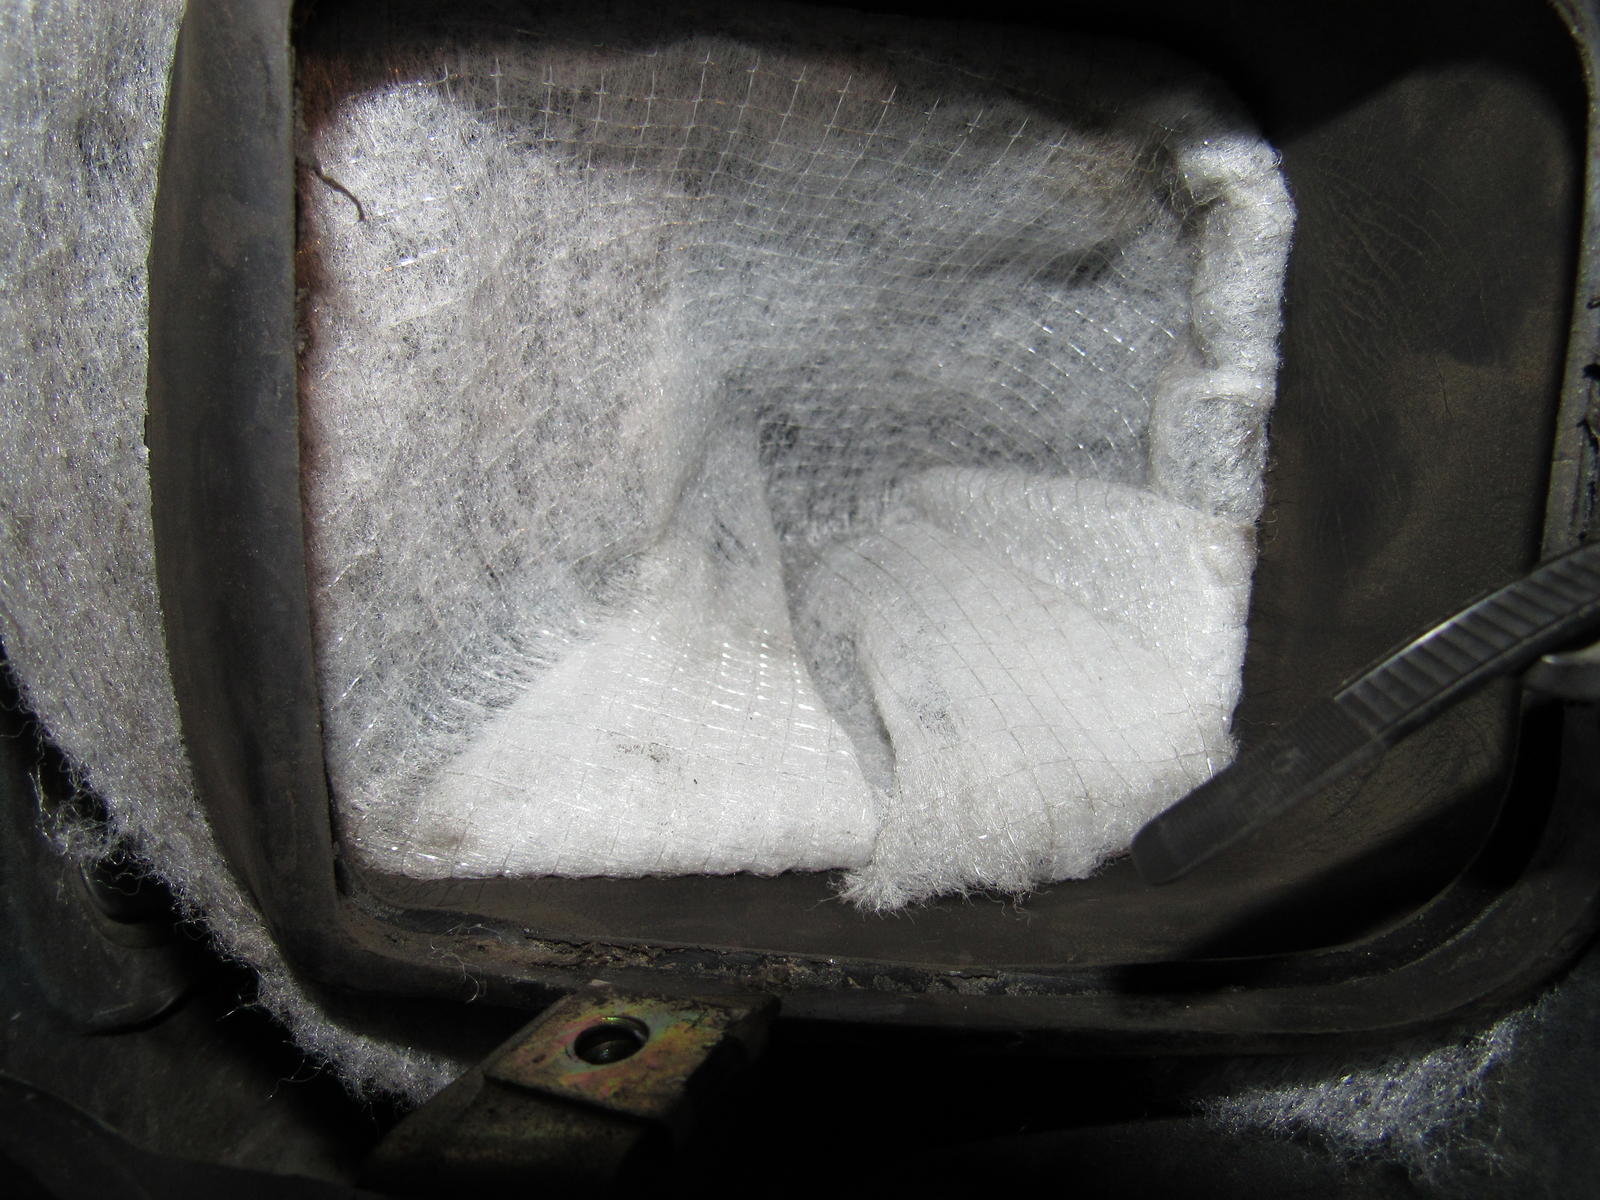
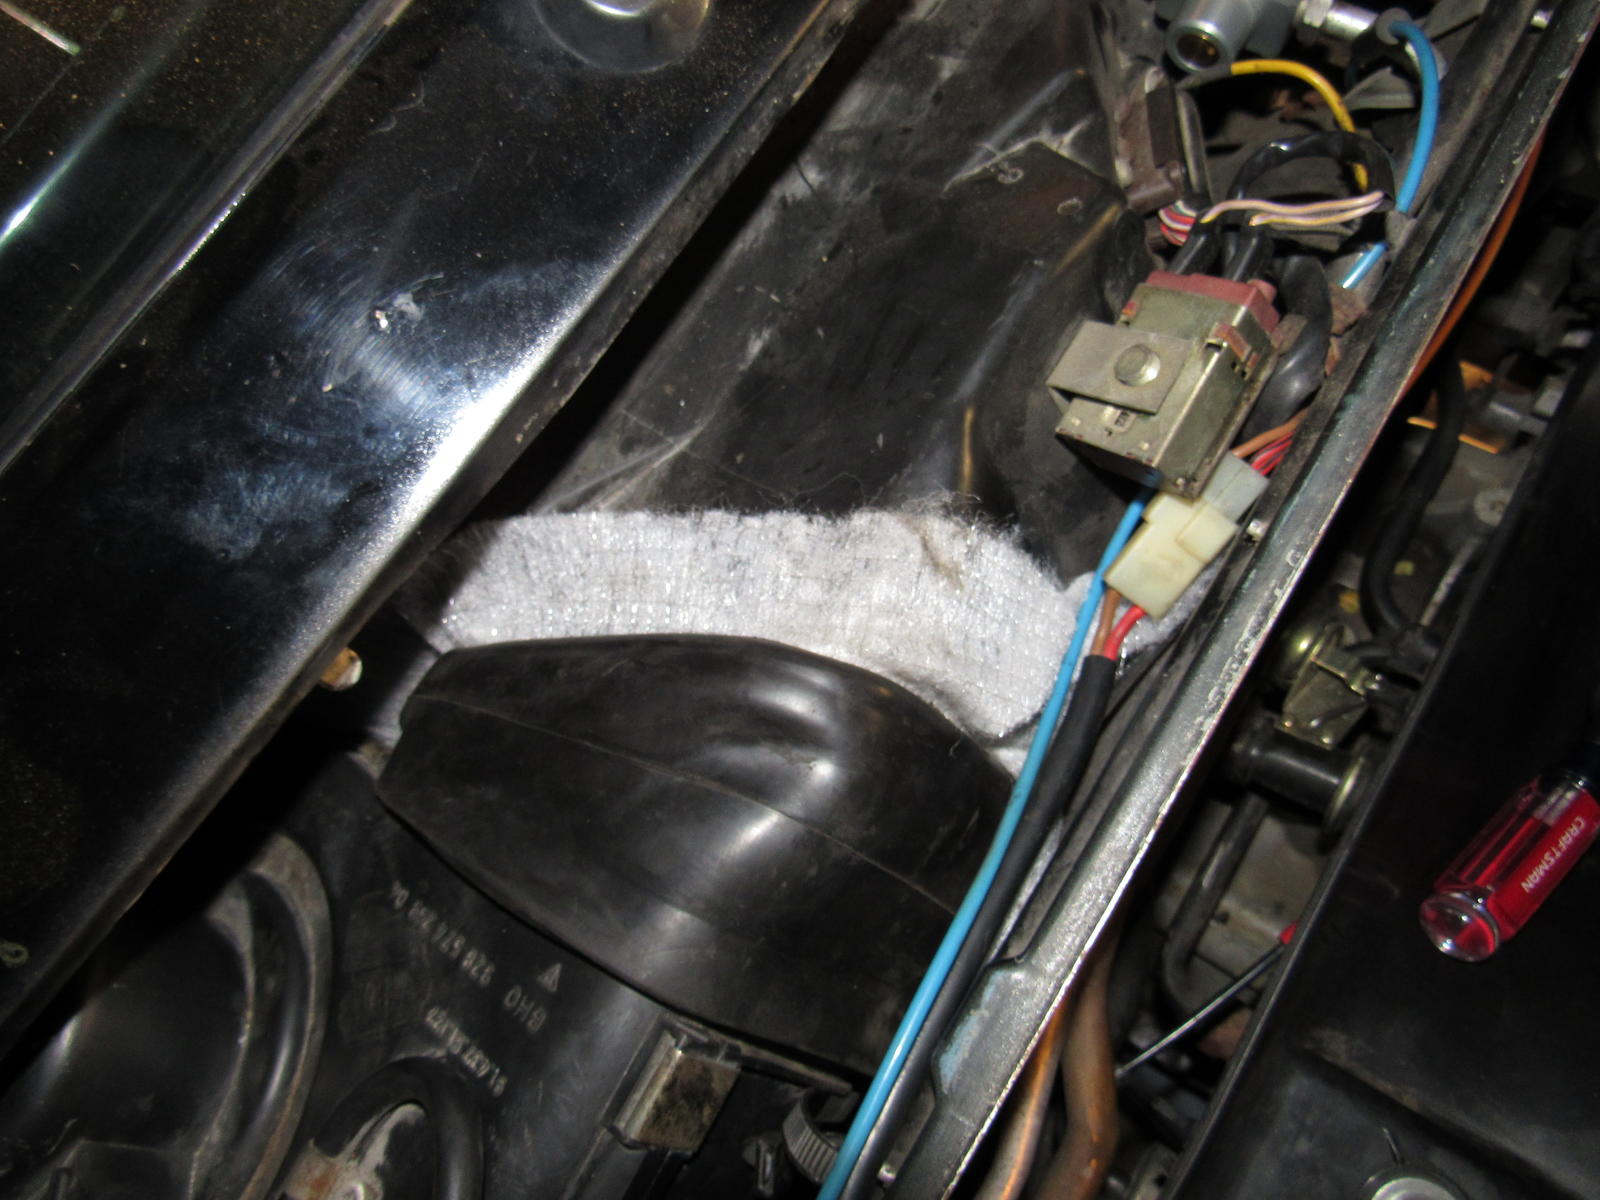
I wanted to filter the air going into the HVAC system and found some lightweight filters that would not impede the airflow but catch the bigger debris. These 3M Filtrete 20"x25" filters were just over $2 for a two pack, the price was the same no matter the size. I cut out a portion and stuffed it into the HVAC box to form a pocket for more surface area and slid the boot over it for a seal. I think it will work well and I cannot tell any difference in airflow.
I finished the day by removing the cam sprockets.
One question I have is about the rebuilt AC compressor I got. It came with new black O rings. Are these compatible with R134a? And I think I should replace the two Schrader valves, are they anything special or would auto parts stores have them?
Finally I have reinstalled the recirc flap housing and CE panel. I removed the hood to replace the AC expansion valve and to have an easier time refitting the HVAC blower.
I wanted to filter the air going into the HVAC system and found some lightweight filters that would not impede the airflow but catch the bigger debris. These 3M Filtrete 20"x25" filters were just over $2 for a two pack, the price was the same no matter the size. I cut out a portion and stuffed it into the HVAC box to form a pocket for more surface area and slid the boot over it for a seal. I think it will work well and I cannot tell any difference in airflow.
I finished the day by removing the cam sprockets.
One question I have is about the rebuilt AC compressor I got. It came with new black O rings. Are these compatible with R134a? And I think I should replace the two Schrader valves, are they anything special or would auto parts stores have them?