When you click on links to various merchants on this site and make a purchase, this can result in this site earning a commission. Affiliate programs and affiliations include, but are not limited to, the eBay Partner Network.
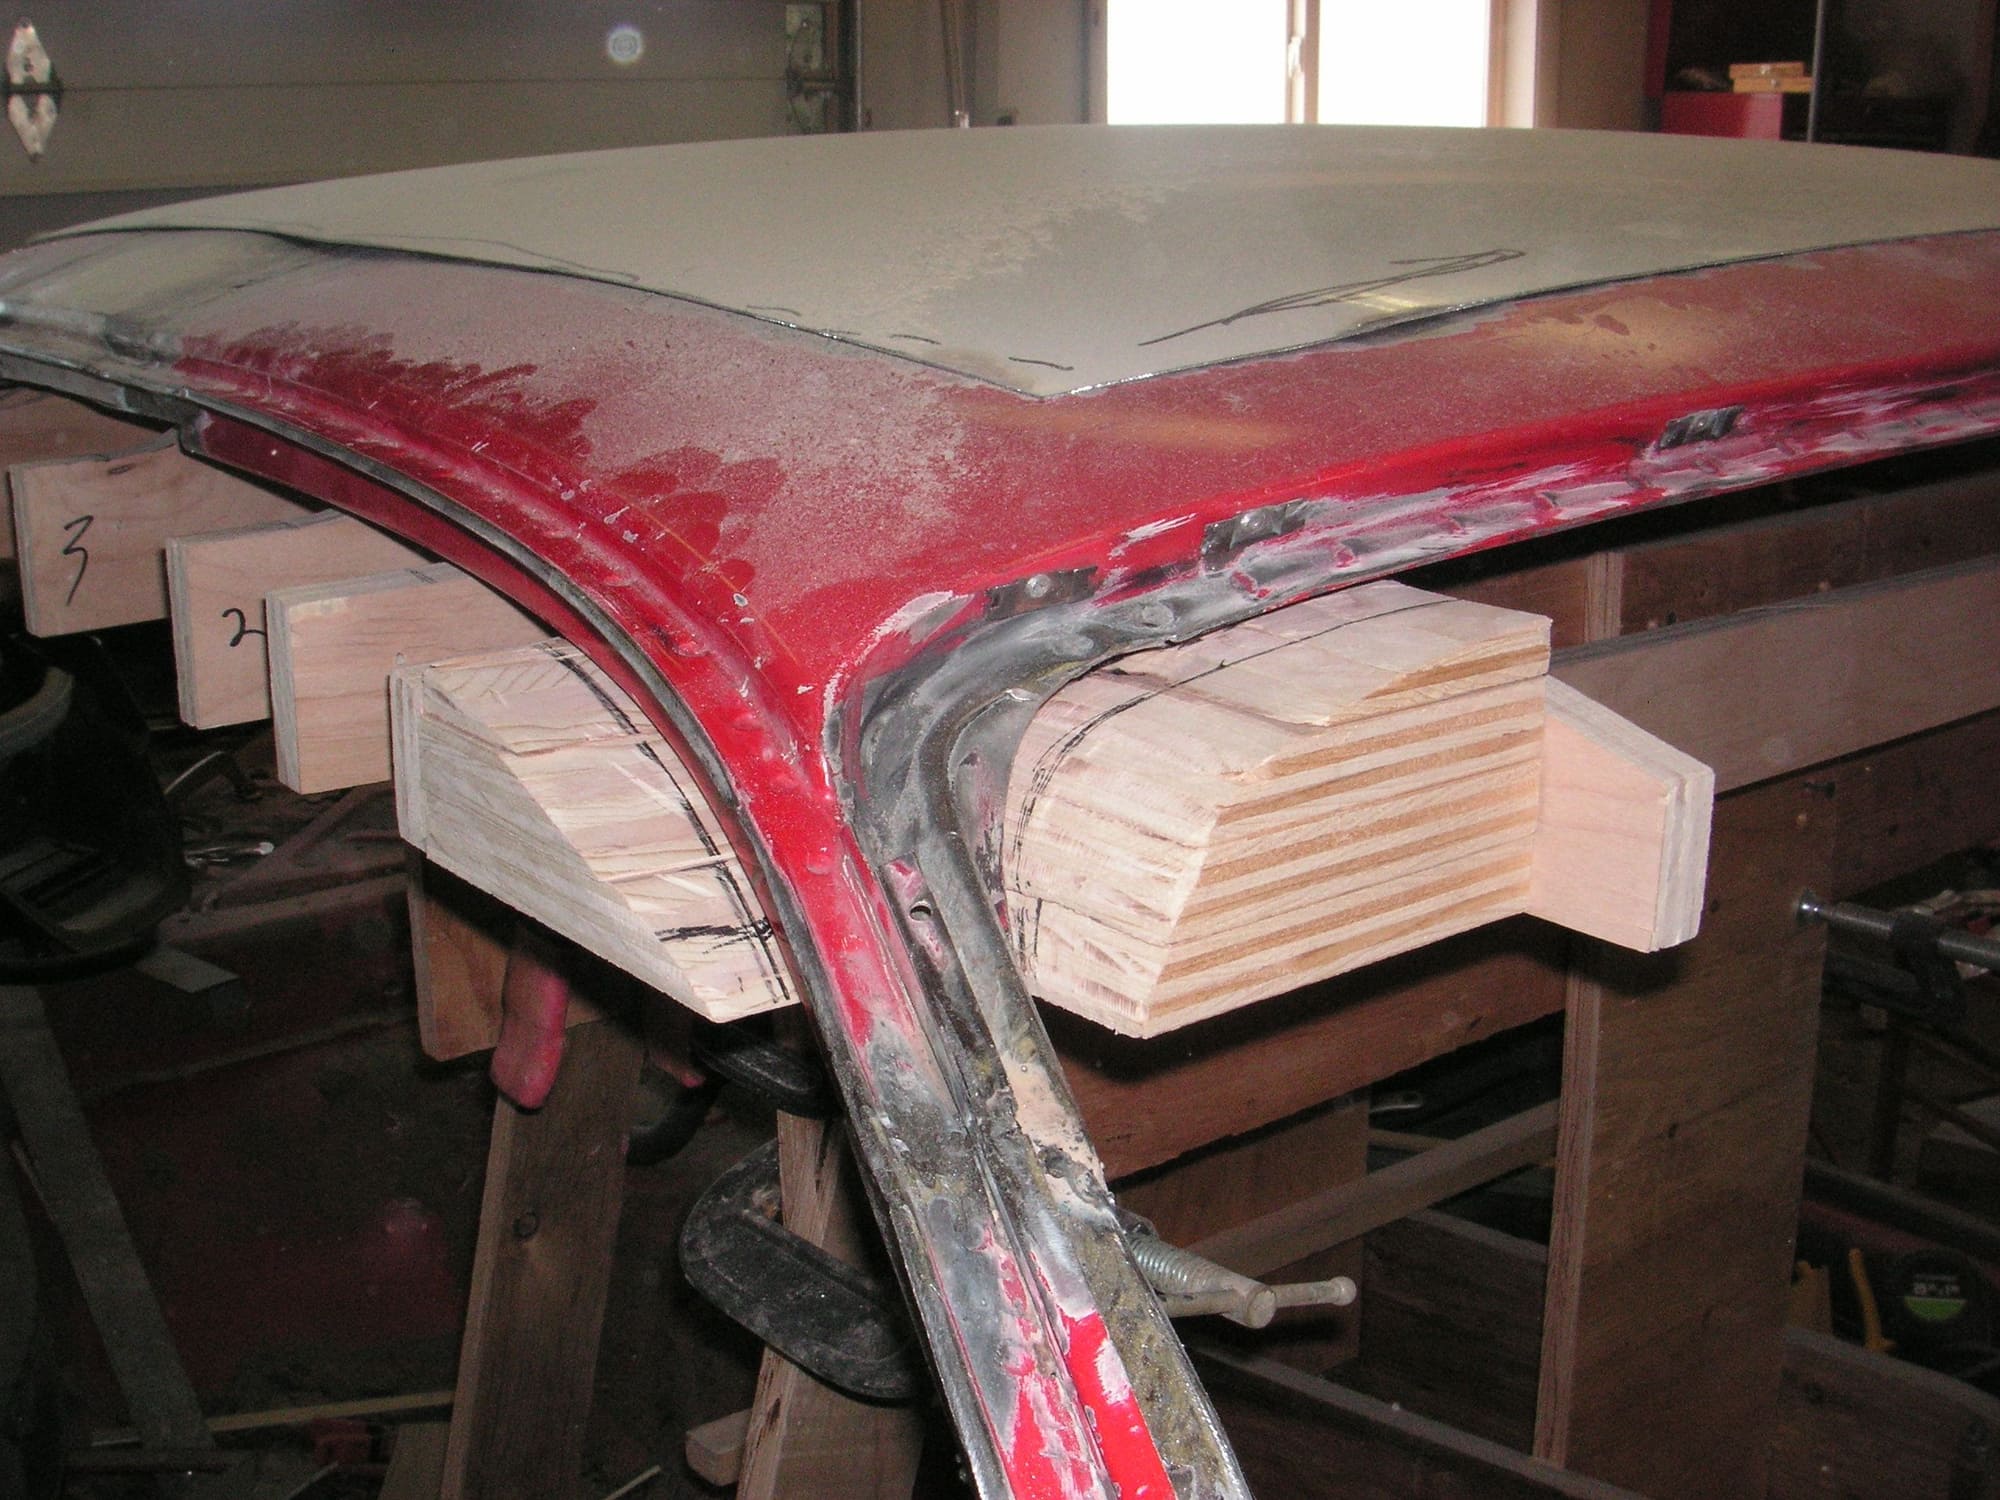
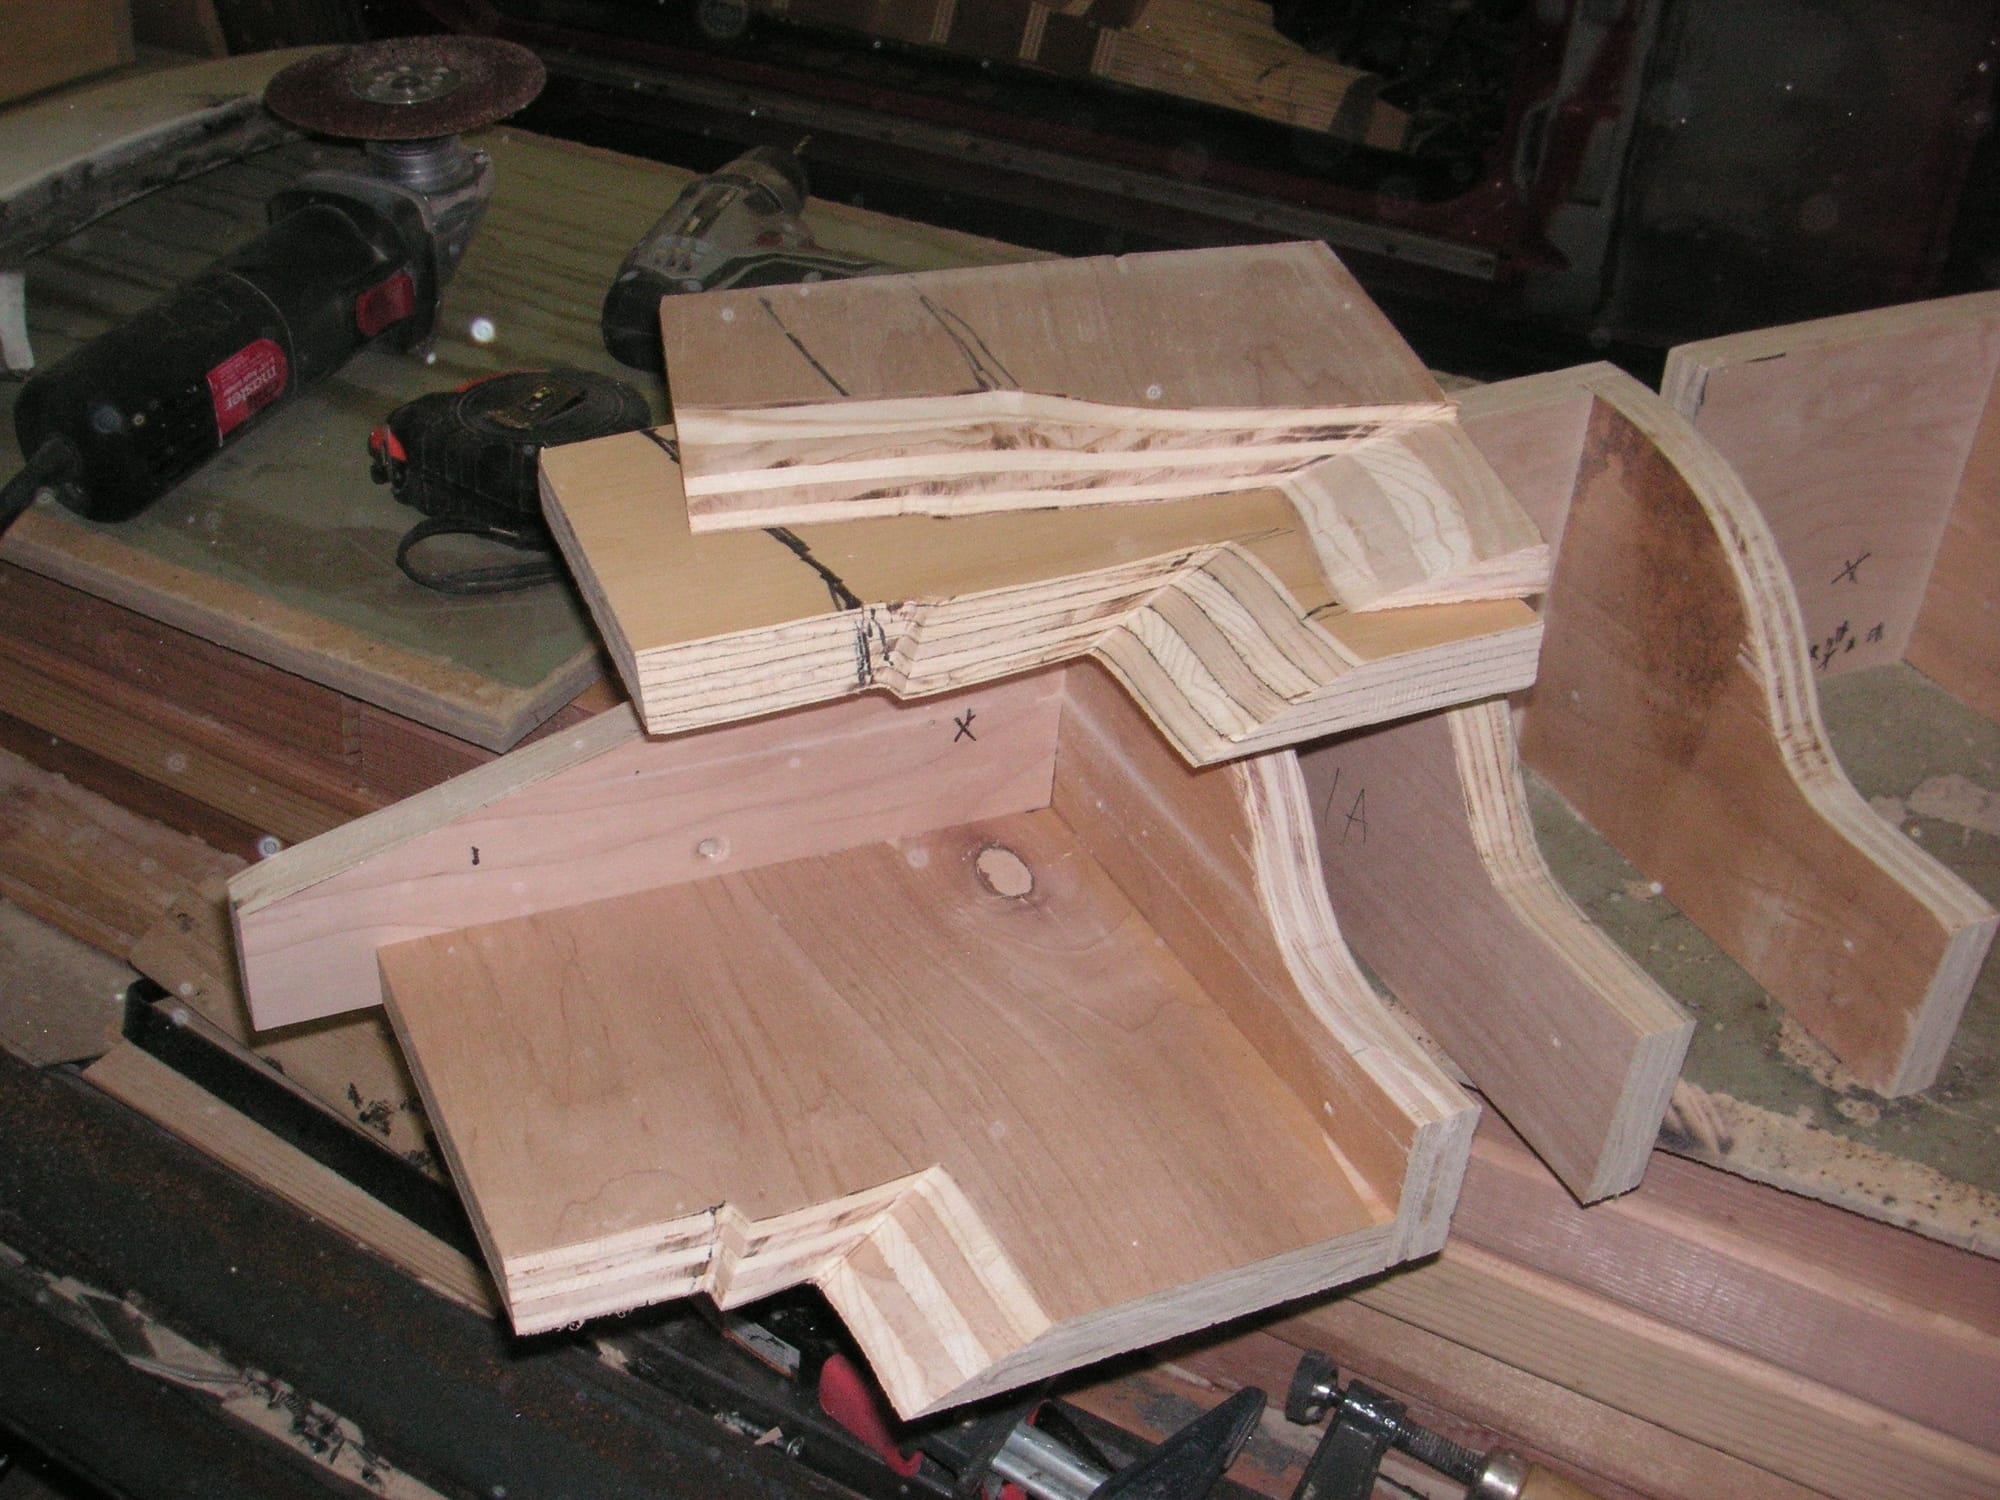
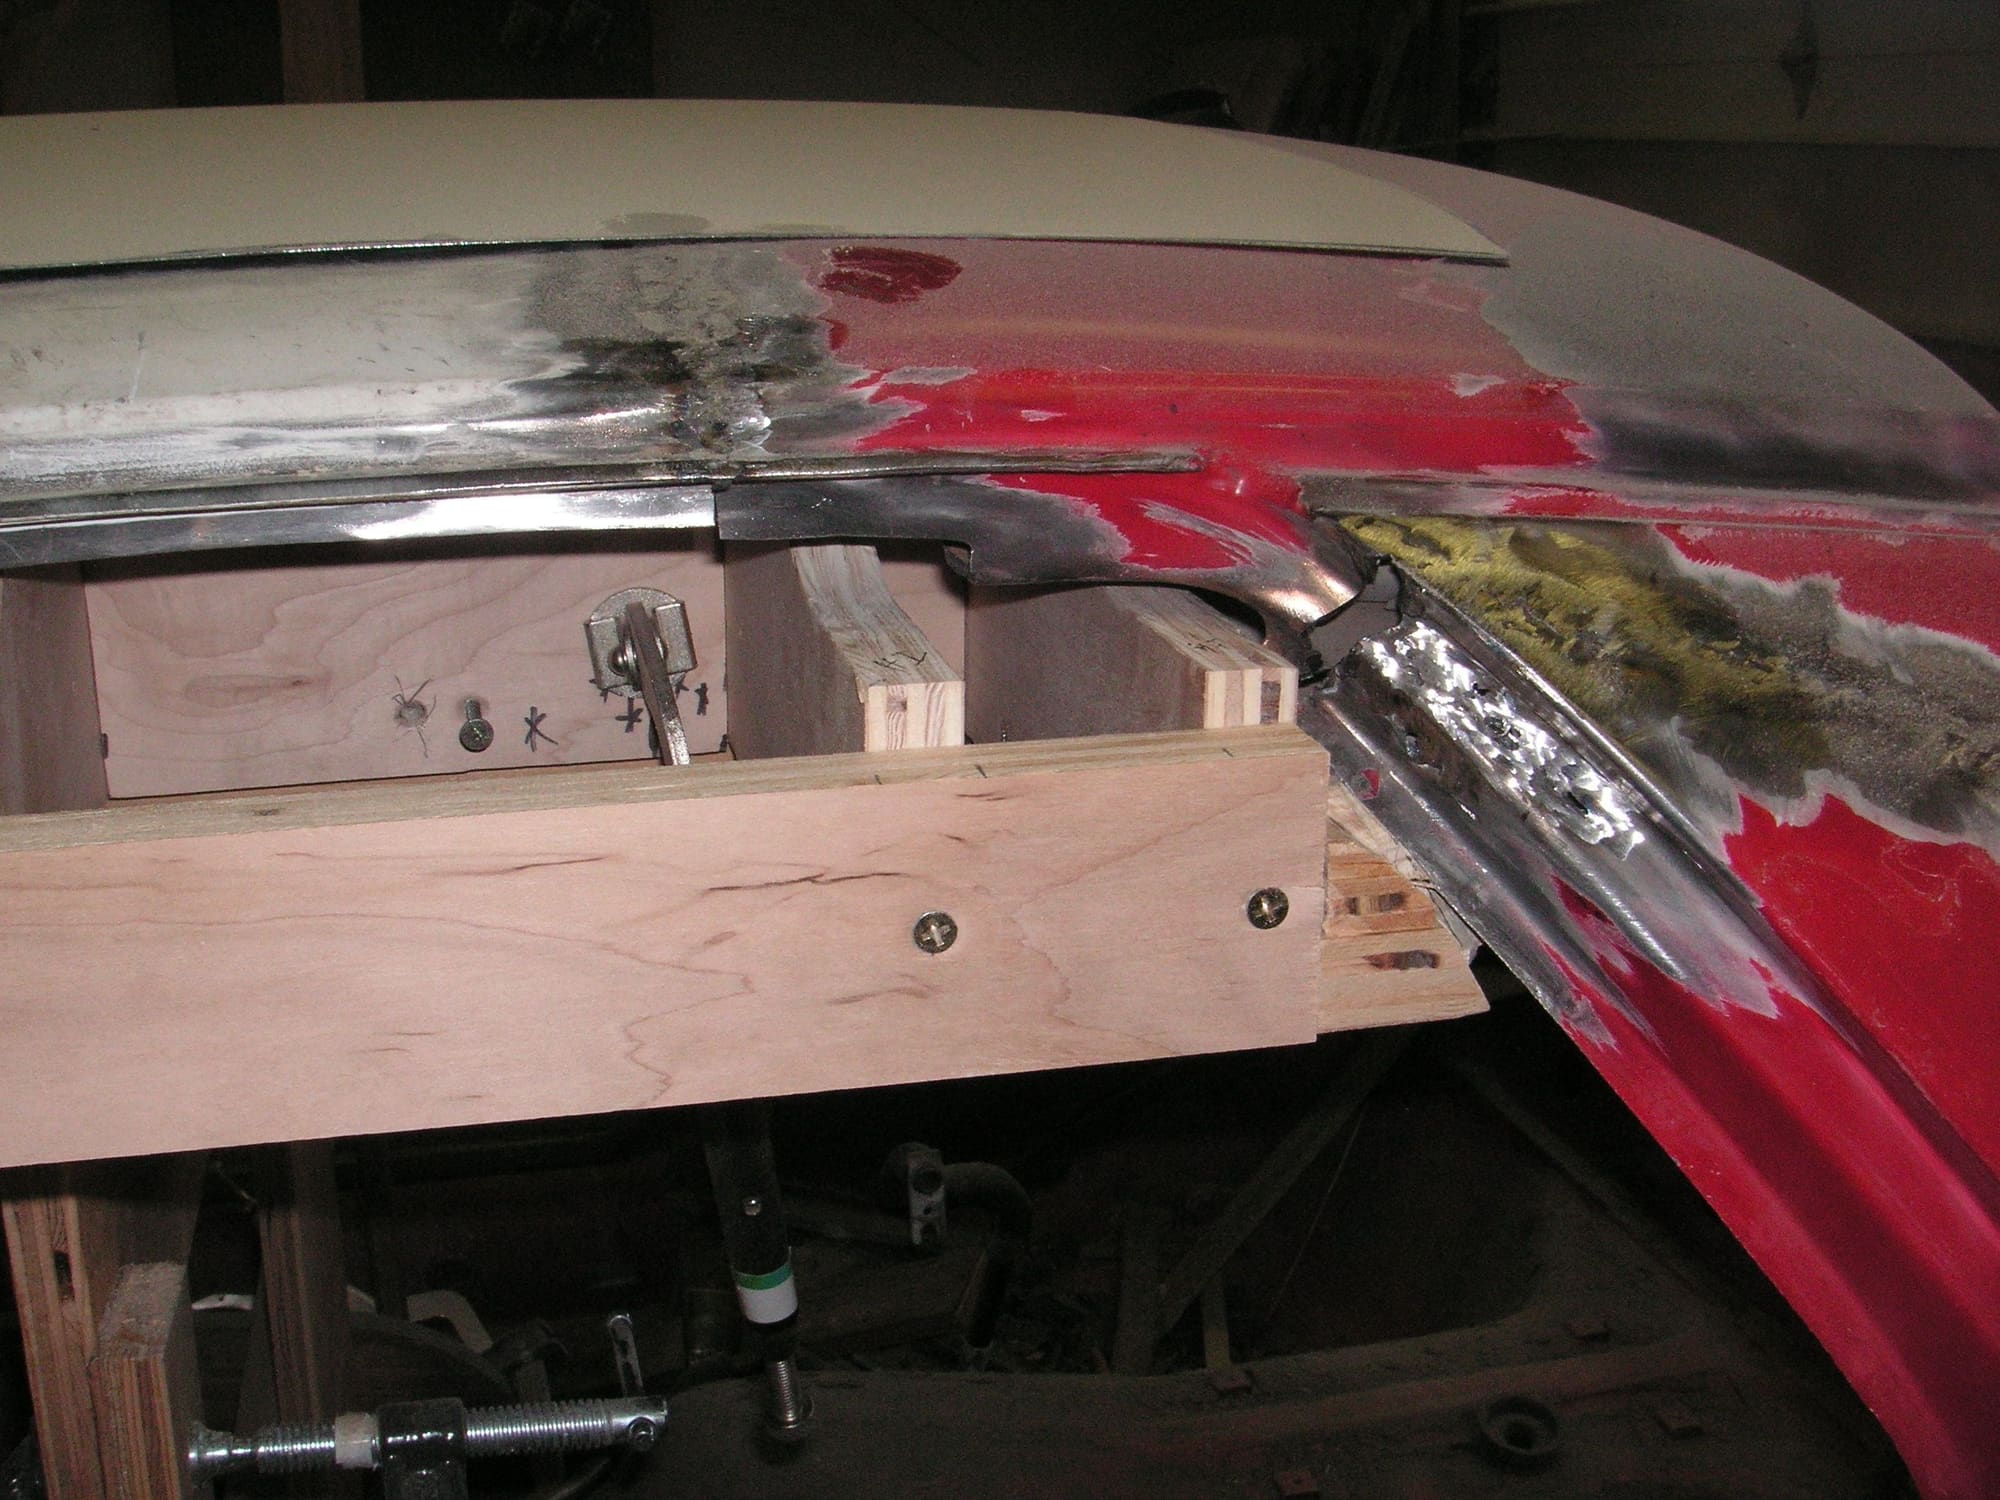
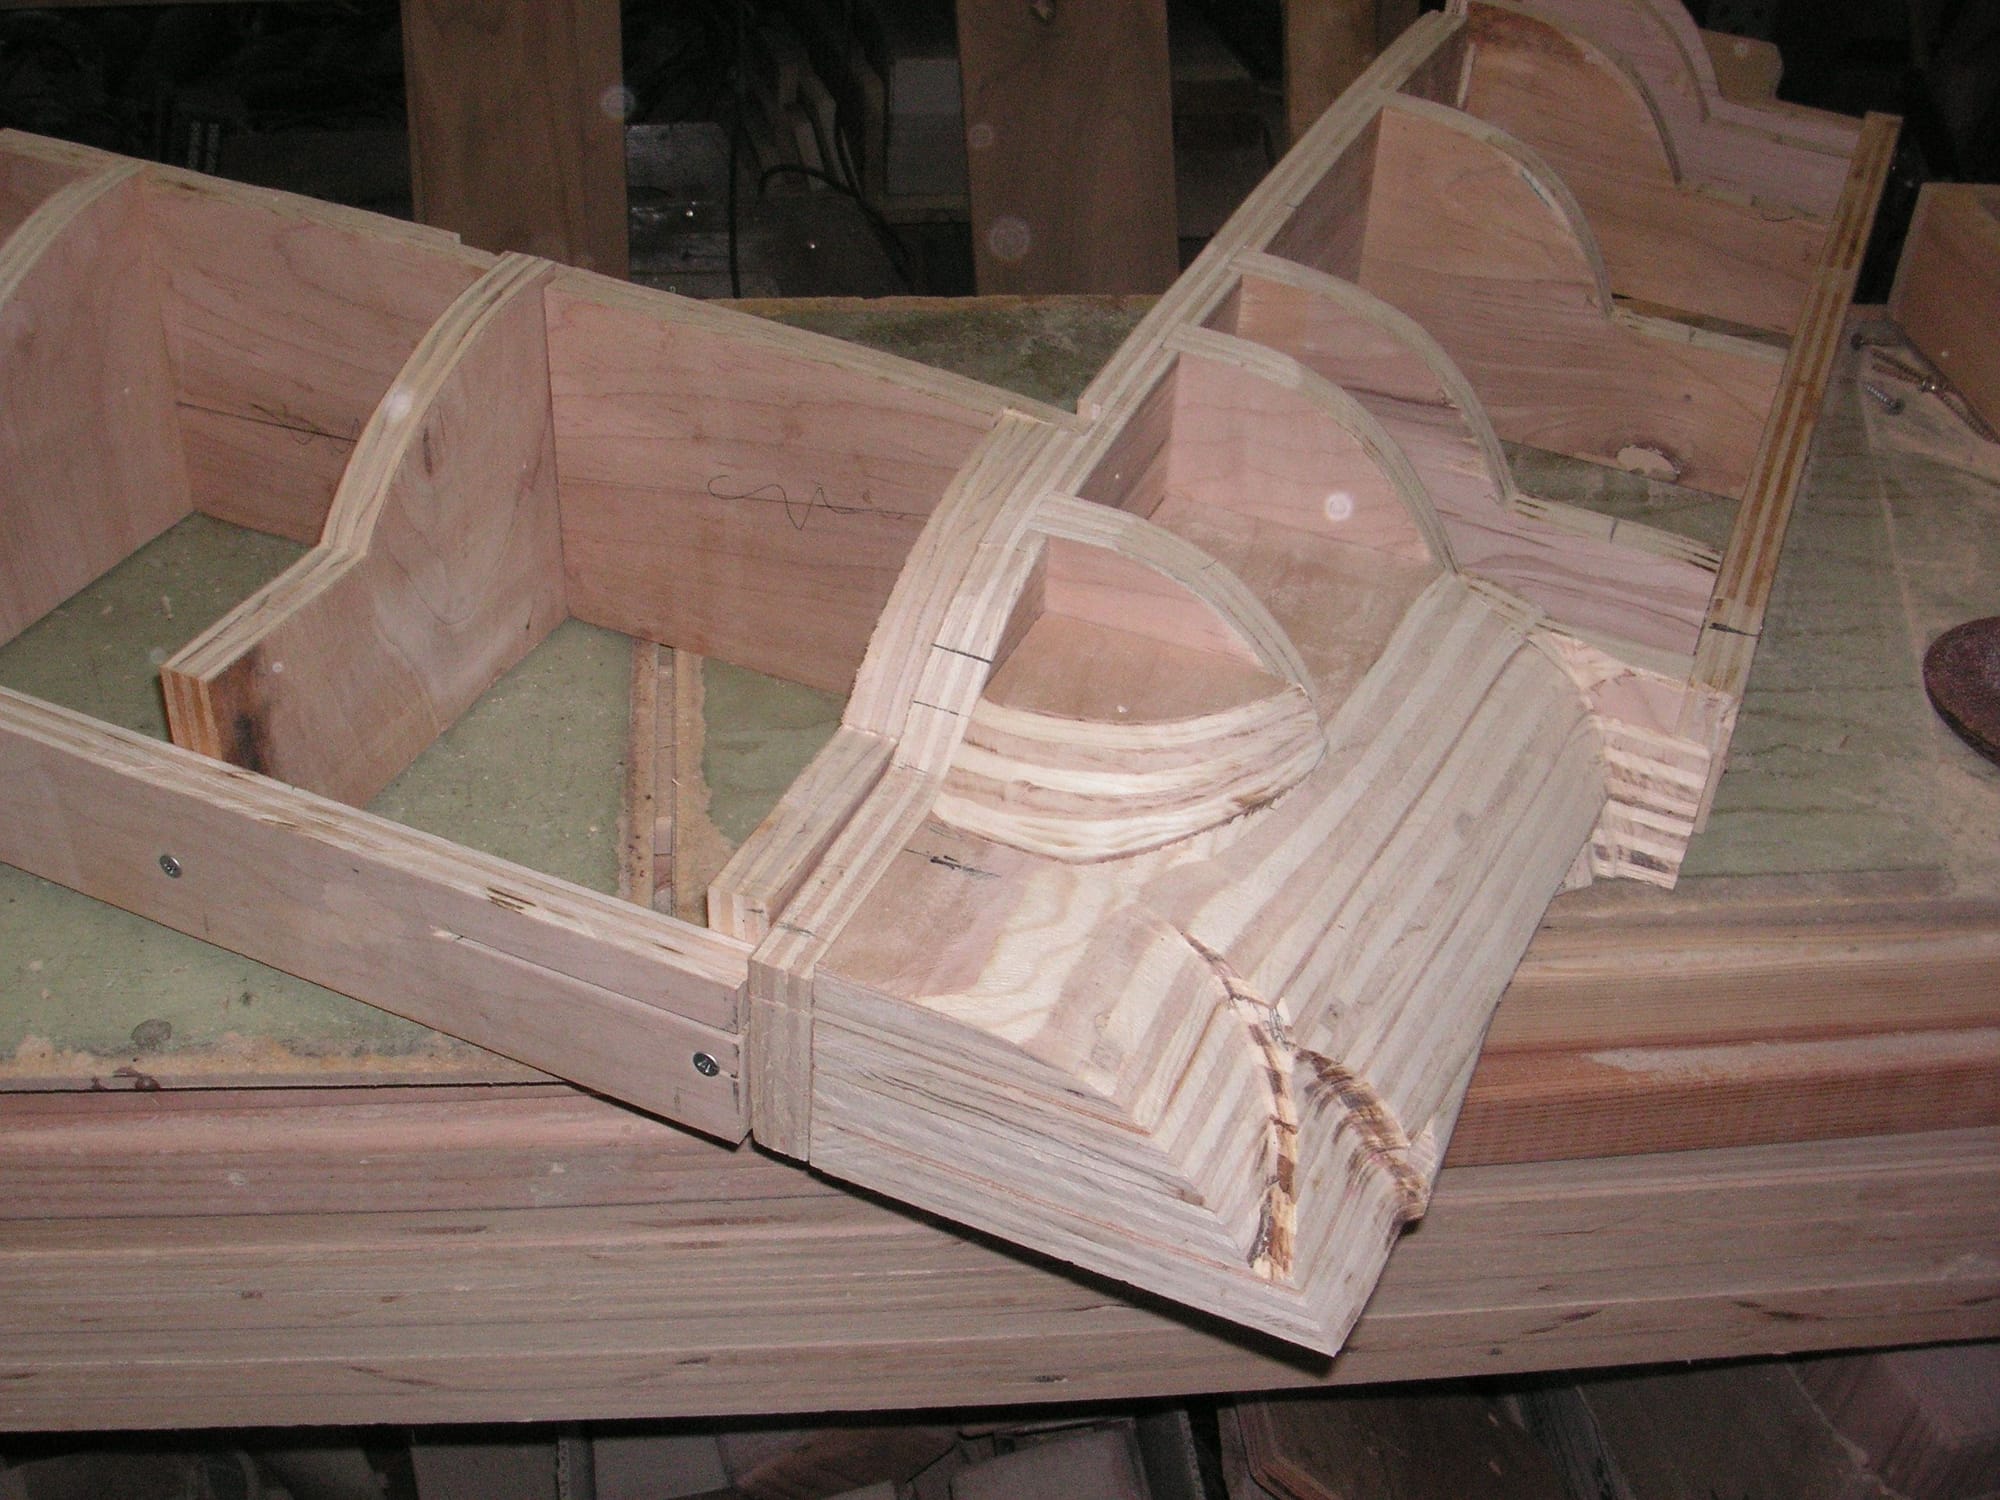
More sculpting and the drivers side is just about compete again. I only had to make over two of the previous layers of plywood to ge it closer to correct. Mow I have both of the front corners nearly complete, at least to the point of figuring out how best to reduce them is size about an eighth of an inch to allow for the layers of fiberglass.
Now I am also trying to figure out just how to do something similar on the rear corners at the top of the B-Posts. They are less complicated, but they mate up to the lower trim inside a bit differently.
When I finish the corners, or at least mostly, I'll work on the formers for the fron
nd back and then I think I'll put it all together with epoxy and start covering it with strips of wood to then finish in epoxy and maybe some bondo.
This is a slow and time consuming process, but one that will hopefully help speed things up later. One of the things that seems to kill various projects usually is the amount of items such as this that get put off until later while concentrating on the "fun" aspects of a project. I'm hoping to avoid that with this project. I may not get the headliner mold fully completed, but close enough that final fitting can be done fairly quickly and then the headliner shell pulled from it in time to complete the interior. Too, I may not properly do the final fitting until the roof is fully welded together and the cross brace removed.
Last edited by Jerry Feather; 06-26-2018 at 10:34 AM.
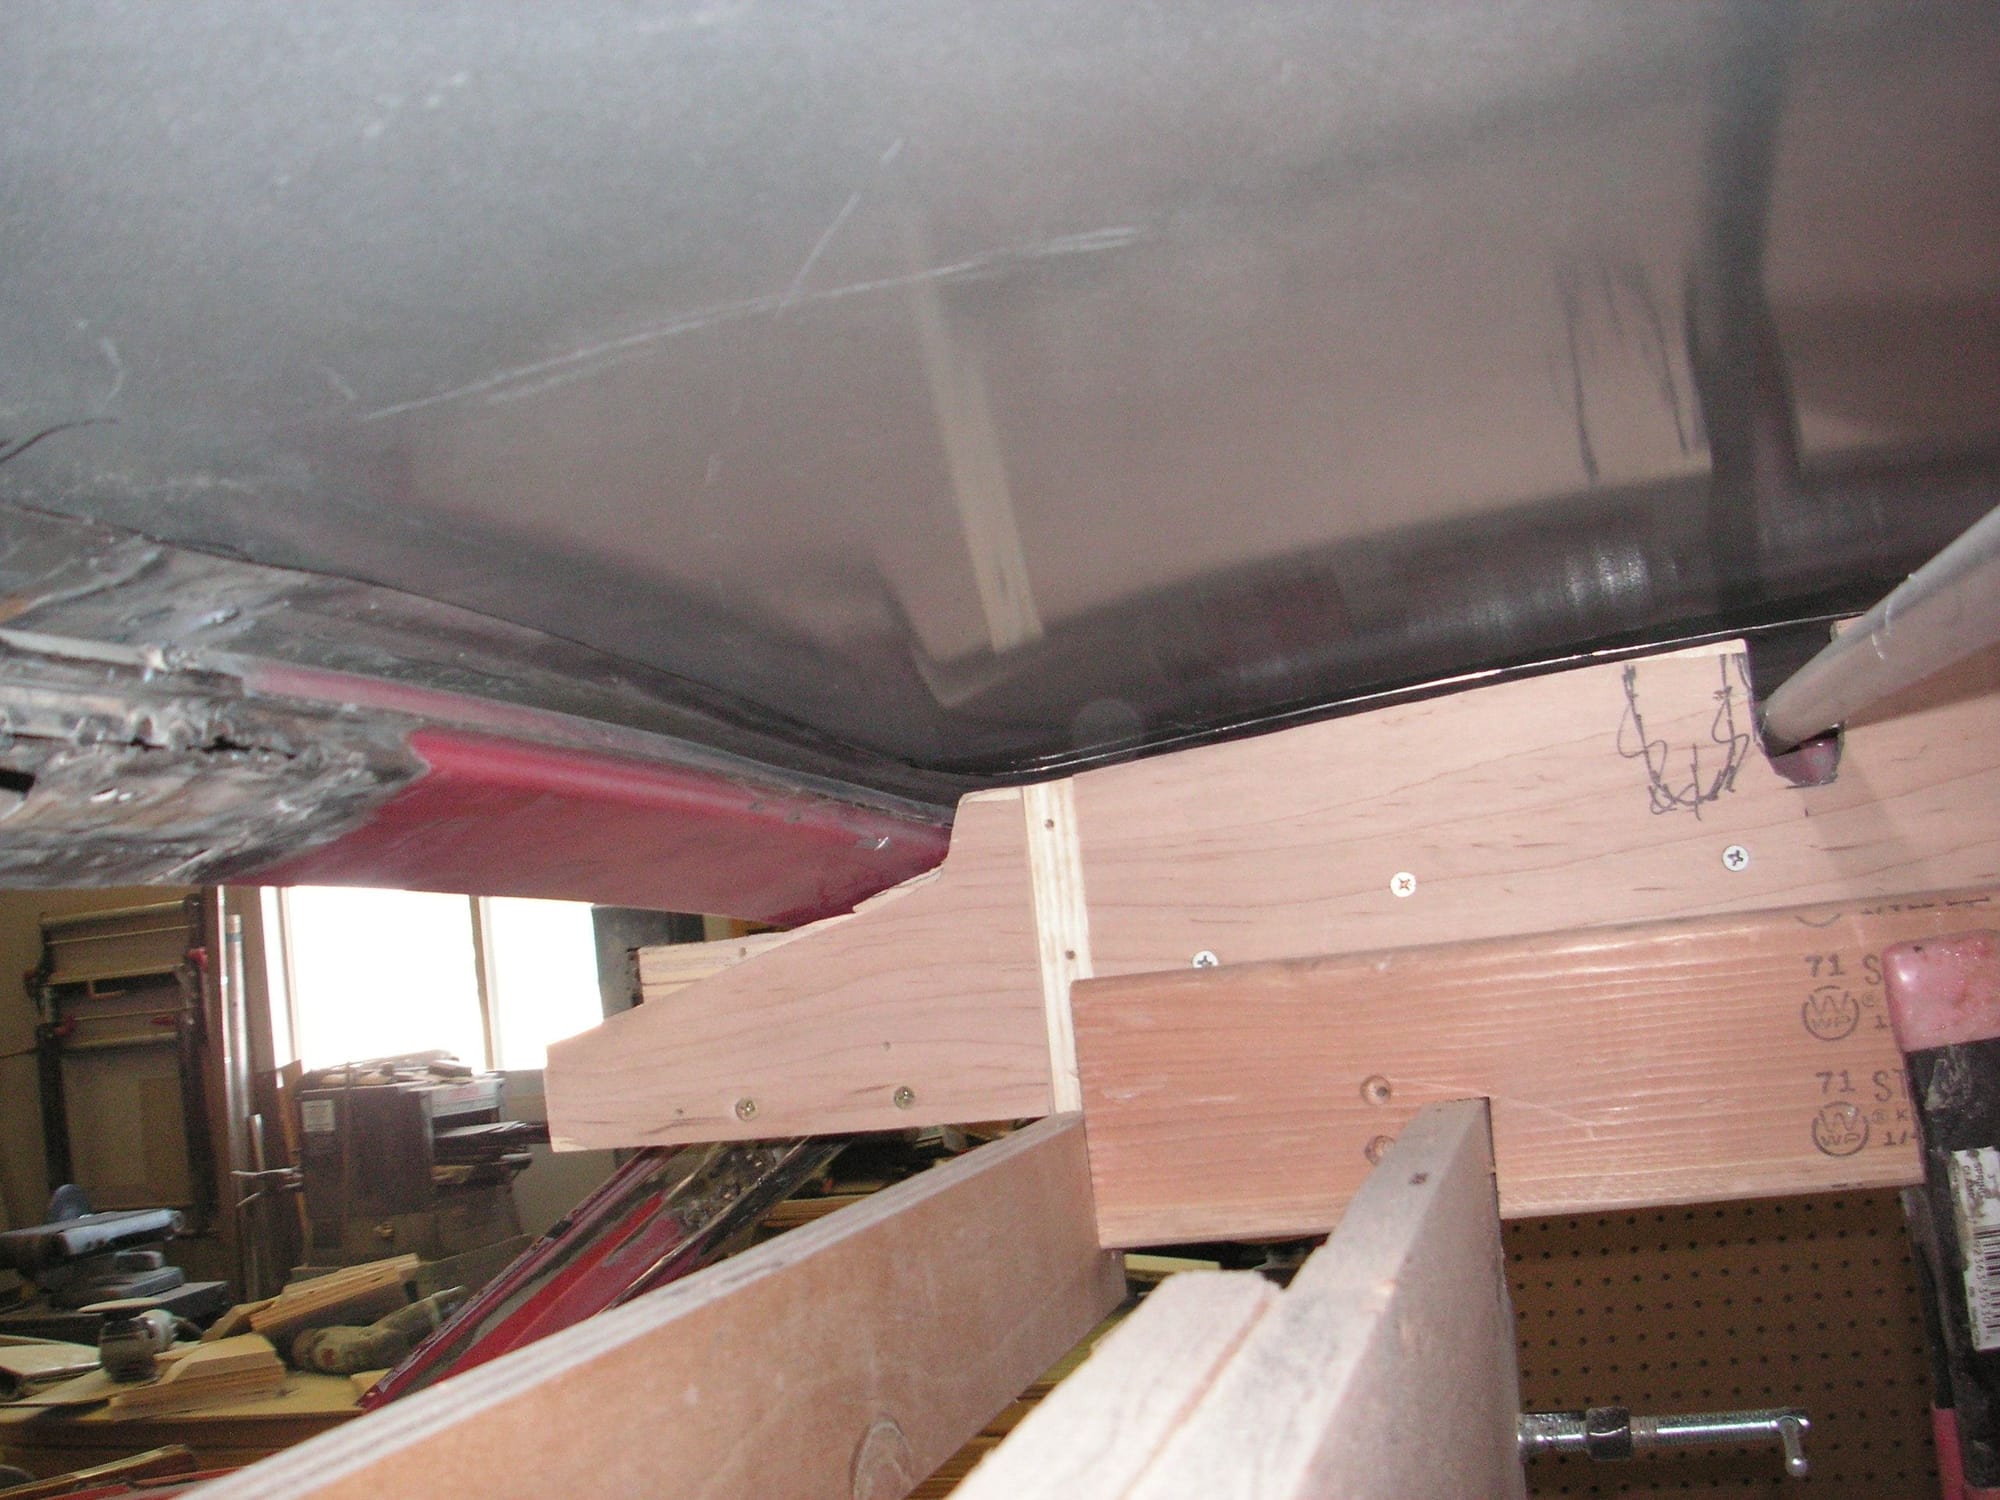
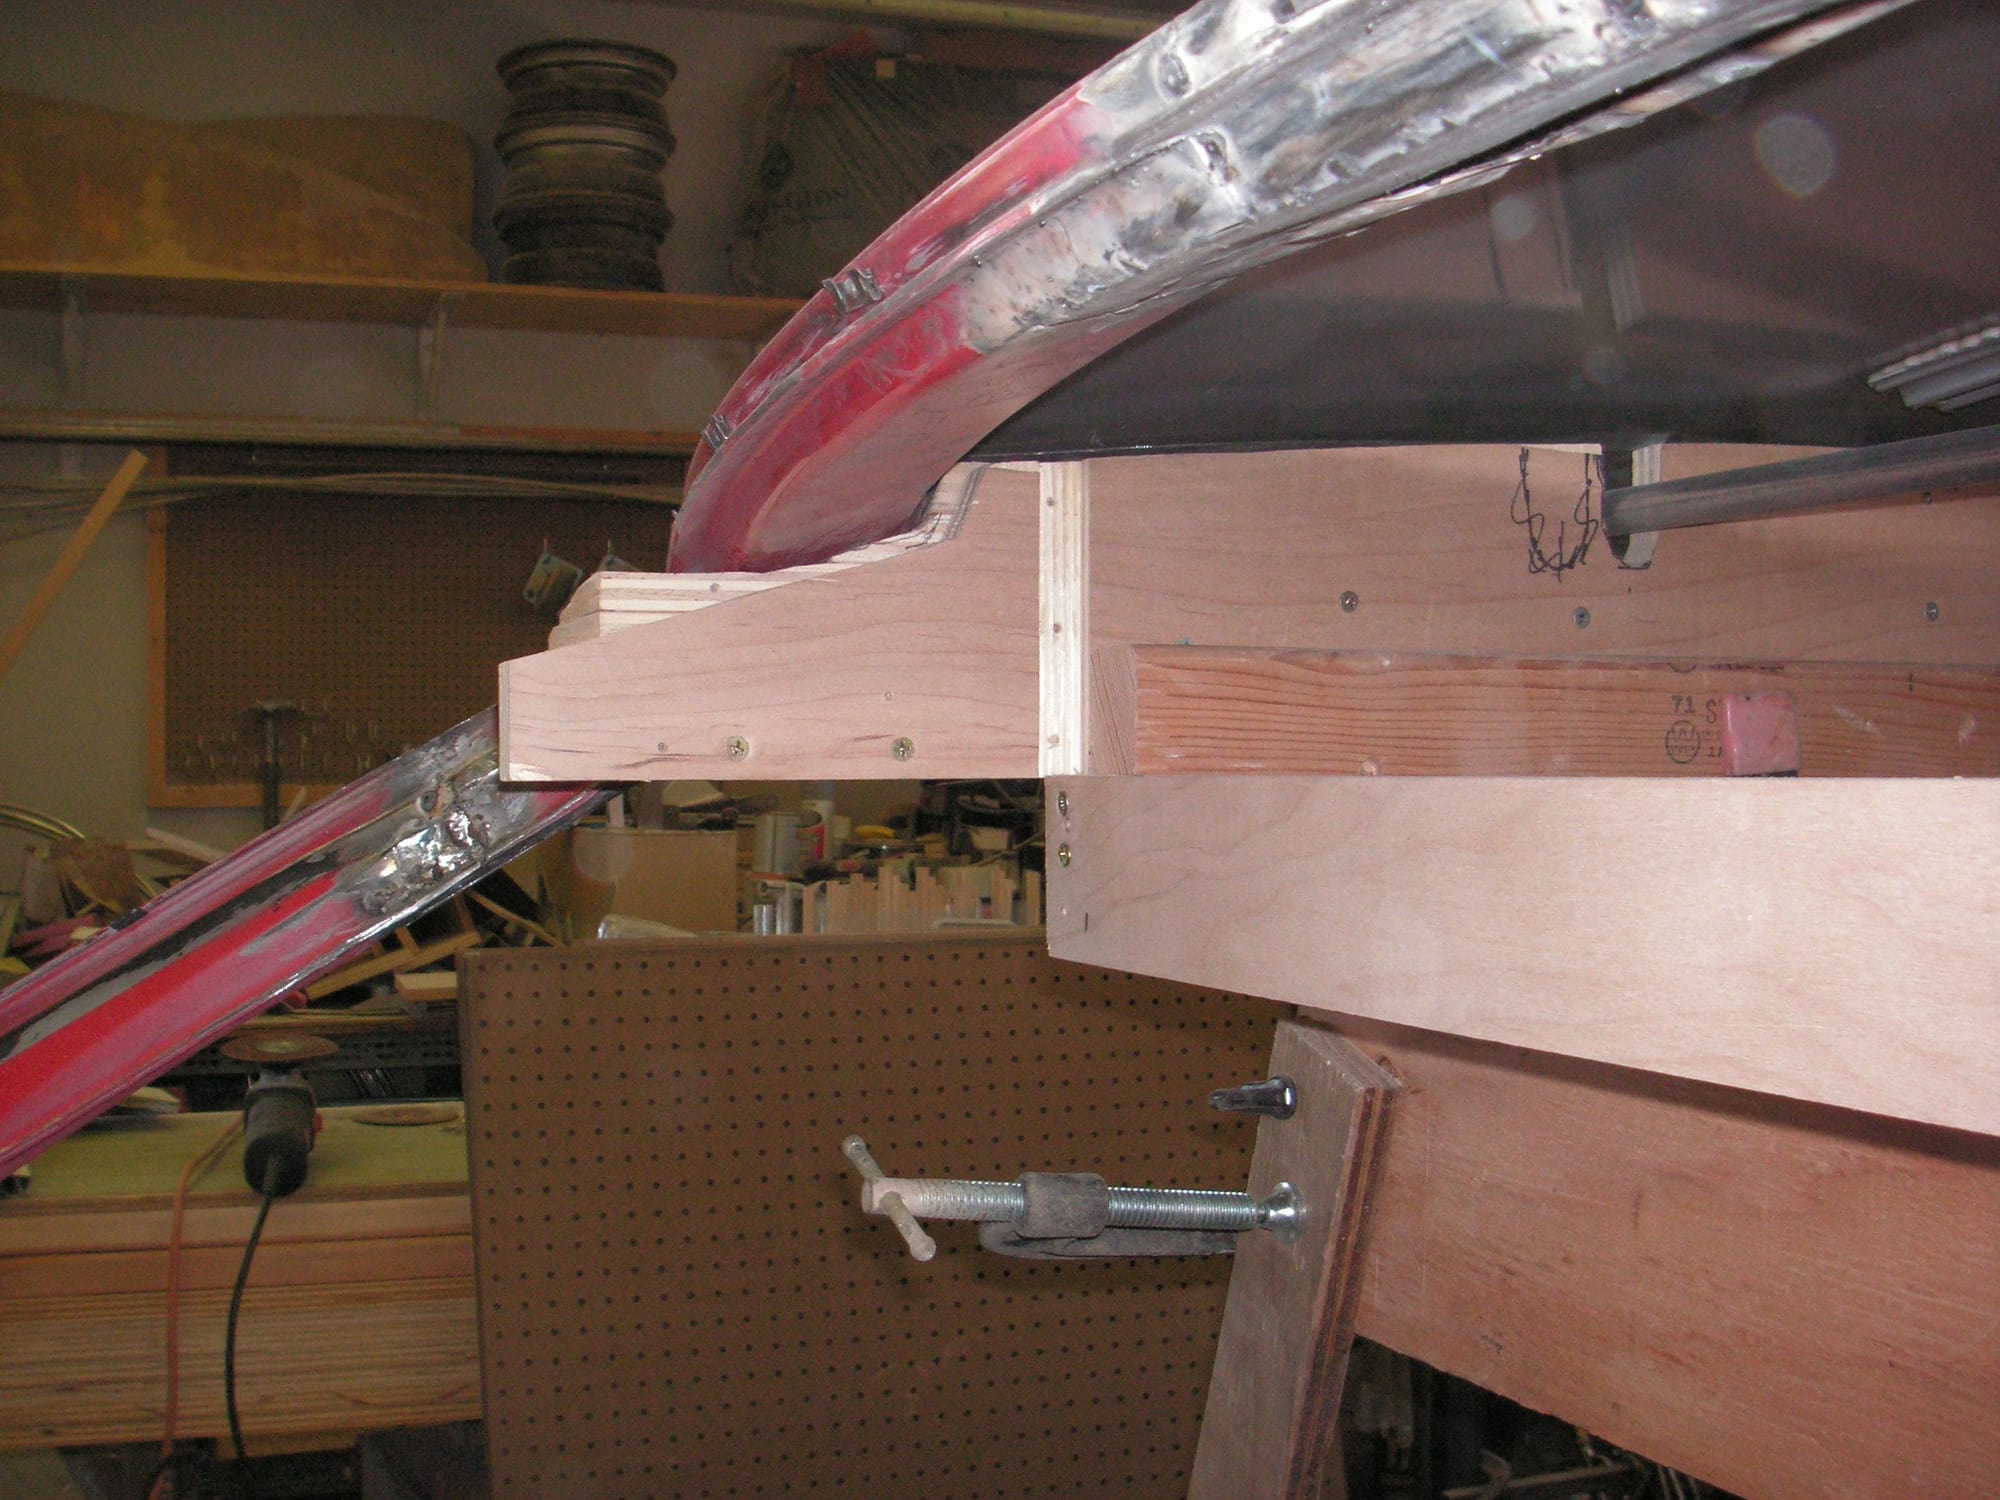
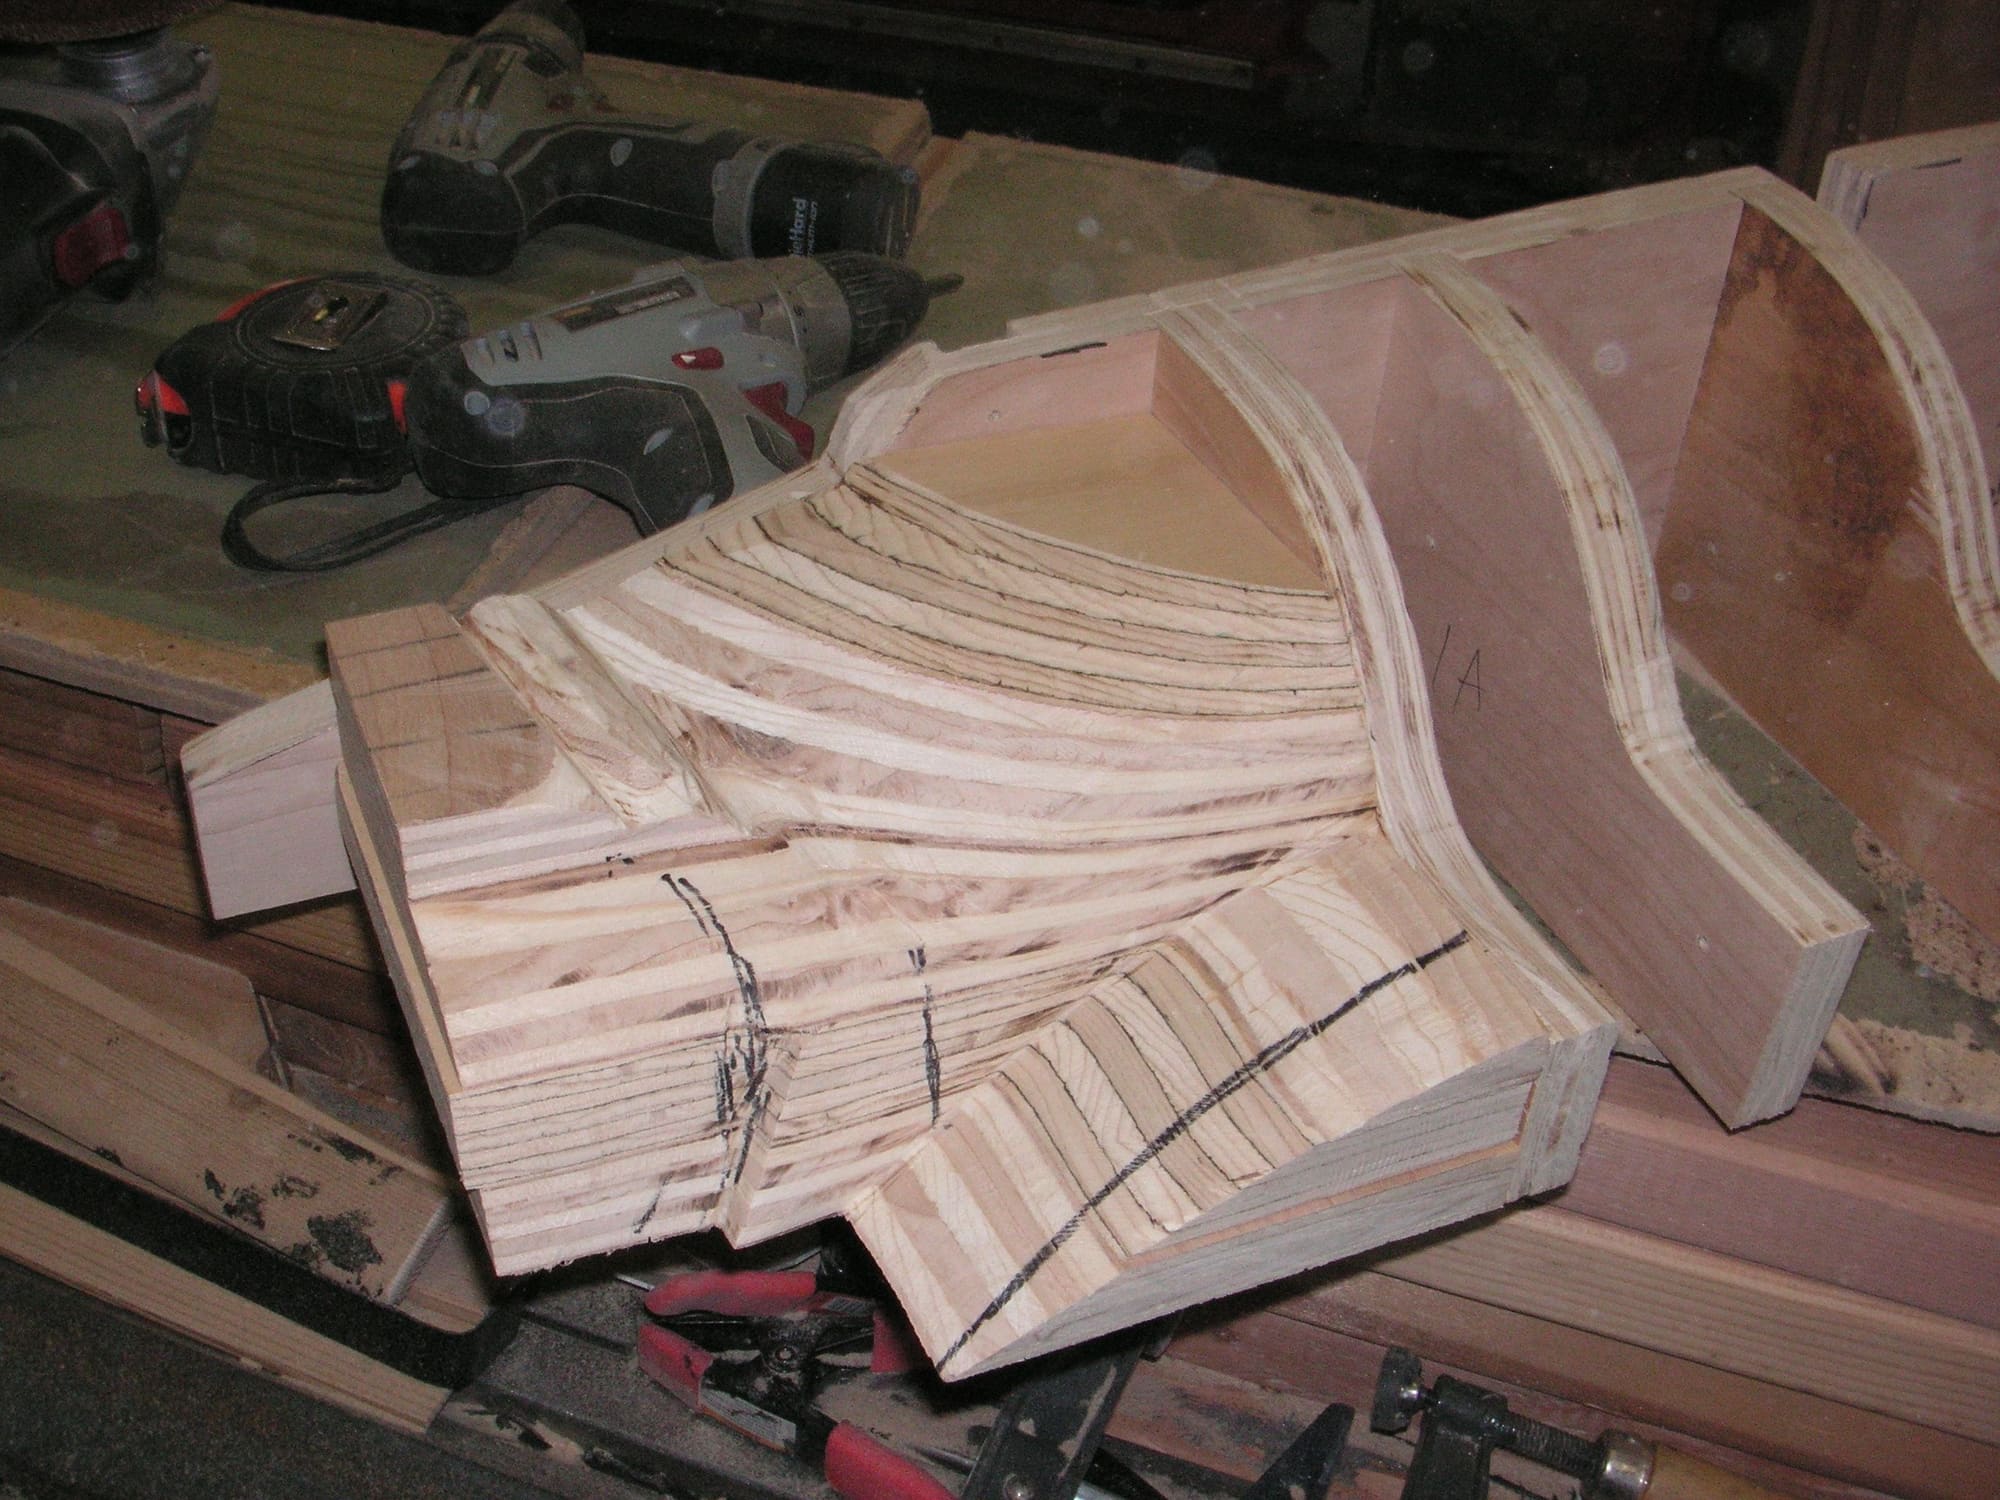
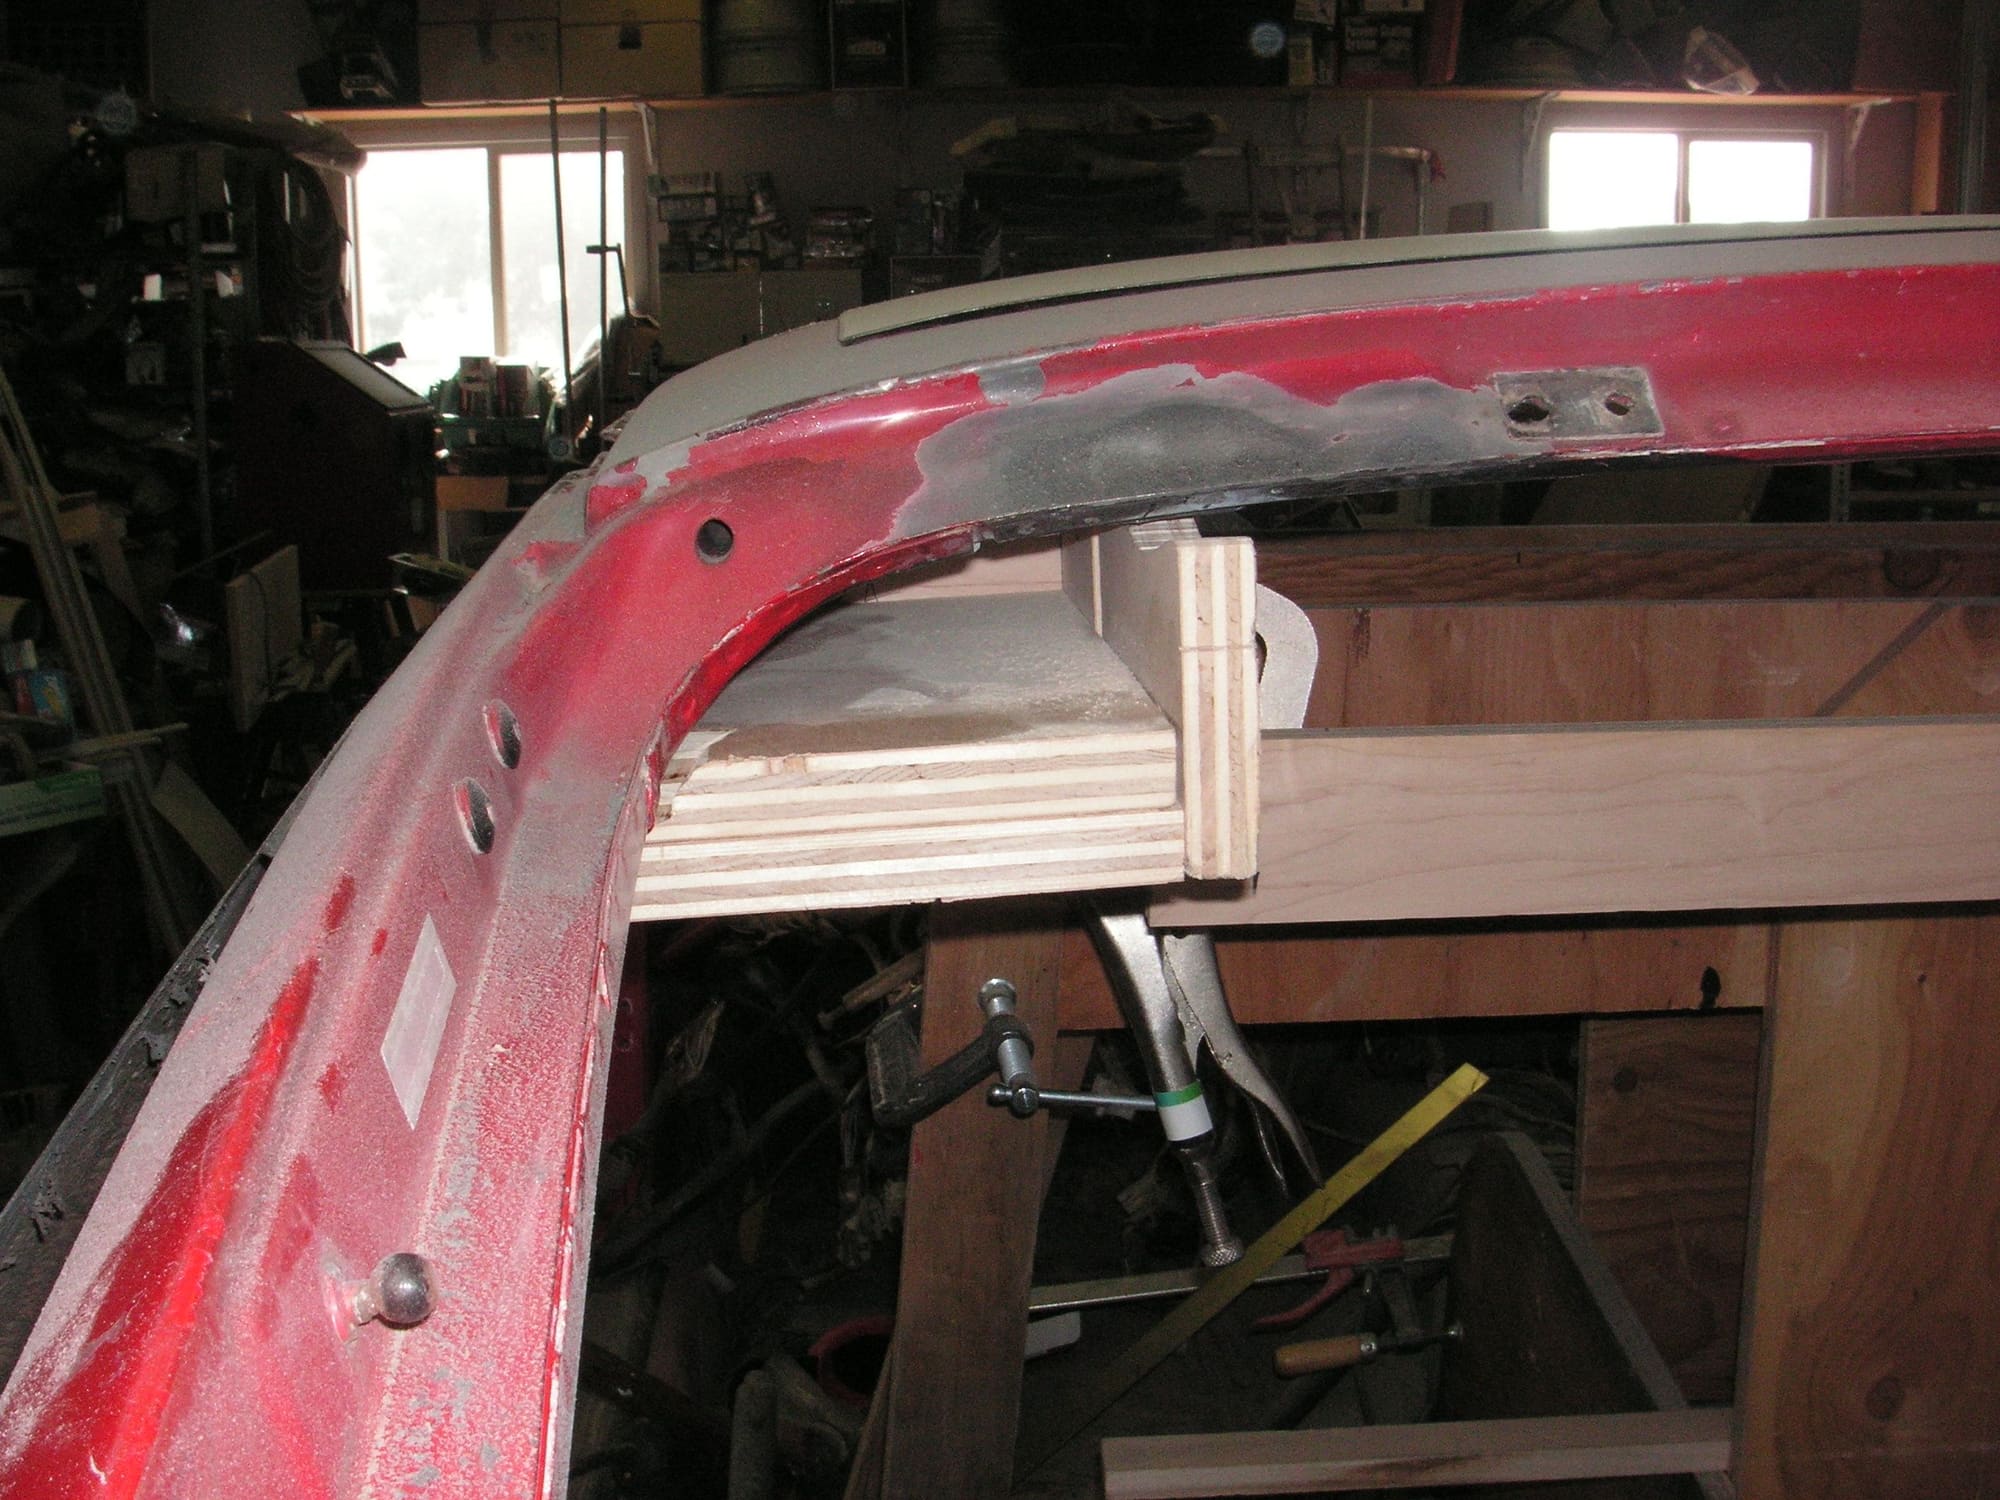
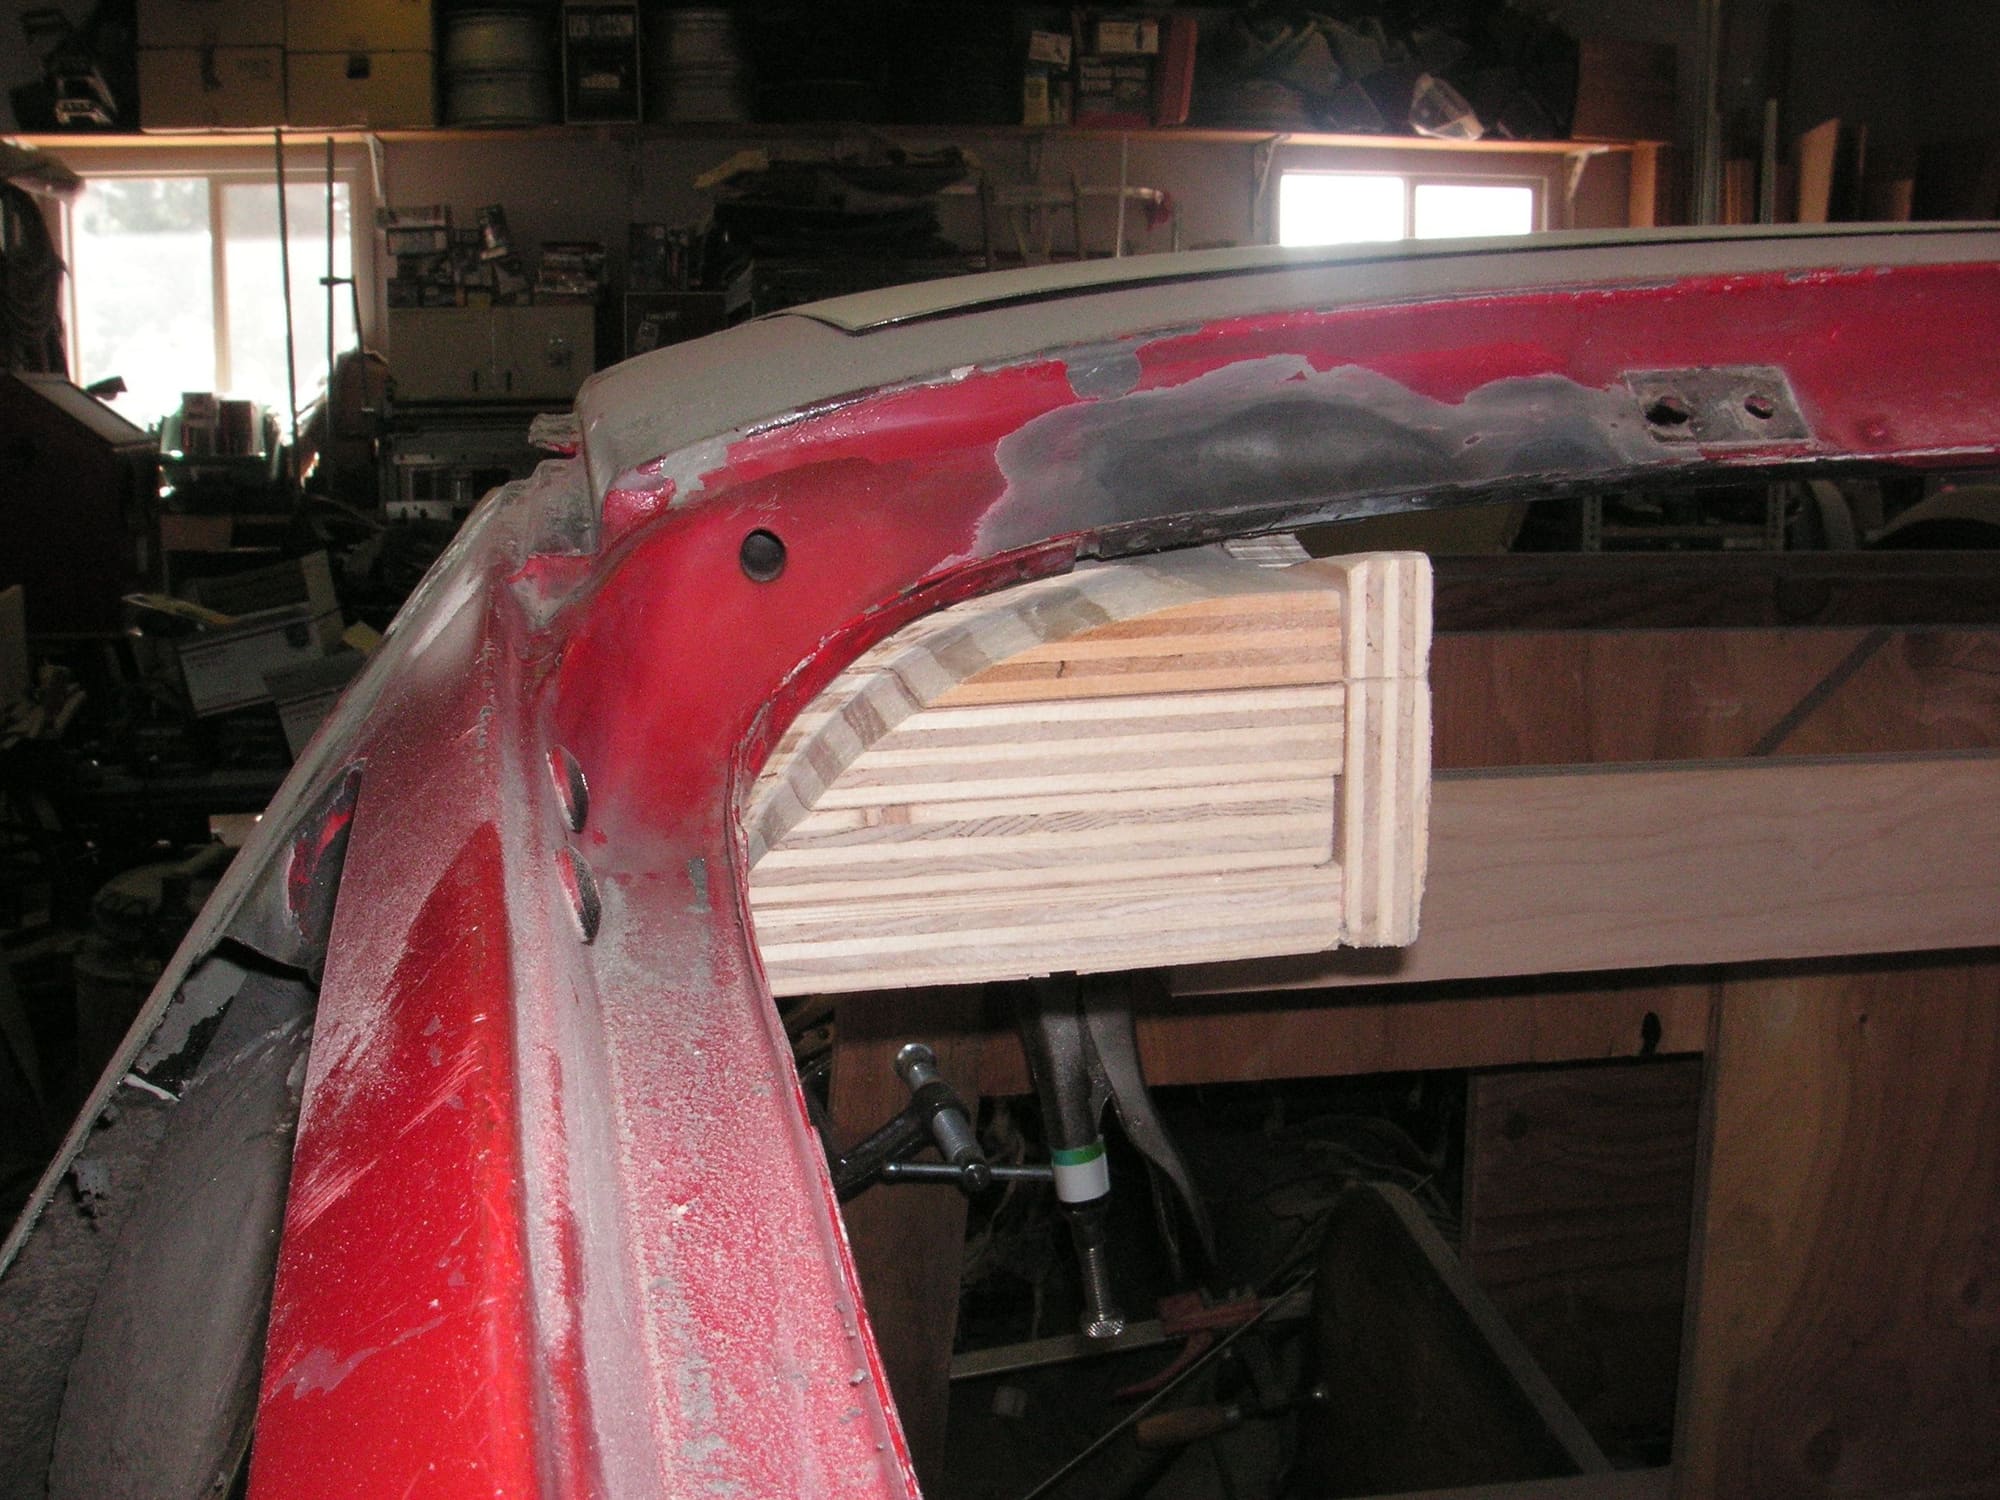
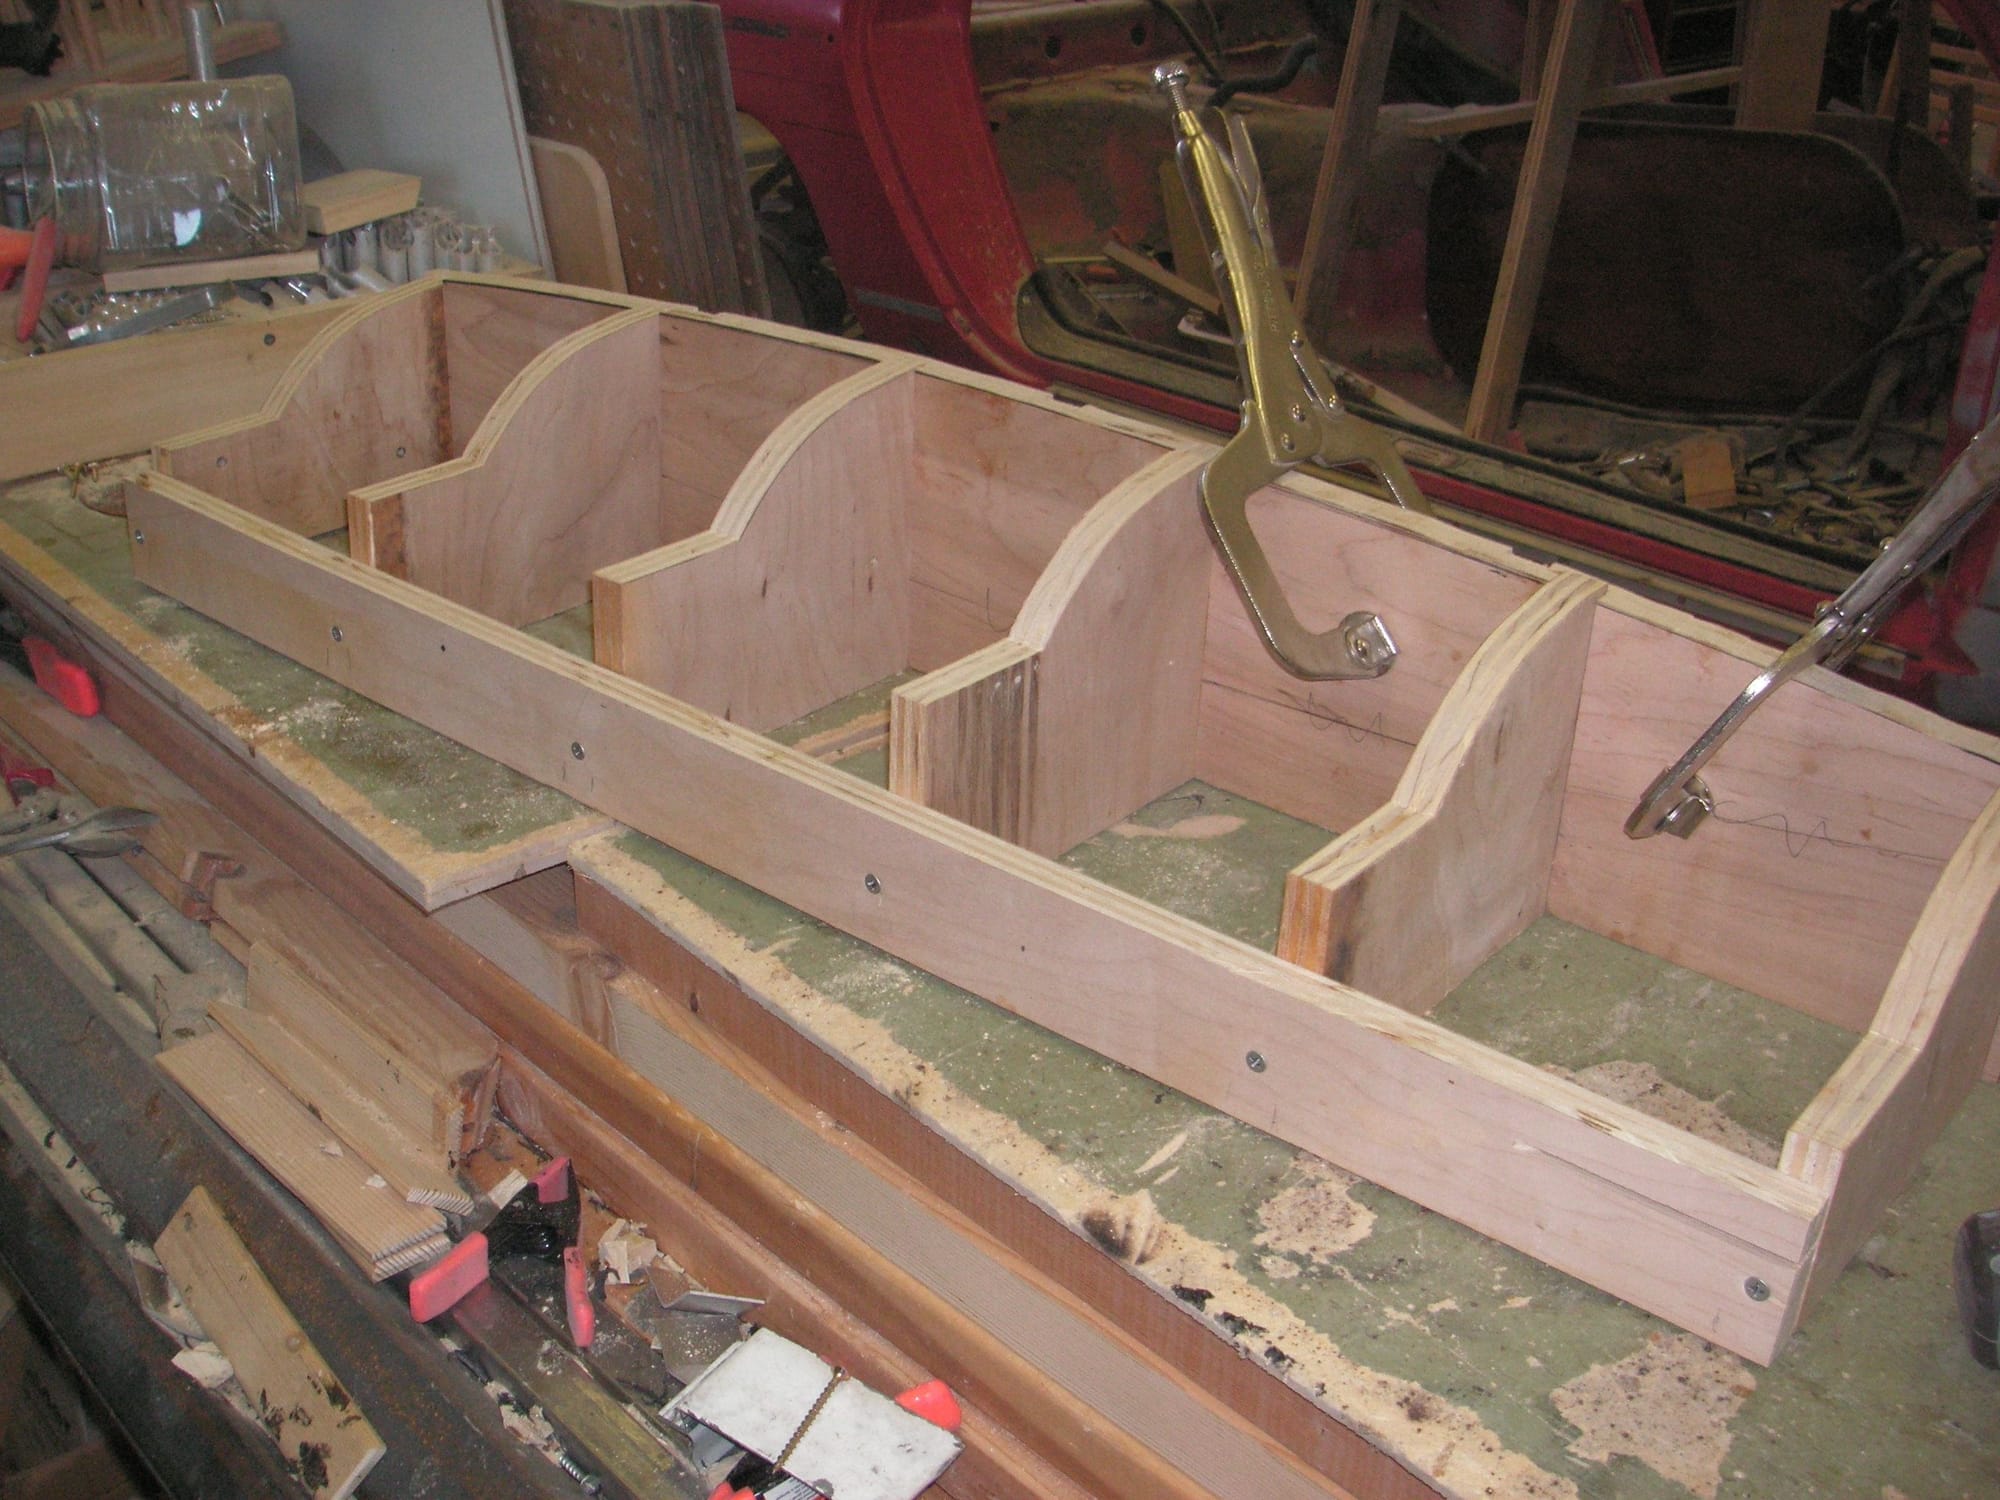
I have the right rear corner pretty close and have started on the last one the one on the left rear. Then I find that the basic frame in the car is not quite centered in the rear, co I have that corrected and will have to grind a bit on the right rear corner and then finish out the left rear corner to fit. When these are rough finished and then reduced in size in places to allow for the firberglass clearance, I'll work up a method to make final fitting with bondo.
I think I can see the light at the end of the kind of sideways tunnel involving this headliner mold. I think the front, back and over the center will go pretty quickly, then I think I can set it aside and get back to the cutting and welding on the car.
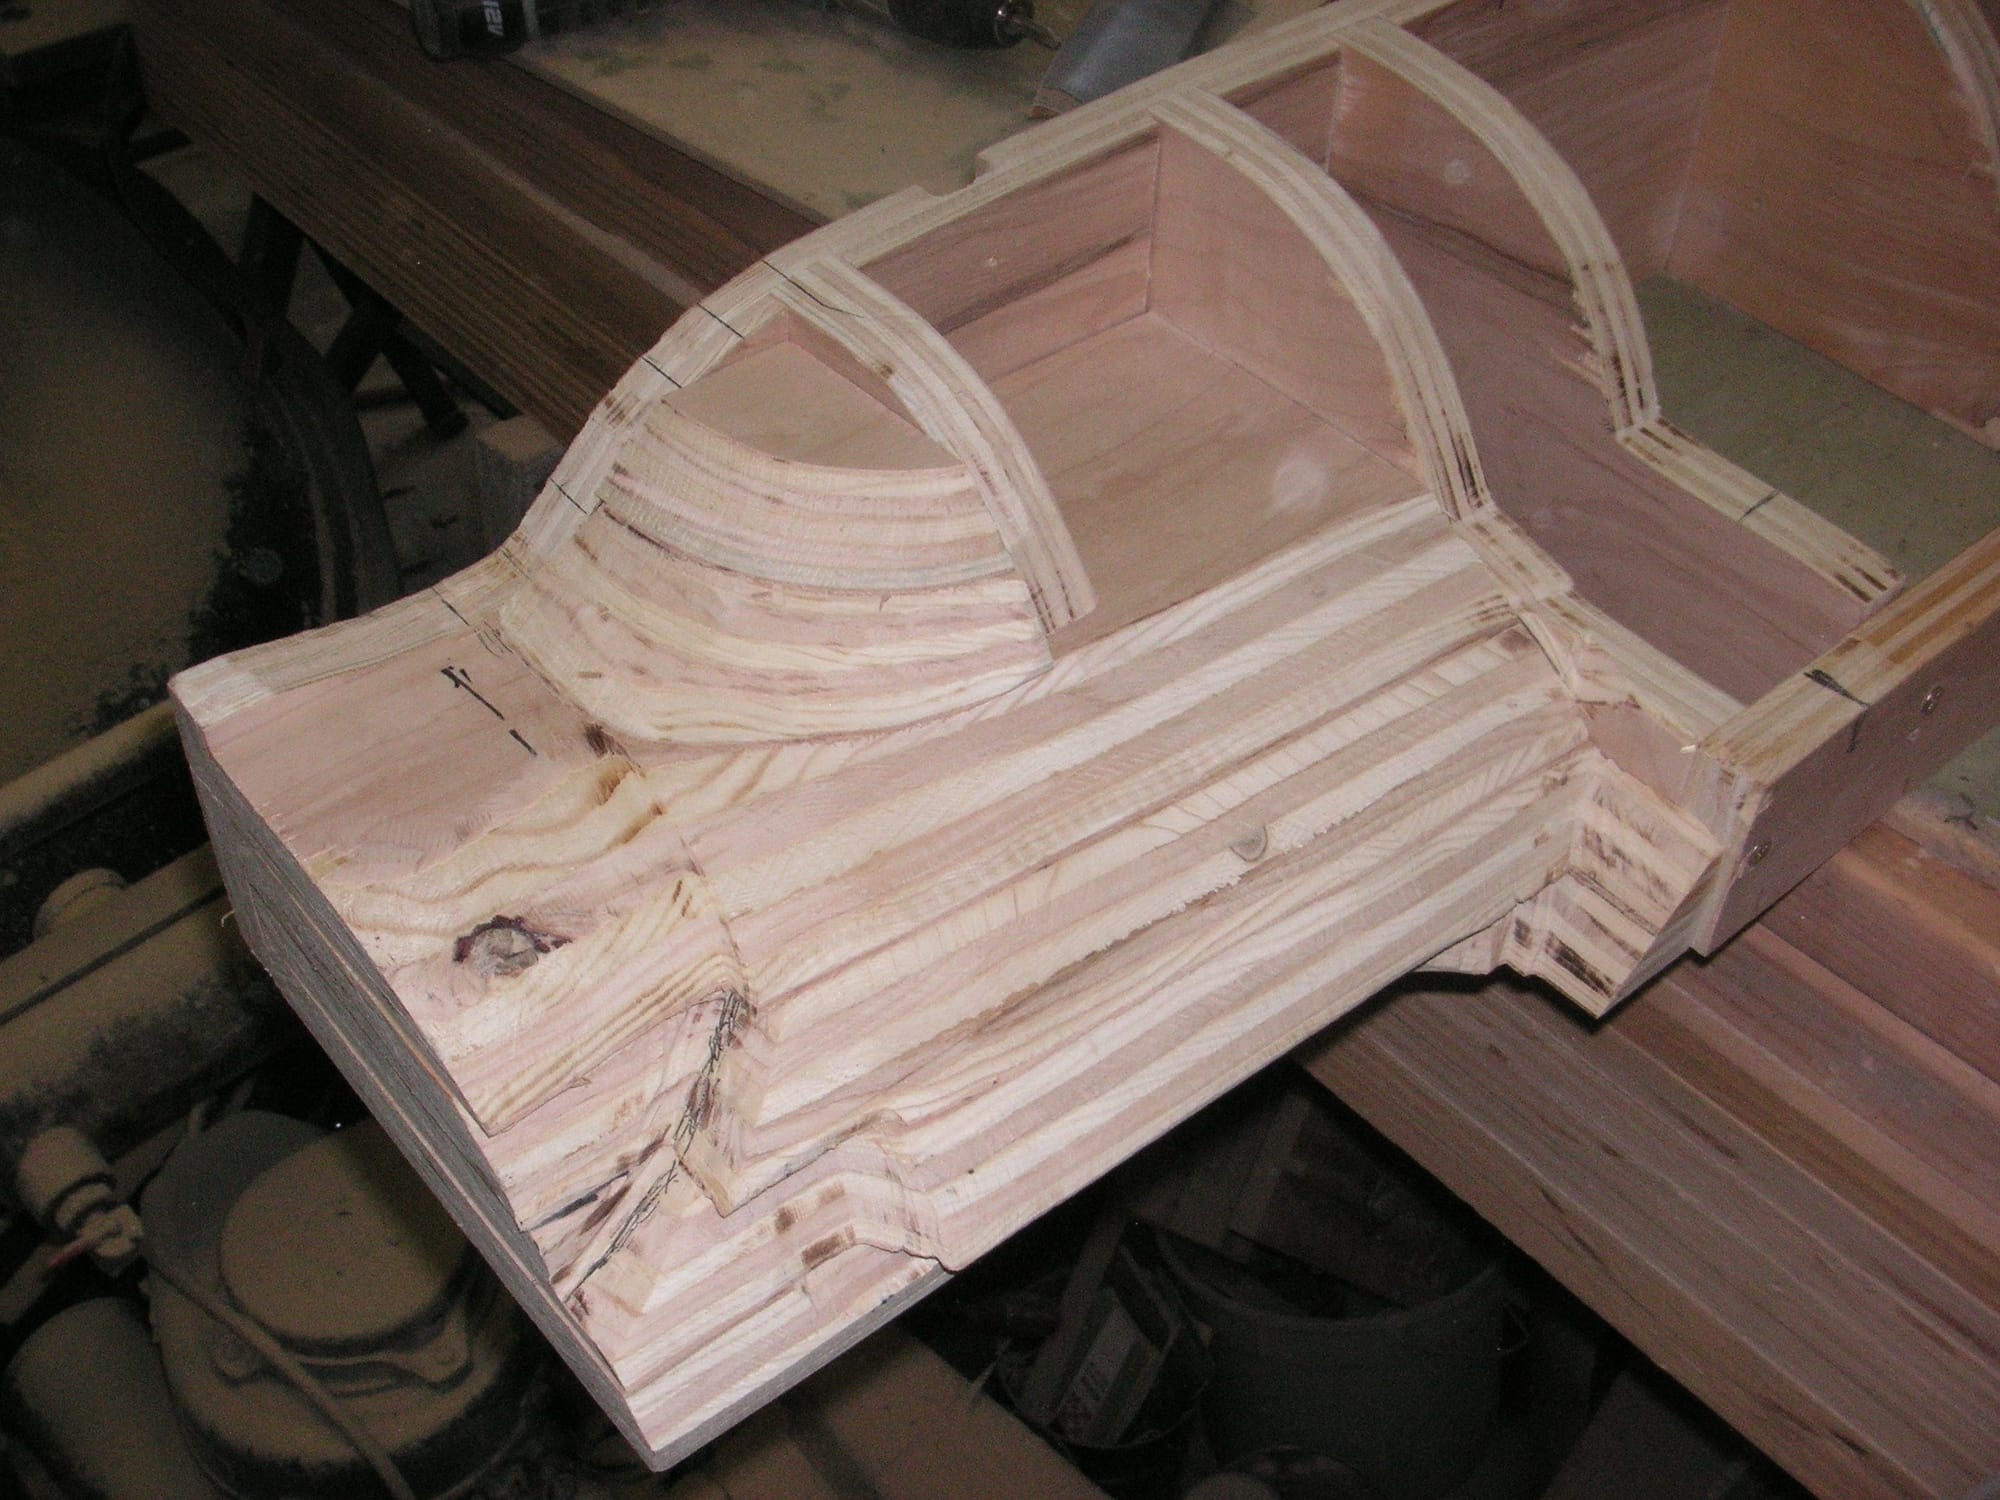
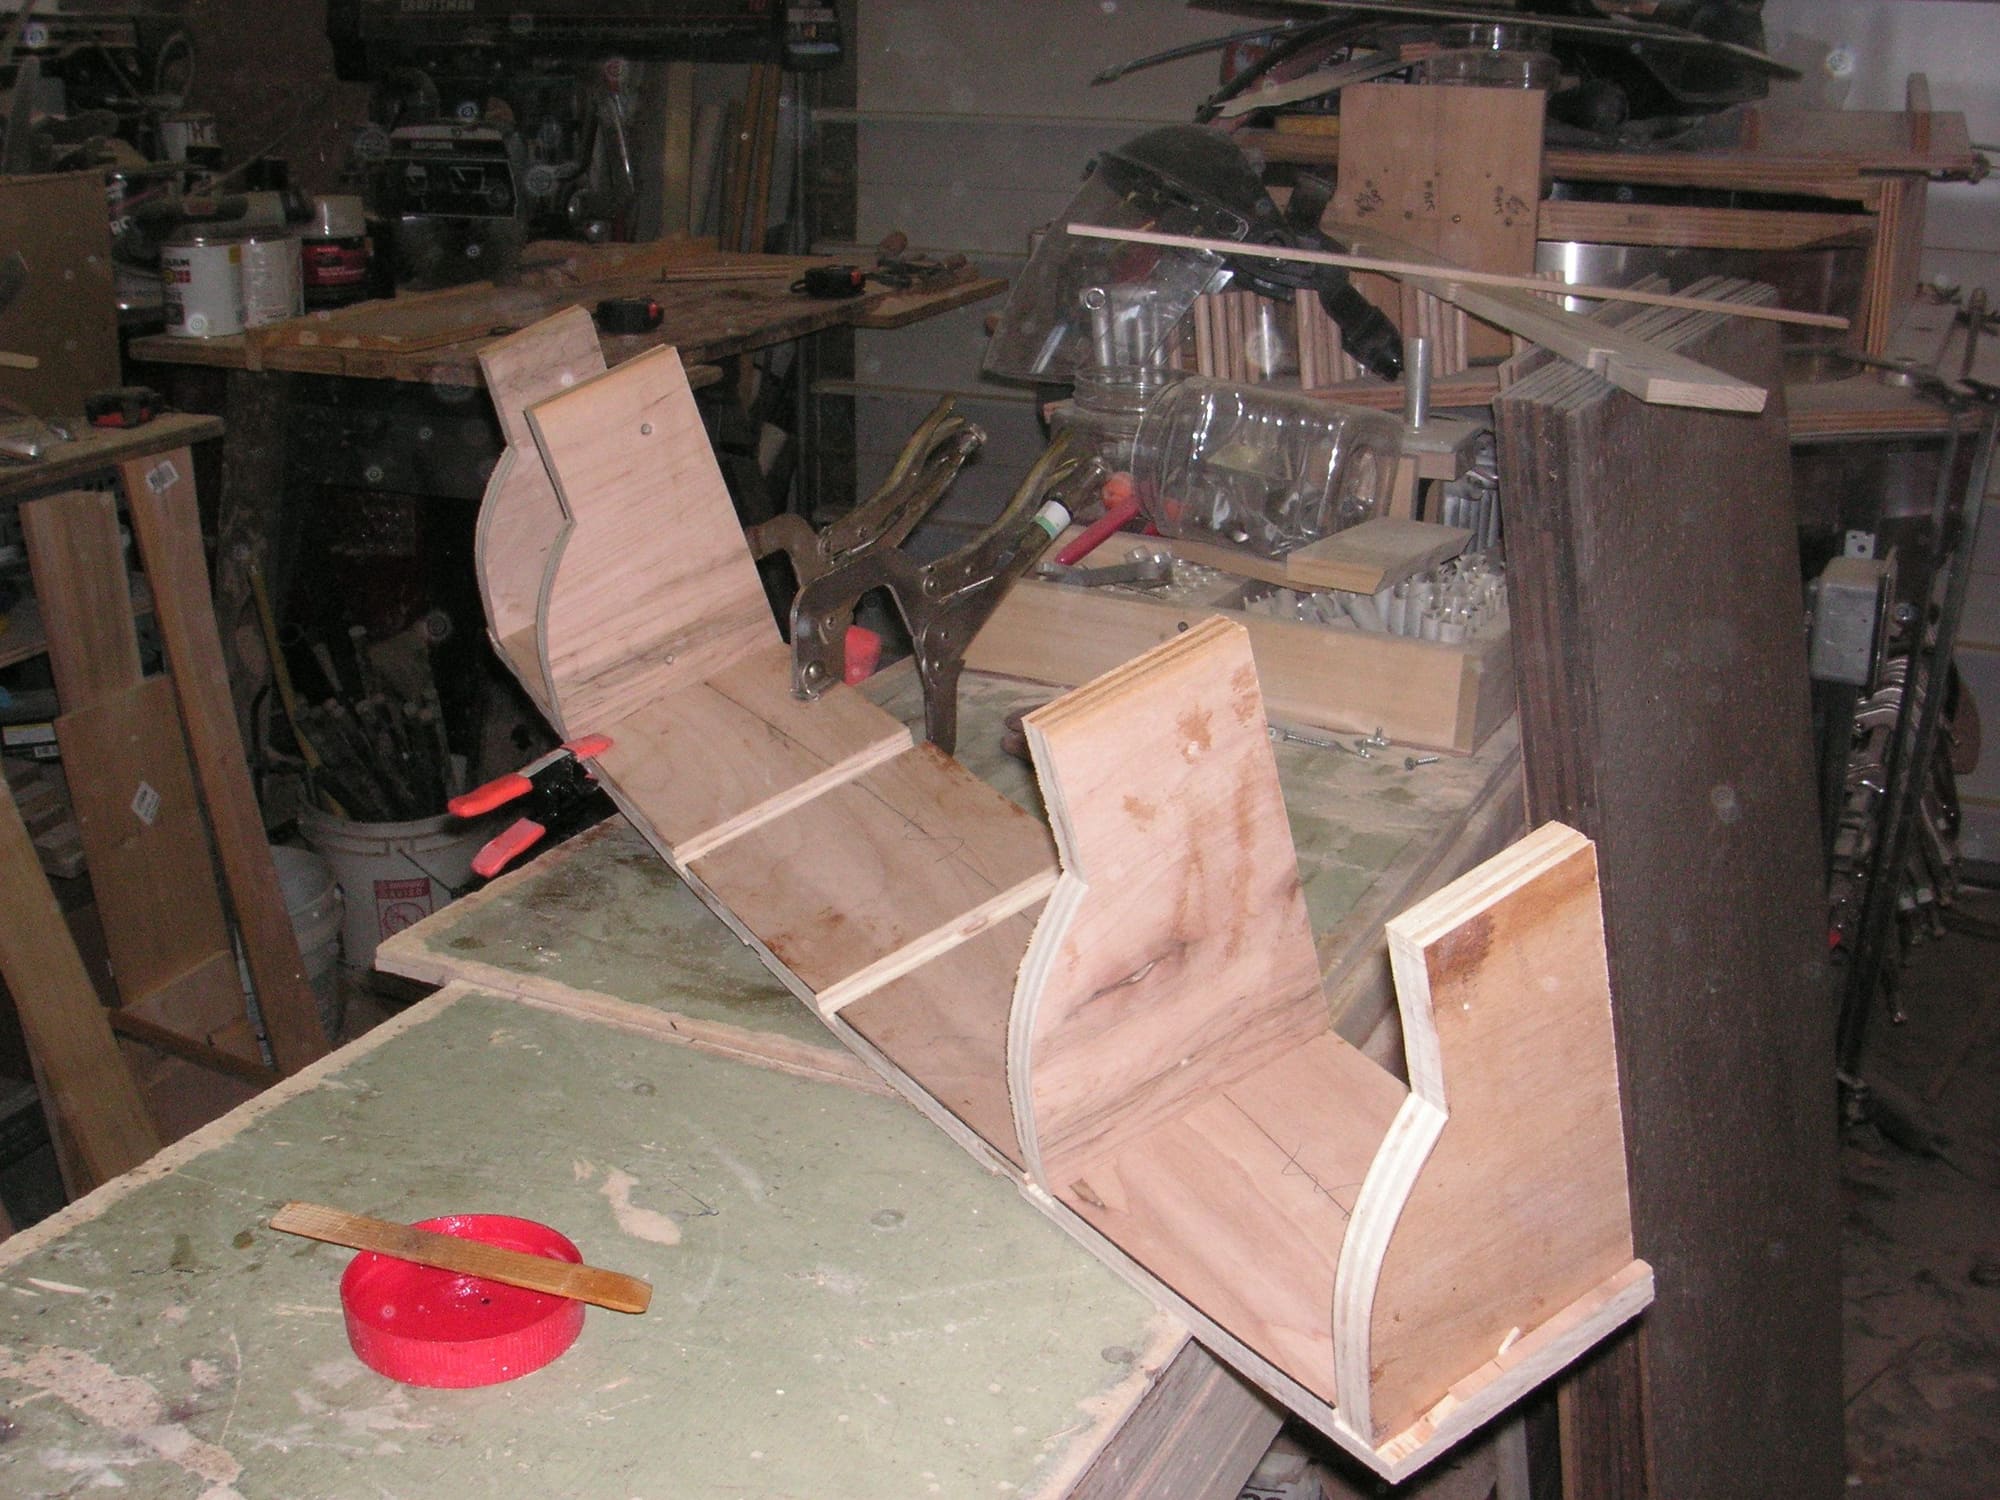
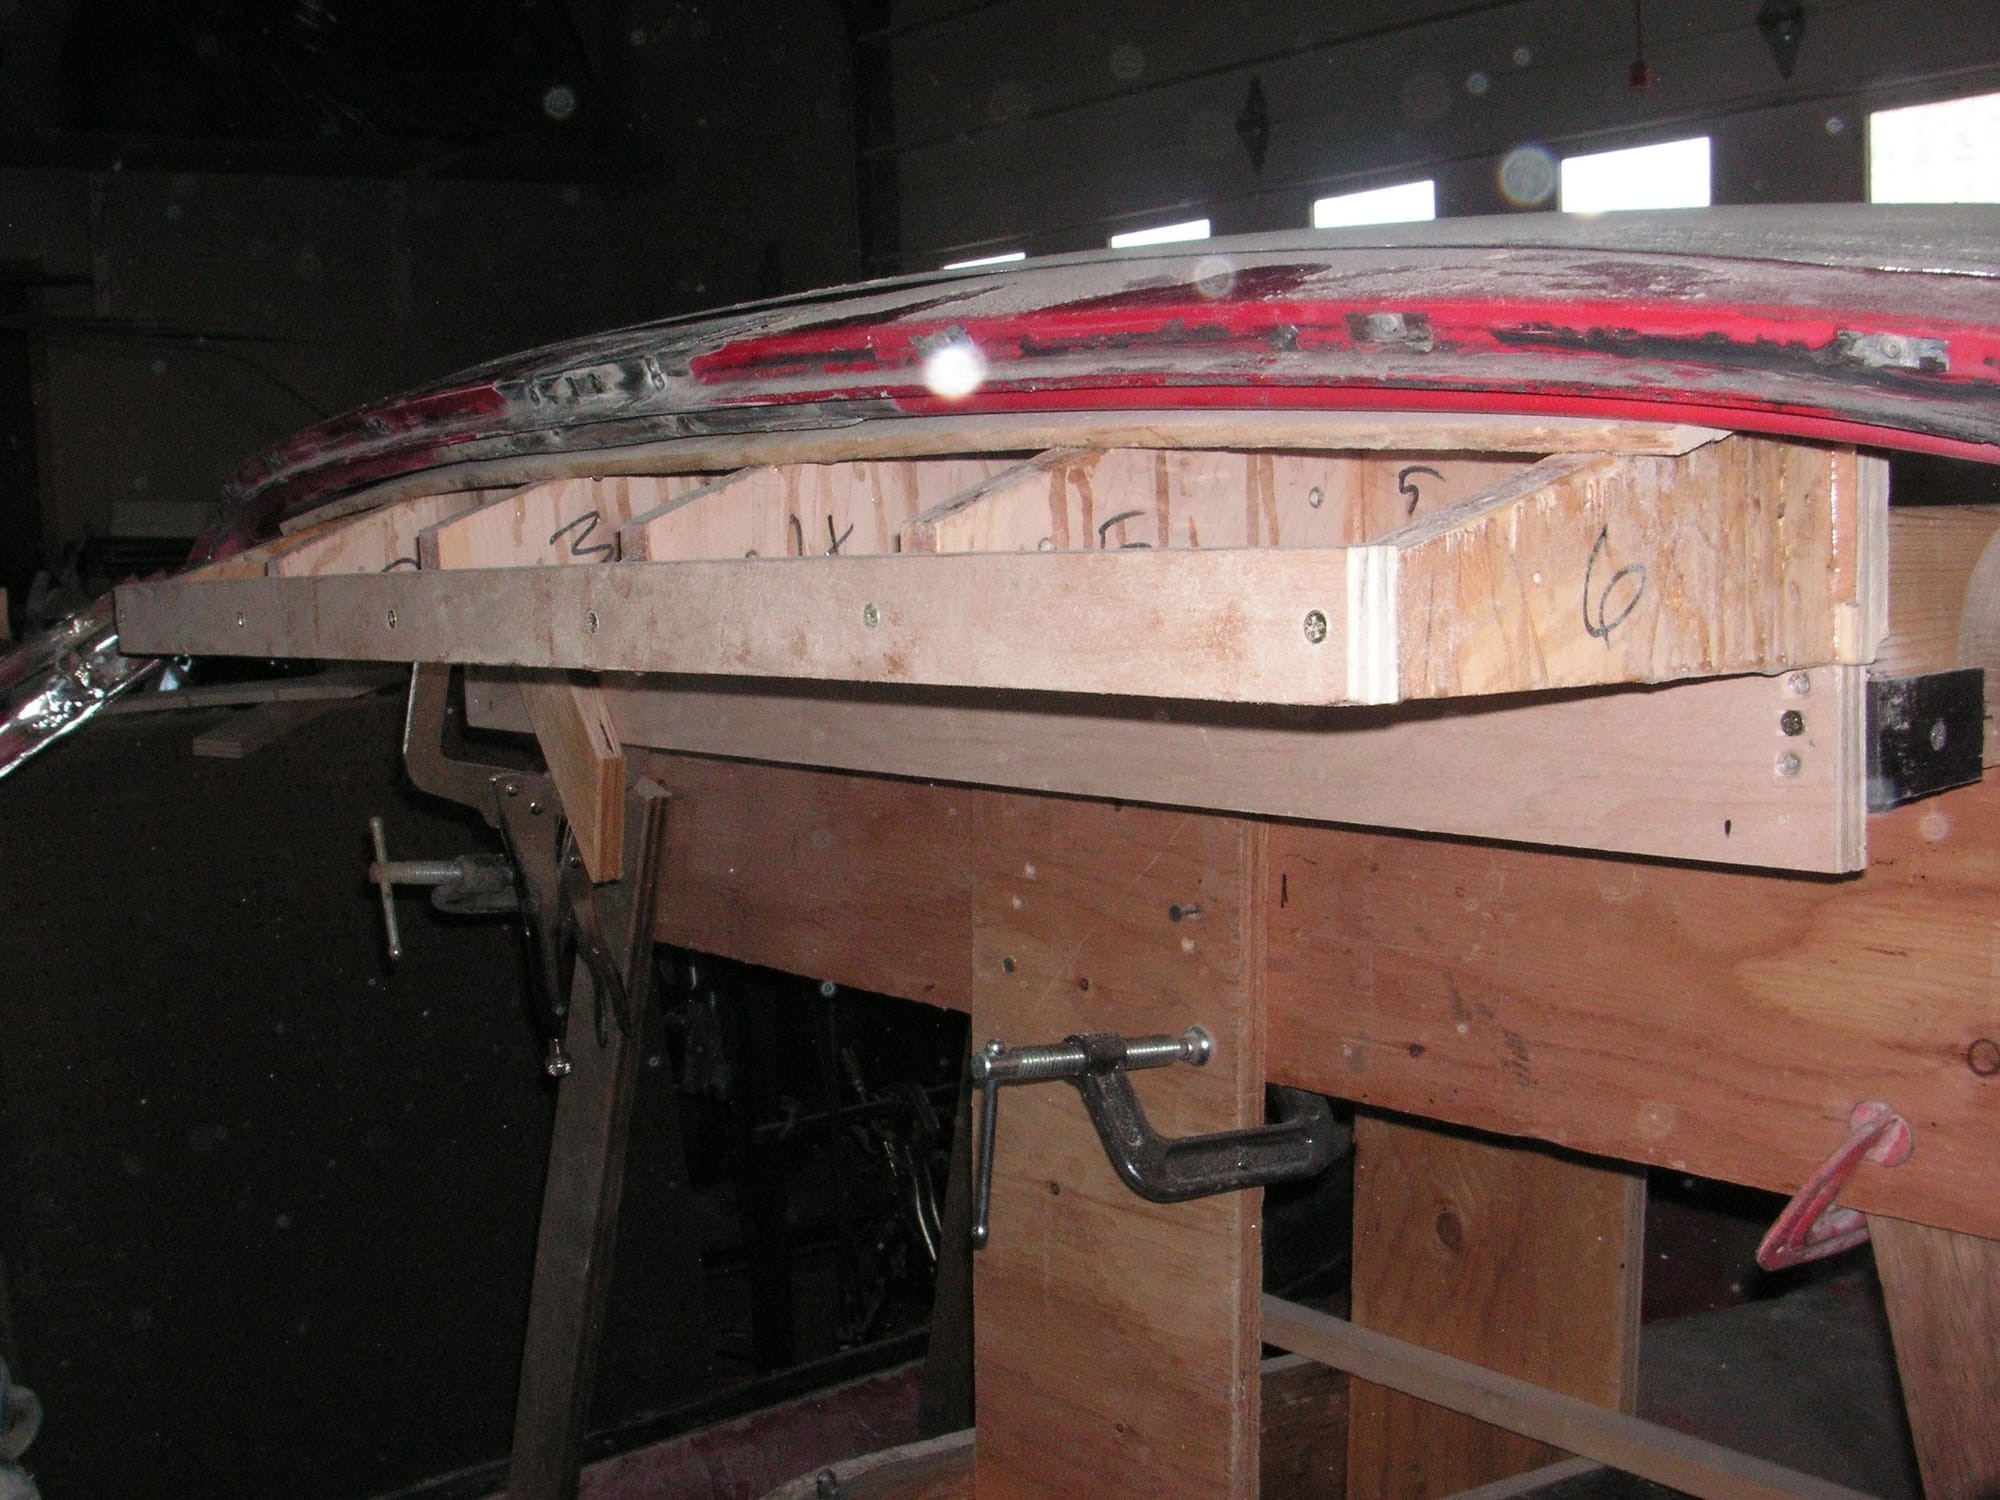
I have almost all the corner pieces ground to fit roughly and will next set them in epoxy. Then I'll cover the other formers with strips of wood also set in epoxy, then I can hand finish each side to a closer fit. I think that in order to get the finish to the point of having about 1/8 inch or less allowance for the fiberglass shell I am going to temporarily glue some kind of space markers on places in the car where the fit is critical then lay the mold up against the inside of the car with fresch bondo on those areas of the mold and wax paper in between and then when it sets I'll be able to rasp and sand the bondo down to the markers and have the correct clearances. That's what I'm going to try anyway.
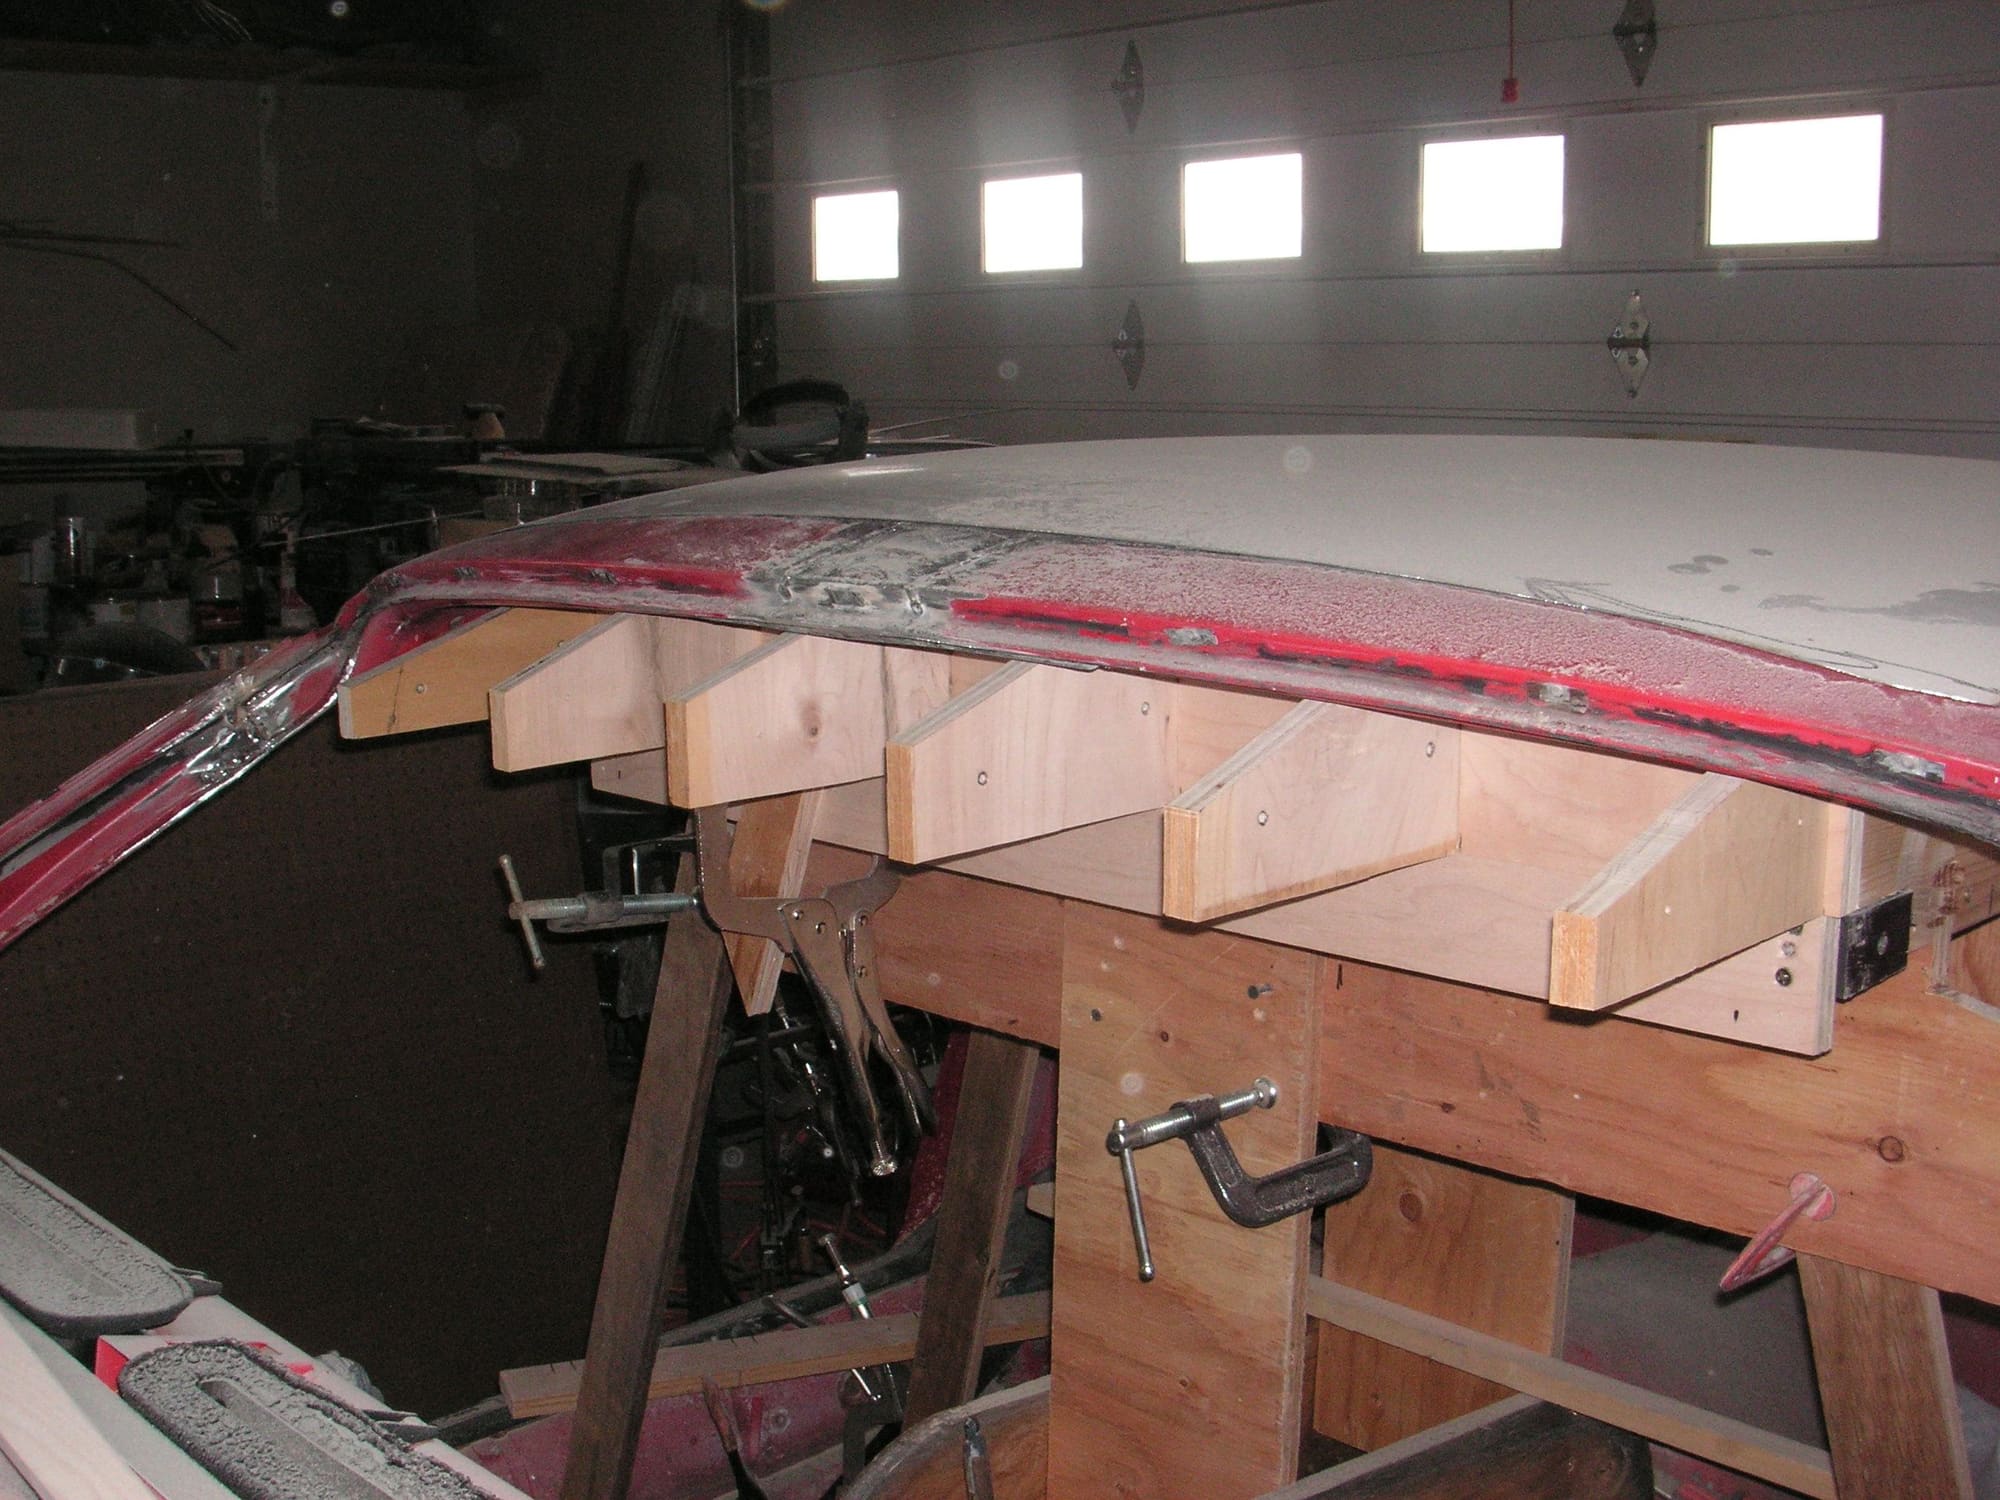
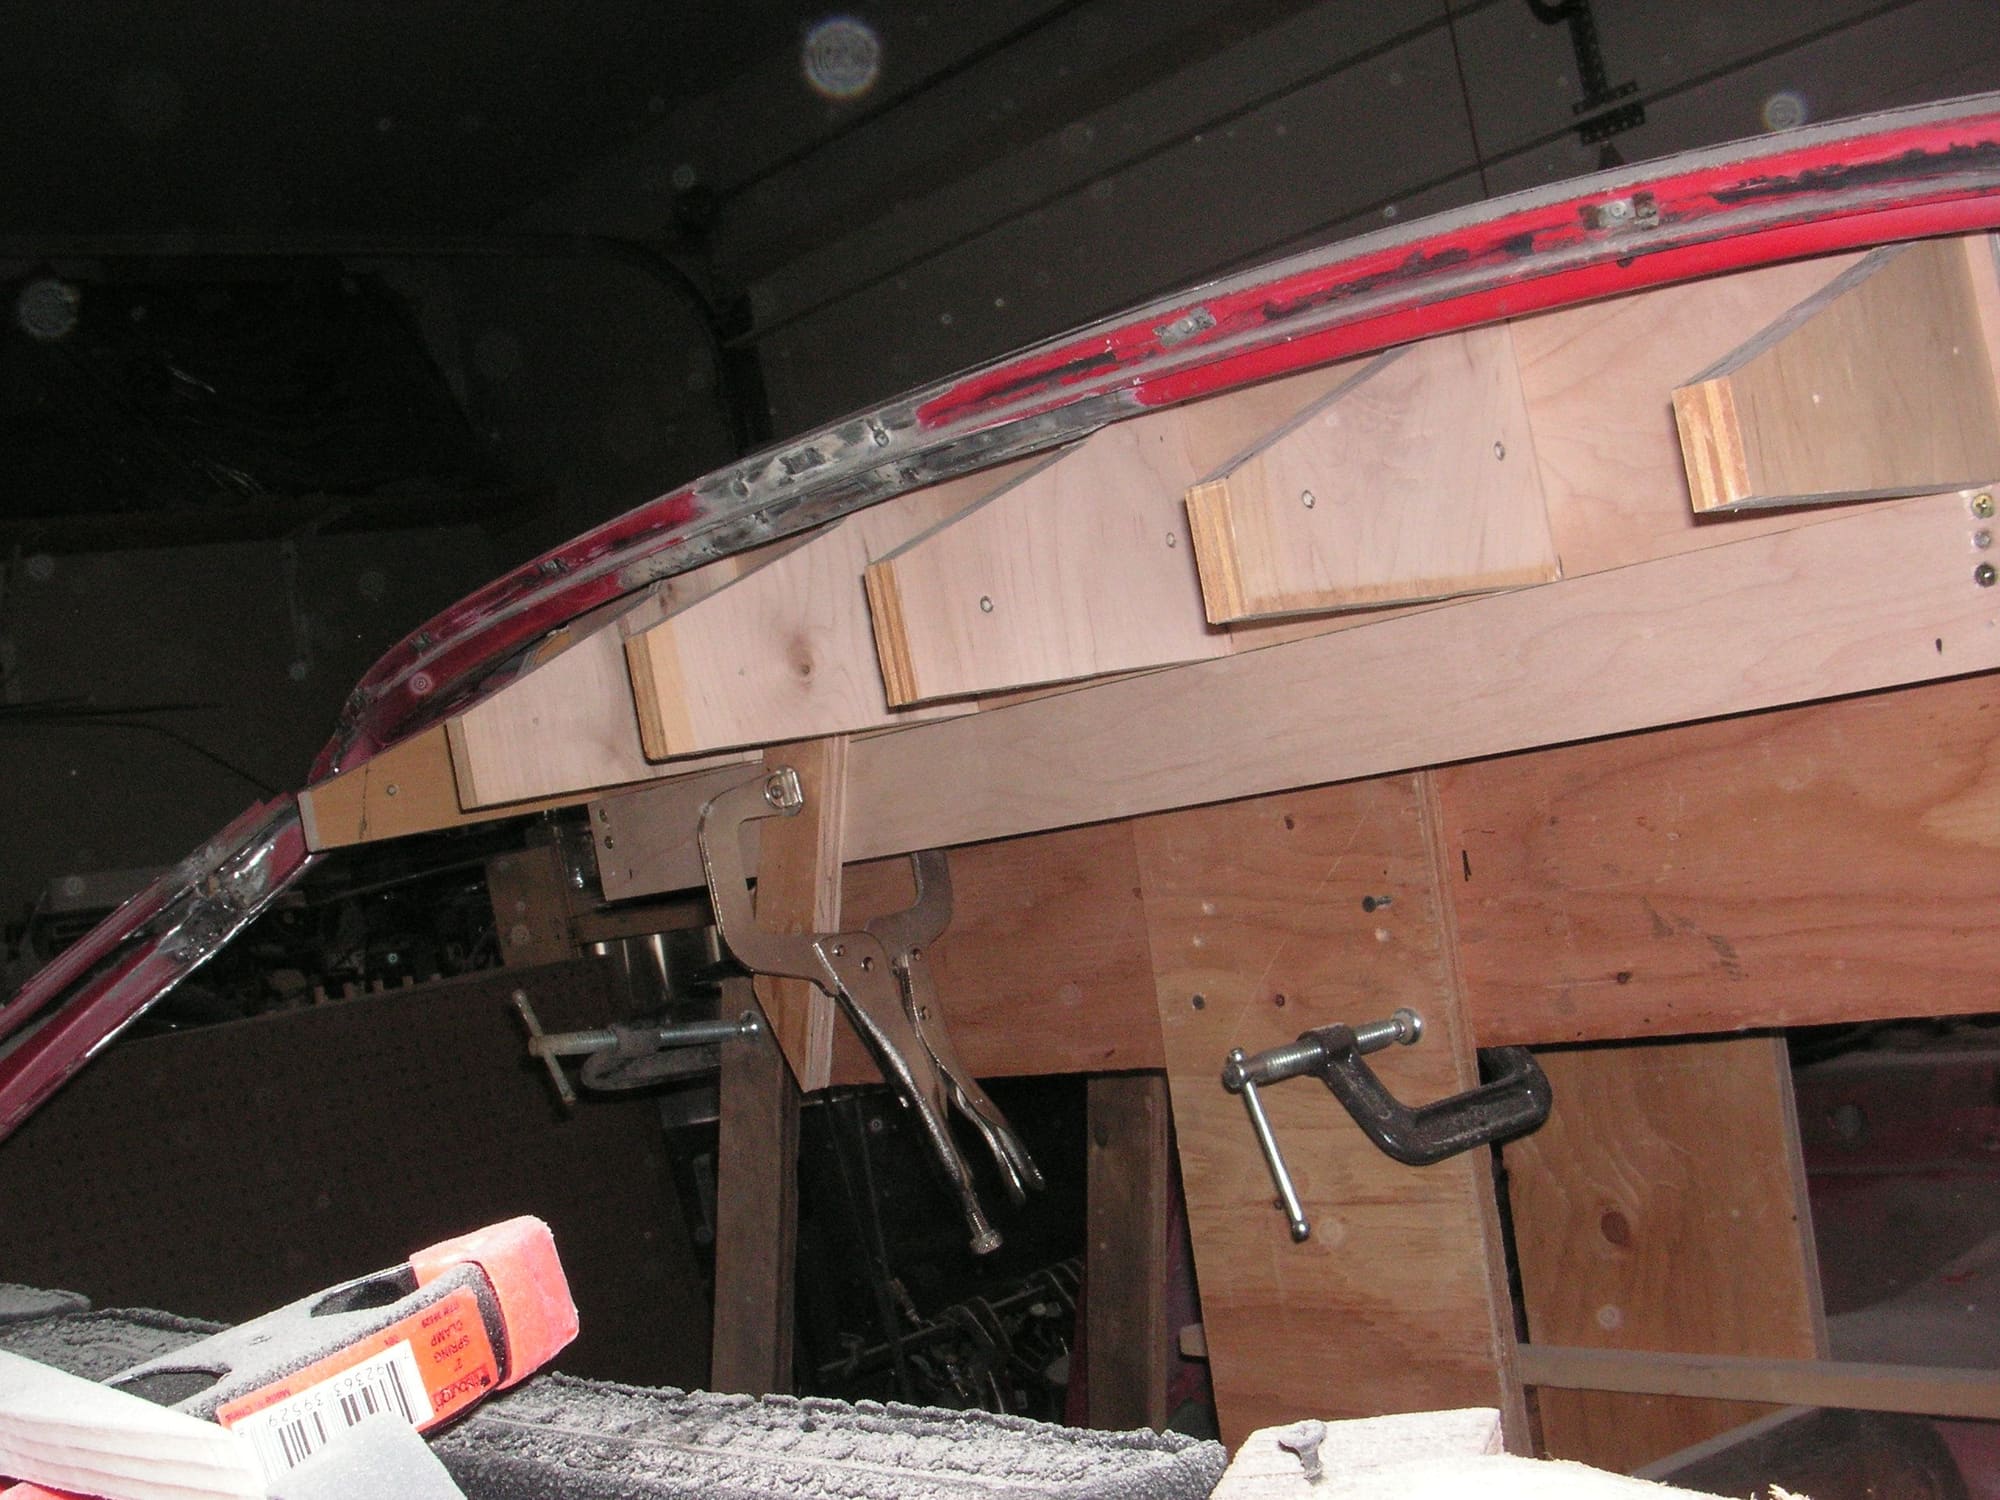
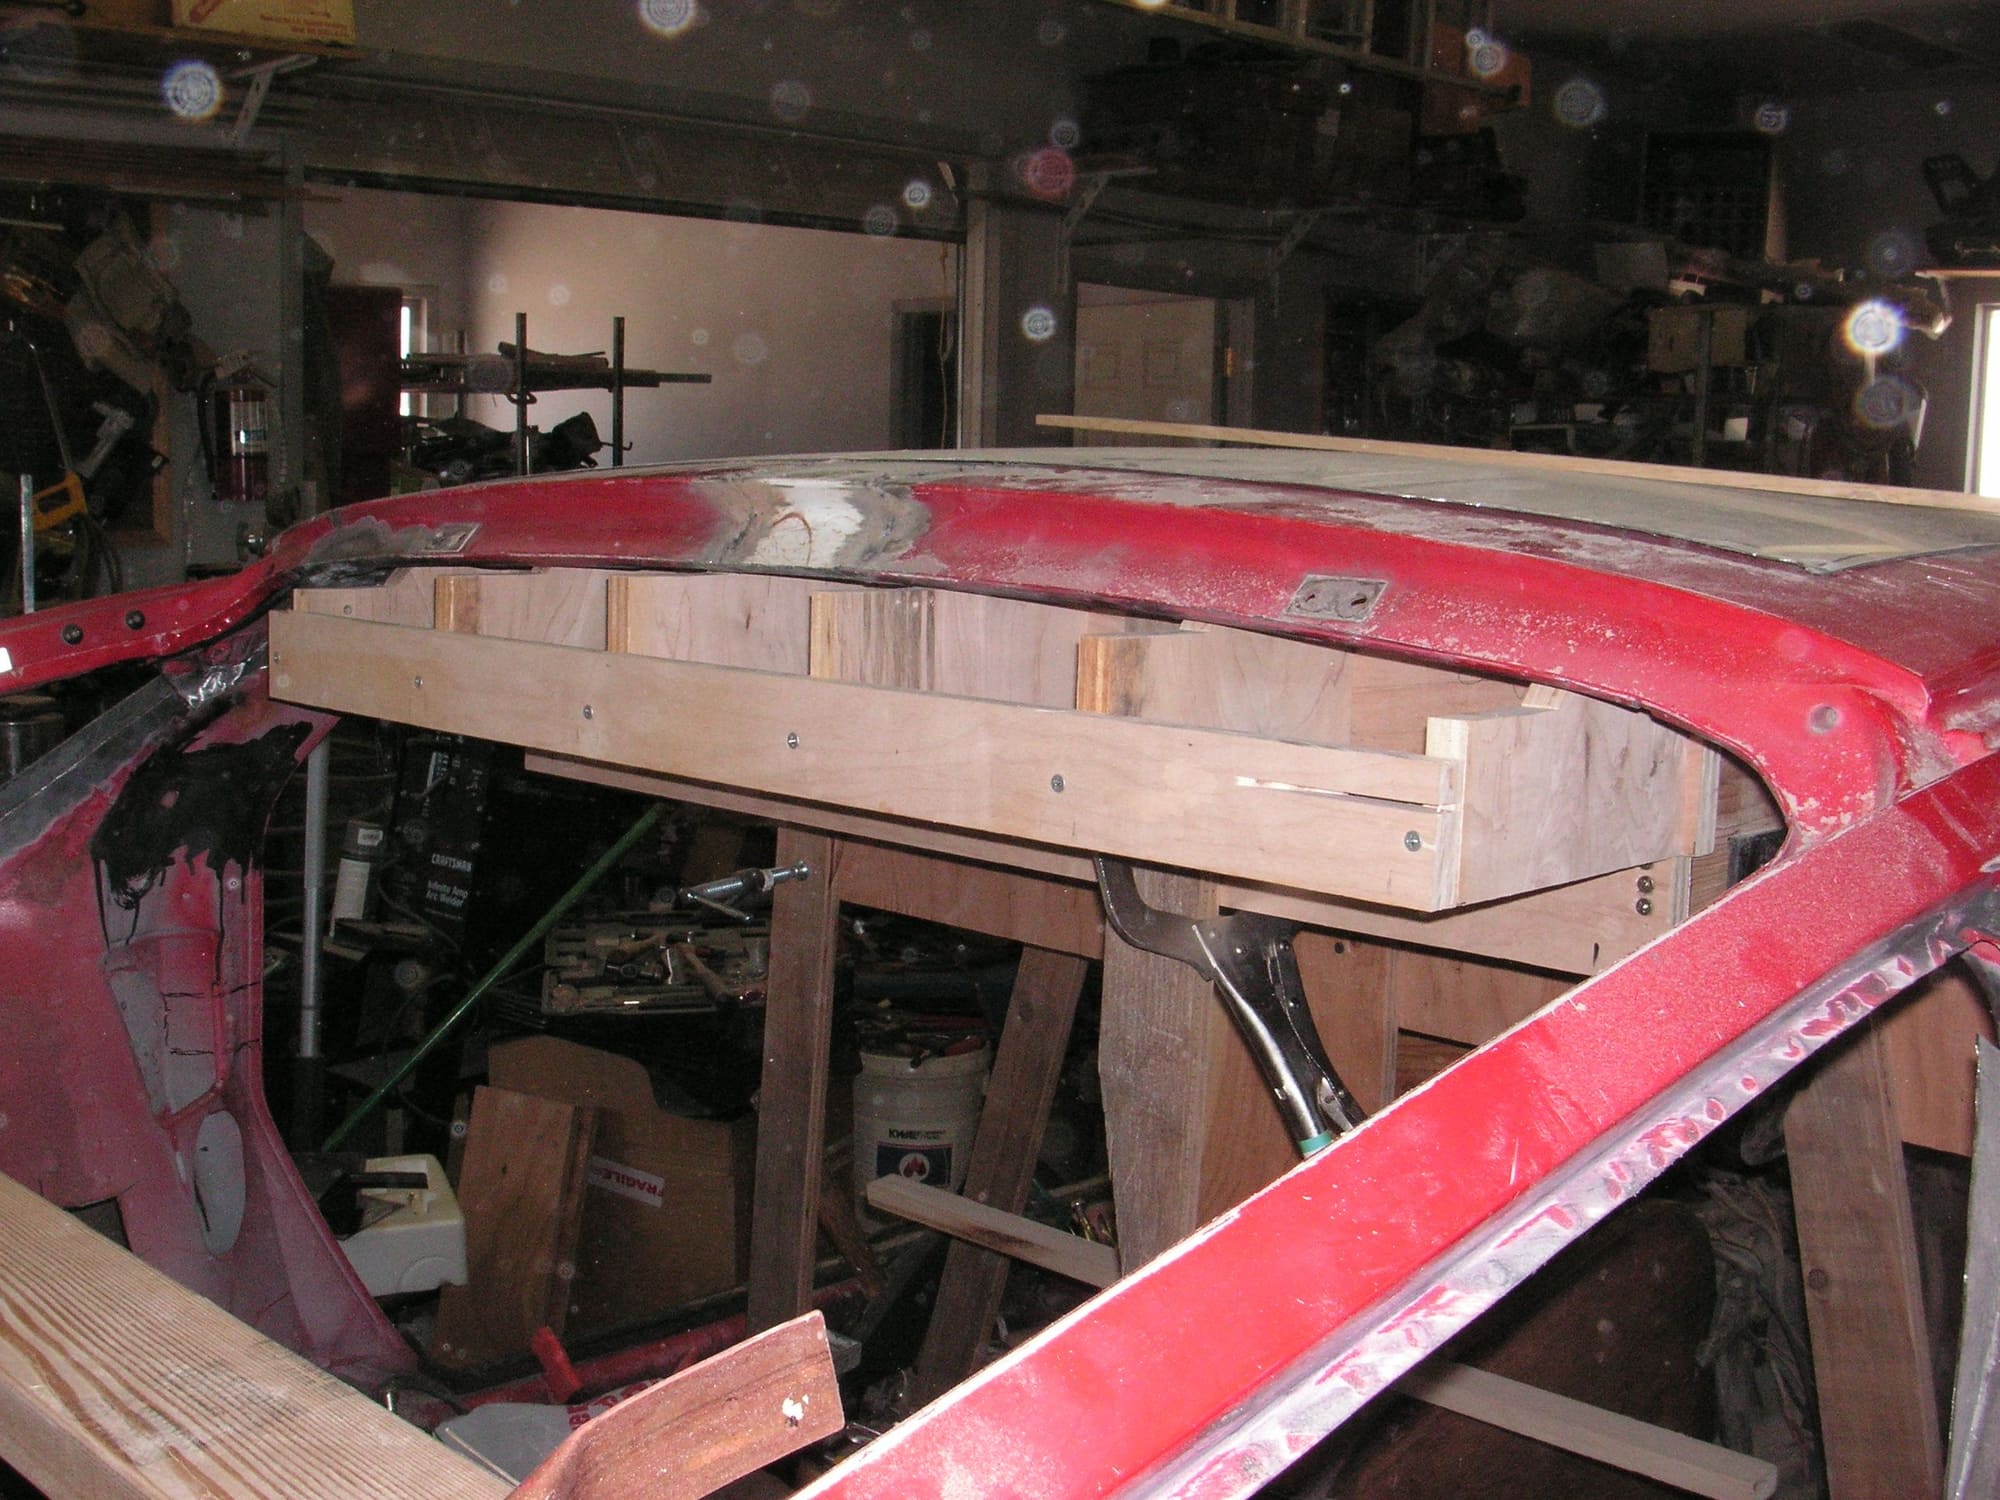
I got a good start on the front mold frame member and will do the same on the rear one tomorrow. Then I can start covering them when I have them all nesting together correctly.
Jerry, what is your background that you know how to do this kind of work?
It really is amazing...
I hadn't actually thought about it in this way until a couple of days ago when I found myself putting the form into place and then rubbing it back and forth so I could see some red marks where it was in contact the paint inside, and then grinding wood off in those areas, and then It occurred to me that this is kind of a carry over from my gun smithing days. Back then I would use a similar technique to do what is called "inletting" a gun or the barreled action into the wood that was going to become its stock. There I would mark the metal with a black compound that I had made up and then put it into place and strike it lightly with a mallet then take it out and carve out the black marks. I haven't done any of that for about 30 years or so.
But that is only a small segment of the overall story, which I wont try to go into at this point. I think I explained it once or twice before on this forum, but I don't mean to be critical that you may not have read it. The short version is that over the many years I have taught myself to do all sorts of fabrication things by thinking, reading, listening, watching, and then doing, but not necessarily in that order and not necessarily all of them in respect to any given project. A key to success is having or having access to the tools and equipment needed to accomplish any given fabrication. I have most of them, and in some case I am three or four deep with any one of them, each set up in some different way to save me time in setup so I don't have to change blades or something each time I need to do something different.
The focus of fabrication is simply problem solving; and I have trained my brain to do that all the time, both in my shop and in my Law Practice.
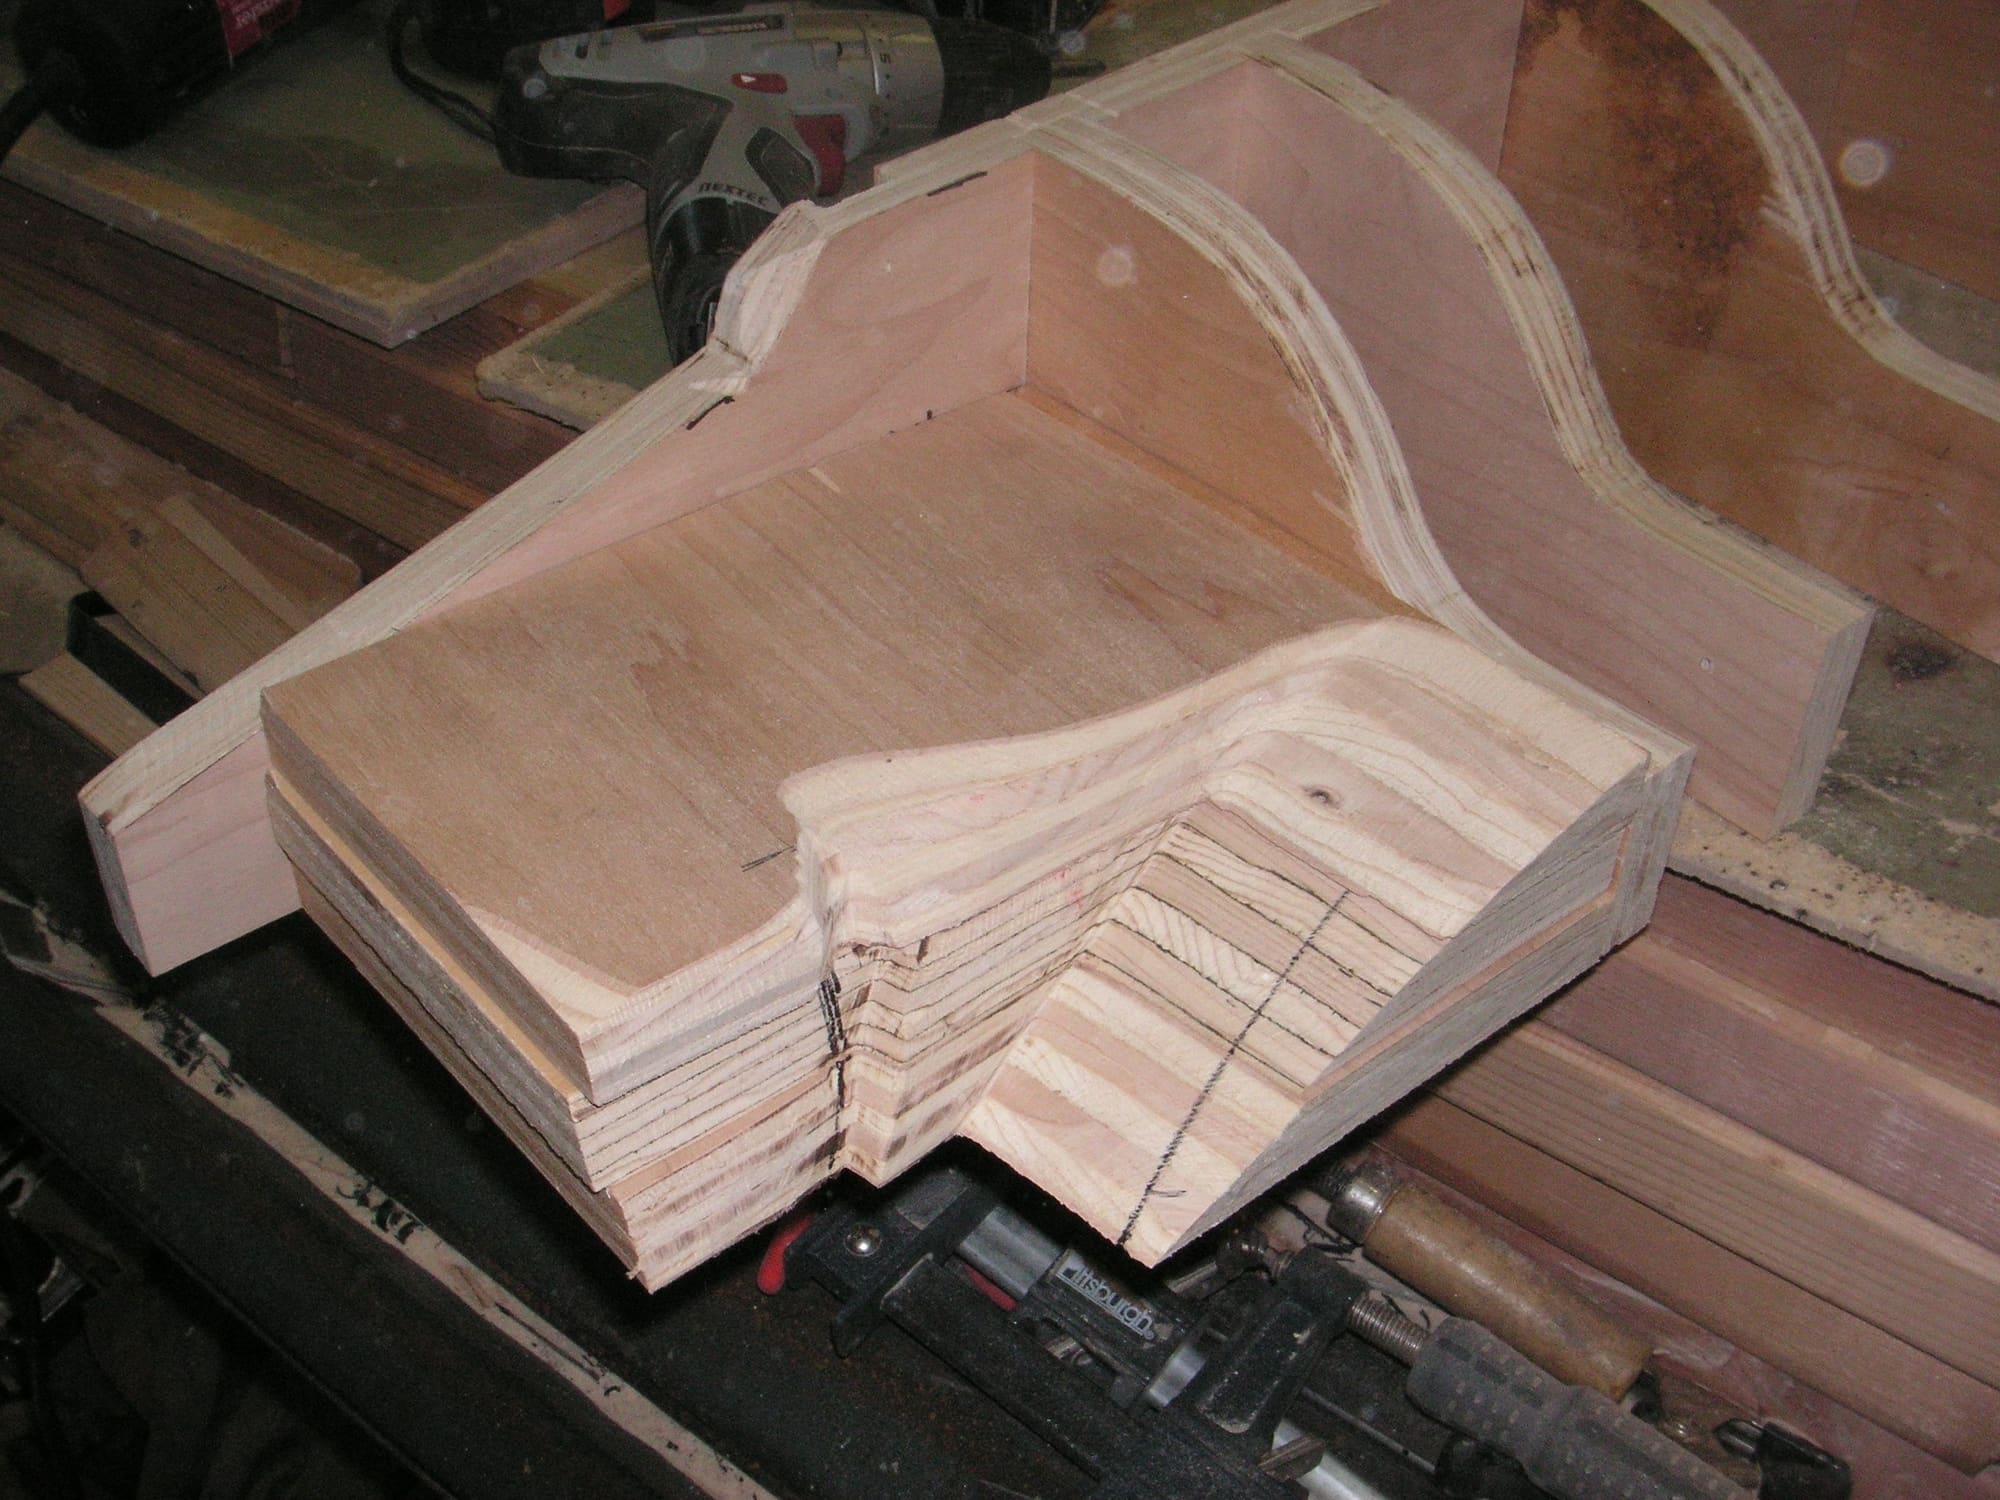
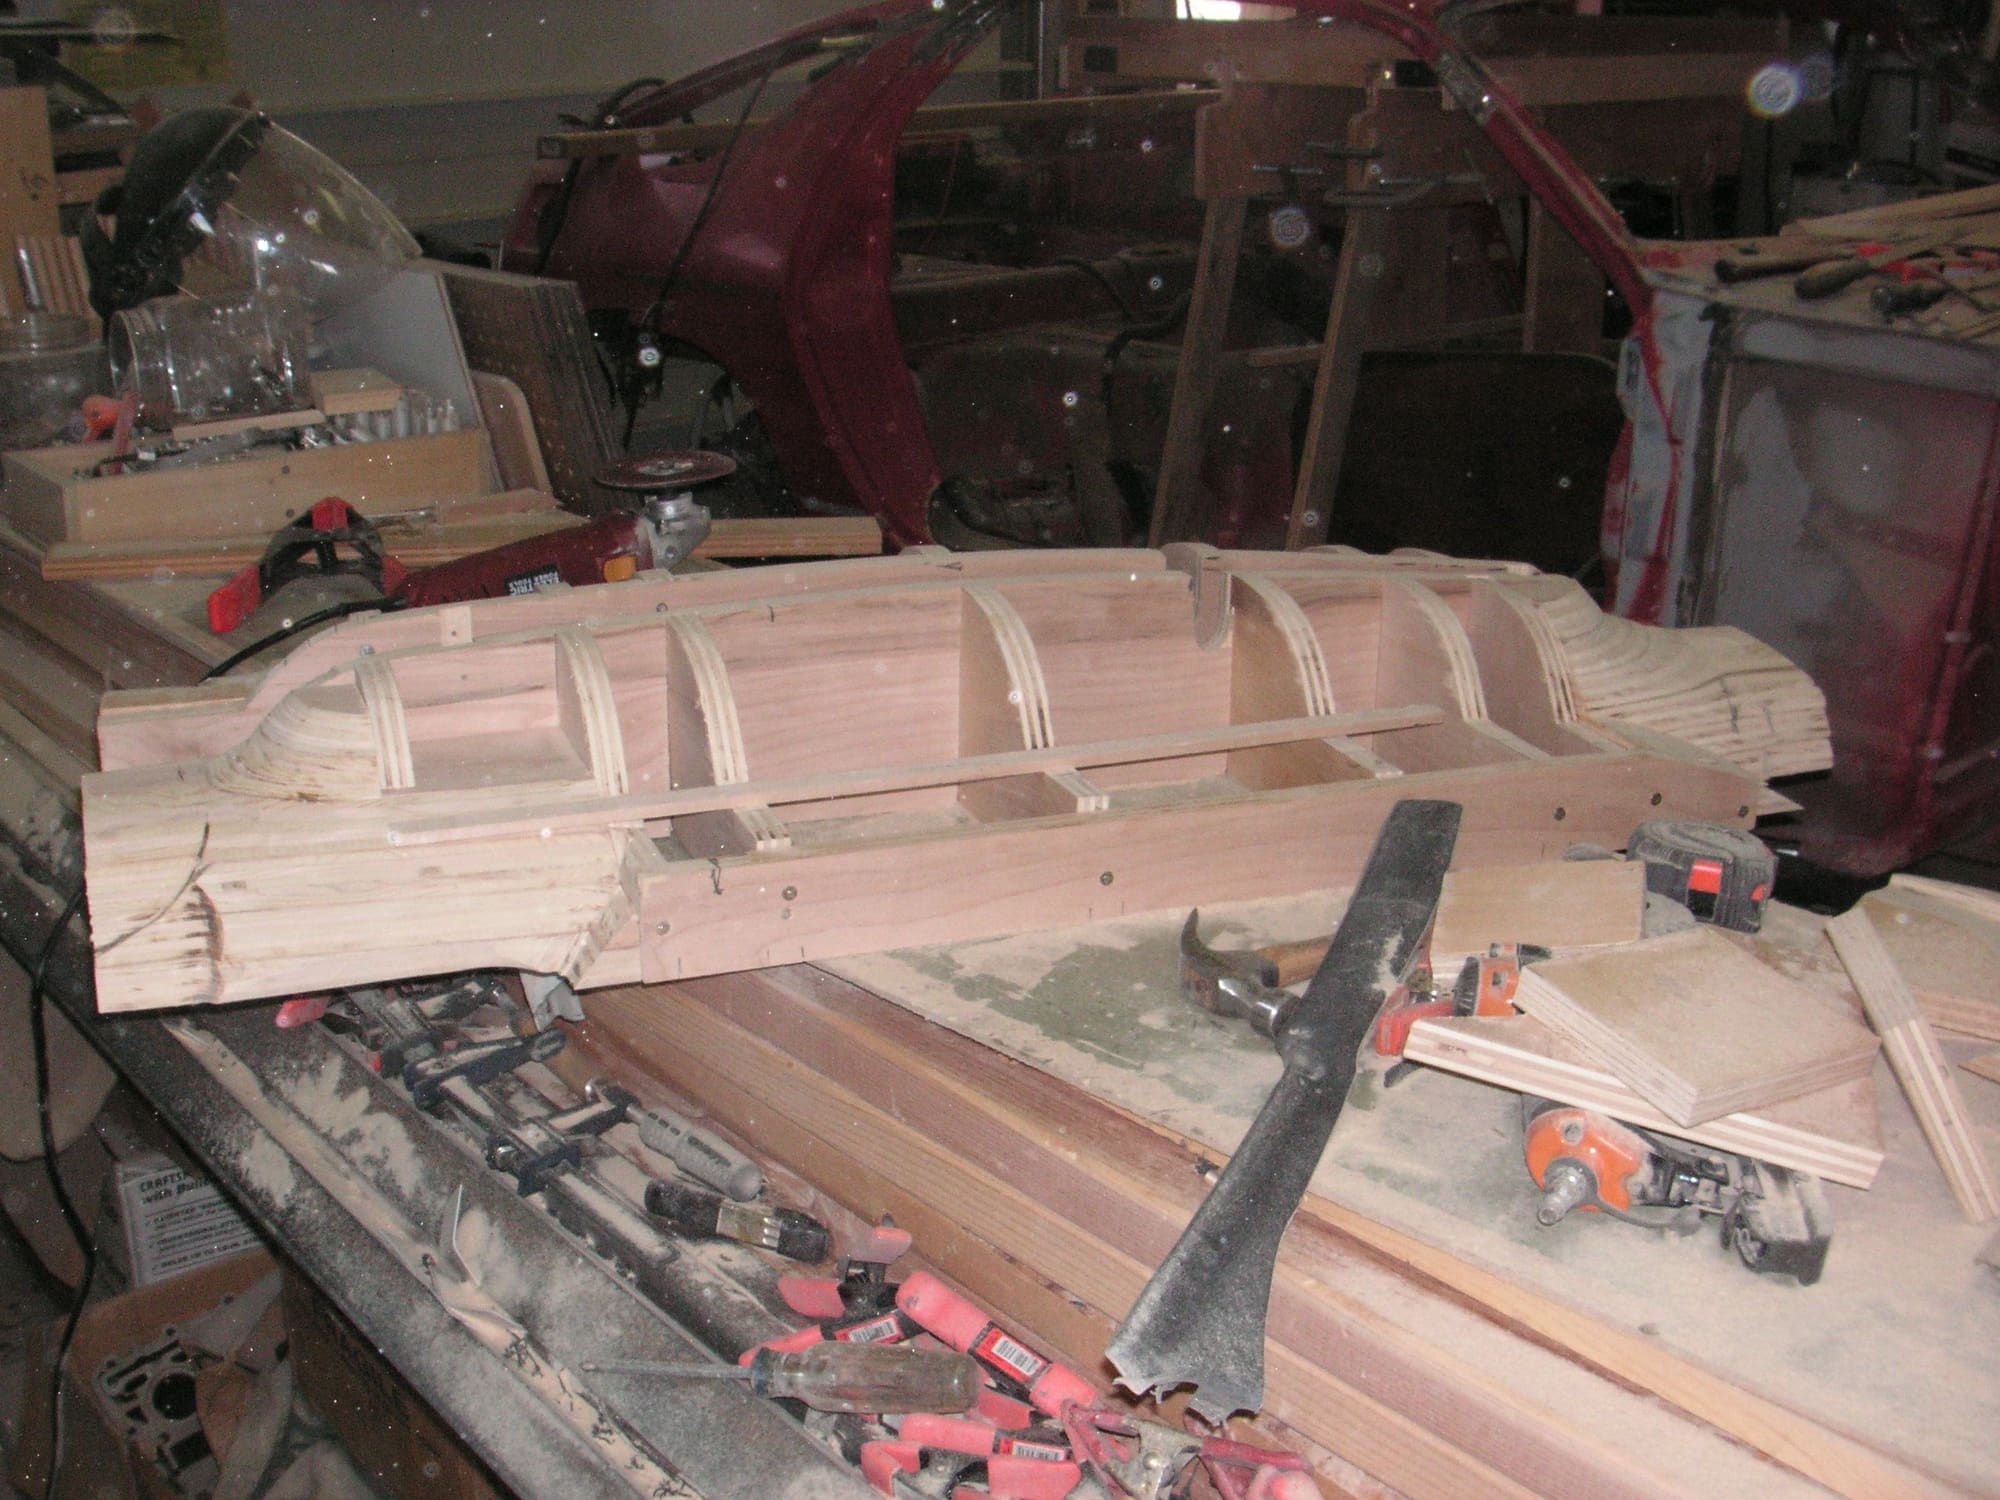
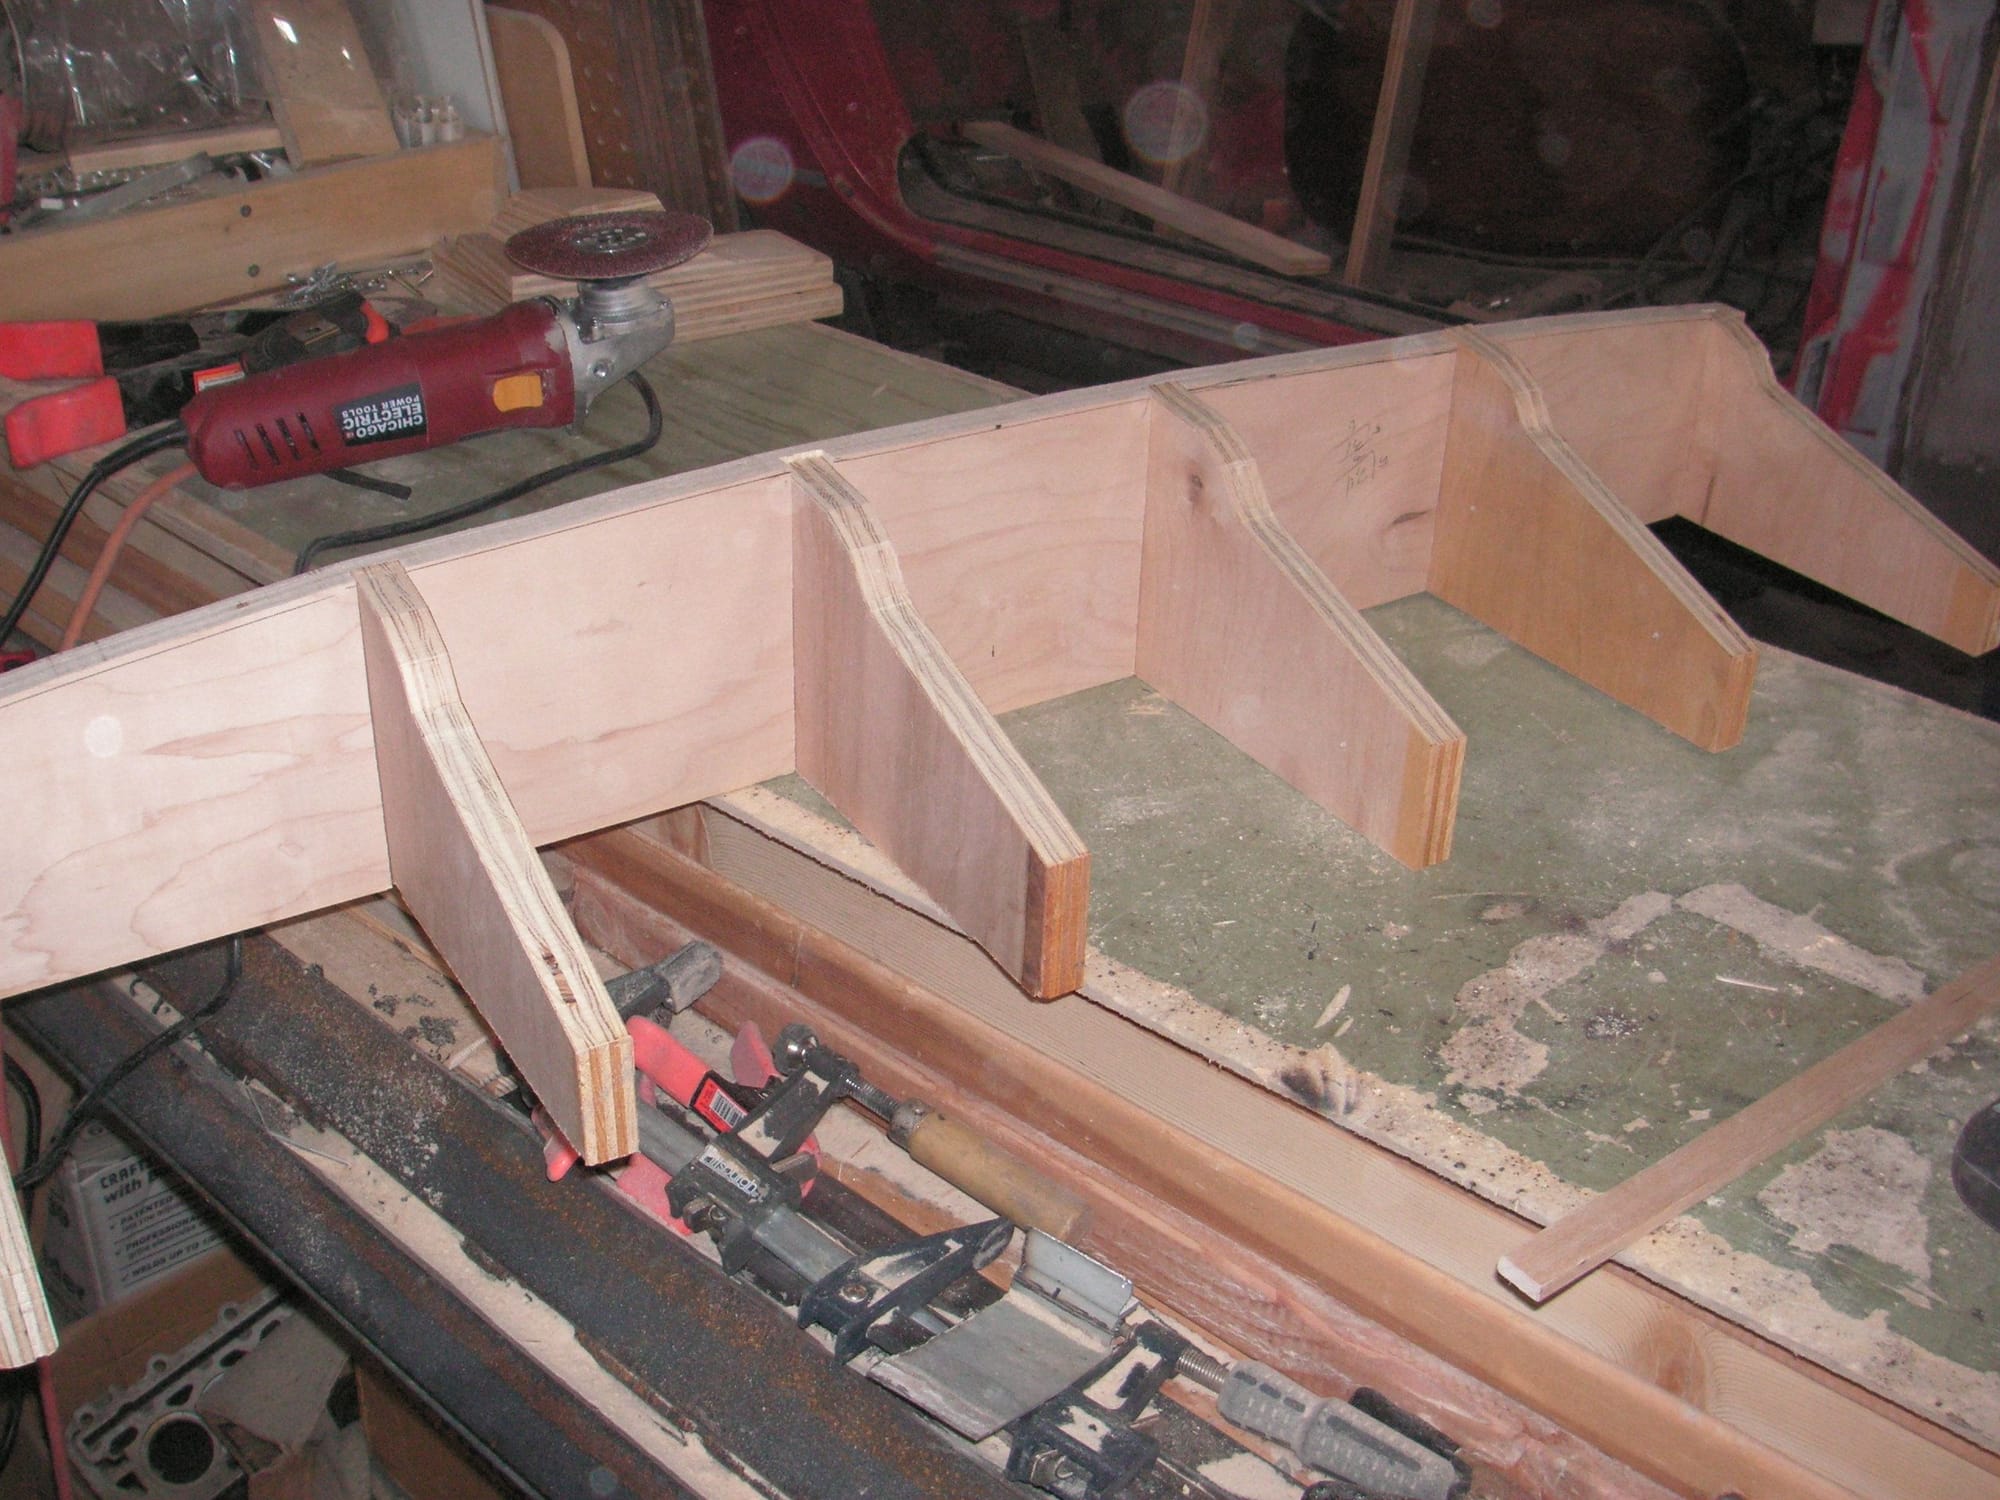
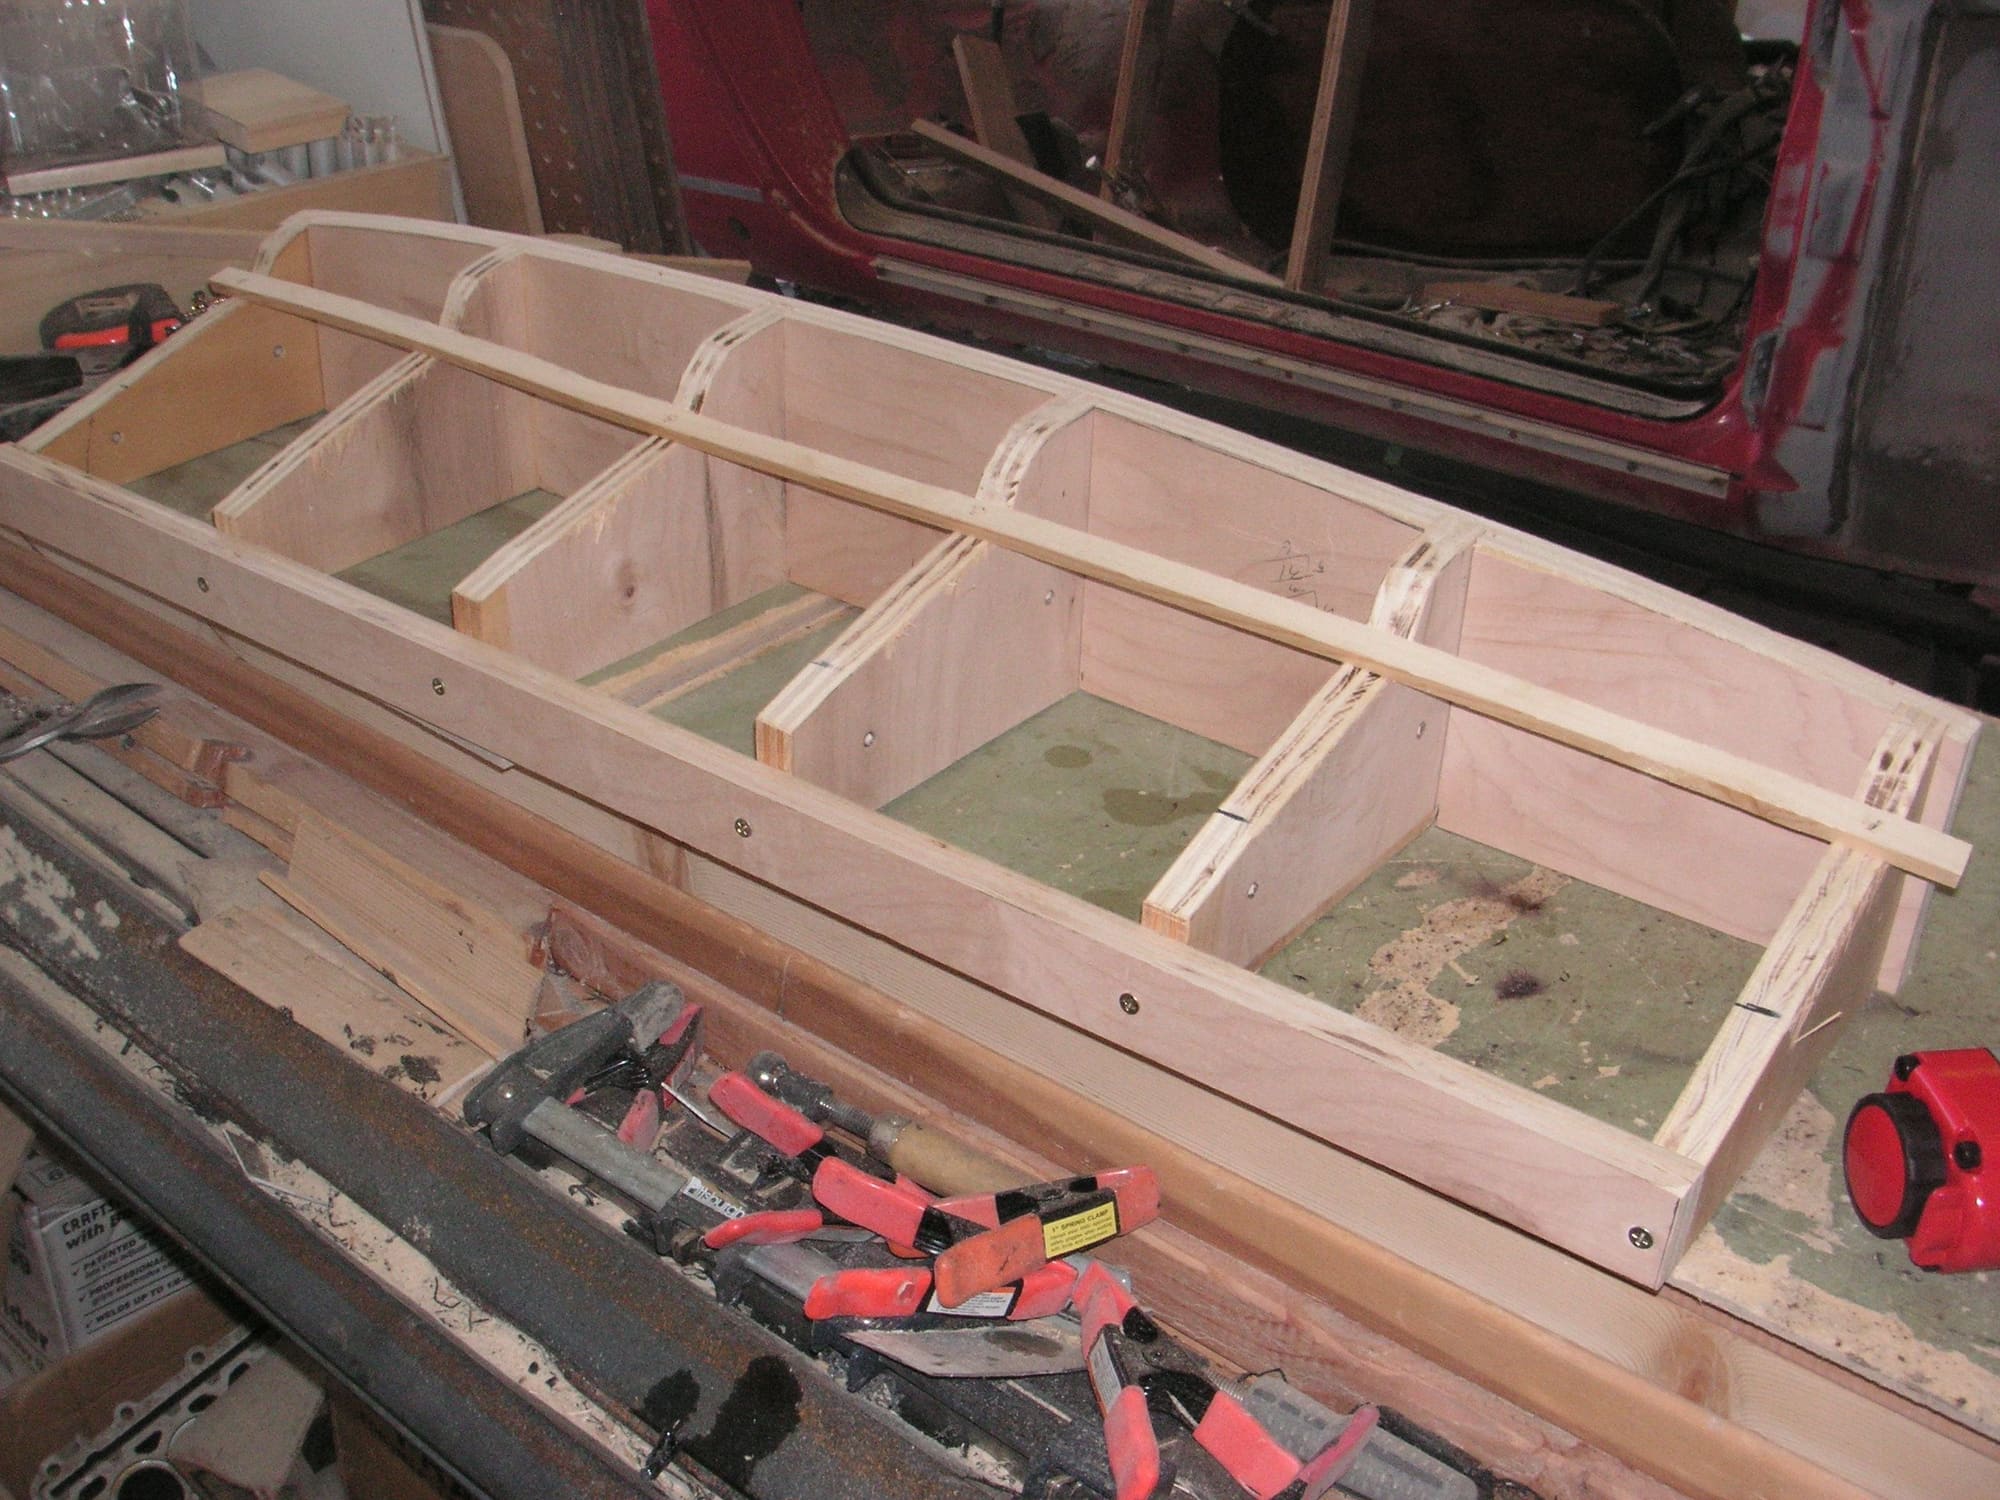
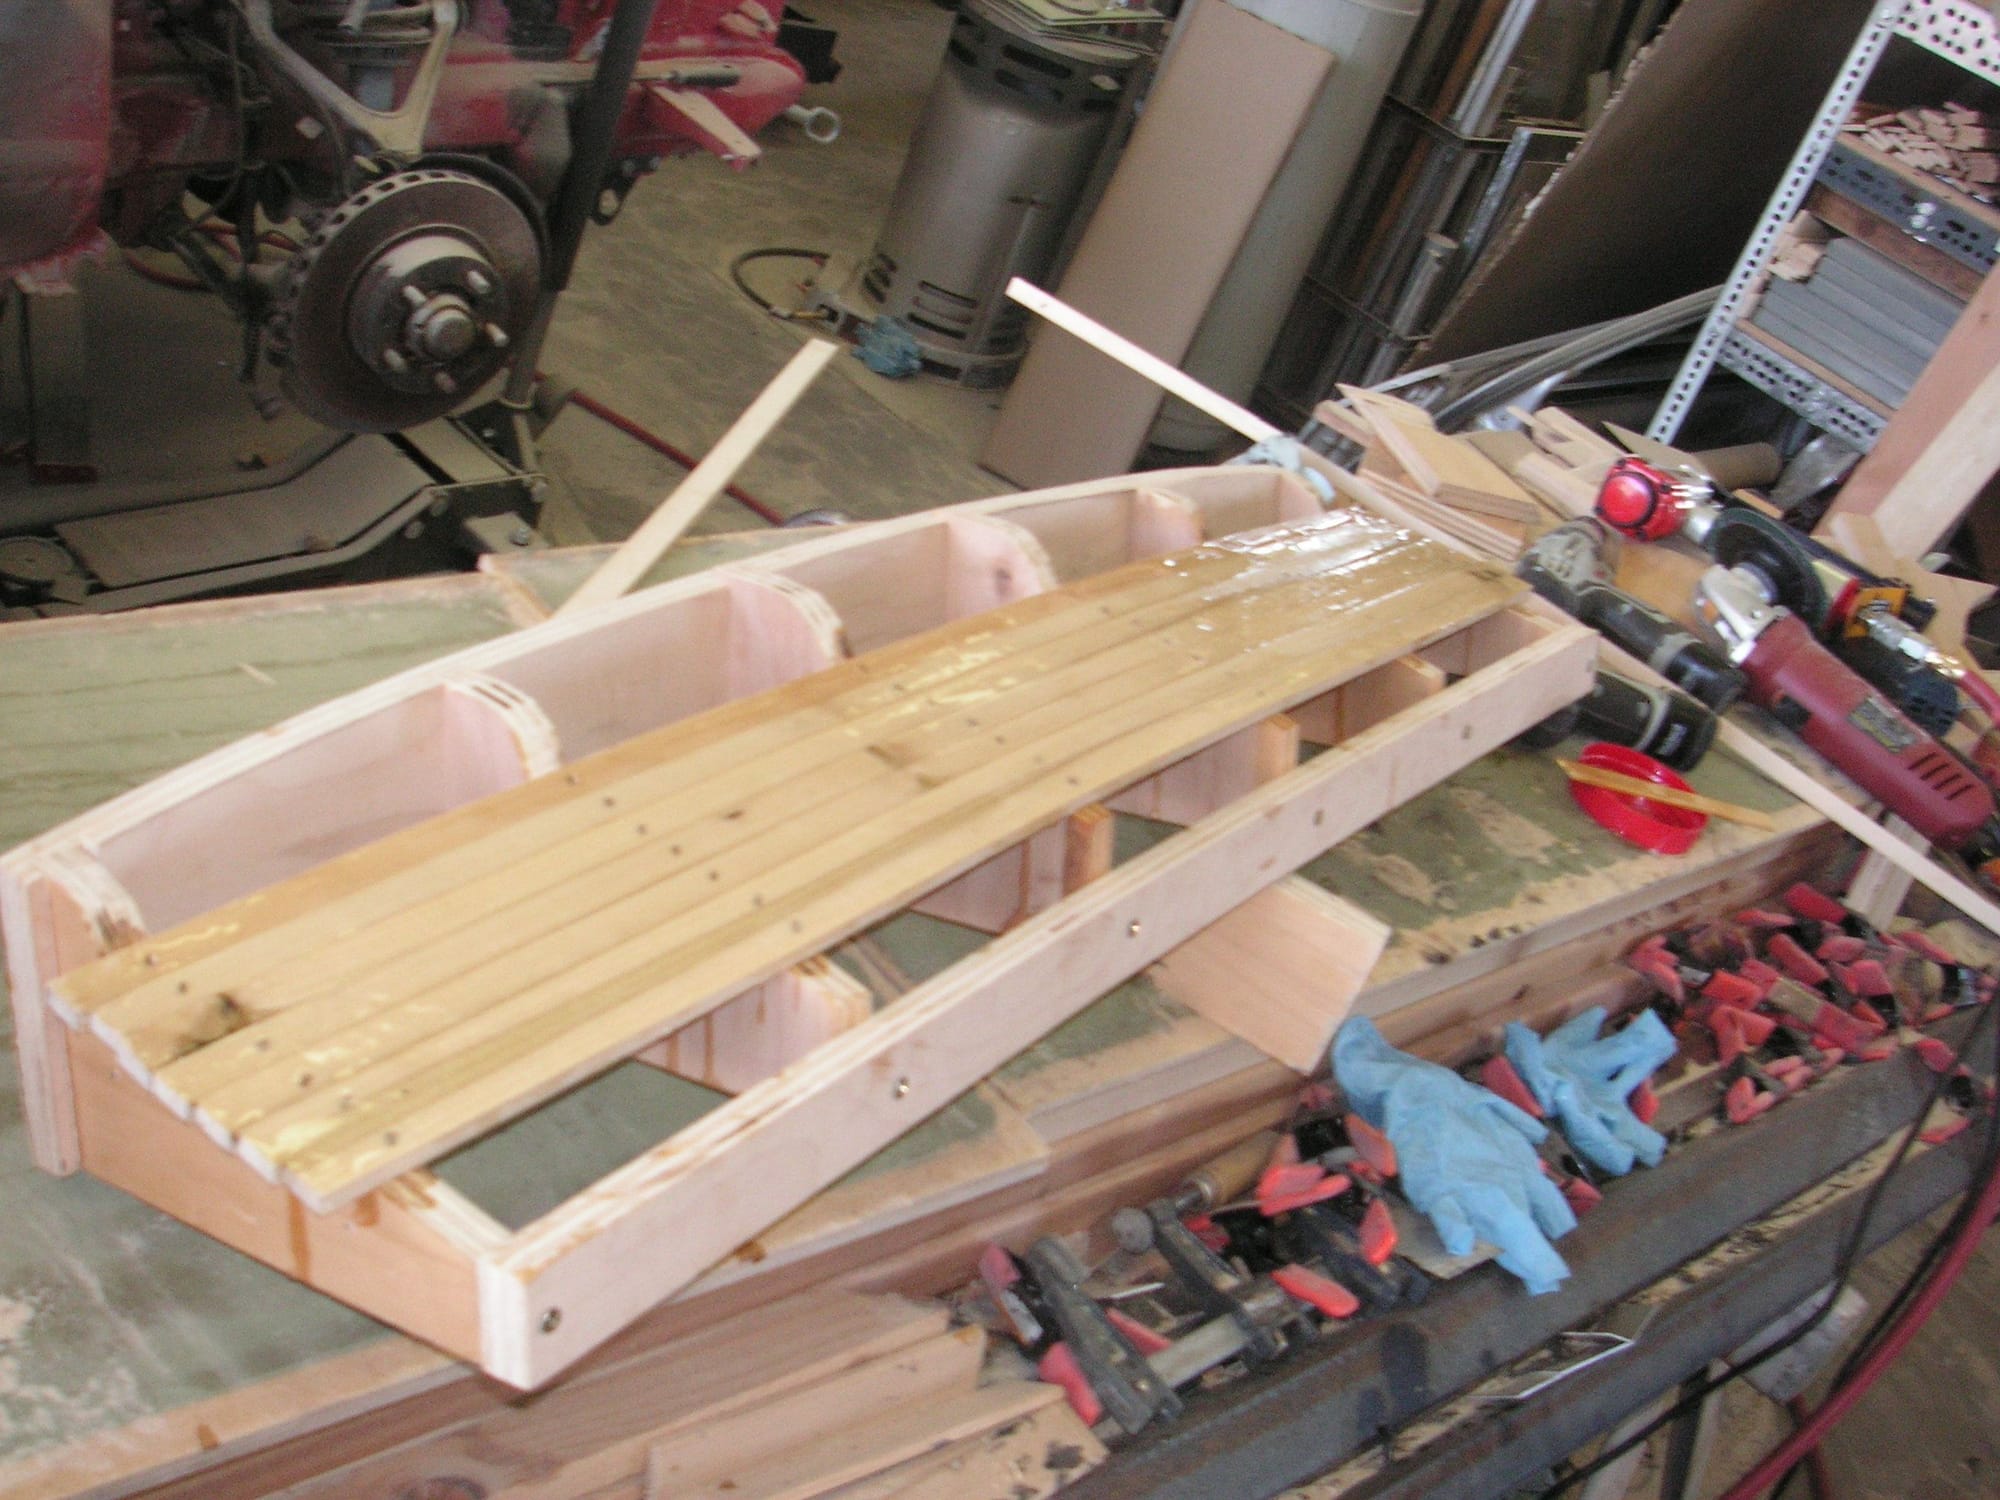
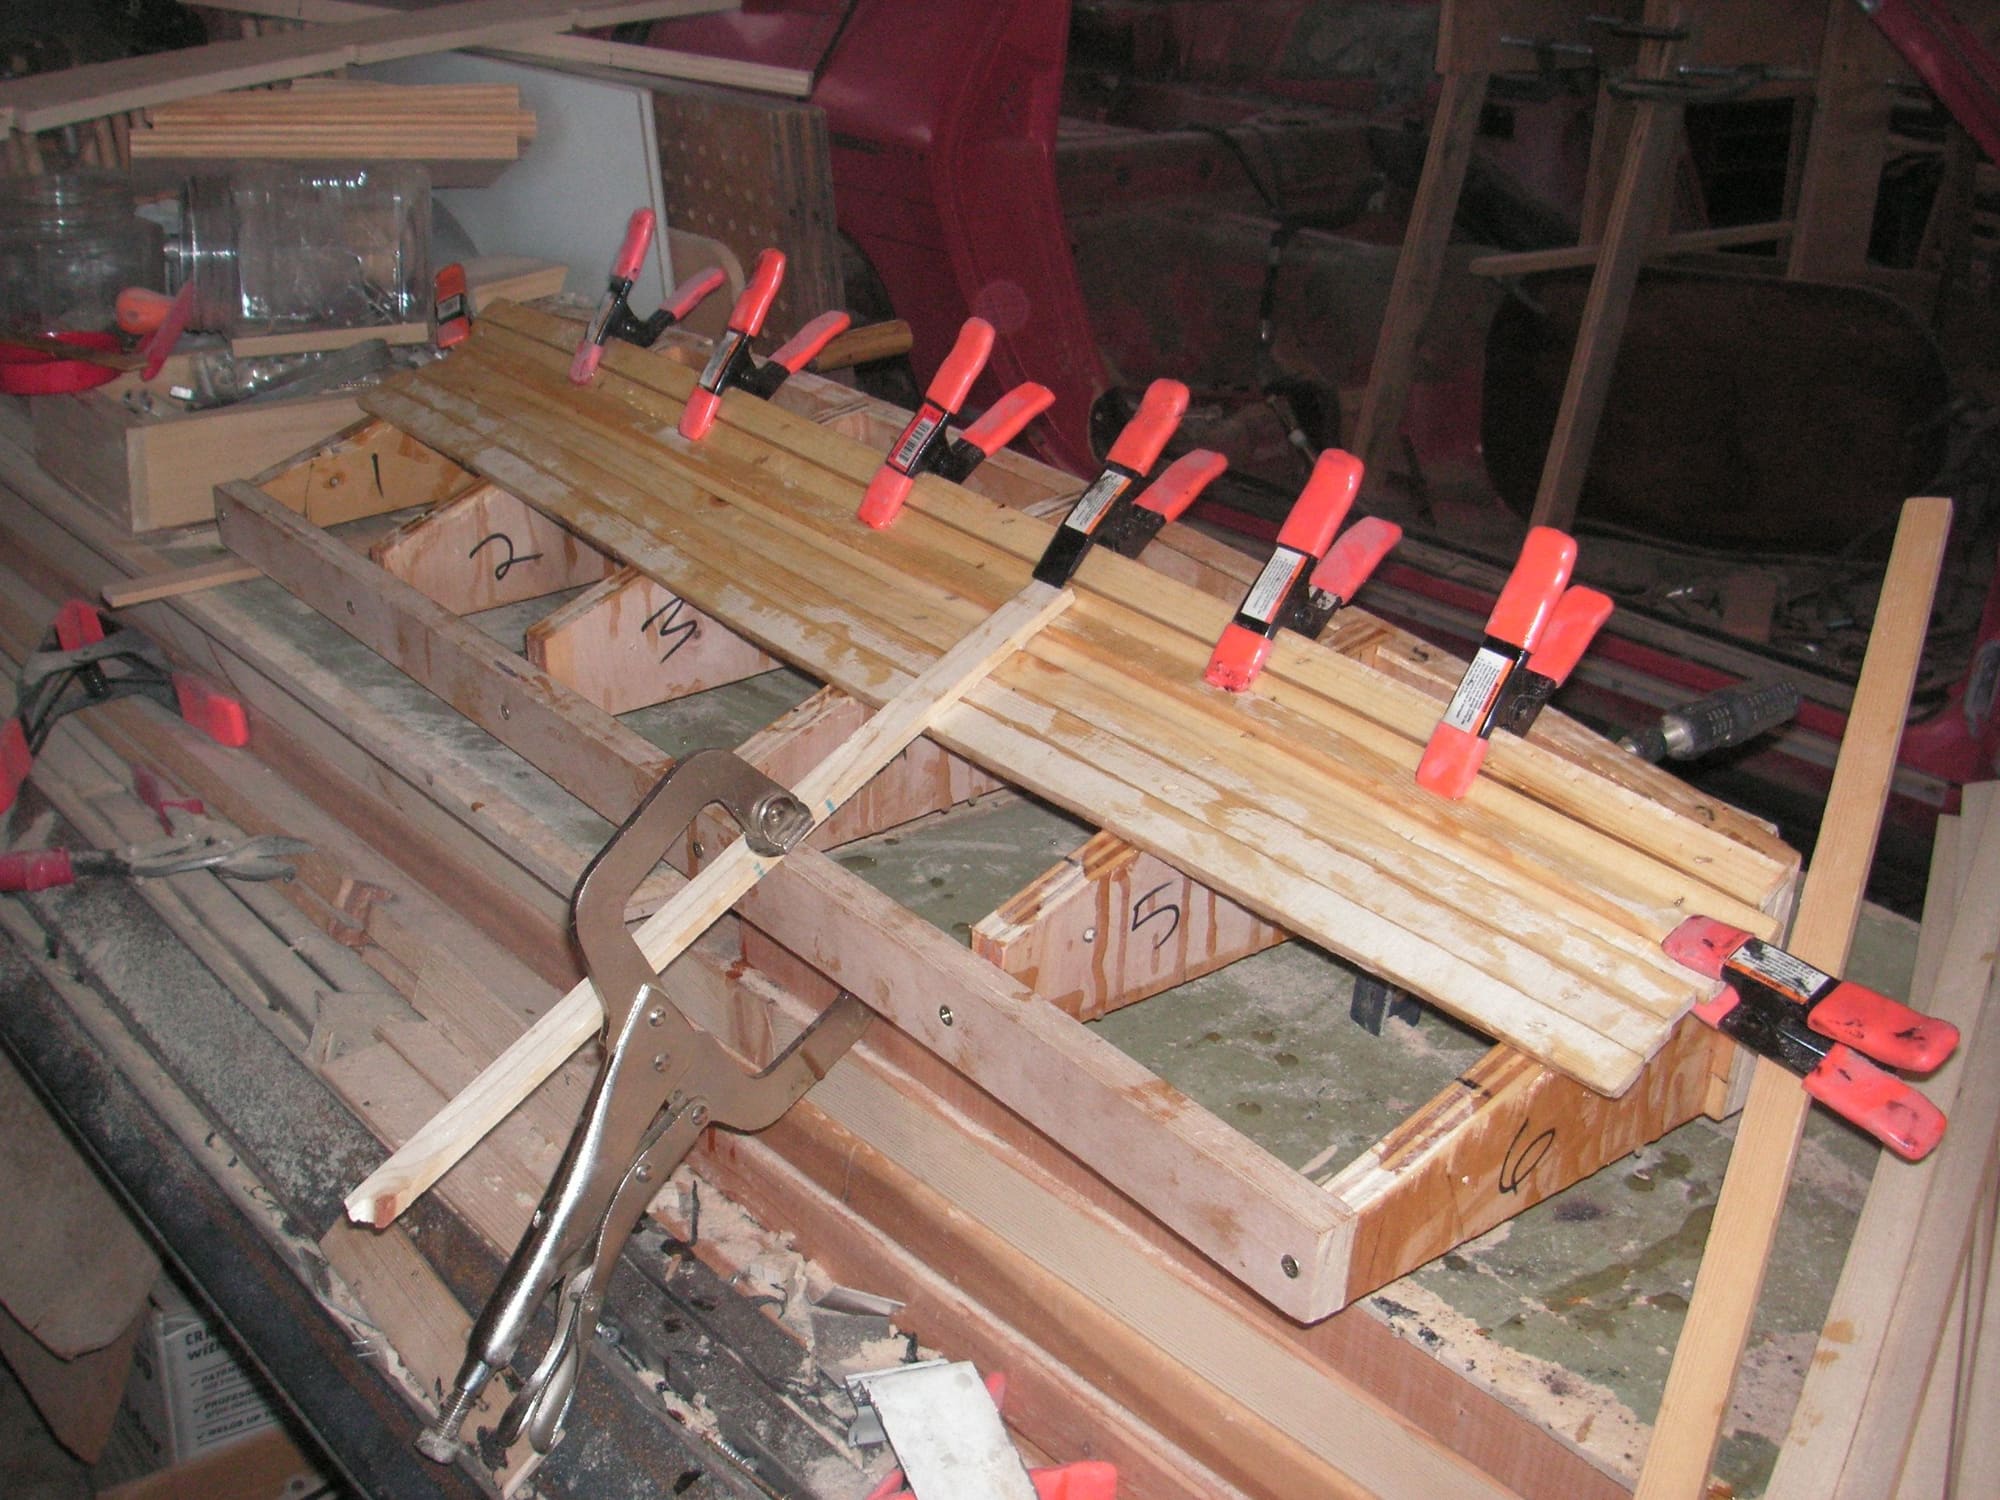
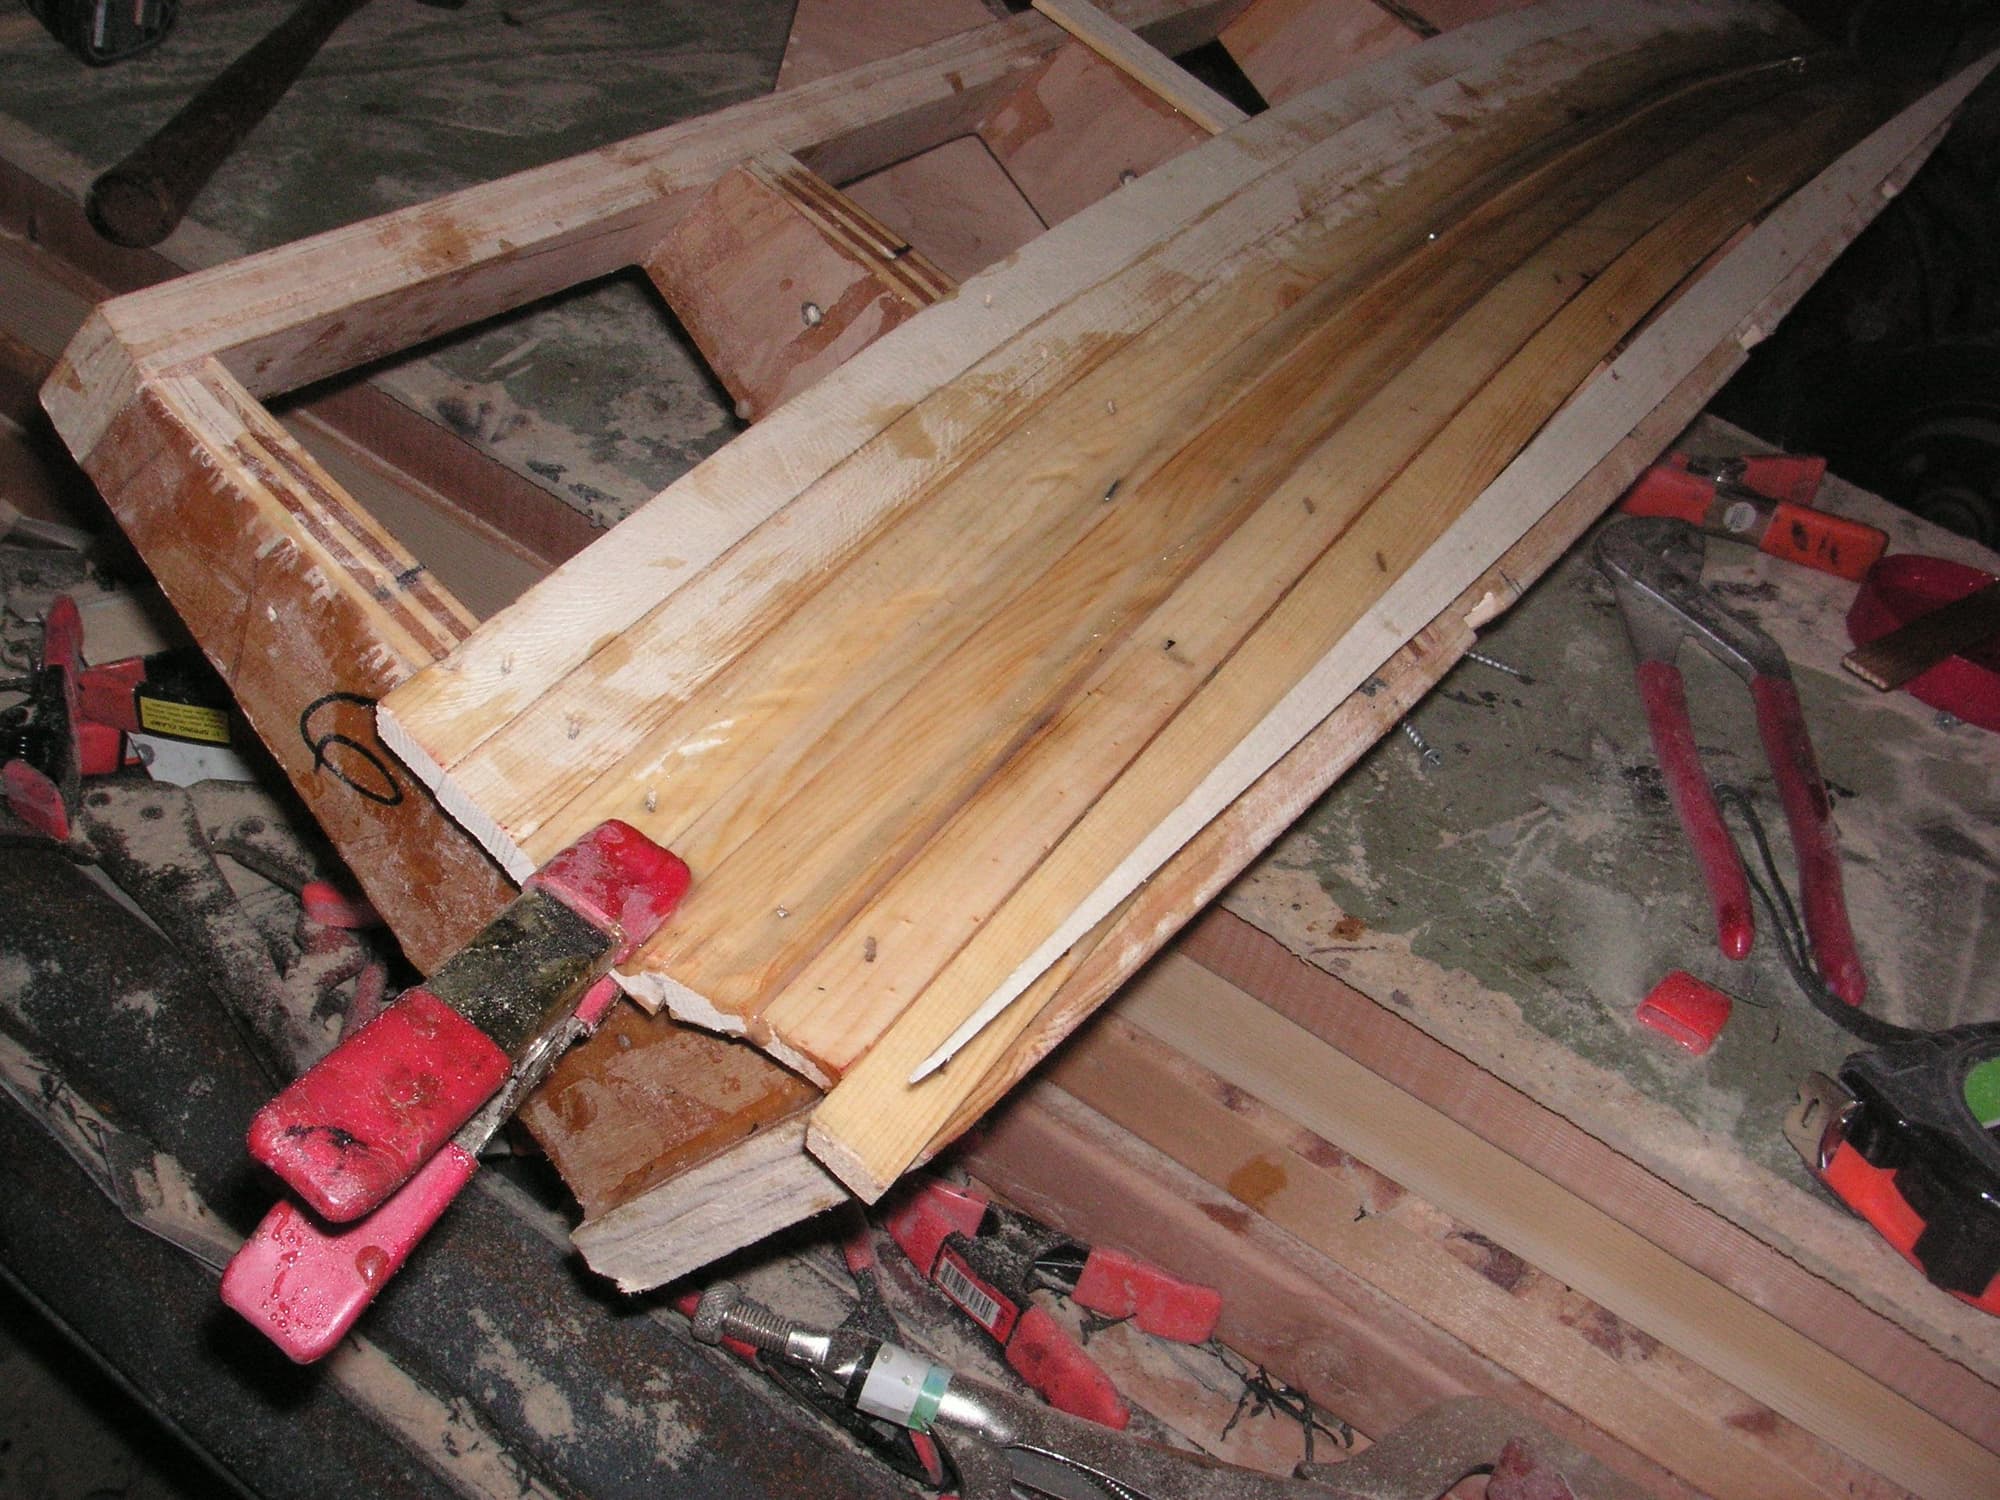
I have the keel for the back segment of the mold cut with slots for the ribs, but then I got anxious to see what covering some of this is wood strips was going to be like and started doing that on the front segment. I see that the curvature is not quite right, but I don't know if it is off too far to correct with bondo or not. I'll wait until the epoxy sets and them put it in place and see what it looks like.
Well, that didn't work too well. The epoxy set up so I tried to put it into place to check the fit and I couldn't get it into position. Then I discovered that the tension put on it with each of the strips of wood covering it warped the keel about a full inch. I stripped all the wood off of it and will try again. I also modified a couple of the formers so that the curvature will be a little better. Now, when I do it again I'll likely clamp a 2 by 4 edgeways to the back of the keel so that it will hold straight against the spring pressure from the wood strips. A good lesson to learn.
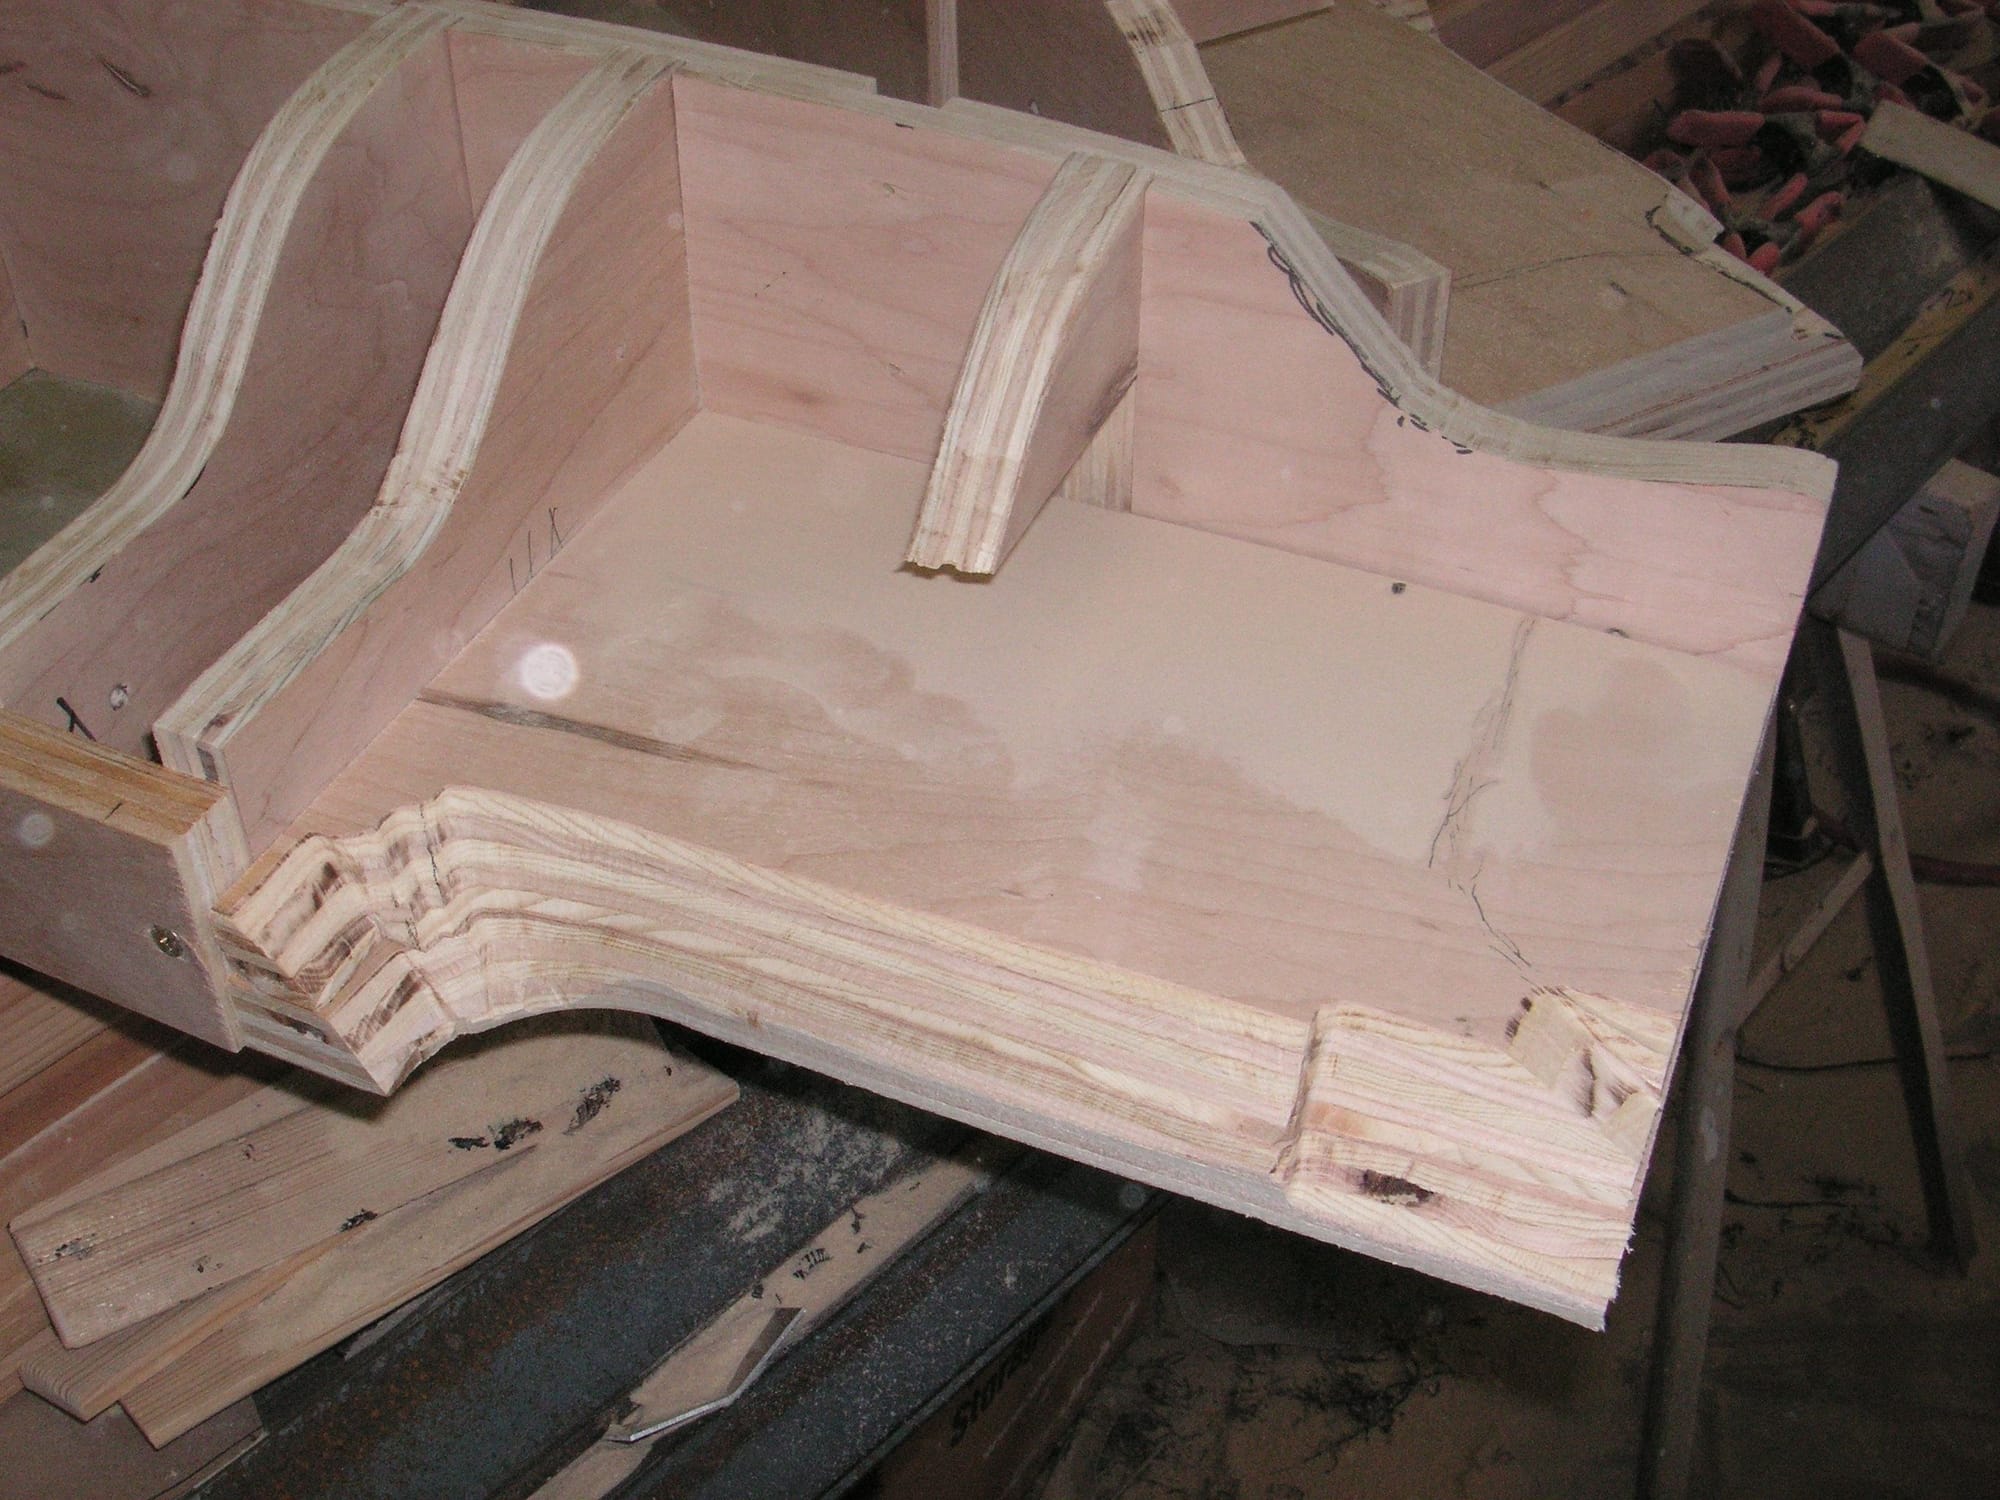
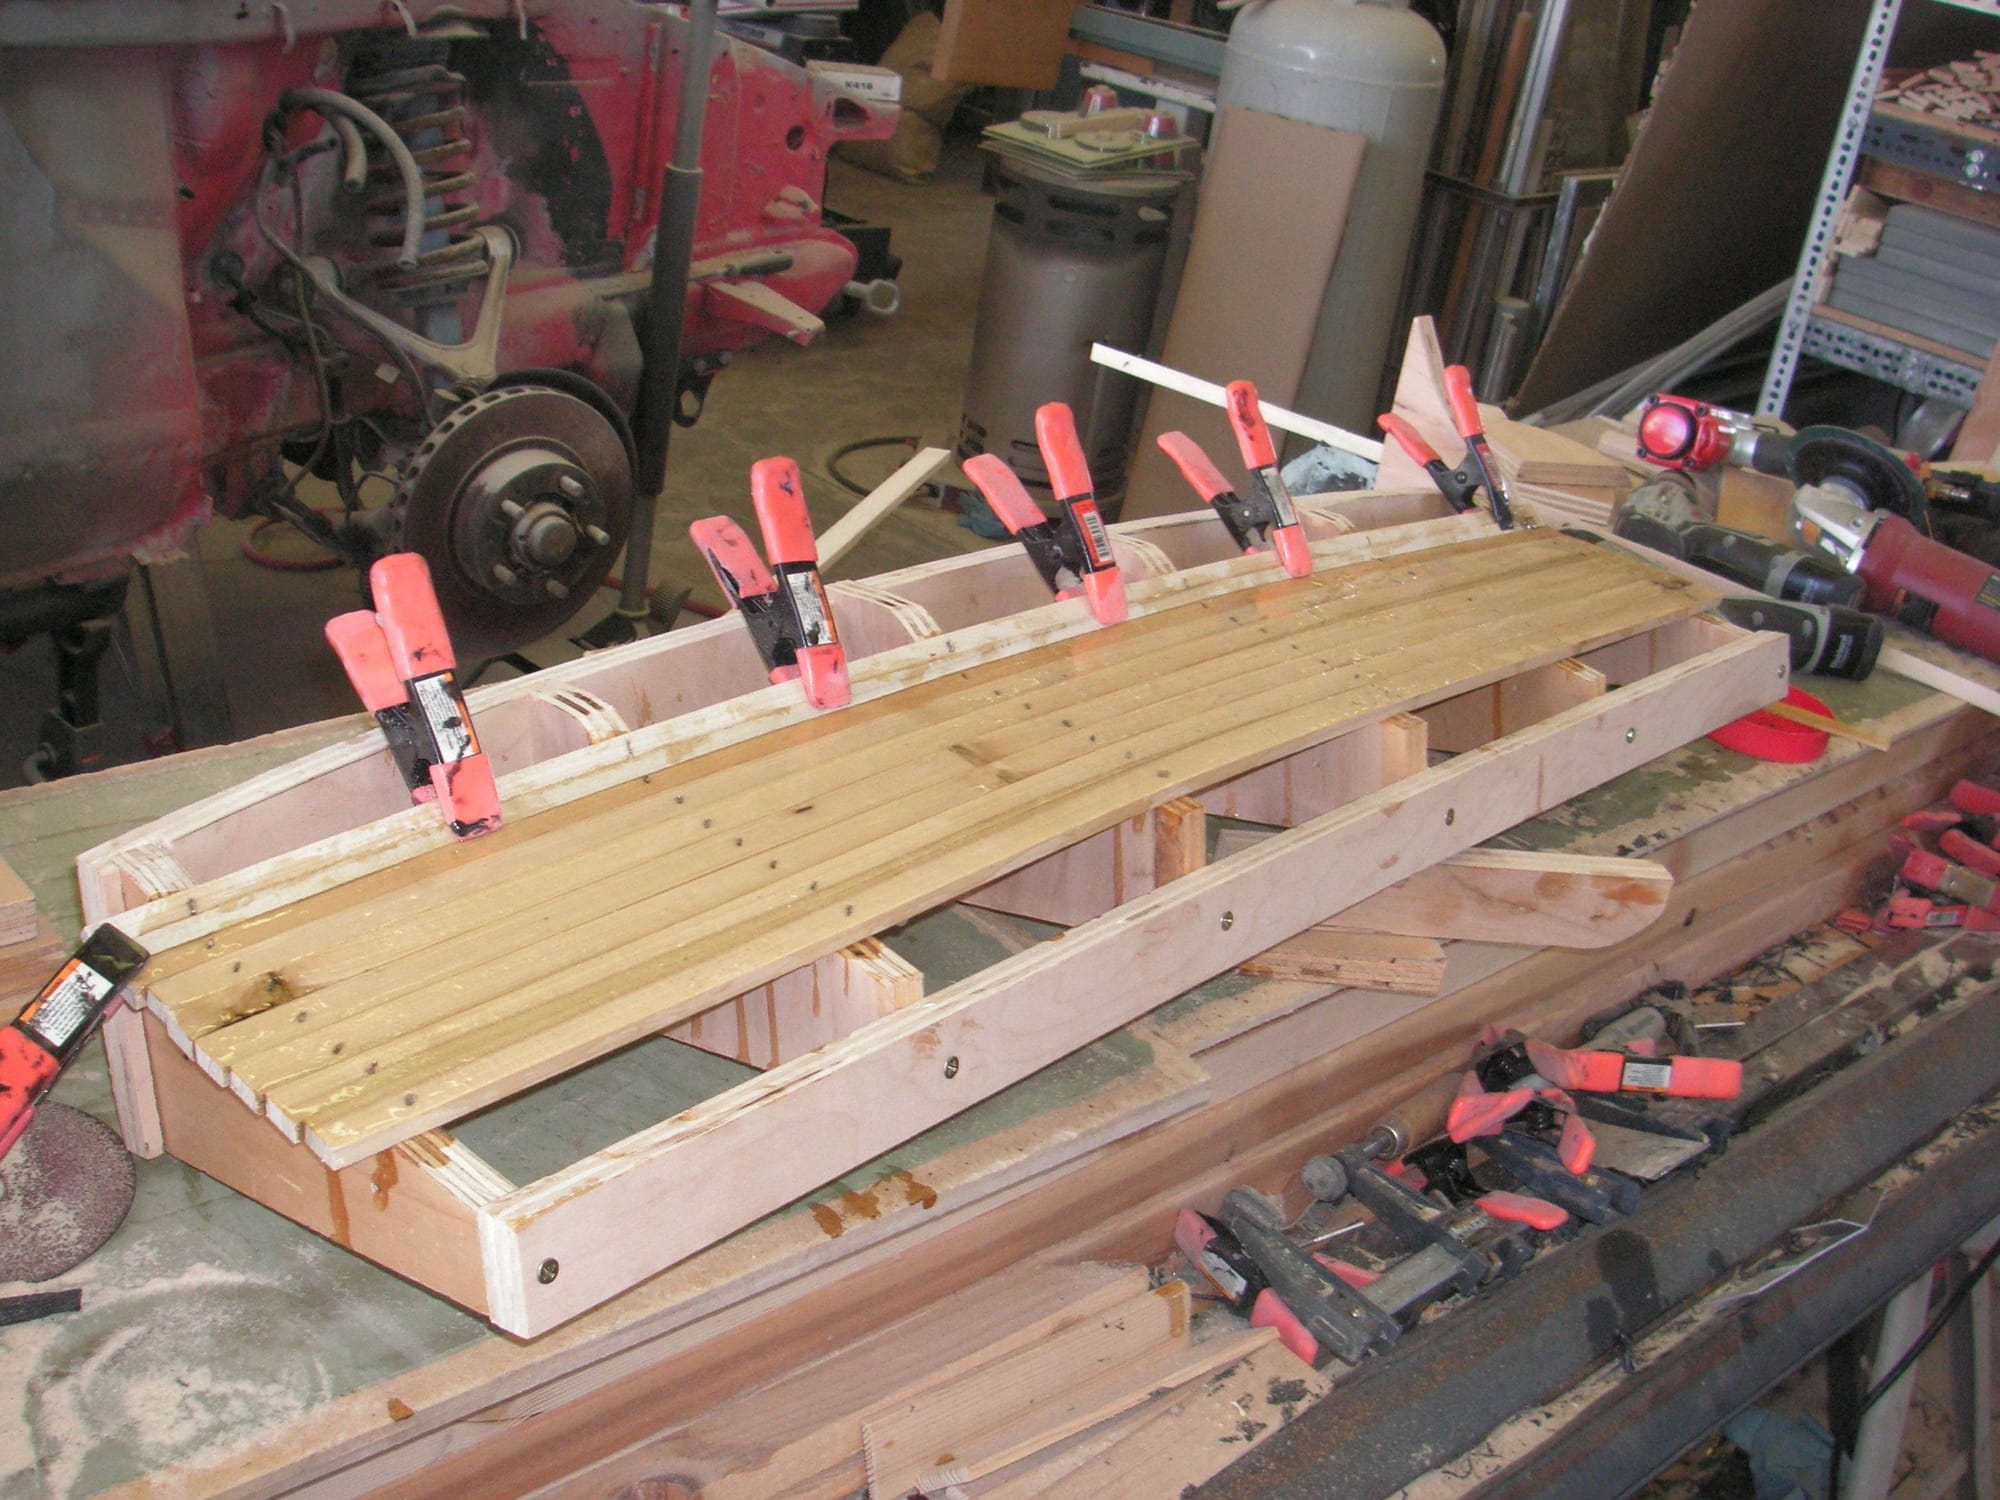
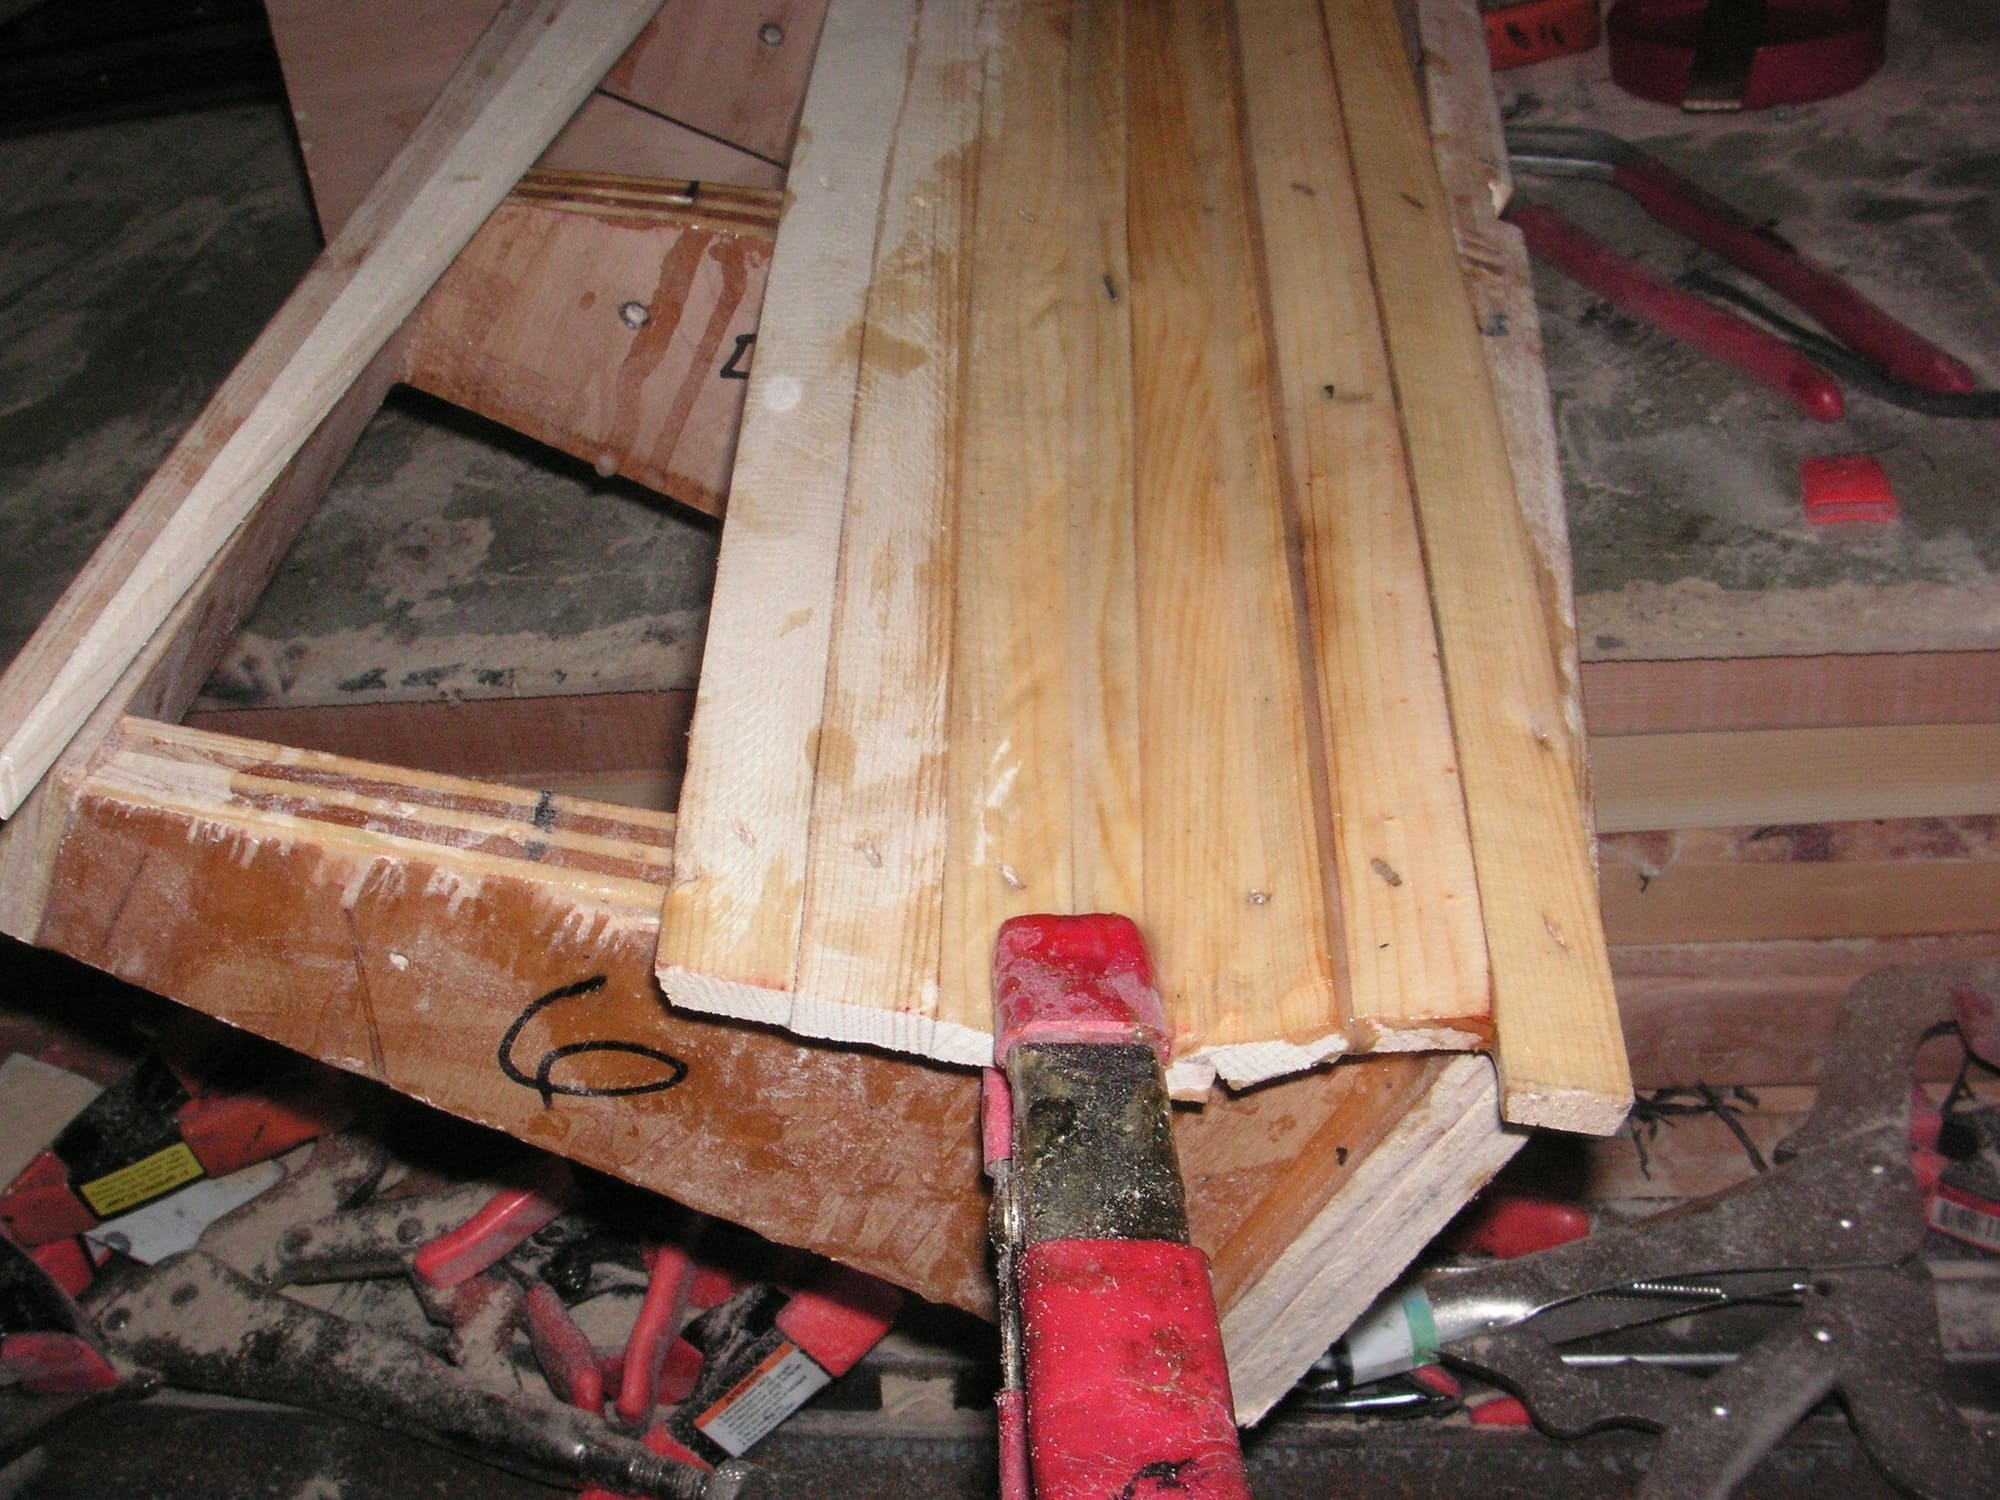
I put the front segment back together and laid it up in epoxy. When that sets I'll try some srtips over part of it again with more bracing. Then I worked up the rear segment and worked it over a couple of times to get it close. Then I related the corners of the side and rear and find quite a difference, but actually only about a quarter inch. I have them ground down to match and can finalize both of those and maybe start with some strips of wood over them. Before I do that I still need to lay up the corners in Bondo to get them fitting closely. I guess I better step back and get that done. I also made a pattern of the roof curvature front to back to use for the formers across the center of the mold.
I tried again with the front segment and covered it partly with some strips of Pine rather than Poplar, which is too expensive and a little more springly. I think the Pine will be just fine unless it proves too soft in the finishing process.
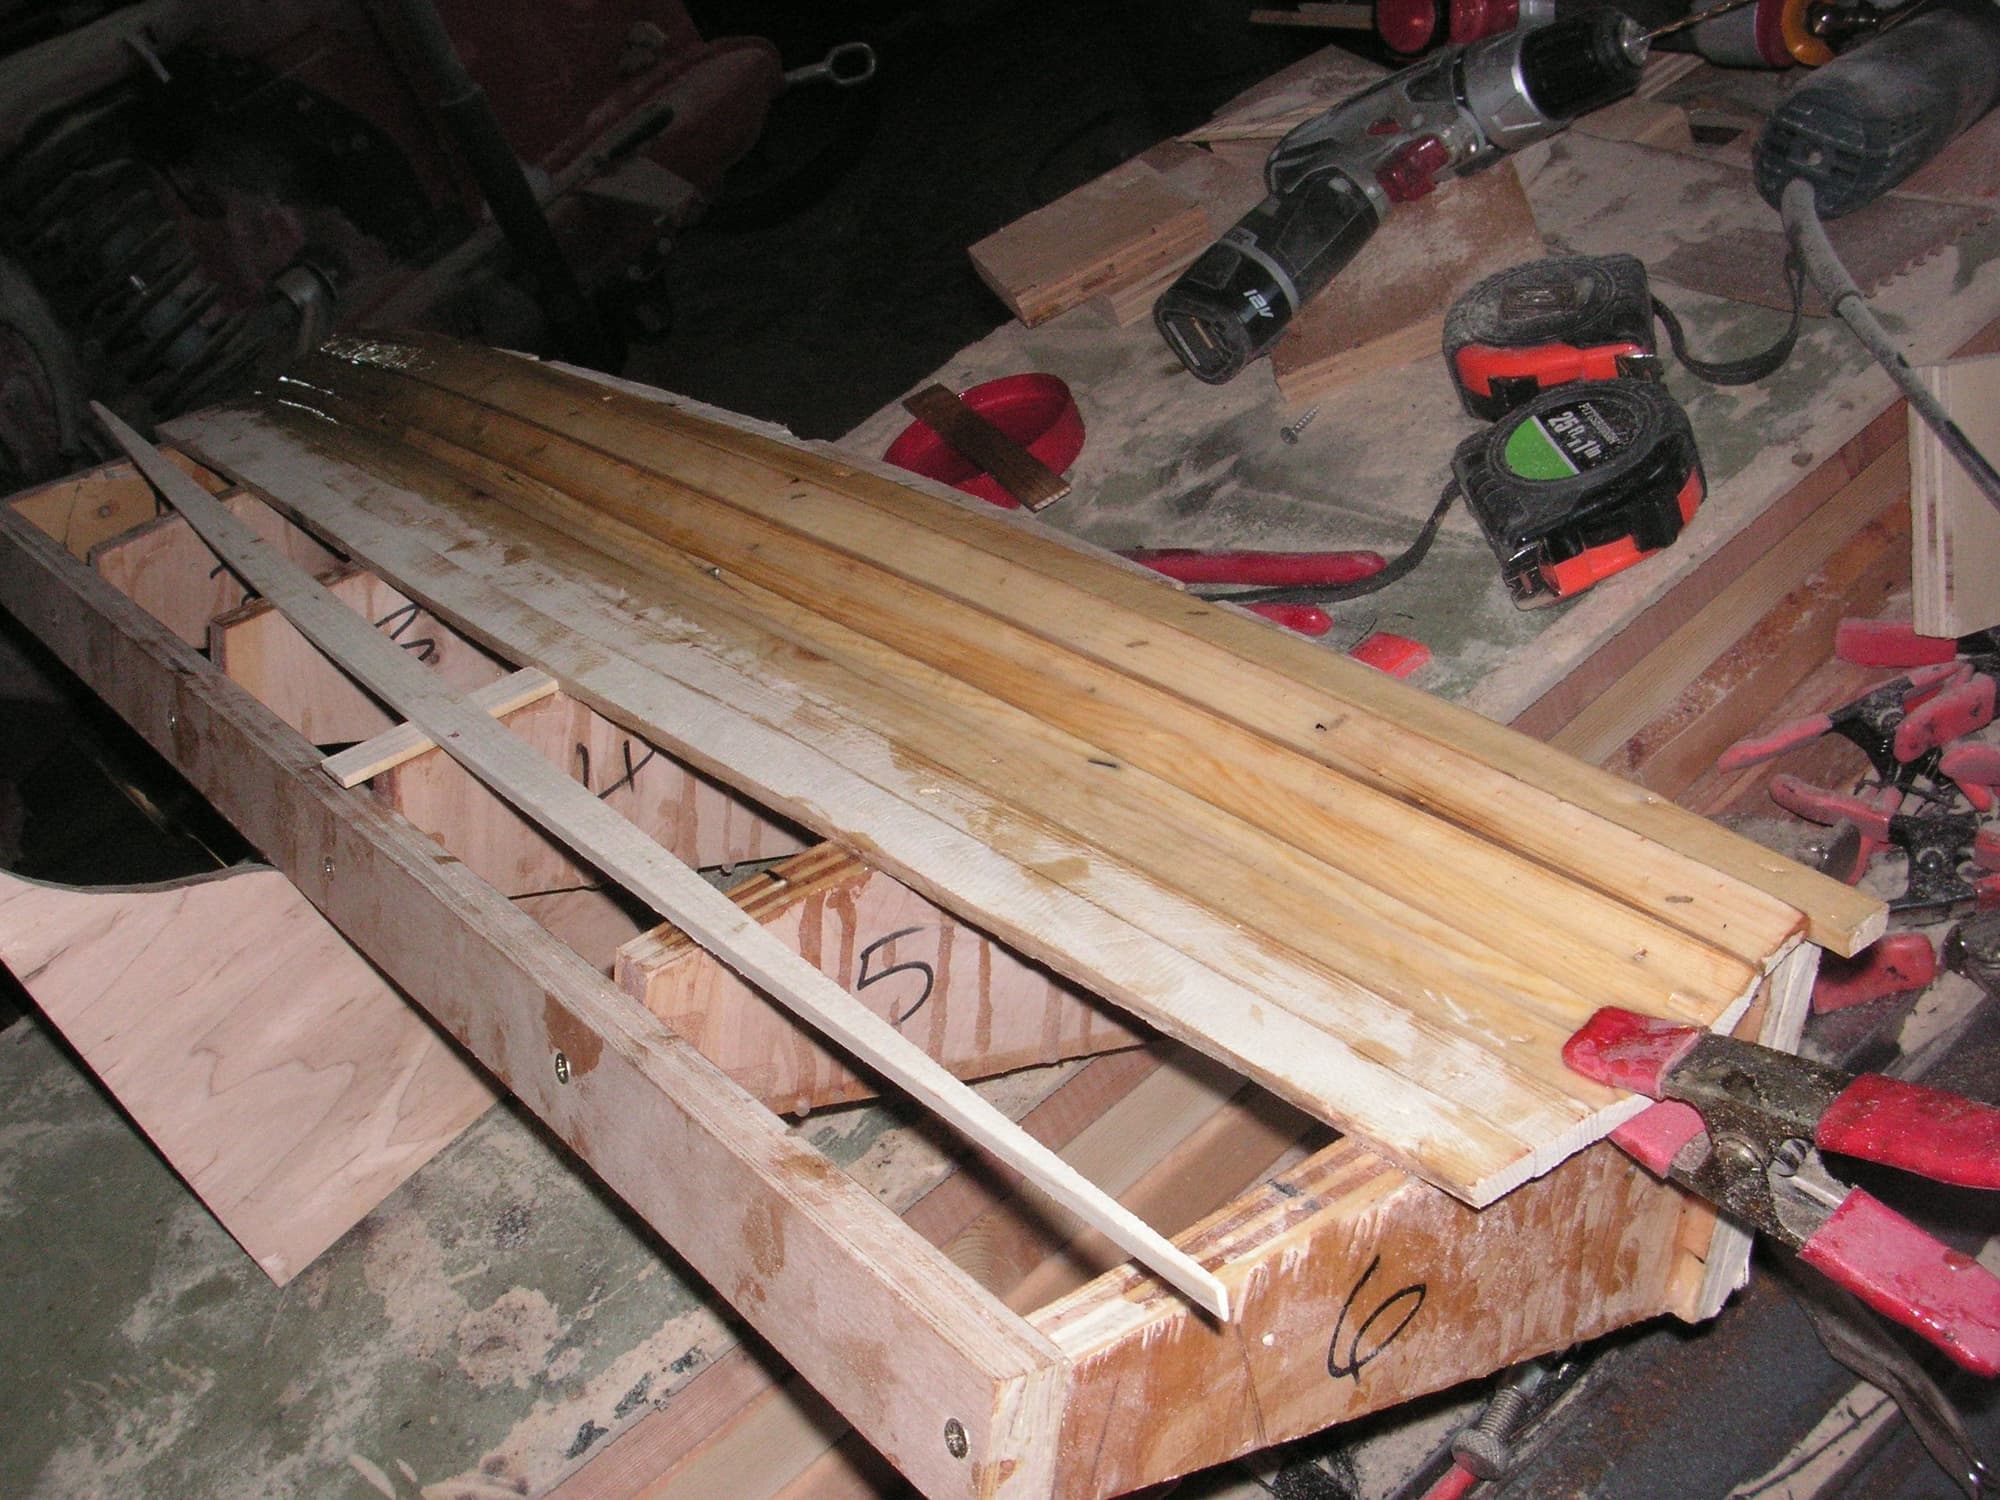
Yesterday I laid up the other three segments in epoxy and let it cure overnight. I also did some more grinding on them to refine the fit. Today I'll test fit them again and then start the wood strip covering of them in the areas that will then need to be closely fit with Bondo. Maybe tomorrow I'll even be able to try some of that.
I am to the point of needing a larger very flat space to do the final assembly and finish of this mold, so I have brought into the shop an old door I have been saving for something like this. It is a solid core door, but not solid wood. I think it is some kind of composition because the darn thing weighs over a hundred pounds. I can barely move it.
I have been doing a lot of this work on a sort of make-shift bench consisting of two sawhorses with a stack of material laid across them. Then as I need some of the material for this project I have to pull some out and then restack the whole pile again to do the work bench over. With the door now I think I'll save out enough wood and then more permanently stack the rest to last longer into this project.
I'm going to need this better work bench later to work on the doors and the hatch, so now is a good time. I'll probably have my son come over to help me put it together.

 06-24-2018, 03:22 PM