

New upholstery for 6-way power seat 928S 1984 Pascha
 07-16-2015, 03:14 PM
#31
Chronic Tool Dropper
Lifetime Rennlist
Member
Lifetime Rennlist
Member

I guess I need to start throwing spare change (and some $hundreds...) into the "Bob Needs New Seat Leather!" piggybank. 
 07-22-2015, 09:37 AM
#32
Rennlist Member
Thread Starter

Hi again,
My upholstery project continues. As I mentioned, I elected to have Bob Budd deal with gluing the foam and material in the seat inserts. I therefore received these as assemblies ready to move onto installation on my frames. This was not very expensive, and removed the messiest part of the project from my work and perhaps ensured a better job in the end.
Anyway back to my seat back. The insert arrived ready to go. I reinforced with some outside clinch staples.
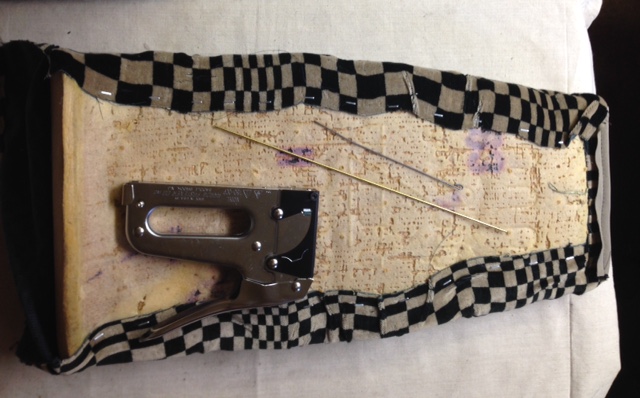
The insert has listing wires placed in its top and bottom seams. The top bar slips under a bar in the seat back frame and is pulled tightly into position, and hog-ringed.
The bottom edge of the insert is stretched over spike and secured.
The side bolsters are partially attached.
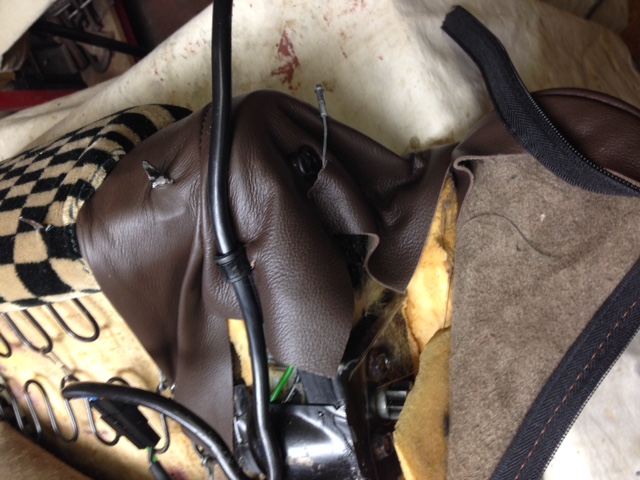
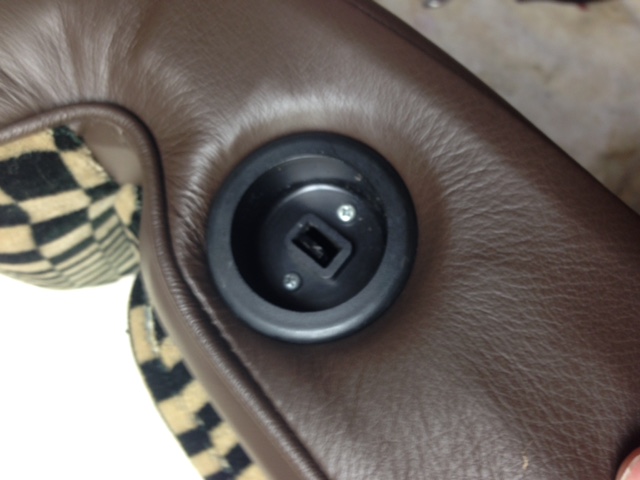
And the seat back release button is installed.
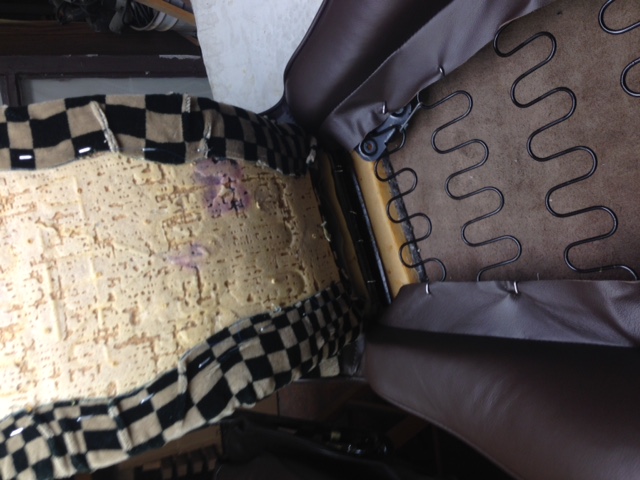
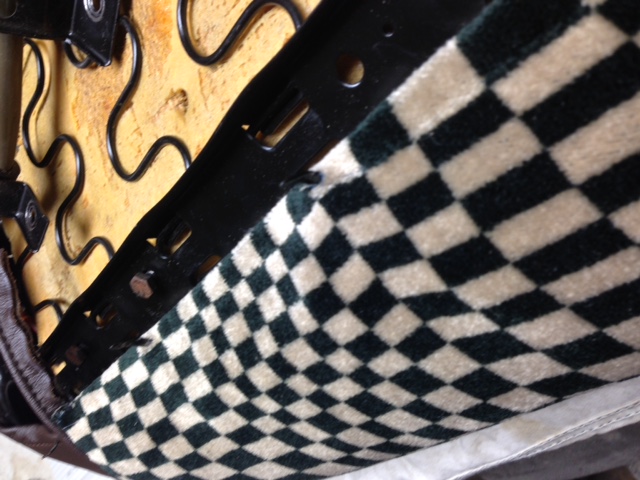
I set the seat back aside and turned to the seat bottom. I placed the seat cushion/insert assembly face down on my table and inserted my seat frame onto it.

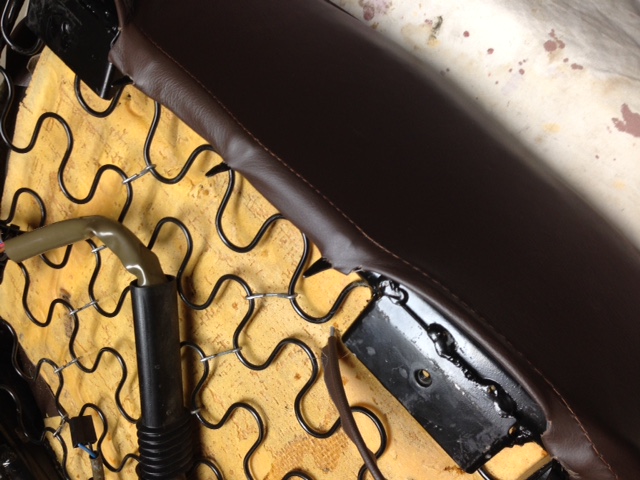
Once again there are listing wires on the front and rear edges, and soft, thin wires in the seams of the sides.
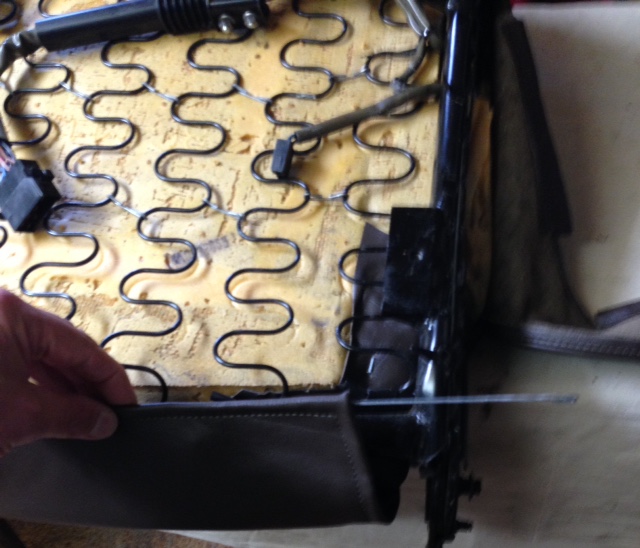

These fit over spikes on the front and sides, and are hog-ringed to the seat springs in the rear.
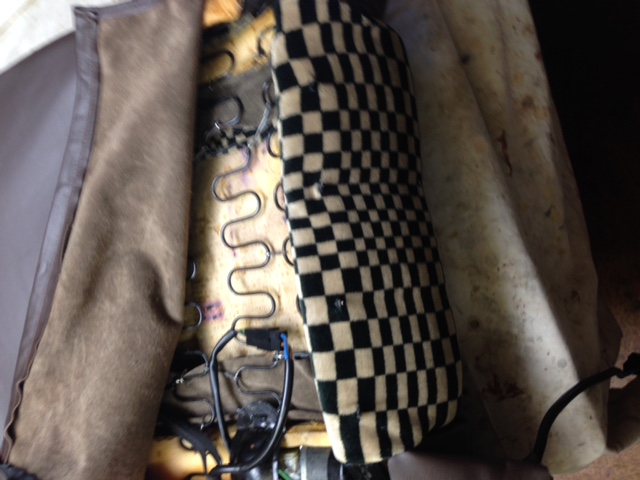
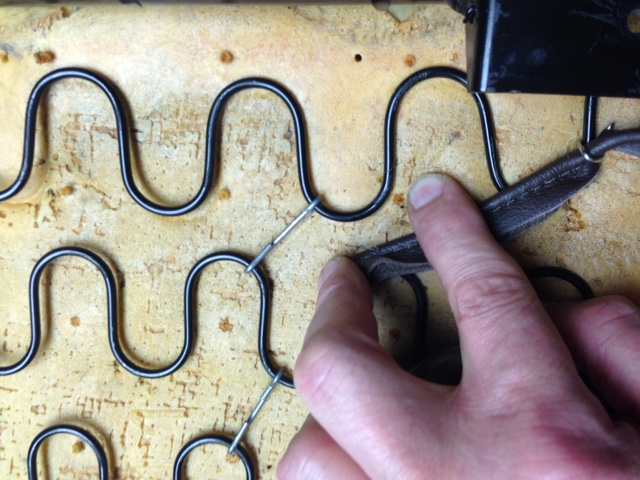
Now I need to finish attaching the seat cushion. In the course of gluing the seat inserts to the cushion, Bob has attached the two longitudinal listing wires to the foam. These are located at the junction to the insert and the bolster and are hog ringed in place before he stretched the leather seat bolsters over the foam cushion. I can see his hog-rings from below, and I can feel the listing wires from below. My next objective is to draw these listing wires down firmly and hog-ring them to the seat springs from below.
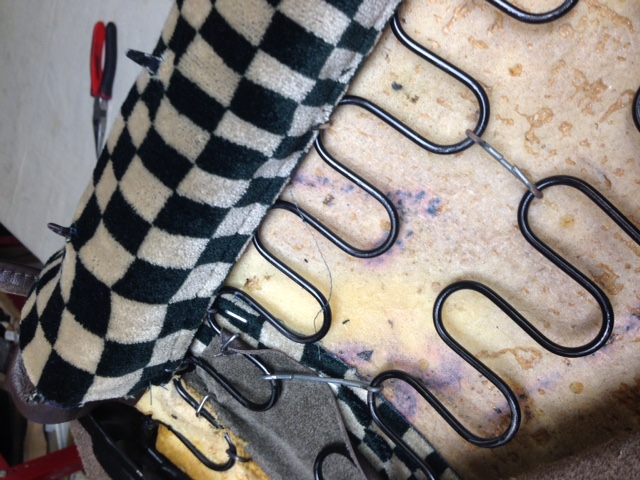
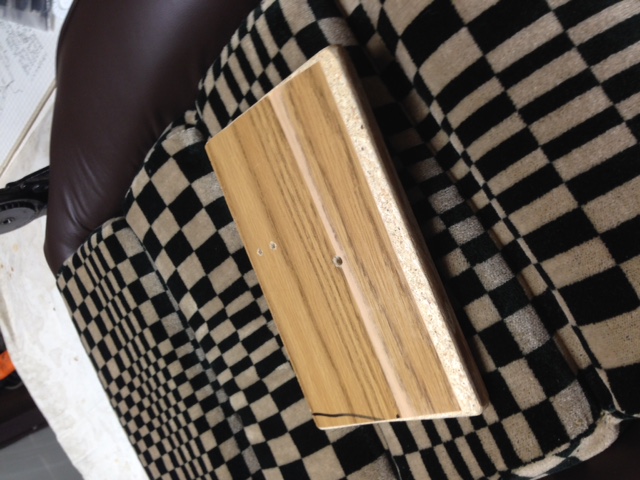
To do this I cut a piece of scrap wood to 5" x 8", rounded the edges, and forced it into the groove between the seat insert and the seat bolster.
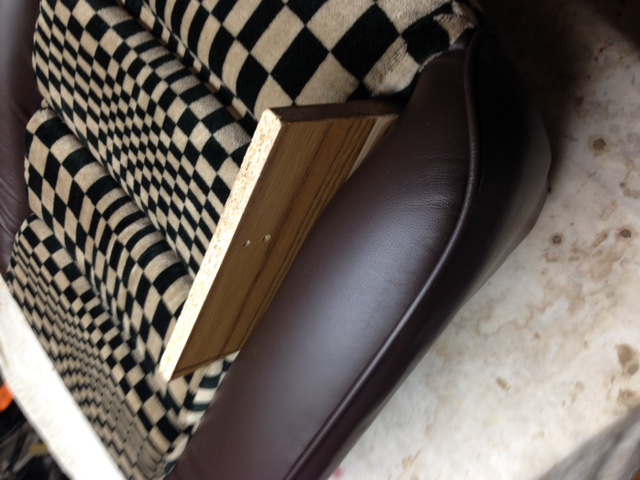
Now if I flip the seat assembly over with the wood in place, I can force the seat springs into contact with the cushion, and working from the spring side I can feel the listing wires. A series of 5 or 6 hog-rings on each side attaches these wires firmly to the seat frame, and completes the general install of the seat cushion.
It's time for a break, so I'll pick this up later.
Thanks for watching,
Dave
My upholstery project continues. As I mentioned, I elected to have Bob Budd deal with gluing the foam and material in the seat inserts. I therefore received these as assemblies ready to move onto installation on my frames. This was not very expensive, and removed the messiest part of the project from my work and perhaps ensured a better job in the end.
Anyway back to my seat back. The insert arrived ready to go. I reinforced with some outside clinch staples.
The insert has listing wires placed in its top and bottom seams. The top bar slips under a bar in the seat back frame and is pulled tightly into position, and hog-ringed.
The bottom edge of the insert is stretched over spike and secured.
The side bolsters are partially attached.
And the seat back release button is installed.
I set the seat back aside and turned to the seat bottom. I placed the seat cushion/insert assembly face down on my table and inserted my seat frame onto it.
Once again there are listing wires on the front and rear edges, and soft, thin wires in the seams of the sides.
These fit over spikes on the front and sides, and are hog-ringed to the seat springs in the rear.
Now I need to finish attaching the seat cushion. In the course of gluing the seat inserts to the cushion, Bob has attached the two longitudinal listing wires to the foam. These are located at the junction to the insert and the bolster and are hog ringed in place before he stretched the leather seat bolsters over the foam cushion. I can see his hog-rings from below, and I can feel the listing wires from below. My next objective is to draw these listing wires down firmly and hog-ring them to the seat springs from below.
To do this I cut a piece of scrap wood to 5" x 8", rounded the edges, and forced it into the groove between the seat insert and the seat bolster.
Now if I flip the seat assembly over with the wood in place, I can force the seat springs into contact with the cushion, and working from the spring side I can feel the listing wires. A series of 5 or 6 hog-rings on each side attaches these wires firmly to the seat frame, and completes the general install of the seat cushion.
It's time for a break, so I'll pick this up later.
Thanks for watching,
Dave
07-22-2015, 01:58 PM
#33
Rennlist Member
Thread Starter
Hi again,
Here's the thrilling conclusion of my interior project.
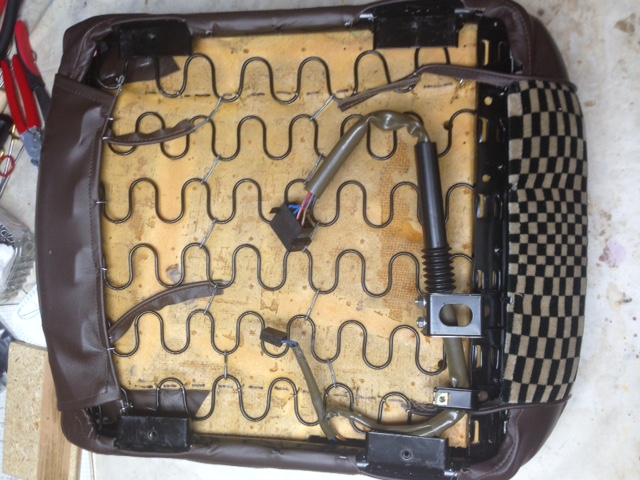
The first picture shows the seat from below, and I have marked where the listing wires are that draw the cushion down to the frame.
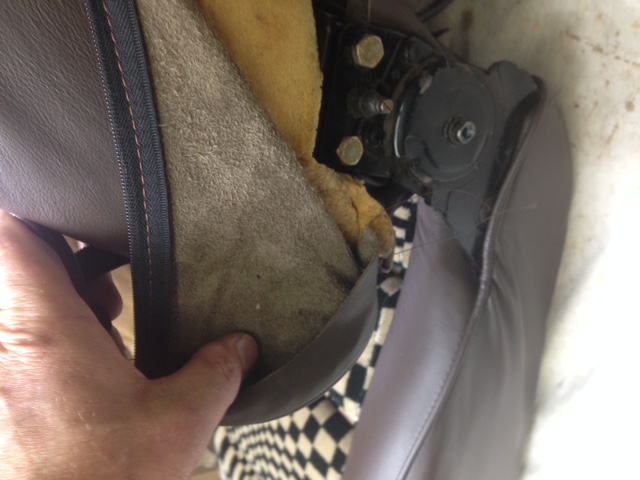
Here I have married the seat back to the seat bottom. One pivot screw on the center hinge and 2 bolts on the outer hinge.
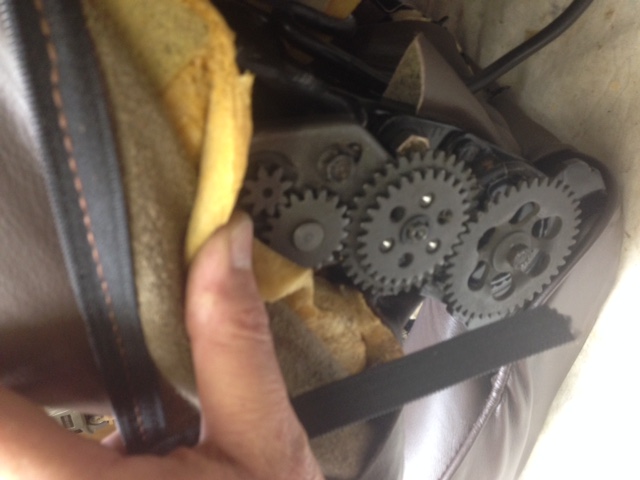
The gears for the reclining mechanism go back in. No indexing needed, maybe because there is no memory function on these.
Now it looks like a seat. And here it is in the car with its mate.
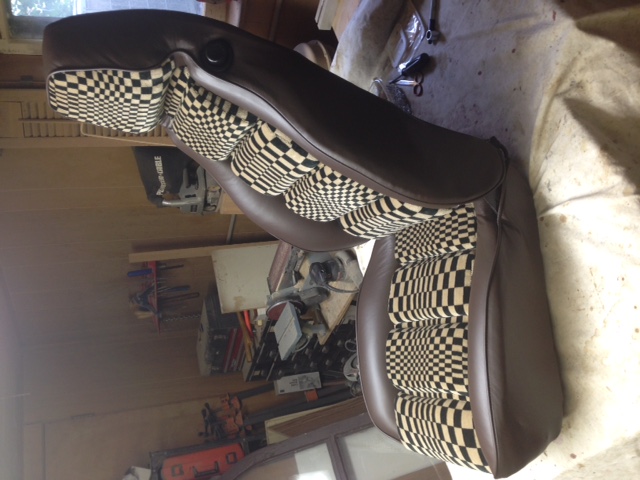
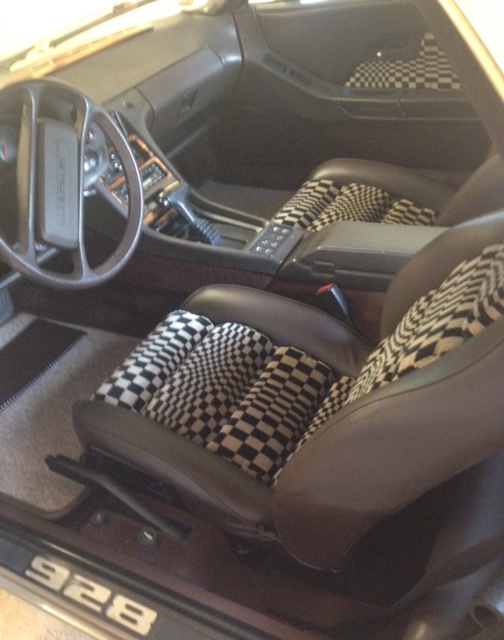
Overall, I am very happy. The foam on the DS seat is a little more worn and the fit is just slightly less tight. I think some wrinkles will subside with time, but the overall efect is very strong.
Thanks for watching,
Dave
Here's the thrilling conclusion of my interior project.
The first picture shows the seat from below, and I have marked where the listing wires are that draw the cushion down to the frame.
Here I have married the seat back to the seat bottom. One pivot screw on the center hinge and 2 bolts on the outer hinge.
The gears for the reclining mechanism go back in. No indexing needed, maybe because there is no memory function on these.
Now it looks like a seat. And here it is in the car with its mate.
Overall, I am very happy. The foam on the DS seat is a little more worn and the fit is just slightly less tight. I think some wrinkles will subside with time, but the overall efect is very strong.
Thanks for watching,
Dave
The following users liked this post:
veedub1955 (06-18-2023)
07-22-2015, 02:09 PM
#34
Chronic Tool Dropper
Lifetime Rennlist
Member
Lifetime Rennlist
Member
07-22-2015, 04:23 PM
#35
Rennlist Member
Thread Starter
The seat back insert is essentially a separate central cushion; I sent that central foam cushion. Also the seat insert and seat bolster cover is sewn as one unit to cover the seat cushion, I sent that foam cushion also. Ends up with the two cushions weighing about 3 pounds, so shipping not much of a problem. He's a great guy, and does excellent work.
The last picture in my post above shows the seat cushion and the seat back insert that I packed up and sent to Bob.
Take care,
Dave
Last edited by j.kenzie@sbcglobal.net; 07-22-2015 at 07:21 PM.