When you click on links to various merchants on this site and make a purchase, this can result in this site earning a commission. Affiliate programs and affiliations include, but are not limited to, the eBay Partner Network.
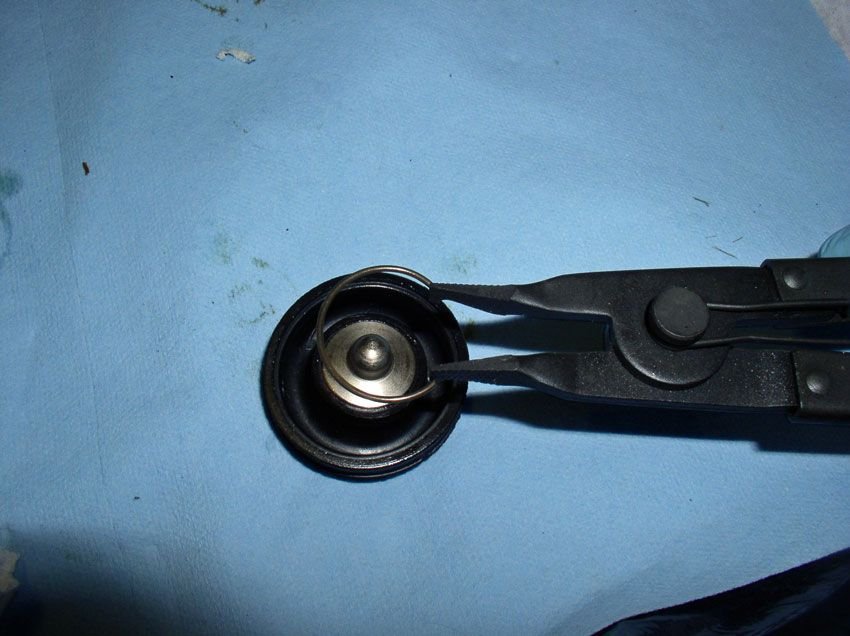
OK one other question that I have is on the tensioner boot, where Dwayne shows a spring clip on the inner boot.
Mine didn't have one so I ordered a spring clip but got another boot clamp instead. I thought I messed up and ordered the wrong thing againBut then I looked at the WSM and it doesn't show one either. I guess the S4 tensioner has the spring clamp but the 85 doesn't?
your doing a good job, please post pictures of your tensioner and its boot.
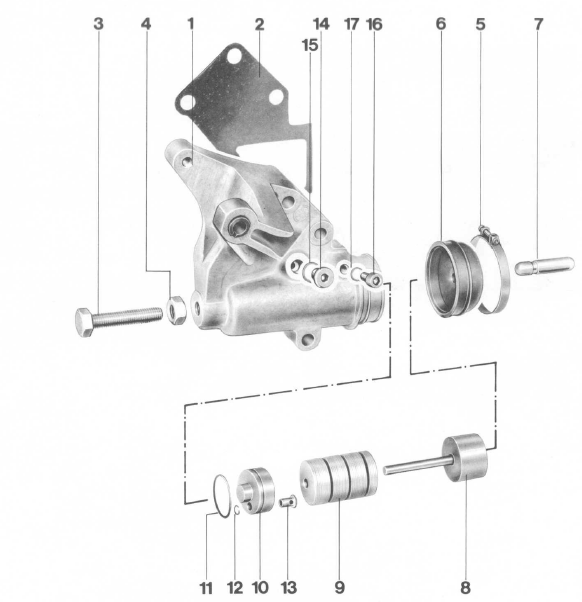
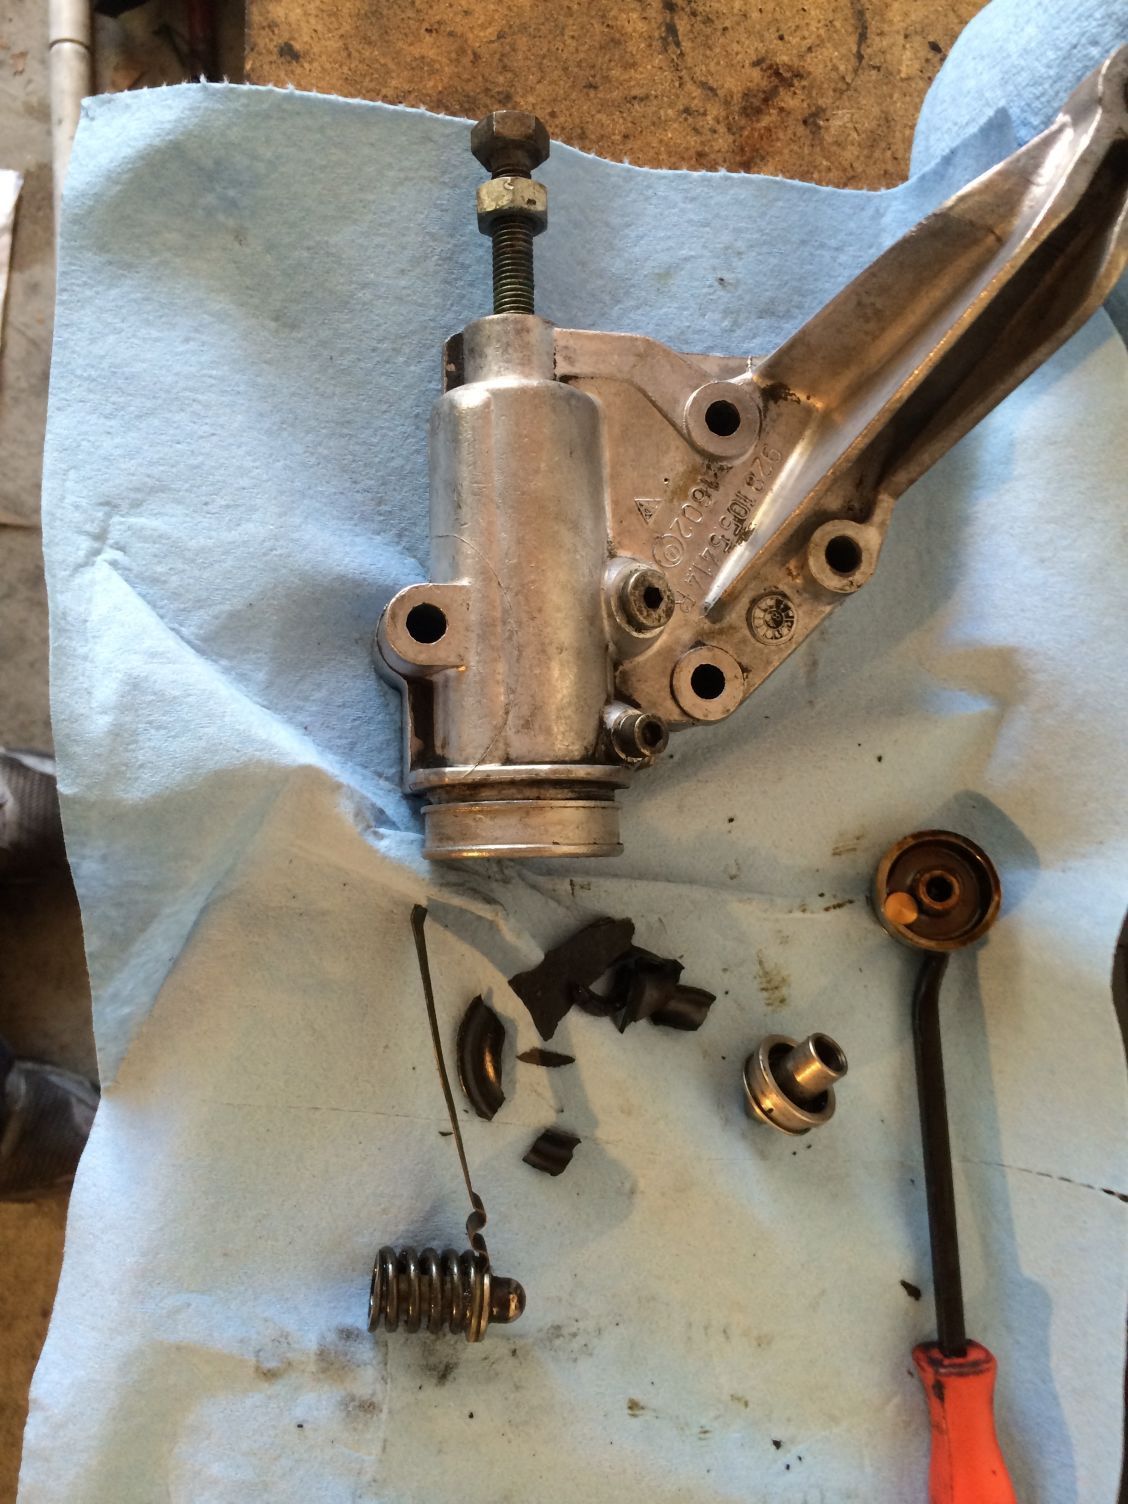
for the oil pump here are things to be aware of ...
Firstly the gears must fit a certain way.
When you remove the pump,
you should find that there is a small punch mark on the side of the outer and inner gears,
these marks must face the engine when installed.
NOTE if the outer gear is installed the other way it will quickly seize in the pump housing.
I suggest that you lubricate the pump O ring with Dow Corning 111 this will keep it soft for many years.
I also suggest to use STP oil treatment for lubricating the pump gears ,
be generous with it , make sure to lube the front radial seal and the inner shaft as well.
The reason for this is that the oil is so thick it wont run out of the pump,
and it will guarantee that you will have oil pressure withing 20 seconds.
NOTE on the pump shaft behind the woodruf key, there is a 1mm spacer washer,
this washer is only used on the aluminum pump gear.
OTHERWISE when fitting a new style steel gear the spacer is not installed,
ref the WSM for this info.
The original boot was hard as plastic and disintegrated on removal. There was no inner spring clip present. I'll send pics of the parts that Roger sent me later today.
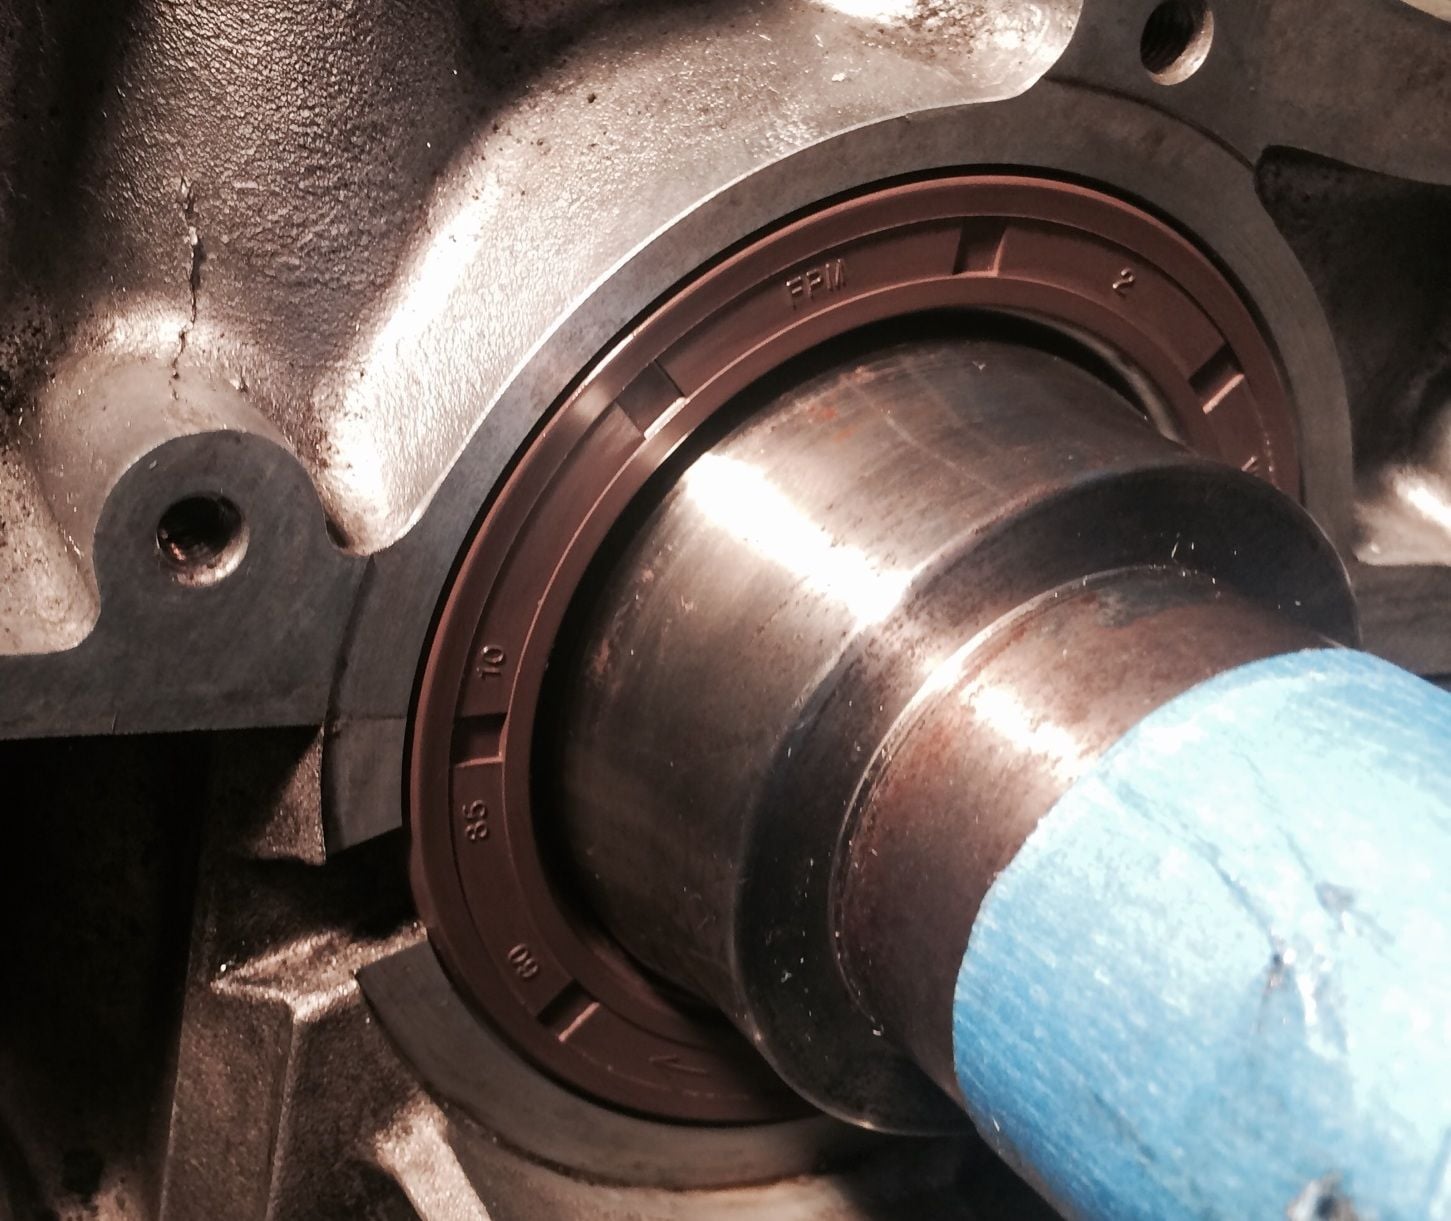
If you have trouble removing the crank seal, a trick is to drill a small hole into it (not all the way), screw in a drywall screw, and yank on the screw with a claw hammer and 2x4. I had no luck trying to pry it out, and used this method, as distasteful as it seems. I think I put in two screws so I could yank it out more evenly, but it came right out with one.
I also recall advice that the new seal should be installed dry, perhaps so it stays put once installed. Its fore and aft position may not be critical, but it must go in parallel or the sealing lip will slew on every rotation, which can't be good. The way to do that easily is to set it flush with the forward surface of the block. Mine went in pretty easily - gentle tapping here and there got it flush. Had I been clumsy and got one side in too far, I would have made the other side match rather than doing the drywall screw thing again.
Words from a novice - caution advised.
You are demonstrating very nicely the wisdom of walking away when faced with trouble. Some thought, some investigation, some Zen, perhaps a new tool - then the stuck nut magically comes off.
I think I'm going to build a seal driver out of PVC, as far as removal my plan is to try the standard screwdriver method first and if I have any issues then to revert to one of the non standard methods.
There was a recommendation by docmirror regarding a small amount of sealant on the outside lip of the seal, I haven't seen this recommendation anywhere else, does anyone else have thoughts here?
The pry-with-screwdriver method demands that you not contact the sealing surface on the crankshaft with the screwdriver. A tiny scratch is all it takes to clean the sealing lip off the new seal and forever have oil leaks. Try the drill-and-drywall-screw method first.
Jury opinions vary on the wisdom of adding sealant to the outsides of seals. If the bore is perfectly clean, no need. In the case of this crank seal, it it's in the split between the block and the girdle, where there's the [very] slight possibility of a mismatch or groove at the seams. In this case, a very light smear of non-hardening sealer like Hondbond or Hylomar is appropriate. On installation, the little lips in the edge of the seal will push any sealant back into the recess, except for what might sit in a groove or other imperfection in the bore.
I made a seal driver from plastic pipe bits per guidance shared here on RL. Then used the crank bolt to push the seal in. I don't have pictures handy, but two pieces-- pipe and a reducer bushing. Cut the pipe ends square in the chop saw rather than using the PCV pipe cutter, which wasn't really that square.
Lubricate the seal face and the crank, but put a wrap of regular "magic tape" on the sharp shelf/step on the crank snout first to protect the seal lip as it passes onto the sealing area.
Kevin,
The 1" diameter spring clip was used from 87 to 91 part # N 012 277 1.
In 92 with the GTS it changed to part number 900 041 013 01.
So not present on your car.
Roger
__________________
Does it have the "Do It Yourself" manual transmission, or the superior "Fully Equipped by Porsche" Automatic Transmission? George Layton March 2014
928 Owners are ".....a secret sect of quietly assured Porsche pragmatists who in near anonymity appreciate the prodigious, easy going prowess of the 928."
The pry-with-screwdriver method demands that you not contact the sealing surface on the crankshaft with the screwdriver. A tiny scratch is all it takes to clean the sealing lip off the new seal and forever have oil leaks. Try the drill-and-drywall-screw method first.
Jury opinions vary on the wisdom of adding sealant to the outsides of seals. If the bore is perfectly clean, no need. In the case of this crank seal, it it's in the split between the block and the girdle, where there's the [very] slight possibility of a mismatch or groove at the seams. In this case, a very light smear of non-hardening sealer like Hondbond or Hylomar is appropriate. On installation, the little lips in the edge of the seal will push any sealant back into the recess, except for what might sit in a groove or other imperfection in the bore.
I worried more about marring the crank journal with some slip of the power tool by drilling than prying from the side. That is the purpose of that recess in the case face. Either method, we agree that marring the journal needs to be avoided at all cost.
As for the sealant(Hylomar-ish), I just like messing with thixotropic non-Newtonian fluids, and I love saying 'thixotropic'. Thixotropic. Thixotropic.....
So my latest head scratcher is the passenger side cam gear bolt which came out looking exactly like the driver side bolt - and now it dawns on me that the bolts were loctited, which I don't see indicated in the WSM but makes sense as both sides took what felt like substantially more than the 47 ft lbs indicated to break loose. Cam snout threads seem fine on both sides. Was there an updated service bulletin calling for loctite here?
Local Rennlister Mike (white93nsx) came down for a few hours to lend a hand (two of them actually and they both came in handy.) Thanks Mike!!
We spent most of the time he was there on the crank seal and we decided to go with the drill and drywal screw method. We eventually managed to get the seal out and we drove the new one in with using a length of PVC and the crank bolt. We were careful not to get the seal past the block face, but if anything it might be a milimeter or so high all around. How does this look?
My next question is on the cam plugs - a couple of threads mention Loctite 574 for these plugs but there's nothing in the workshop manual mentioning sealant here. What say you Rennlist? Is there a Permatex equivalent that would work as well?
the 574 sealant is used if your removing the camshaft journal caps,
this would happen after you have removed the cam covers.
More than likely your only going to remove the cap,
and press in a new cap and install the arm. so no sealant is necessary.
NOTE it wouldnt bother me one bit if you added a drop of blue loctite to the cam bolts,
this based on how many cams have been broken by lost torque bolts
Nice work. Great thread. I'm following closely as I need to do this soon. How are your rubber manifold couplers? Mine look good, are pliable with no cracks. but are sticky on the inside. Is this normal?
I worried more about marring the crank journal with some slip of the power tool by drilling than prying from the side. That is the purpose of that recess in the case face. Either method, we agree that marring the journal needs to be avoided at all cost.
As for the sealant(Hylomar-ish), I just like messing with thixotropic non-Newtonian fluids, and I love saying 'thixotropic'. Thixotropic. Thixotropic.....
For the record Mike and I inspected the journal after we pulled the seal and found it very clean, we decided to install the seal dry on the outer surface with a bit of lubrication on the inner.


 03-13-2015, 04:56 AM


 George Layton March 2014