When you click on links to various merchants on this site and make a purchase, this can result in this site earning a commission. Affiliate programs and affiliations include, but are not limited to, the eBay Partner Network.
You don't them for disassembly since they are for assembly purposes. Disassemble the cams evenly loosen the cam caps one turn at a time as not to put too much pressure in one spot.
Back to the questions: I noticed that the WSM states to use the #1-specialtool when releasing the camshafts.
"12. Hold both camshafts in bearings with
Special Tool 9226. Unscrew and
remove all other bearing bridges and
bearing caps.
13. Release special tool uniformly and
remove both camshafts with chain
carefully."
What can I expect in tension of the camshaft when they come loose? Any risk for damages?
It's a simple process taking apart and putting back together. The video is nice. I didn't use any special tools and just made sure everything was properly orients before finishing assembly. Put cloth over the head drain holes so you don't drop a washer or nut down to the oil pan. Get a cam timing tool set from porken. Naked the cam timing easy. Gross timing can be done by eyeball and lining up the marks on the cams with the chain
It's a simple process taking apart and putting back together. The video is nice. I didn't use any special tools and just made sure everything was properly orients before finishing assembly. Put cloth over the head drain holes so you don't drop a washer or nut down to the oil pan. Get a cam timing tool set from porken. Naked the cam timing easy. Gross timing can be done by eyeball and lining up the marks on the cams with the chain
Will get the tools necessary. Porken is a good tip! Thanks!
It's a simple process taking apart and putting back together. The video is nice. I didn't use any special tools and just made sure everything was properly orients before finishing assembly. Put cloth over the head drain holes so you don't drop a washer or nut down to the oil pan. Get a cam timing tool set from porken. Naked the cam timing easy. Gross timing can be done by eyeball and lining up the marks on the cams with the chain
^^^Exactly^^^
Never used any "special" P-car tools when doing the cams, keeping the tension even across the cams and taking your time is the most important thing.
Bag and mark all the parts / bolts, and replace them all in the same locations they came from while keeping it all clean and using a clean work place.
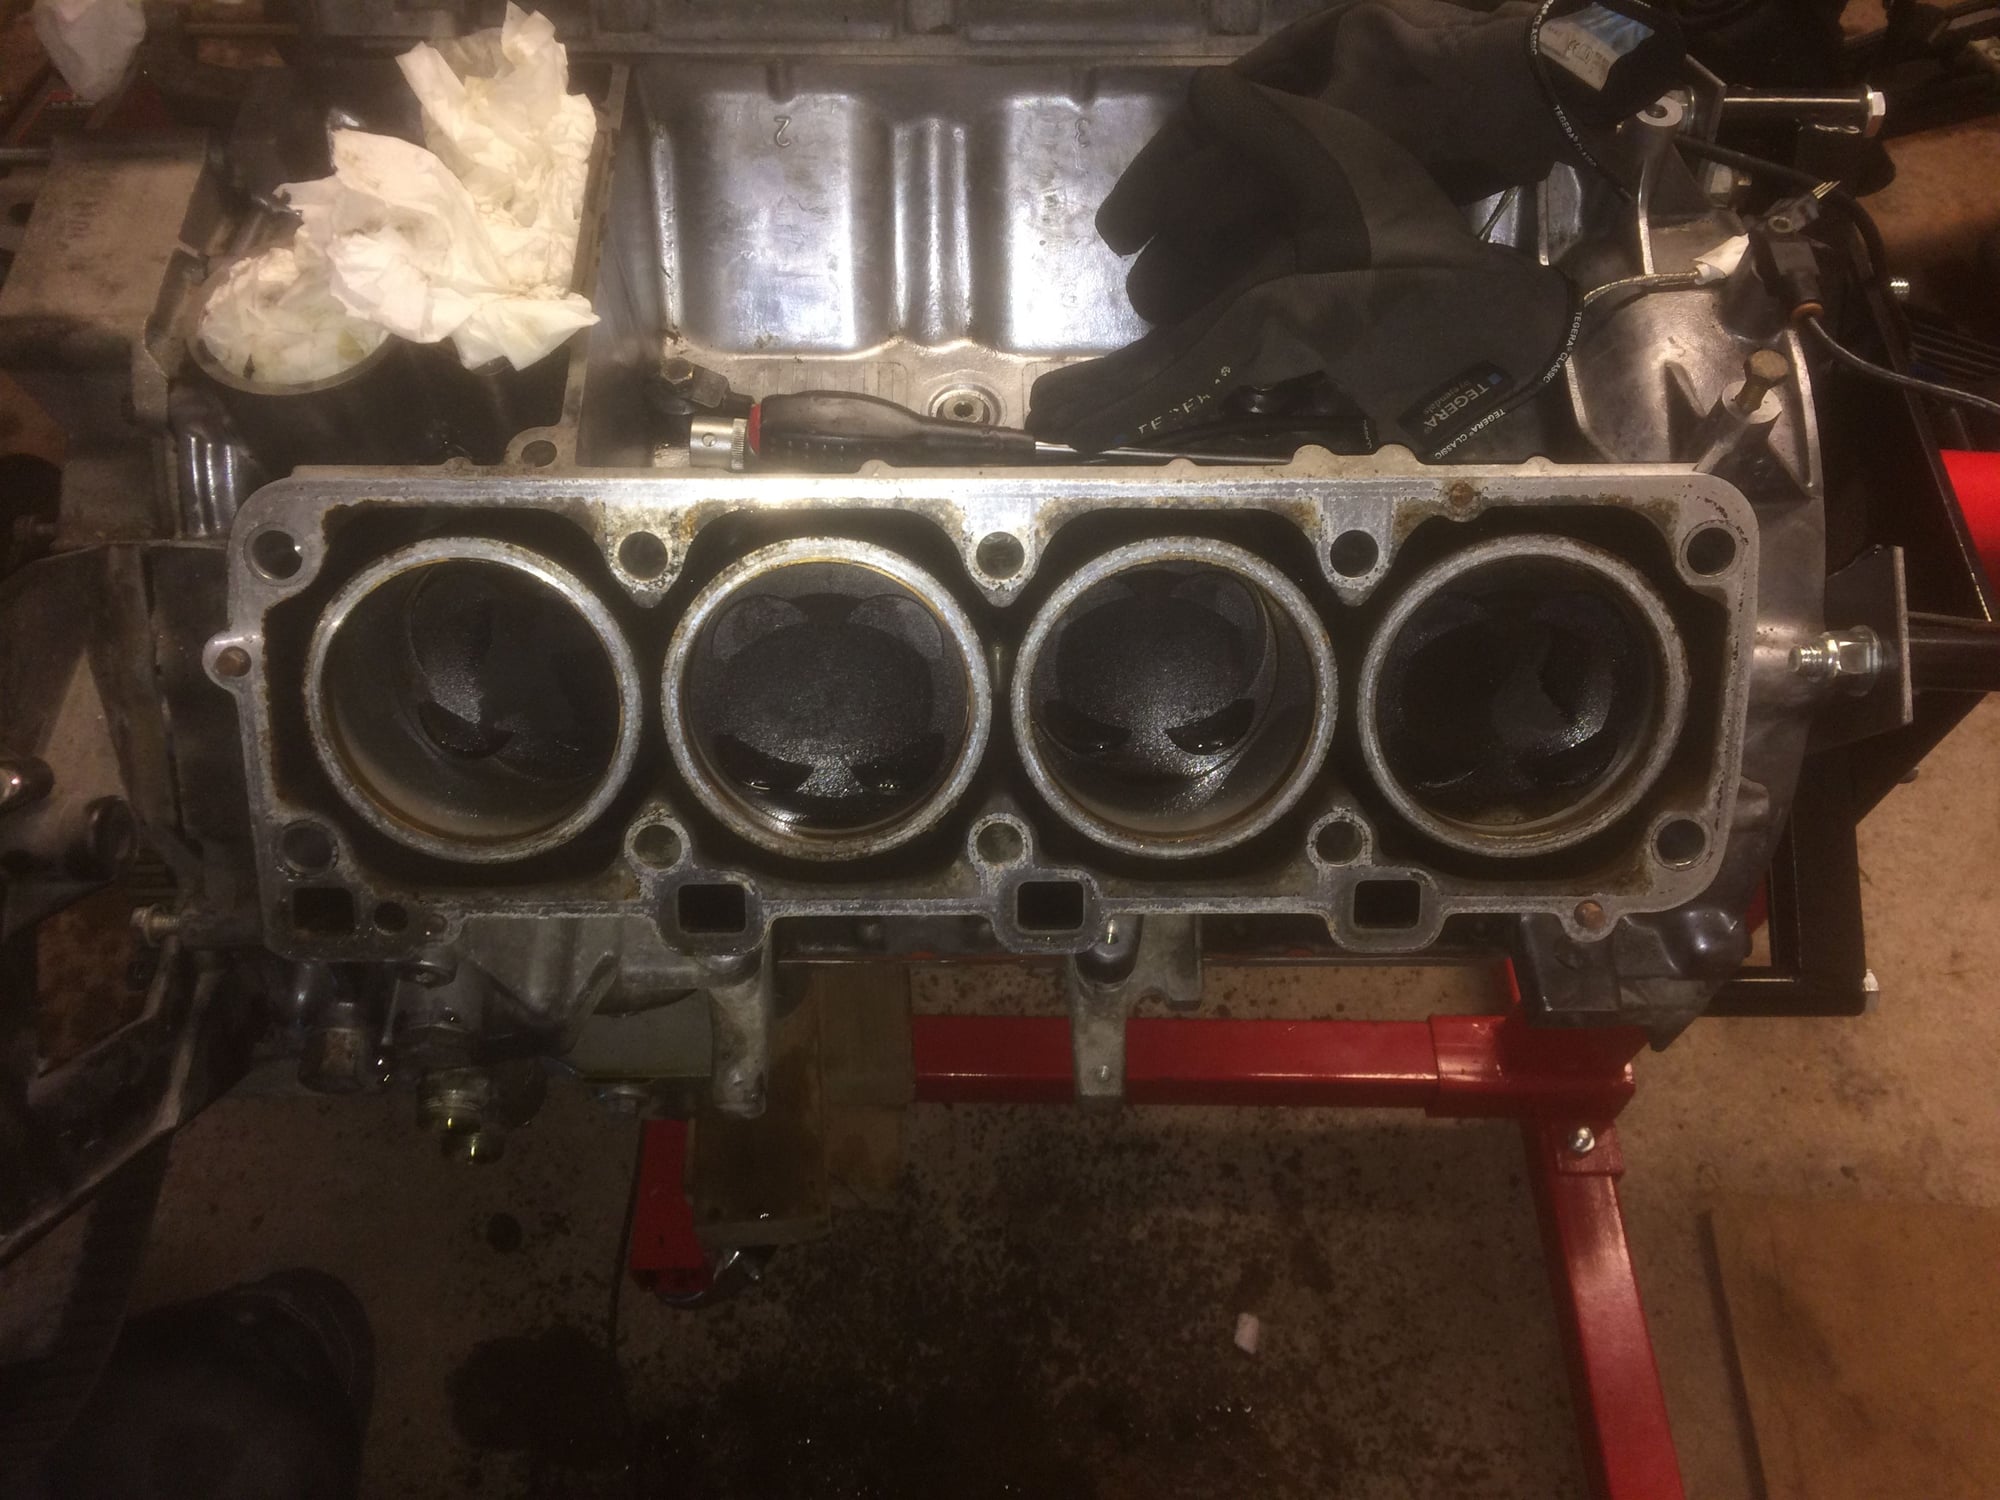
I have come a bit further and now I need your help to analyse.
The last couple of time I drove the car I had a massive oil accumulation underneath the back of the car. As I could not find any external leaks my conclusion was that the oil came through the exhaust.
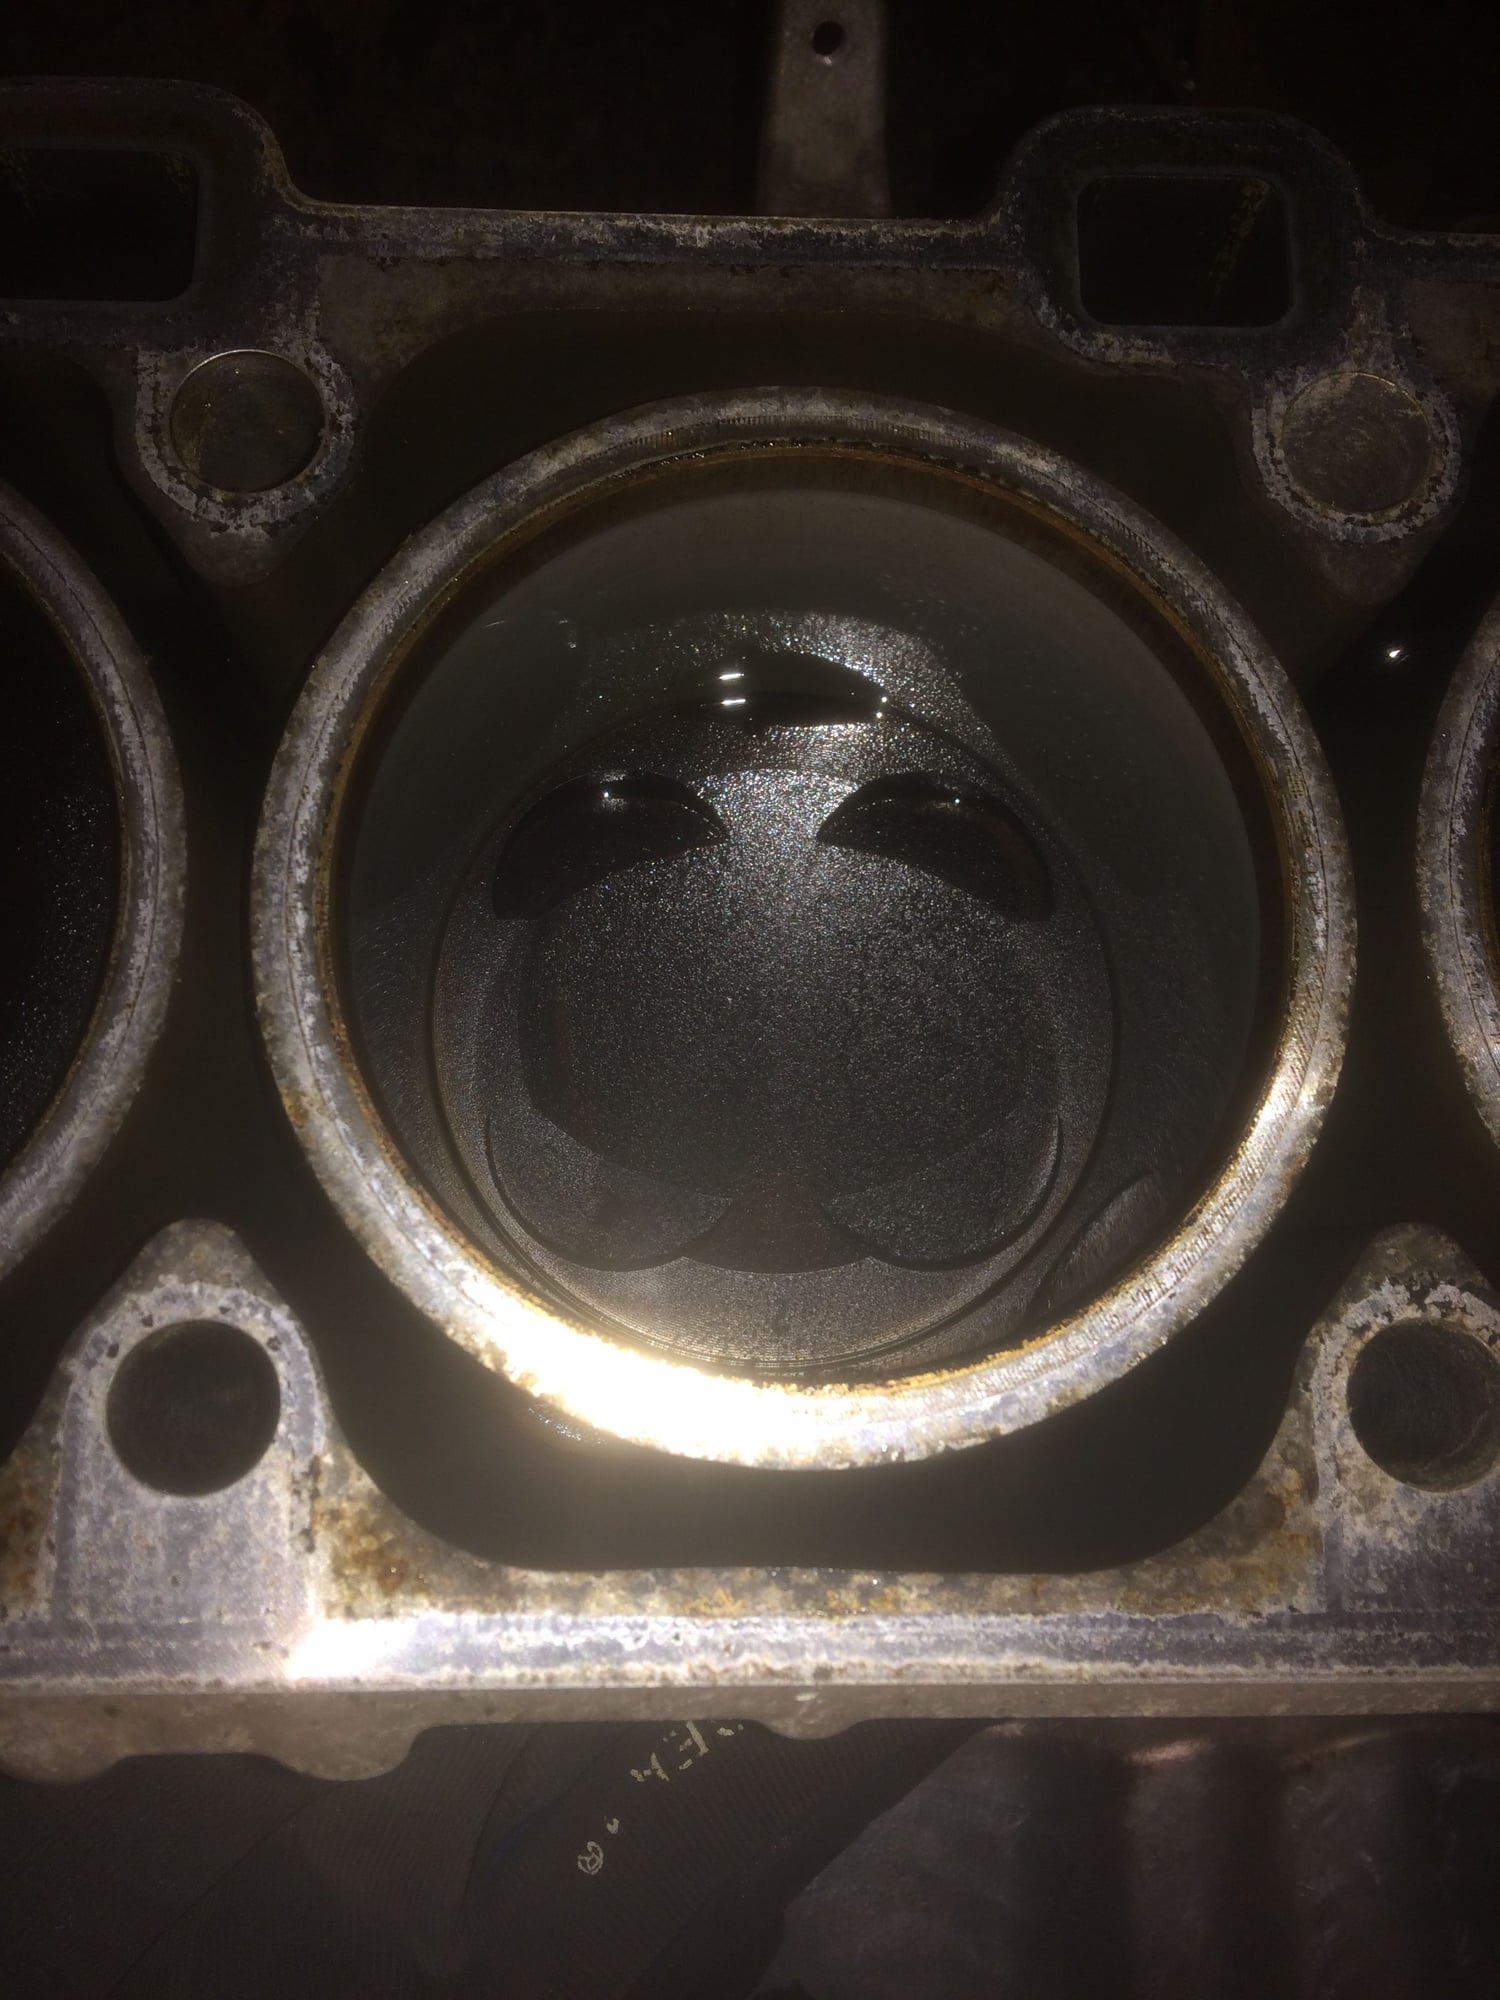
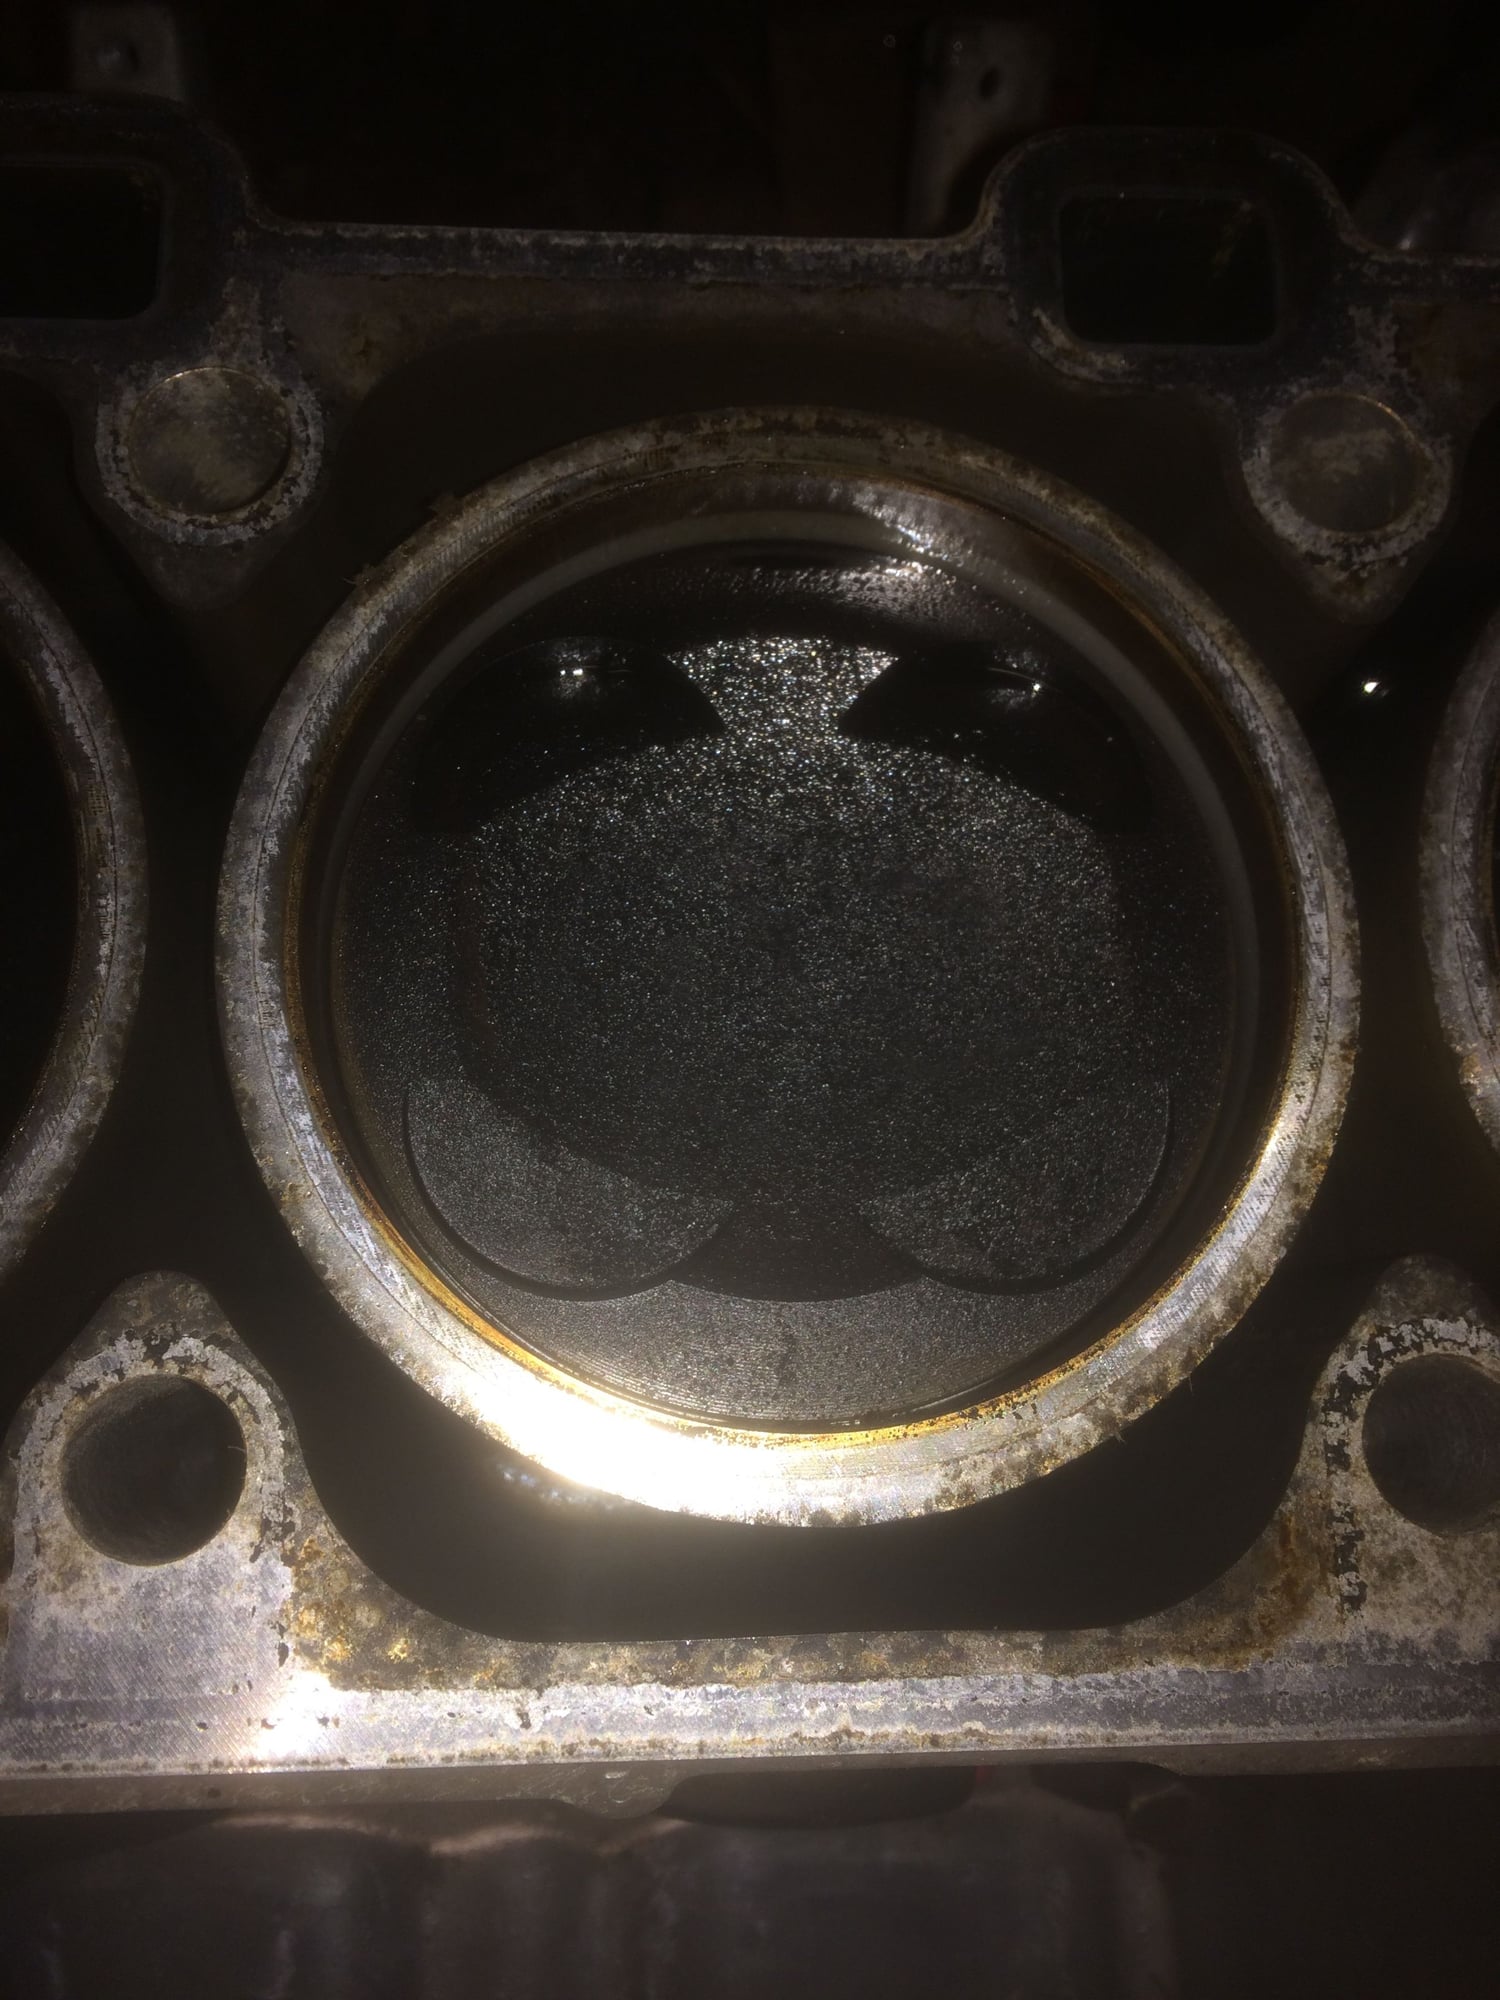
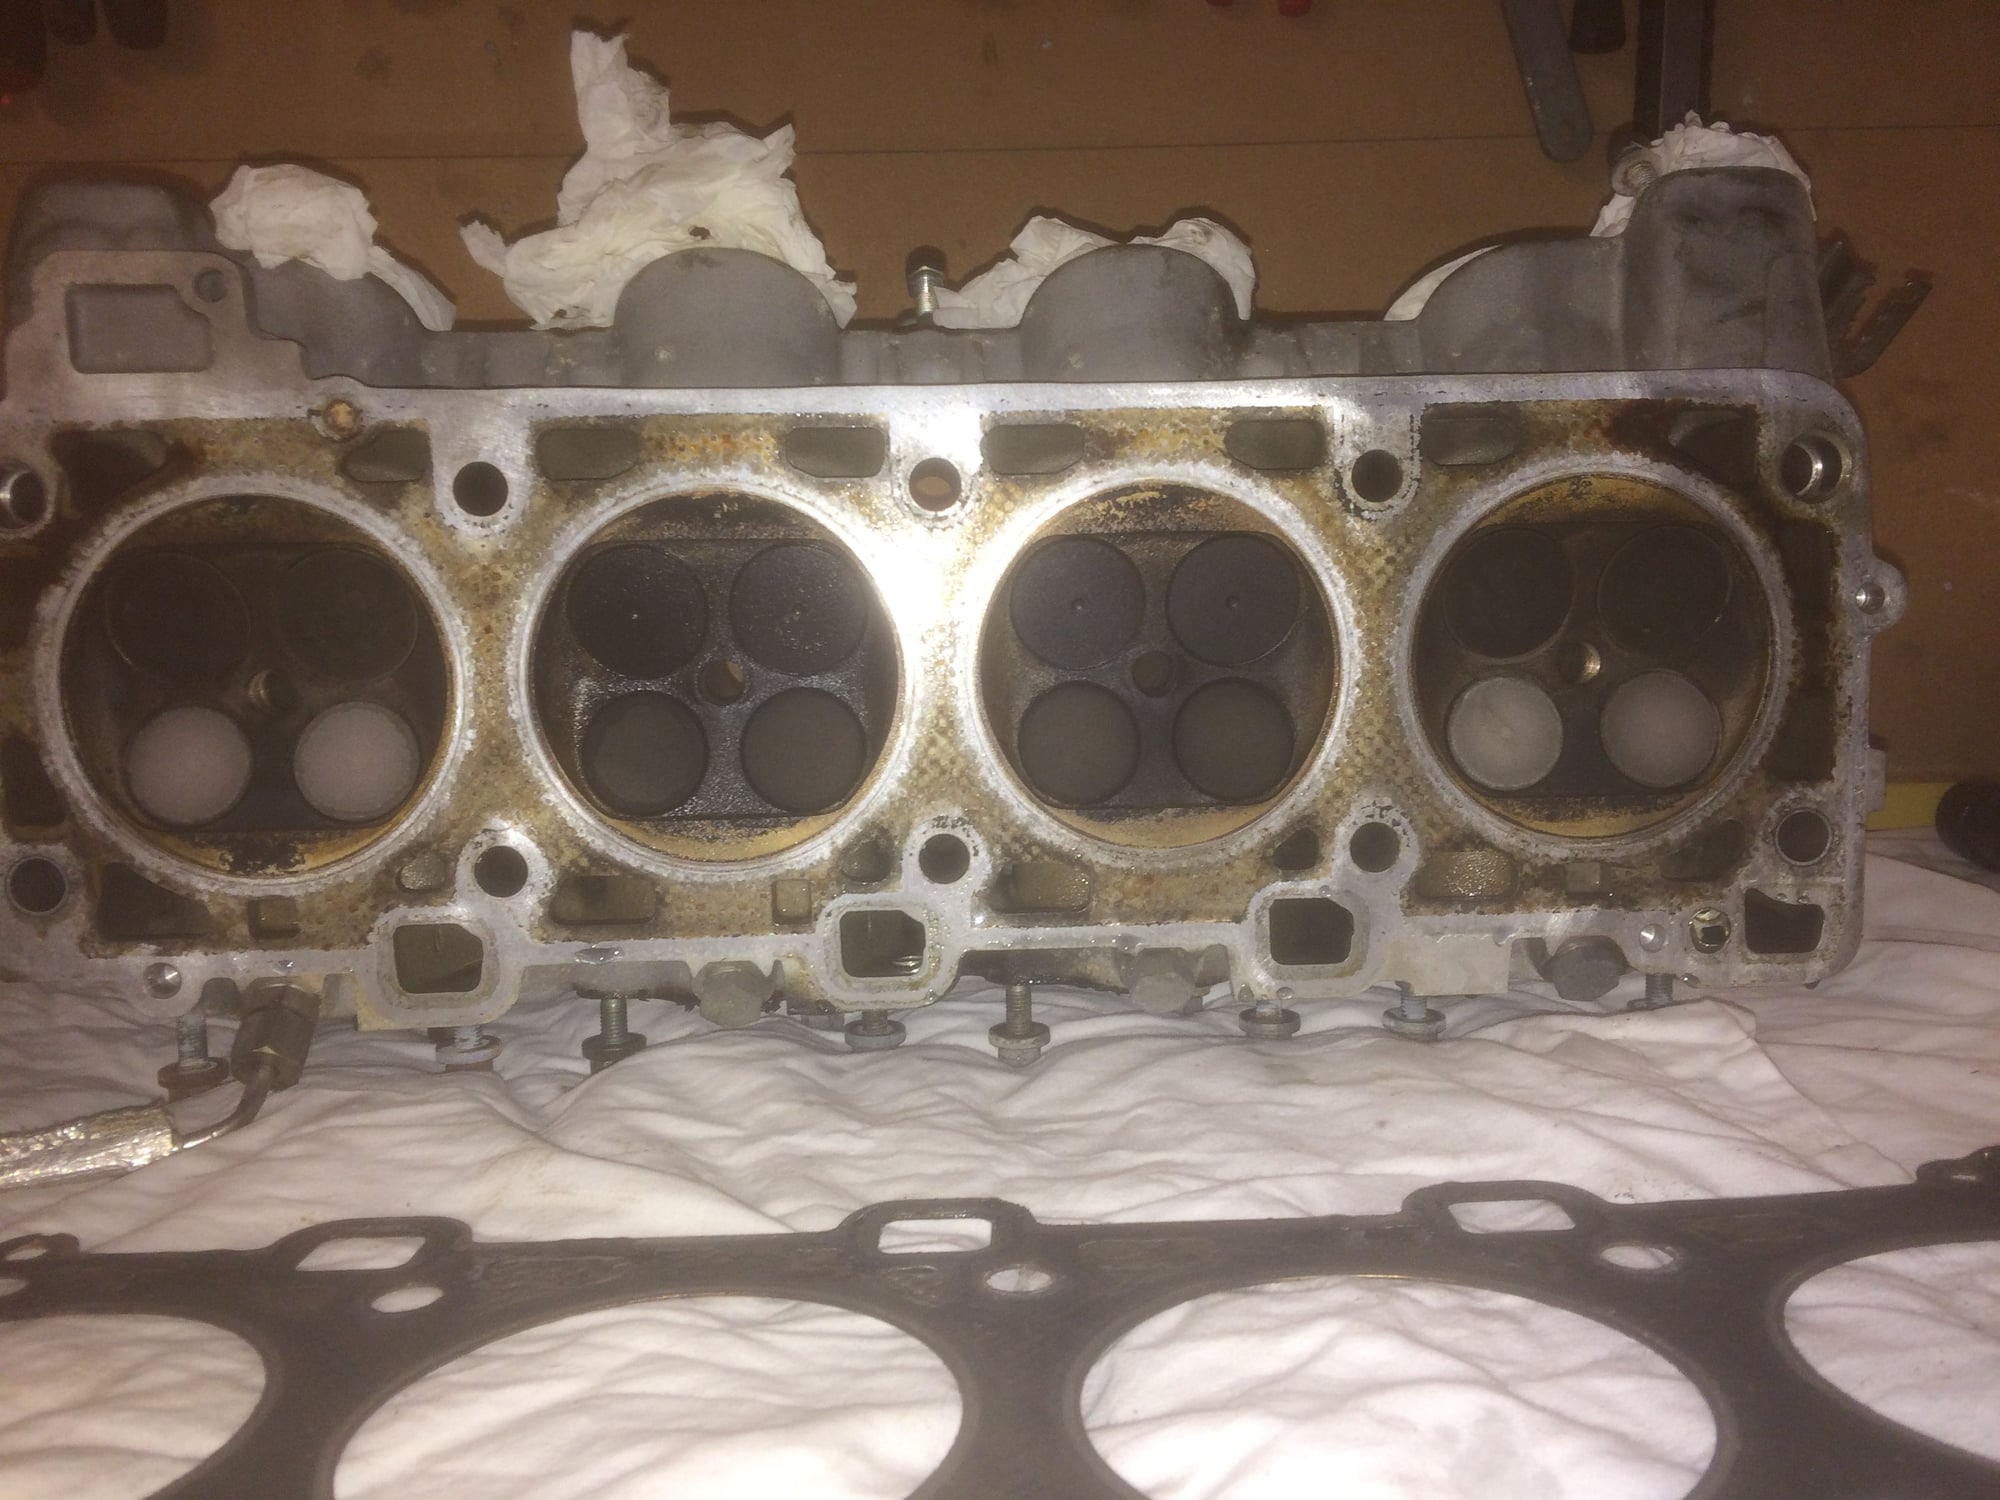
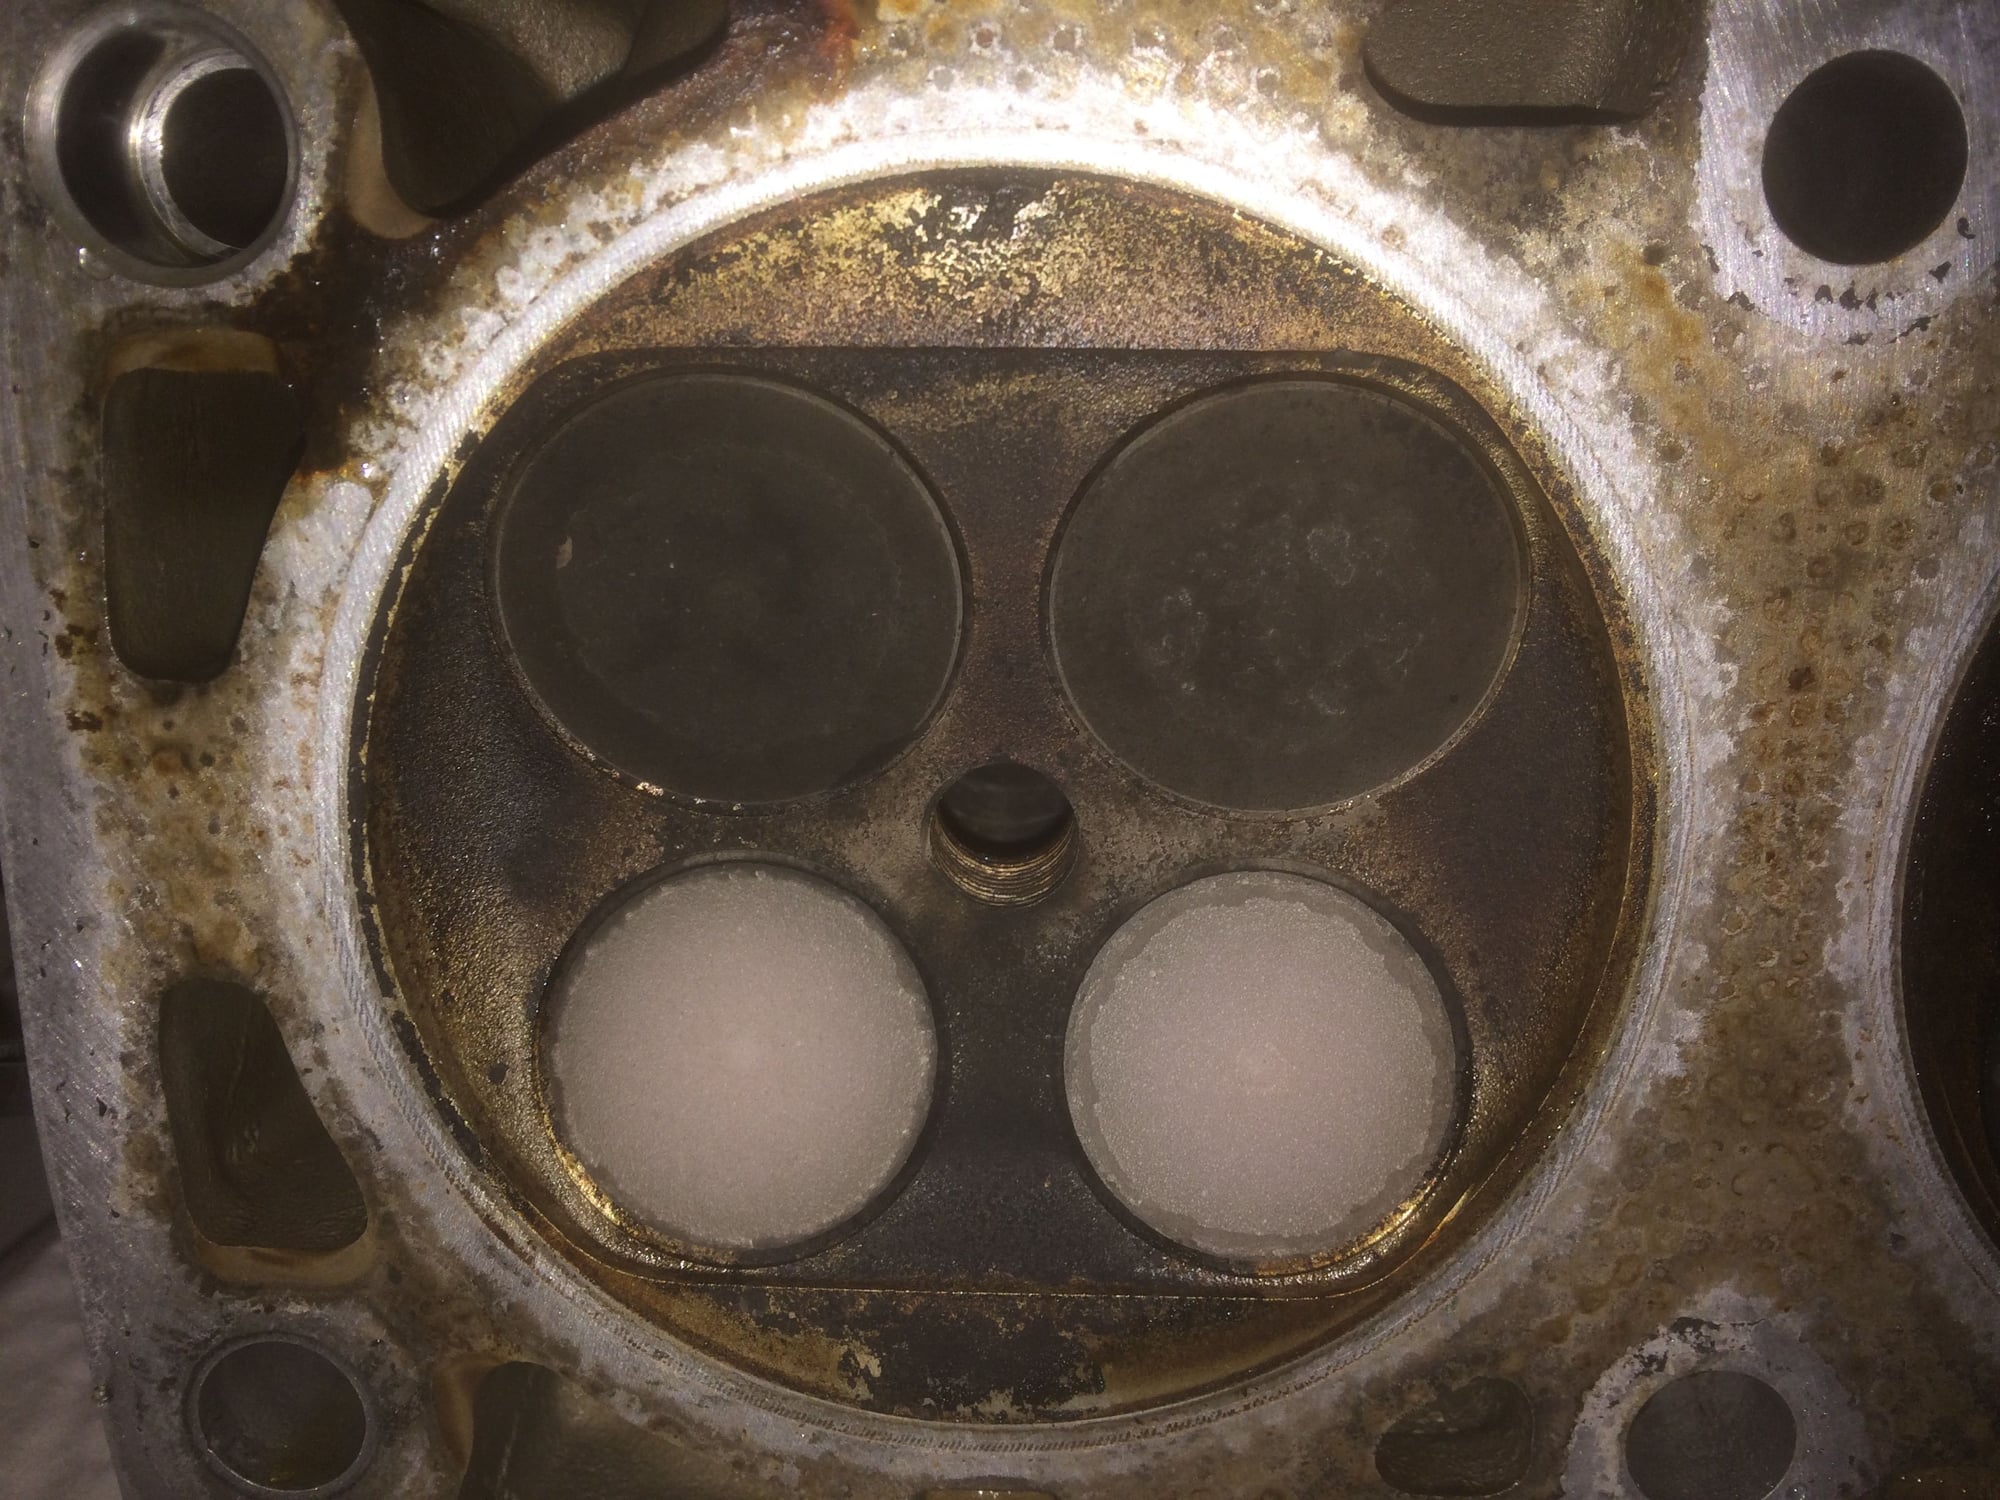
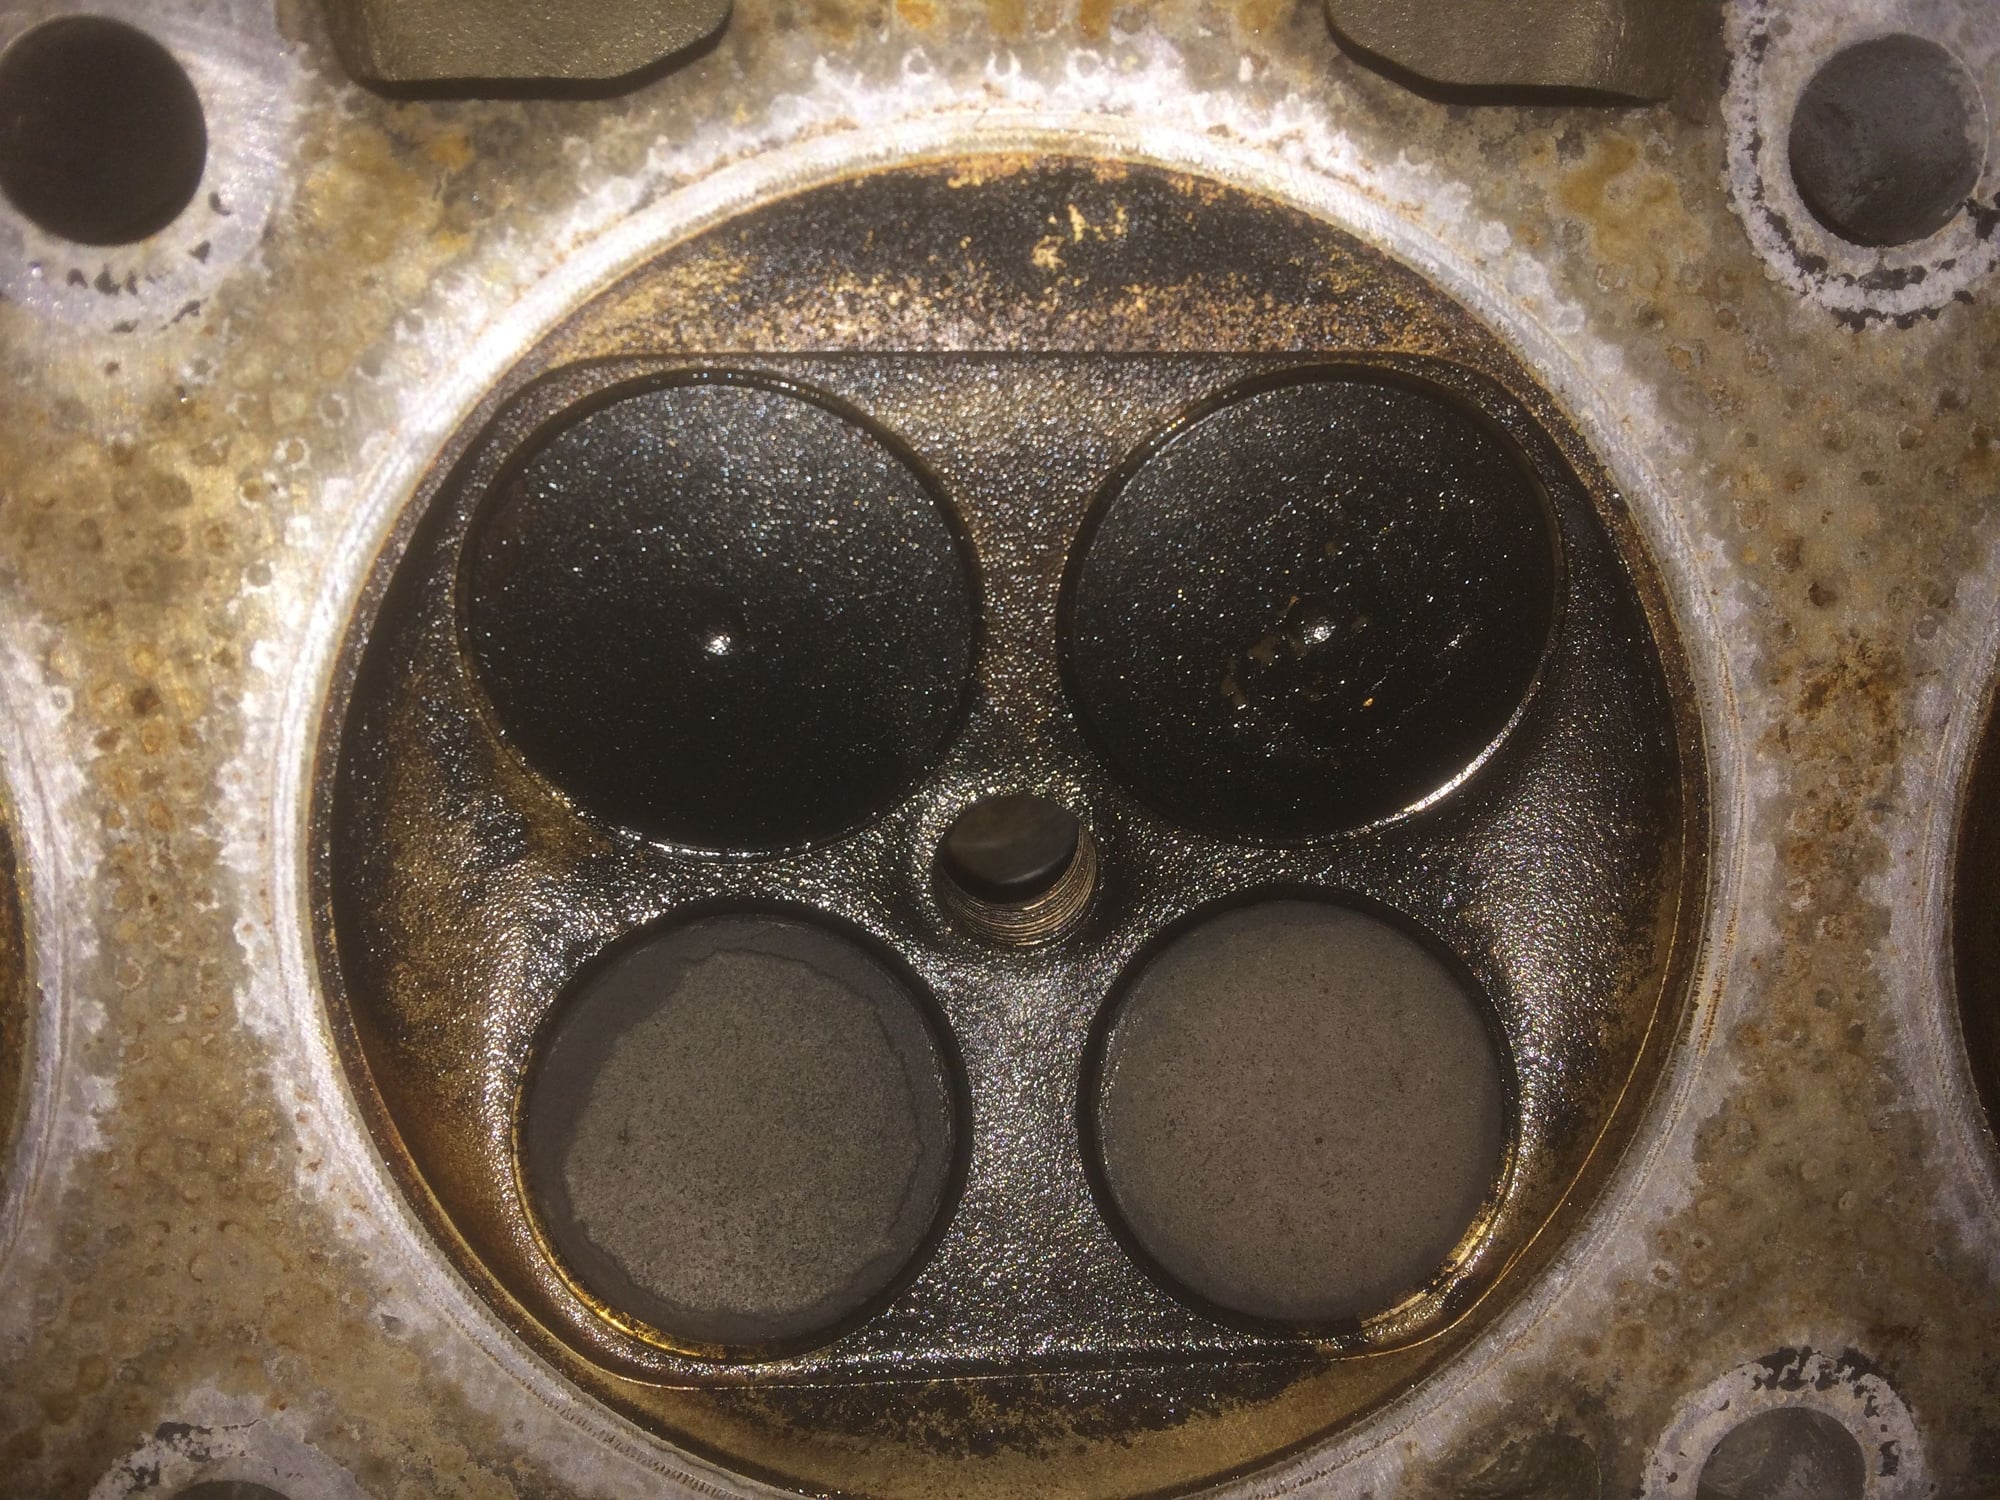
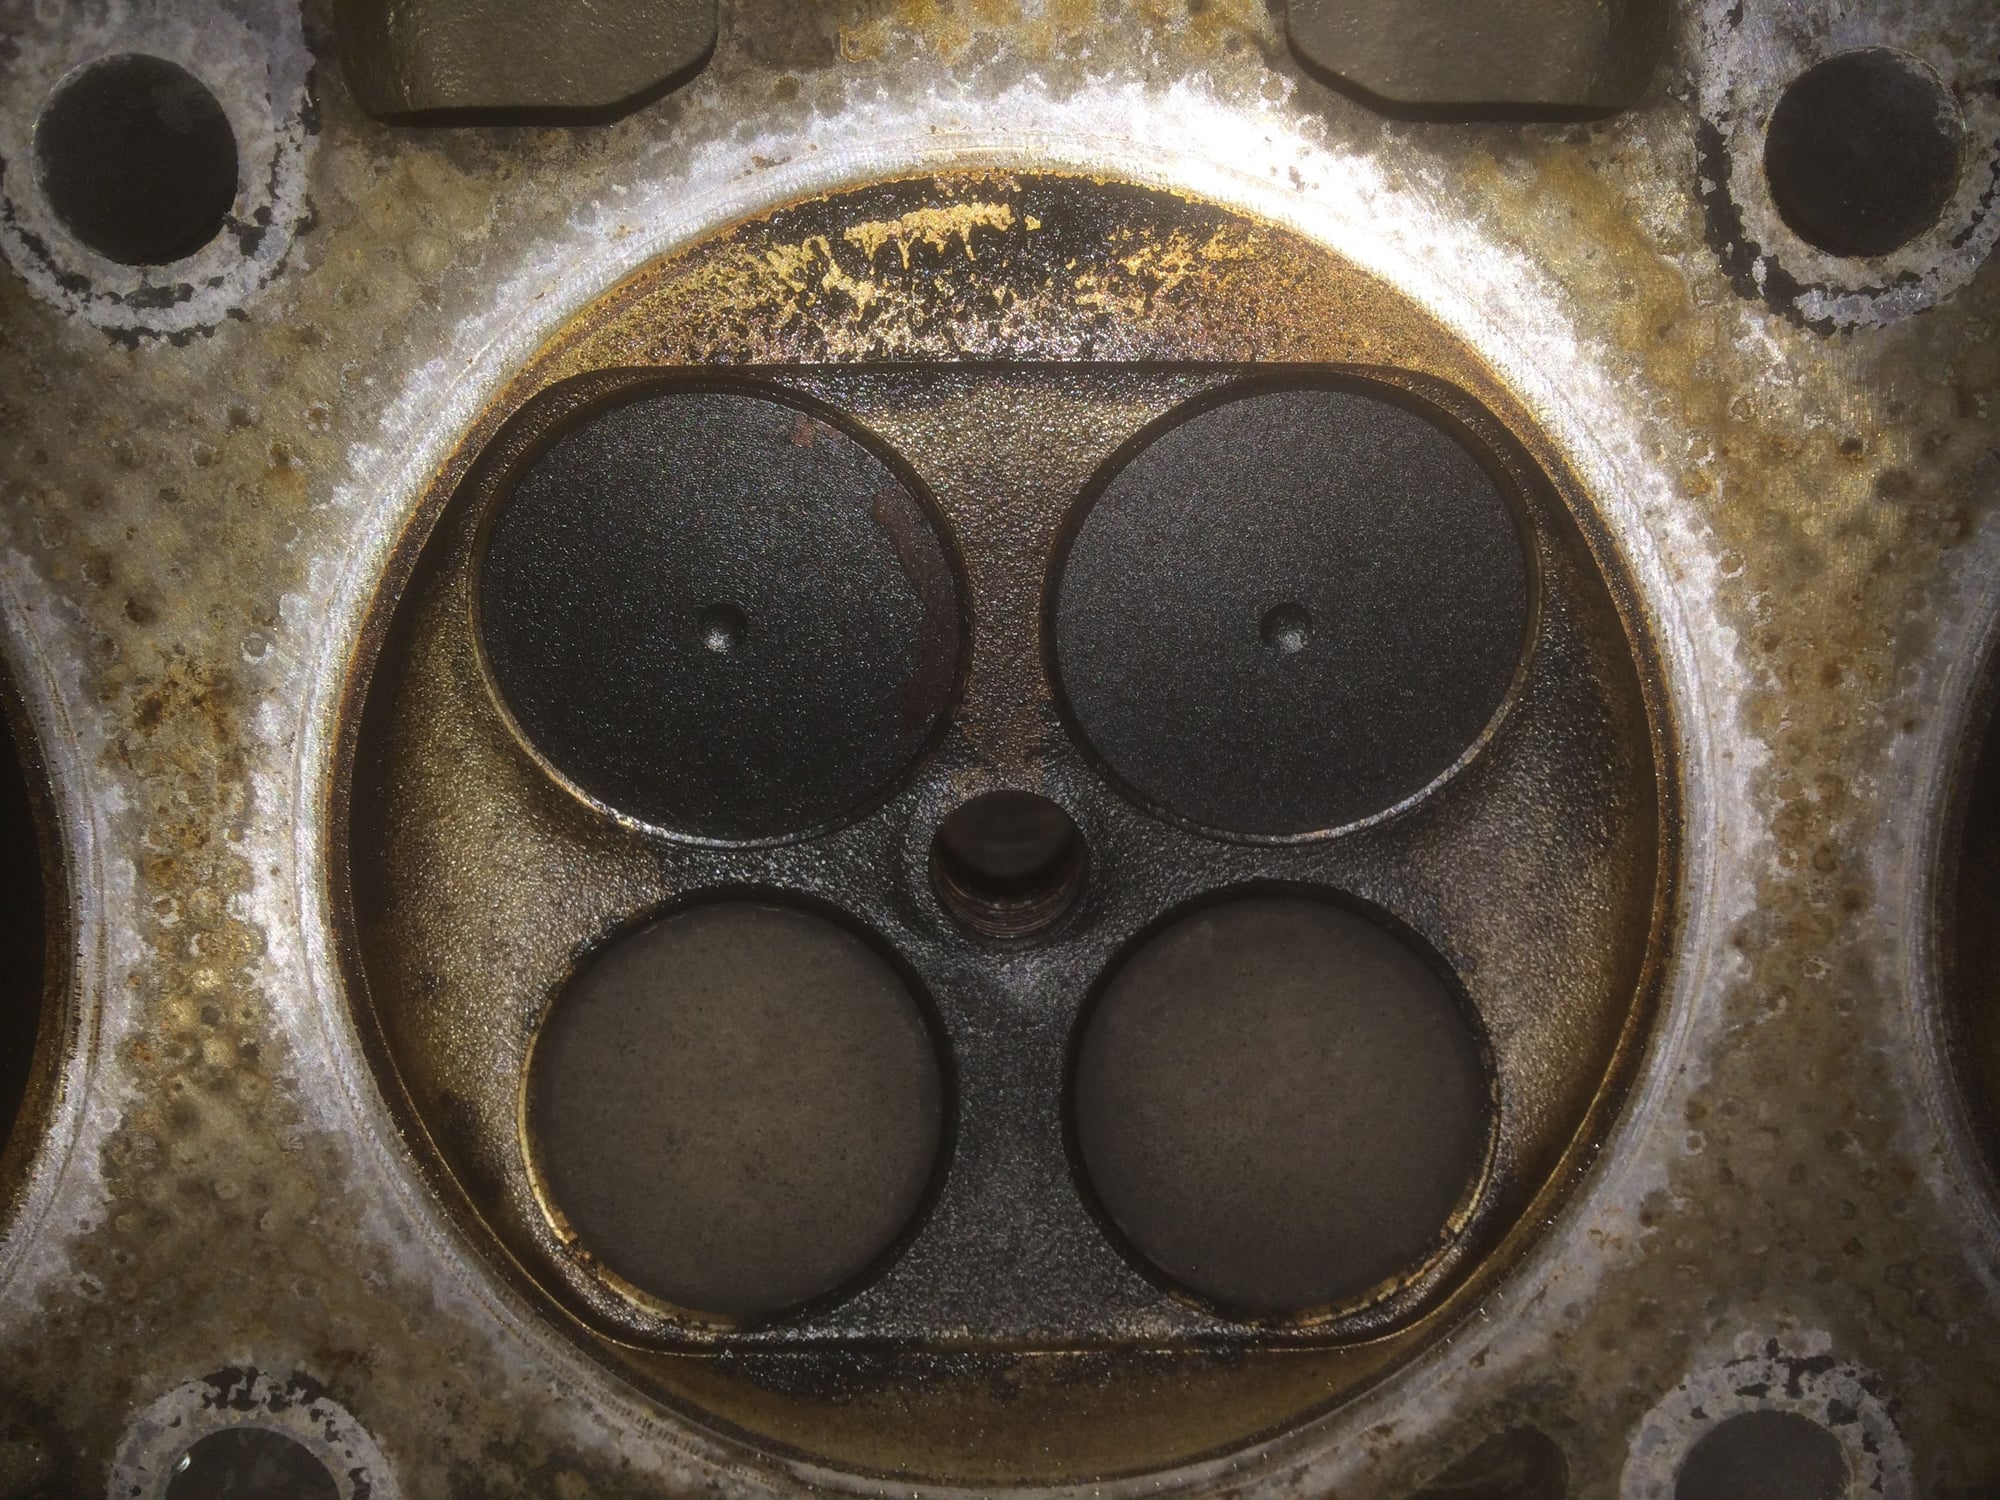
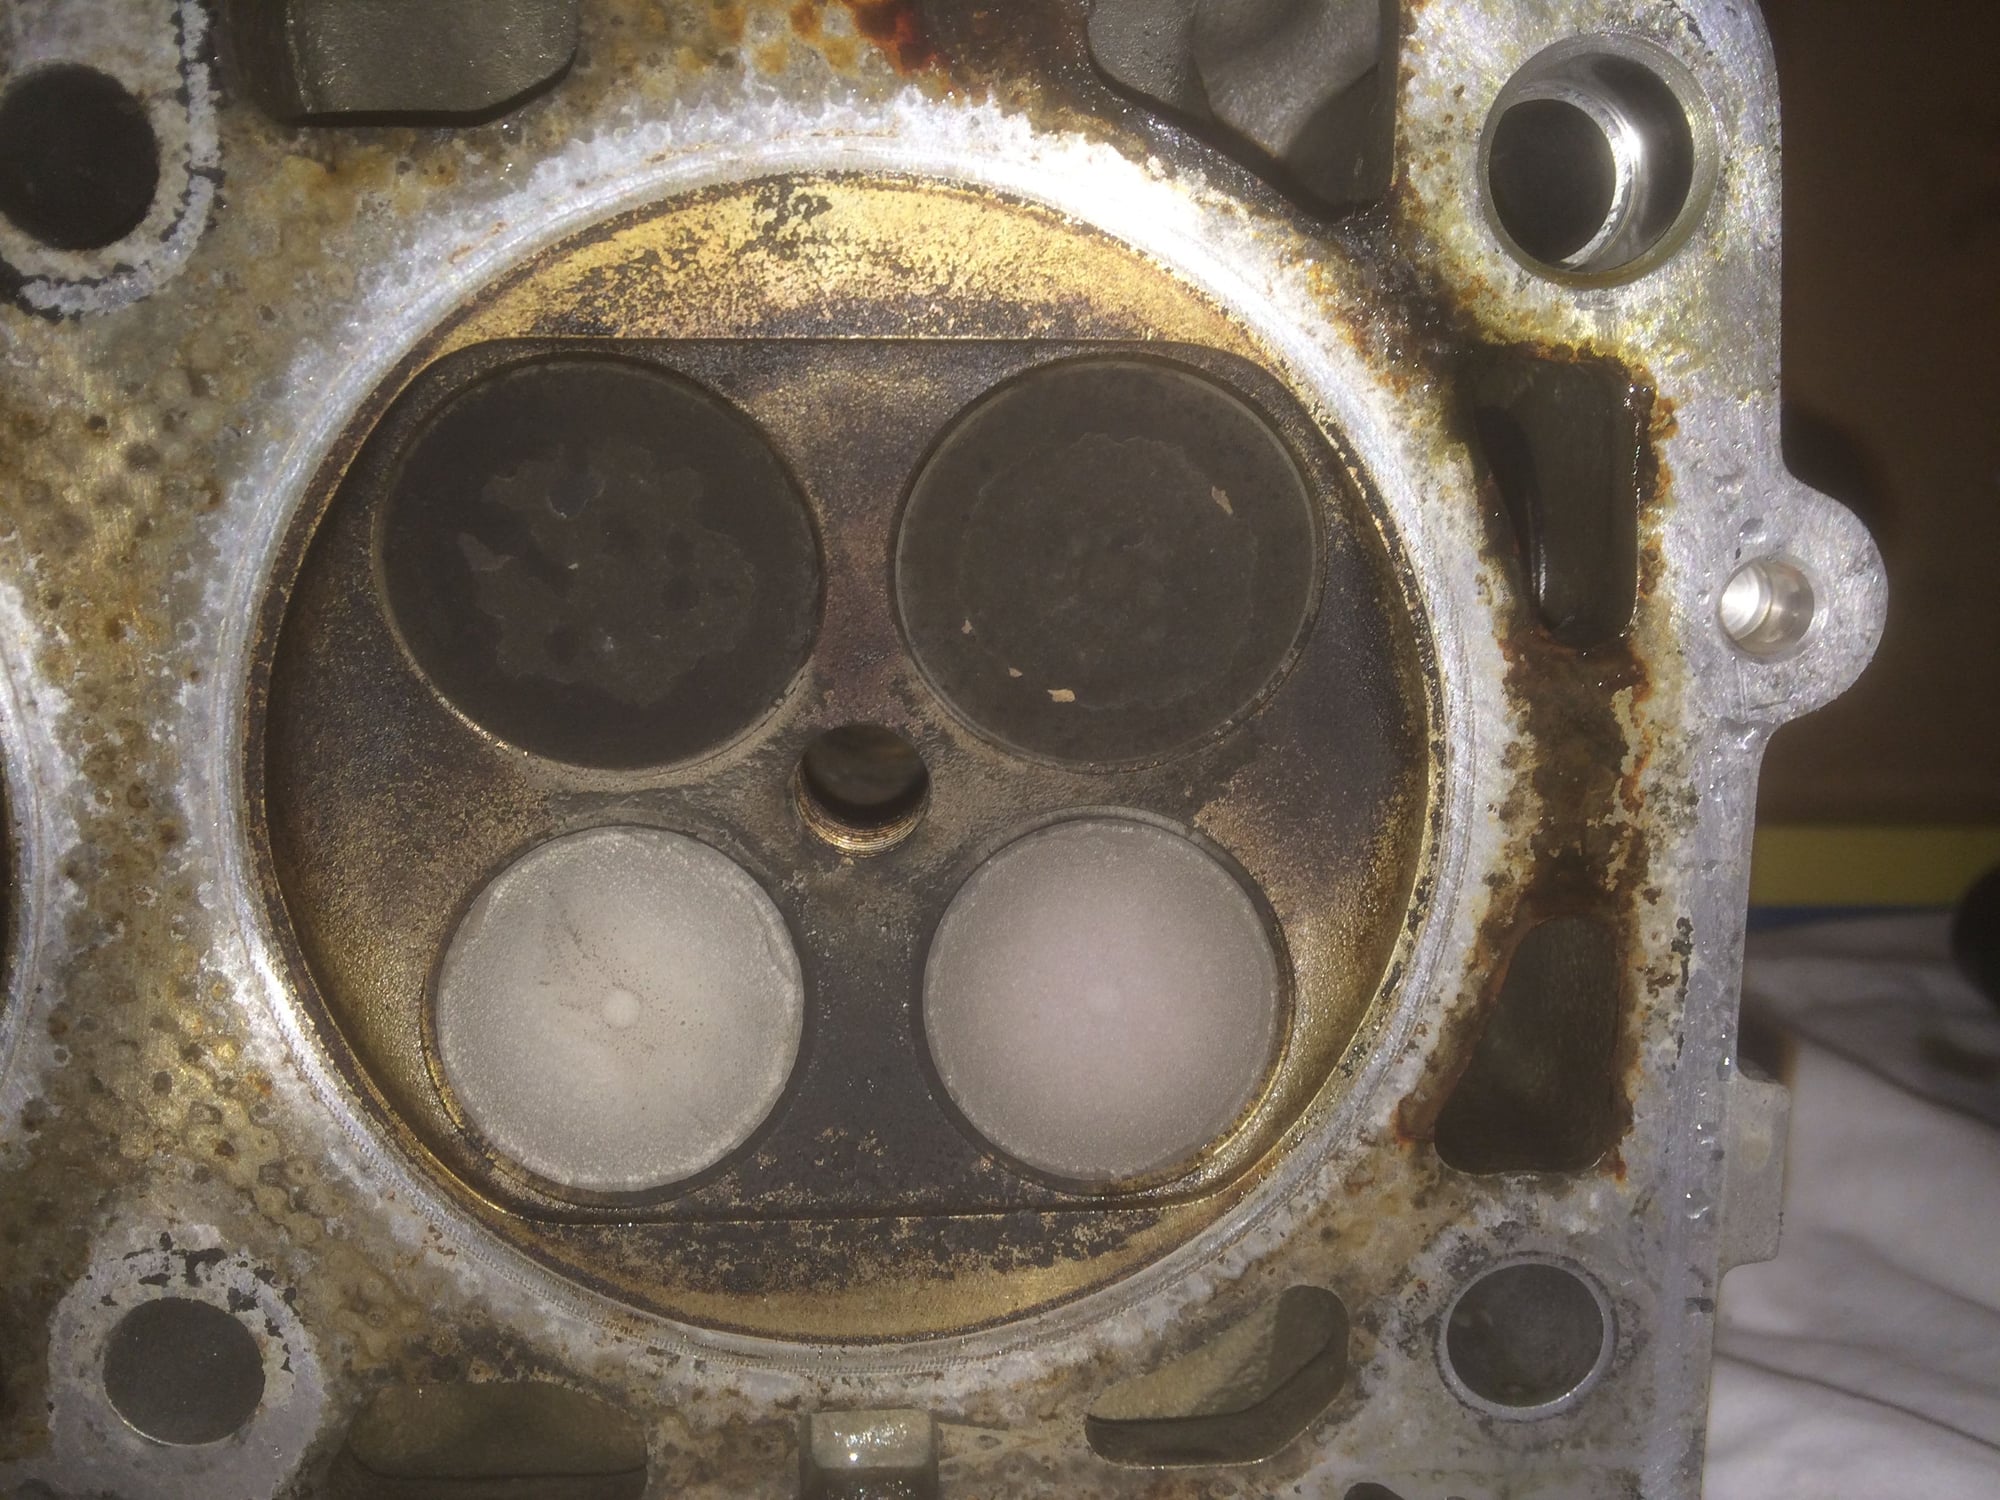
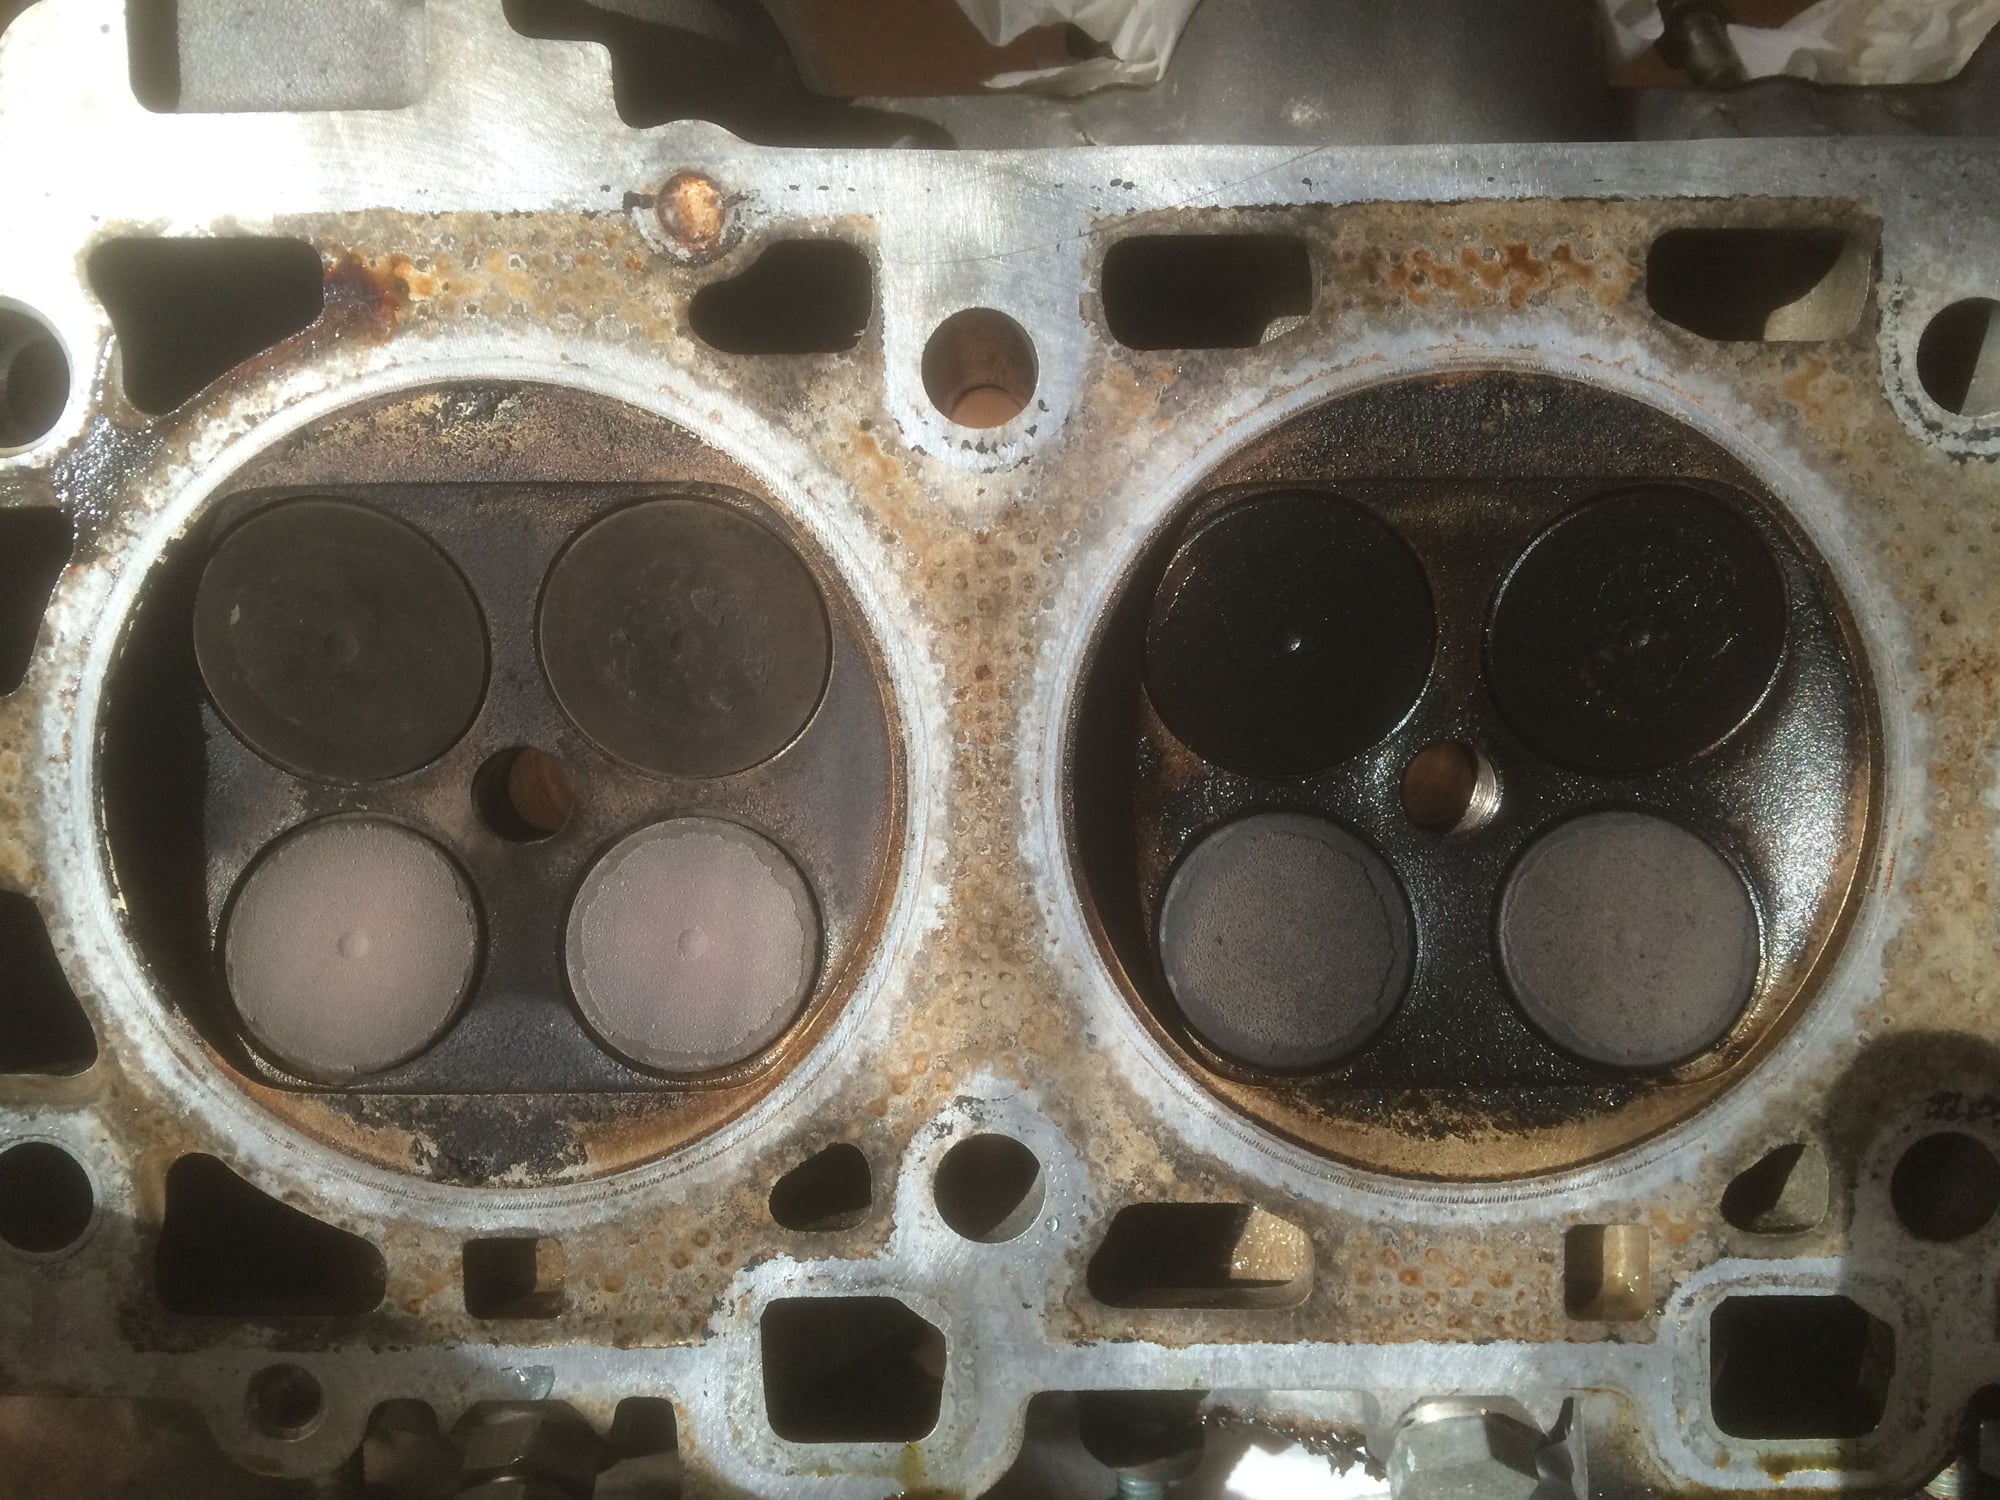
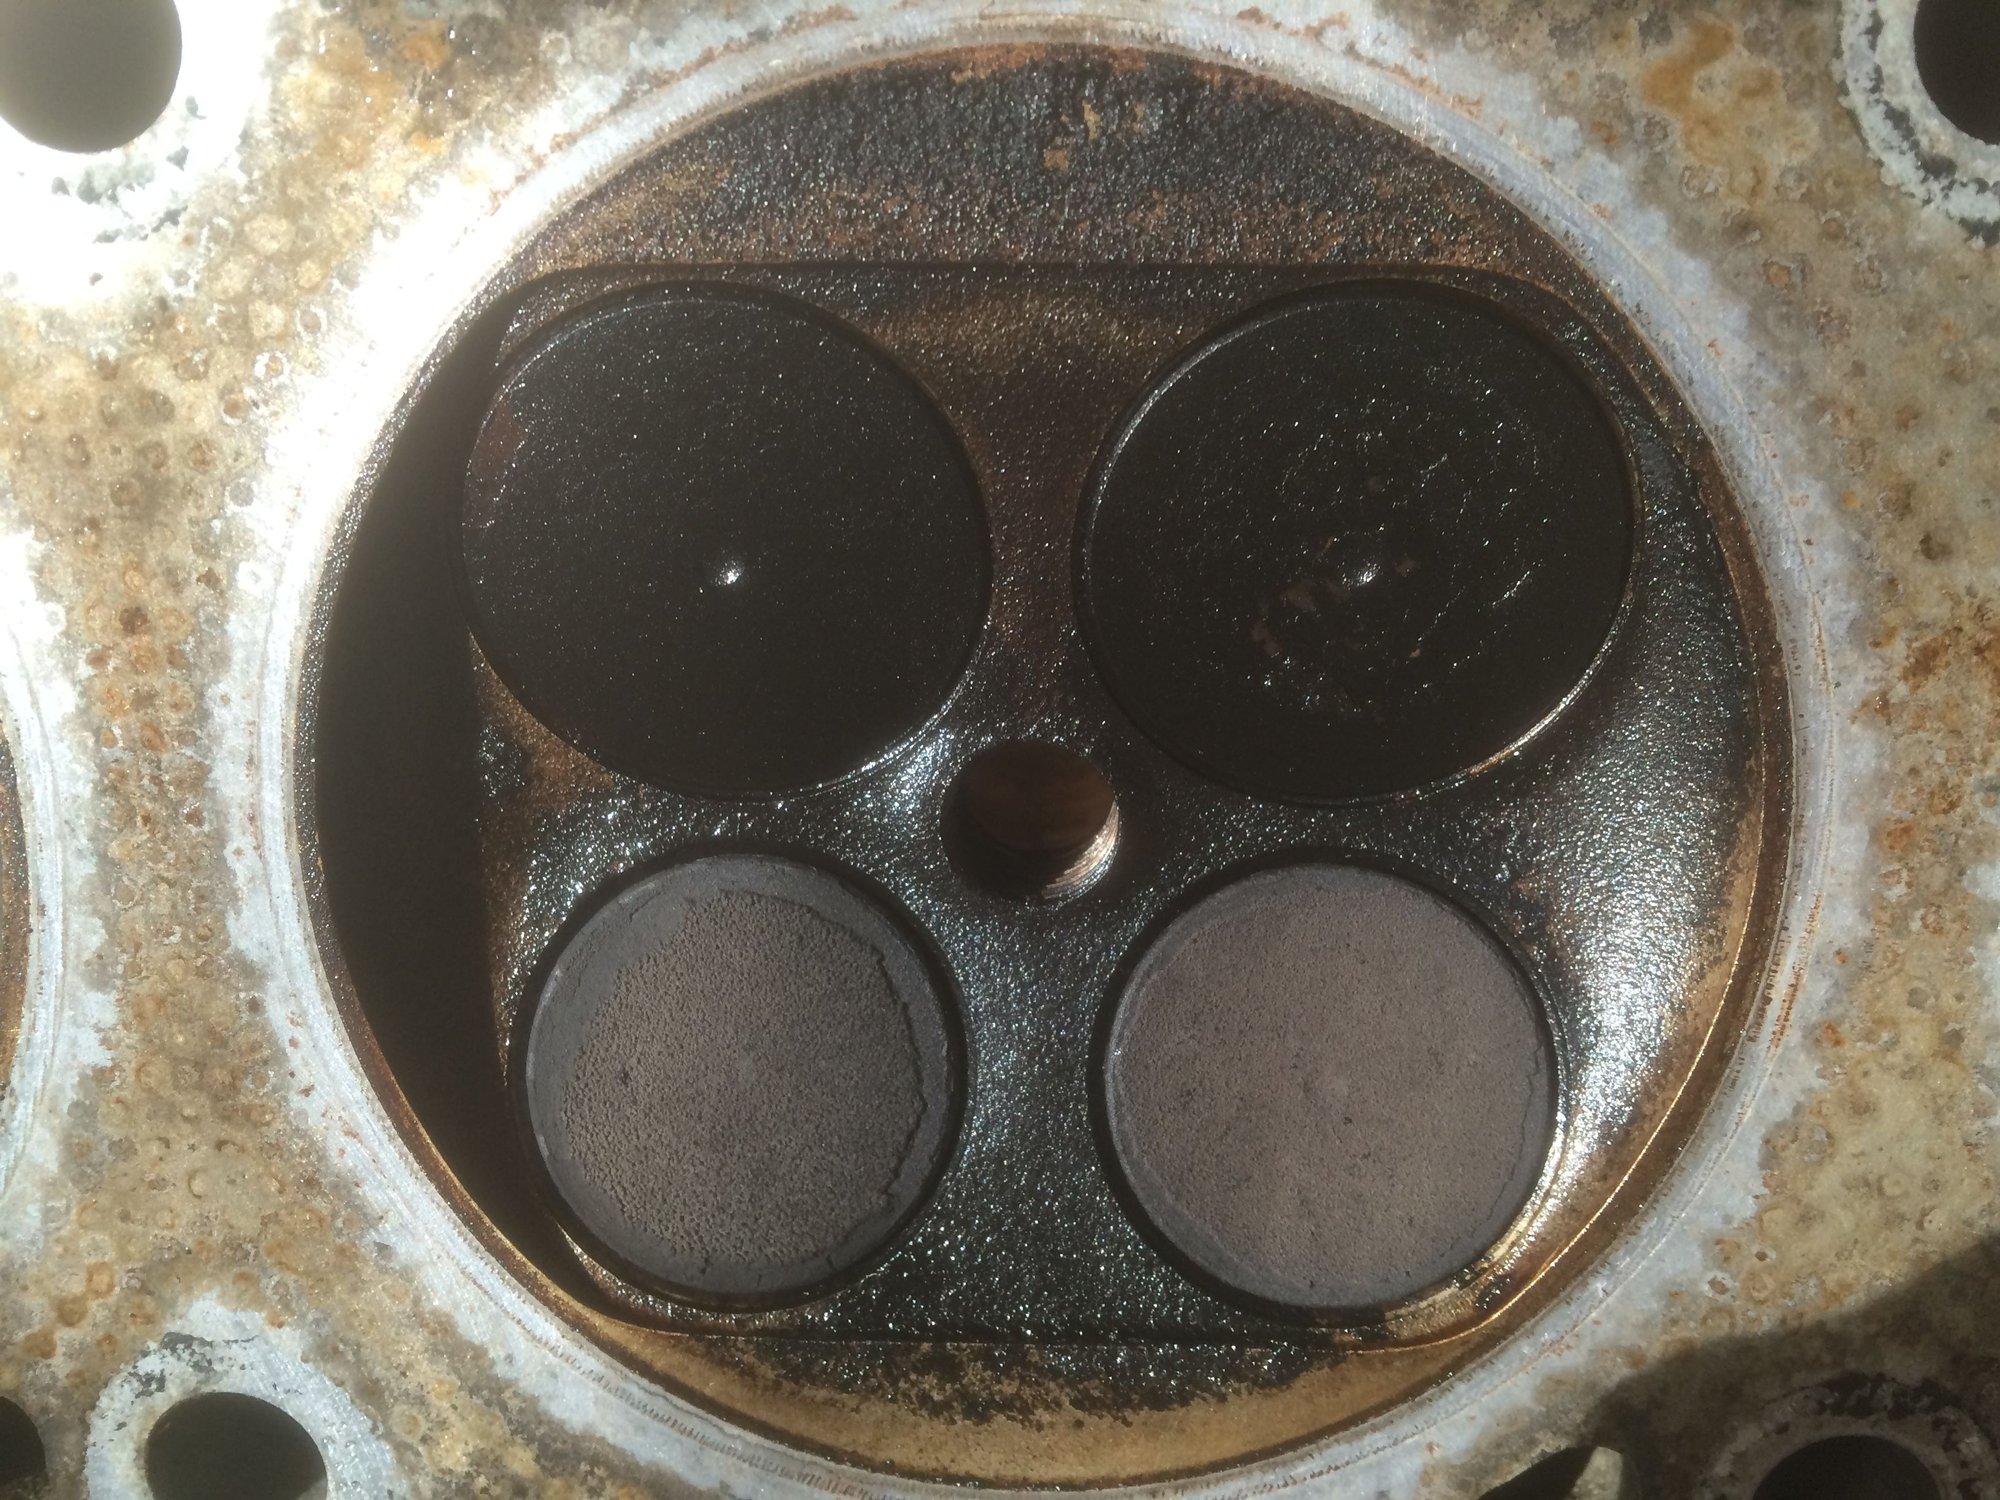
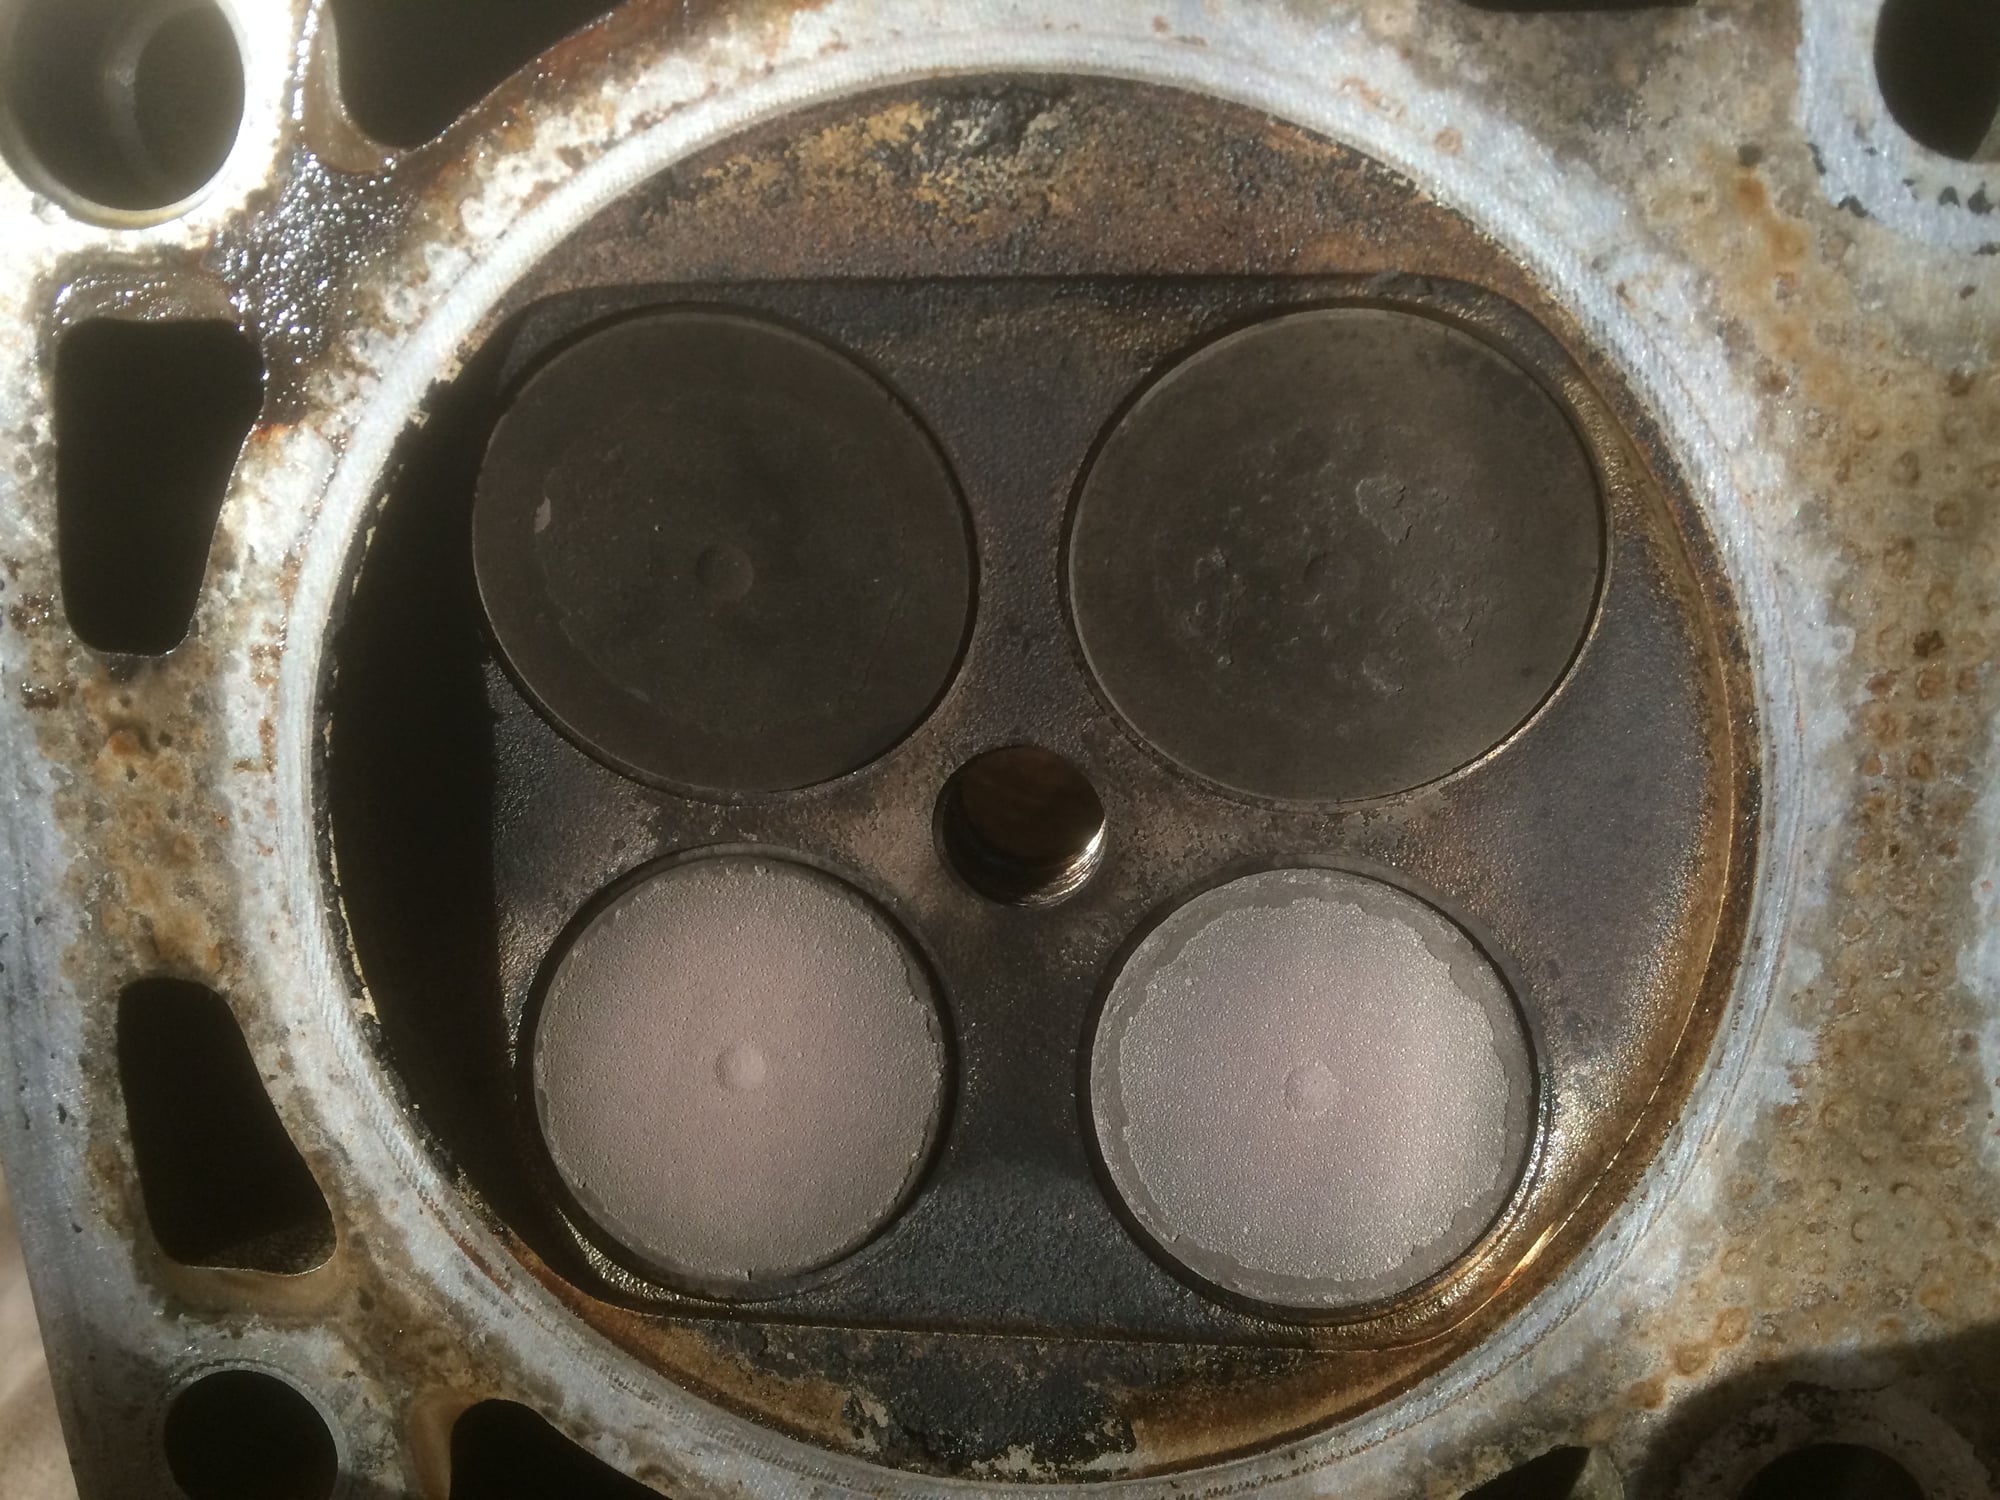
The first head is off and without ever before having seen pistons, valves and head inside an engine to me it looks as if I have found some clues to the oilleakage. In cylinder 6 and 7 it appers to be lots of residue from burnt oil.
Send the Heads out and have new Valve Seals (rubber) installed, they can check the Valve Guides too, most likely they will still be w/in spec.
You can also do this yourself however, you will need to learn how to remove the valves, re-lap the valve seats and a Valve removal tool will be required.
Cleaning everything is very tedious too.
From the pics it looks like the Head surface is good (no pitting) and a simple cleaning of the surface will do, if you go w/ a shop to do the heads that is usually included. I'd tell them not to cut them unless its required, as being flat and smooth is more important the staining doesn't matter.
Approx cost is about 400 per head, most good speed shops familiar w/ 32valve Aluminum hemi heads can do it, shop around and ask local car nuts.
Clean clean clean, that's how to produce great results.
Dave
I'm sure there are some threads here on head rebuilding
Did you do a compression/leakdown check before pulling it apart?
Good contextual information for the rest of the thread.
Of course!
Km: 142000
Model: GT
Year: 1990
Did not do a compression/leakdown test. Dont think the engine has been apart before but the looks of a couple of the bearingstuds (?) in the head may point to another direction...
To me the difference on the valves between 6 + 7 on one hand and 5 + 8 on the other hand leads me to think that there is a problem with 6+7.
Send the Heads out and have new Valve Seals (rubber) installed, they can check the Valve Guides too, most likely they will still be w/in spec.
You can also do this yourself however, you will need to learn how to remove the valves, re-lap the valve seats and a Valve removal tool will be required.
Cleaning everything is very tedious too.
From the pics it looks like the Head surface is good (no pitting) and a simple cleaning of the surface will do, if you go w/ a shop to do the heads that is usually included. I'd tell them not to cut them unless its required, as being flat and smooth is more important the staining doesn't matter.
Approx cost is about 400 per head, most good speed shops familiar w/ 32valve Aluminum hemi heads can do it, shop around and ask local car nuts.
Clean clean clean, that's how to produce great results.
Dave
I'm sure there are some threads here on head rebuilding
Deleted my original warning story about my first motor rebuild....I see you are already into it. Good luck. I'm a DIY guy as well. If you just stick with doing the heads and don't go too much further, you may get out of this alive. You need a good machine shop that knows how to properly install and finish the guides and will source the right parts. How are the lifters and cams? Did you sort the lifters per valve?

 02-03-2015, 05:18 AM