When you click on links to various merchants on this site and make a purchase, this can result in this site earning a commission. Affiliate programs and affiliations include, but are not limited to, the eBay Partner Network.
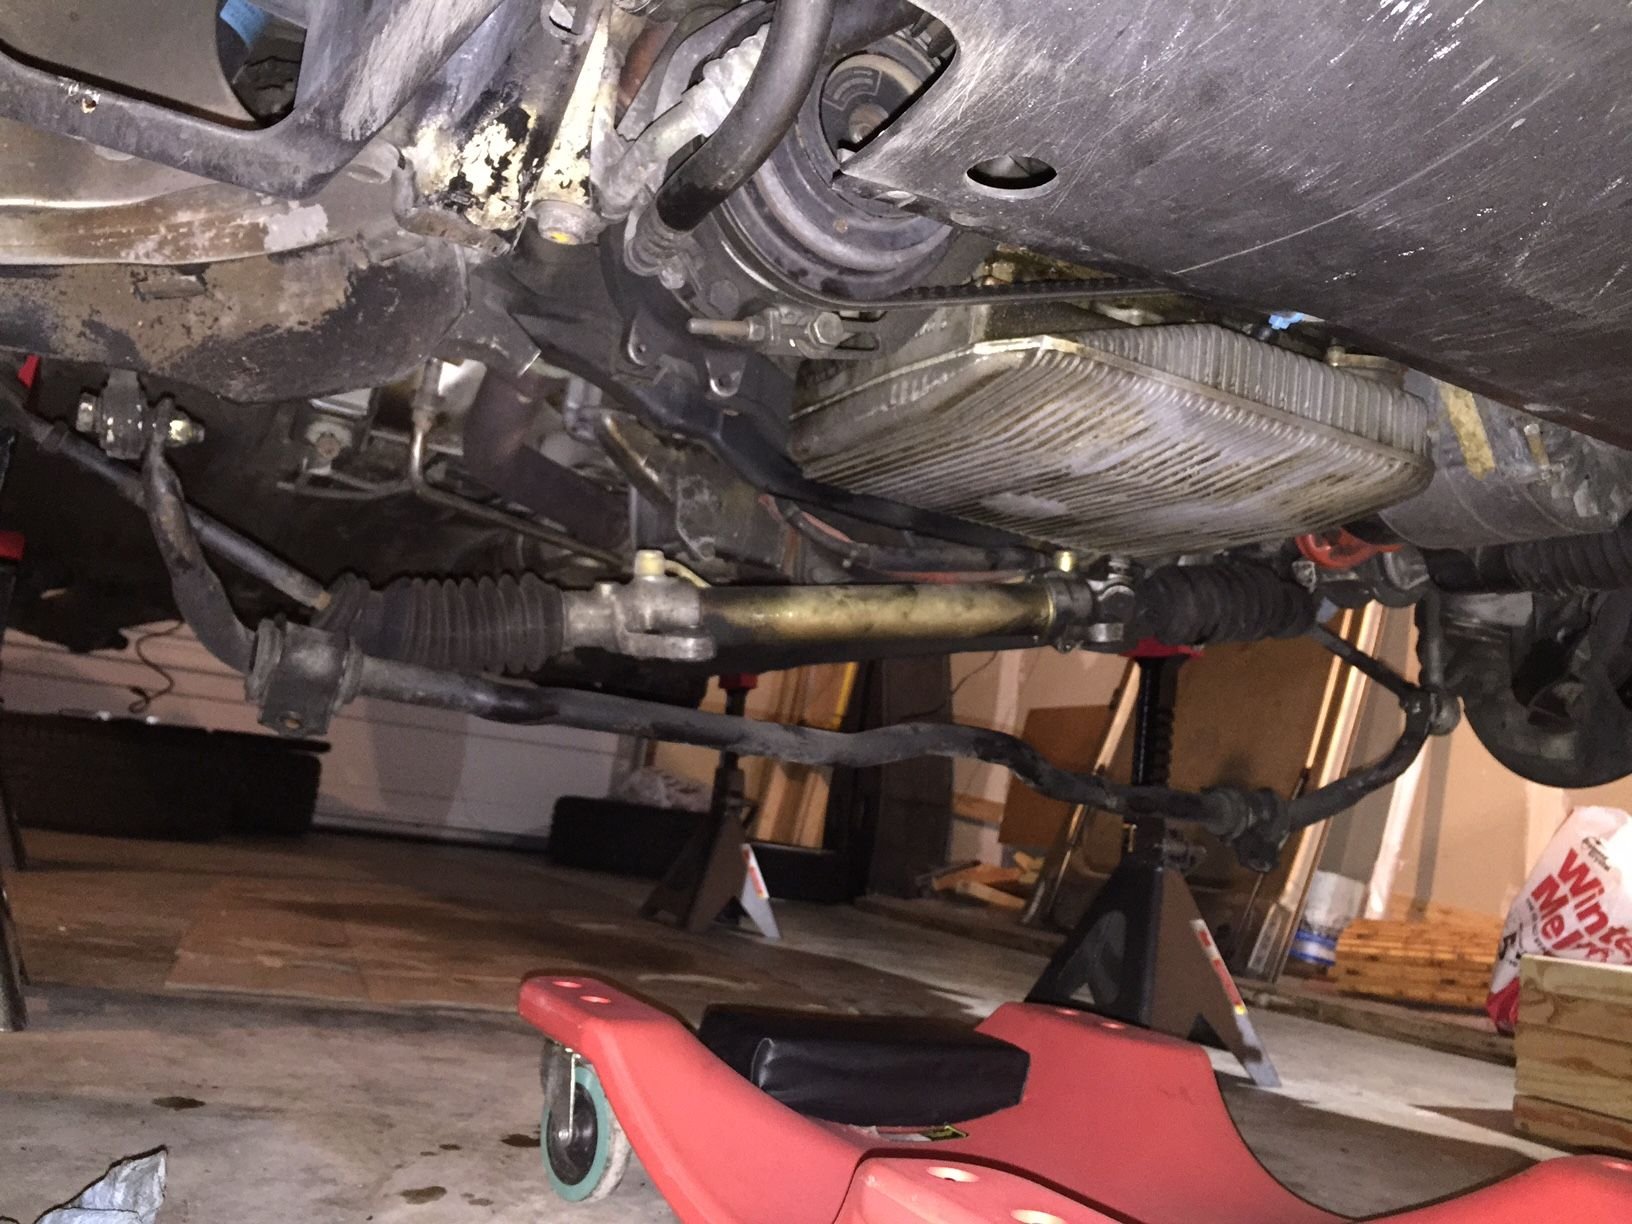
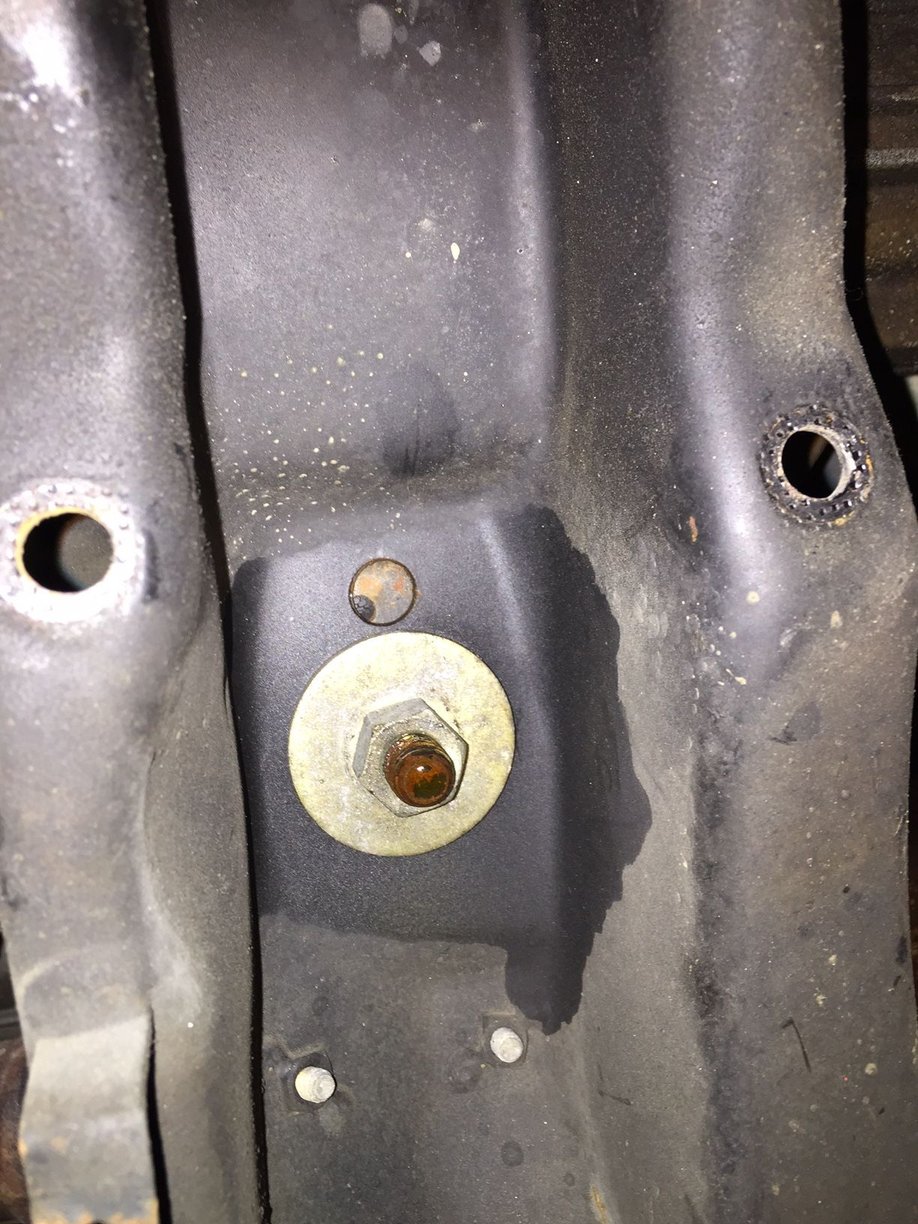
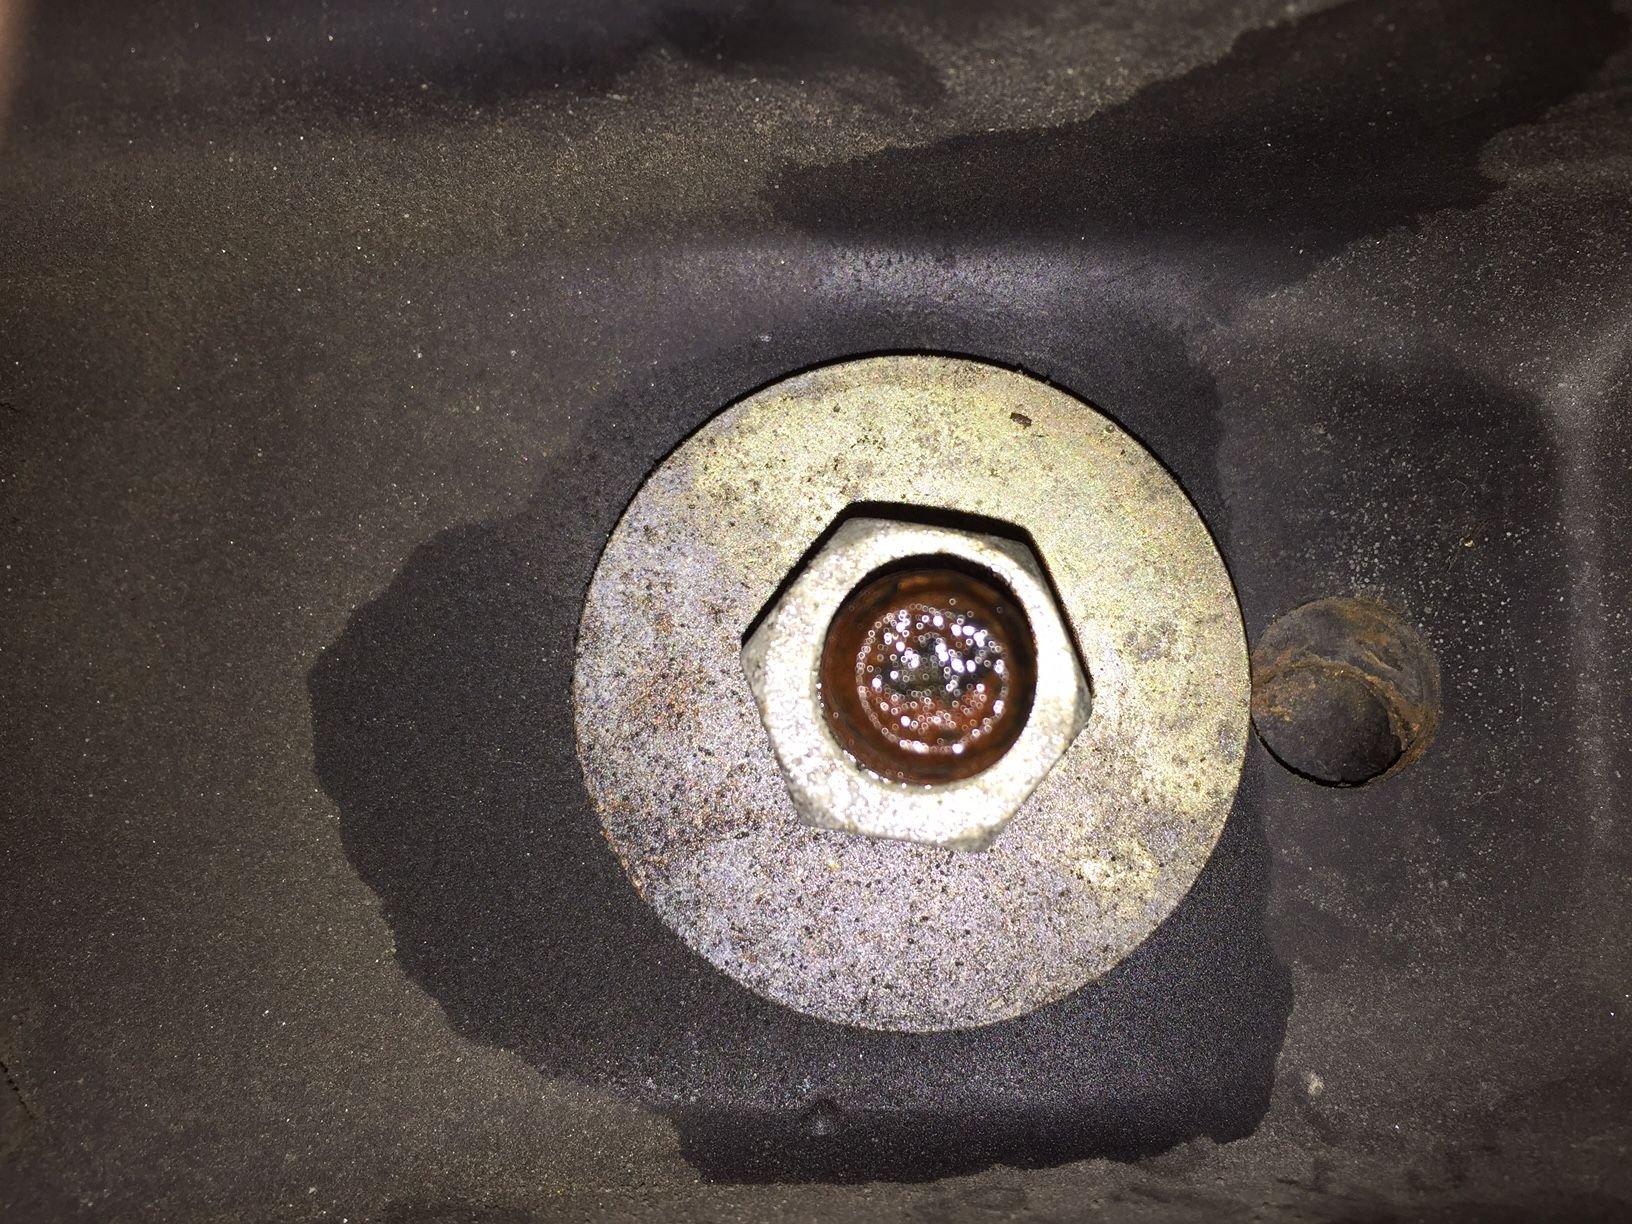
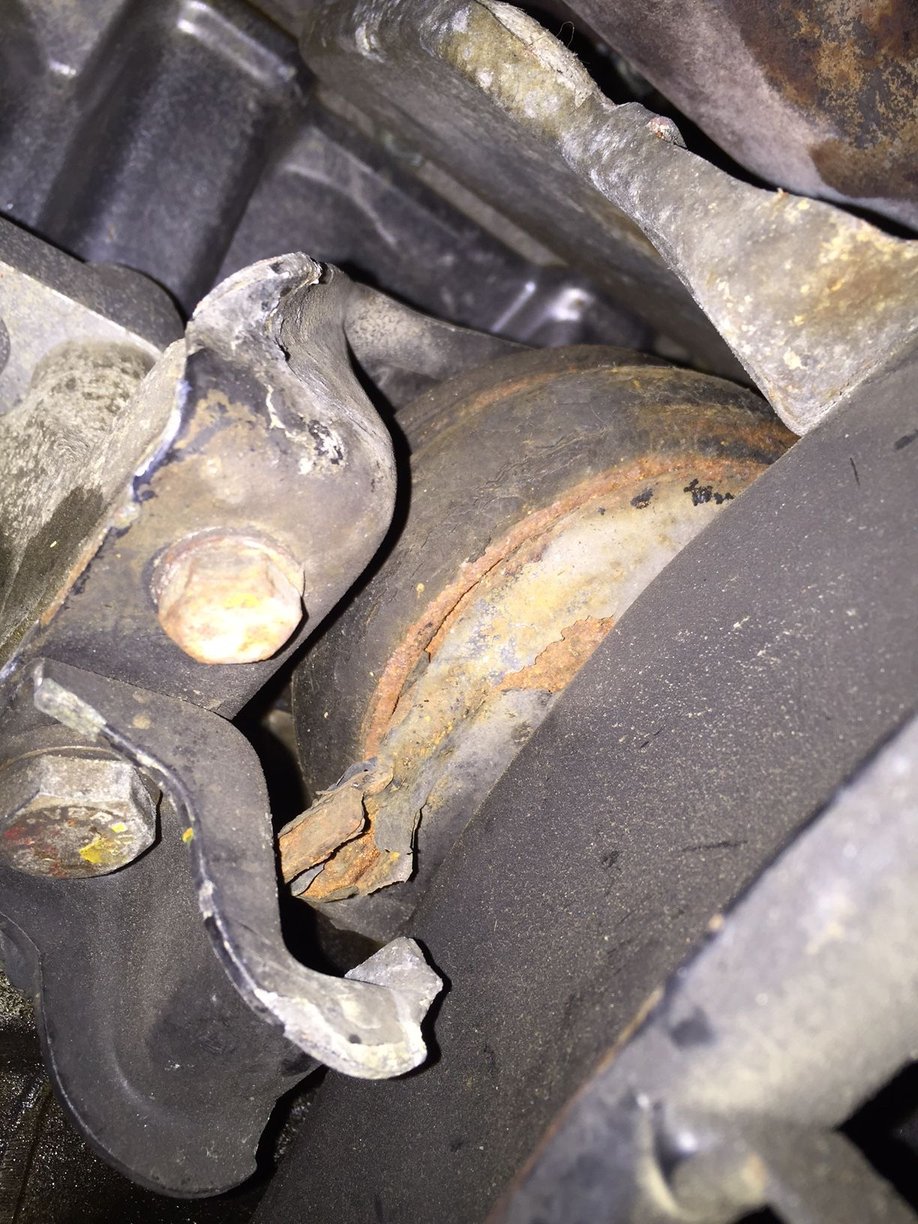
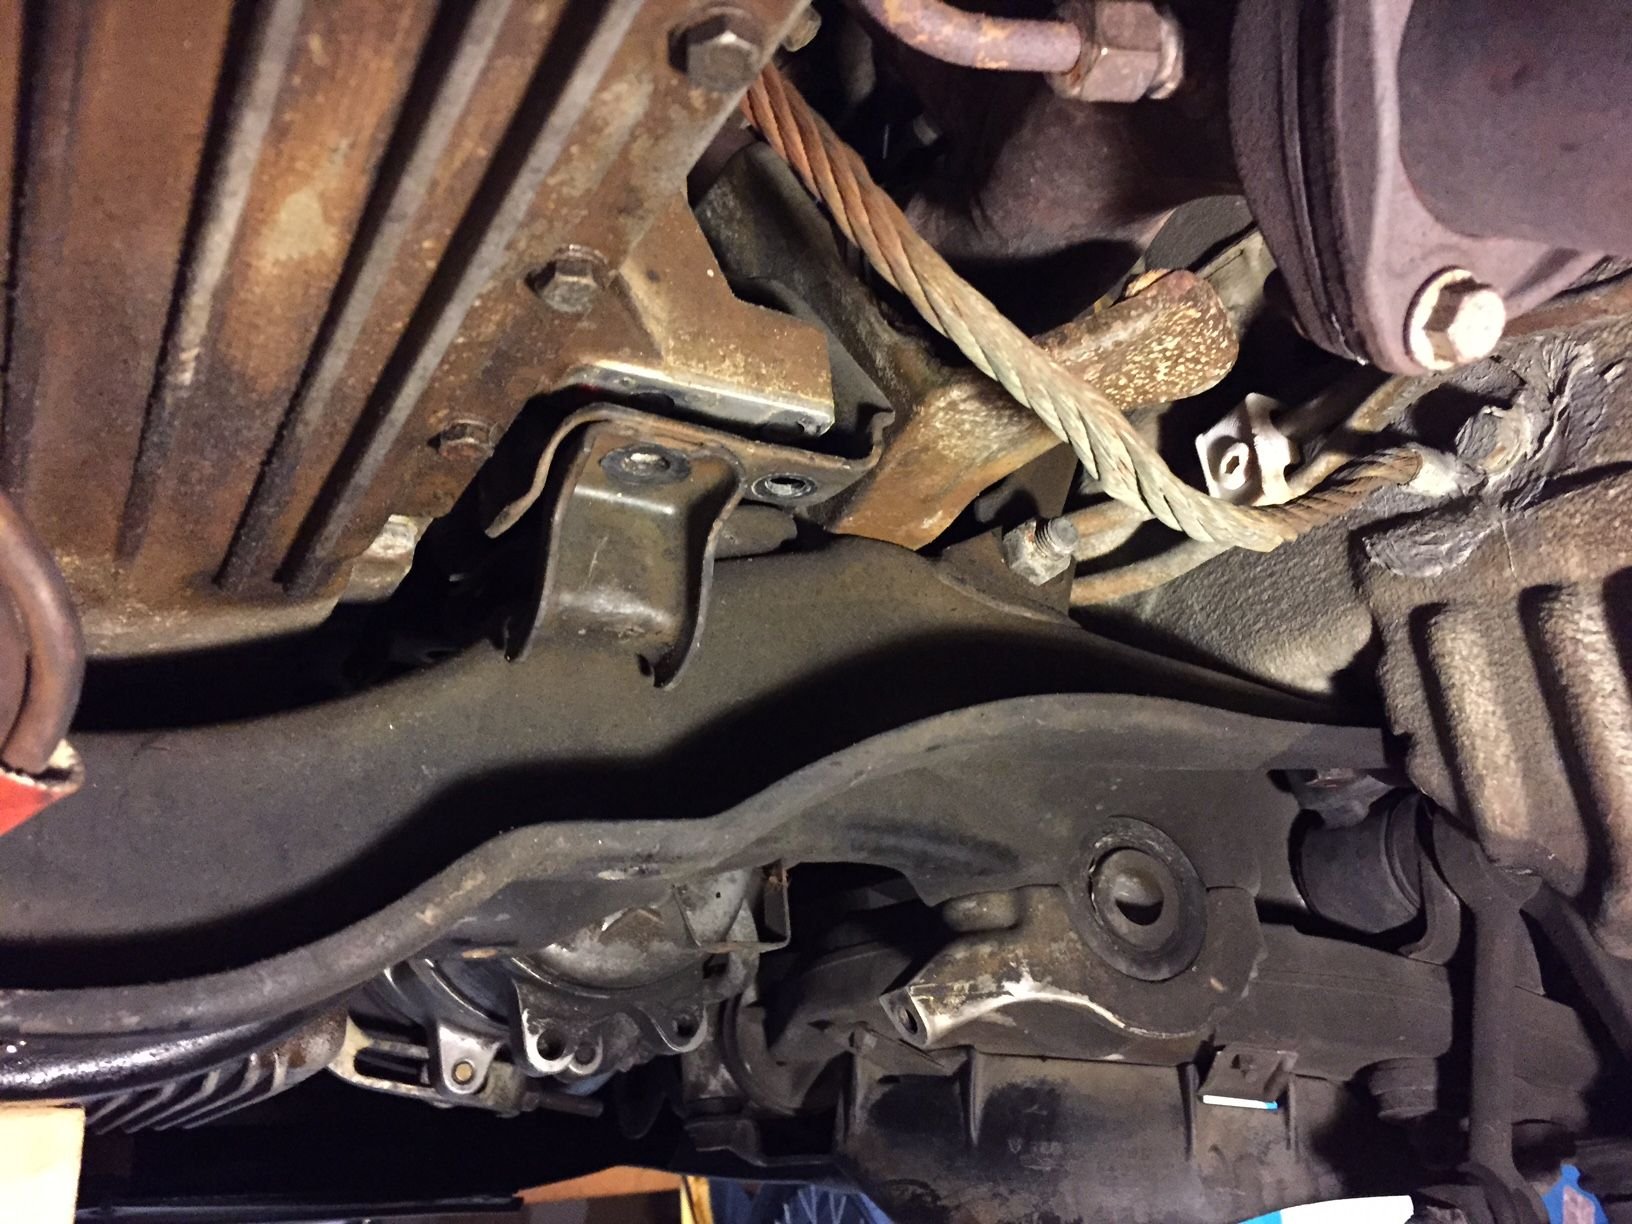
The previous owner mentioned he thought the mounts were the "Ford ones". I guess this means Anchor mounts for a Ford Contour. The pics of the lower mount nuts and flat washers show the absence of the OEM stud in the alignment hole off to the side. Also note that little effort was made to align the holes so that the safety fingers would align well. Also looks like the driver's side top finger was bent to provide clearance when mounts were new. But this compromised the paint leading to rust. I'm hoping to get a replacement from Mark. And..someone used the steering rack protector plate as a jack point (judging by the dent it looks like it was a bottle jack). Was relieved to see the steering rack is untouched. I'm hoping to get the plate and the "top finger piece" during Mark's 1/2 off sale.
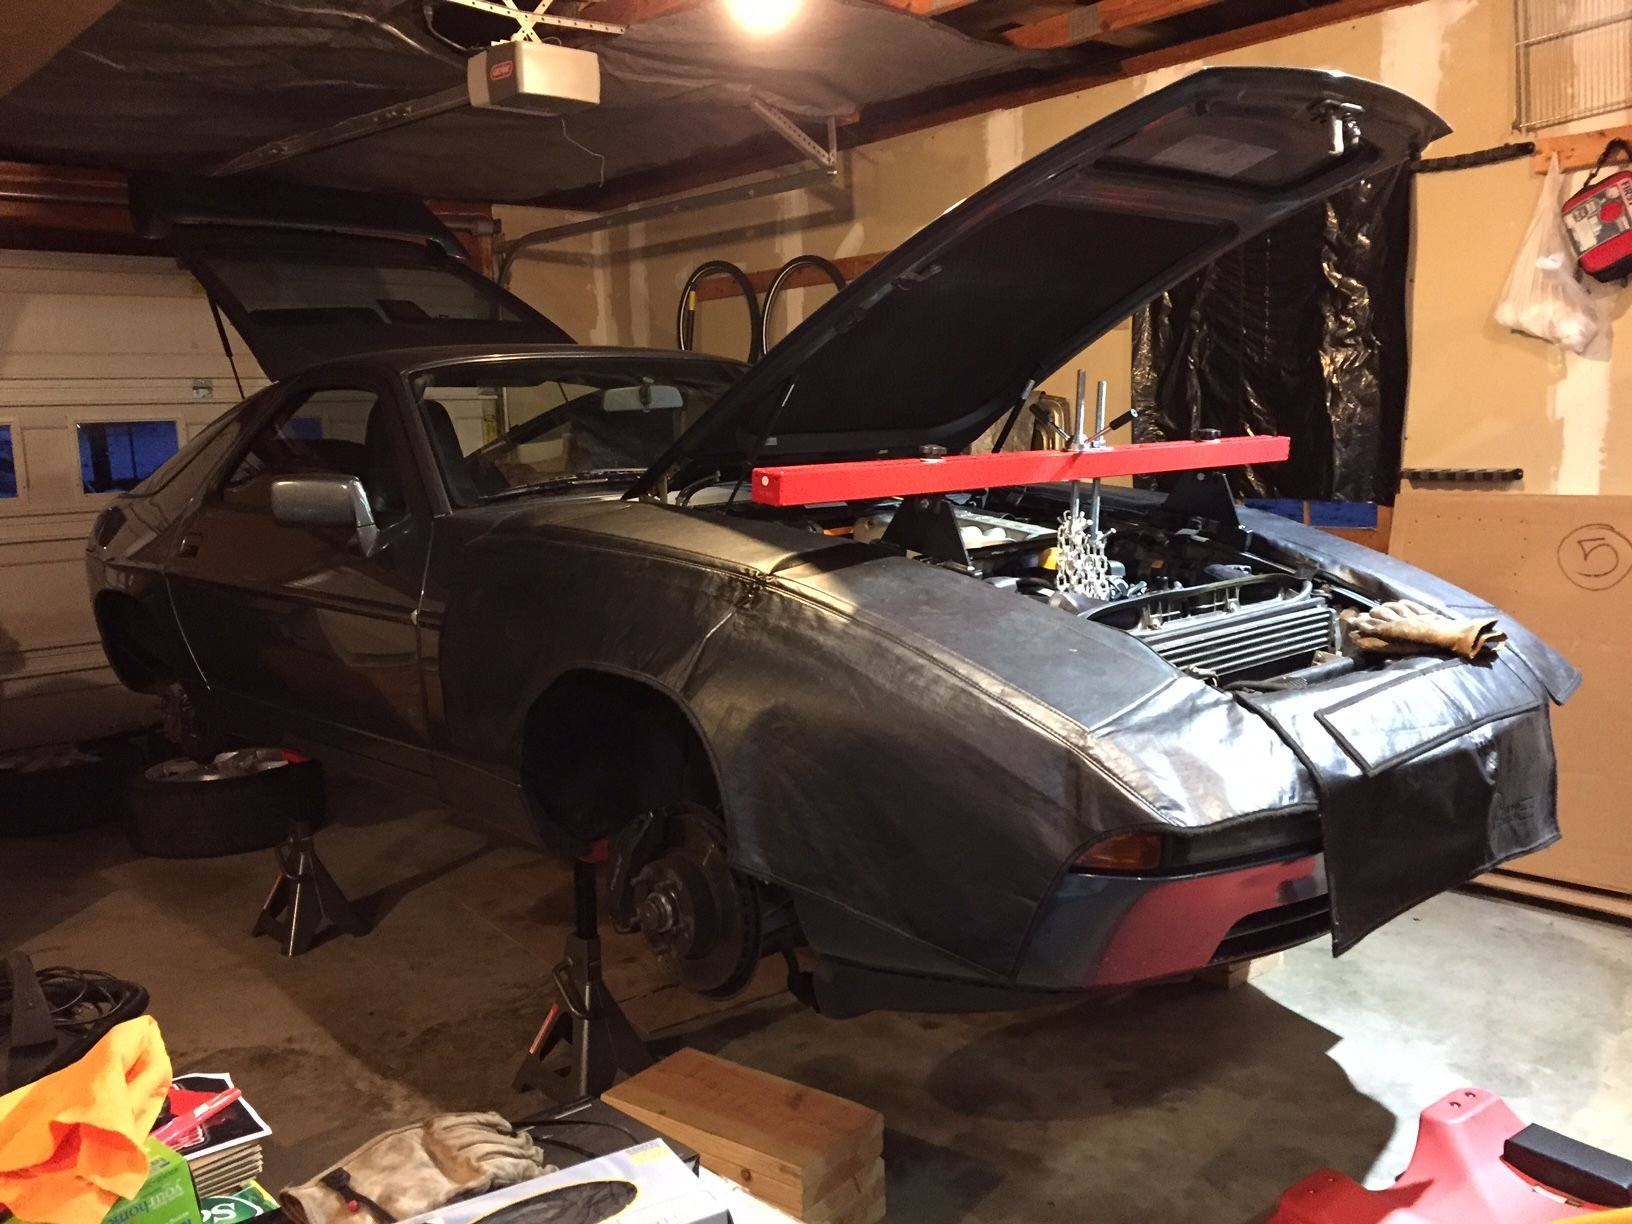
Also included some pics of my set up for the MM & OPG job. I'm working very slowly. Between holiday guests and my 3 year old son I don't have much time to work. Sometimes I just roll under and look and spray some Blaster on what needs to be loosened or removed next. Longest I've been able to work is about 2 hours (including 45 minutes in the dark with a headlamp due to power outage). I have about 3 hours in it so far. I'm giving my self until New Years to do the MMs and OPG. So far it's been fun and relaxing - largely due to my car being relatively CLEAN
Hi Martin,
Harbor Freight in Sterling. I think I got it on sale for $60. If you don't want to buy one you can borrow the lift bar when I'm finished. I was going to sell it after the job, but five years doesn't sound very long so I better keep it. Which mounts did you use? I'm putting in the Volvo mounts and silicone pan gasket (both from Roger). I've been meaning to talk to you about a tour at Monticello, perhaps this spring.
The 13mm and 17 mm bolts that hold the MM brackets to the block were way too easy to break loose, and the amount of effort was different for each bolt. I was using a 20 inch breaker bar, but the effort was still very low. I'm doubting they were torqued to spec when the Ford/Anchor mounts were installed. Getting ready to lift the motor then dropping the cross member.
When you drop the crossmember watch the power cable that is bolted to it on the driver side (US). It uses a 10mm socket to get it off. Sometimes you have to counterhold with a 10mm wrench on top. Hidden well. Also pay attention to how the mm heat shields go on. (Hint: take a picture of cross member with mm on it with heat shields attached).
Jeff, are you not talking about the harness that goes to the starter? I already loosened that one. Thanks for the tip on taking pics of how stuff is attached.
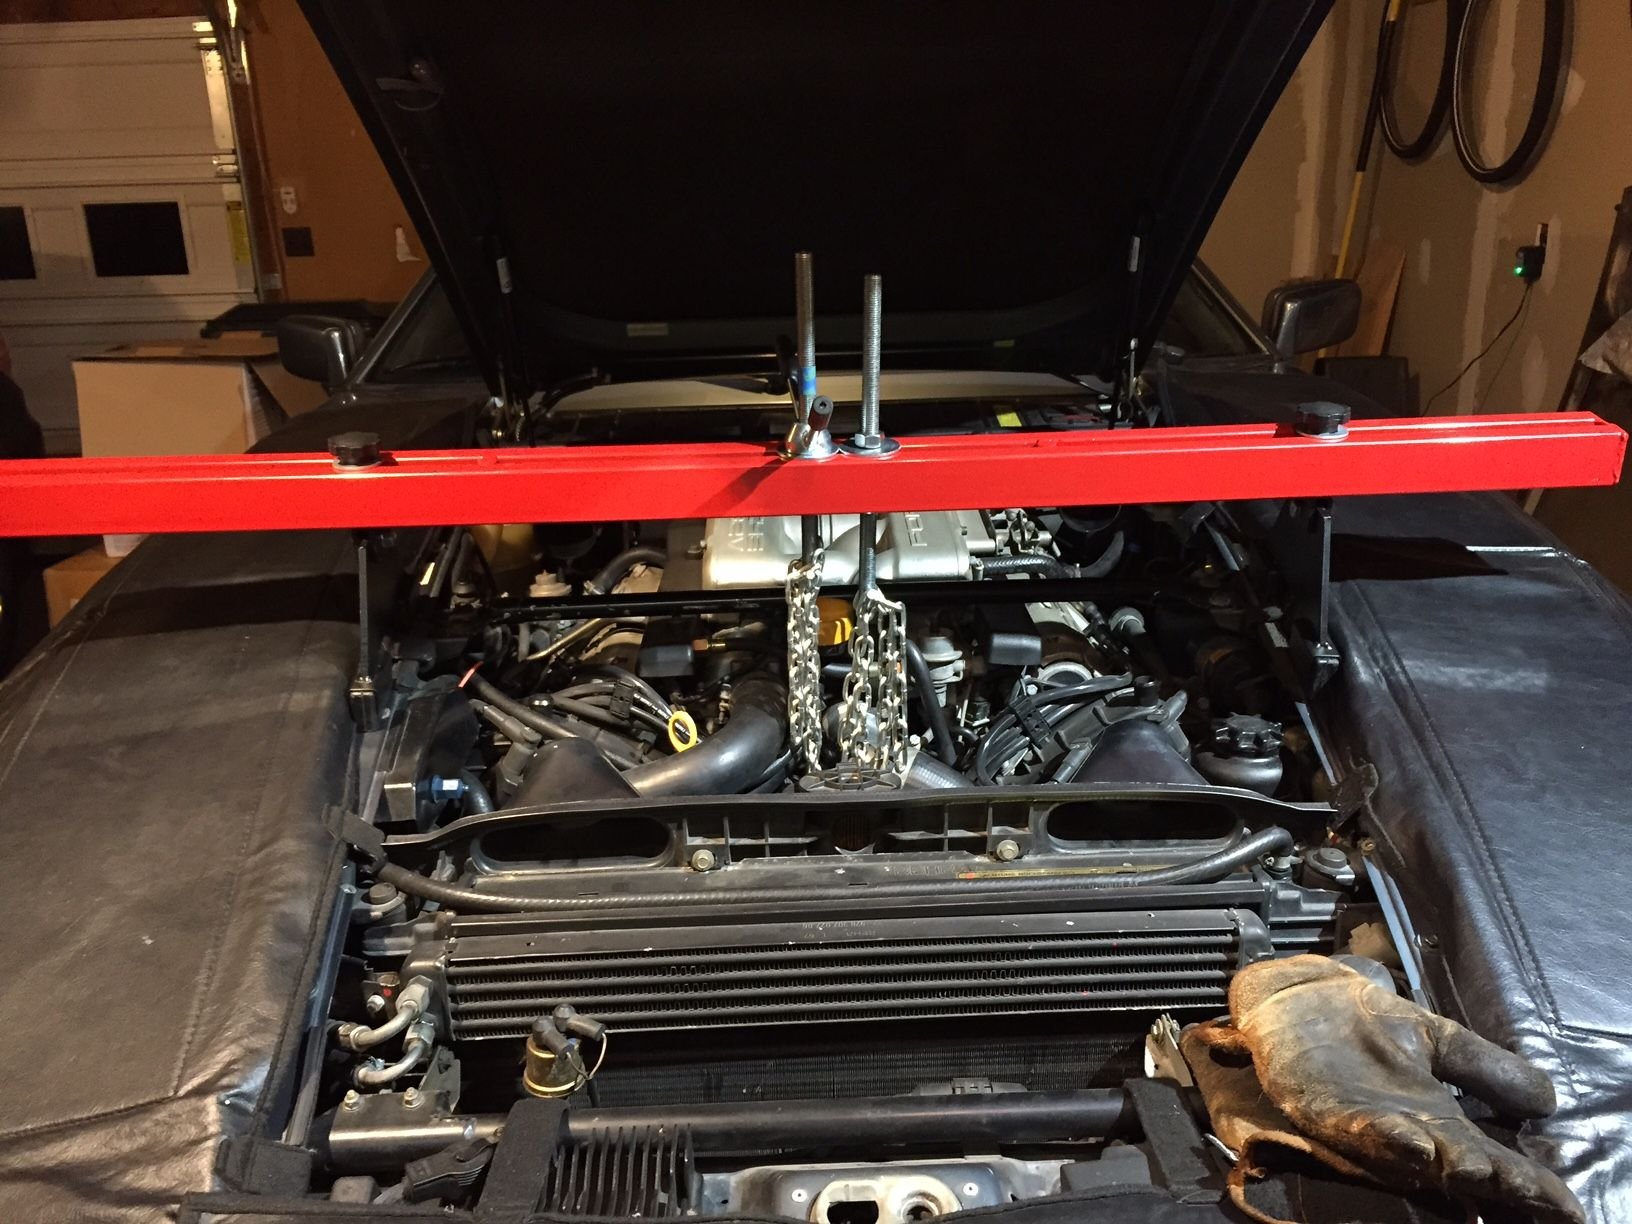
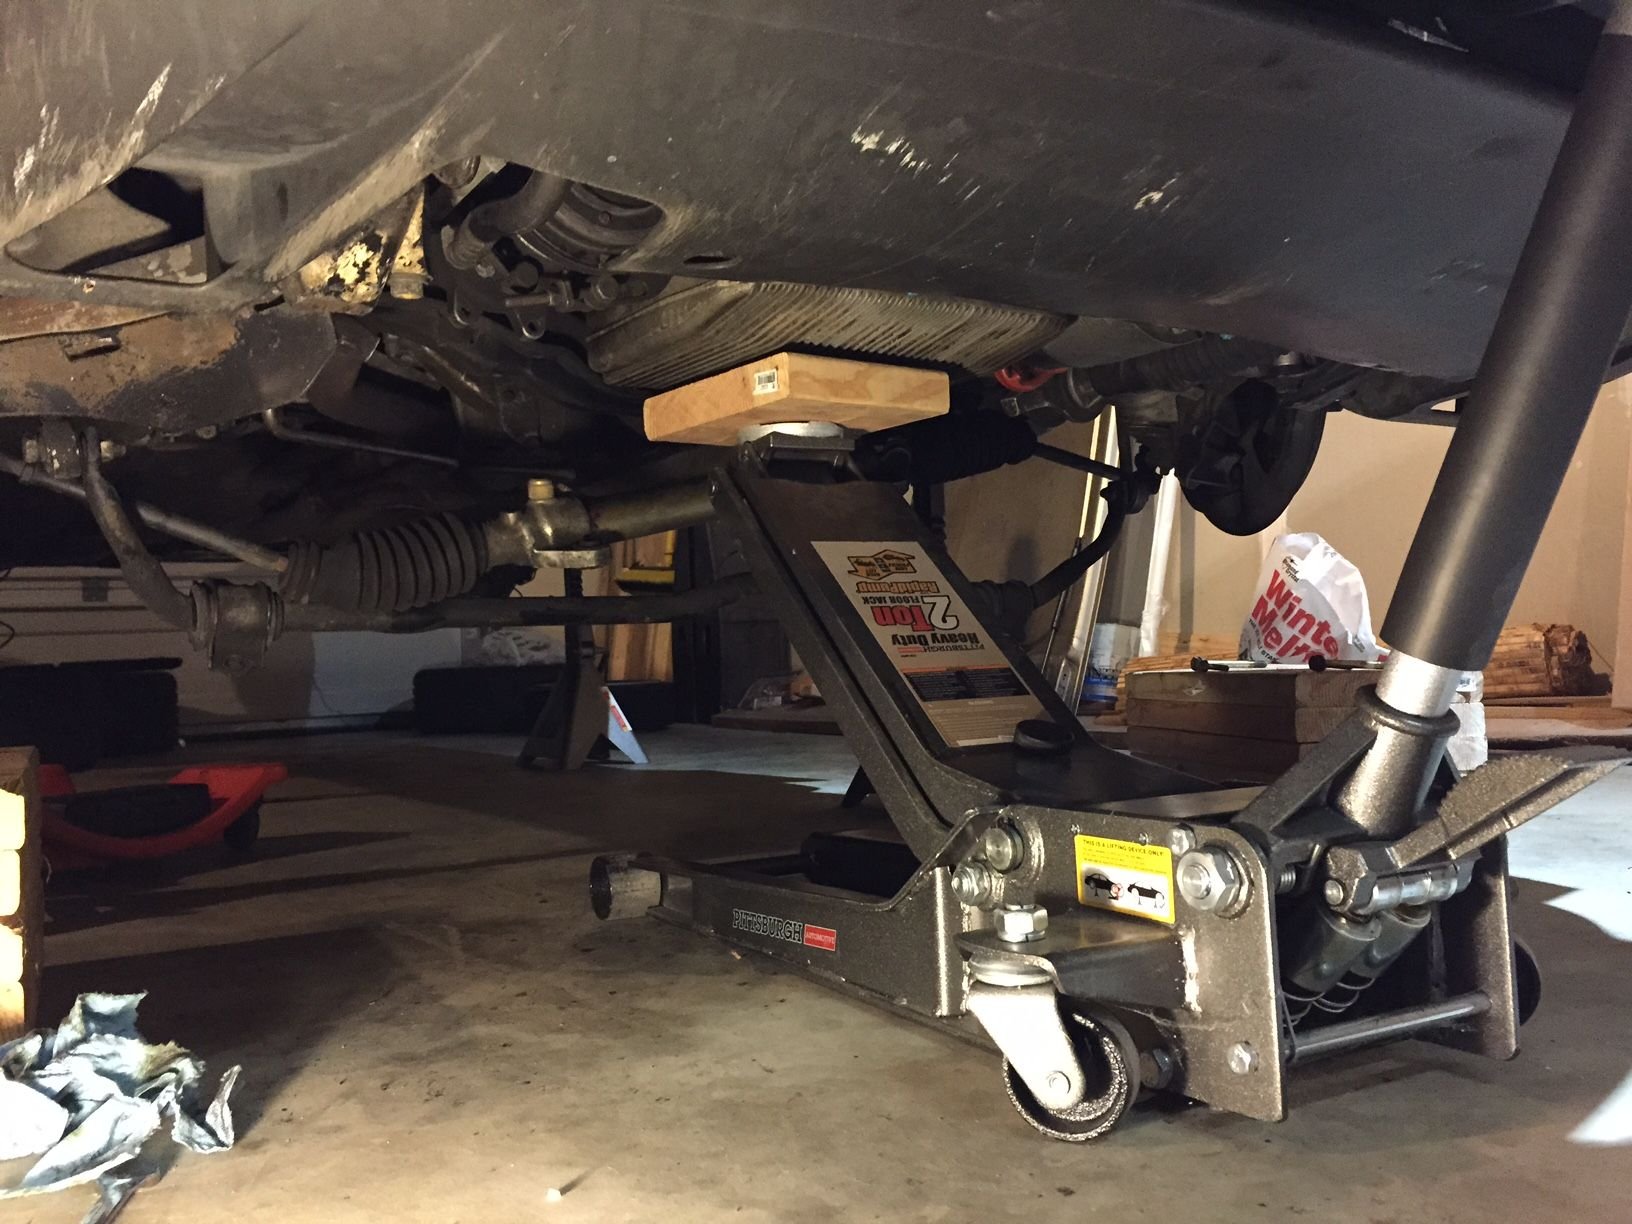
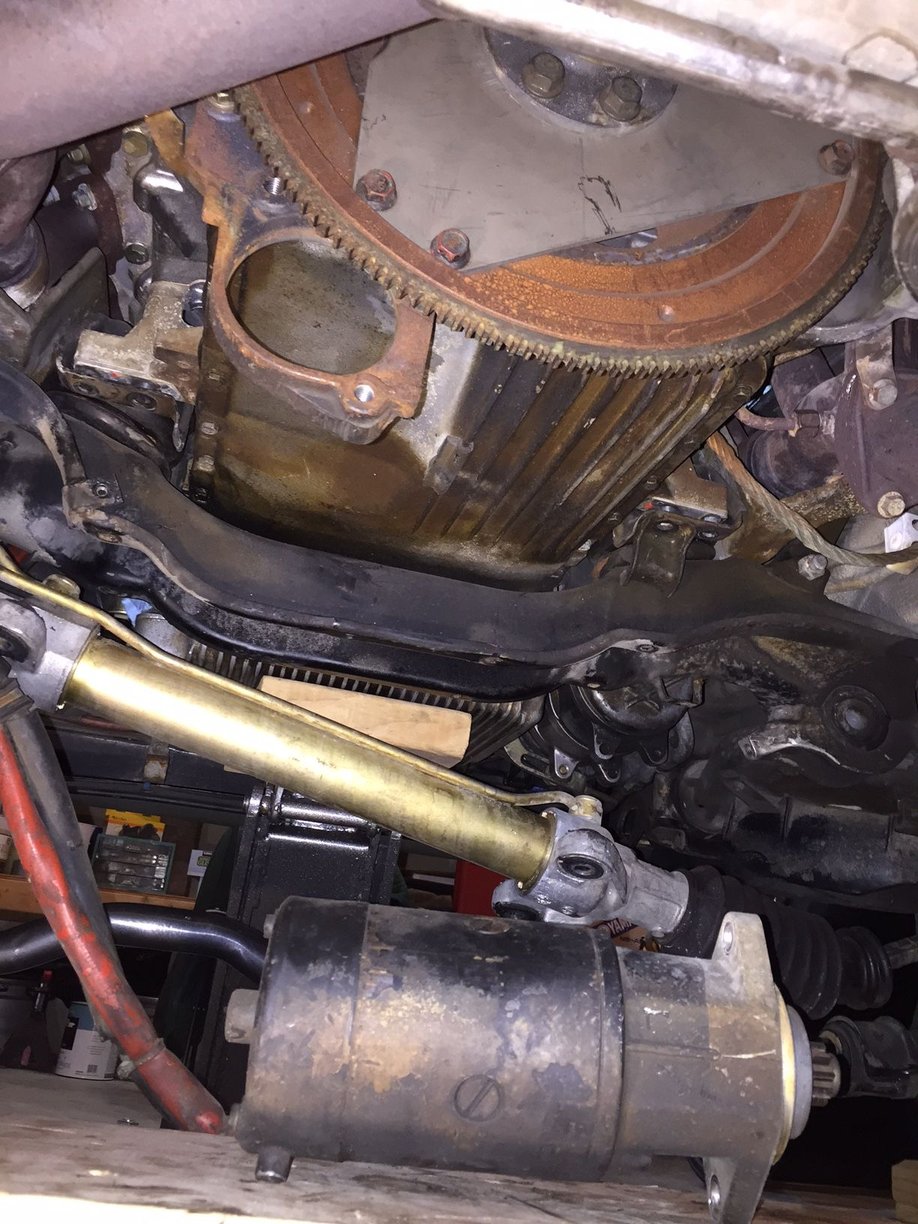
I didn't get to dropping the cross member before dinner this evening. I spent a good bit of time making sure the engine support bar was set up securely. Because of the wobbly (by design) legs I noticed the leg attachment position on the bar needed to be moved in or out slightly as the load grew on the chain. I wanted the legs perfectly vertical. I also noticed it required a lot of effort to turn the "wing nut" on the bar hook. Then I recalled something I read about the bar being more of a "support" than a "lift" device. So I put my jack under the oil pan with a block of wood between it and the pan. I did my best to keep the load distributed between the chains and the jack as I incrementally raised the engine exactly 1 inch (O2 sensor had plenty of clearance). When the support bar was standing as shown below I let the jack down until it wasn't touching the pan. Everything was holding fine and the bar legs remained vertical. I raised the jack up until was just slightly assisting from below. I will sleep better with it this way until I return to it tomorrow.
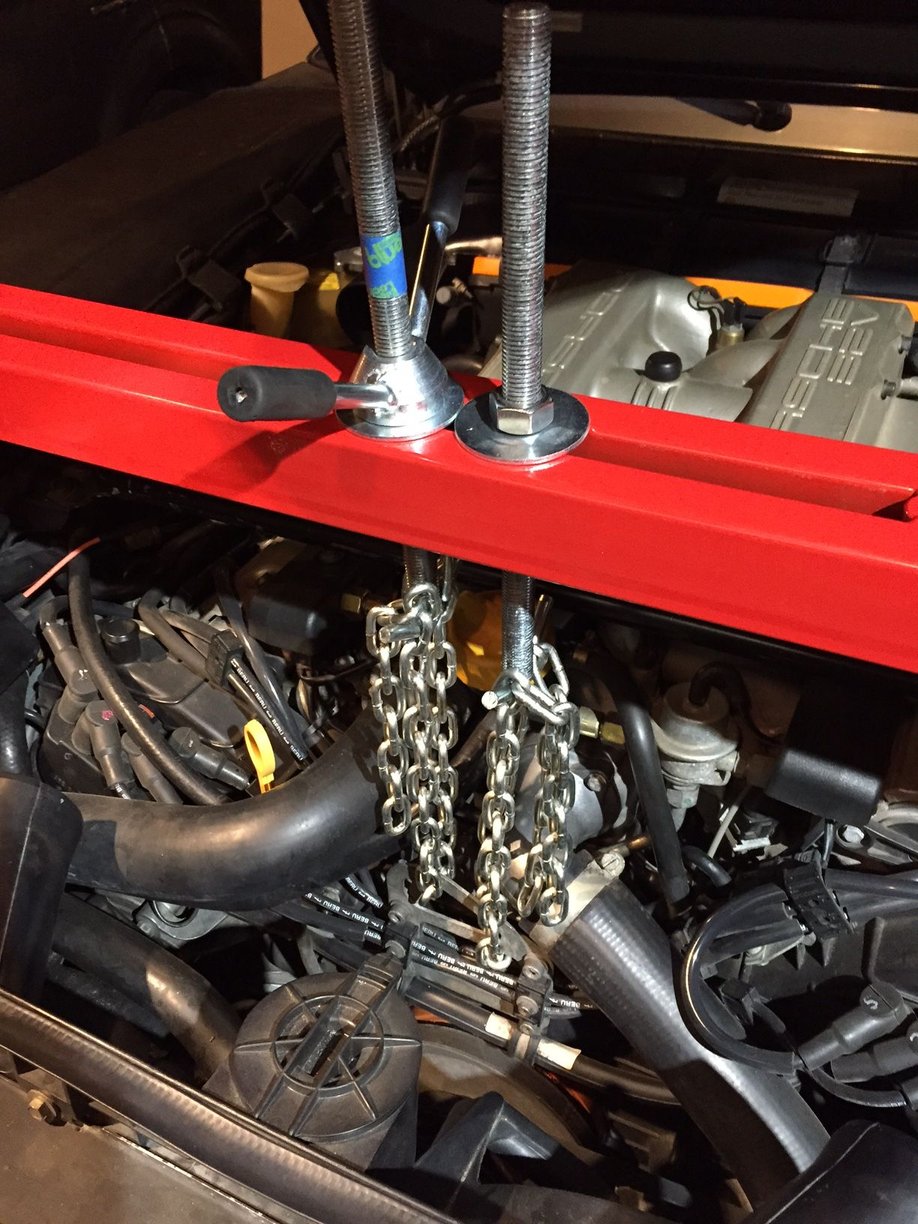
Below: I removed one of the big "wing nuts" so I could put both hooks as close as possible. I bought a nut at the hardware store. After the hook on the left was supporting the load, I tightened the nut on the other hook until it was taking some of the load.
The blue tape on the bar hook shows 1 inch of threads (lift). The gap between at the attachment point for the mounts to the block is about half an inch. The mounts were quite compressed and expanded when unloaded.
the harness that Jeff is talking about passes under the left exhaust manifold and is attached to the top of the cross member ,
you can see the nut once the rack is dropped down
Is that the correct location to lift from..?
My 88 has two lift hooks (on front right & rear left of engine).
I was planning to use those two locations when I do mine.
But if that center bracket is an acceptable point, I will use that.
It certainly appears to be easier to access, and more central.
Is that the correct location to lift from..?
My 88 has two lift hooks (on front right & rear left of engine).
I was planning to use those two locations when I do mine.
But if that center bracket is an acceptable point, I will use that.
It certainly appears to be easier to access, and more central.
Yes. There are at least two threads showing this water pump bracket being used for cars 87+. Roger says it's the factory recommended location provided specifically for this job. The back of the engine is being supported by the transmission mounts via the TT. Still, it looks like a smallish bracket to me, so I keep the jack under the pan as a safety measure. It's holding about 10% of the weight. I will place the jack and chunk of 4x4 across the bell housing (cover removed) just beneath the flex plate clamp during the OPG part of the job. I would like to leave the jack under the pan while lowering the cross member to replace MMs.
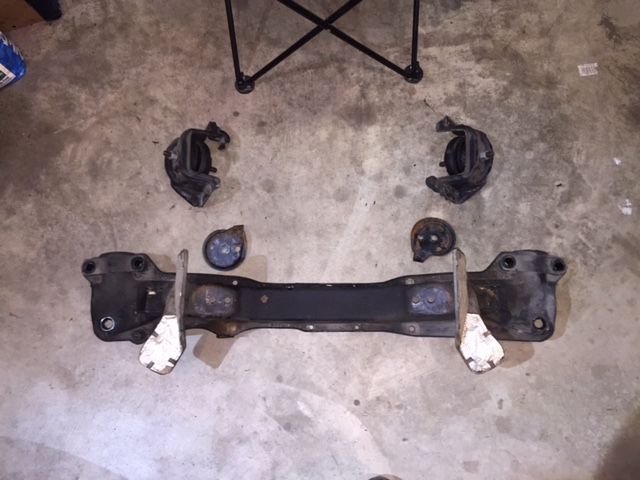
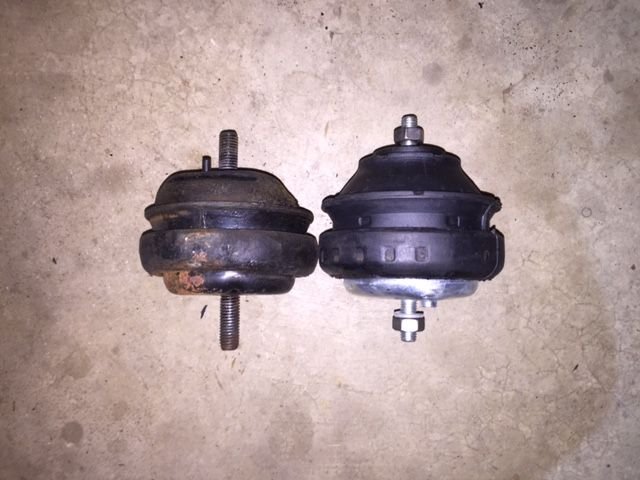
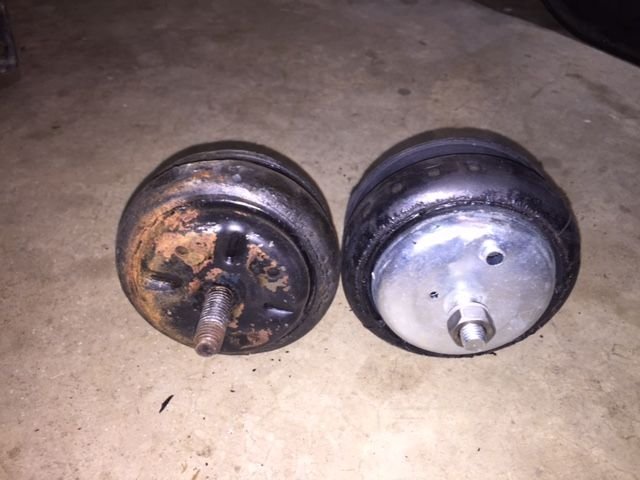
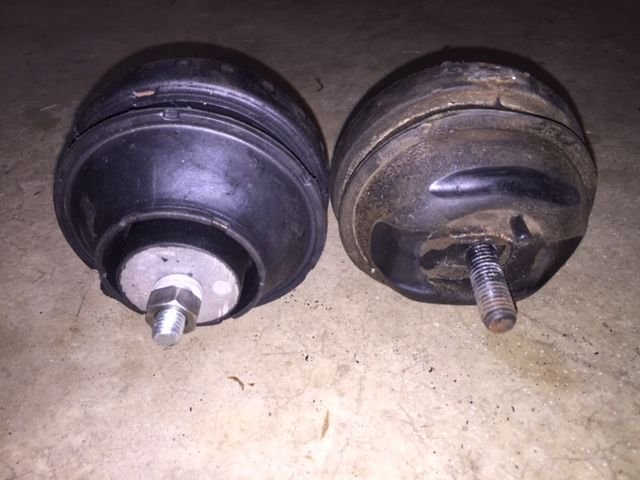
Finally found time to spend a few hours unbolting the cross member and dropping it and the motor mounts. Also took a few pics of the new Volvo mounts vs. the old mounts.
These appear to be the Anchor mounts. I did not hear any sloshing inside, nor any signs of leaking. Seem to be solid rubber, but not up to the task. Based on the condition of the copper unit-sieze on the bolt threads I estimate the mounts to be about 5-6 years old. Quite a bit of wrestling to get the mounts and cross member out. Would be easier a second time. But getting the new mounts and cross member back up will be much more of a challenge without dropping the LCAs by detaching the shocks. Any suggestions? Next comes the OPG.
More pics anyone who might be following along and perhaps those who are, like I was, uncertain about taking on the MM/OPG DIY. I've done one other job as labor intensive as this one - replacing a clutch on a Mercedes Benz Unimog 404. Both jobs actually MANY simple but uniquely awkward and strenuous tasks that add up to something that is (so far) not as complex as it appears. However, taking things apart is often much easier than putting it all back together again. Going to the garage now feels like going to the gym -- my "carlates" workout.
Last edited by Captain_Slow; 12-07-2014 at 09:08 PM.
Reason: forgot to upload the pics


 11-29-2014, 12:47 PM