When you click on links to various merchants on this site and make a purchase, this can result in this site earning a commission. Affiliate programs and affiliations include, but are not limited to, the eBay Partner Network.
Great thanks for the input. So it looks like people are removing the pusher in front of the radiator and cooler too. It doesn't say to in the instructions but I would assume that to be recommended so they aren't fighting each other. Gotta get the ac switch wire and switched ignition wire to the CE panel then I'm done.
Can you post a pic of your installation on the '86? I might consider something like this for the '86.5. So you remove the condenser fan with this? And current draw is comparable to that fan?
Originally Posted by 928NOOBIE
I have also installed an FF Dynamics system on my '86. I got the dual fan set up and am testing the system by using the radiator fan switch only...so far it's been working well.
I will be making an adjustment once I get the AC fixed..but so far it does a great job.
Echo comments above about quality..great system and so much quieter than the "pusher" fan that also gets removed.
Only thing for '86 is the fan mount has to remain since the throttle mount requires it...but I got a puller and got the clutch driven fan assembly + pulley removed.
Very happy with result..car was having trouble running at proper temp (too cold)...esp. in winter. Without air being pulled through the front at stoplights etc the car runs at proper temp and runs much better as a result.
They are also very responsive to questions; very nice people.
One reason I was attracted to the dual fan kit was they advertised that you remove the pusher and that the current draw is a wash (or better since these are new motors/wires/tech etc).
I'll get some pics up here in a few...still doing the work thing.
I do have some disclaimers
1. It's kind of in "pilot" phase..I wanted to know if the radiator temp switch would work to regulate and so far it's done so.
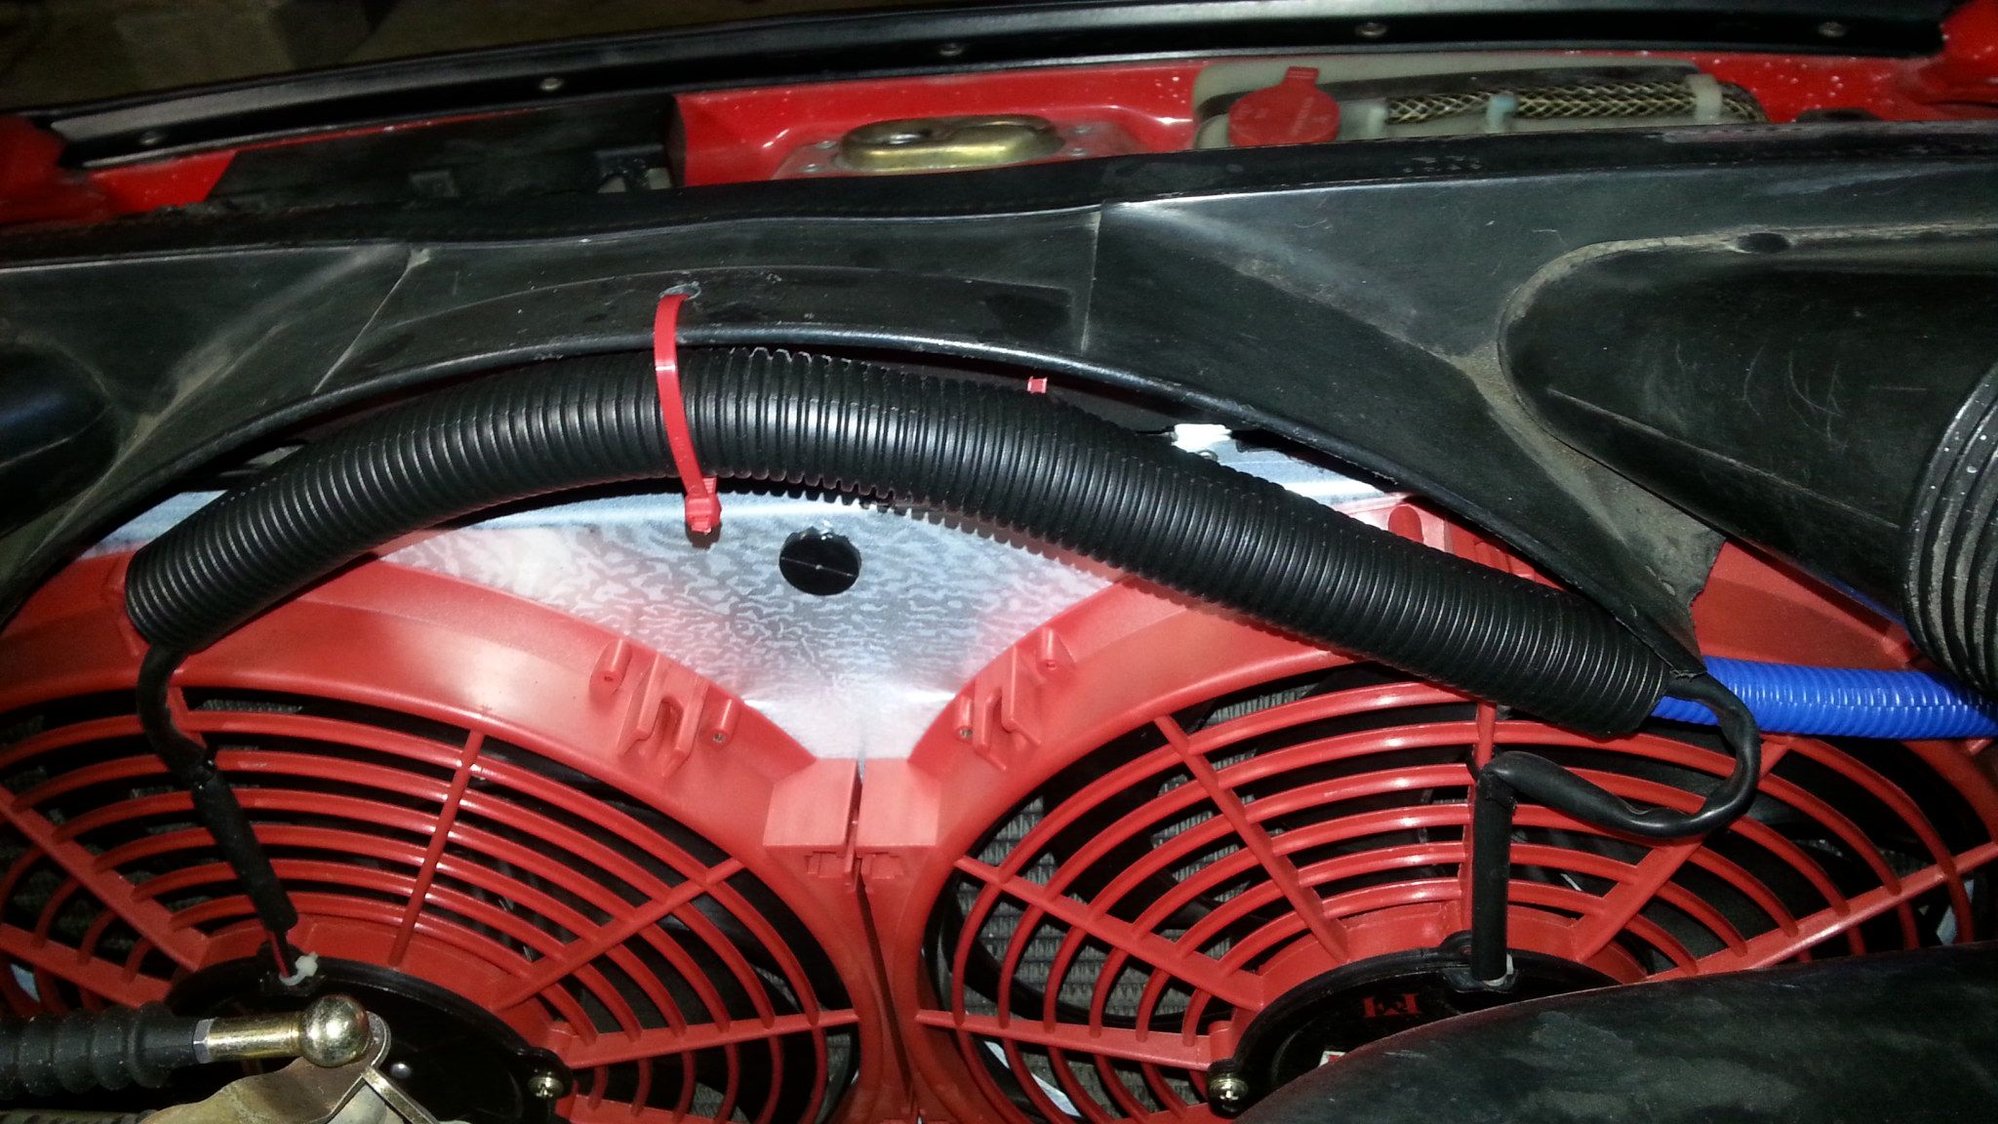
2. Mounting of the top of the old fan shroud is in "mock-up" phase so you see a couple plastic wire ties securing it to the radiator instead of the screws...I've not finished the aforementioned modifications to allow it to mount comfortably and I don't want to break stuff so I'm using the ties to give it a little flex while I iron out the wrinkles.
3. I will be making similar electrical modification as discussed in this thread via commercial relays for the AC (will be adding a relay to give the built-in relay on the climate control mod the much-needed relief, and will also use that same relay to trigger another relay which will provide AC-switched control over the fans in addition to the radiator temp switch...
4. Bottom half of fan shroud has to go bye-bye...so get yourself a nice large box to keep that, your fan pulley and other clutch driven fan accoutrements to restore back to stock.
5. Used upper fan shrouds are available for purchase ....I chose to do this so I'd still have an unmolested upper-fan shroud for returning the system to stock.
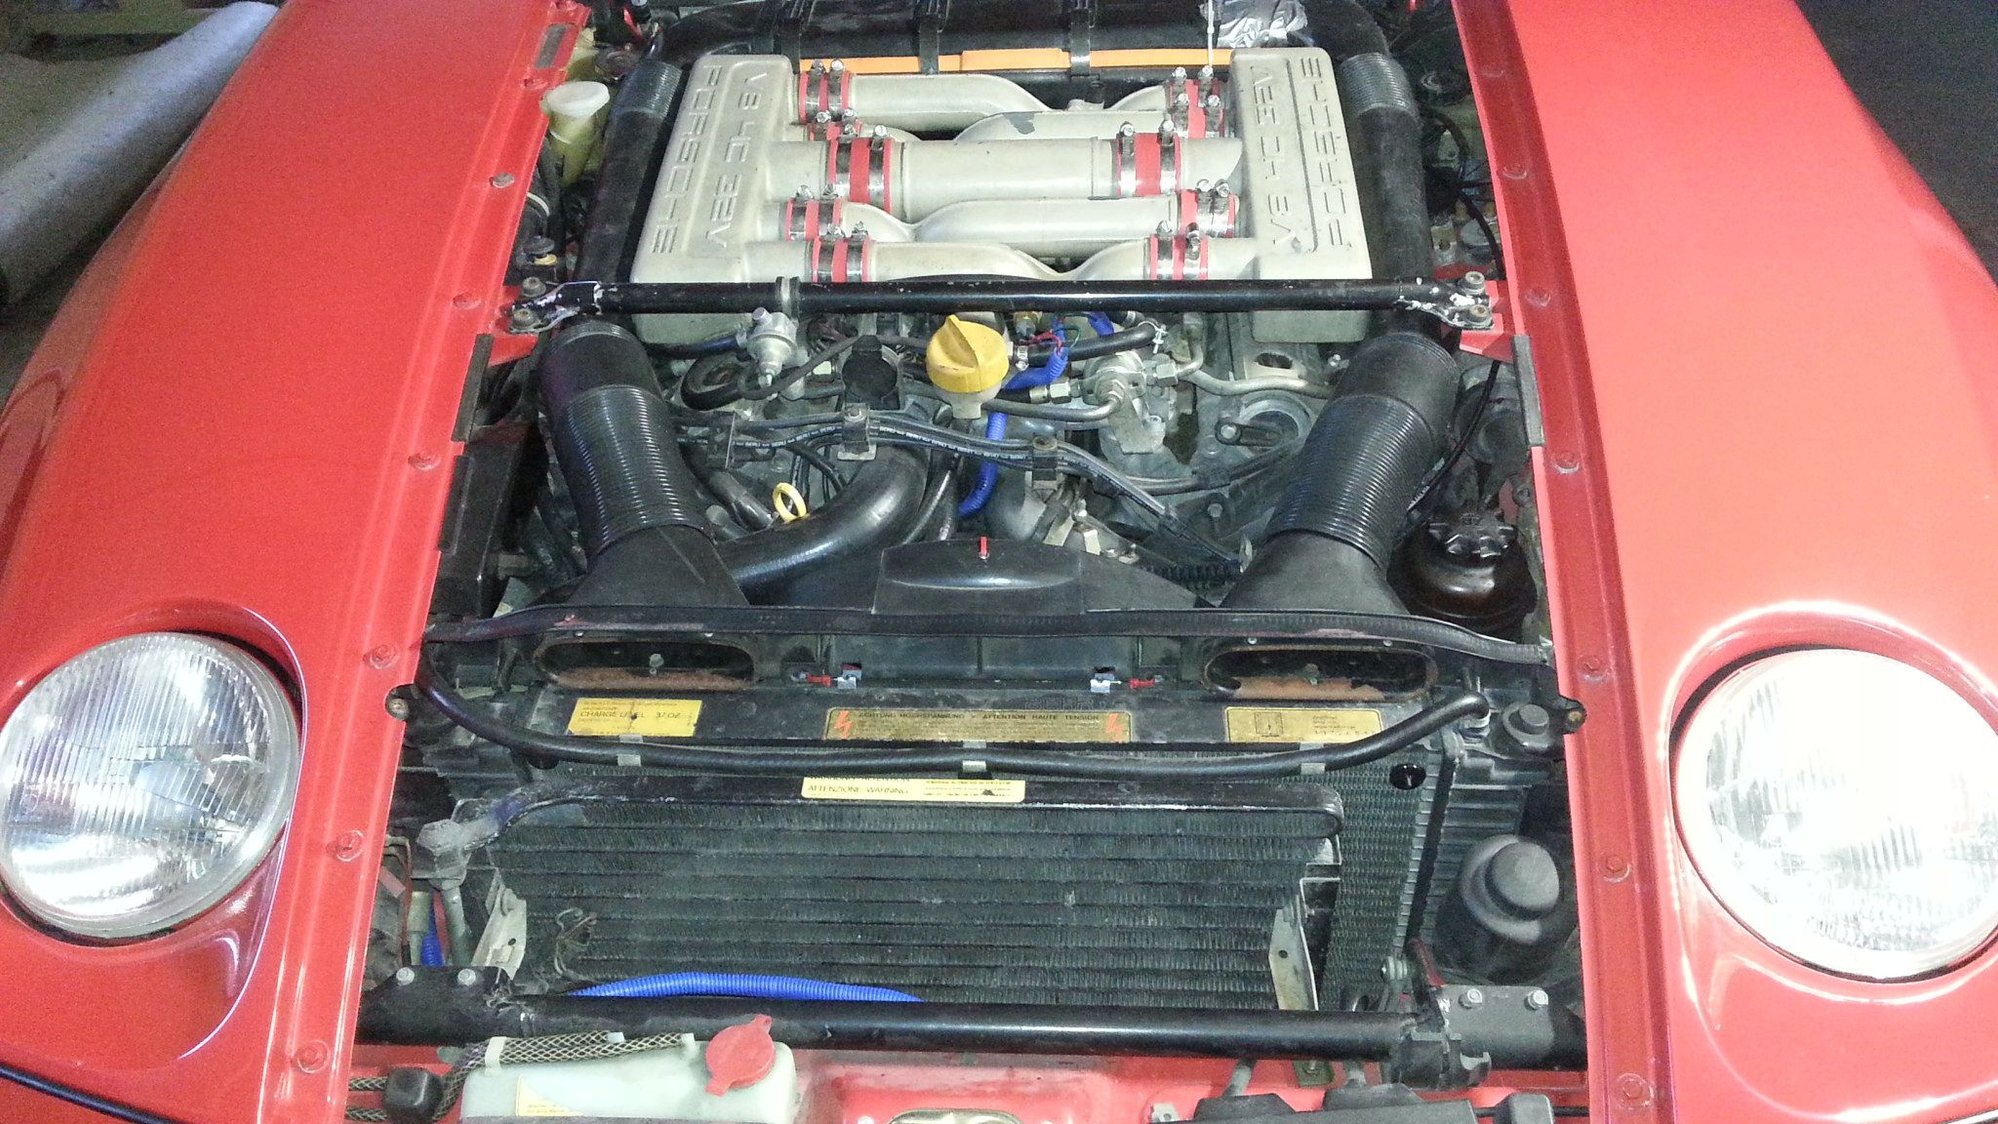
OK some pics are attached...I've tried to do a decent job with descriptions...hope this helps...let me know if you want to see some different ones...also...this will come back apart and be put together with a little more polish here once I'm satisfied with what the final config will be...
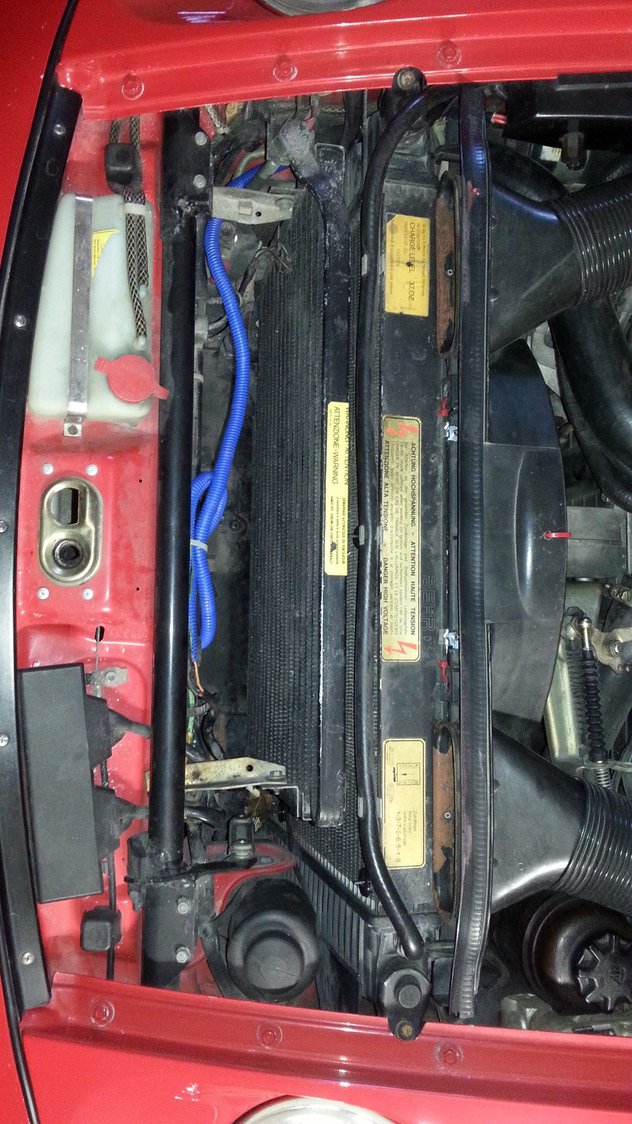
Another view of the gap left by removal of the pusher fan.
Overhead view of removal of pusher fan (forgive the blue wiring loom please; I'm not a showman under the hood and this is in test phase....I'll be removing slack and making it pretty later) P.S. for power to the fans I soldered the stock fan lead from the car and ran a fresh ground wire...no visible impact on dashboard volt meter when fans run. Can barely hear them..and only if you know what to listen for..they are very quiet.
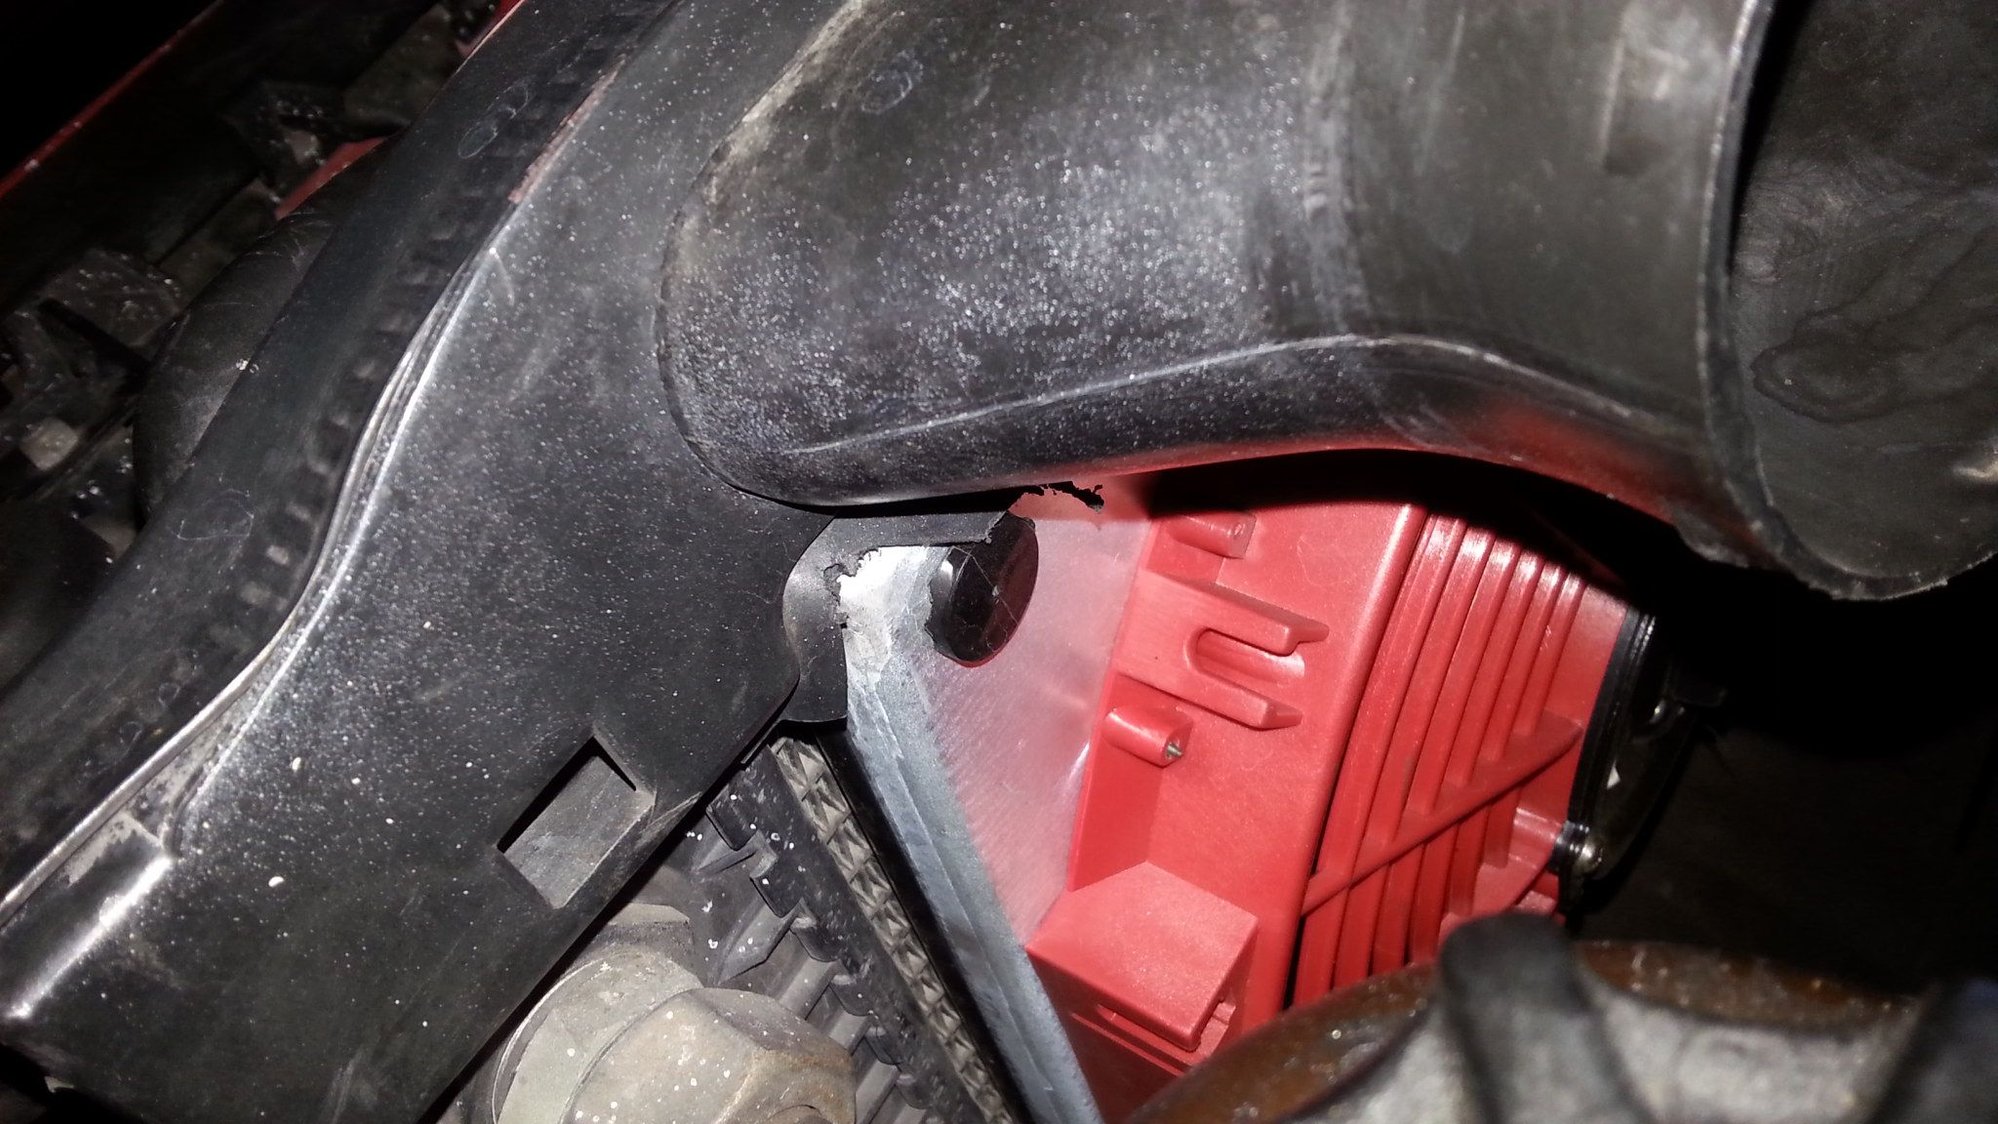
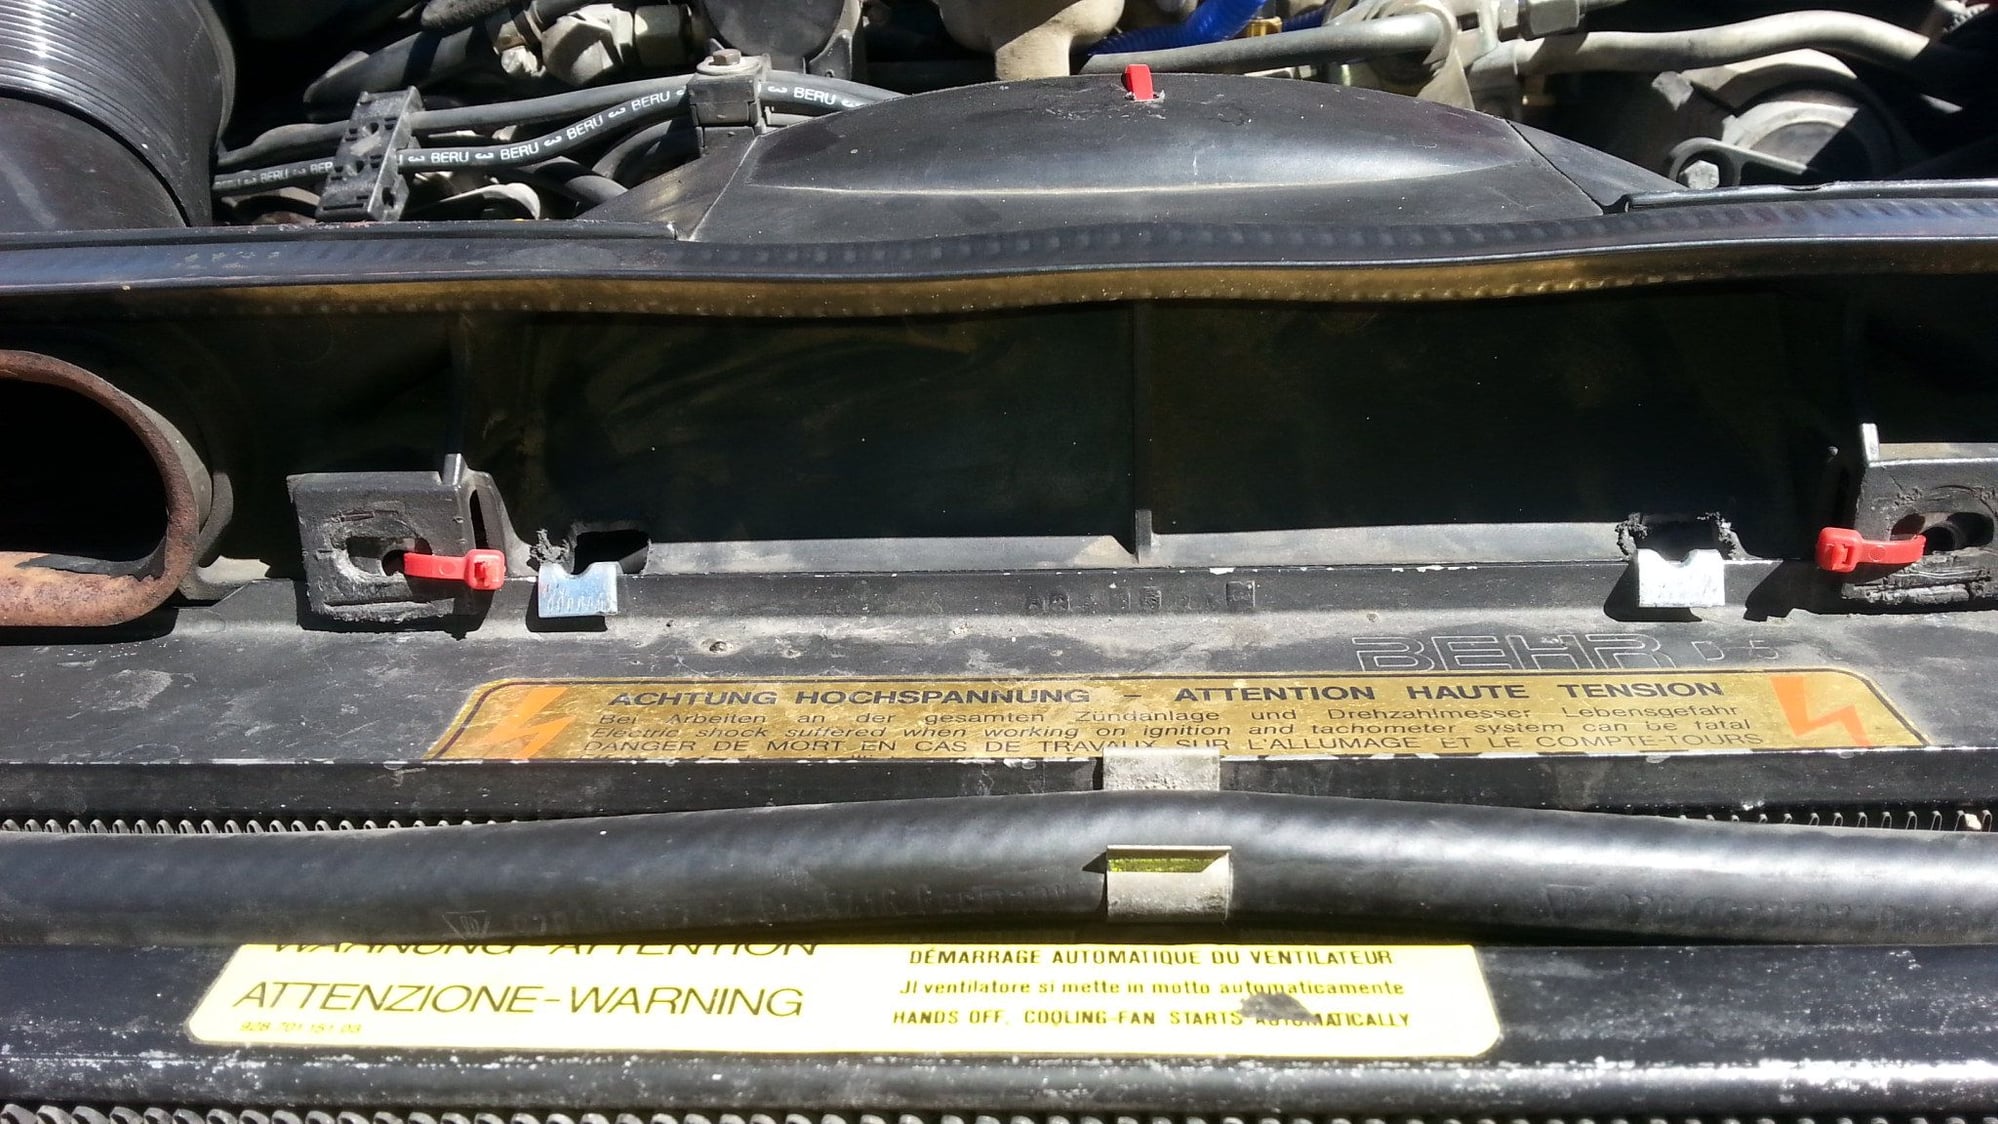
Upper drivers-side fan shroud fit modification
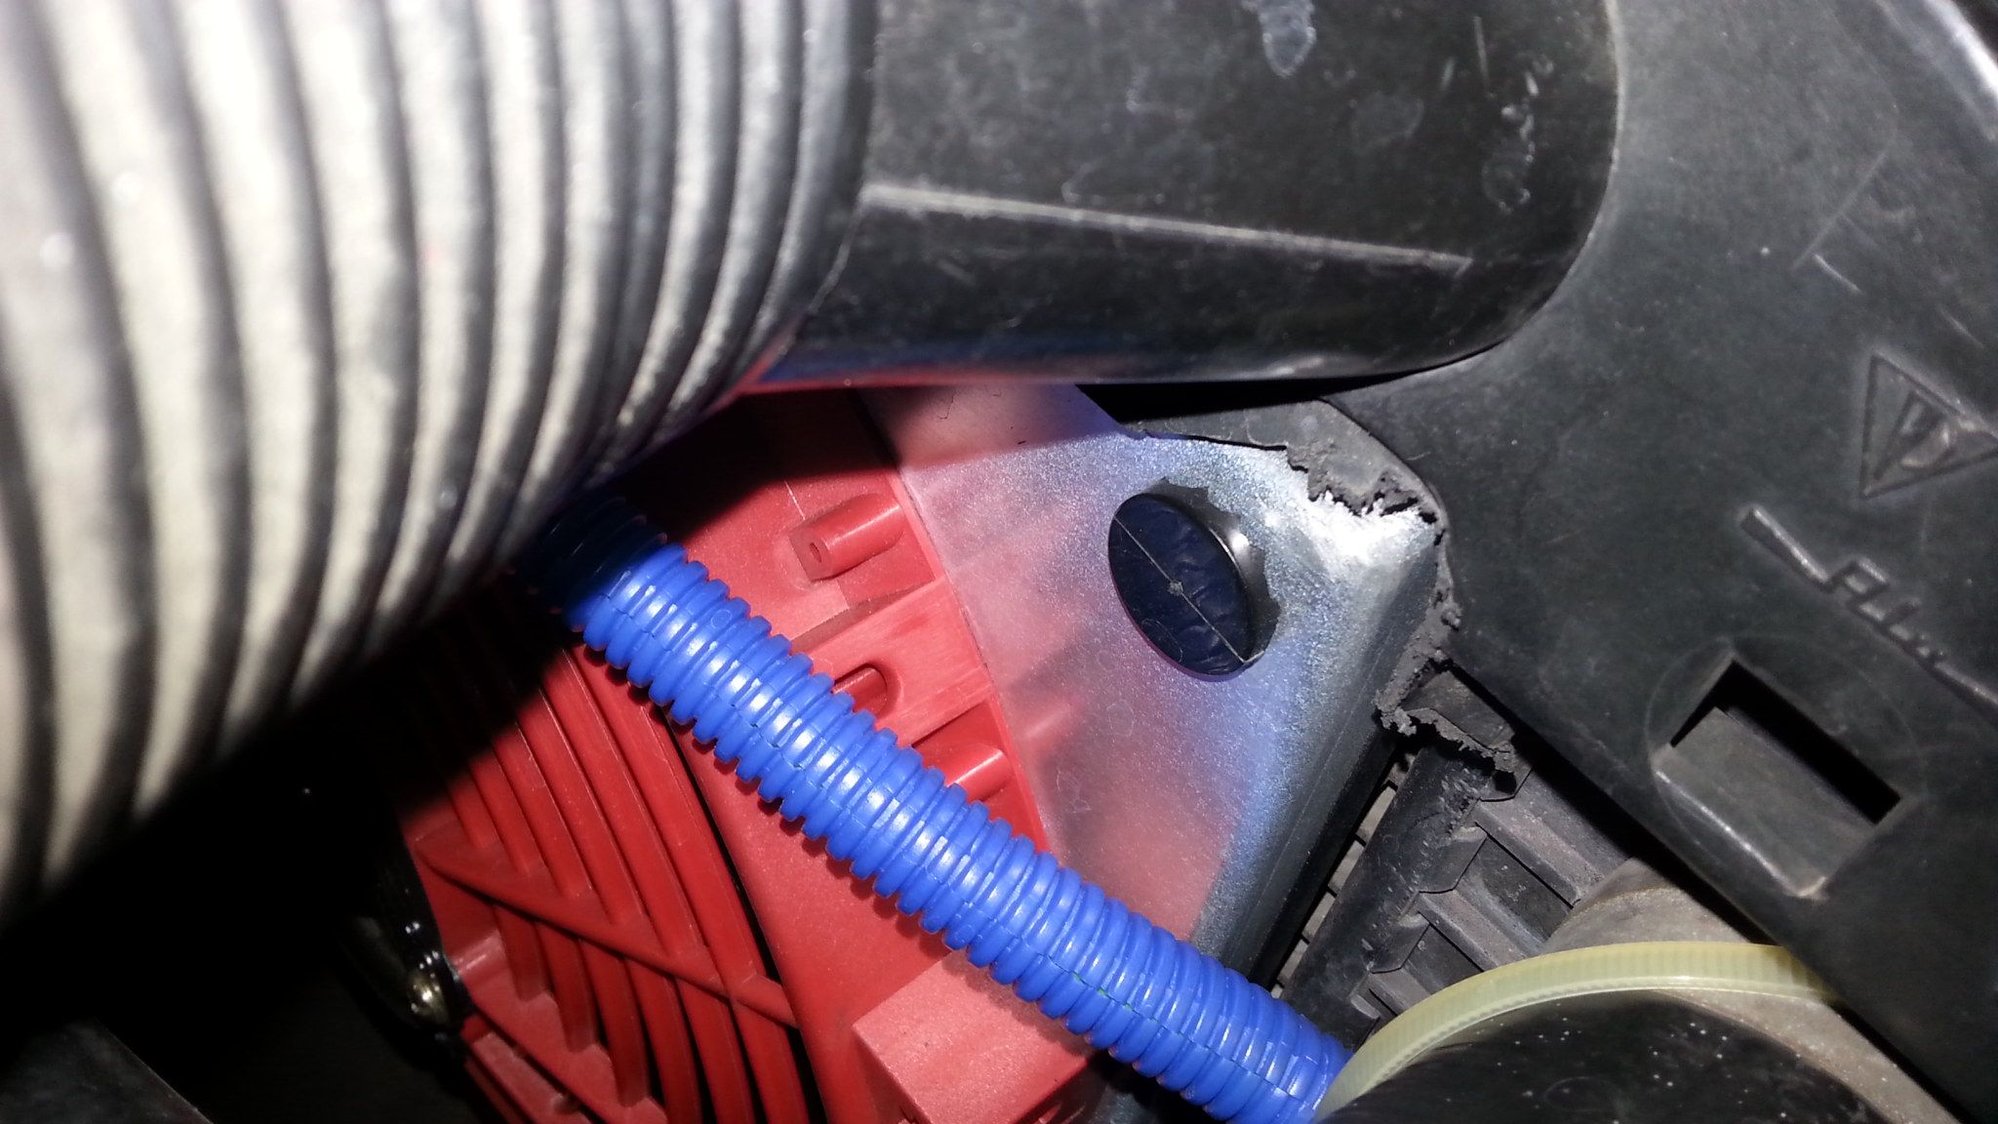
Passenger side upper-fan shroud mod.<br/>Also I had to grind down the bolts where the snorkels attach to the fan shroud itself...otherwise they push the shroud up too high....due to the bolts resting on the top of the aluminum shroud the new fans come mounted in (hope that made some sense)
I made a small hole and zip tied the wiring in a larger loom to keep it out of the way...kind of rides underneath the curvature of the stock fan shroud so it's out of sight also...was cheap and fast..and so far it's been working great and no issues. I soldered my fan leads together and ran one large 12 ga lead over to the stock radiator fan switch lead.
Front of the upper fan shroud...note I'm currently using wire ties to attach to radiator...I still have some grinding to do to either the bolts holding the snorkel fittings in or maybe drill a couple holes in the aluminum fan shroud so the bolds can just fit through....I kind of wished I'd thought about the drilling holes part earlier..I have already ground down the bolts somewhat...but I'm not too terribly bothered by it...haven't needed to unbolt those yet for anything so far...
You may find that the colored corrugated loom doesn't hold up to well over time. But it is providing some organization and protection. Suggest checking the clampage on your intake boots, esp #6, I'd bet there are a couple vac leaks there. The silicone is tough that way, in an already ornery intake arrangement. Especially once a little oil gets in the mix. Also, running too cold is often indication of stuck thermostat. Also, and I hope you'll pardon the observations, is your air filter oriented so that the taller portion faces up? From the tab, looks like it may be inverted.
Kudos for getting the used shroud...I've been thinking about this and weighing that approach v. using a Motorsports offering.
Hope you provide feedback on the bolts back to the manufacturer, they should dimple the shroud in my opinion. Or failing that provide info on clearancing via drilling, as you suggest. Might be good to do an overdrill with a grommet to avoid rattles and provide an additional contact point.
Thanks for the pics and write up, look forward to further results.
Last edited by SMTCapeCod; 03-30-2015 at 11:00 PM.
So is this their "Extreme Cooling" solution? I sent them an inquiry, as their web site just lists the '78-'84 as the available kit, and they said the '85+ should use this Extreme Cooling kit for $299. I'm not sure if that's what you have or not...I was hoping for something that required less fabricating and was more plug-n-play....I'm not that great with the fabricating of stuff lol...
SMT appreciate the heads up on the clamps ...you are so right about the silicone...I took that pic yesterday and didn't even notice that clamp had moved...argh...will probably move back to rubber next time I go in...I want to do Doc's crankcase breathing kit.
Air filter's good...checked it
I'll get a couple good pics and send to the manufacturer on the bolt holes...no reason why they couldn't drill a couple nice sized holes there with some grommets...
Bureau not sure if this is the extreme cooling version or not...I think someone mentioned for Texas heat they recommended their kit with a large single fan.
I have not run the system in Kansas City heat..which can be quite brutal (110 and very humid plus traffic) on really hot summer days. I also haven't implemented my AC relay fix..I'll be using a dual-relay set up...daisy chaining the 2nd relay from activation of the first one...which will kick off the compressor to directly engage the fans...plus I have the new rad from our friends in Cali...which I'm going to put in with new oil cooler hoses...
"We have 2 systems available. The basic daily driver system which is for up to 1984 cars with the low horsepower engines. For an '86 we would recommend an Extreme system with hand built aluminum fan shroud and extreme fans, extreme fan control system, shorter v belt and mounting hardware. Price is $299 with free shipping anywhere in the USA and it takes up to 3 business days to be shipped out as it is hand built to order. "
Maybe I'm reading too much into "extreme fan control" and "mounting hardware" but the way I interpret those terms, you would think you wouldn't have to do as much customization as you did...which is why I'm wondering if they're the same thing? I note that they also said "fans" but I don't know for sure that literally means each kit has more than one, or not. I've asked for more info, pics, etc, so we'll see. It looks like a great setup either way...
That sounds like the one I got....dual fans and short v-belt to run smog pump without including the fan pulley....I paid about $320 with everything so that sounds like the one.
The fans are super quiet...love them..they start up with a nice "whoosh" sound....much nicer than the pusher fan...which probably if you have near the milage I did when I converted..has shot bearings...which you'll realize when you remove it and give it a spin compared to how the new fans feel/sound when you spin those
You'll need a puller to disassemble the clutch fan pulley assembly..its only way to remove the old fan and its works so it may be re-used....there's a dowel in there..can't remember what it's called...but it locks the fan shaft to the pulley...it ain't comin' apart without a puller unless you don't care that it ever goes back together again.
Give yourself several hours....it sounds simple and it is...but remember..the car sets the pace....
Getting close.. Wondering how you guys fish wires from inside to outside the firewall. I see the one rubber boot (TIGHT!) penetrating from behind the CE panel but I can't fish anything through that tight *** elbow in it. Any other spots for me too fish my switched power and A/C switched wire through? Guess I'm used to working on lesser cars with grommets and penetrations all over the place.. Man this thing is sealed up.
FWIW, here is the description of the fan kit they recommend for the S3 cars...
"This would be a large single fan mounted onto a hand built aluminum semi shroud, which will be approx 16x20. The fan will have aluminized coated blades to deflect heat and hold pitch better with high under the hood temps. System is rated at over 3500 CFM. Current draw will be around 15 amps. You can remove your front a/c fan and this system will take the place of both your mechanical and your a/c fan. Installation is straight forward, two top mounting brackets mount to the upper radiator channel and then we give through core stabilizing straps to hold it to the radiator and halt any vibration. As long as your radiator is in good internal condition, it will cool better than factory fan. "
My concerns are if this current draw is OK for our stock alternators (they said somewhere that it's less than the stock A/C fan but I don't know if that's necessarily true) and also, if that cooling is still sufficient on a hot day at idle for both radiator and the A/C system. If both of those answers are yes, then this seems like the ideal setup, and is quite reasonably priced.
I have the single fan set up with aluminum frame and the 928 MS aluminum radiator.
I have had no problems keeping cool in the summer months, in the winter the rad is so efficient that the fan rarely comes on unless I am sitting in traffic for an extended period.
I did install a 180 amp alternator because of the fan and 1200 watt stereo.
Seriously considering this, since I'll be putting in an X-pipe and removing the cats, which means I can remove the air pump, which means I have to at the very least change fan belts so why not change the whole thing....you can never do just oen thing!
Cut the cat out of the y pipe and welded in a SS piece with O2 bung.
Bolted in a cat back SS Borla exhaust and it sounds great. Maybe too throaty for the purists, but I like the sound.
Best way to calibrate the fan potentiometer is to boil some water in a pan, let it sit until the temp is around 185F or whatever temp is good for your year) measured with a IR gun.
Stick the fan bayonet temp probe in the hot water and turn the potentiometer screw on the fan control until the fan comes on.
Before I did this step, the fan would come on too soon as the fan default is way below 185-190F.
Sounds good. Is there any way to mount the FF Dynamics temp probe in the stock radiator temp probe location (the one that turns on the condenser fan, which will now be gone)? I am nervous about creating a new place for a coolant temp probe.

 03-30-2015, 12:22 PM