When you click on links to various merchants on this site and make a purchase, this can result in this site earning a commission. Affiliate programs and affiliations include, but are not limited to, the eBay Partner Network.
nzpaul,
I had one sitting around my desk at home for ages in the hope of measuring it up and getting some printed - can't seem to find it ATM. Would also need the cap that snaps over it to hold it closed. I was going to beef up the unit a bit to help with strenght - just havn't got around to it yet.....
Note that you do need to have H4 lamps with pivoting frmes for this to work - USA sealed beam carriers 7" or DOT H5 8" lamps are rigidly fixed in place and only the sub-frame moves for adjustments (a spring + winder type).
Awesome write up, thankyou
I'm about to attempt this and was wondering about the oil, you used a 20wt oil and said it was a bit thick. I have some 10 and 5 motorbike fork oil and was wondering if this would do?
I was trying to better understand how this whole headlight adjustment system works, this post is awesome !!
Just one question : I see that the initial post is from 2013, does the repair still work today? I see some people were a bit perplex as to the time the repair would last. It would be great if we could have a small return on experience about this.
It would be good to know if there are replacement line alternatives. My lines were so brittle on the 85 euro, that after barely touching them, they would snap instantly. As my pappy always said, is the view worth the climb!!
It would be good to know if there are replacement line alternatives. My lines were so brittle on the 85 euro, that after barely touching them, they would snap instantly. As my pappy always said, is the view worth the climb!!
A suggestion I was given was fish aquarium aerator line. I have no clue if it would work. But it's similar.
I tried to follow this writeup, but didn't have any success. I'm pretty sure that my lines leaked somewhere. I didn't see any drips, but it would not make the acutators move. The piston & actuators worked well, and I had the line full of fluid with no air. So my only conclusion is that it wouldn't hold the pressure.
Replacing the line is on my list, but it's far enough down the list that it likely won't happen any time soon.
I was planning to remove my actuators and figure out a way of locking them in the extended position, nobody fits in the back seats and I never carry a load that's going to change the headlight angle.
I was planning to remove my actuators and figure out a way of locking them in the extended position, nobody fits in the back seats and I never carry a load that's going to change the headlight angle.
There's a factory part for that..
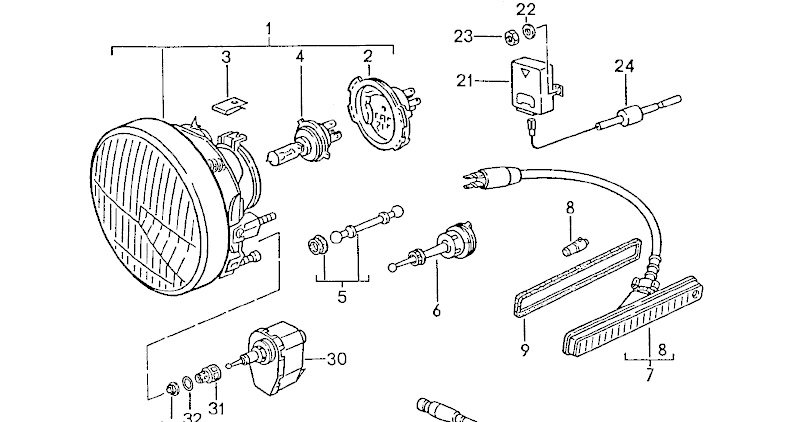
You need two of 928 631 201 02. You then remove the actuator, and the part fits in its place, and attaches at the other end with the ball-cup arrangement like the dumbell on the actuator. I fitted them to my 89 about a decade ago.
You need two of 928 631 201 02. You then remove the actuator, and the part fits in its place, and attaches at the other end with the ball-cup arrangement like the dumbell on the actuator. I fitted them to my 89 about a decade ago.
Pic from PET - its item no. 6
Thanks for this, 100 Euro for the pair so I might look at plan A first, save my money for a water pump 😀
You need two of 928 631 201 02. You then remove the actuator, and the part fits in its place, and attaches at the other end with the ball-cup arrangement like the dumbell on the actuator. I fitted them to my 89 about a decade ago.
Pic from PET - its item no. 6
Indeed, this is an expensive little piece of plastic...


 10-02-2014, 12:32 PM