Repaint 1990 S4
 02-26-2013, 05:12 PM
#16
Intermediate
Thread Starter
Join Date: Jan 2010
Location: Vernon, BC Canada
Posts: 47
Likes: 0
Received 0 Likes
on
0 Posts
Porsche used some kind of anti-sandpaper kryptonite **** in the paint they used on the bumpers. It makes the factory bumper paint tough as nails. A complete strip down on them is a nightmare. I normally agree with Stan on most things paint related, but as far as the bumper covers go (and the rest of the car as well) the important thing is to get rid of ANY paint that was put on after it left the factory. The factory finish overall is of incredibly high quality, and a complete strip down isn't necessary. On my '85 I stripped the front cover completely. On the rear, the cover was a replacement that had been repainted previously. On that, I simply sanded off the "repaint" finish, and then heavily sanded the factory paint that was underneath. You MUST treat any cut through (when the sander breaks all the way through to raw plastic) with adhesion promoter or paint will absolutely not stick to them. Flex additive in the primer and clear is also mandatory IMO. The flex additive argument on paint forums is like the synthetic oil versus conventional oil argument on Rennlist, or cut versus uncut on venues frequented by adolescents and other insecure males. Paint the plastic panels on the lower doors, fenders, etc the same as the bumper covers. I painted my '85 6 years and 70K miles ago. I used flex additive on the bumpers. The rear is still pristine, and there are maybe one or two tiny chips on the front. The hood OTOH has numerous chips. I used the maximum amount of flex additive that Glasurit recommended on the bumper covers. And although it can make color sanding a bitch, I noticed that the bumper covers required minimal color sanding afterward. This is because the clear I used didn't normally call for reducer, but with flex additive, it did require a small amount. So the clear had a lower viscosity from the reducer, plus a longer cure time which allowed the clear to level/flow out better than it normally would. The plastic, lower body trim on your car replaced the anti-chip coating they used on pre-S4 cars. If you want maximum chip protection on those lower panels, you need maximum flex additive IMO. If I were painting my car again, I'd use 5-10% flex additive on the metal surfaces in addition to the max amount on the plastic.
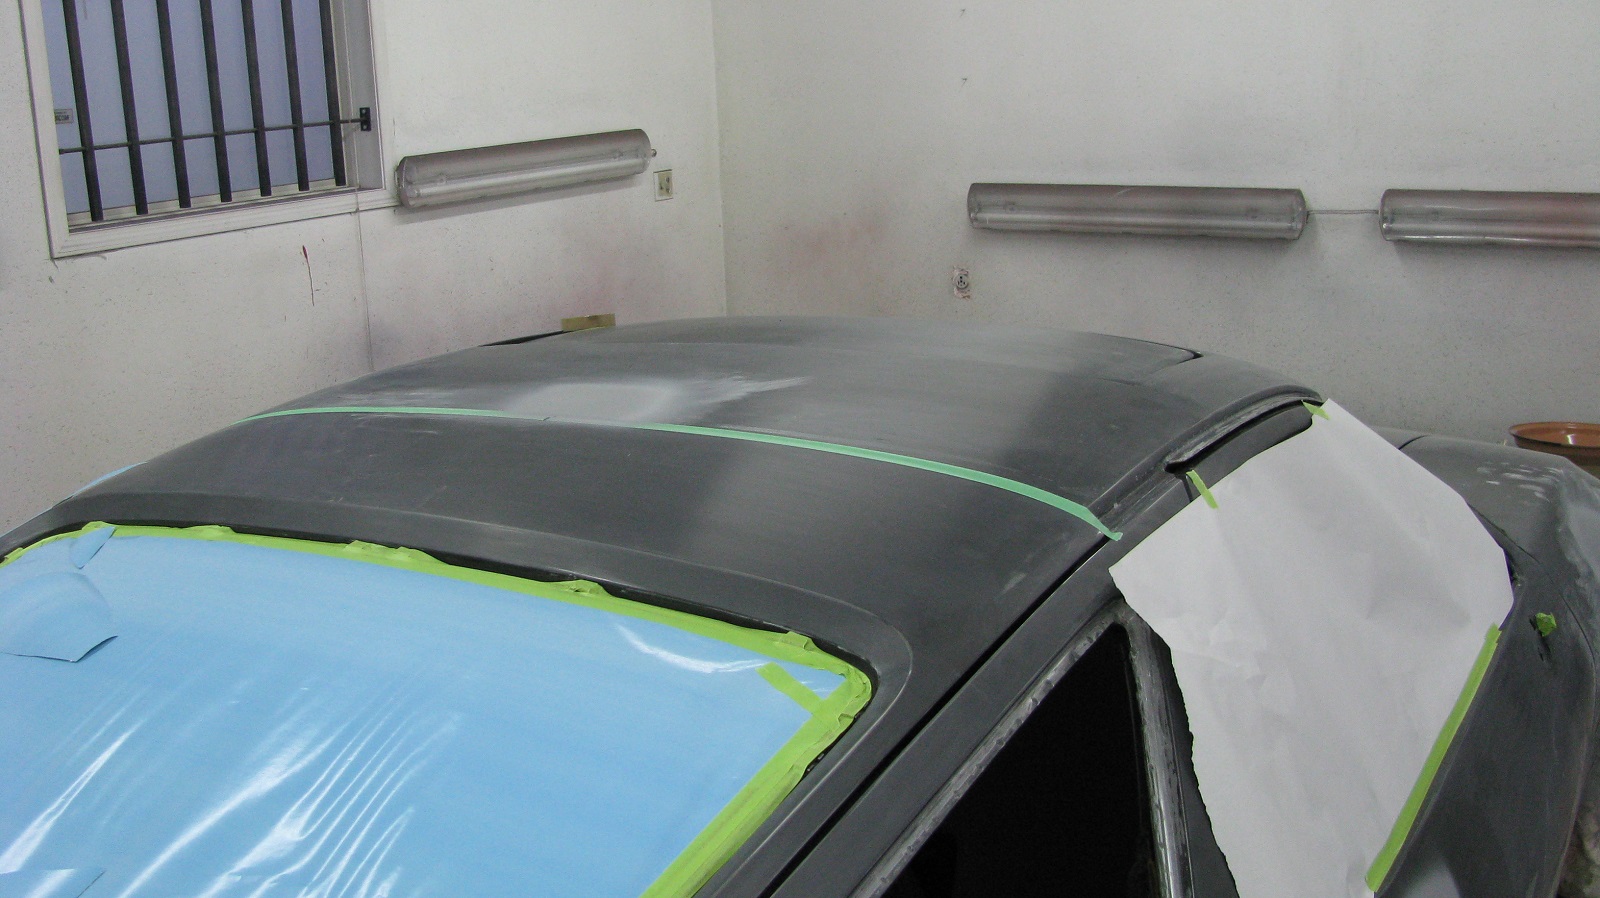
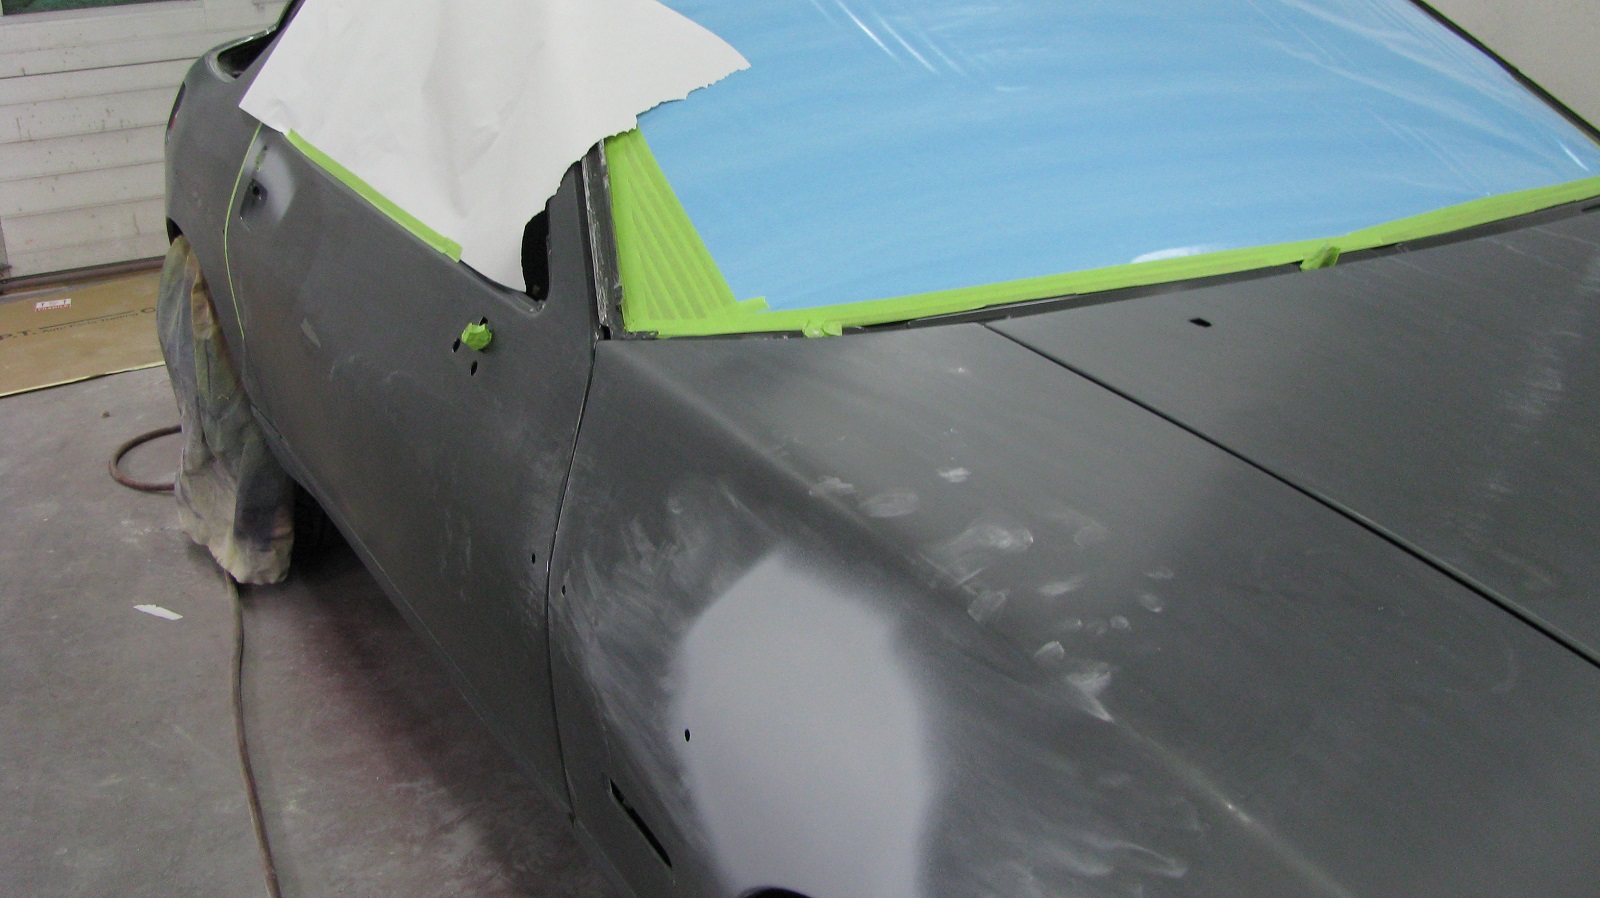
Here's why I mentioned the need to eliminate all traces of paint and primer not applied at the factory.

This is my truck I painted last year. (Yes I used Glasurit 55-line on a '95 Chevy full size with 250K miles.) The seam the tape runs along is where the side of the extended cab meets the roof. What you're seeing is a lot of new paint, then an area that appears to have had some of that new paint chipped off, and in the chipped area you see old well sanded paint. What happened is I got lazy and didn't pay attention. That panel had been repainted previously as part of some body work before I got the truck. That area that's chipped was the one spot on that entire panel where I didn't remove ALL of the non-factory paint. I was taping off the panel so I could start to paint the roof, and I put the tape down and pulled it off to move it. When I pulled it off, it took off the new paint I had applied a few days before. On closer inspection, it also removed the layer of non-factory paint underneath. A few lessons to be learned here.
1. Remove ALL paint not applied by the factory. This is the reason the paint makers all say a suitable substrate is cured, well-sanded, and cleaned FACTORY PAINT. None of them give a green light to apply their product over a prior respray, and this is why. The point of failure wasn't the paint I applied (technically, it was my poor prep). The bond of the Glasurit was rock solid. The weak spot was the bond between the factory finish and that little bit of prior respray material I didn't completely remove.
2. Not all paints are created equal. Some stick better than others.
3. Always inspect the panel thoroughly before applying a new layer of material.
4. Screw ups happen even in the best body shops. There's one difference. The body shop buys paint material and uses it rapidly. The shade tree car painter doesn't. Here's why this is important. Glasurit clear is only sold in one gallon cans. Many of their primers are sold in the same quantity. So if you run out when you've only got one panel to go, guess what? You're buying another gallon of material, most of which will sit on your shelf until the local landfill has an amnesty day, or you do another paint project which may be a few years down the road. So while the cost of repairing that mistake may only be $50 in materials, if you're running low on supplies when the mistake happens, it may actually cost you close to $300 depending on what you use.
A "paint system" is a range of products by a paint manufacturer that are meant to be used together. A system will list applicable products for all stages in the process. You can cheat the system somewhat.
Here's why I mentioned the need to eliminate all traces of paint and primer not applied at the factory.
This is my truck I painted last year. (Yes I used Glasurit 55-line on a '95 Chevy full size with 250K miles.) The seam the tape runs along is where the side of the extended cab meets the roof. What you're seeing is a lot of new paint, then an area that appears to have had some of that new paint chipped off, and in the chipped area you see old well sanded paint. What happened is I got lazy and didn't pay attention. That panel had been repainted previously as part of some body work before I got the truck. That area that's chipped was the one spot on that entire panel where I didn't remove ALL of the non-factory paint. I was taping off the panel so I could start to paint the roof, and I put the tape down and pulled it off to move it. When I pulled it off, it took off the new paint I had applied a few days before. On closer inspection, it also removed the layer of non-factory paint underneath. A few lessons to be learned here.
1. Remove ALL paint not applied by the factory. This is the reason the paint makers all say a suitable substrate is cured, well-sanded, and cleaned FACTORY PAINT. None of them give a green light to apply their product over a prior respray, and this is why. The point of failure wasn't the paint I applied (technically, it was my poor prep). The bond of the Glasurit was rock solid. The weak spot was the bond between the factory finish and that little bit of prior respray material I didn't completely remove.
2. Not all paints are created equal. Some stick better than others.
3. Always inspect the panel thoroughly before applying a new layer of material.
4. Screw ups happen even in the best body shops. There's one difference. The body shop buys paint material and uses it rapidly. The shade tree car painter doesn't. Here's why this is important. Glasurit clear is only sold in one gallon cans. Many of their primers are sold in the same quantity. So if you run out when you've only got one panel to go, guess what? You're buying another gallon of material, most of which will sit on your shelf until the local landfill has an amnesty day, or you do another paint project which may be a few years down the road. So while the cost of repairing that mistake may only be $50 in materials, if you're running low on supplies when the mistake happens, it may actually cost you close to $300 depending on what you use.
A "paint system" is a range of products by a paint manufacturer that are meant to be used together. A system will list applicable products for all stages in the process. You can cheat the system somewhat.
 02-26-2013, 05:16 PM
#17
Intermediate
Thread Starter
Join Date: Jan 2010
Location: Vernon, BC Canada
Posts: 47
Likes: 0
Received 0 Likes
on
0 Posts
We didn't even stock a flex additive at the last shop I worked at using Glasurit. Flex additive is advertised to protect against spider cracking on flimsy plastic parts with prior resprays. I've never known anyone to put it down on body panels. I've certainly never had a BASF paint rep or any other paint rep ever advertise that it protects against rock chips.
In short, I look at flex additive like I do sealer. Good for trying to hide poor prep work. I use neither unless applying sealer over new sheet metal. Mil thickness determines durability. Too much material = rock chips.
I say save your money. If you'd like, I can put you in contact with a Glasurit rep from Alabama. Ray is a good friend and has been using the products since it came over from Germany in the old yellow cans.
02-26-2013, 05:42 PM
#18
Drifting
Gary,
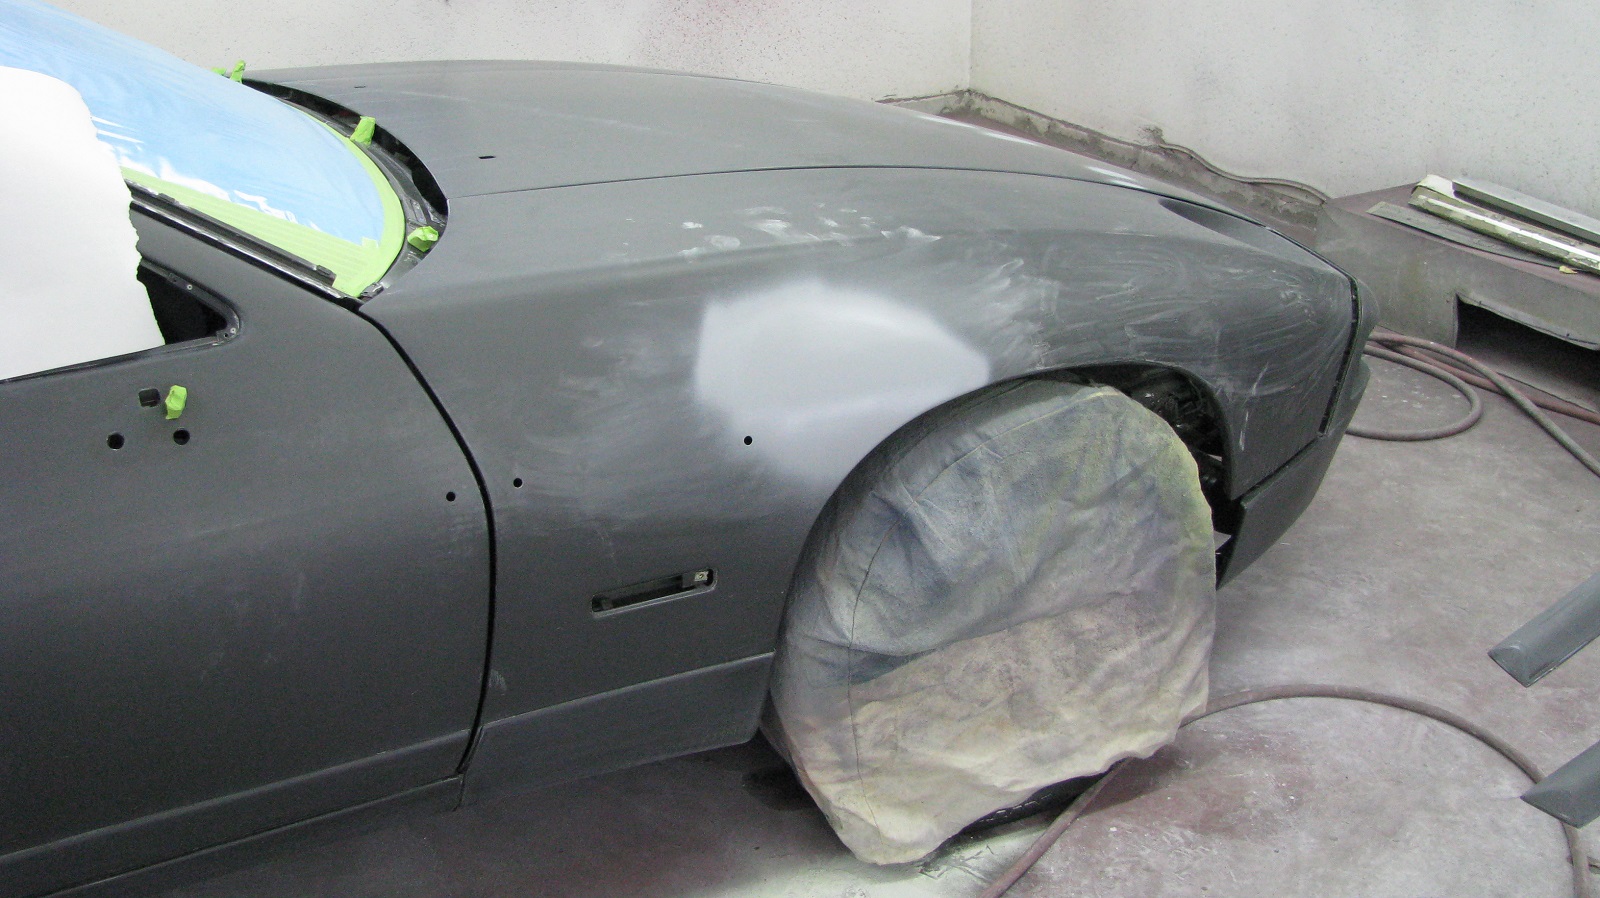
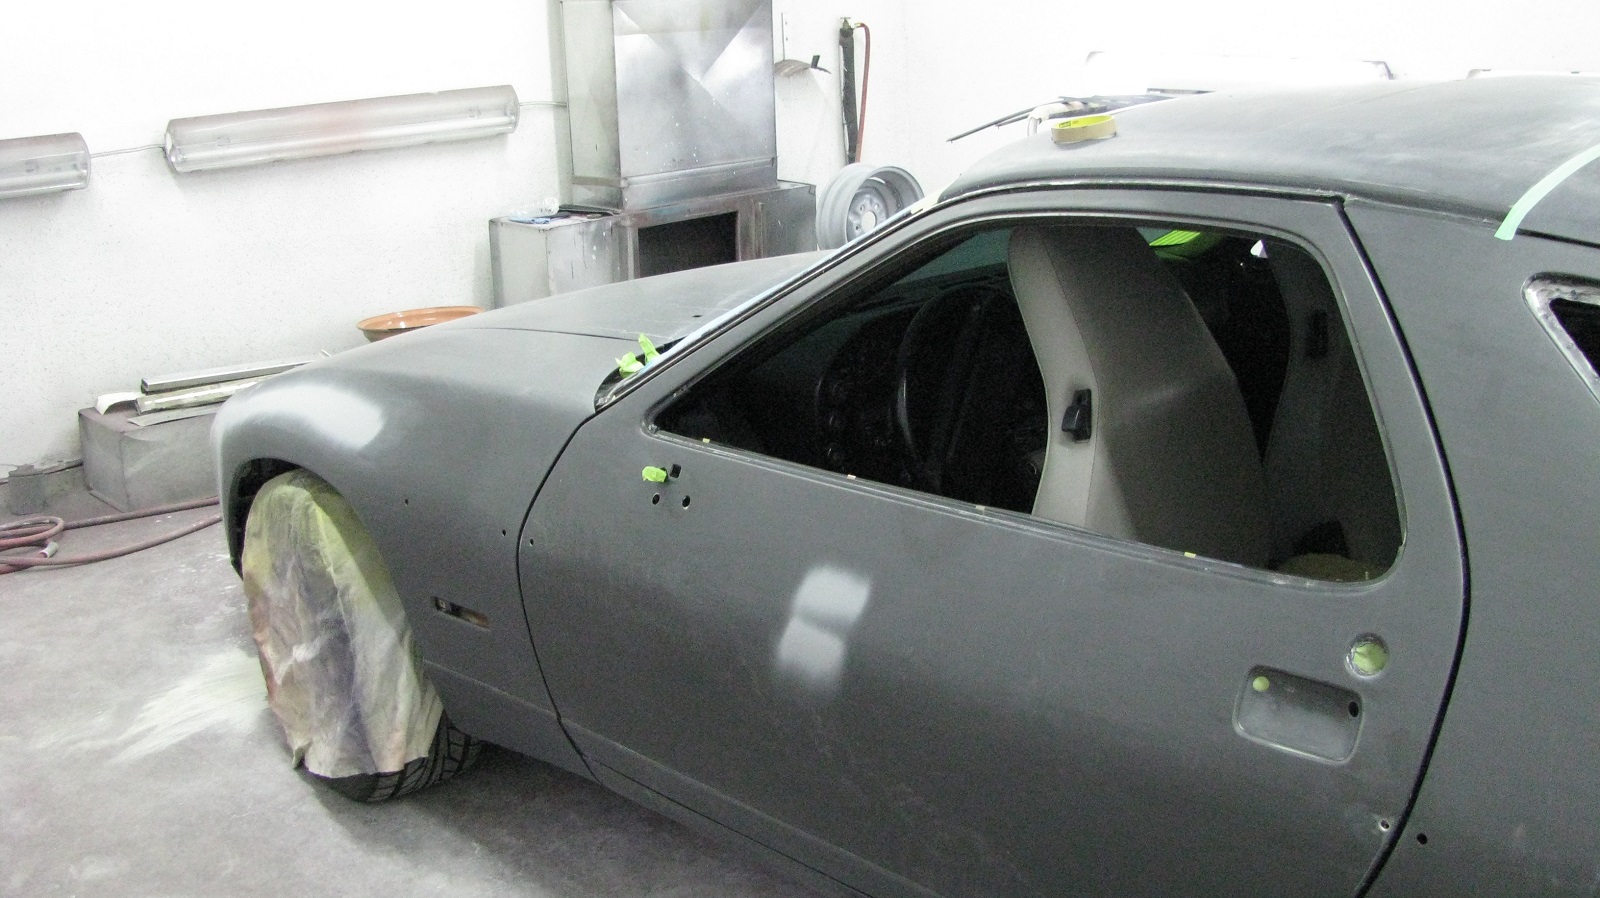
Great project. I might be attempting the same with my 90 S4 also. Would like to see more pictures and what ever else you will be removing before it goes to final paint. Also very interested to know where the new vs old paint lines will be as you are not removing the engine or interior.
Thanks
Great project. I might be attempting the same with my 90 S4 also. Would like to see more pictures and what ever else you will be removing before it goes to final paint. Also very interested to know where the new vs old paint lines will be as you are not removing the engine or interior.
Thanks
02-26-2013, 07:32 PM
#19
Drifting
We didn't even stock a flex additive at the last shop I worked at using Glasurit. Flex additive is advertised to protect against spider cracking on flimsy plastic parts with prior resprays. I've never known anyone to put it down on body panels. I've certainly never had a BASF paint rep or any other paint rep ever advertise that it protects against rock chips.
In short, I look at flex additive like I do sealer. Good for trying to hide poor prep work. I use neither unless applying sealer over new sheet metal. Mil thickness determines durability. Too much material = rock chips.
I say save your money. If you'd like, I can put you in contact with a Glasurit rep from Alabama. Ray is a good friend and has been using the products since it came over from Germany in the old yellow cans.
In short, I look at flex additive like I do sealer. Good for trying to hide poor prep work. I use neither unless applying sealer over new sheet metal. Mil thickness determines durability. Too much material = rock chips.
I say save your money. If you'd like, I can put you in contact with a Glasurit rep from Alabama. Ray is a good friend and has been using the products since it came over from Germany in the old yellow cans.
The factory base is fine in your case to paint over on your S4, it is in good overall condition minus the abuse by the PO.
I personally hate metallics and prefer non.
I painted my slate blue '83 last Summer using Sikkens / Lesanol paint system. It's pretty but i have plans to repaint..
as a side note for thought;
Metallics are pretty an all but if they are damaged they can be hard to repair: match/blend. This is due to a lot of factors i will not bore everyone with
I plan to repaint my slate blue 928 but will order the factory paint code without any metallic flake added and do a single stage DuPont Imron instead, for a factory look (no clear) that will be tough as nails.
Imron is very durable if you plan to do track events. Paint it, wait 3 days and color sand as needed and compound/polish.
Last edited by The Fixer; 02-26-2013 at 07:49 PM.
02-26-2013, 07:57 PM
#20
Intermediate
Thread Starter
Join Date: Jan 2010
Location: Vernon, BC Canada
Posts: 47
Likes: 0
Received 0 Likes
on
0 Posts
Gary,
Great project. I might be attempting the same with my 90 S4 also. Would like to see more pictures and what ever else you will be removing before it goes to final paint. Also very interested to know where the new vs old paint lines will be as you are not removing the engine or interior.
Thanks
Great project. I might be attempting the same with my 90 S4 also. Would like to see more pictures and what ever else you will be removing before it goes to final paint. Also very interested to know where the new vs old paint lines will be as you are not removing the engine or interior.
Thanks
02-26-2013, 08:45 PM
#21
Drifting
Know i'm just some guy on the web but,
If you have the choice to repaint and the choice to go metallic or not
Remember when you get a stone chip (and eventually u will) a non metallic paint job can be touched in with a small brush, wait a week, block sanded and compounded/polished by hand in the general area for a perfect and easy repair.
Metallics can be touched up w a small brush but the metallic pattern will never match and it will be seen or have to be blended professionally.
Something to consider..
02-27-2013, 12:42 AM
#23
Drifting
We didn't even stock a flex additive at the last shop I worked at using Glasurit. Flex additive is advertised to protect against spider cracking on flimsy plastic parts with prior resprays. I've never known anyone to put it down on body panels. I've certainly never had a BASF paint rep or any other paint rep ever advertise that it protects against rock chips.
In short, I look at flex additive like I do sealer. Good for trying to hide poor prep work. I use neither unless applying sealer over new sheet metal. Mil thickness determines durability. Too much material = rock chips.
I say save your money. If you'd like, I can put you in contact with a Glasurit rep from Alabama. Ray is a good friend and has been using the products since it came over from Germany in the old yellow cans.
In short, I look at flex additive like I do sealer. Good for trying to hide poor prep work. I use neither unless applying sealer over new sheet metal. Mil thickness determines durability. Too much material = rock chips.
I say save your money. If you'd like, I can put you in contact with a Glasurit rep from Alabama. Ray is a good friend and has been using the products since it came over from Germany in the old yellow cans.
Glasurit 522-111 isn't advertised to protect against spider cracking on flimsy plastic parts with prior resprays. Glasurit doesn't specify any product for use over materials that were RE-painted previously. They sometimes refer to "well cured old paintwork," but that's kind of vague if you think about it. You can generally paint over factory paint with confidence and proper prep. Bubba's Bait and Bodywork is a different story. That little f*ckup i posted previously is what happens when you deal with old resprays of unknown origin.
As for the flex additive, I went to the Glasurit site and started digging. On the 928, the bumper covers, headlight buckets, and the lower door/fender trim on S4+ are constructed of polyurethane(PU) according to the WSM. PU is a flexible plastic. Glasurit requires the use of flex additive in all primers, sealers, and clears that are deemed suitable for use on PU parts. It doesn't surprise me to hear that the sales reps aren't suggesting it, but the fact remains, they're salesmen. I'm going to take the word of the chemical engineers over the sales reps any day of the week.
As for flex additive not being advertised as protection against rock chips, you are quite correct. It isn't. The reason it prevents chips is because it turns hard materials into springy, rubbery materials, and they stay springy and rubbery. I've already tested the internet theory that flex additive disappears over time. It doesn't. I ran that test for well over a year. If I ever get the time and motivation, I'll test my theory on a spare hood and fender I've got.
02-27-2013, 01:30 AM
#24
Drifting
Remember "anti fish eye" additive, i don't know anyone using that anymore either. Like the siphon spray gun.
Most are getting away from additives into their paints because the paint doesn't need it. But to each their own way, no one is right or wrong it's guess work.
I do know i can flex my rear fascia way in and out with no problem though.
So nobody out there on RL is sick of or bored with metallic paints?
Thought someone would have an opinion on that.
I can't wait to blast off my new metallic slate blue and put down an old school single stage plain old slate blue/grey paint job.
My friend has an Audi in an old fashion grey, no '80s look metallic,
it has a very 1960s Porsche look, simple and beautiful.
02-27-2013, 04:19 AM
#25
Rennlist Member
Remember "anti fish eye" additive, i don't know anyone using that anymore either. Like the siphon spray gun.
Most are getting away from additives into their paints because the paint doesn't need it. But to each their own way, no one is right or wrong it's guess work.
I do know i can flex my rear fascia way in and out with no problem though.
Most are getting away from additives into their paints because the paint doesn't need it. But to each their own way, no one is right or wrong it's guess work.
I do know i can flex my rear fascia way in and out with no problem though.
I've shot more than a thousand bumper covers with Glasurit paint products. Never repainted not even one for spider cracking, peeling, etc.
My clear gets hardener and reducer, where applicable. Nothing more. Nothing less.
02-27-2013, 10:52 AM
#27
Drifting
If i may, to remove bottom door glass trim
take your time if it hasn't been off ever, it will really hold.
Get it moving upward slowly. Take corner mold out and mark the leading location of the bottom trim. there is a gap of around 3/16". I removed the top trim piece first i believe then the bottom. It is important to locate the leading edge location of the trim to door so the seam btwn the two is tight.
From the outside of the door i used a small wooded block (and hammer) that fit in my hand easily (3/4" x 3" in section) with a 45 degree cut along it's section but leaveing a 3/16" flat area to be the point of contact with your door window trim. (hope you understand)
This way the wood doesn't just go up under the trim and wedge itself.
You will probably also need the inner door panel off as to lever the trim up from that side with out damaging the top of the upholstered panel.
I found removing this trim item to be the most challenging part of taking the whole car apart. Mine were really on there. I made the tolerance less tight knowing i may remove them again. To put em back is again wacking them carefully with wooden block slowly seating them back and forth along the leangth. This is another stressful time for me because i had new paint.
In my opinion the 928 was designed with repairs in mind (to be easier/cheaper) and subsequently is very easy to take apart and re paint. (overall)
Painting my '86 911 was a nightmare of fasteners, the front bumper assembly alone will have you pulling hair out. Another example of how the 928 is superior to the 911 at least in my world. Off to work now speaking of my world. Good luck and PM me if you have problems
Matt
Last edited by The Fixer; 02-27-2013 at 05:00 PM. Reason: to be clearer
03-06-2013, 11:05 PM
#28
Intermediate
Thread Starter
Join Date: Jan 2010
Location: Vernon, BC Canada
Posts: 47
Likes: 0
Received 0 Likes
on
0 Posts
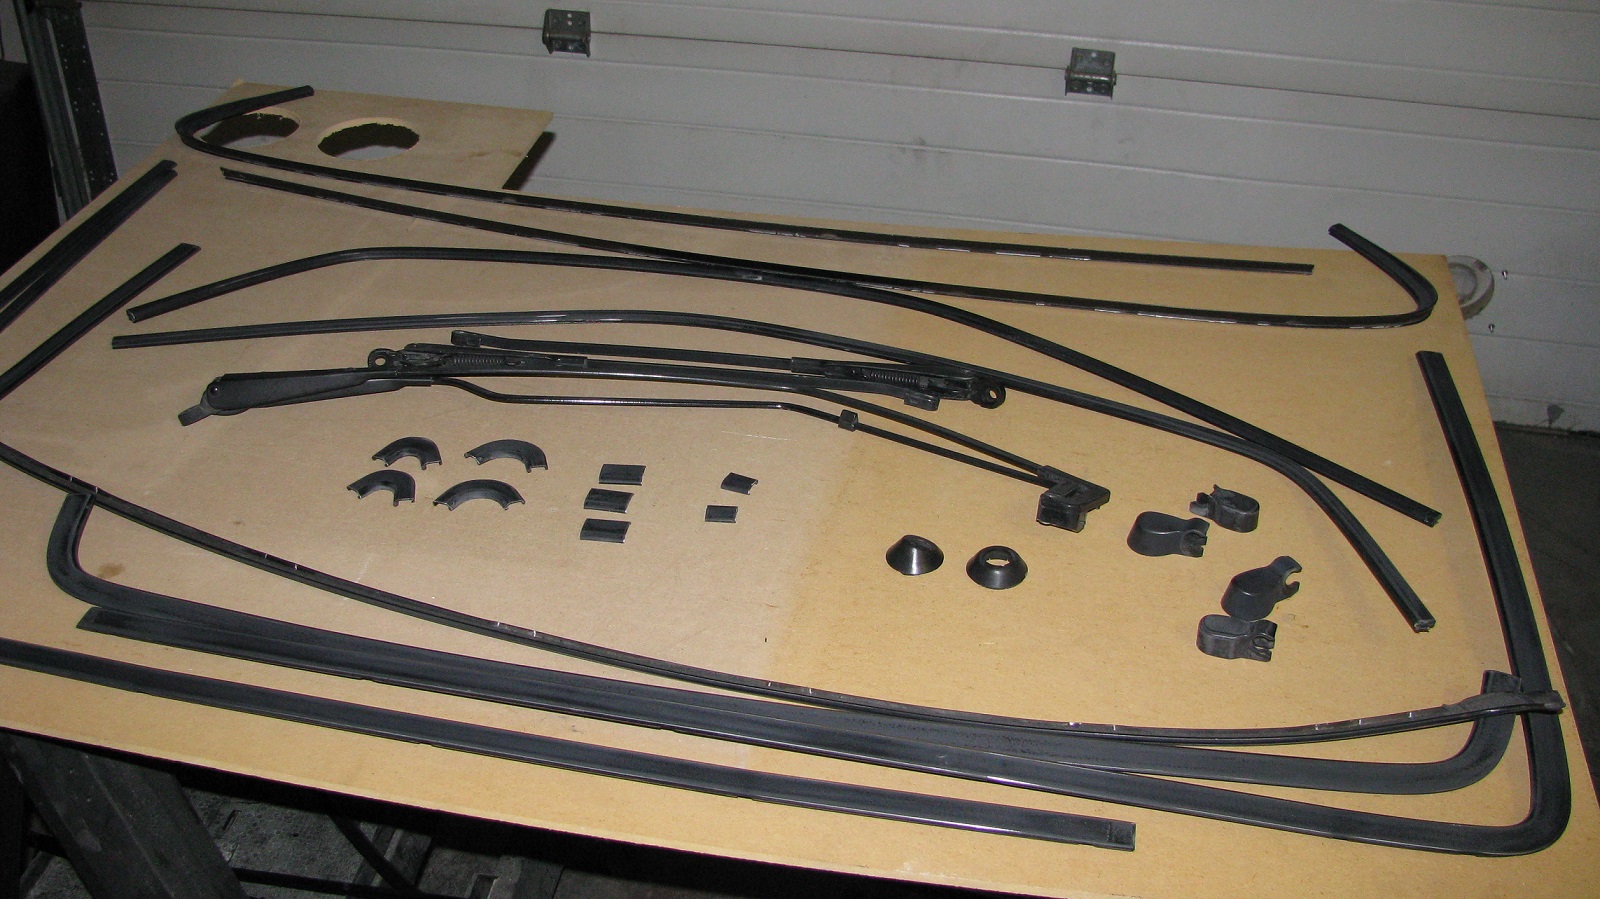
As to the trim removal, further to what TheFixer contributed, I would just add that the trim on the hatch window and at the top of the windshield attach via clips mounted to the body. (There are pics earlier in this post showing the blue plastic trim tools I used to remove those, and you should see the approximate angle they should come off at.)
The door trim pieces (and the vertical trim for the windshield) are friction fit, with the slot in the trim. Mine were glued as well, so the trick is to go slow, and let the glue "break free" as you move along. I started at the seam at the back of the door, removing the top trim piece first.
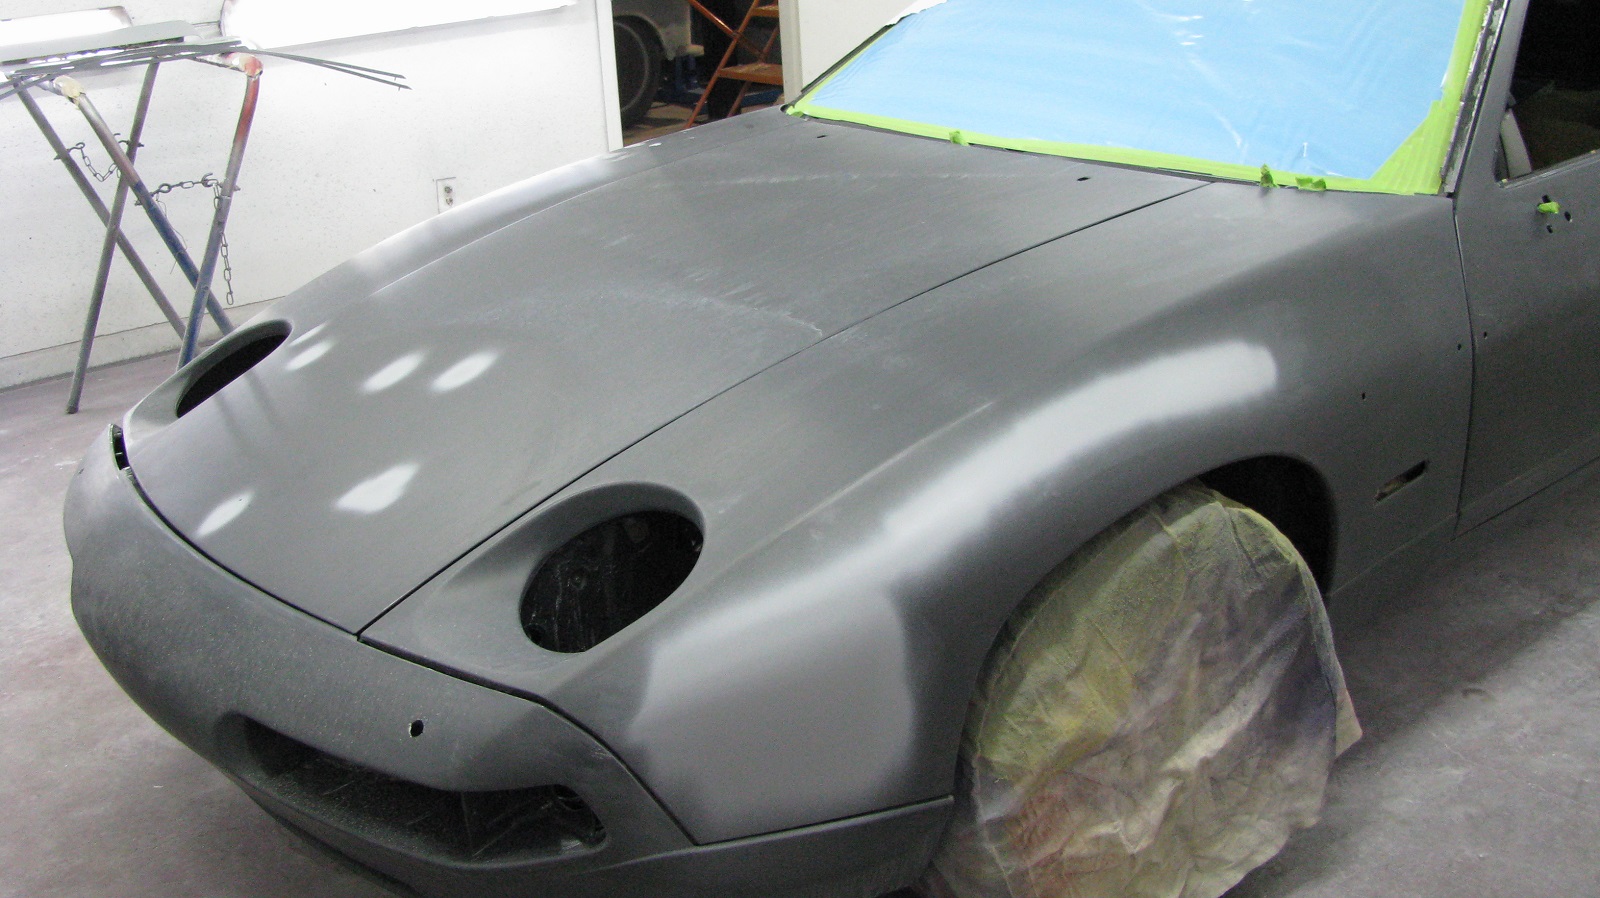
Here is a pic of all the trim and bits to be painted:
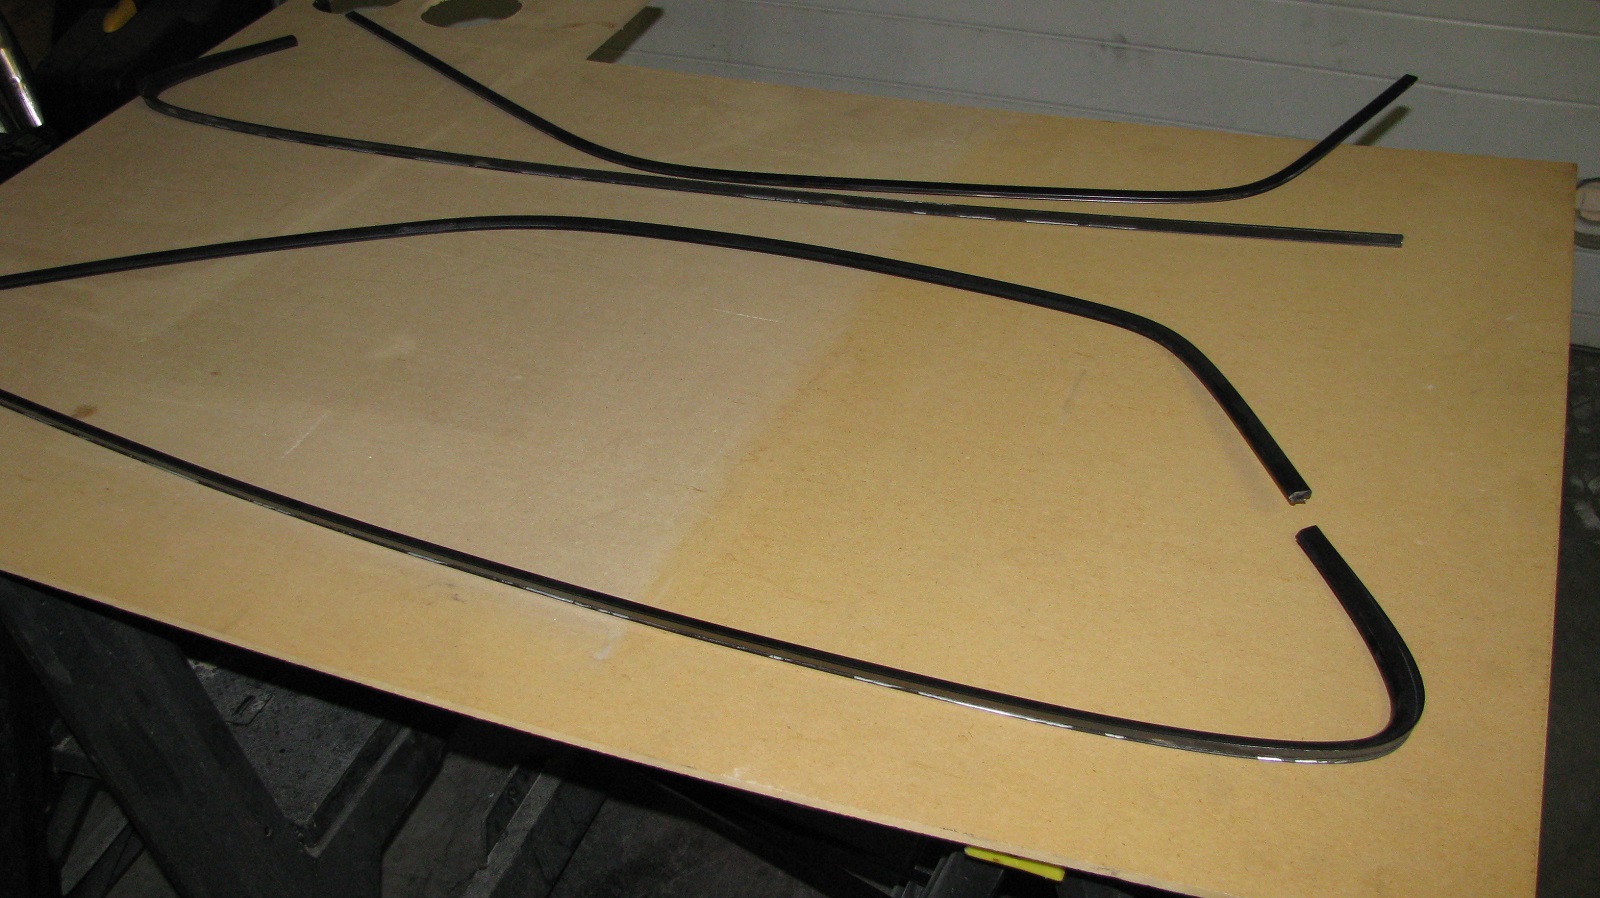
Here's the driver's side window trim removed:
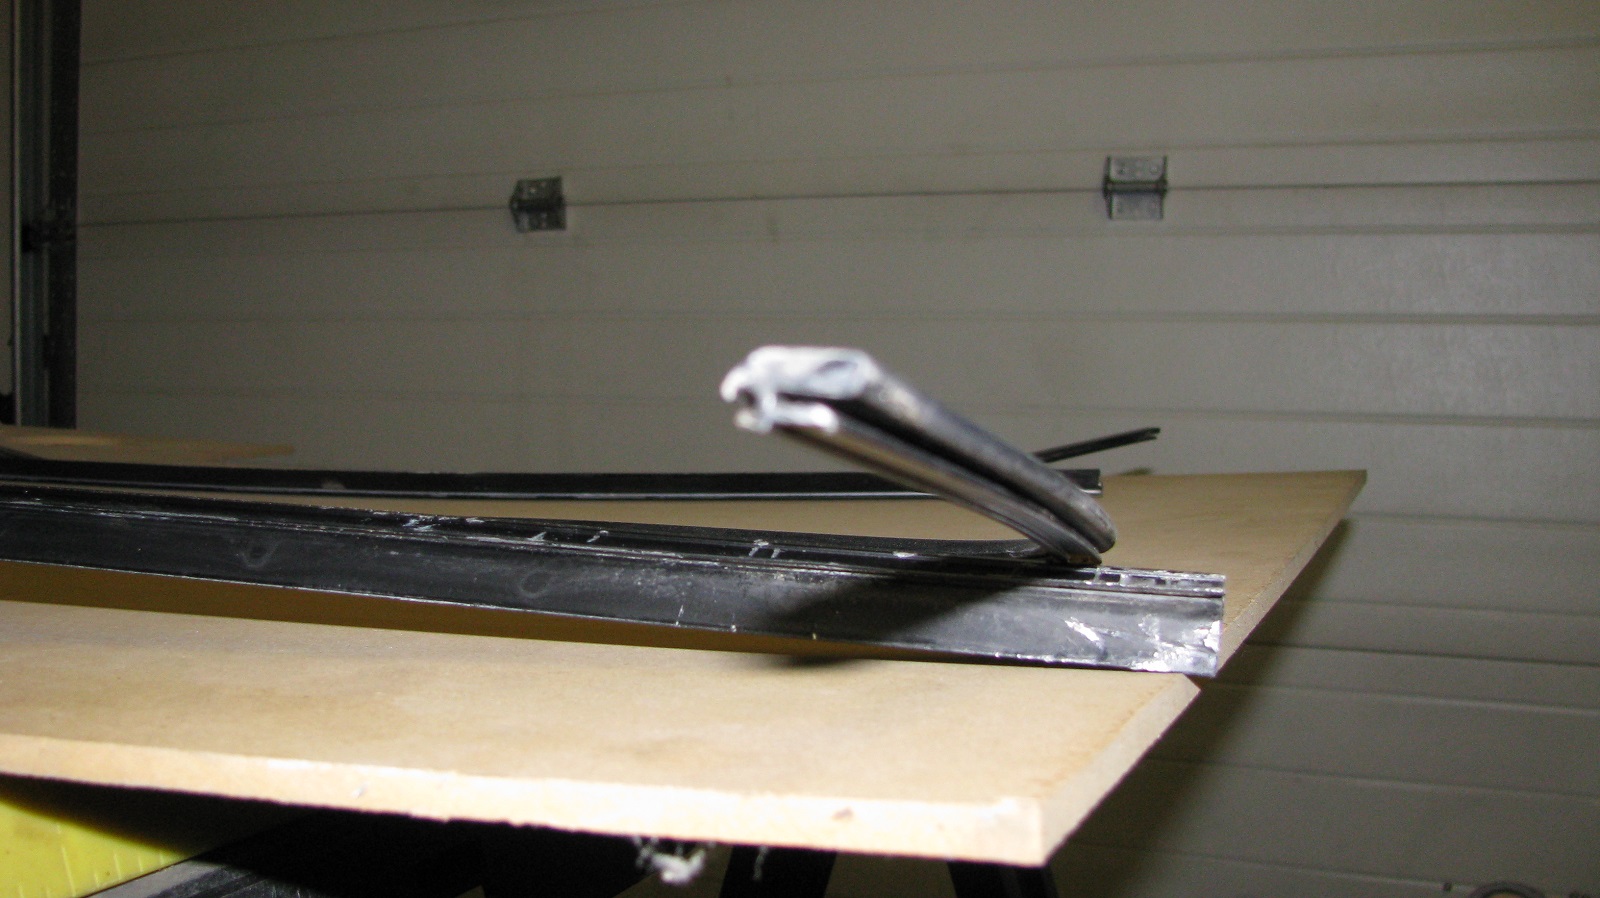
A profile of the horizontal window trim:
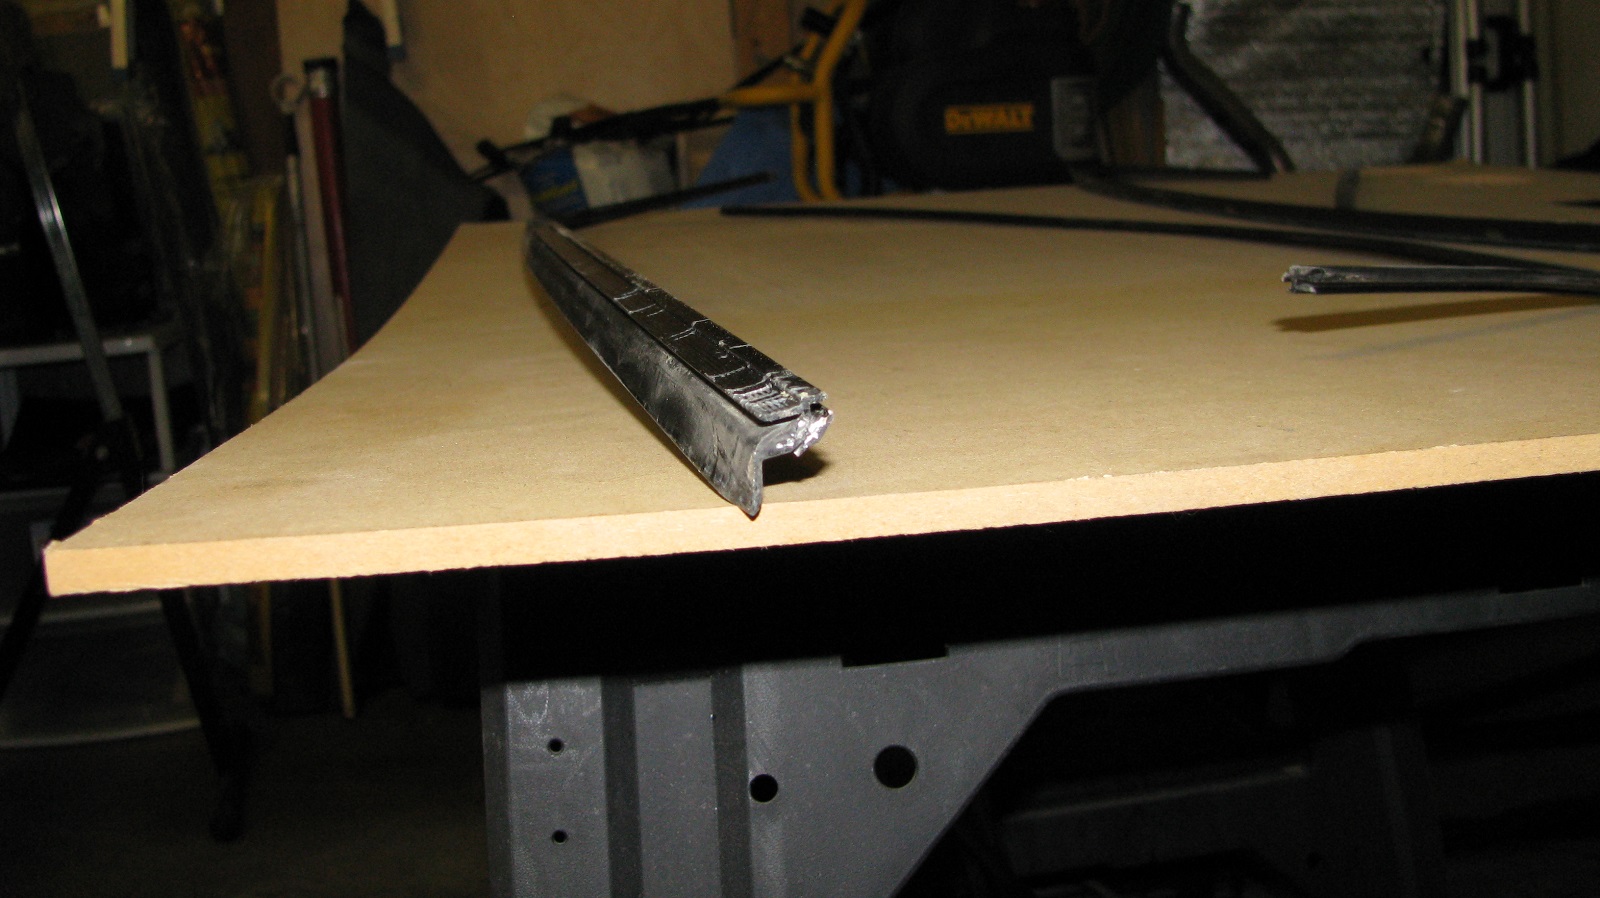
And lastly, the upper window trim profile:
Hope that helps.