

Introduction & questions....
 07-31-2012, 04:01 PM
#16
Rennlist Member
Thread Starter
Yes it is there: also on the right hand side. Thanks....!
So basically there is no need to reinstall it? As my car has no 'lambdasonde' and I know that the air mixture was not to specs when tested 10 years ago, would it be wise to reinstall it anyway?
 07-31-2012, 04:02 PM
#17
Three Wheelin'
He Smitje
Ziet er goed uit maar even rustig aan beginnen.
I think your best plan will be to tackle one job/project at the time I don't think you need to remove the tank (it's plastic) just remove the inside tank fuel pump or screen (since yrs is 87) and clean out the bottom of the tank from that opening.
Lots of info here on RL for each project to studie (bezint eer gij begint) have you talked with Theo Jenkins
http://jenniskens.livedsl.nl/
he can give you some goed advice before you get started.
I may be in Heemstede to visit later this year en will check-up on you.
MVG Herman
Although I've posted 1 thread before (no replies at all, must have been a sign... ), I consider this to be my formal introduction to the forum.
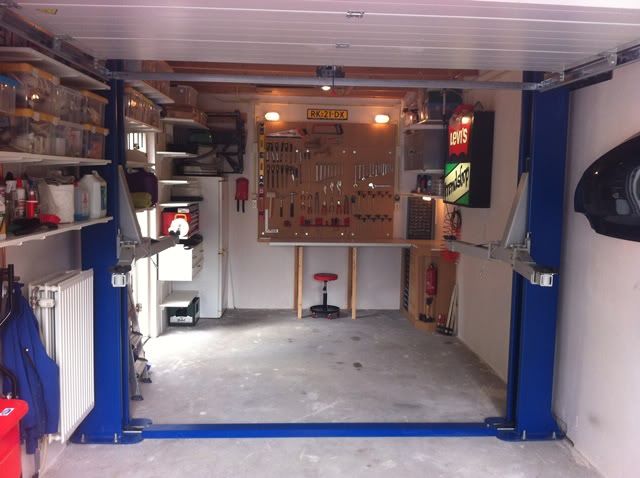
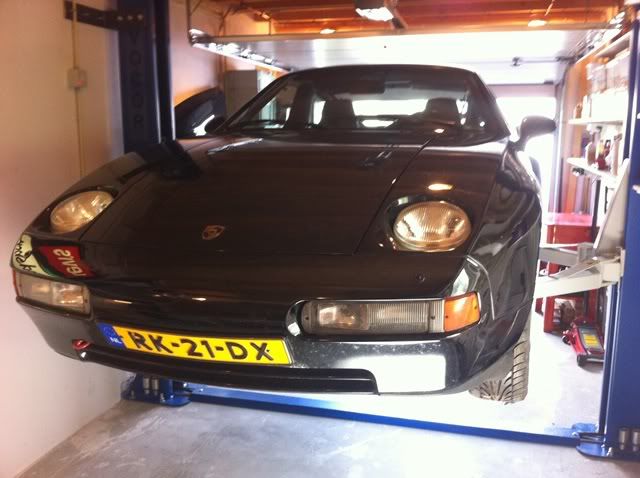
I have owned a '87 S4 for over 12 years now. She's been sitting idle in the garage for over 8 years and I've just lifted her of the ground to start bringing her back to life.
Here's a few pictures:
My empty garage waiting for the shark to enter...:
First time on the lift:
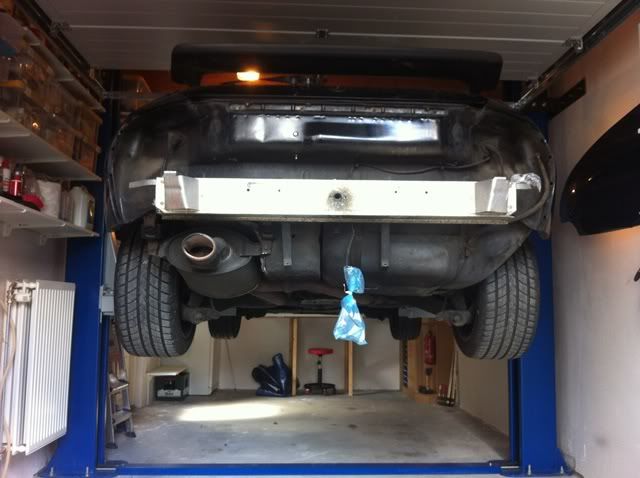
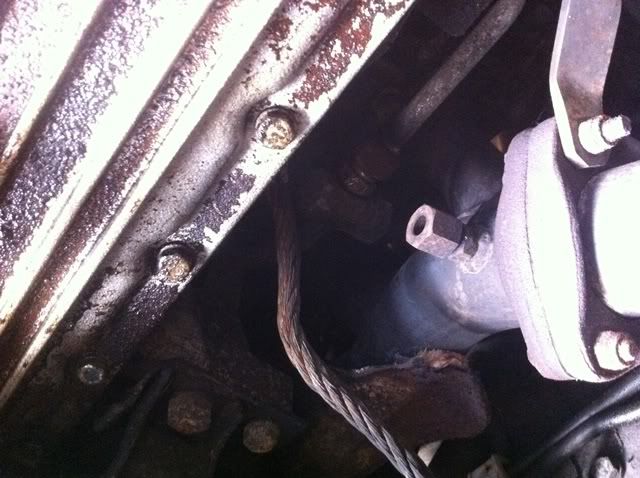
A very 'oily and greasy' underside...
...and after I removed the bellypan this piece of tubing fell on the floor:
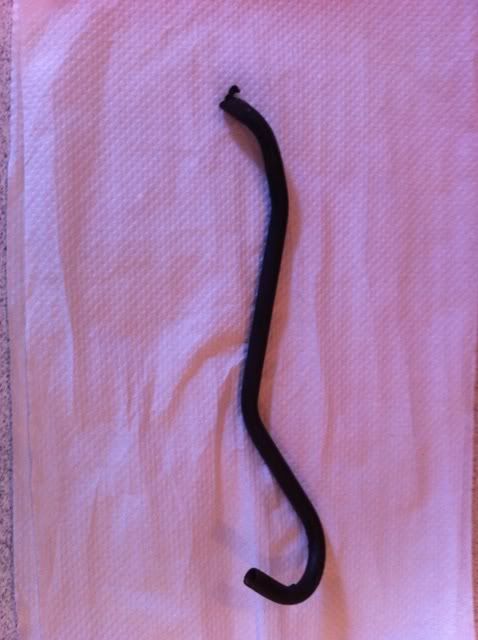
Does anyone have any idea where this may have come from? After checking PET I noticed this socket on the exhaust manifold where a tube should be, but there is none.
Strange thing is that this tube doesn't look anything like the tube that is drawn in PET:
Anyway, my plan for the project is as follows:
1. Remove the gas tank and give it a good clean-up: the rubber grommet behing the fuel intake was completely dried up and fell in small pieces into the gas tank....
2. Remove the rear axle and overhaul most of it (including the brake callipers and installing new shocks)
3. Take out the Gearbox & Torque Converter for revision (there was a persistent oil leak near the Torque Converter before I put her 'to rest' 8 years ago...).
4. Take out the Torque Tube and replace the bearings with Constantine's bearings plus the Superclamp...!
5. Replace the Motor Mounts, Steering Rack and front shocks
6. Replace (the rubbers on) the front A-Arms and lower Swing Arms.
7. Do the Engine Intake as described by Dwayne (soooooo impressive...!)
I am NOT a mechanic but very enthousiastic and luckily my dad is willing to help me out. Nonetheless, any advice from you all on these steps would be appreciated a lot...!!!!
Is it wise to start at the back and move forwards? Is this the correct order? Any 'pitfalls' I should consider?
I will do my best to post pictures while I go along.....
), I consider this to be my formal introduction to the forum.I have owned a '87 S4 for over 12 years now. She's been sitting idle in the garage for over 8 years and I've just lifted her of the ground to start bringing her back to life.
Here's a few pictures:
My empty garage waiting for the shark to enter...:
First time on the lift:
A very 'oily and greasy' underside...
...and after I removed the bellypan this piece of tubing fell on the floor:
Does anyone have any idea where this may have come from? After checking PET I noticed this socket on the exhaust manifold where a tube should be, but there is none.
Strange thing is that this tube doesn't look anything like the tube that is drawn in PET:
Anyway, my plan for the project is as follows:
1. Remove the gas tank and give it a good clean-up: the rubber grommet behing the fuel intake was completely dried up and fell in small pieces into the gas tank....
2. Remove the rear axle and overhaul most of it (including the brake callipers and installing new shocks)
3. Take out the Gearbox & Torque Converter for revision (there was a persistent oil leak near the Torque Converter before I put her 'to rest' 8 years ago...).
4. Take out the Torque Tube and replace the bearings with Constantine's bearings plus the Superclamp...!
5. Replace the Motor Mounts, Steering Rack and front shocks
6. Replace (the rubbers on) the front A-Arms and lower Swing Arms.
7. Do the Engine Intake as described by Dwayne (soooooo impressive...!)
I am NOT a mechanic but very enthousiastic and luckily my dad is willing to help me out. Nonetheless, any advice from you all on these steps would be appreciated a lot...!!!!
Is it wise to start at the back and move forwards? Is this the correct order? Any 'pitfalls' I should consider?
I will do my best to post pictures while I go along.....
07-31-2012, 04:08 PM
#18
Rennlist Member
Thread Starter
He Smitje
Ziet er goed uit maar even rustig aan beginnen.
I think your best plan will be to tackle one job/project at the time I don't think you need to remove the tank (it's plastic) just remove the inside tank fuel pump or screen (since yrs is 87) and clean out the bottom of the tank from that opening.
Lots of info here on RL for each project to studie (bezint eer gij begint) have you talked with Theo Jenkins
http://jenniskens.livedsl.nl/
he can give you some goed advice before you get started.
I may be in Heemstede to visit later this year en will check-up on you.
MVG Herman
Ziet er goed uit maar even rustig aan beginnen.
I think your best plan will be to tackle one job/project at the time I don't think you need to remove the tank (it's plastic) just remove the inside tank fuel pump or screen (since yrs is 87) and clean out the bottom of the tank from that opening.
Lots of info here on RL for each project to studie (bezint eer gij begint) have you talked with Theo Jenkins
http://jenniskens.livedsl.nl/
he can give you some goed advice before you get started.
I may be in Heemstede to visit later this year en will check-up on you.
MVG Herman
Bedankt! Yes I've been in contact with Theo, but only regarding my ECU: my car seems to have a very early version (that was even new to him...) and he updated the chip. I will contact him on the gas tank, might be a time saver...!!
Would be nice to hear from you when you are in Heemstede....
Hartelijke groeten uit regenachtig Nederland.....
07-31-2012, 04:46 PM
#20
Rennlist Member
Thread Starter
Maybe I should put this question in a new thread, let me know if that's a better choice.
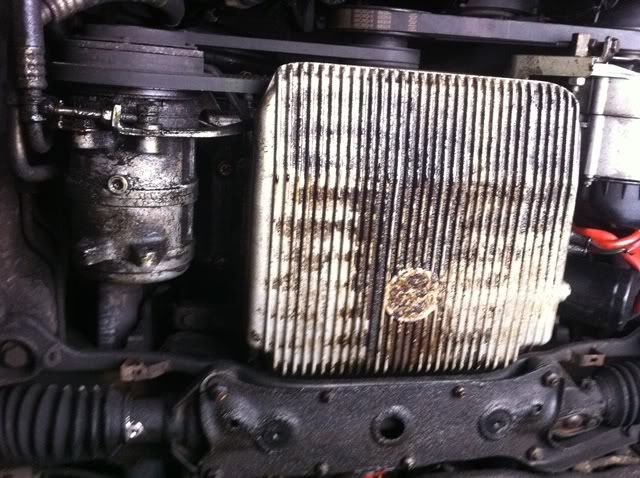
Looking at the starter motor I noticed a piece of 'filler foam' at the end. Is that common?
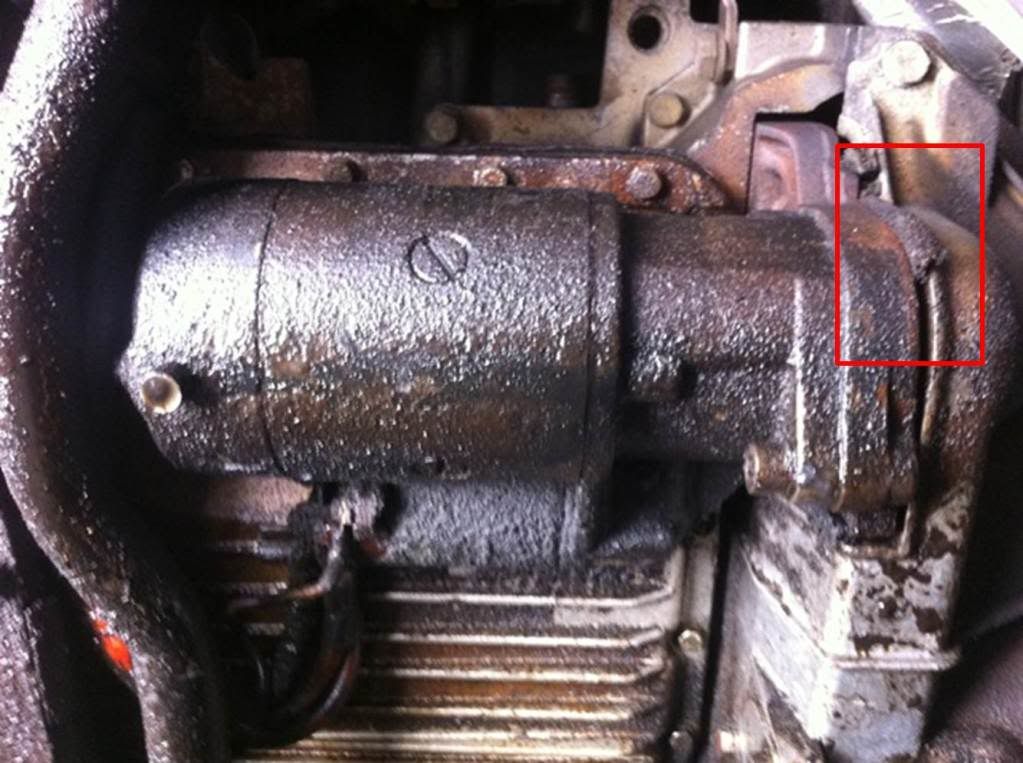
Looking at the starter motor I noticed a piece of 'filler foam' at the end. Is that common?
07-31-2012, 04:49 PM
#21
Rennlist Member
Thread Starter
07-31-2012, 04:51 PM
#22
Rennlist Member
I'll be in The Hague/Amsterdam area in September. If you still need advice by then, I may have some time to stop by and help with anything I can.
07-31-2012, 05:00 PM
#24
Rennlist Member
Thread Starter
07-31-2012, 05:04 PM
#26
Rennlist Member
That metal tube was for CO testing...NOBODY does that anymore, nobody...its useless to the modern era. Ditch it, cap it.
That foam falling out between the starter and housing..normal.
That foam falling out between the starter and housing..normal.
07-31-2012, 05:20 PM
#27
Three Wheelin'
Join Date: Jun 2008
Location: Surprise, Arizona
Posts: 1,914
Likes: 0
Received 0 Likes
on
0 Posts
One key point you have noted is the car running on 4 cyl. The 87 does not have any way of cutting off fuel when this happens. If you keep trying to run the car in this condition, it pours fuel into the cats (if you have them... Can you have cats without O2 sensor?) and WILL start a fire. I'd check the coils, coil wires, rotors, caps and ignition modules for faults. I've had this happen before and it ended up being a bad coil.
The front of that motor needs attention. Check the cam, crank, and oil pump gears for condition and replace if the coating it worn through. If your oil pump gear is aluminum, swap it out with a steel unit and be sure to remove the shim washer from behind the pulley if you do. The shim is only used for the aluminum gear. Water pump needs to be genuine Porsche or Laso with the plastic impeller. Use a genuine Porsche or Gates (same mfg.) belt, Gates also makes a new blue "racing" belt that is kevlar reinforced. I also highly recommend a Pksn'r... Love the peace of mind they bring knowing that the tension will always be correct regardless of engine heat or belt stretch.
WELCOME!!!!!
08-01-2012, 07:18 AM
#28
Rennlist Member
Thread Starter
Thanks, I'll avoid reinstalling it and cap it.
I will probably need to have the starter overhauled at some stage, but I'll disregard the foam...
08-01-2012, 07:48 AM
#29
Rennlist Member
Thread Starter
One key point you have noted is the car running on 4 cyl. The 87 does not have any way of cutting off fuel when this happens. If you keep trying to run the car in this condition, it pours fuel into the cats (if you have them... Can you have cats without O2 sensor?) and WILL start a fire. I'd check the coils, coil wires, rotors, caps and ignition modules for faults. I've had this happen before and it ended up being a bad coil.
The front of that motor needs attention. Check the cam, crank, and oil pump gears for condition and replace if the coating it worn through. If your oil pump gear is aluminum, swap it out with a steel unit and be sure to remove the shim washer from behind the pulley if you do. The shim is only used for the aluminum gear. Water pump needs to be genuine Porsche or Laso with the plastic impeller. Use a genuine Porsche or Gates (same mfg.) belt, Gates also makes a new blue "racing" belt that is kevlar reinforced. I also highly recommend a Pksn'r... Love the peace of mind they bring knowing that the tension will always be correct regardless of engine heat or belt stretch.
The front of that motor needs attention. Check the cam, crank, and oil pump gears for condition and replace if the coating it worn through. If your oil pump gear is aluminum, swap it out with a steel unit and be sure to remove the shim washer from behind the pulley if you do. The shim is only used for the aluminum gear. Water pump needs to be genuine Porsche or Laso with the plastic impeller. Use a genuine Porsche or Gates (same mfg.) belt, Gates also makes a new blue "racing" belt that is kevlar reinforced. I also highly recommend a Pksn'r... Love the peace of mind they bring knowing that the tension will always be correct regardless of engine heat or belt stretch.
Hi Mike,
I will replace most of that in the proces: new spark plugs, new distributors, new coil wires and the coils were replaced relatively short before I put the car to rest.
As to the front of the engine:
- I will check all you mention; is there a parts number on the oil pump gear that will identify it as aluminium?
- I'll check the impeller on the new water pump tonight; what's the reason for the plastic one being better?
- Being a 'newbee poster' on rennlist: what is a "Pksn'r"?
08-01-2012, 08:11 AM
#30
Rennlist Member
Pksn'r = PorKensioner (Timing belt tensioner)
Everything you need to know about it is here - http://liftbars.com/
Everything you need to know about it is here - http://liftbars.com/